4www.pixlip.com
Bitte beachten Sie, dass maximal 40 PX
LED Module an einem Y-Kabel angeschlos-
sen werden können! | Please note that the
maximum amount of PX LED modules which
can be connected to a Y-cable is 20!
AUFBAU |CONSTRUCTION
7
7
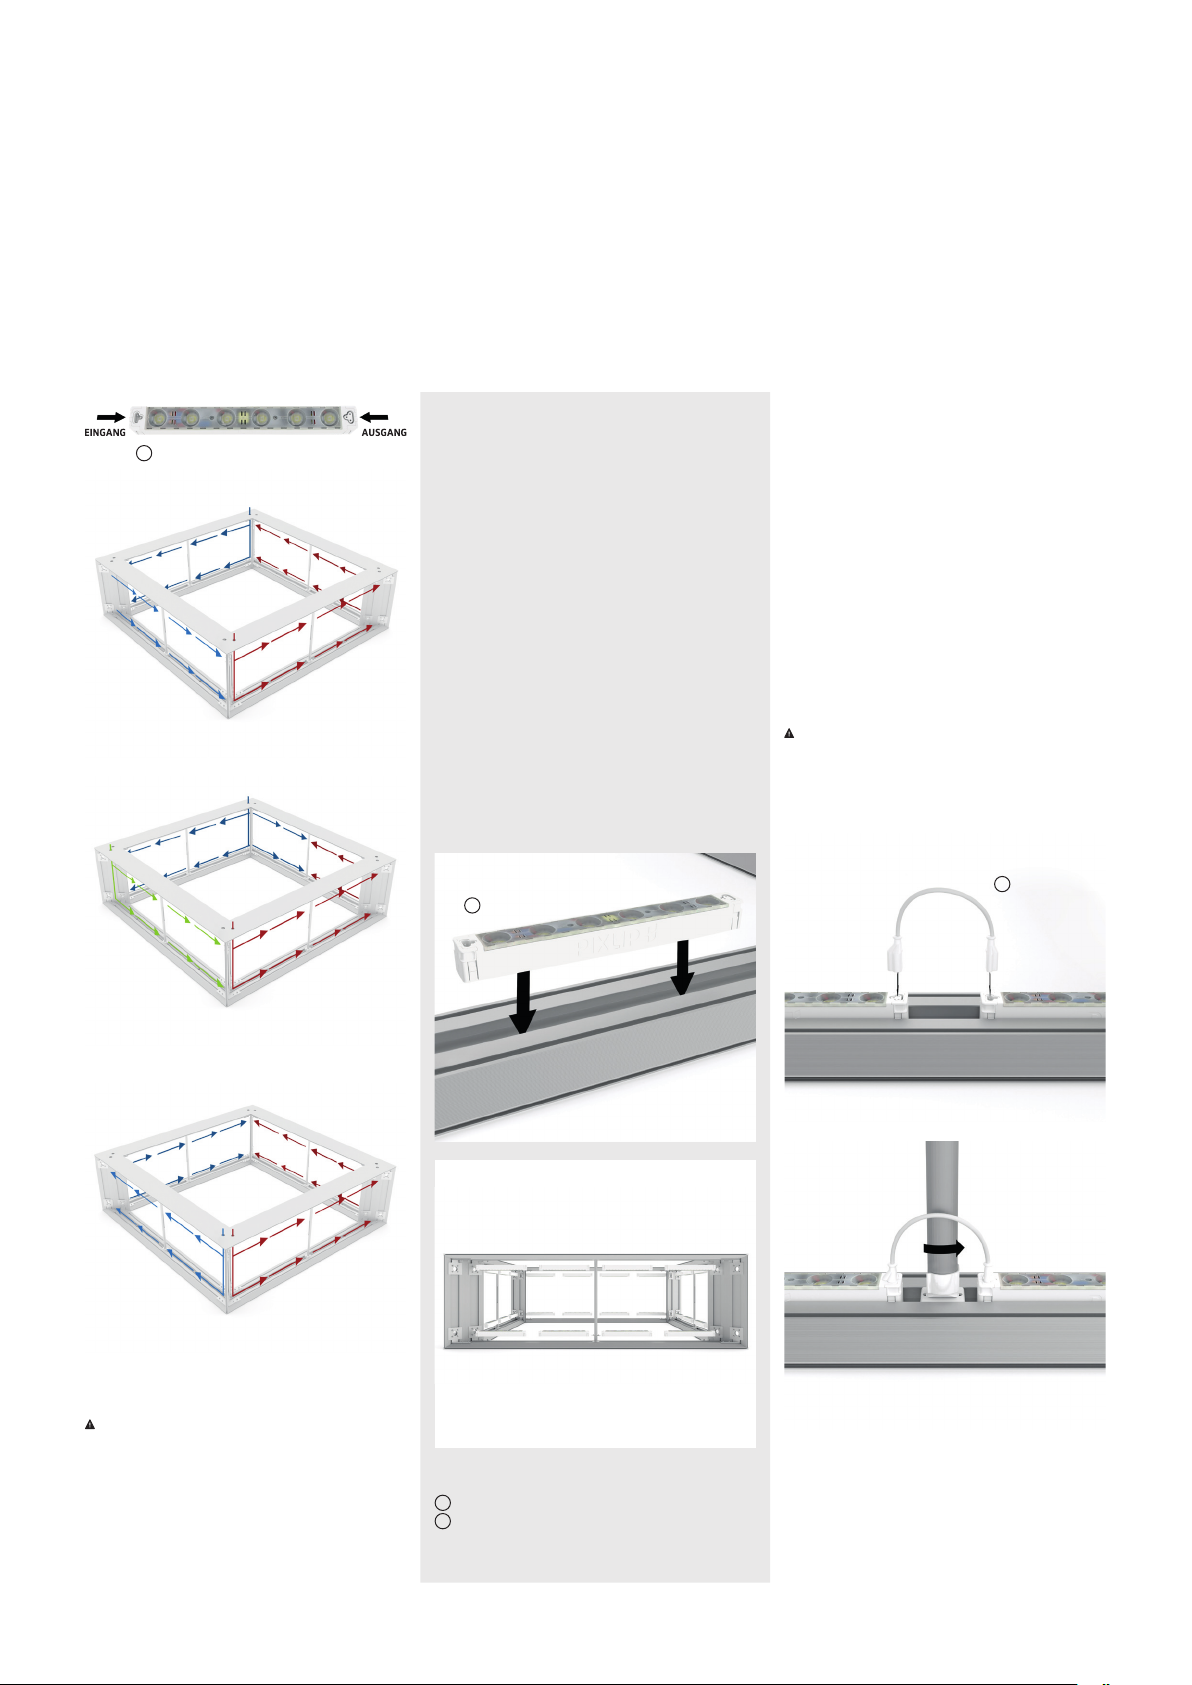
PLANUNG LED VERTEILUNG
PLANNING LED DISTRIBUTION
PX LED Modul | PX LED module
7
Bevor Sie die PX LED Module montieren
machen Sie sich zunächst Gedanken über die
Anordnung der Module und der Stromver-
sorung. Achten Sie darauf, dass die Module
mit ihren Ein- und Ausgängen in die selbe
Richtung ausgelegt sind und an welcher
Position die Stromzufuhr in den Deckenring
gelegt wird. Die Anordnung der LED Module
ist zudem kundenindividuell und je nach
Rahmengröße zu gestalten. | Before you
mount the PX LED modules think about the
set-up of those modules and the power supply.
Keep in mind that the modules are aligned in
the same direction because of its input and
output and at which position the power supply
will be arranged into the ceiling ring. Moreover
the set-up of the LED modules is customer-ori-
ented and depending on the frame size.
PX Kabel | PX cable
8
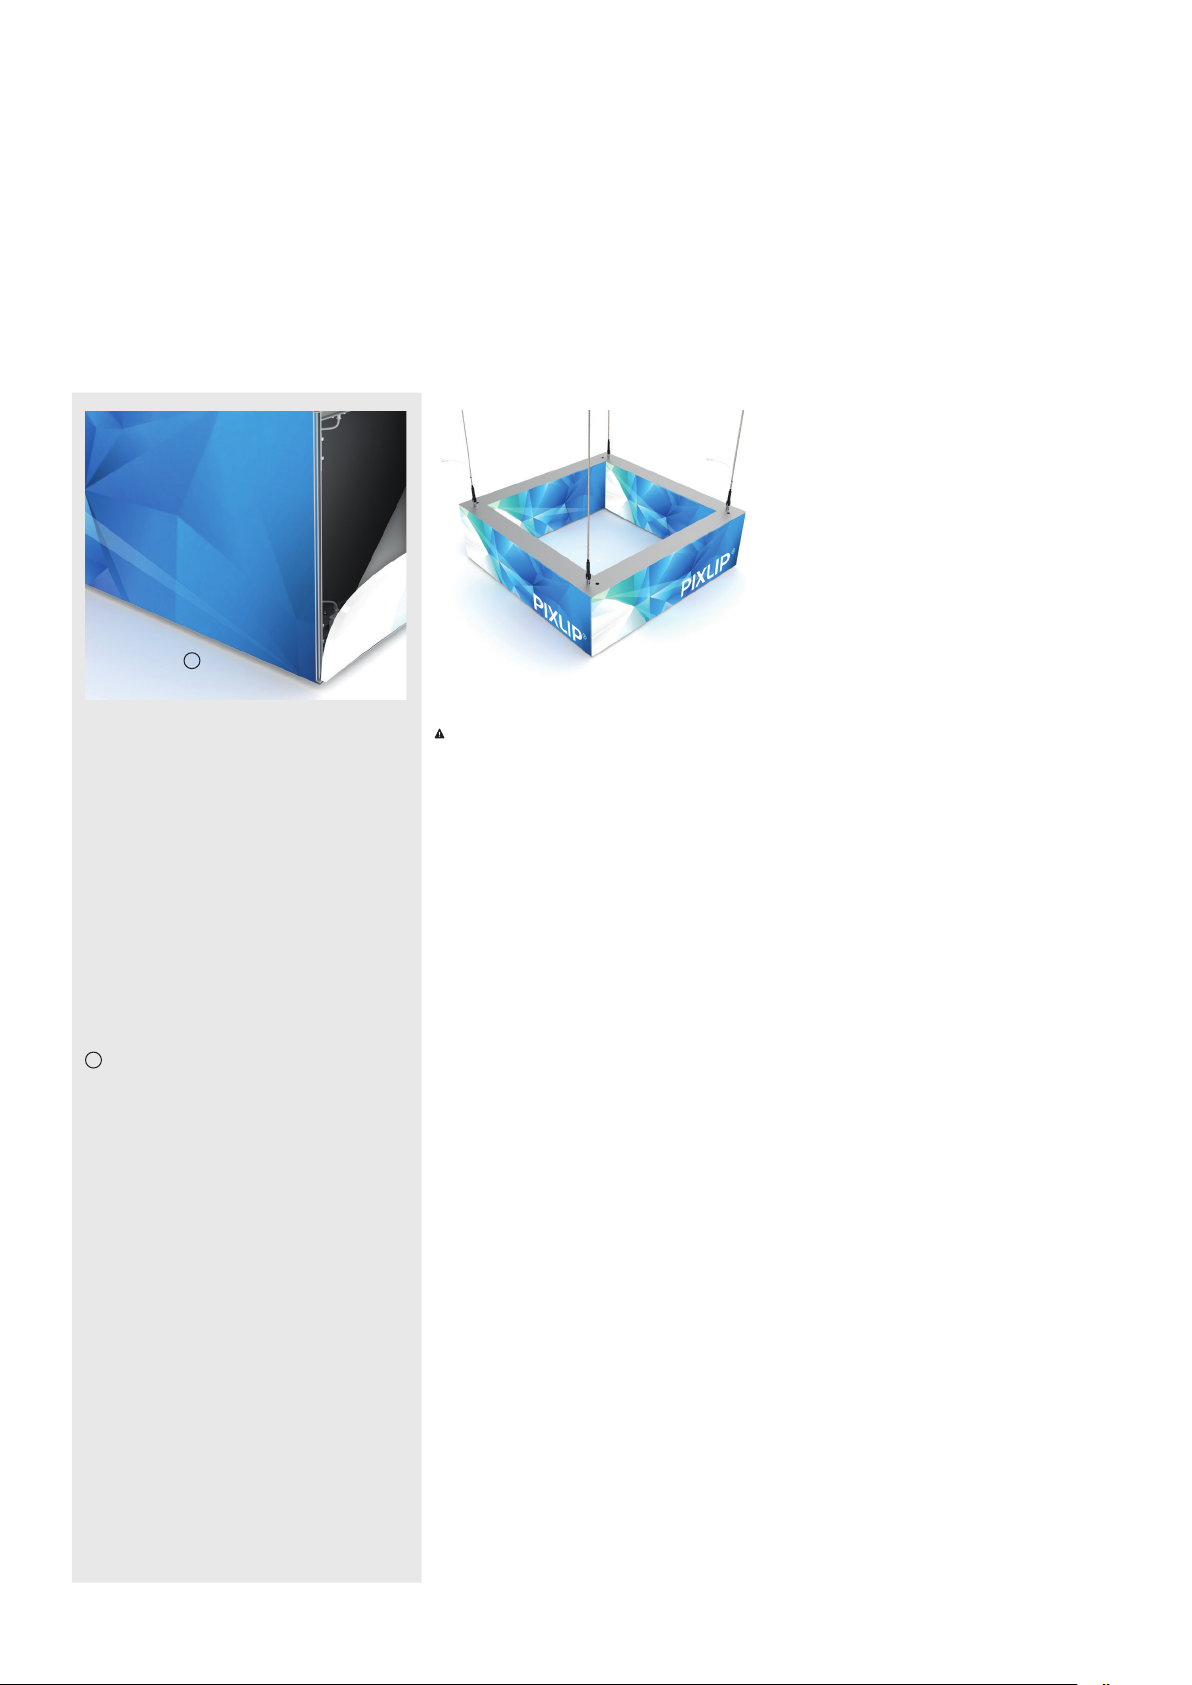
Die oberen Abbildungen zeigen Bespiele,
wie die PX LED Module und Y-Kabel
montiert werden können. |The upper illus-
trations show possibilities to mount the PX
LED modules and Y-cables.
Die Module müssen in jedem Fall gleichmäßig
auf den Prolen verteilt werden und einen
maximalen Abstand von etwa 8cm zueinan-
der haben. Ordnen Sie die Module beispiels-
weise entsprechend der links zu sehenden
Abbildung an und klicken Sie diese einfach
in die vorgesehene Nut des Rahmens ein. | In
any case the modules have to be spaced out
evenly on the proles. The maximum distance
to each module should be around 8cm. For ex-
ample order the modules according to the left
picture. Then just click them in the provided
grooves of the frame.
8
EINBAU PX LED MODULE
MOUNTING PX LED MODULES