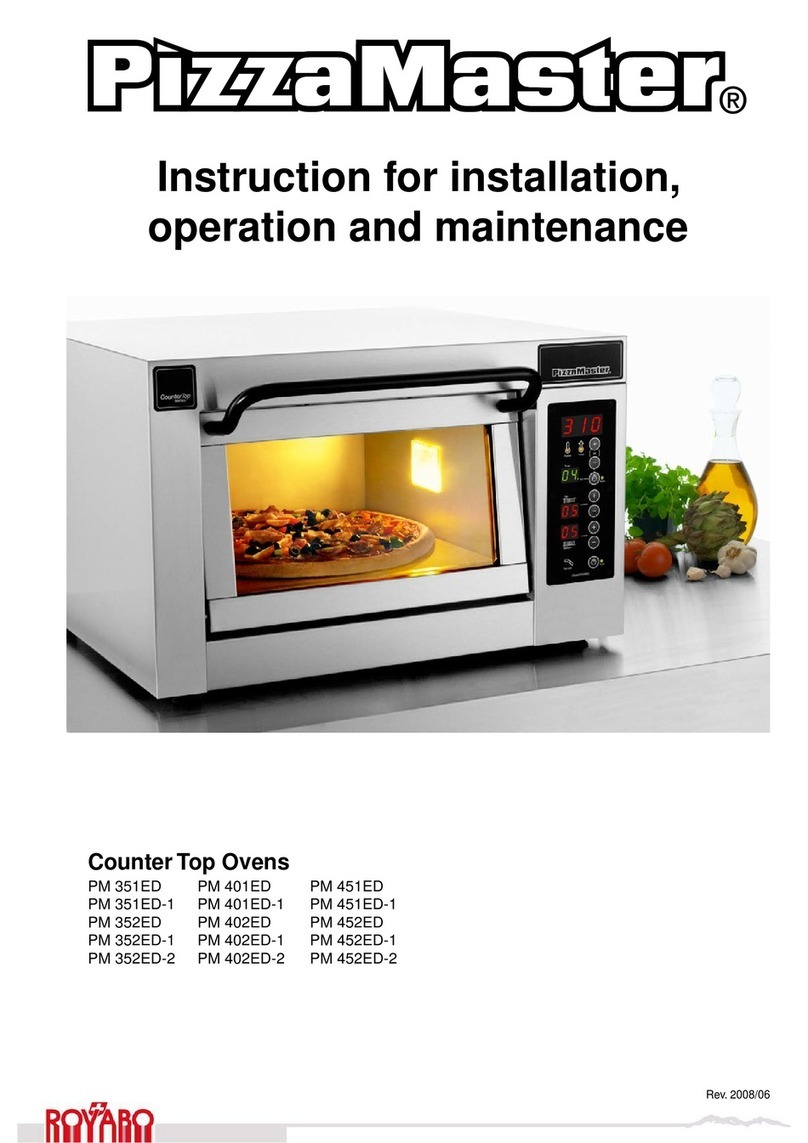
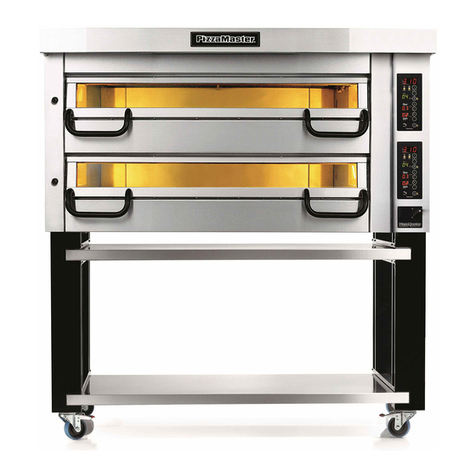
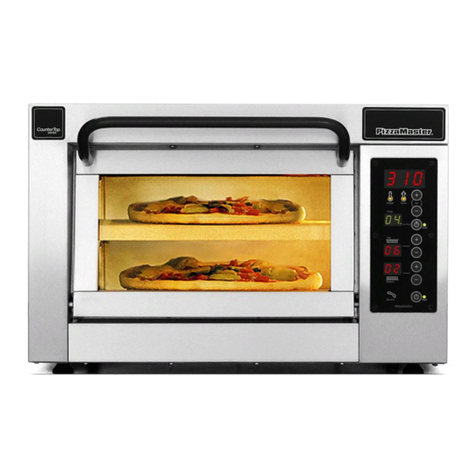
PizzaMaster PM 351ED Programming manual

Svenska BakePartner AB
Odegardsgatan 5
504 94 Boras, Sweden
Phone +4633 230 025
www.bakepartner.com
Power supply
Electrical connection must be carried out by an authorized electrician
Power / deck Power total IP
Model - Type
Serial No.
Counter Top Ovens
PM 351ED PM 401ED PM 451ED
PM 351ED-1 PM 401ED-1 PM 451ED-1
PM 352ED PM 402ED PM 452ED
PM 352ED-1 PM 402ED-1 PM 452ED-1
PM 352ED-2 PM 402ED-2 PM 452ED-2
PM 351ED-DW PM 401ED-DW PM 451ED-DW
PM 351ED-1DW PM 401ED-1DW PM 451ED-1DW
PM 352ED-DW PM 402ED-DW PM 452ED-DW
PM 352ED-1DW PM 402ED-1DW PM 452ED-1DW
PM 352ED-2DW PM 402ED-2DW PM 452ED-2DW
Instruction for installation,
operation and maintenance
9006-0121 R1A

2PizzaMaster®
PizzaMaster® ovens are designed and built by
Svenska BakePartner AB
We thank you for your trust and congratulate you on the
purchase of your new PizzaMaster® oven. Our goal has
always been to build the best pizza ovens in the world.
Right from the start, we knew this could be achieved
only by specializing in the pizza industry and making
bake-quality our top priority. PizzaMaster® ovens are
therefore made exclusively for the pizza industry to
meet the demands of all businesses that depend on
quality pizza.
2-year manufacturer’s warranty
All PizzaMaster® Counter Top ovens come with a
2-year limited warranty that covers the purchaser
against any defect in material or workmanship. For fur-
ther details about this important cover, please consult
your BakePartner representative.
Special expertise
PizzaMaster® service technicians are trained special-
ists. They are equipped with all instruments and tools
needed to make the correct diagnosis and perform
service work quickly and efficiently. Our technicians
travel the world continuously, training local technicians
to uphold the BakePartner standard.
Genuine parts
Your PizzaMaster® oven consists of over 1000 quality
parts with long service life. Should it become neces-
sary to replace a part, it is most important to replace
it with a genuine PizzaMaster® part. This ensures not
only optimum function but also continued safety in the
workplace.
When contacting BakePartner or your local PizzaMaster®
distributor for assistance, please remember to quote
the model designation and serial number of your oven.
This will help us to help you more quickly.
Quality tastes better.
Svenska BakePartner AB
Odegaerdsgatan 5
SE-504 94 Boras
Sweden
Tel: +46(0)33-230 025
Fax: +46(0)33-248 140
Internet: www.pizzamaster.com
www.bakepartner.com
E-mail: info@bakepartner.com
Warranty and service

3
PizzaMaster®
Index
Index Page
Serial No / Oven rating plate ..................................................... 1
Warranty and service................................................................. 2
Index.......................................................................................... 3
Technical data......................................................................... 4-5
Electrical connection ................................................................. 6
Positioning the oven .................................................................. 7
First-time start-up of oven.......................................................... 7
Installation – Assembly UBC .................................................. 8-9
Display................................................................................ 10-11
Changing of oven lamps / Maintenance .................................. 12
Oven settings........................................................................... 13
Maintenance and Preventative Maintenance...................... 14-15
Trouble shooting ...................................................................... 16
Quality assurance and delivery certificate............................... 17
EU-Declaration of conformity................................................... 18
Notes ....................................................................................... 19
Attachment :
Electrical diagram
Parts list - Electrical components

4PizzaMaster®
Technical data
1) These models has one chamber with 2 hearthstones and one chamber with 1 hearthstone, the chamber with
2 hearthstones can be either the lower or upper chamber. Preferred chamber with 2 hearthstones must be
indicated with order.
Models
Dimensions in millimetres
Width x Depth x Height
Dimensions in inches
Width x Depth x Height
Independent
chambers
per oven
Hearth-
stones
per oven
Power
kW
External Internal (per hearthstone) External Internal (per hearthstone)
PM 351ED-DW 950 x 545 x 430 710 x 355 x 195 (1st) 37.4 x 21.5 x 16.9 28.0 x 14.0 x 7.7 (1 st) 11 4.45
PM 351ED-1DW 710 x 355 x 85 (2 st) 28.0 x 14.0 x 3.4 (2 st) 26.65
PM 352ED-DW
950 x 545 x 730
710 x 355 x 195 (2st)
37.4 x 21.5 x 28.7
28.0 x 14.0 x 7.7 (2 st)
2
8.90
PM 352ED-1DW 1) 710 x 355 x 195 (1st)
710 x 355 x 85 (2 st) 1)
28.0 x 14.0 x 7.7 (1 st)
28.0 x 14.0 x 3.4 (2 st) 3 11.10
PM 352ED-2DW 710 x 355 x 85 (4 st) 28.0 x 14.0 x 3.4 (4 st) 4 13.30
PM 401ED-DW 1060 x 600 x 430 820 x 410 x 195 (1 st) 41.7 x 23.6 x 16.9 32.3 x 16.1 x 7.7 (1 st) 11 6.05
PM 401ED-1DW 820 x 410 x 85 (2 st) 32.3 x 16.1 x 3.4 (2 st) 29.05
PM 402ED-DW
1060 x 600 x 730
820 x 410 x 195 (2 st)
41.7 x 23.6 x 28.7
32.3 x 16.1 x 7.7 (2 st)
2
12.10
PM 402ED-1DW 1) 820 x 410 x 195 (1 st)
820 x 410 x 85 (2 st) 1)
32.3 x 16.1 x 7.7 (1 st)
32.3 x 16.1 x 3.4 (2 st) 3 15.10
PM 402ED-2DW 820 x 410 x 85 (4 st) 32.3 x 16.1 x 3.4 (4 st) 4 18.10
PM 451ED-DW 1160 x 650 x 430 920 x 460 x 195 (1 st) 45.7 x 25.6 x 16.9 36.2 x 18.1 x 7.7 (1 st) 11 7.21
PM 451ED-1DW 920 x 460 x 85 (2 st) 36.2 x 18.1 x 3.4 (2 st) 210.79
PM 452ED-DW
1160 x 650 x 430
920 x 460 x 195 (2 st)
45.7 x 25.6 x 28.7
36.2 x 18.1 x 7.7 (2 st)
2
14.42
PM 452ED-1DW 1) 920 x 460 x 195 (1 st)
920 x 460 x 85 (2 st) 1)
36.2 x 18.1 x 7.7 (1 st)
36.2 x 18.1 x 3.4 (2 st) 3 18.00
PM 452ED-2 DW 920 x 460 x 85 (4 st) 36.2 x 18.1 x 3.4 (4 st) 4 21.58
PizzaMaster®CounterTop series - Standard width
PizzaMaster®CounterTop series - Double width
Models
Dimensions in millimetres
Width x Depth x Height
Dimensions in inches
Width x Depth x Height
Independent
chambers
per oven
Hearth-
stones
per oven
Power
kW
External Internal (per hearthstone) External Internal (per hearthstone)
PM 351ED 595 x 545 x 430 355 x 355 x 195 (1st) 23.4 x 21.5 x 16.9 14.0 x 14.0 x 7.7 (1 st) 11 2.25
PM 351ED-1 355 x 355 x 85 (2 st) 14.0 x 14.0 x 3.4 (2 st) 23.35
PM 352ED
595 x 545 x 730
355 x 355 x 195 (2st)
23.4 x 21.5 x 28.7
14.0 x 14.0 x 7.7 (2 st)
2
4.50
PM 352ED-1 1) 355 x 355 x 195 (1st)
355 x 355 x 85 (2 st) 1)
14.0 x 14.0 x 7.7 (1 st)
14.0 x 14.0 x 3.4 (2 st) 3 5.60
PM 352ED-2 355 x 355 x 85 (4 st) 14.0 x 14.0 x 3.4 (4 st) 4 6.70
PM 401ED 650 x 600 x 430 410 x 410 x 195 (1 st) 25.6 x 23.6 x 16.9 16.1 x 16.1 x 7.7 (1 st) 11 3.05
PM 401ED-1 410 x 410 x 85 (2 st) 16.1 x 16.1 x 3.4 (2 st) 24.55
PM 402ED
650 x 600 x 730
410 x 410 x 195 (2 st)
25.6 x 23.6 x 28.7
16.1 x 16.1 x 7.7 (2 st)
2
6.10
PM 402ED-1 1) 410 x 410 x 195 (1 st)
410 x 410 x 85 (2 st) 1)
16.1 x 16.1 x 7.7 (1 st)
16.1 x 16.1 x 3.4 (2 st) 3 7.60
PM 402ED-2 410 x 410 x 85 (4 st) 16.1 x 16.1 x 3.4 (4 st) 4 9.10
PM 451ED 700 x 650 x 430 460 x 460 x 195 (1 st) 27.6 x 25.6 x 16.9 18.1 x 18.1 x 7.7 (1 st) 11 3.63
PM 451ED-1 460 x 460 x 85 (2 st) 18.1 x 18.1 x 3.4 (2 st) 25.42
PM 452ED
700 x 650 x 430
460 x 460 x 195 (2 st)
27.6 x 25.6 x 28.7
18.1 x 18.1 x 7.7 (2 st)
2
7.26
PM 452ED-1 1) 460 x 460 x 195 (1 st)
460 x 460 x 85 (2 st) 1)
18.1 x 18.1 x 7.7 (1 st)
18.1 x 18.1 x 3.4 (2 st) 3 9.05
PM 452ED-2 460 x 460 x 85 (4 st) 18.1 x 18.1 x 3.4 (4 st) 4 10.84

5
PizzaMaster®
BakePartner has a policy of continuous product development and reserves the right to change specifications and
designs without prior notice.
Technical data
Models Dimensions in millimetres
Width x Depth x Height
Dimensions in inches
Width x Depth x Height
Shelf support
package (option)
No of shelf possible
to stack per package
Note:
As a standard the support
is delivered without shelf
supports.
Shelf support package
includes: shelf supports,
brackets and dividers.
Suitable for most applica-
tions.
It is possible to increase
storage space by adding
more shelf supports and
dividers.
PM 351-S 595 x 530 x 900 23.4 x 20.9 x 35.4 SP-1 4
PM 352-S 595 x 530 x 750 23.4 x 20.9 x 29.5 SP-2 4
PM 401-S 650 x 585 x 900 25.6 x 23.0 x 35.4 SP-1 4
PM 402-S 650 x 585 x 750 25.6 x 23.0 x 29.5 SP-2 4
PM 451-S 700 x 635 x 900 27.6 x 25.0 x 35.4 SP-1 4
PM 452-S 700 x 635 x 750 27.6 x 25.0 x 29.5 SP-2 4
PM 351DW-S 950 x 530 x 900 37.4 x 20.9 x 35.4 SP-1DW 8
PM 352DW-S 950 x 530 x 750 37.4 x 20.9 x 29.5 SP-2DW 8
PM 401DW-S 1060 x 585 x 900 41.7 x 23.0 x 35.4 SP-1DW 8
PM 402DW-S 1060 x 585 x 750 41.7 x 23.0 x 29.5 SP-2DW 8
PM 451DW-S 1160 x 635 x 900 45.7 x 25.0 x 35.4 SP-1DW 8
PM 452DW-2 1160 x 635 x 750 45.7 x 25.0 x 29.5 SP-2DW 8
PizzaMaster®CounterTop series - Support

6PizzaMaster®
Electrical connection
• Beforeconnectingtheovenseetheovensratingplate
and attached electrical diagram
• Theovenhastobeconnectedwiththeattached
power supply cable (1.5 m)
• Theearthpotentialequalizerscrewhastobe
installed. The earth potential screw is located on
the backside next to the connecting cable.
Important!
For reasons of safety and the validity of the war-
ranty, all electrical work must be carried out by a
qualified electrician.
The oven must be connected via an external main
switch with min. 3 mm gape of at least 3 mm for
each power supply cable.
On request ovens can be delivered with different Voltage than above.
Electrical connection - Standard width
Power and fuse ratings per oven
Electrical connection - Double width
Power and fuse ratings per oven
400V 3N 230V 1N 230V 3AC 208V 1AC 208V 3AC 240V 1N 240V 3AC 480V 3N
PM 351ED-DW 3/10A 20A* 3/13A* 22A* 3/15A* 19A* 3/13A* 3/8A
PM 351ED-1DW 3/10A 29A* 3/17A* 32A* 3/19A* 28A* 3/17A* 3/9A
PM 352ED-DW 3/15A* 20A** 3/13A** 43A* 3/29A** 38A* 3/25A* 3/16A*
PM 352ED-1DW 3/20A* 29A** 3/17A** 54A* 3/37A** 47A* 3/32A* 3/16A*
PM 352ED-2DW 3/20A* 29A** 3/17A** 64A* 3/37A** 56A* 3/32A* 3/16A*
PM 401ED-DW 3/14A 27A* 3/18A* 29A* 3/20A* 26A* 3/17A* 3/11A
PM 401ED-1DW 3/14A 40A* 3/23A* 44A* 3/26A* 38A* 3/22A* 3/11A
PM 402ED-DW 3/20A* 27A** 3/18A** 59A* 3/39A** 51A* 3/34A* 3/22A*
PM 402ED-1DW 3/27A* 40A** 3/23A** 73A* 3/50A** 63A* 3/44A* 3/22A*
PM 402ED-2DW 3/27A* 40A** 3/23A** 87A* 3/51A** 76A* 3/44A* 3/22A*
PM 451ED-DW 3/16A 32A* 3/21A* 35A* 3/23A* 31A* 3/20A* 3/13A
PM 451ED-1DW 3/16A - 3/27A* 52A* 3/30A* 45A* 3/26A* 3/14A
PM 452ED-DW 3/24A* 32A** 3/21A** 70A* 3/46A** 61A* 3/40A* 3/26A*
PM 452ED-1DW 3/32A* - 3/27A** 87A* 3/60A** 75A* 3/52A* 3/27A*
PM 452ED-2DW 3/32A* - 3/27A** 104A* 3/60A** 90A* 3/52A* 3/27A*
Model
*** Models possible to connect both to 230V 3~ and
400V 3N is not provided with a power supply cable.
* Model not provided with a power supply cable.
** This model requires 2 separately electrical
connections each protected with indicated fuse.
Model not provided with a power supply cable.
400V 3N 230V 1N 230V 3AC 208V 1AC 208V 3AC 240V 1AC 240V 3AC 480V 3N
PM 351ED 3/5A 10A 3/9A* 11A* 3/10A* 10A* 3/8A* 3/5A
PM 351ED-1 3/5A 15A 3/9A* 17A* 3/10A* 14A* 3/9A* 3/5A
PM 352ED 3/10A 20A* 3/14A* 22A* 3/15A* 19A* 3/13A* 3/9A
PM 352ED-1 3/10A 25A* 3/17A* 27A* 3/19A* 24A* 3/16A* 3/9A
PM 352ED-2 3/10A 30A* 3/17A* 33A* 3/19A* 28A* 3/17A* 3/9A
PM 401ED 3/7A 14A 3/12A* 15A* 3/13A* 13A* 3/11A* 3/6A
PM 401ED-1 3/7A 20A* 3/12A* 22A* 3/13A* 19A* 3/11A* 3/6A
PM 402ED 3/14A 27A* 3/17A* 30A* 3/20A* 26A* 3/17A* 3/12A
PM 402ED-1 3/14A 33A* 3/23A* 37A* 3/25A* 32A* 3/22A* 3/12A
PM 402ED-2 3/14A 40A* 3/23A* 44A* 3/26A* 38A* 3/22A* 3/12A
PM 451ED 3/8A 16A 3/14A* 18A* 3/15A* 16A* 3/13A* 3/7A
PM 451ED-1 3/8A 24A* 3/14A* 27A* 3/16A* 23A* 3/14A* 3/7A
PM 452ED 3/16A 32A* 3/21A* 35A* 3/24A* 31A* 3/20A* 3/14A
PM 452ED-1 3/16A 40A* 3/28A* 44A** 3/30A* 38A* 3/26A* 3/14A
PM 452ED-2 3/16A - 3/28A* 53A** 3/31A* 46A* 3/27A* 3/14A
PM 551ED 3/10A 20A* 3/17A* 22A* 3/19A* 19A* 3/16A* 3/9A
PM 551ED-1 3/10A 29A* 3/17A* 32A* 3/19A* 28A* 3/16A* 3/9A
PM 552ED 3/20A 39A* 3/26A* 43A** 3/29A* 37A* 3/25A* 3/17A
PM 552ED-1 3/20A - 3/34A* 53A** 3/37A* 46A* 3/32A* 3/17A
PM 552ED-2 3/20A - 3/34A* 64A** 3/37A* 55A* 3/32A* 3/17A
Model

7
PizzaMaster®
Positioning the oven
When positioning your oven, it is important to consider
the following points:
• Itisimportantfortheoortobeat,sothattheoven
is both horizontal and stable.
• Forventilationoftheoven,aspaceofatleast
50 mm is needed between the oven and any
adjacent wall, on all sides.
First-time start-up of oven
Before putting the oven into operation, it should be
switched on and brought up to temperature to burn off
any remaining protective oil in the oven chamber(s).
When this is done, the oven will emit a certain amount
of smoke, which is normal. Make sure therefore that the
kitchen ventilation system is switched on. If possible,
open doors and windows to allow the smoke to escape
more quickly. All decks can be switched on simultane-
ously. Follow the running-in schedule below:
1. Close all the oven doors.
2. Switch on the oven and set all heat controls to posi-
tion 10 and adjust the thermostat to 300 oC.
3. When the oven reaches 300 oC (which takes about
20 minutes), leave it switched on for 1 hour.
4. The oven is now ready for use.
Positioning the oven / First-time start-up
50 mm
2”
50 mm
2”
50 mm
2”
50 mm
2”

8PizzaMaster®
UBC = Standard cabinet
UBC-W = Heated cabinet
UBC-P = Cabinet with proofer
Important!
For reasons of safety and the validity of the war-
ranty, all electrical work must be carried out by a
qualified electrician.
Electrical connection
Valid only for UBC-W and UBC-P
Feed the electrical wires and the protective plastic tube
through the access hole in the bottom of the oven.
Then connect the electrical wires to the oven, see
the attached Technical description and the Electrical
diagram.
UBC = Standard cabinet
UBC-W = Heated cabinet
Factory settings
Temperature: 75 degree C.
Available temperature settings: room temperature - 100
degree C.
Tip! food should not be stored longer than 2 hour and
the temperature should not be lower than 70 degree C.
UBC-P = Cabinet with proofer
Factory settings
Temperature: 38 degree C
Humidity: 78%
Available temperature settings: room temperature -
50 degree C
Tip! for best fermentation result should the factory set-
tings not be changed.
If slower fermentation is required lower the temperature
slightly.
Installation – Assembly UBC

9
PizzaMaster®
Assembly
1. Starting from inside the cabinet. Place the upper bar
as shown on 1a place there after the side divider as
shown on 1b. Place the lower bar as shown on 1c.
2. Fit the dividers and supports as shown on fig. 2. The
unique and smart design makes it possible to adjust
both the width and the height inside the cabinet, to
fit your exact needs.
3. Place the water container as per fig. 3.
(UBC-P only)
4. Fit the glass-doors to the cabinet.
Picture 1
Picture 2 Picture 3
1a
1c
1b
Installation – Assembly UBC

10 PizzaMaster®
Display
This appliances is not intended for use by persons
(including children) with reduced physical, sensory
or mental capabilities, or lack of experience and
knowledge, unless they have been given supervi-
sory or instruction concerning use of the appliance
by a person responsible for their safety. Children
shall be supervised to ensure they not play with
the appliance

11
PizzaMaster®
Display
Display - Instruction
Oven mode - ON / OFF
Place the oven in desired mode by pressing
ON: The display is active and the oven lights is on.
OFF: The display is dimmed, OFF is showed in the up-
per display.
Temperature - setting / display
Adjust desired temperature with
The display shows desired temperature, to see real-
time temperature press Set.
Power
A yellow lamp indicates that the heating element is on.
Turbo
The turbo-start function, engaged automatically at start
up, brings the oven up to temperature very quickly.
When the desired temperature has been reached, the
turbo-start shuts off automatically. A yellow lamp indi-
cates that the turbo is in operation.
Setting the heat output controls
Adjust desired power for each heat zone by
pressing
0 = Off
10 = Maximum output
Top - Overhead heat
Bottom - Bottom heat
Important! When Turbo-function is activated all
heat zones are set at maximum regardless off
settings/display.
Service
If the oven overheats, it is turned off automatically. A
red light will show when the overheating cut-off has
been activated. The oven can be reset by turning off the
main switch and turn it on again, when the temperature
have gone down below 350 °C. The main circuit break-
ers on the back of the oven also needs to be reset.
Timer
Timer function can be set in two different modes.
For setting individual baking/roasting times (normal
mode) or common baking times (auto mode)
The timer display shows whole minutes.
Individual baking times - Normal mode
When using individual baking/roasting times, gives after
desired baking time a alarm with manual shut-off.
Common baking time - Auto mode
For common baking/roasting time at the press of a but-
ton. E.g. if timer is set at 4 min the oven makes for each
press at a short alarm after 4 min.
Using individual baking times - Normal mode
Press adjust desired baking time by
pressing confirm with Set. Desired baking
time is showed and a small green indication light is
turned on in the timers display window (lower right
corner).
Start the timer by pressing , green indica-
tionlightisashingandremainingbakingtimeis
showed.
To stop timer press , green indication light is
turned off.
After desired baking time the oven gives a alarm
with manual shut-off. To turn off alarm press .
Activating - Auto mode
Keep pressed until green Auto lamp is turned
on.
Adjust desired baking time with confirm
with Set.
Desired baking time is showned and the displays
green indication light is turned on.
Press to start timer, the green indication light is
ashing
Up to 5 independent alarms can be activated.
Deactivating Auto mode:
Keep pressed until Auto lamp is turned off then
press Set.

12 PizzaMaster®
Changing an oven lamp
1. Turn the oven off.
2. Loosen the lamp glass. (Stick a small screwdriver in
the small gap at the lamp glass short side and press
gentle to loosen the glass)
3. Take out the defective lamp.
IMPORTANT!
Take care not to touch the new lamp directly, for that
would reduce its service life.
4. Wear gloves or use a piece of paper to grasp and fit
the new lamp.
5. Fit back the lamp glass
How to remove door gasket for cleaning or
replacement.
Changing of oven lamps / Maintenance
Remove door gasket
For replacement of door gasket it is necessary to use
a screwdriver with Phillips Head.
Remove all screws on both left and right hand side
and on the side A (see image) of the oven door.
Remove door gasket.
IMPORTANT! when replacing the old gasket make
sure the old gasket is fully removed.
Installation of door gasket
Place the gasket in the gap between the door frame
and the stainless steel parts. Make sure the gasket is
left out with 8mm/0.3in as shown in the image.
Fasten gasket and stainless steel parts by attaching
all screws.

13
PizzaMaster®
Base settings
We suggest using the recommended base-settings to
begin with. Then, as you gain experience with the oven,
you can experiment with different thermostat and heat-
control settings until you find the optimum settings for
your brand of pizza.
Pizza baked directly Pizza baked
on hearthstone in pan
Temperature 300 °C 300 °C
Top 7 7
Bottom 2 7
Setting the right temperature
The oven temperature is set by means of the ther-
mostat at the top of the control panel. It should be
set to suit the composition of the dough, the size and
thickness of the crust, the quantity of pizza-toppings
and the desired baking result, e.g. whether you pre-
fer the crust to be fairly soft or nice and crispy.
Basic rule
The basic rule is that the pizza crust should be
ready by the time the pizza toppings are ready.
To help achieve this, bear in mind the following:
Quantity and relationship between salt and sugar
• Sugarmakesthecrustmorecrispyandgivesit
more colour. The use of sugar therefore enables
either the baking time to be shortened or the oven
temperature to be reduced.
• Saltmakesthecrustsofterandgivesitlesscolour.
The use of salt therefore requires either a longer
baking time or a higher oven temperature.
Thickness of pizza crust (and base)
• Thethinnerthecrust,theshorterthebakingtime.
• Thethickerthecrust,thelongerthebakingtime.
Quantity of pizza toppings
• Thefewerthepizzatoppings,theshorterthebak-
ing time.
• Themorepizzatoppings,thelongerthebaking
time.
Important! Once you have found the right thermo-
stat temperature-setting for your brand of pizza,
always use that setting regardless of the workload
and number of pizzas in the oven.
Setting the heat output controls
Top- – Overhead heat
If the preset oven temperature drops by more than
30
oC during baking, then the settings for To p are
too low. Increase the settings as necessary, but just
enough to maintain the oven temperature.
Bottom – Bottom-heat
The bottom heat should be set as high as possible
without burning the undersides of the pizzas.
Tip! When you are expecting an extra high workload,
e.g. during rush hours, you can increase the bottom
heat 15 minutes beforehand to boost the heat in the
hearthstones. This will help to maintain the bottom
heat throughout the rush period.
Oven settings

14 PizzaMaster®
WARNING!
DO NOT use any cleaning agents on the hearthstones
DO NOT use pressure washing equipment or a water hose to clean the oven
DO NOT use abrasive materials like steel wool or abrasive sponges to clean the oven door glass or the
under built cabinets glass doors
DO NOT clean the oven door glass until its cool enough to touch
DO NOT use any oven cleaners or detergents to clean the aluminum coated steel interior
DO NOT clean the oven when it is hot to avoid burning injuries
DO NOT clean ovens in Phantom Black or Royal Gold exterior with any abrasive cleaners inclusive of
Preventative Maintenance
DO always install oven with required minimum clearance for easy maintenance
DO create a cleaning program and regularly clean the oven
DO routinely service the oven and only use original parts
DO contact your nearest PizzaMaster representative or PizzaMaster directly if maintenance or repairs are
necessary
It is possible to use conventional non toxic oven cleaners but for the best possible cleaning result we
always recommend PizzaMaster cleaning products
Cleaning the oven
• Clean the ovens stainless steel front exterior, door handles, display panels and worktops shelves under
theovenusingaspongelightlydampedwithamixofwateranddishuid.Ifnecessaryusethesponges
white non abrasive side, if stainless steel always with the grains of the metal. Dry with a clean soft cloth.
• Cleantheovendoorglassusingaspongelightlydampedwithamixofwateranddishuid.Ifnecessary
use the sponges white non abrasive side. Dry with a clean soft cloth.
• Brushoutandscrapeoutanybakedepositorsootintheovenchamberregularlyduringtheday.Usea
Metal or Soft brush, it is also possible to use a cloth lightly damped with water wrapped around the head
of the brush.
Daily cleaning
If oven is equipped with UBC
• Remove, if equipped with, the worktop shelf and clean the top of the UBC using a sponge lightly dam-
pedwithamixofwateranddishuid.Drywithacleansoftcloth.
• CleantheUBCdoorglassusingaspongelightlydampedwithamixofwateranddishuid.Ifnecessary
use the sponges white non abrasive side. Dry with a clean soft cloth.
• Emptythewatercontainerandcleantheinsideofthecontainerwithaspongelightlydampedwithamix
ofwateranddishuid.Drywithasoftcleancloth.
• Cleanthecabinet’soorwithasoftclothwithamixofwateranddishuid.Drywithacleancloth.
Maintenance and Preventative Maintenance

15
PizzaMaster®
• Lubricate the door bushings with a non toxic high-temperature spray lubricant.
4 week cleaning
Important! Before starting this cleaning cycle turn off all electrical supplies to the oven
• Cleantheventilationoutletsontheovenstop(frontandback)fromsootandresidue.
• Removethepaneltotheelectricalcompartmentandvacuum-cleantheentireinsidearea.
• Liftoutthehearthstonesandvacuum-cleantheentireovenchamber.
Important!
Be very careful to mark and put back the hearth-stones exactly as they were. Each stone must be retur-
ned to its original place with the same side facing upward and turned in the same direction as before.
12 month cleaning
PizzaMaster has developed a unique range of cleaning and maintenance products especially made for pizza
and bakery ovens. Using these products saves the environment at the same time as they are much easier to use
than conventional oven cleaning products and helps keep your oven new longer.
Product Art. No Suitable for
Oven brush Metal with scraper 50053-01 cleaning the ovens hearth stones
from soot and baking deposits
Oven brush Soft 50053-02 cleaning the ovens hearth stones
from soot and baking deposits
Cleaning cloth package 50341 removing burned soot from ovens stainless steel exterior
no more need for oven cleaners when removing hard burned
soot or deposits, this cloth cleans the ovens stainless steel
exteriordrywithouttheuseofanywaterorcleaninguids.
Cleaning sponge package 50716 regular exterior cleaning and cleaning oven door glass
sponge with one side that is a regular sponge and the other
side is a scratchy but non abrasive side that makes the daily
cleaning very easy
To order these products contact your nearest PizzaMaster representative or PizzaMaster directly
Environment friendly cleaning
• CleantheovensstainlesssteelfrontexteriorwithaPizzaMastercleaningcloth.Alwayscleanwiththe
grain of the metal.
If oven is equipped with UBC
• Removeallinteriorremovableparts(glassdoors,watercontainer,shelfsupports,dividers,bottomand
top brackets) there is no tool necessary for removing these parts. Clean all surfaces inside of the cabi-
netwithaspongelightlydampedwithamixofwateranddishuid.Drysurfaceswithacleansoftcloth.
Clean and dry all parts before replacing them into the UBC.
1 week cleaning
Maintenance and Preventative Maintenance

16 PizzaMaster®
Symptom Possible cause Probable solution
The oven does not start Main fuse has blown/tripped Replace/reset main fuse
Oven temperature falls Main fuse has blown/tripped Replace/reset main fuse
too much or recovery A power relay is broken Replace power relay
period is too long Top settings are too low Increase settings for Top
The top of the pizza is Top settings are too high Decrease settings for Top
too dark Too high baking temperature Decrease baking temperature
The bottom of the pizza Bottom is set too high Decrease bottom
is too dark Too high baking temperature Decrease baking temperature
Both the top and bottom Too high baking temperature Decrease baking temperature
of the pizza is too dark Too long baking time Decrease baking time
Baking time is too long Baking temperature is too low Increase baking temperature
before the pizza is ready
Trouble shooting
The table below will help to make baking easier, simplify adjustments of the oven and help in the event of problem.
If solution is not found please contact your nearest PizzaMaster® distributor or contact our service department.
Trouble shooting

17
PizzaMaster®
Quality assurance and delivery certificate
To ensure the highest quality, every PizzaMaster® oven is checked carefully throughout the manufacturing proc-
ess. Finally, prior to delivery, all functions below are tested thoroughly. Only then is the oven issued with a delivery
certificate.
Info! PizzaMaster® ovens can be supplied with 1 or 2 decks. Deck 1 is always the lower deck.
Thermostat
Deck 1 Function .........
Deck 2 Function .........
Power
Deck 1 Function ......... Pilot lamp...............
Deck 2 Function ......... Pilot lamp...............
Turbo
Deck 1 Function ......... Pilot lamp...............
Deck 2 Function ......... Pilot lamp...............
Overheat protection system – Service
Deck 1 Function ......... Pilot lamp...............
Deck 2 Function ......... Pilot lamp...............
Timer
Normal-mode
Deck 1 Function .........
Deck 2 Function .........
Auto-mode
Deck 1 Function ......... Pilot lamp...............
Deck 2 Function ......... Pilot lamp...............
Heat output controls – Function
Deck 1 Top ............... Bottom ..........
Deck 2 Top ............... Bottom ..........
Oven mode – Function
On.............. Off .............
Oven door
Deck 1 Function ......... Seal test.........
Deck 2 Function ......... Seal test.........
Lighting
Deck 1 .............. Deck 2................
Upper deck ( two electrical connections)
L1 ........... A L2............ A L3 ........... A
Lower deck + upper deck
(one electrical connection)
L1 ........... A L2............ A L3 ........... A
Checked and approved by Date
...................................................................................... ......................................................................................
Quality assurance and delivery certificate
Electrical start-up test with maximum output
Power supply Voltage
208-240V 1N 50/60Hz
208V 3ph 50/60Hz
220-240V 3ph 50/60Hz
380-415 3N 50/60Hz.
440-480 3N 50/60Hz.

18 PizzaMaster®
EU-Declaration of conformity
Svenska BakePartner AB
declare under sole responsibility that the PizzaMaster oven
is approved and in conformity with,
Electromagnetic compatibility Directive 2004/108/EC,
and applicable supplements
Low voltage Directive 2006/95/EC, and applicable supplements
Counter Top Ovens
PM 351ED PM 401ED PM 451ED
PM 351ED-1 PM 401ED-1 PM 451ED-1
PM 352ED PM 402ED PM 452ED
PM 352ED-1 PM 402ED-1 PM 452ED-1
PM 352ED-2 PM 402ED-2 PM 452ED-2
PM 351ED-DW PM 401ED-DW PM 451ED-DW
PM 351ED-1DW PM 401ED-1DW PM 451ED-1DW
PM 352ED-DW PM 402ED-DW PM 452ED-DW
PM 352ED-1DW PM 402ED-1DW PM 452ED-1DW
PM 352ED-2DW PM 402ED-2DW PM 452ED-2DW
...............................................................
Anders Carlsson
Technical Manager
Svenska BakePartner AB
Date
2009-03-06

19
PizzaMaster®
Notes

Svenska BakePartner AB
Odegaerdsgatan 5
SE-504 94 Boras
Sweden
Tel: +46(0)33-230 025
Fax: +46(0)33-248 140
Internet: www.pizzamaster.com
www.bakepartner.com
E-mail: info@bakepartner.com
PizzaMaster® ovens are manufactured by
Svenska BakePartner AB. BakePartner is renowned for
quality pizza ovens that combine efficiency and high
productivity with traditional, old-world baking results.
Now, building on its success, experience and know-how
in the highly-demanding pizza industry, the
company has developed a series of multi-purpose
countertop ovens with exceptional qualities.
PizzaMaster® multi-purpose ovens are intended to
set new standards of capacity, versatility, safety and
style in countertop baking and roasting applications.
Other manuals for PM 351ED
1
This manual suits for next models
29
Table of contents
Other PizzaMaster Oven manuals