Planex GW-DS54GR User manual

2.4 GHz IEEE 802.11g 54Mbps Wireless LAN
PCIbus Adapter
GW-DS54GR

GW-DS54GR PlanexCommunicationsInc.
Table of Contents
Chapter 1 Introduction................................................................................................ 3
1.1 Wireless Network Options ...............................................................................................................3
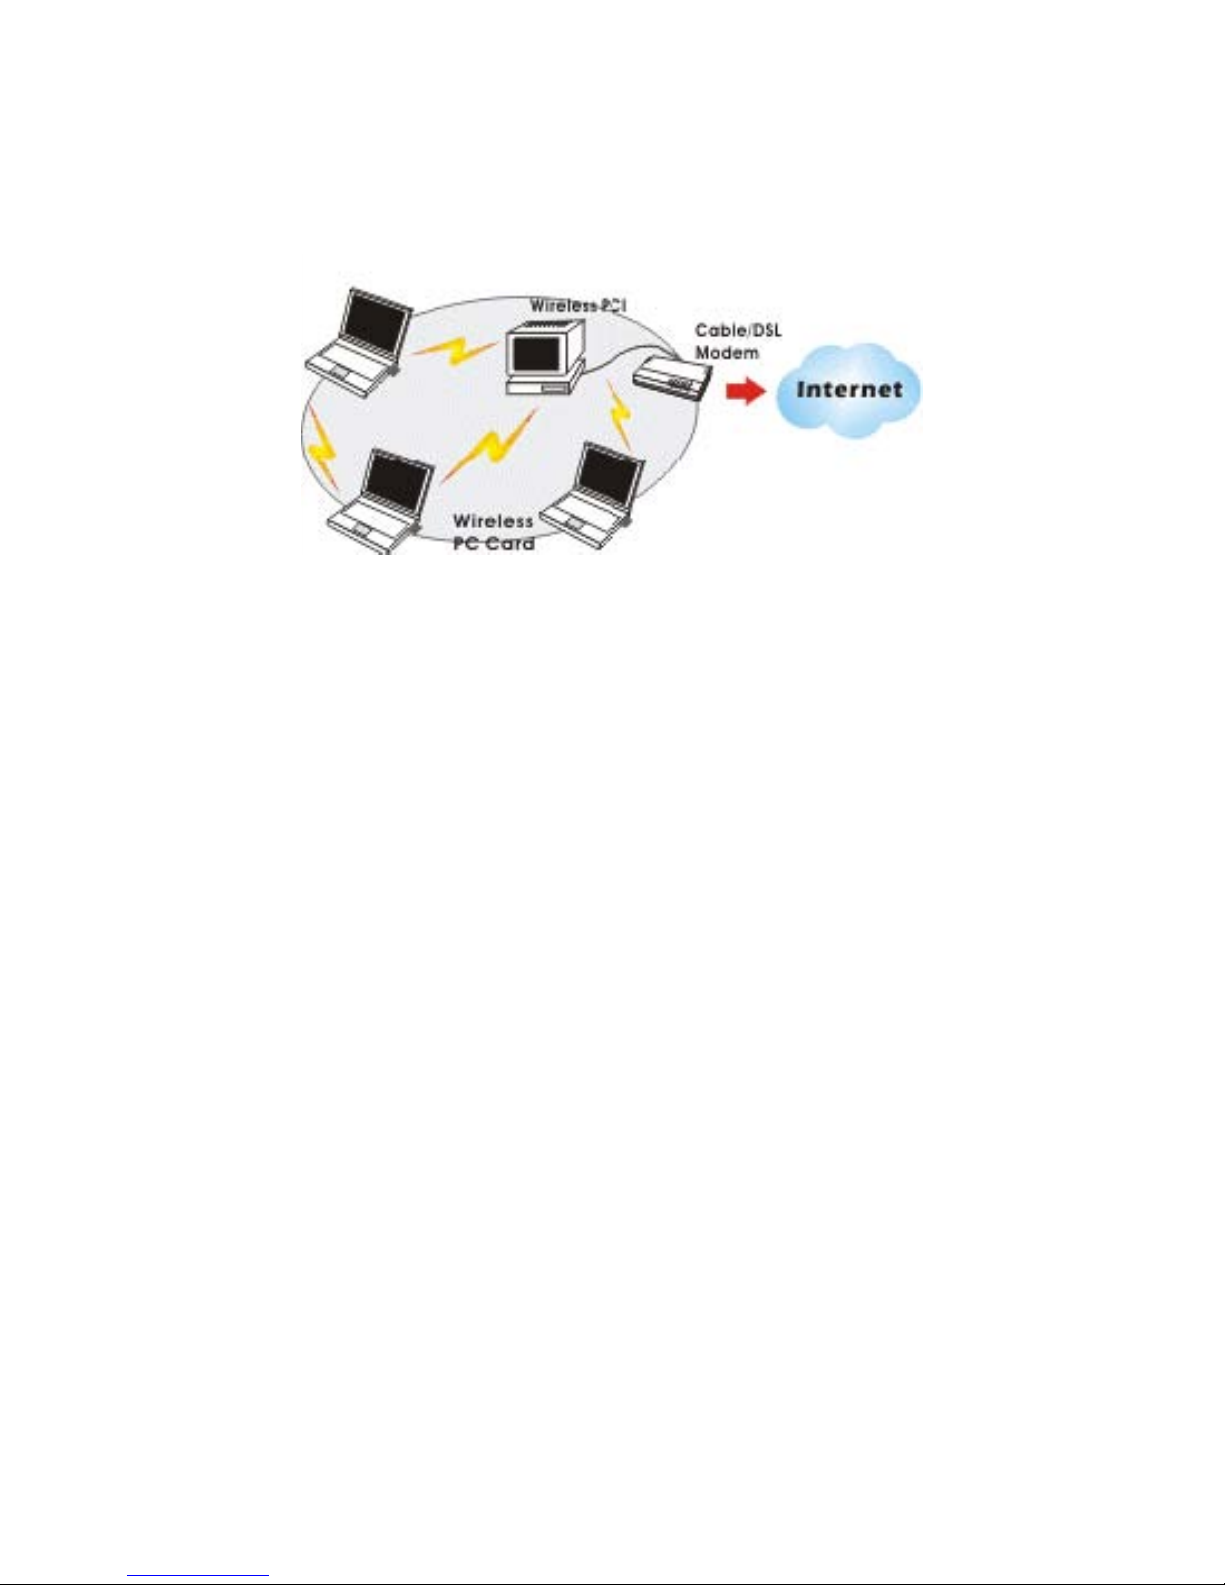
1.1.1 The Peer-to-Peer Network ........................................................................................................3
1.1.2 The Access Point Network........................................................................................................4
Chapter 2 Package Contents....................................................................................... 5
Chapter 3 Installation.................................................................................................. 6
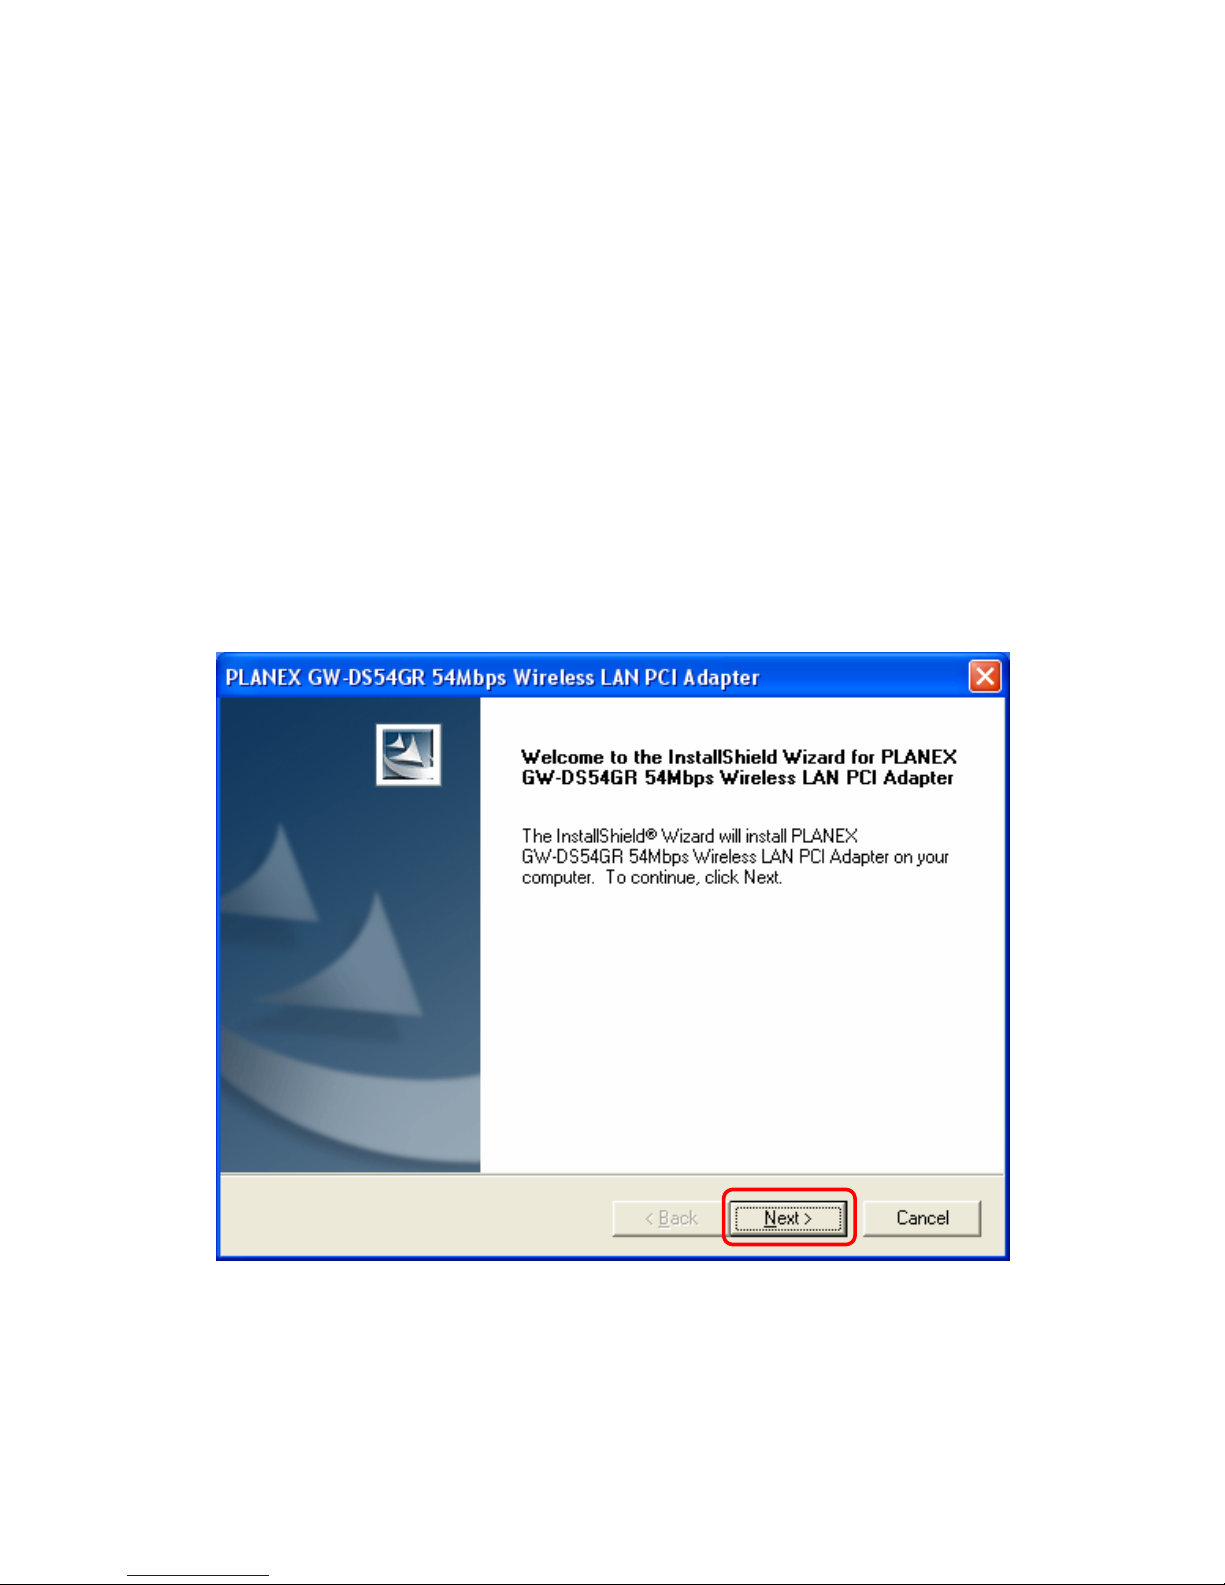
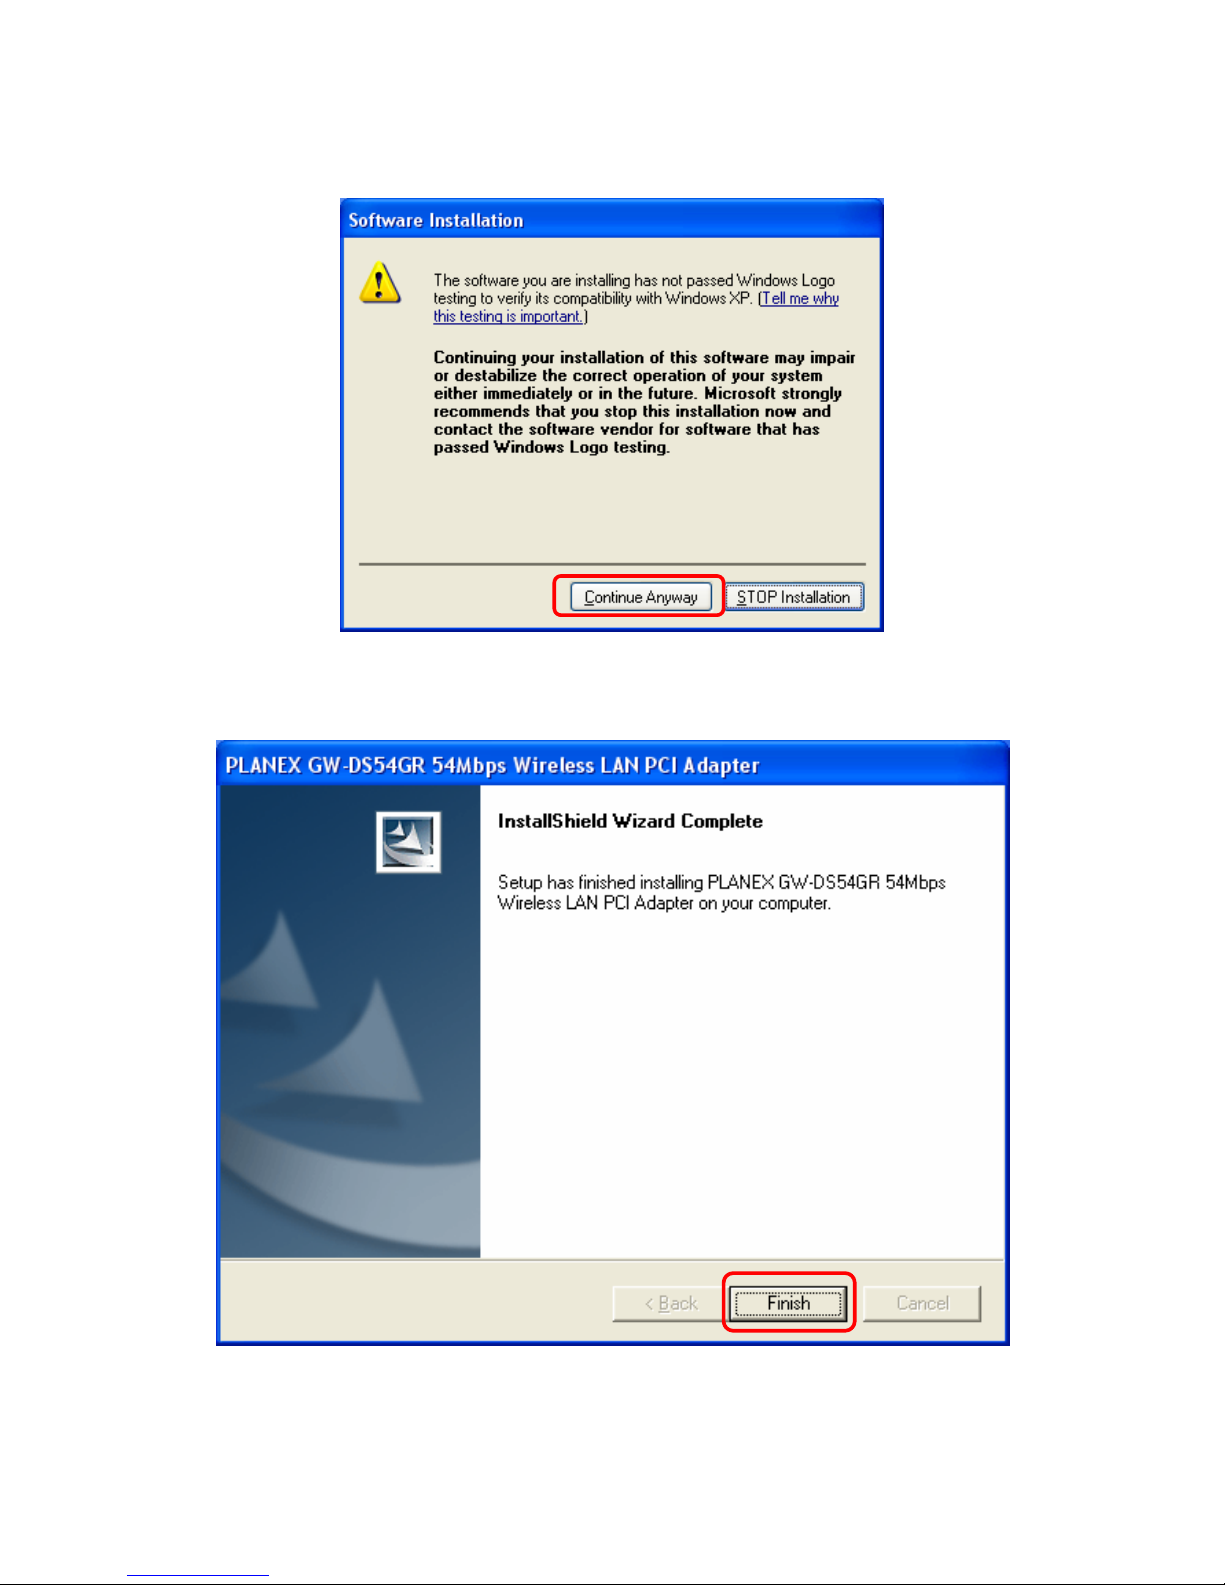
3.1 Utility Installation..............................................................................................................................6
3.2 Device Installation .............................................................................................................................8
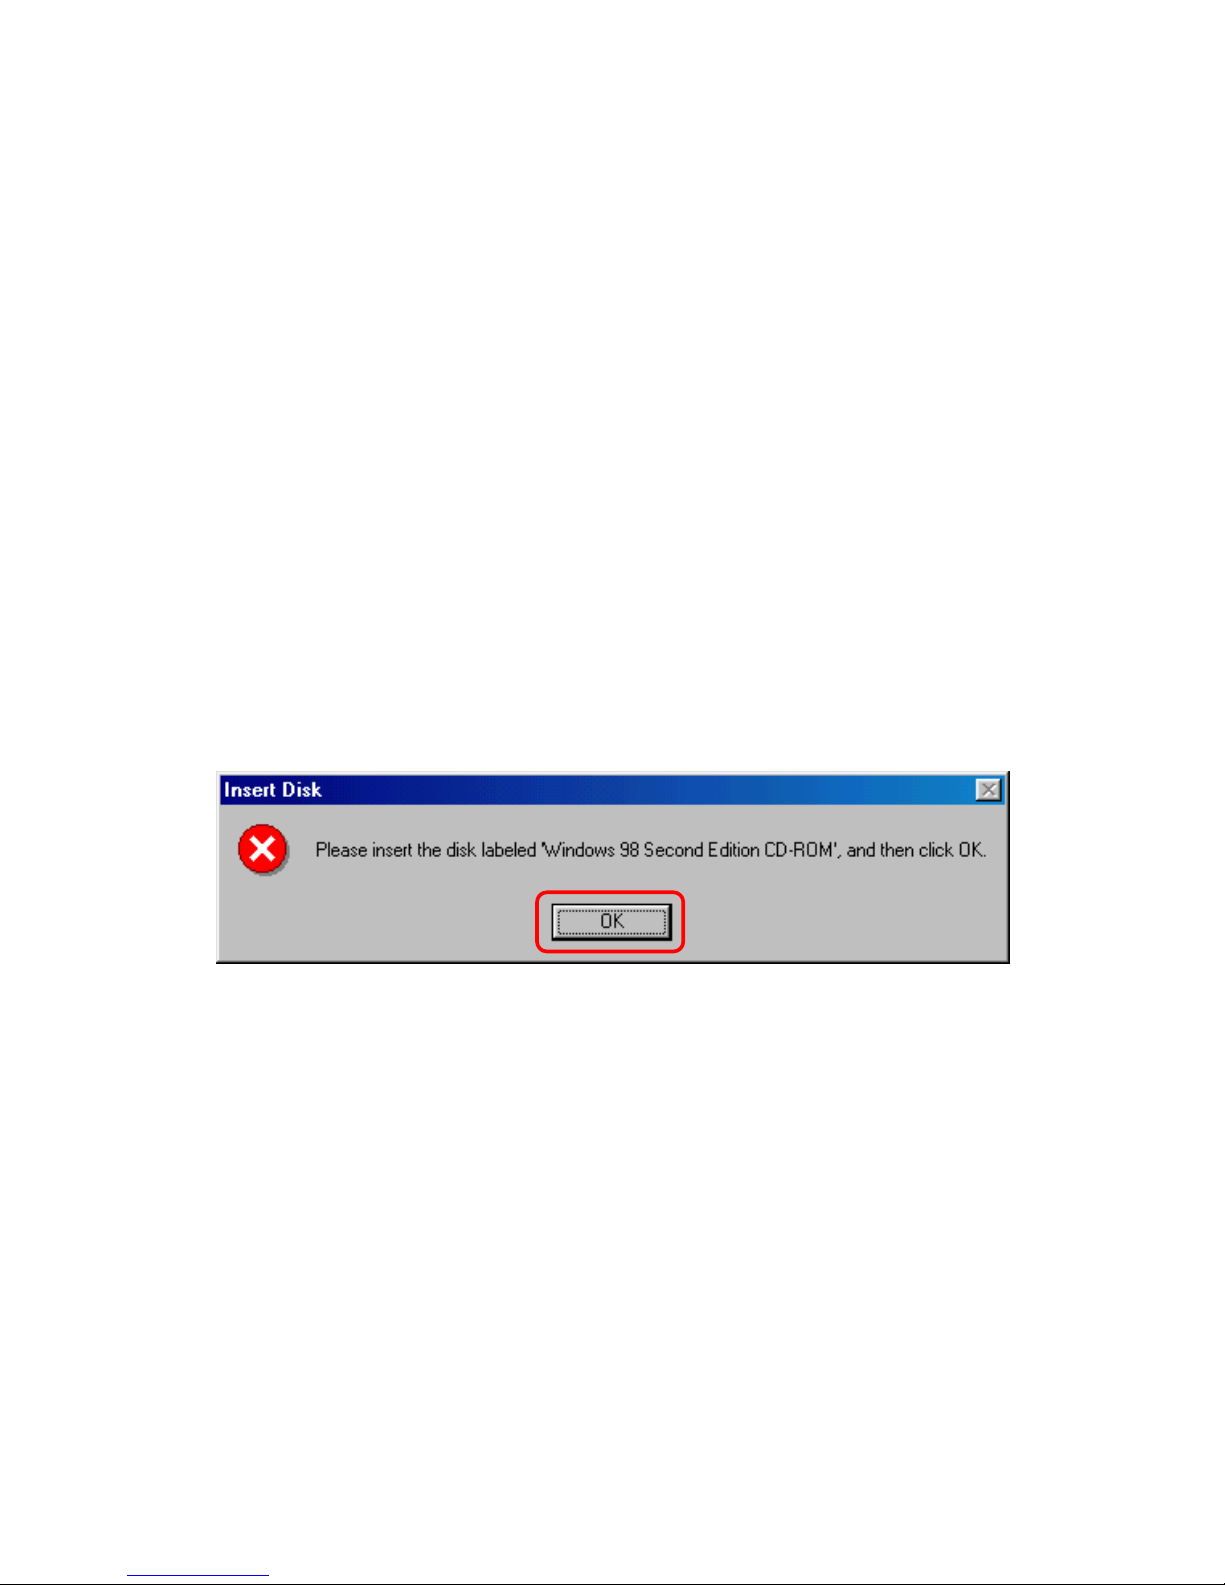
3.2.1 Notes for Windows 98SE/ME users........................................................................................8
3.2.2 Notes for Windows 2000 users.................................................................................................8
3.2.3 Notes for Windows XP users....................................................................................................9
3.2.4 Device Verification...................................................................................................................12
Chapter 4 Configuration........................................................................................... 13
4.1 Easy Config.......................................................................................................................................13
4.2 Accessing the Configuration Utility..............................................................................................17
4.2.1 Main Tab....................................................................................................................................17
4.2.2 Profile Manager Tab ................................................................................................................19
4.2.3 Advanced Tab...........................................................................................................................22
4.2.4 Info Tab......................................................................................................................................24
4.2.5 About Tab..................................................................................................................................24
Chapter 5 Uninstallation .......................................................................................... 26
Chapter 6 Specification............................................................................................. 28
Chapter 7 Safety Statements .................................................................................... 29

GW-DS54GR PlanexCommunicationsInc.
Chapter 1 Introduction
TheGW-DS54GR is a device that allows you connect your computer to a wireless
local area network (LAN). A wireless LAN allows your system to use wireless
Radio Frequency (RF) technology to transmit and receive data without physically
attaching to the network. The Wireless protocols that come with this product
ensure data security and isolation from interference generated by other radio
frequencies.
This card also allows you to take full advantage of your computer’s mobility
with access to real-time information and online services anytime and anywhere.
In addition, this device eliminates the bother of pulling cable through walls and
under furniture. It even allows you to place your system in locations where
cabling is impossible. Modifying and augmenting networks has never been so
easy.
1.1 Wireless Network Options
1.1.1 The Peer-to-Peer Network
This network installation lets you set a small wireless workgroup easily and
quickly. Equipped with wireless PC Cards or wireless PCI, you can share files
and printers between each PC and laptop.
You can also use one computer as an Internet Server to connect to a wired global
network and share files and information with other computers via a wireless

GW-DS54GR PlanexCommunicationsInc.
LAN.
1.1.2 The Access Point Network
The network installation allows you to share files, printers, and Internet access
much more conveniently. With Wireless LAN Cards, you can connect wireless
LAN to a wired global network via an Access Point.

GW-DS54GR PlanexCommunicationsInc.
Chapter 2 Package Contents
GW-DS54GR comes with the following items. Please go through each item below.
If any of listed items appears to be damaged or missing, please contact your local
dealer.
¾GW-DS54GR
¾Quick Installation Guide
¾CD-ROM (User’s Manual / Driver & Utility)
¾2dBi Dipole Antenna
¾2dBi Desktop Antenna (except Europe area)
¾Warranty Card

GW-DS54GR PlanexCommunicationsInc.
Chapter 3 Installation
Caution: Do not insert the GW-DS54GR into your desktop computer until the
procedures in Utility Installation has been performed.
3.1 Utility Installation
1. Insert the CD-ROM into the drive on your PC.
2. The auto-run program should start automatically. Choose English and click
Install Utility to start the installation. If it does not, run the CD-ROM
path:\EN\utility\setup.exe program.
3. When the InstallShield Wizard screen appears, click Next to continue.
4. Click Continue Anyway to continue.

GW-DS54GR PlanexCommunicationsInc.
5. Click Finish to complete the installation.

GW-DS54GR PlanexCommunicationsInc.
3.2 Device Installation
Note: Make sure the procedure in Utility Installation has been performed.
1. Before installing the device, make sure the computer is turned off. Remove the
expansion slot cover from the computer.
2. Carefully slide the GW-DS54GR into the PCI slot of your computer. Push
evenly and slowly and ensure it is properly seated. You may have to use the
mounting screw to have the card screwed securely in place.
3. After the device has been connected to your computer, turn on your computer.
Windows will detect the new hardware and then automatically copy all of the
files needed for networking.
3.2.1 Notes for Windows 98SE/ME users
Please make sure you have the operating system CD-ROM ready before
installation of the device. You may be asked to insert the CD-ROM in order to
locate the specific drivers.
3.2.2 Notes for Windows 2000 users
During the installation, when the Digital Signature Not Found screen appears,
click Yes to continue.

GW-DS54GR PlanexCommunicationsInc.
3.2.3 Notes for Windows XP users
1. Select No, not this time and click Next.

GW-DS54GR PlanexCommunicationsInc.
2. Select Install the software automatically (Recommended) and click Next.

GW-DS54GR PlanexCommunicationsInc.
3. Click Continue Anyway.
4. Click Finish to complete the installation.

GW-DS54GR PlanexCommunicationsInc.
3.2.4 Device Verification
To verify that the device has been properly installed in your computer and is
enabled, go to Start ÎSettings ÎControl Panel ÎSystem (Hardware) Î
Device Manager. Select the Network adapters item. If the PLANEX
GW-DS54GR 54Mbps Wireless LAN PCI Adapter is listed, it means that your
device is properly installed and enabled successfully.

GW-DS54GR PlanexCommunicationsInc.
Chapter 4 Configuration
After successful installation of the Wireless LAN Card’s driver, the utility icon
will display in the task bar. You will be able to access the Configuration Utility
through the Network Status icon.
If the icon doesn’t appear automatically, go to StartÎProgramsÎbRoad
Lanner WaveÎPLANEX GW-DS54GR Utility, it will appear in the task bar.
4.1 Easy Config
1. In the Main tab, click Easy Config on the right down corner to start quick
configuration.

GW-DS54GR PlanexCommunicationsInc.
2. Select the wireless connection type, either Infrastructure or Ad-Hoc. Click
Next to continue.

GW-DS54GR PlanexCommunicationsInc.
3. Select a wireless station on the list, and click Next to configure its settings.
The following screen will appear for you to configure, for detailed configuration,
please refer 4.2.2 Profile Manager Tab.

GW-DS54GR PlanexCommunicationsInc.
4. Configure the network TCP/IP, you may select DHCP to obtain an IP address
automatically or select Manual to set an IP address. Click Next to continue.
5. Select DNS Auto to obtain DNS automatically or select Manual to set the
primary and secondary DNS. Click Finish to complete the Easy Config
procedure.

GW-DS54GR PlanexCommunicationsInc.
4.2 Accessing the Configuration Utility
All settings are categorized into 5 Tabs:
¾Main Tab
¾Profile Manager Tab
¾Advanced Tab
¾Info Tab
¾About Tab
4.2.1 Main Tab
The main tab enables you to scan for available networks, select a network to
which to connect, modify the settings for the current connection, or set up your
station for Ad Hoc connection.
¾Status- Shows the current connection status.
¾Speed- Shows the connection speed.
¾Type- Shows the wireless connection type.
¾Authentication- Shows the authentication type.

GW-DS54GR PlanexCommunicationsInc.
¾Encryption- Shows the encryption type.
¾SSID- The SSID is the unique name shared among all points in your
wireless network. The name must be identical for all devices and points
attempting to connect to the same network.
¾Signal Strength- The signal strength from the network Access Point or
station. The strength is displayed in three formats: a signal quality level (one
of five levels, from Bad to Best), a numerical value in dBm, and a signal
quality bar graph with a scale of –82 to –10.
¾Link Quality- Shows the link quality percentage.
¾Total Throughput- Shows the total throughput percentage.
¾Throughput TX- The actual instantaneous transmitting rates.
¾Throughput RX- The actual instantaneous receiving rates.
¾Network Address
zMAC Address- The MAC address of this wireless adapter.
zIP Address- The IP address of this wireless adapter.
zSubnet Mask- The subnet mask of this wireless adapter.
zGateway- The default gateway address of the adapter.
¾Show Tray icon- Place a check in the check box to show the utility icon in
the tray.
¾Radio Off- Place a check in the check box to disable the radio function.
¾Windows Zero Config- External Configuration Checkbox (Windows XP
only): A checkbox that enables you to disable the WLAN Station
Configuration Utility and indicates that the station driver is to be configured
with Windows XP’s built-in Zero Configuration Utility (ZCU).
On Windows XP systems, the ZCU service is automatically stopped when
the WLAN utility is installed. The ZCU is started when you check the
Configure using Windows Zero Configuration checkbox. The checkbox is
only displayed on Windows XP systems.

GW-DS54GR PlanexCommunicationsInc.
4.2.2 Profile Manager Tab
The Profile Manager enables you to create, modify and delete the profiles that the
station uses to connect to WLAN networks, to activate and de-activate profiles,
and to raise and lower a profiles’ priority.
¾Connect- Select a wireless device that you want to connect with and click
Connect to make a connection. The wireless device you have connected will
be added into the Available Profile(s) field below.
¾Rescan- Click Rescan to refresh the wireless device list.
¾Configure- Click Configure to set up the detailed configuration.
¾Add- Click Add to add a wireless device into the Available Profile(s) field
below.
¾Remove- Select a wireless device that listed in the Available Profile(s) field
and then click Remove to delete it.
¾Edit- Select a wireless device in the Available Profile(s) field and then click
Edit to change its configuration.
The following configuration screen will appear if you just click Connect,
Configure or Add buttons.

GW-DS54GR PlanexCommunicationsInc.
Note:
1.) WEP:
If WEP is selected, you can either input Encryption Key #1~4 or check the
Generate WEP Key and enter a WEP, the system will automatically generate.
2.) WPA-PSK/WPA2-PSK:
If WPA-PSK/WPA2-PSK is selected, enter the Passphrase in the column.
¾Profile Name- You may enter the preferred profile name in this column.
¾Network Name (SSID)- The SSID for the current profile.
¾Ad Hoc-
zAd Hoc- Place a check in the check box to enable the Ad Hoc function.
This mode allows wireless-equipped computers to communicate
directly with each other. No access point is used.
Note:Infrastructure- The infrastructure allows wireless and wired
networks to communicate through an access point.
Table of contents
Other Planex Adapter manuals

Planex
Planex BT-01UD1 User manual

Planex
Planex FW-100TX User manual

Planex
Planex BT-01UDE User manual

Planex
Planex GW-US54GZL User manual

Planex
Planex BT-MicroEDR1X User manual

Planex
Planex GW-US54GZL User manual

Planex
Planex GW-US54Mini User manual

Planex
Planex URS-02 User manual

Planex
Planex GW-US54GD User manual

Planex
Planex GN-1200TW3 User manual
Popular Adapter manuals by other brands

Linksys
Linksys WPC54GS - Refurb Wrls-g Notebook Adr Spdbstr No... user guide

Airlinkplus
Airlinkplus AWLL017 user manual

Linksys
Linksys WUSB12 user guide

MITSUBISHI ELECTRIC ENGINEERING
MITSUBISHI ELECTRIC ENGINEERING FA1-TE40PA user manual

Compex
Compex WLP54G 3a Quick install guide

Mercusys
Mercusys MW150US user guide