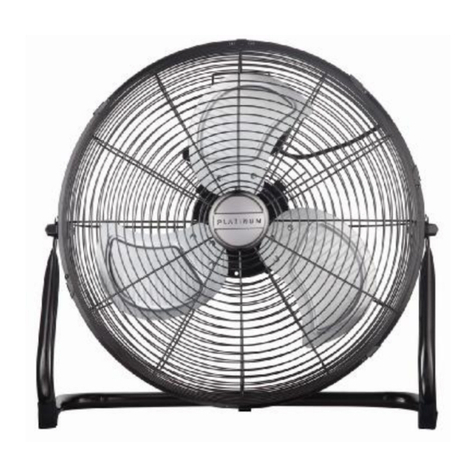
Platinum FD-30M User manual

INSTRUCTION MANUAL
30CMMETALPEDESTALFAN
Articleno. Modelno. / Itemno. EAN
10320000 FD-30M(SR6919140) 6001001620710
10533904 FD-30M(SR7772623) 6001224348170
10533905 FD-30M(SR7772647) 6001224348187
INDOORHOUSEHOLD USE ONLY
Please save and read this instruction manualcarefullybefore use.

ENGLISH
INTRODUCTION
Thankyou forpurchasingour Platinum”MetalPedestalFan.Each unithasbeen manufactured to
ensuresafety,reliability,and easyofuse.Beforeuse,pleaseread these instructionscarefullyand
savethemfor futurereference.
IMPORTANTSAFEGUARDS
Whenusing your Pedestal Fan, basicprecautions shouldalwaysbe followed, including the
following:
lIfthe supplycordisdamaged,itmustbe replacedby themanufacturer, itsservice agentor
similarlyqualifiedpersons inorder toavoidhazard.
lDuring the use ofan appliance, apersonalmonitor onthe Appliance isnecessary.
lThisappliance isnotintended foruse bypersons(including children)withreduced physical,
sensoryormentalcapabilities,orlackofexperienceand knowledge,unless they havebeen
given supervision orinstruction concerning use ofthe appliance byapersonresponsiblefor
their safety.
lChildren shouldbe supervised toensurethat theydo not playwiththe appliance.
lDonotallowthe cordtotouch hotsurfaces and do notplace on ornearahotgas orelectric
burner or inaheated oven.
lNever use thispedestalfan near bathtubs,showers, basins or othervesselscontaining water.
lNever immerse the pedestalfan, plug or cordinwater, or allow anyliquidtocomeintocontract
withany partofthe pedestalfan.
lMakeensurethat the voltage used, corresponds tothe voltage indicated on the rating label.
lNever touch the blades withyourhand or anyotherobject!
lDonotpullthe cordtoo tight. Ifitbecomes damagedafterprolonged use,getitrepaired bya
technician.
lNeverinsert yourfingers,pencils,orotherobjectsthrough the pedestalfan grilleduring
operation.
lThe pedestalfan shouldbe used onastableand levelsurface.Donotoperatewithout the grille
being properlyinplace.
lDonotexpose the pedestalfan toexcessiveheatorhumidity.Thiscouldcausedamage tothe
electricalcomponents.
lCheckthe powercordand plug regularlyforanydamage.Ifthe cordorthe plug isdamaged,it
must be replaced bymanufacturer or aqualified person inorder toavoidan electricalhazard.
lWedo not recommendthe use ofan extension cord.It couldoverheat and causeafirehazard.
lThisappliance isintendedforhouseholduse only.Industrialorcommercialuse will voidthe
warranty,and the supplier can not be heldresponsiblefor injuryor damage caused when using
the appliance for anyotherpurpose than thatintended.
lTo reduce the riskoffireorelectricshock, do notuse thisfan withanysolid-statespeed control
device.
lTo disconnect, gripplug and pull fromwall outlet. Neverpull on the cordtounplug.
lThe use ofaccessoryattachmentsthatarenotrecommended orsupplied bythe manufacturer
mayresult ininjuries, fireor electricshock.

ENGLISH
KNOWYOUR METALPEDESTAL FAN
1. Front grill
2. Fan blade
3. Blade locking screw
4. Backgrilllocking screw
5. Backgrill
6. Motor shaft
7. Motor
8. Speedcontrol
9. Oscillation knob
10. Hand screw
11. Hand nut
12. Locking screw
13. Connector
14. Inner pipe
15. High-adjust screw
16. Outer pipe
17. Base
18. Blackweight
19.Washer
20. Locking lever
21. Power cordand plug
22. Securingbolt
23. Securingnut
ELECTRICSCHEMATICDIAGRAM

ENGLISH
SPECIFICATIONS
Voltage:AC 230V/50Hz
Wattage:35W
Plug Articleno.Modelno. / Itemno. EAN
3R16ASouthAfrica Plug 10320000FD-30M (SR6919140) 6001001620710
3Flat Pin 10533904FD-30M (SR7772623) 6001224348170
Schuko 10533905FD-30M (SR7772647) 6001224348187
USINGYOURMETALPEDESTALFAN
Beforefirst use, please follow these instructions:
lRemoveall packing and anylabels.
lMaking surethatyourMetalPedestalFan isingood condition.Itmusthaveno cracks on the
unit andno damage tothecord/plug.
TOUSE YOUR METALPEDESTALFAN
ASSEMBLYINSTRUCTIONS
BASEASSEMBLY:
1). Unscrewthe lockingleverfromthe bottomofthe outer
pipe.
2). Turnthe pipe upsidedownand slide the openinginthe
center ofthe pedestalfan base over the pipe. Place the
blackweight ontothe basefollowed bythe washer.
3). Insert the threaded endofthe locking lever intothe hole
ofthe washer and throughthe base intothe bottomofthe
stand. Turnthe lockinglever clockwise tosecureand
tighten the base tothe pipe.
4). Turnthe baseover and set it on the floor.

ENGLISH
5). Loose thehand screwon the innerpipe.Insert the
connector intothe inner pipe.
6). Fixthe hand screw onthe connector.
FANHEADASSEMBLY:
7). Removethe outer4pcs backgrill locking screwfrom
the front cover ofthe motor.
Back
grill
locking
screw.

ENGLISH
8). Position the backgrilloverthe motorshaft, fitting the
holes inthe backgrilloverthe 4pcs screwsholes that
outsideofthe motor. Make surethe handleisat thetop.
9). Securethe backgrillby screwing the 4pcsbackgrill
lockingscrews.
10). Loosen the securingscrewon the pedestal fanblade.
Slide thepedestalfan blade ontothe mounting shaftwith
the shaftsleevefacing the motor. Align securingscrew
withflatgrooveinthe motorshaftand tighten witha
Phillips screwdriver.
11). Removethe small securingboltfromthe bottomofthe
frontgrill.Position frontgrillso the logo ishorizontaland
make surethe grillclips areopen.Securethe top tab to
the backgrill.Fasten the grillstogetherwithsecuring
bolt. Holdthe frontgrillagainstthe backgrilland snap
the grillclipsclosed tocompletethe assembly.
OPERATIONINSTRUCTIONS:
1. Turnthe speed controltoselect speeds: 0(off) andspeeds I (Low), II (Middle), III (High).
2. The pedestalfan can operateinoscillation orstationarymode.Press the Oscillation Knob down
toactivatethe oscillatingmode.Tostoposcillation,pullthe knobupward.Toadjustthe tiltofthe
pedestalfan grasp the pedestalfanmotorhousingand gentlypush forwardorbackward.
The pedestalfan head canadjusts30 degree tilt angle.
ADJUSTMENTINSTRUCTIONS:
lToadjust the angleofthe pedestalfan head, loosen the adjustable-tiltknob andmovethe
pedestalfan head tothe desiredangle. Firmlytightenthe knob tosecureintoplace.
lToadjust the height ofthepedestalfan, turnthe adjustableheightknob counter-clockwiseto
loosen the stand. Adjust the pedestalfantothe desired height, then firmlytighten tosecure
intoplace.

CAREANDCLEANING
Unplugthe pedestalfanbeforecleaning ormakingrepairs. NOTE: Iffor anyreason thisunit
requires service, returnappliancetomanufacturer or asimilarlyqualified serviceagent toensure
safety.
Cleaning
lToclean:Disconnect the power cordfromthe socket. Removethe guardandthe blades
carefully. Donot drop the blades!First use asoft clothwithlight soap toclean offoilstains.
Thenwipe dryand polish withadrycloth. Never usepolish or anycorrosiveliquidthat will
damagethe paint, metalor plastic!Put backthe blades andlocktheguardsecurelybefore
use.
lSet the switch tooff and unplug the unit.
lClean using adampclothand amilddetergent, ifnecessary. Makecertainall detergent
residue isremoved.
lNever use abrasivecleaning agentsor solvents. Thismaycausedamage or deterioration to
the surface ofthe unit.
lDonot allow water todripon or intothe pedestalfanmotor housing.
Maintenance:
lMakecertainthe pedestal fan isunplugged.Unlockthe metalclipson the front grill and
removethe frontgrill.Use aPhillipsscrewdrivertoloosen the securingscrewand removethe
pedestalfan blade.
lThe pedestalfan bladeandgrillmaybe cleanedwithadampclothandmilddetergent.
lReassemblethe pedestalfan after the partshavedried completely. Todo so, replace the
pedestalfan blade, tightenthe securing screw, and securethe front grill. Donot plug the
pedestalfan intoan electricaloutlet untilit isfullyreassembled.
Storage:
lWhennot inuse, storethepedestalfan inacool, drylocation. Toprevent dust and dirt
build-up, use the oldpackaging torepacktheunit.
PROBLEMSOLVING
Ifthe pedestalfan will not operate:
lConfirmthat the pedestalfan switch isnot inthe off position.
lMakesuretheelectricitytothe mainfuseisworking.For troubleshooting assistance,
contact customer service.
ENGLISH

ENGLISH
WARRANTY
PLEASE AFFIXYOUR RECEIPT/PROOFOFPURCHASE HERE.
INTHE EVENTOFACLAIMUNDERTHISWARRANTY THE AFORESAID RECEIPT/PROOF
OFPURCHASE MUSTBEPRODUCEDTOGETHER WITHTHISWARRANTY.
Modelnumber (Lot number: )
Product name
Dateofpurchase
Place ofpurchase
1.The partyselling the product ( the seller”) tothe originalpurchaser ofthisproduct ( the
customer”)herebywarrantsthatthisproductwill be ofgoodqualityand,ingoodworking order
and, freeofdefectsandsuitablefor itsintendedpurpose under normalhouseholduse, for a
periodof1(one) year fromthe dateofpurchase ( warrantyperiod”) ofthisproduct.
2.Inthe eventthatthe warrantyperiod has notlapsedand the productisnotofagood quality,
or ingoodworking order or, isdefectiveor isnot suitablefor itsintended purpose under
normalhouseholduse,the customermay,subjecttoparagraph 3below, returnthe productto
the seller andhavethe following options available:
2.1Withinthe first6(six)monthsofthe warranty:toreceivearefundoftheactualprice
paidortoexchangethe productforthe sameorsimilarproductofthe samepurchased
value;
2.2Withinthe second 6(six) months ofthe warranty:tohavethe product exchanged for
the sameor similar product ofthe samepurchased value.
3.The seller willnot replacethe product or refundthe customer intermsofthiswarrantyif the
product:
3.1has been altered contrarytothe instructions provided inthe product manual;
3.2has been misused, abusedor tampered with;
3.3isdefectiveor not inworking order duetoordinarywear and tear;
3.4isdamaged resultingfromthe customer’sgross negligence,recklessness,malicious
behavior or criminalconduct;
3.5has been utilised for commercialuse.
4.Thiswarrantyapplies onlytothe productthathas been purchased fromthe sellerand notto
anyexpendables attachedtoor installed onthe product bythe customer.
5.Anyclaimintermsofthiswarrantymust be supported bythe originalproofofpurchase.
6.Notethat the exchange itemwill onlycarrythe balance ofthe warrantyperiod as fromthe
originaldateofpurchase.

PORTUGU S
INTRUÇÃO
Obrigado por adquirir nosso ventilador Platinum”ventilador pedestaldemetal. Cada unidade foi
fabricado paragarantir asegurança, confiabilidade efacilidade de uso. Antesde usar este
aparelho, leiaatentamenteestas instruçõeseguarde-as parareferênciafutura.
SALVAGUARDASIMPORTANTE
Quandousarasua Platinum”ventiladorpedestaldemetal,as precauções básicas devemsempre
ser seguidas, incluindooseguinte:
lSeocabo de alimentaçãoestiverdanificado,eledevesersubstituídopelofabricante,seu
agentede serviçoou pessoas comqualificações semelhantes, afim de evitaroperigo elétrico.
lDuranteouso de umutensílio, ummonitor pessoalnoUtensílio énecessário.
lEsteaparelho não édestinado ao uso porpessoas (incluindo crianças)comcapacidades
físicas,sensoriaisou mentais,ou afaltade experiênciaeconhecimento,amenos que sejam
supervisionadas ou quetenhamsido dadas instruções relativas àutilizaçãodo aparelho por
umapessoaresponsávelpelasua segurança.
lAscrianças devemsersupervisionadas paraassegurar-se de que nãojoguemcomo
apparatus.
lNãodeixe ocabo tocaremsuperfícies quentes enãocoloque sobreou pertodeumgás
quenteou queimador elétrico ou emforno aquecido.
lNunca utilizeesteventiladorpedestalde metalpertode banheiras,chuveiros,lavatórios ou
outros recipientes que contenham água.
lNunca mergulhe oventiladorpedestalde metal,ficha ou ocabo na água,oupermitirqualquer
tipo de líquido aentrar em contactocomqualquer partedo ventilador.
lAssegureque avoltagemutilizada , corresponde àvoltagemindicada na etiquetade avaliação
lNunca toque as laminascomsua mãoou qualquer outroobjeto!
lNãopuxe ocabo comforçademais.Seelefordanificado apósuso prolongado,enviá-lopara
reparopor umtécnico.
lNunca insiraos seus dedos ,lápisou outrosobjetos atravésdagrade doventiladordurantea
operação.
lOventiladorpedestalde metaldeveserusado sobreumasuperfícieestávelenivelada.Não
operá-losemagrade ser no lugar próprio.
lNãoexponhaoventiladorpedestalde metalao calor ou umidadeexcessivo. Isso pode causar
danos aos componentes elétricos.
lInspeccione ocabo de alimentaçãoeoplugue regularmenteporqualquerdano.Seocabo ou
oplugue estiverdanificado ,eledevesersubstituído pelofabricanteouumapessoa
qualificada , afim de evitarumperigo elétrico .
lNósnãorecomendamos ouso de umcabo de extensão.Poderiasuperaquecerecausarum
perigo incêndio.
lEstedispositivodestina-se parauso doméstico.Uso industrialou comercialanularáagarantia,
eofornecedornãopodeserresponsabilizado porprejuízos ou danos causados ao usaro
aparelho paraqualquer outrofim.
lParareduzirorisco deincêndioou choque elétrico,nãoutilizeesteventiladorcomqualquer
dispositivode controlede velocidade emestado sólido.
lParadesconectar , puxe oplugue da tomada da parede. Nunca puxe ocabo paradesligar
lOuso dos acessórios nãorecomendados ou fornecidos pelofabricantepode resultarem
ferimento, incêndioou choque elétrico.

PORTUGU S
CONHEÇAOSEUVENTILADORPEDESTALDEMETAL
1.Grade dianteira
2.Lâmina do ventilador
3.Parafusode travamentodelâmina
4.Parafusode travamento
paragradetraseira
5.Grade traseira
6.Eixodo motor
7.Motor
8.Controledevelocidade
9.Botãodeoscilação
10.Parafusomanual
11.Porca demão
12.Parafusode fixação
13.Conector
14.Tubointerior
15.Parafusode ajustedealtura
16.Tuboexterior
17.Base
18.Pesopreto
19.Arruela
20.Alavanca de fixação
21.Cordade energiaeplugue
22.Parafusode segurança
23.Porca desegurança
DIAGRAMADE ESQUEMAELÉTRICO

SPECIFICATIONS
Voltage:AC 230V/50Hz
Puissance : 35W
Plugue Artigo no. Modelono. / Itemno. EAN
Pluguede África do Sul3R16A10320000FD-30M (SR6919140)
6001001620710
3Pino Plano 10533904FD-30M (SR7772623)
6001224348170
Schuko 10533905FD-30M (SR7772647)
6001224348187
UTILISERVOTREVENTILADORPEDESTALDEMETAL
Avant lapremièreutilisation, veuillezsuivreces instructions:
lRetirer tous lesemballageset les étiquettes.
lS'assurerque votreventilateurmétallique surterreesten bon état.Ilne doitpas avoirdes
fissuressur l'unitéet aucundommage au câble/ àlaprise.
USARSEUVENTILADORPEDESTALDEMETAL
INSTRUÇÕES DE MONTAGEM
MontagemdeBase
PORTUGU S
1). Desaperteaalavanca de bloqueioapartirdo fundo do
tubo exterior.
2). Ponhaotubo de cabeçaparabaixoedeslizeaabertura
no centroda base doventilador pedestalsobreotubo .
Coloque opeso pretonabase seguido pelaarruela.
3). Inseraaextremidaderoscadada alavancade bloqueio
por dentrodo buracoda arruelaeatravésda base parao
fundo do suporte. Gireoalavancade travamentono
sentidohorárioparasegurar ereforçar abase comotubo.
4). Vireabase ecoloque-ano chão.

PORTUGU S
5).Solteoparafusono cano interno. Insireoconector
dentrodo cano interno.
6). Fixe oparafuso manualno conector.
MONTAGEMDE CABEÇADO VENTILADOR
7). Retireos 4parafusos de fixaçãoparagrade traseirada
tampafrontaldomotor.
Parafusode
fixação
paragrade
traseira

PORTUGU S
8). Posicione agrade traseiranoeixo do motor,ajustando
os buracosda gradetraseirasob 4buracosde parafuso
foradomotor. Confirmeque aalçaestáno topo.
9). Fixe agrade traseiracomos4parafusos de fixação.
10). Solteoparafusodefixaçãonalâminadoventilador
de pedestal.Deslizealâminado ventiladorpedestal
sobreoeixo de montagemcomaluvado eixodefrente
paraomotor. Alinhe parafusode fixaçãocomsulcoplano
no eixo do motoreapertecomumachavede fenda
Phillips.
11). Removaopequeno parafusode fixaçãoda parte
inferiorda grade frontal.Posicione gradedianteirade
modo queologotipo éhorizontaleconfirmeque osclipes
da grade estãoabertas.Fixe aguiasuperiorparaagrade
traseira.Aperteas gradesjuntocom parafuso de fixação.
Segureagrade frontalcontraagradetraseiraetireos
clipes dagradefechadaparacompletar amontagem.
INSTRUÇÕES DE OPERAÇÃO
1. Gireocontroldevelocidade paraselecionarvelocidades:O(desligado),evelocidades
I(baixo),II(meio) III(alto)
2. Oventiladorpedestaldemetalpodefuncionaremmodo de oscilaçãoou estacionário.
Pressione oBotãode Oscilaçãoparaactivaromodo de oscilação.Parapararaoscilação,
puxe obotãoparacima.Paraajustarainclinaçãodo ventiladorde mesa,agarreacaixa do
motordoventiladoreempurregentilmenteparaafrenteou paratrás.Acabeçado ventilador
de pedestalpodeser ajustado pelo ângulode indinaçãode30 graus.
INSTRUÇÃO DEAJUSTAMENTO
lParaajustar o ânguloda cabeçado ventilador demesa, solteobotãodeinclinaçãoajustável
emovaacabeçado ventiladordemesa no ângulodesejado.Apertefirmementeobotãopara
fixar no lugar.
lParaajustar aalturado ventilador demesa , gireobotãode alturaajustávelno sentido
anti-horárioparasoltar asuporte. Ajusteoventiladorde mesa atéaalturadesejada , em
seguida, apertefirmementeparafixar nolugar.

PORTUGU S
CUIDADOS ELIMPEZA
Desligueoventilador pedestaldemetalantes de limpezaou reparos. NOTA:Sepor algumcausa
estaunidade necessitarmanutenção, volteodispositivoparafabricanteou um agentede serviço
qualificadoparagarantir asegurança.
Limpeza:
lParalimpar:Desligueocabo de alimentaçãoda tomada .Removaaproteçãoeas lâminas
cuidadosamente.Nãodeixe cairas lâminas!Primeiroutilizeumpano comsabãolevepara
limparmanchas de óleo .Emseguida,esfregesecoepolimentocomumpanoseco .Nunca
utilizepolonêsou qualquerlíquido corrosivoque danificaráapintura,metalou plástico!
Coloque as lâminas nolugar originaletraveoguarda de formaseguraantes de usar.
lAjusteointerruptor paradesligado edesligueaunidade.
lLimpecomumtecido úmido edetergentesuave,senecessário.Certifique-seque todos os
resíduos dodetergentesãoremovidos.
lNunca utilizelimpadores ou solventes abrasivos.Istopode causardanosoudeterioração à
superfícieda unidade.
lNãopermiteque a água gotejaemouentreocaixa do motor do ventilador .
Manutenção:
lCertifique-se que oventiladorpedestalde metalestádesligado.Abraos clipes de metalna
grade frontaleremovaagrade frontal.Utilizeumachavede fenda Phillipsparasoltaro
parafuso defixaçãoeremovaalâmina do ventilador .
lAlâmina eagrelha do ventilador pedestalde metal podemser limpadas com umpano úmido
edetergentesuave.
lMonteoventiladordepisonovamenteapósaspartes teremsecadas completamente.Para
isso,substitua alâmina do ventiladorpedestalde metal,aperteoparafusode fixação,e
segureagrelha frontal.Nãoligue oventiladorpedestaldemetalnumatomada elétrica até
que estejatotalmentemontado novamente.
Armazenagem
lQuandonãoemuso,armazeneoventiladorpedestalde metalemumlocalfresco eseco.
Parapreveniraacumulaçãoda poeiraesujeira,utilizeaembalagemantiga paraempacotar
novamenteodispositivo.
RESOLUÇÃODEPROBLEMAS
Seoventilador pedestaldemetalnãopodefuncionar:
lConfirmese ointerruptordo ventilador estánaposiçãodesligada.
lCertifique-se que aeletricidade dofusívelprincipalestáfuncionando.Paraaassistênciade
resoluçãode problemas, entreemcontatocomserviçoao cliente.

PORTUGU S
TERMODEGARANTIA
FAVOR ANEXAR AQUI SEURECIBO/FISCALDE COMPRA.
EMCASODE RECLAMAÇÃODURANTE OPRAZODA GARANTIAESTE RECIBO/ FISCALDE
COMPRADEVE SERAPRESENTADO JUNTAMENTECOMESTAGARANTIA.
Númerodo modelo (Númerodo lote:)
Nomedo produto
Datadacompra
Localda compra
1.Apartevendedorado produto( vendedor”) ao comprador originaldesteproduto
(comprador”)garantepormeiodesteque oproduto éde boa qualidade e,estáemperfeitas
condições de funcionamentoe, semdefeitoseadequadoparausodomésticonormalpor
umperíodo de 1(um)anoapartirda datada compra(‘período da garantia”)desteproduto.
2.Nocaso emque operíodode garantianãoexpiroueoprodutonão éde boa qualidade, ou
embomestado de funcionamentoou, estácomdefeitoou não éadequado paraasua
finalidade emuso doméstico normal, oclientepode,de acordo comoParagrafo3 ºabaixo,
devolver oprodutoaovendedor eter as seguintes opções disponíveis:
2.1Nosprimeiros6(seis)meses da garantia:parareceberumreembolsodo preço
efetivamentepagoou atroca do produtoparaomesmoprodutoou similardomesmo
valor adquirido;
2.2Dentrodos segundos 6(seis)meses dagarantia: ter oprodutotrocado paraomesmo
produtoousimilar do mesmovalor comprado.
3.O vendedor nãoirásubstituir oprodutooureembolsar ocomprador de acordocomos
termosdestagarantiase oproduto:
3.1for modificado contrariando as instruções fornecidas no manualdo produto;
3.2sofrer uso inadequado, abusoou modificação;
3.3for defeituosoou nãoemcondições de funcionamentodevido aodesgatenatural
3.4fordanificado devido anegligencia,imprudencia,comportamentomalicioso ou
criminosopor partedo comprador.
3.5for utilizado parafinscomerciais.
4.Estagarantiaaplica-se somenteao produtoadquiridodo vendedor, nãocobrindo quaisquer
itens agregados ouinstalados no produtopelocomprador.
5.Qualquer reclamaçãonostermos destagarantiadeveser acompanhadada provaoriginal
de compra.
6.Noteque oitemdetroca sóirátransportar osaldo do períodode garantiaapartir da data
de compraoriginal.

FRANÇAIS
INTRODUCTION
Mercid'avoir choisinotreVentilateur piédestalmétallique «Platinum ». Chaqueunitéa été
fabriquéepour assurer lasécurité, lafiabilitéet lafacilitéd'utilisation. Avant l'utilisation, veuillezlire
attentivement ces instructions et les conserver pour référence future.
MESURESDESÉCURITÉIMPORTANTES
Lorsquevous utilisezvotreVentilateur piédestal, lesprécautionsde basedoivent toujours être
respectées, ycomprisles suivantes:
lEncas de dommage de cordon d'alimentation,il doit êtreremplacéparlefabricant, son agent
de service ou des personnes de qualification similaireafind'éviter toutdanger.
lAucoursd’utilisation de cet appareil, un moniteur de personnelsur l’appareil estnécessaire.
lCetappareil n’estpas destinéàêtreutilisépardes personnes(ycomprisles enfants)dontles
capacitésphysiques,sensorielles ou mentales sontréduites,ou manque d’expérience etde
connaissance,saufsielles sontsupervisées ouontreçudesinstructions d’utilisation de
l’appareil par une personneresponsablede leur sécurité.
lLes enfantsdoivent êtresurveilléspour assurer qu'ilsne jouent pas avec l'appareil.
lNepas laisserlecâbletoucherdes surfaceschaudes etne pasplacersurou àcôtéd'un
brûleur àgazchaud ou électriqueou dans un four chauffé.
lNejamaisutiliserce ventilateurau sol àproximitédes baignoires,des douches,des lavabos
ou d’autres récipientscontenant de l'eau.
lNejamaisplongerleventilateurpiédestal,laprise oulecâbledans l'eau,ou permettre àun
liquide d’entrer en contactavec n'importequellepartiedu Ventilateur piédestal.
lS’assurer que latension utiliséecorrespond àlatension indiquéesur l'étiquettesignalétique.
lNejamaistoucher leslames avec votremainou tout autreobjet!
lNepas tirersurlecâbletrop serré.S'il estendommagéaprèsune utilisationprolongée,le
faireréparer par un technicien.
lNejamaisinsérervos doigts,des crayons,ou d’autres objets àtraverslagrilledu ventilateur
pendant lefonctionnement.
lLe ventilateurpiédestalmétallique doit êtreutilisésurune surface stableetplate.Nepas faire
fonctionner sans lagrillemise enplace.
lNepas exposerleventilateurpiédestalmétallique àlachaleurou àunehumiditéexcessive.
Celapourrait causer desdommages auxcomposants électriques.
lVérifierlecâbled'alimentation etbrancherrégulièrementpourtoutdommage.Si lecâbleou
lafiche estendommagée,il doit êtreremplacépar lefabricantou une personne qualifiéeafin
d'éviter un danger électrique.
lNousne recommandons pas l'utilisation d'une rallonge.Ilpourraitsurchaufferetcauserun
risqued'incendie.
lCetappareilestdestinéàun usage domestique uniquement. L'utilisationindustrielleou
commercialeannuleralagarantieetlefournisseurne peut êtretenu responsabledes
blessures ou desdommages causéslorsde l'utilisation de l'appareil àd'autresfins quecelles
définies.
lPourréduirelerisque d'incendieoudu choc électrique,ne pas utiliserceventilateuravec tout
dispositif àcommande devitesse àsemi-conducteurs.
lPourdéconnecter, brancherlaprise ettirerde laprise murale.Nejamaistirersurlecâble
pour débrancher.
lL'utilisationd'accessoiresquine sontpas recommandésou fournisparlefabricantpeut
entraîner des blessures, d'incendieoudu choc électrique.

FRANÇAIS
CONNAITREVOTREVENTILATEUR SUR PIEDESTALMETALLIQUE
1.Grilleavant
2.Hélice de ventilateur
3.Visdeverrouillage d’hélice
4.Visdeverrouillage de lagrillearrière
5.Grillearrière
6.Axe moteur
7.Moteur
8.Contrôledevitesse
9.Boutond’oscillation
10.Vis àmain
11.Ecrou àmain
12.Visdeverrouillage
13.Connecteur
14.Tuyau intérieur
15.Visd’ajustement de hauteur
16.Tuyau extérieur
17.Base
18.Poids noir
19.Rondelle
20.Levier de verrouillage
21.Cordon et fiche
22.Visdesécurité
23.Ecrou desécurité
DIAGRAMME ELECTRIQUE

FRANÇAIS
SPECIFICATIONS
Voltage:AC 230V/50Hz
Puissance : 35W
Prise Articlen°Modèlen°/ Articlen°EAN
3R16APrise d’AfriqueduSud
10320000 FD-30M (SR6919140)
6001001620710
3Broches Plates 10533904 FD-30M (SR7772623)
6001224348170
Schuko 10533905 FD-30M (SR7772647)
6001224348187
UTILISERVOTREVENTILATEURPIEDESTALMETALLIQUE
Avant lapremièreutilisation, veuillezsuivreces instructions:
lRetirer tous lesemballageset les étiquettes.
lS'assurerque votreventilateurpiédestalmétallique esten bon état. Ilnedoitpasavoirdes
fissuressur l'unitéet aucundommage au câble/ àlaprise.
UTILISATIONDEVOTREVENTILATEUR PIEDESTALMETALLIQUE
INSTRUCTIONS DE L’ASSEMBLAGE :
ASSEMBLAGEDE LABASE:
1). Dévissezlelevierdeverrouillage aubas dutuyau
extérieur.
2). Retournezletuyau etglissezl’ouvertureau centrede la
base dupiédestalsur letuyau. Placezlepoidsnoir dans la
base avec larondelle.
3). Insérezl’extrémitéfiletéedu levier de verrouillagedans
letrou de larondelleet àtraverslabase au-dessousdu
support. Tournezlelevier de verrouillage dans lesens
horairepour serrerfermement labase au tuyau.
4). Retournezlabase et placez-lasur lesol.

FRANÇAIS
5). Défaiteslavis àmainsur letube intérieur. Insérez
leconnecteur dansletubeintérieur.
6). Fixezlavis àmainsurleconnecteur.
ASSEMBLAGE DE LATETE DU VENTILATEUR :
7). Retirezles 4visdeverrouillage de lagrillearrièredu
couvercleavant du moteur.
Visde
verrouillage
de lagrille
arrière

FRANÇAIS
8). Positionnezlagrillearrièresurl’axe dumoteur, en
faisantcorrespondrelestrous de lagrillearrièreaux 4
trous àvis àl’extérieurdumoteur. Assurez-vous que la
poignéesoit en haut.
9). Serrezlagrillearrièreen vissant les 4visde
verrouillage.
10). Desserrezlavisde sécuritésur l’hélice du ventilateur.
Glissezl’hélice surl’axe de montageavec lemanchon
d’axefaisantfaceaumoteur. Alignezlavisde sécurité
avec larainureplatesur l’axe dumoteuretserrezavec un
tournevisPhillips.
11). Desserrezlepetit écrou de sécuritéde lagrilleavant.
Positionnezlagrillepourque lelogo soit àl’horizontaleet
que les clips delagrillesoientouverts.Sécurisezl’onglet
du haut àlagrillearrière.Attachezles grilles ensembles
avec l’écrou de sécurité.Maintenezlagrilleavantcontrela
grillearrièreetfermezles clips pourterminer
l’assemblage.
INSTRUCTIONSD’OPERATION:
1. Tourner lacommande de vitesse pour sélectionnerdes vitesses: 0(off) et des vitesses I
(basse), II (moyenne), III (élevée).
2. Le ventilateur piédestalpeut fonctionner en oscillationou en modestationnaire. Appuyer sur le
bouton d'oscillation verslebas pour activer lemoded’oscillation. Pour arrêter l'oscillation, tirer
sur lebouton verslehaut. Pour ajuster l'inclinaisondu ventilateur piédestal, saisir lecarter du
moteur du ventilateur piédestalet pousser doucement versl'avant ou versl'arrière. La têtedu
ventilateur àpiédestalpeut êtreajustée àuneinclinaison de30 degrés.
This manual suits for next models
3
Table of contents
Languages:
Other Platinum Fan manuals
Popular Fan manuals by other brands

Thermador
Thermador RECHMIB installation guide

PennBarry
PennBarry MXI Series Operation & maintenance manual

Hunter
Hunter Downtown installation manual

CampBitz
CampBitz Fridge M8 Fitting instructions

Duco
Duco DucoBox Energy Comfort 325 installation guide

Harbor Breeze
Harbor Breeze DUBOIS DM52BCP5CS installation guide