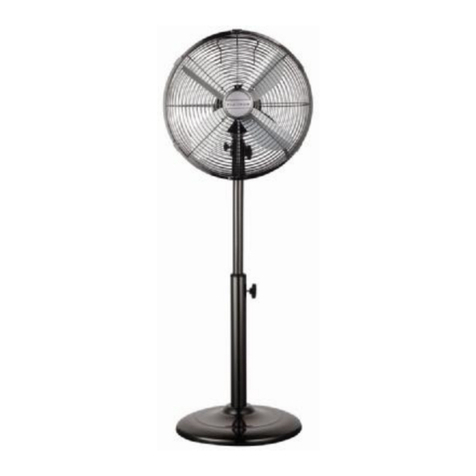
Platinum FD-40M User manual

INSTRUCTION MANUAL
40CM METAL PEDESTAL FAN
Article no.
Model no. / Item no.
EAN
10319429
FD-40M (SR 6913359)
6001001620314
10533902
FD-40M (SR 7772582)
6001224348194
10533903
FD-40M (SR 7772609)
6001224348200
INDOOR HOUSEHOLD USE ONLY
Please save and read this instruction manual carefully before use.

ENGLISH
INTRODUCTION
Thank you for purchasing our “Platinum” Metal Pedestal Fan. Each unit has been manufactured to
ensure safety, reliability, and easy of use. Before use, please read these instructions carefully and
save them for future reference.
IMPORTANT SAFEGUARDS
When using your Pedestal Fan, basic precautions should always be followed, including the
following:
If the supply cord is damaged, it must be replaced by the manufacturer, its service agent or
similarly qualified persons in order to avoid hazard.
During the use of an appliance, a personal monitor on the Appliance is necessary.
This appliance is not intended for use by persons (including children) with reduced physical,
sensory or mental capabilities, or lack of experience and knowledge, unless they have been
given supervision or instruction concerning use of the appliance by a person responsible for
their safety.
Children should be supervised to ensure that they do not play with the appliance.
Do not allow the cord to touch hot surfaces and do not place on or near a hot gas or electric
burner or in a heated oven.
Never use this pedestal fan near bathtubs, showers, basins or other vessels containing water.
Never immerse the pedestal fan, plug or cord in water, or allow any liquid to come in to contract
with any part of the pedestal fan.
Make ensure that the voltage used, corresponds to the voltage indicated on the rating label.
Never touch the blades with your hand or any other object!
Do not pull the cord too tight. If it becomes damaged after prolonged use, get it repaired by a
technician.
Never insert your fingers, pencils, or other objects through the pedestal fan grille during
operation.
The pedestal fan should be used on a stable and level surface. Do not operate without the grille
being properly in place.
Do not expose the pedestal fan to excessive heat or humidity. This could cause damage to the
electrical components.
Check the power cord and plug regularly for any damage. If the cord or the plug is damaged, it
must be replaced by manufacturer or a qualified person in order to avoid an electrical hazard.
We do not recommend the use of an extension cord. It could overheat and cause a fire hazard.
This appliance is intended for household use only. Industrial or commercial use will void the
warranty, and the supplier can not be held responsible for injury or damage caused when using
the appliance for any other purpose than that intended.
To reduce the risk of fire or electric shock, do not use this fan with any solid-state speed control
device.
To disconnect, grip plug and pull from wall outlet. Never pull on the cord to unplug.
The use of accessory attachments that are not recommended or supplied by the manufacturer
may result in injuries, fire or electric shock.

ENGLISH
KNOW YOUR METAL PEDESTAL FAN
1. Front grill
2. Fan blade
3. Blade locking screw
4. Back grill locking screw
5. Back grill
6. Motor shaft
7. Motor
8. Speed control
9. Oscillation knob
10. Hand screw
11. Hand nut
12. Locking screw
13. Connector
14. Inner pipe
15. High-adjust screw
16. Outer pipe
17. Base
18. Black weight
19. Washer
20. Locking lever
21. Power cord and plug
22. Securing bolt
23. Securing nut
ELECTRIC SCHEMATIC DIAGRAM

ENGLISH
SPECIFICATIONS
Voltage: AC 230V/50Hz
Wattage: 50W
Plug
Article no.
Model no. / Item no.
EAN
3R 16A South Africa Plug
10319429
FD-40M (SR 6913359)
6001001620314
3 Flat Pin
10533902
FD-40M (SR 7772582)
6001224348194
Schuko
10533903
FD-40M (SR 7772609)
6001224348200
USING YOUR METAL PEDESTAL FAN
Before first use, please follow these instructions:
Remove all packing and any labels.
Making sure that your Metal Pedestal Fan is in good condition. It must have no cracks on the
unit and no damage to the cord/plug.
TO USE YOUR METAL PEDESTAL FAN
ASSEMBLY INSTRUCTIONS
BASE ASSEMBLY:
1). Unscrew the locking lever from the bottom of the outer
pipe.
2). Turn the pipe upside down and slide the opening in the
center of the pedestal fan base over the pipe. Place the
black weight onto the base followed by the washer.
3). Insert the threaded end of the locking lever into the hole
of the washer and through the base into the bottom of the
stand. Turn the locking lever clockwise to secure and
tighten the base to the pipe.
4). Turn the base over and set it on the floor.

ENGLISH
5). Loose the hand screw on the inner pipe.Insert the
connector into the inner pipe.
6). Fix the hand screw on the connector.
FAN HEAD ASSEMBLY:
7). Remove the outer 4pcs back grill locking screw from
the front cover of the motor.
Back
grill
locking
screw.

ENGLISH
8). Position the back grill over the motor shaft, fitting the
holes in the back grill over the 4pcs screws holes that
outside of the motor. Make sure the handle is at the top.
9). Secure the back grill by screwing the 4pcs back grill
locking screws.
10). Loosen the securing screw on the pedestal fan blade.
Slide the pedestal fan blade onto the mounting shaft with
the shaft sleeve facing the motor. Align securing screw
with flat groove in the motor shaft and tighten with a
Phillips screwdriver.
11). Remove the small securing bolt from the bottom of the
front grill. Position front grill so the logo is horizontal and
make sure the grill clips are open. Secure the top tab to
the back grill. Fasten the grills together with securing bolt.
Hold the front grill against the back grill and snap the grill
clips closed to complete the assembly.
OPERATION INSTRUCTIONS:
1. Turn the speed control to select speeds: 0(off) and speeds I (Low), II (Middle), III (High).
2. The pedestal fan can operate in oscillation or stationary mode. Press the Oscillation Knob down
to activate the oscillating mode. To stop oscillation, pull the knob upward. To adjust the tilt of the
pedestal fan grasp the pedestal fan motor housing and gently push forward or backward.
The pedestal fan head can adjusts 30 degree tilt angle.
ADJUSTMENT INSTRUCTIONS:
To adjust the angle of the pedestal fan head, loosen the adjustable-tilt knob and move the
pedestal fan head to the desired angle. Firmly tighten the knob to secure into place.
To adjust the height of the pedestal fan, turn the adjustable height knob counter-clockwise to
loosen the stand. Adjust the pedestal fan to the desired height, then firmly tighten to secure
into place.

CARE AND CLEANING
Unplug the pedestal fan before cleaning or making repairs. NOTE: If for any reason this unit
requires service, return appliance to manufacturer or a similarly qualified service agent to ensure
safety.
Cleaning:
To clean: Disconnect the power cord from the socket. Remove the guard and the blades
carefully. Do not drop the blades! First use a soft cloth with light soap to clean off oil stains.
Then wipe dry and polish with a dry cloth. Never use polish or any corrosive liquid that will
damage the paint, metal or plastic! Put back the blades and lock the guard securely before
use.
Set the switch to off and unplug the unit.
Clean using a damp cloth and a mild detergent, if necessary. Make certain all detergent
residue is removed.
Never use abrasive cleaning agents or solvents. This may cause damage or deterioration to
the surface of the unit.
Do not allow water to drip on or into the pedestal fan motor housing.
Maintenance:
Make certain the pedestal fan is unplugged. Unlock the metal clips on the front grill and
remove the front grill. Use a Phillips screwdriver to loosen the securing screw and remove the
pedestal fan blade.
The pedestal fan blade and grill may be cleaned with a damp cloth and mild detergent.
Reassemble the pedestal fan after the parts have dried completely. To do so, replace the
pedestal fan blade, tighten the securing screw, and secure the front grill. Do not plug the
pedestal fan into an electrical outlet until it is fully reassembled.
Storage:
When not in use, store the pedestal fan in a cool, dry location. To prevent dust and dirt
build-up, use the old packaging to repack the unit.
PROBLEM SOLVING
If the pedestal fan will not operate:
Confirm that the pedestal fan switch is not in the off position.
Make sure the electricity to the main fuse is working. For troubleshooting assistance,
contact customer service.
ENGLISH

ENGLISH
WARRANTY
PLEASE AFFIX YOUR RECEIPT/PROOF OF PURCHASE HERE.
IN THE EVENT OF A CLAIM UNDER THIS WARRANTY THE AFORESAID RECEIPT/PROOF OF
PURCHASE MUST BE PRODUCED TOGETHER WITH THIS WARRANTY.
Model number
(Lot number: )
Product name
Date of purchase
Place of purchase
1. The party selling the product (“the seller”) to the original purchaser of this product (“the
customer”) hereby warrants that this product will be of good quality and, in good working
order and, free of defects and suitable for its intended purpose under normal household use,
for a period of 1 (one) year from the date of purchase (“warranty period”) of this product.
2. In the event that the warranty period has not lapsed and the product is not of a good quality,
or in good working order or, is defective or is not suitable for its intended purpose under
normal household use, the customer may, subject to paragraph 3 below, return the product
to the seller and have the following options available:
2.1 Within the first 6 (six) months of the warranty: to receive a refund of the actual price
paid or to exchange the product for the same or similar product of the same purchased
value;
2.2 Within the second 6 (six) months of the warranty: to have the product exchanged for
the same or similar product of the same purchased value.
3. The seller will not replace the product or refund the customer in terms of this warranty if the
product:
3.1 has been altered contrary to the instructions provided in the product manual;
3.2 has been misused, abused or tampered with;
3.3 is defective or not in working order due to ordinary wear and tear;
3.4 is damaged resulting from the customer’s gross negligence, recklessness, malicious
behavior or criminal conduct;
3.5 has been utilised for commercial use.
4. This warranty applies only to the product that has been purchased from the seller and not to
any expendables attached to or installed on the product by the customer.
5. Any claim in terms of this warranty must be supported by the original proof of purchase.
6. Note that the exchange item will only carry the balance of the warranty period as from the
original date of purchase.

PORTUGUÊS
INTRUÇÃO
Obrigado por adquirir nosso ventilador “Platinum” ventilador pedestal de metal. Cada unidade foi
fabricado para garantir a segurança, confiabilidade e facilidade de uso. Antes de usar este
aparelho, leia atentamente estas instruções e guarde-as para referência futura.
SALVAGUARDAS IMPORTANTE
Quando usar a sua “Platinum” ventilador pedestal de metal , as precauções básicas devem sempre
ser seguidas, incluindo o seguinte:
Se o cabo de alimentação estiver danificado, ele deve ser substituído pelo fabricante, seu
agente de serviço ou pessoas com qualificações semelhantes, a fim de evitar o perigo elétrico.
Durante o uso de um utensílio, um monitor pessoal no Utensílio é necessário.
Este aparelho não é destinado ao uso por pessoas (incluindo crianças) com capacidades
físicas, sensoriais ou mentais, ou a falta de experiência e conhecimento, a menos que sejam
supervisionadas ou que tenham sido dadas instruções relativas à utilização do aparelho por
uma pessoa responsável pela sua segurança.
As crianças devem ser supervisionadas para assegurar-se de que não joguem com o
apparatus.
Não deixe o cabo tocar em superfícies quentes e não coloque sobre ou perto de um gás
quente ou queimador elétrico ou em forno aquecido.
Nunca utilize este ventilador pedestal de metal perto de banheiras, chuveiros, lavatórios ou
outros recipientes que contenham água.
Nunca mergulhe o ventilador pedestal de metal, ficha ou o cabo na água, ou permitir qualquer
tipo de líquido a entrar em contacto com qualquer parte do ventilador.
Assegure que a voltagem utilizada , corresponde à voltagem indicada na etiqueta de avaliação
Nunca toque as laminas com sua mão ou qualquer outro objeto !
Não puxe o cabo com força demais. Se ele for danificado após uso prolongado , enviá-lo para
reparo por um técnico.
Nunca insira os seus dedos , lápis ou outros objetos através da grade do ventilador durante a
operação.
O ventilador pedestal de metal deve ser usado sobre uma superfície estável e nivelada. Não
operá-lo sem a grade ser no lugar próprio.
Não exponha o ventilador pedestal de metal ao calor ou umidade excessivo . Isso pode causar
danos aos componentes elétricos.
Inspeccione o cabo de alimentação e o plugue regularmente por qualquer dano . Se o cabo ou
o plugue estiver danificado , ele deve ser substituído pelo fabricante ou uma pessoa
qualificada , a fim de evitar um perigo elétrico .
Nós não recomendamos o uso de um cabo de extensão . Poderia superaquecer e causar um
perigo incêndio.
Este dispositivo destina-se para uso doméstico. Uso industrial ou comercial anulará a garantia ,
e o fornecedor não pode ser responsabilizado por prejuízos ou danos causados ao usar o
aparelho para qualquer outro fim.
Para reduzir o risco de incêndio ou choque elétrico, não utilize este ventilador com qualquer
dispositivo de controle de velocidade em estado sólido.
Para desconectar , puxe o plugue da tomada da parede. Nunca puxe o cabo para desligar
O uso dos acessórios não recomendados ou fornecidos pelo fabricante pode resultar em
ferimento, incêndio ou choque elétrico.

PORTUGUÊS
CONHEÇA O SEU VENTILADOR PEDESTAL DE METAL
1. Grade dianteira
2. Lâmina do ventilador
3. Parafuso de travamento de lâmina
4. Parafuso de travamento
para grade traseira
5. Grade traseira
6. Eixo do motor
7. Motor
8. Controle de velocidade
9. Botão de oscilação
10. Parafuso manual
11. Porca de mão
12. Parafuso de fixação
13. Conector
14. Tubo interior
15. Parafuso de ajuste de altura
16. Tubo exterior
17. Base
18. Peso preto
19. Arruela
20. Alavanca de fixação
21. Corda de energia e plugue
22. Parafuso de segurança
23. Porca de segurança
DIAGRAMA DE ESQUEMA ELÉTRICO

PORTUGUÊS
SPECIFICATIONS
Voltage: AC 230V/50Hz
Puissance : 50W
Plugue
Artigo no.
Modelo no. / Item no.
EAN
Plugue de África do Sul 3R 16A
10319429
FD-40M (SR 6913359)
6001001620314
3 Pino Plano
10533902
FD-40M (SR 7772582)
6001224348194
Schuko
10533903
FD-40M (SR 7772609)
6001224348200
UTILISER VOTRE VENTILADOR PEDESTAL DE METAL
Avant la première utilisation, veuillez suivre ces instructions :
Retirer tous les emballages et les étiquettes.
S'assurer que votre ventilateur métallique sur terre est en bon état. Il ne doit pas avoir des
fissures sur l'unité et aucun dommage au câble / à la prise.
USAR SEU VENTILADOR PEDESTAL DE METAL
INSTRUÇÕES DE MONTAGEM:
Montagem de Base
1). Desaperte a alavanca de bloqueio a partir do fundo do
tubo exterior.
2). Ponha o tubo de cabeça para baixo e deslize a abertura
no centro da base do ventilador pedestal sobre o tubo .
Coloque o peso preto na base seguido pela arruela.
3). Insera a extremidade roscada da alavanca de bloqueio
por dentro do buraco da arruela e através da base para o
fundo do suporte . Gire o alavanca de travamento no
sentido horário para segurar e reforçar a base com o tubo.
4). Vire a base e coloque-a no chão.

PORTUGUÊS
5).Solte o parafuso no cano interno. Insire o conector
dentro do cano interno.
6). Fixe o parafuso manual no conector.
MONTAGEM DE CABEÇA DO VENTILADOR
7). Retire os 4 parafusos de fixação para grade traseira da
tampa frontal do motor.
Parafuso de
Fixação para
grade
traseira

PORTUGUÊS
8). Posicione a grade traseira no eixo do motor , ajustando
os buracos da grade traseira sob 4 buracos de parafuso
fora do motor. Confirme que a alça está no topo.
9). Fixe a grade traseira com os 4 parafusos de fixação.
10). Solte o parafuso de fixação na lâmina do ventilador
de pedestal . Deslize a lâmina do ventilador pedestal
sobre o eixo de montagem com a luva do eixo de frente
para o motor. Alinhe parafuso de fixação com sulco plano
no eixo do motor e aperte com uma chave de fenda
Phillips.
11). Remova o pequeno parafuso de fixação da parte
inferior da grade frontal. Posicione grade dianteira de
modo que o logotipo é horizontal e confirme que os clipes
da grade estão abertas. Fixe a guia superior para a grade
traseira. Aperte as grades junto com parafuso de fixação .
Segure a grade frontal contra a grade traseira e tire os
clipes da grade fechada para completar a montagem .
INSTRUÇÕES DE OPERAÇÃO
1. Gire o control de velocidade para selecionar velocidades:O(desligado),e velocidades
I(baixo),II(meio) III(alto)
2. O ventilador pedestal de metal pode funcionar em modo de oscilação ou estacionário.
Pressione o Botão de Oscilação para activar o modo de oscilação. Para parar a oscilação,
puxe o botão para cima. Para ajustar a inclinação do ventilador de mesa ,agarre a caixa do
motor do ventilador e empurre gentilmente para a frente ou para trás. A cabeça do ventilador
de pedestal pode ser ajustado pelo ângulo de indinação de 30 graus.
INSTRUÇÃO DE AJUSTAMENTO
Para ajustar o ângulo da cabeça do ventilador de mesa, solte o botão de inclinação ajustável
e mova a cabeça do ventilador de mesa no ângulo desejado. Aperte firmemente o botão para
fixar no lugar.
Para ajustar a altura do ventilador de mesa , gire o botão de altura ajustável no sentido
anti-horário para soltar a suporte. Ajuste o ventilador de mesa até a altura desejada , em
seguida, aperte firmemente para fixar no lugar.

PORTUGUÊS
CUIDADOS E LIMPEZA
Desligue o ventilador pedestal de metal antes de limpeza ou reparos. NOTA: Se por algum causa
esta unidade necessitar manutenção, volte o dispositivo para fabricante ou um agente de serviço
qualificado para garantir a segurança .
Limpeza:
Para limpar : Desligue o cabo de alimentação da tomada . Remova a proteção e as lâminas
cuidadosamente. Não deixe cair as lâminas! Primeiro utilize um pano com sabão leve para
limpar manchas de óleo . Em seguida, esfrege seco e polimento com um pano seco . Nunca
utilize polonês ou qualquer líquido corrosivo que danificará a pintura , metal ou plástico!
Coloque as lâminas no lugar original e trave o guarda de forma segura antes de usar.
Ajuste o interruptor para desligado e desligue a unidade.
Limpe com um tecido úmido e detergente suave , se necessário. Certifique-se que todos os
resíduos do detergente são removidos.
Nunca utilize limpadores ou solventes abrasivos. Isto pode causar danos ou deterioração à
superfície da unidade.
Não permite que a água goteja em ou entre o caixa do motor do ventilador .
Manutenção:
Certifique-se que o ventilador pedestal de metal está desligado. Abra os clipes de metal na
grade frontal e remova a grade frontal. Utilize uma chave de fenda Phillips para soltar o
parafuso de fixação e remova a lâmina do ventilador .
A lâmina e a grelha do ventilador pedestal de metal podem ser limpadas com um pano úmido
e detergente suave.
Monte o ventilador de piso novamente após as partes terem secadas completamente. Para
isso, substitua a lâmina do ventilador pedestal de metal, aperte o parafuso de fixação , e
segure a grelha frontal. Não ligue o ventilador pedestal de metal numa tomada elétrica até
que esteja totalmente montado novamente.
Armazenagem:
Quando não em uso, armazene o ventilador pedestal de metal em um local fresco e seco.
Para prevenir a acumulação da poeira e sujeira, utilize a embalagem antiga para empacotar
novamente o dispositivo.
RESOLUÇÃO DE PROBLEMAS
Se o ventilador pedestal de metal não pode funcionar:
Confirme se o interruptor do ventilador está na posição desligada.
Certifique-se que a eletricidade do fusível principal está funcionando. Para a assistência de
resolução de problemas, entre em contato com serviço ao cliente.

PORTUGUÊS
TERMO DE GARANTIA
FAVOR ANEXAR AQUI SEU RECIBO/FISCAL DE COMPRA.
EM CASO DE RECLAMAÇÃO DURANTE O PRAZO DA GARANTIA ESTE RECIBO/ FISCAL DE
COMPRA DEVE SER APRESENTADO JUNTAMENTE COM ESTA GARANTIA.
Número do modelo
(Número do lote: )
Nome do produto
Data da compra
Local da compra
1. A parte vendedora do produto (“vendedor”) ao comprador original deste produto
(“comprador”) garante por meio deste que o produto é de boa qualidade e, está em
perfeitas condições de funcionamento e, sem defeitos e adequado para uso doméstico
normal por um período de 1 (um) ano a partir da data da compra (‘período da garantia”)
deste produto.
2. No caso em que o período de garantia não expirou e o produto não é de boa qualidade, ou
em bom estado de funcionamento ou, está com defeito ou não é adequado para a sua
finalidade em uso doméstico normal, o cliente pode, de acordo com o Paragrafo 3 º abaixo,
devolver o produto ao vendedor e ter as seguintes opções disponíveis:
2.1 Nos primeiros 6 (seis) meses da garantia: para receber um reembolso do preço
efetivamente pago ou a troca do produto para o mesmo produto ou similar do mesmo
valor adquirido;
2.2 Dentro dos segundos 6 (seis) meses da garantia: ter o produto trocado para o mesmo
produto ou similar do mesmo valor comprado.
3. O vendedor não irá substituir o produto ou reembolsar o comprador de acordo com os
termos desta garantia se o produto:
3.1 for modificado contrariando as instruções fornecidas no manual do produto;
3.2 sofrer uso inadequado, abuso ou modificação;
3.3 for defeituoso ou não em condições de funcionamento devido ao desgate natural
3.4 for danificado devido a negligencia, imprudencia, comportamento malicioso ou
criminoso por parte do comprador.
3.5 for utilizado para fins comerciais.
4. Esta garantia aplica-se somente ao produto adquirido do vendedor, não cobrindo quaisquer
itens agregados ou instalados no produto pelo comprador.
5. Qualquer reclamação nos termos desta garantia deve ser acompanhada da prova original
de compra.
6. Note que o item de troca só irá transportar o saldo do período de garantia a partir da data
de compra original.

FRANÇAIS
INTRODUCTION
Merci d'avoir choisi notre Ventilateur piédestal métallique « Platinum ». Chaque unité a été
fabriquée pour assurer la sécurité, la fiabilité et la facilité d'utilisation. Avant l'utilisation, veuillez lire
attentivement ces instructions et les conserver pour référence future.
MESURES DE SÉCURITÉ IMPORTANTES
Lorsque vous utilisez votre Ventilateur piédestal, les précautions de base doivent toujours être
respectées, y compris les suivantes:
En cas de dommage de cordon d'alimentation, il doit être remplacé par le fabricant, son agent
de service ou des personnes de qualification similaire afin d'éviter tout danger.
Au cours d’utilisation de cet appareil, un moniteur de personnel sur l’appareil est nécessaire.
Cet appareil n’est pas destiné à être utilisé par des personnes( y compris les enfants)dont les
capacités physiques, sensorielles ou mentales sont réduites, ou manque d’expérience et de
connaissance, sauf si elles sont supervisées ou ont reçu des instructions d’utilisation de
l’appareil par une personne responsable de leur sécurité.
Les enfants doivent être surveillés pour assurer qu'ils ne jouent pas avec l'appareil.
Ne pas laisser le câble toucher des surfaces chaudes et ne pas placer sur ou à côté d'un
brûleur à gaz chaud ou électrique ou dans un four chauffé.
Ne jamais utiliser ce ventilateur au sol à proximité des baignoires, des douches, des lavabos
ou d’autres récipients contenant de l'eau.
Ne jamais plonger le ventilateur piédestal, la prise ou le câble dans l'eau, ou permettre à un
liquide d’entrer en contact avec n'importe quelle partie du Ventilateur piédestal.
S’assurer que la tension utilisée correspond à la tension indiquée sur l'étiquette signalétique.
Ne jamais toucher les lames avec votre main ou tout autre objet !
Ne pas tirer sur le câble trop serré. S'il est endommagé après une utilisation prolongée, le
faire réparer par un technicien.
Ne jamais insérer vos doigts, des crayons, ou d’autres objets à travers la grille du ventilateur
pendant le fonctionnement.
Le ventilateur piédestal métallique doit être utilisé sur une surface stable et plate. Ne pas faire
fonctionner sans la grille mise en place.
Ne pas exposer le ventilateur piédestal métallique à la chaleur ou à une humidité excessive.
Cela pourrait causer des dommages aux composants électriques.
Vérifier le câble d'alimentation et brancher régulièrement pour tout dommage. Si le câble ou
la fiche est endommagée, il doit être remplacé par le fabricant ou une personne qualifiée afin
d'éviter un danger électrique.
Nous ne recommandons pas l'utilisation d'une rallonge. Il pourrait surchauffer et causer un
risque d'incendie.
Cet appareil est destiné à un usage domestique uniquement. L'utilisation industrielle ou
commerciale annulera la garantie et le fournisseur ne peut être tenu responsable des
blessures ou des dommages causés lors de l'utilisation de l'appareil à d'autres fins que celles
définies.
Pour réduire le risque d'incendie ou du choc électrique, ne pas utiliser ce ventilateur avec tout
dispositif à commande de vitesse à semi-conducteurs.
Pour déconnecter, brancher la prise et tirer de la prise murale. Ne jamais tirer sur le câble
pour débrancher.
L'utilisation d'accessoires qui ne sont pas recommandés ou fournis par le fabricant peut
entraîner des blessures, d'incendie ou du choc électrique.

FRANÇAIS
CONNAITRE VOTRE VENTILATEUR SUR PIEDESTAL METALLIQUE
1. Grille avant
2. Hélice de ventilateur
3. Vis de verrouillage d’hélice
4. Vis de verrouillage de la grille arrière
5. Grille arrière
6. Axe moteur
7. Moteur
8. Contrôle de vitesse
9. Bouton d’oscillation
10. Vis à main
11. Ecrou à main
12. Vis de verrouillage
13. Connecteur
14. Tuyau intérieur
15. Vis d’ajustement de hauteur
16. Tuyau extérieur
17. Base
18. Poids noir
19. Rondelle
20. Levier de verrouillage
21. Cordon et fiche
22. Vis de sécurité
23. Ecrou de sécurité
DIAGRAMME ELECTRIQUE

FRANÇAIS
SPECIFICATIONS
Voltage: AC 230V/50Hz
Puissance : 50W
Prise
Article n°
Modèle n° / Article n°
EAN
3R 16A Prise d’Afrique du Sud
10319429
FD-40M (SR 6913359)
6001001620314
3 Broches Plates
10533902
FD-40M (SR 7772582)
6001224348194
Schuko
10533903
FD-40M (SR 7772609)
6001224348200
UTILISER VOTRE VENTILATEUR PIEDESTAL METALLIQUE
Avant la première utilisation, veuillez suivre ces instructions :
Retirer tous les emballages et les étiquettes.
S'assurer que votre ventilateur piédestal métallique est en bon état. Il ne doit pas avoir des
fissures sur l'unité et aucun dommage au câble / à la prise.
UTILISATION DE VOTRE VENTILATEUR PIEDESTAL METALLIQUE
INSTRUCTIONS DE L’ASSEMBLAGE :
ASSEMBLAGE DE LA BASE :
1). Dévissez le levier de verrouillage au bas du tuyau
extérieur.
2). Retournez le tuyau et glissez l’ouverture au centre de la
base du piédestal sur le tuyau. Placez le poids noir dans la
base avec la rondelle.
3). Insérez l’extrémité filetée du levier de verrouillage dans
le trou de la rondelle et à travers la base au-dessous du
support. Tournez le levier de verrouillage dans le sens
horaire pour serrer fermement la base au tuyau.
4). Retournez la base et placez-la sur le sol.

FRANÇAIS
5). Défaites la vis à main sur le tube intérieur. Insérez
le connecteur dans le tube intérieur.
6). Fixez la vis à main sur le connecteur.
ASSEMBLAGE DE LA TETE DU VENTILATEUR :
7). Retirez les 4 vis de verrouillage de la grille arrière du
couvercle avant du moteur.
Vis de
verrouillage
de la grille
arrière

FRANÇAIS
8). Positionnez la grille arrière sur l’axe du moteur, en
faisant correspondre les trous de la grille arrière aux 4
trous à vis à l’extérieur du moteur. Assurez-vous que la
poignée soit en haut.
9). Serrez la grille arrière en vissant les 4 vis de
verrouillage.
10). Desserrez la vis de sécurité sur l’hélice du ventilateur.
Glissez l’hélice sur l’axe de montage avec le manchon
d’axe faisant face au moteur. Alignez la vis de sécurité
avec la rainure plate sur l’axe du moteur et serrez avec un
tournevis Phillips.
11). Desserrez le petit écrou de sécurité de la grille avant.
Positionnez la grille pour que le logo soit à l’horizontale et
que les clips de la grille soient ouverts. Sécurisez l’onglet
du haut à la grille arrière. Attachez les grilles ensembles
avec l’écrou de sécurité. Maintenez la grille avant contre la
grille arrière et fermez les clips pour terminer
l’assemblage.
INSTRUCTIONS D’OPERATION :
1. Tourner la commande de vitesse pour sélectionner des vitesses: 0 (off) et des vitesses I
(basse), II (moyenne), III (élevée).
2. Le ventilateur piédestal peut fonctionner en oscillation ou en mode stationnaire. Appuyer sur le
bouton d'oscillation vers le bas pour activer le mode d’oscillation. Pour arrêter l'oscillation, tirer
sur le bouton vers le haut. Pour ajuster l'inclinaison du ventilateur piédestal, saisir le carter du
moteur du ventilateur piédestal et pousser doucement vers l'avant ou vers l'arrière. La tête du
ventilateur à piédestal peut être ajustée à une inclinaison de 30 degrés.
This manual suits for next models
3
Table of contents
Languages:
Other Platinum Fan manuals
Popular Fan manuals by other brands

Kichler Lighting
Kichler Lighting Lehr Decor 80" instruction manual

Hunter
Hunter 24852 Installating and operation manual

Lifebreath
Lifebreath Pure Performance 120ERV Instalation instructions

Jumbo
Jumbo Ayce FGSB-6 Original instructions

enervent
enervent LTR-5 Z eWind installation instructions

Vents
Vents VUE 250 V mini A12 user manual