3
To use, set both devices to TEST mode by setting dip switch 3 down, and connect and power the
devices via the RS485 cable. The RS485 LED will be solid on during TEST mode. Each device will send a
packet every .5s. The receive device will flash the USB LED when it receives the packet, and the TEST
device will flash the RS232 LED when it sends the data.
4: Restore Factory Defaults
Resets the interface high and low speeds to the factory defaults. This must be in the DOWN
position prior to powering on the device.
Factory Settings:
USB: Baud: 115200, Parity: None
RS485: Baud: 1.55Mbs, Parity: None
RS232: Baud: 19200, Parity: None
5: Program Mode
Put the device into a mode where using PC software you can program the port settings for each
of the interfaces. The programming connection is only available using the USB port. All other ports are
inactive during this mode. Enter this mode by setting dip switch 5 down. All LEDs will be on when
entered into this mode. The USB LED will flash while communicating with the computer.
Programming
To change internal settings on the device, you will need software from Colorado Time Systems.
Please see the website: www.coloradotime.com or contact Customer Support to obtain it.
1. Place the device into ‘Program Mode’ by moving dip switch 5 to the ‘DOWN’ position.
a. All other dip switches are ignored, but if dip switch 4 (factory reset) is down when you
reboot, all changes will be lost
2. Connect the device to a USB port on the computer
a. LEDs 1, 2, 3 should be on solid green. 4 will be flashing.
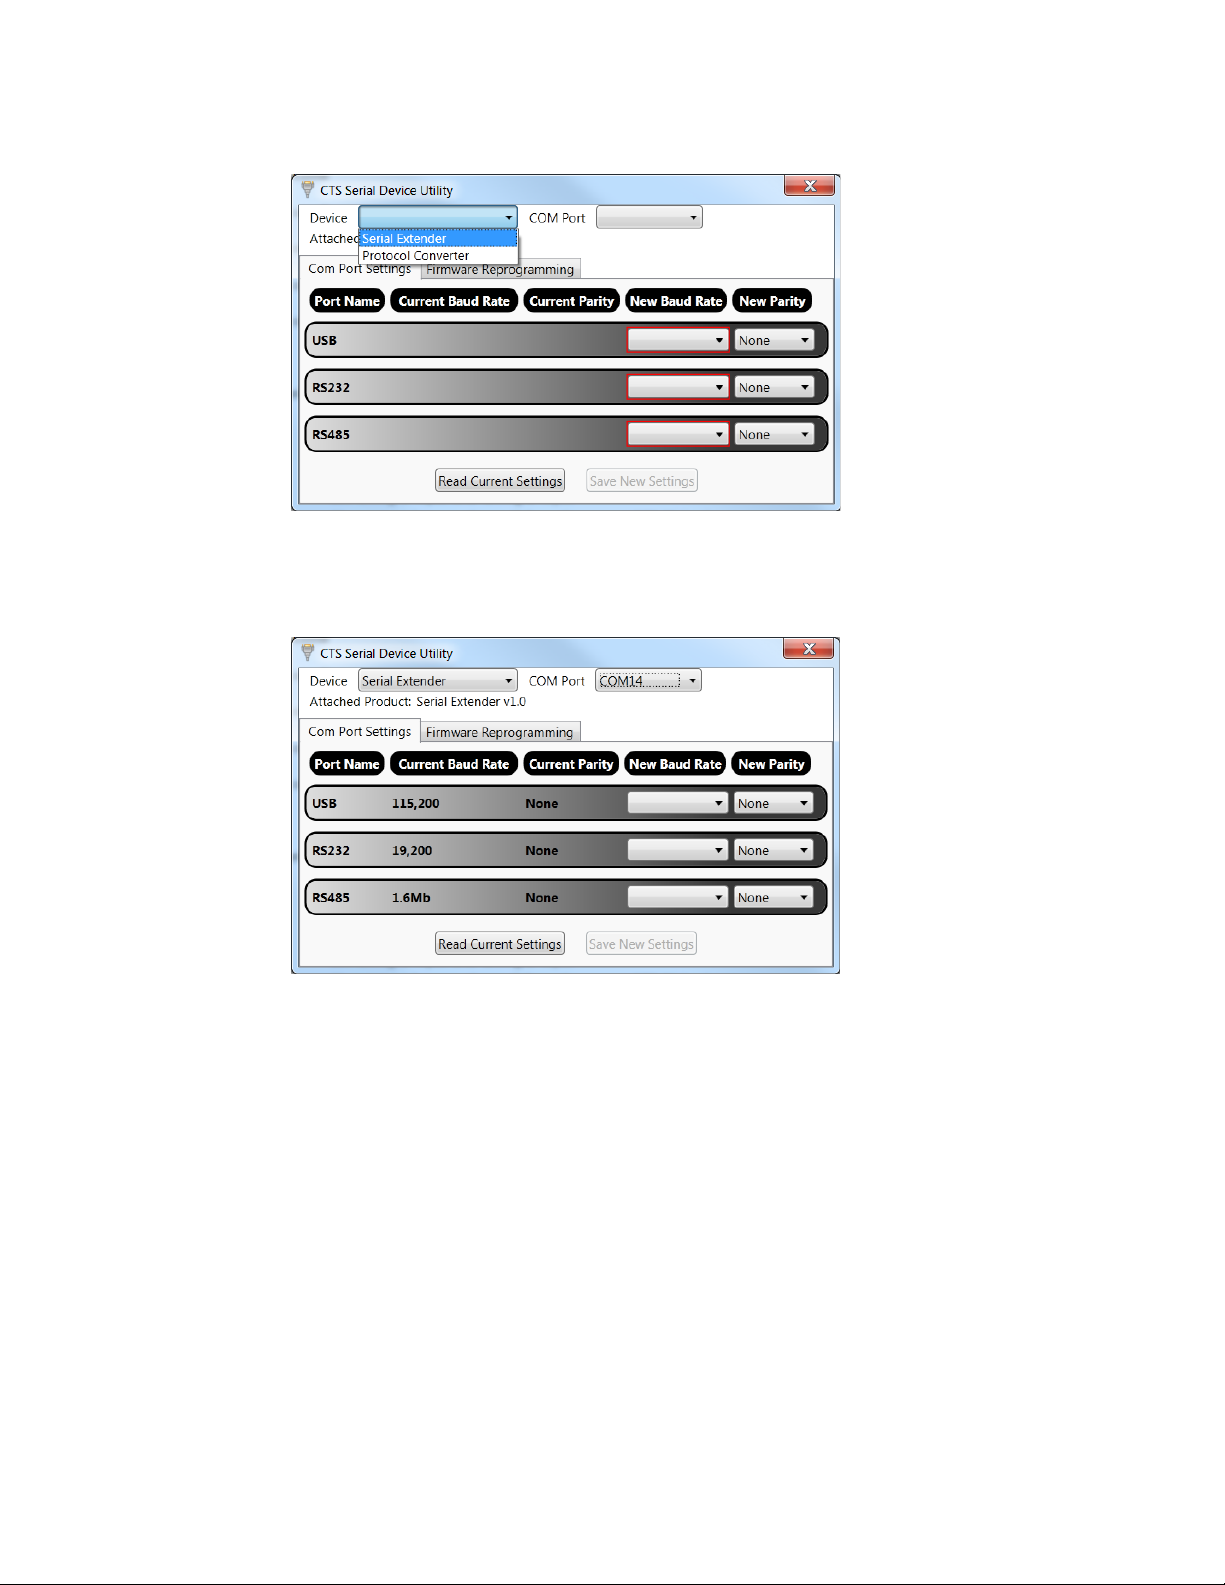
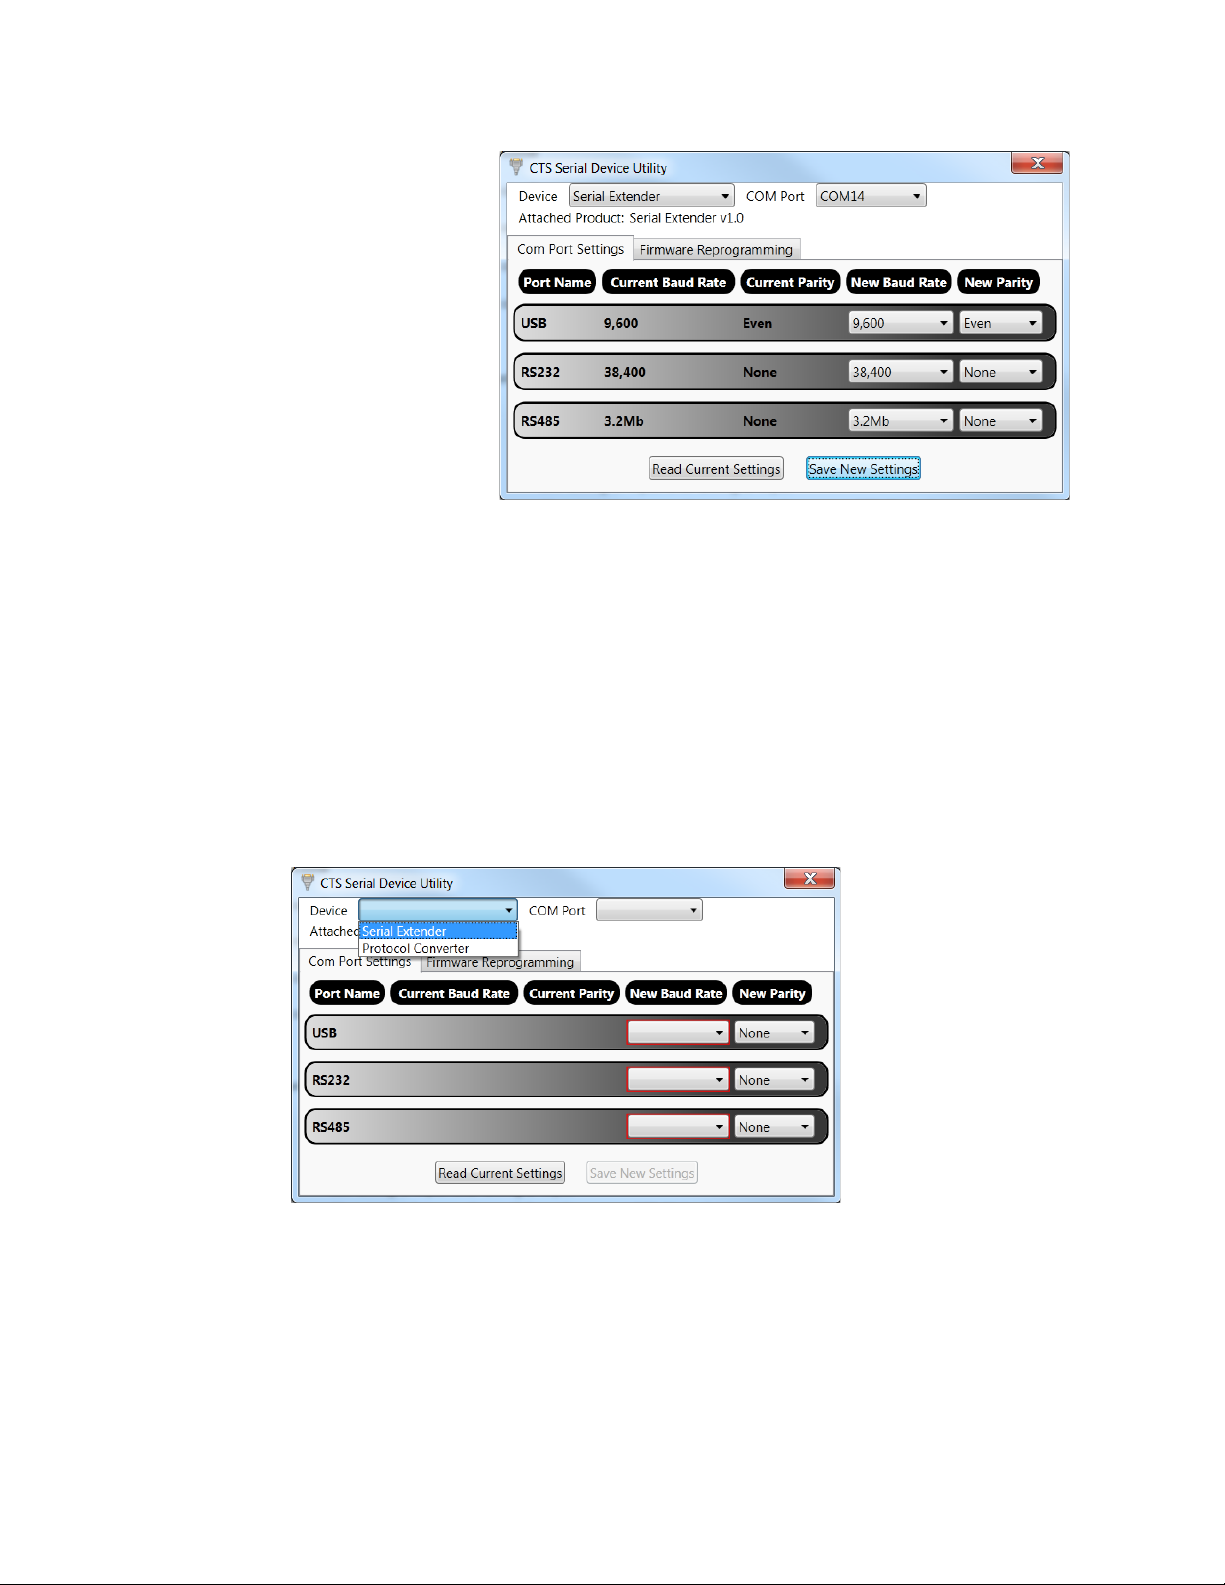
3. Open the CTS Serial Device Utility