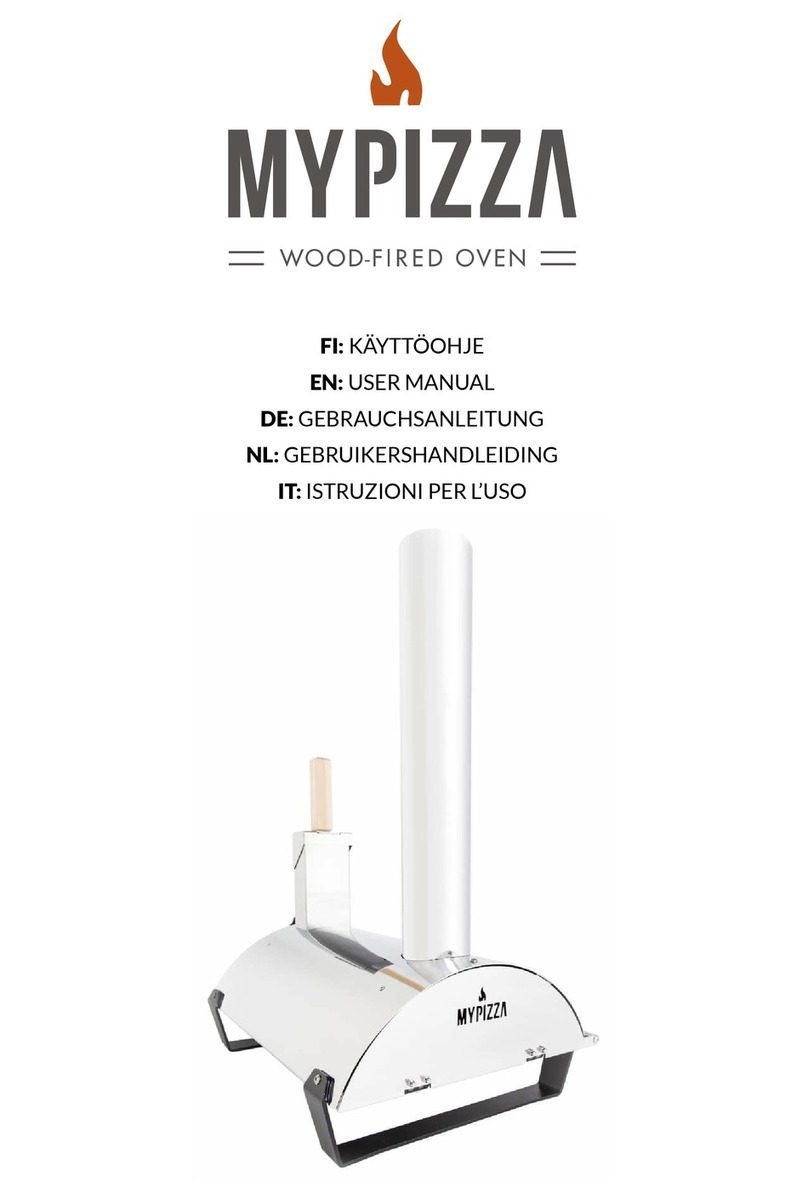
Polar Metalli mypizza User manual

KÄYTTÖOHJE
USER MANUAL
GEBRAUCHSANLEITUNG

1
A ( 1 : 1 )
B ( 1 : 1 )
A
B
1 2
5
3
4
6
7
8
11
9

2
FI
Kiitos kun ostit kotimaisen MyPizza-uunin!
Käytä MyPizza-uunia aina palamattomalla alustalla ja
vähintään kahden metrin päässä rakennuksista.
1. Nosta syöttöputkea.
2. Ota polttokaukalo pois uunista.
3. Täytä polttokaukalo pelleteillä.
Käytä puupellettejä (esim. puupelletti, laatu-
luokka 1, EN-koodi A1)
4. Täytä polttokaukalo niin, että polttokaukalon kes-
kikolmiosta jää ilmarakoja näkyviin kuvan mukai-
sesti ja syöttöputki pääsee laskeutumaan alimpaan
asentoonsa.
5. Levitä sytytysgeeliä pellettien päälle molemmille
laidoille ja sytytä geeli.
6. Aseta polttokaukalo uunin sisälle ja laita pelletti-
kauha takaisin syöttöputken päälle. Anna pellettien
palaa vapaasti noin 10 minuuttia. Älä koske enää
tämän jälkeen polttokaukaloon!
7. Kun pelletit ovat palaneet noin 10 min ja syttyneet
kunnolla, laske syöttöputki aivan alimpaan asen-
toon ja täytä syöttöputki pelleteillä. Kun putki on
täynnä, nosta putkea noin sentti. Anna uunin läm-
metä noin 20-30 minuuttia. Lisää pellettejä syöttö-
putkeen aina tarvittaessa.
Vinkki: Lämpötilan säätöä on hyvä harjoitella,
älä nosta syöttöputkea liikaa, muuten uuni kuu-
menee liikaa. Lämpötila pysyy sitä matalampa-
na, mitä alempana syöttöputki on.
8. Levitä jauhoja pizzalapiolle ja ota pizza pizzalapion
päälle. Aluksi kannattaa käyttää reilummin jauhoja,
jotta oppii saamaan pizzan uuniin.
Vinkki: Kokeile karkeita vehnäjauhoja pizzalapi-
olle ja pohjan alle. Karkeat jauhot eivät imeydy
niin helposti taikinaan ja pizza liikkuu hyvin
niiden päällä.
9. Aseta pizza paistumaan uuniin ja sulje luukku.
10. Paista pizzaa 2-5 minuuttia. Seuraa paistumista
liekkilogon reiästä ja käännä pizzaa pizzalapion
avulla paistumisen aikana 2-3 kertaa, niin että
pizza kypsyy tasaisesti joka puolelta. Käännettäes-
sä pizzaa, ota pizza pizzalapion päälle ja käytä
vähän ulkona uunista ja käännä pizzaa pizzalapion
päällä käsin ja aseta pizza takaisin uuniin.
Vinkki: Pizza kypsyy nopeammin syvemmällä
uunissa ja vastaavasti hitaammin lähempänä
luukkua.
11. Ota pizza uunista ja paista seuraava!
12. Sammuttaminen: Anna pellettien palaa loppuun
luukku suljettuna ja pellettikauha paikoillaan. Kun
luukusta katsottuna ei näy enää liekkiä, voit todeta
hiilloksen sammumisen kurkkaamalla syöttöputkes-
ta polttokaukaloon.
Yleisiä ohjeita ja vinkkejä
• Pidä pelletit aina lämpimissä sisätiloissa, muuten ne
keräävät kosteutta ja turpoavat syöttöputkeen lai-
tettaessa. Jos pelletit turpoavat syöttöputkeen, niin
ne eivät mene palotilaan ja tuli sammuu. Kosteutta
keränneet pelletit eivät myöskään lämmitä yhtä
tehokkaasti.
• Ilman suhteellinen kosteus voi vaikuttaa pellettien
turpoamiseen. Jos syöttöputki tukkeutuu, eivätkä
pelletit kulkeudu alaspäin, avaa syöttöputken kansi
ja työnnä pelletit eteenpäin syöttöputkessa tar-
peeksi pitkän kepin avulla. Tukkeutumista voi myös
ehkäistä lisäämällä pellettejä vähemmän kerrallaan.
• Puhdista MyPizza-uuni käytön jälkeen, kun uuni on
jäähtynyt. Nosta syöttöputkea sen verran, että saat
polttokaukalon pois, kaada vanhat tuhkat pois ja
puhdista polttokaukalon ilma-aukot. Ota paistolevy
ulos ja pese.
• MyPizza-uuni vaihtaa kuumuessaan väriä ja teräs
myös taipuilee lämmön seurauksena, nämä ovat
tavallisia ominaisuuksia teräkselle.
• Vesi voi vahingoittaa kuumaa uunia.
• Uunin kaikki pinnat puukahvoja lukuunottamatta
ovat kuumia käytön aikana, älä koske niihin.
Tule mukaan MyPizzan maailmaan
Facebook, Instagram ja Pinterest @MyPizzaMoments
Twitter @MyPizzaOven
Youtube MyPizza

3
EN
Thank you for purchasing MyPizza!
Always use MyPizza oven on a non-flammable surface
and at least two metres away from any buildings.
1. Lift the pellet hopper.
2. Take out the grate.
3. Fill the grate with pellets.
Use wood pellets suitable for barbeque (European
standardisation EN class A1)
4. Fill the grate so that you can still see the air circula-
tion holes in the middle as in the picture. This enables
you to lower the pellet hopper to its lowest position.
5. Pour ethanol gel on pellets on both sides of the
grate and light the pellets.
6. Place the grate inside the oven and put the pellet
shovel to its place on the pellet hopper. Let the pellets
burn freely for about 10 minutes. Do not touch the
grate after this.
7. After letting the pellets burn for about 10 minutes,
lower the pellet hopper to its lowest position possi-
ble and fill in the pellet hopper with pellets. When the
pellet hopper is full, lift the pellet hopper about 1 cm
upwards. Let the pizza oven heat up for about 20 to 30
minutes. Add pellets when needed.
Hint: It takes some time to learn how to adjust the
temperature in a most effective way. Do not lift
the pellet hopper too high, as the oven might get
too hot. The lower the pellet hopper, the lower the
temperature.
8. Sprinkle some flour on the pizza paddle and place
your pizza on the paddle. You might like to use more
flour at first, to make it easier to place the pizza into
the oven.
Hint: Try using rough flour on the pizza paddle and
under the pizza. Rough flour does not get absorbed
into the pizza dough, and the pizza can be moved
easily.
9. Use the pizza paddle to place the pizza inside the
oven. Close the oven door.
10. Bake the pizza for about 2 to 5 minutes the oven
door closed. You can look through the flame logo to
see how the pizza is getting baked. Rotate the pizza
2 to 3 times so that the pizza gets evenly baked on all
sides. When rotating the pizza, put the pizza on the
paddle, take it out of the oven and rotate the pizza on
the paddle. Put the pizza back into the oven.
Hint: The pizza gets baked quicker deeper inside the
oven and more slowly near the oven door.
11. Take your pizza out of the oven and bake the next
one!
12. Turning off: Let all the pellets burn with the oven
door closed and the pellet shovel on its place. If you
cannot see any flames when you look inside the oven
door, also check the pellet hopper to make sure the
fire is gone.
General advice and hints
• Store the pellets in a warm and dry place, otherwise
they might get damp and swell. If the pellets are damp,
they will not burn and the fire will go out. Pellets that
have absorbed moisture might not heat as effectively.
• The relative humidity might cause swelling of pellets.
If the pellets are stuck in the pellet hopper, use a long
enough stick to push the pellets downwards in the
pellet hopper. You can prevent clogging by using less
pellets in the pellet hopper.
• Always clean MyPizza after use, after the oven has
cooled down. Lift the pellet hopper so that you can
take the grate out, remove the ashes and clean up the
air ventilation holes of the grate. Remove the baking
stone and wash it.
• MyPizza oven changes colour when hot, and the
stainless steel might bend. These are normal features
of stainless steel.
• Water can damage a hot pizza oven.
• All the surfaces of the oven excluding the wooden
handles will become hot when the oven is in use. Do
not touch the hot steel.
Facebook, Instagram ja Pinterest @MyPizzaMoments
Twitter @MyPizzaOven
Youtube MyPizza

4
DE
Danke, dass Sie sich für MyPizza entschieden haben!
Verwenden Sie den MyPizza-Ofen immer auf einer nicht
brennbaren Oberfläche und in mindestens zwei Metern
Entfernung von Gebäuden.
1. Heben sie das Zuführungsrohr hoch.
2. Nehmen Sie den Feuerrost aus dem Ofen.
3. Füllen Sie den Feuerrost mit Pellets.
Verwenden Sie Holzpellets, die sich für Barbecue
eignen (Europäische Norm EN Klasse A1)
4. Füllen Sie den Feuerrost so, dass Sie die Löcher für
die Luftzirkulation in der Mitte noch sehen können, wie
im Bild. Dies ermöglicht es Ihnen, das Zuführungsrohr
in seine niedrigste Position zu senken.
5. Tragen Sie auf beiden Seiten des Feuerrosts Etha-
nol-Gel auf den Pellets auf und setzen Sie die Pellets in
Brand.
6. Schieben Sie den Feuerrost in den Ofen und plat-
zieren Sie die Pelletschaufel an ihrem Platz auf dem
Zuführungsrohr. Lassen Sie die Pellets circa 10 Minuten
lang frei brennen. Berühren Sie danach den Feuerrost
nicht mehr.
7. Nachdem die Pellets circa 10 Minuten lang gebrannt
haben, senken Sie das Zuführungsrohr in die niedrigste
mögliche Position und füllen Sie das Zuführungsrohr
mit Pellets. Wenn das Zuführungsrohr voll ist, heben
Sie das Zuführungsrohr circa 1 cm hoch. Lassen Sie den
Pizzaofen circa 20 bis 30 Minuten warm werden. Fügen
Sie bei Bedarf Pellets hinzu.
Hinweis: Es braucht etwas Zeit, um zu lernen, wie
die Temperatur am wirksamsten eingestellt wird. He-
ben Sie das Zuführungsrohr nicht zu hoch an, da der
Ofen sonst zu heiß werden kann. Je niedriger das
Zuführungsrohr, desto niedriger die Temperatur.
8. Streuen Sie etwas Mehl auf die Pizzaschaufel und le-
gen Sie Ihre Pizza auf die Schaufel. Zu Beginn empfiehlt
es sich, mehr Mehl zu verwenden, damit es leichter ist,
die Pizza in den Ofen zu befördern.
Hinweis: Testen Sie die Verwendung von grobem
Mehl auf der Pizzaschaufel und unter der Pizza.
Grobes Mehl wird nicht vom Pizzateig absorbiert und
die Pizza kann leicht bewegt werden.
9. Verwenden Sie die Pizzaschaufel, um die Pizza in den
Ofen zu befördern. Schließen Sie die Ofenklappe.
10. Backen Sie die Pizza circa 2 bis 5 Minuten lang mit
geschlossener Ofenklappe. Sie können durch das Flam-
menlogo beobachten, wie die Pizza gebacken wird.
Drehen Sie die Pizza 2- bis 3-mal, damit sie auf allen
Seiten gleichmäßig gebacken wird. Wenn Sie die Pizza
drehen, geben Sie die Pizza auf die Schaufel, nehmen
Sie sie aus dem Ofen und drehen sie die Pizza auf der
Schaufel. Schieben Sie die Pizza zurück in den Ofen.
Hinweis: Die Pizza wird tiefer im Ofen schneller ge-
backen und in der Nähe der Klappe langsamer.
11. Nehmen Sie Ihre Pizza aus dem Ofen und backen Sie
die nächste!
12. Abschalten: Lassen Sie die Pellets bei geschlossener
Ofenklappe und mit der Pelletschaufel an ihrem Platz
ausbrennen. Wenn Sie keine Flammen sehen, wenn Sie
durch die Ofenklappe schauen, kontrollieren Sie auch
das Zuführungsrohr, um sicherzustellen, dass das Feuer
erloschen ist.
Allgemeine Hinweise und Tipps
• Lagern Sie die Pellets an einem warmen und trocke-
nen Ort, ansonsten können Sie feucht werden und auf-
quellen. Wenn die Pellets feucht sind, brennen sie nicht
und das Feuer erlischt. Feuchte Pellets werden nicht so
effektiv erhitzt.
• Die Luftfeuchtigkeit kann das Aufquellen von Pellets
beeinflussen. Falls die Pellets im Zuführungsrohr ste-
cken bleiben, können Sie die Pellets mit einem langen
Stock runter schieben. Sie können weniger Pellets im
Zuführungsrohr benutzen, um Blockierung zu verhin-
dern.
• Reinigen Sie den MyPizza-Ofen immer nach dem
Gebrauch, wenn der Ofen ausgekühlt ist. Heben Sie das
Zuführungsrohr, so dass Sie den Feuerrost herausneh-
men können, entfernen Sie die Asche und reinigen Sie
die Löcher für die Luftzirkulation im Feuerrost. Entfer-
nen Sie die Backplatte und waschen Sie sie.
• Der MyPizza-Ofen wechselt die Farbe, wenn er heiß
wird, und der rostfreie Stahl kann sich verbiegen. Dies
sind normale Eigenschaften von rostfreiem Stahl.
• Wasser kann den Pizzaofen beschädigen, wenn er
heiß ist.
• Alle Oberflächen des Ofens mit Ausnahme der Holz-
griffe werden heiß, wenn der Ofen in Gebrauch ist.
Berühren Sie den heißen Stahl nicht.
Verfolgen Sie MyPizza in den sozialen Medien
Facebook, Instagram ja Pinterest @MyPizzaMoments
Twitter @MyPizzaOven
Youtube MyPizza

5

6

Other manuals for mypizza
2
Table of contents
Languages:
Other Polar Metalli Oven manuals
Popular Oven manuals by other brands

AEG
AEG COMPETENCE 5231 B operating instructions

Indesit
Indesit K 3G2/G Instructions for installation and use

Gorenje
Gorenje BOP658A13XG Detailed instructions

Whirlpool
Whirlpool WOD51ES4ES User instructions

KitchenAid
KitchenAid KEBC167MSS - Architect Series 36'' Single Electric Wall... Dimensions

AEG
AEG COMPETENCE KB9820E User information

Frigidaire
Frigidaire Gallery FGET2765K F Specifications

AEG
AEG COMPETENCE B1100-3 operating instructions

Bakers Pride
Bakers Pride P-44S Specifications

Hotpoint
Hotpoint BS43 Instructions for installation and use

Signature
Signature AFMP65X/1 Instructions for use

Mono
Mono Harmony Installation and operation manual