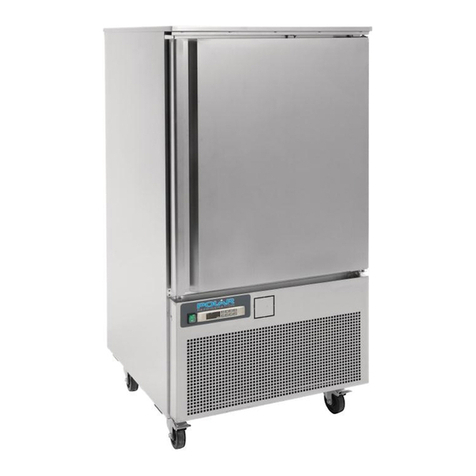
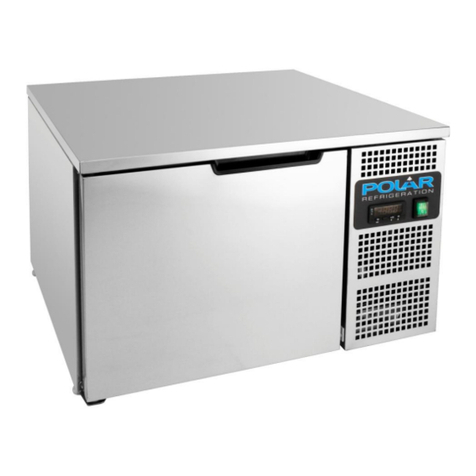
Polar Refrigeration G Series User manual

Model:
CK640-A
Blast Chiller / Freezer
Instruction manual
CK640-A_A5_v1_20190507.indb 1 2019/5/7 15:55

2
AU Telephone Helpline: 1300225960
Safety Tips
• Position on a flat, stable surface.
• A service agent/qualified technician should carry out
installation and any repairs if required. Do not remove any
components or service panels on this product.
• Consult Local and National Standards to comply with the
following:
- Health and Safety at Work Legislation
- Fire Precautions
- Wiring Regulations
- Building Regulations
• DO NOT use jet/pressure washers to clean the appliance.
• DO NOT use the appliance outside.
• DO NOT use this appliance to store medical supplies.
• DO NOT use electrical appliances inside the appliance
(e.g. heaters, ice cream makers, etc.)
• DO NOT allow oil or fat to come into contact with the plastic
components or door seal. Clean immediately if contact occurs.
• Always carry, store and handle the appliance in a vertical
position and move by holding the base of the appliance.
• Always switch off and disconnect the power supply to the unit
before cleaning.
• Keep all packaging away from children. Dispose of the
packaging in accordance with the regulations of local
authorities.
• If the power cord is damaged, it must be replaced by a POLAR
agent or a recommended qualified technician in order to avoid
a hazard.
• Polar recommend that this appliance is PAT tested on an
annual basis to ensure the product remains safe.
CK640-A_A5_v1_20190507.indb 2 2019/5/7 15:55

3
AUAU
Telephone Helpline: 1300225960
• This appliance is not intended for use by persons (including
children) with reduced physical, sensory or mental capabilities,
or lack of experience or knowledge, unless they have been
given supervision or instruction concerning the use of the
appliance by a person responsible for their safety.
Caution Risk of Fire
• Do not store explosive substances such as aerosol cans with a
flammable propellant in this appliance.
Warning: Keep all ventilation openings clear of
obstruction. Unit should not be boxed in without
adequate ventilation.
• Warning: Do not use mechanical devices or other means
to accelerate the defrosting process, other than those
recommended by the manufacturer.
• Warning: Do not damage the refrigerant circuit.
• Warning: Do not use electrical appliances inside the food
storage compartments of the appliance, unless they are the
type recommended by the manufacturer.
Product Description
CK640-A - POLAR Blast Chiller / Freezer
Introduction
Please take a few moments to carefully read through this manual. Correct maintenance and operation of
this machine will provide the best possible performance from your POLAR product.
Pack Contents
The following is included:
• POLAR Blast Chiller /Freezer
• Instruction manual
POLAR prides itself on quality and service, ensuring that at the time of packaging the contents are
supplied fully functional and free of damage.
Should you find any damage as a result of transit, please contact your POLAR dealer immediately.
CK640-A_A5_v1_20190507.indb 3 2019/5/7 15:55

4
AU Telephone Helpline: 1300225960
Installation
Note: If the unit has not been
stored or moved in an upright
position, let it stand upright for
approximately 12 hours before
operation. If in doubt allow to
stand.
1. Remove the appliance from the packaging.
Make sure that all protective plastic film and
coatings are thoroughly removed from all
surfaces.
2. Maintain a distance of 20cm (7 inches)
between the unit and walls or other objects for
ventilation. NEVER LOCATE NEXT TO OR
NEAR A HEAT SOURCE.
Note: Before using the appliance
for the first time, clean the
shelves and interior with soapy
water.
Operation
Storing Food
To get the best results from your POLAR appliance,
follow these instructions:
• It is important that food entering the Blast
Chiller/Freezer does not exceed a temperature
of 90°C.
• It is recommended that metal containers /
trays are used as other materials such as
plastic or polystyrene containers will act as an
insulator and extend blast chilling times.
• Sufficient space must be left between products
in order to guarantee a sufficient flow of cold
air. Ensure product is not in contact with the
internal walls of the unit, and leave sufficient
gaps between trays.
• Never obstruct the inlet of the evaporator fans.
• Products that are more difficult to chill because
of their composition and size should be placed
in the centre of the unit.
• Blast chilling data refers to standard products
(low fat content) with a thickness below
50 mm: therefore avoid overlaying products
on trays or the insertion of pieces with a
much higher thickness, as this will lead to
an extension of blast chilling times. Always
distribute the product well on the trays and in
the case of thick pieces decrease the amount
to blast chill.
• Limit the number of times and the duration of
time the doors are opened.
• The chiller should be used for storage for short
periods only.
• When removing product that has undergone
blast chilling/shock freezing, always wear
gloves to protect the hands from cold burns.
Introduction
The appliance has the following operational states:
On • The appliance is switched on and
an operating cycle is running
Standby • The appliance is switched on but
no operating cycle is running
Off • The appliance is not switched on
• If power is interrupted during a timed blast
chilling operation, when power is restored,
chilling will continue from the time point
at which the interruption occurred (with a
maximum error of 10 minutes).
• If power is interrupted during a set-
temperature blast chilling operation, when
power is restored, chilling will start again from
the beginning.
• If power is interrupted during a storage
operation, when power is restored the storage
operation will be reset.
• If power is interrupted while in “stand-by”
mode, when power is re- stored the device will
be in the same state.
Turn On
1. Ensure the power switch is set to [O] and turn
on at the socket.
2. Switch on the Power [I]. This will place the
unit in standby whilst waiting for the cycle to
be selected.
CK640-A_A5_v1_20190507.indb 4 2019/5/7 15:55
5
AUAU
Telephone Helpline: 1300225960
Insert the food probe
• Before selecting which cycle to use, the probe must be inserted into the food. This allows the internal
temperature of the food to be measured.
• It is important that the probe is correctly connected to the unit.
Note: To prevent bacterial contamination or contamination of any other
biological nature, the needle probe must be disinfected after use.
Control Panel
Alarm LED Minute LED
Degree
Celsius LED
Degree
Fahrenheit LED
Timed
Chilling LED
Set-Temperature
Chilling LED
Storage LED
In the “on” state, during normal operation, the display shows:
• the amount of time remaining for a timed blast chilling operation, if this is ongoing
• the temperature measured by the pin probe if a set-temperature chilling operation is ongoing
• the temperature of the cabinet, if storage is ongoing.
In “stand-by” mode, during normal operation, the display shows the temperature of the cabinet for ½
second every 3 seconds.
Signals
LED Message
Timed Chilling LED
• If on and the LED is off, a timed chilling operation is ongoing
• If on and the LED is also on, a post timed-chilling storage operation is ongoing
• If flashing, a timed chilling and storage cycle will have been selected
Set-temperature chilling LED
• If on and the LED is off, a set-temperature chilling storage operation is ongoing
• If on and the LED is also on, a post set-temperature chilling storage operation will
be ongoing
• If flashing, a set temperature chilling and storage cycle will have been selected
CK640-A_A5_v1_20190507.indb 5 2019/5/7 15:55

6
AU Telephone Helpline: 1300225960
LED Message
• If it is on for ½ second every 3 seconds, the test to verify correct pin probe insertion
will be ongoing
• If flashing and the LED is on, then the test to verify correct pin probe insertion will
have had a negative outcome and the cycle will have been started in timed mode
• If flashing and the LED is on, the chilling stage will have had a negative outcome
and so this will continue
• If flashing and the LEDs and are on, the chilling stage will have had a negative
outcome, the device will have switched to storage mode and this will be ongoing
Storage LED
• If on, a storage operation will be ongoing
• If flashing then the operational set point will be being modified while a storage
operation is ongoing
Alarm LED
• If on, an alarm is ongoing
Degree Celsius LED
• If on the unit of measurement for temperature is degrees Celsius
Degree Fahrenheit LED
• If on the unit of measurement for temperature is degrees Fahrenheit
Decimal
Point
Minute LED
• If flashing, the unit of measurement of magnitude displayed is the minute
d• Defrosting or drip draining is ongoing
Operational Cycles
The device has the following operational cycles:
• Timed positive chilling and storage
• Timed negative chilling and storage
• Set-temperature positive chilling and storage
• Set-temperature negative chilling and storage.
Set-temperature cycles are preceded by a test step in order to check correct
insertion of the pin probe ( “Test To Check Correct Pin Probe Insertion”)
To re-start using the same settings as the last cycle run:
• ensure that the device is in “stand-by” mode, that no procedures are running and that another cycle
has not been selected
• press for 2 seconds. The display will show the label of the last cycle run
• press within 60 seconds: in the case of a timed cycle, the display will show the duration of the
blast chilling step (in minutes) or in the case of a set-temperature cycle, the set target temperature
• press or within 15 seconds to change the value (the setting re- mains active until another
cycle is selected, when the value r1, r2, r3 or r4 is restored)
• press within 15 seconds and the cycle will be activated
CK640-A_A5_v1_20190507.indb 6 2019/5/7 15:55

7
AUAU
Telephone Helpline: 1300225960
Timed Positive Blast Chilling And Storage Cycle
To start the cycle: • ensure the device is in “stand-by” mode and no procedures are running
• press to select “PoS” and ensure the LED is flashing
• press within 15 seconds: the display will show the duration of the blast
chilling step (in minutes)
• press or within 15 seconds to change the value (the setting
remains active until another cycle is selected, when the value assigned by
parameter r1 is restored)
• press : after 2 minutes, the appliance will run timed positive blast
chilling and storage cycle
During chilling: • the display shows the residual chilling time remaining
• the LED is on
• parameter r1 sets the chilling time duration
• parameter r7 sets the operational set point
• press several times to:
- display the message “PoS”
- display the cabinet temperature
- exit the procedure, or leave for 15 seconds
Once the chilling
period has
elapsed:
• the device switches to storage mode
• the display shows the message “End”
• the buzzer sounds for the period of time set by parameter AA
• press any key to mute the buzzer; press once more to cancel the message
“End”
During storage: • the display shows the cabinet temperature
• the LEDs and are on
• the parameter r9 sets the operational set point
• press several times to:
- display the message “PoS”
- exit the procedure, or leave for 15 seconds.
To interrupt the
cycle:
• press for 2 seconds
Timed Negative Chilling And Storage Cycle
To start the cycle: • ensure the device is in “stand-by” mode and no procedures are running
• press to select “nEg” and ensure the LED is flashing
• press within 15 seconds: the display will show the duration of the blast
chilling step (in minutes)
• press or within 15 seconds to change the value (the setting
remains active until another cycle is selected, when the value assigned by
parameter r2 is restored)
• press : after 2 minutes, the appliance will run timed negative chilling
and storage cycle
CK640-A_A5_v1_20190507.indb 7 2019/5/7 15:55

8
AU Telephone Helpline: 1300225960
During chilling: • the display shows the residual chilling time remaining
• the LED is on
• parameter r2 sets the chilling time duration
• parameter r8 sets the operational set point
• press several times to:
- display the message “nEg”
- display the cabinet temperature
- exit the procedure, or leave for 15 seconds
Once the chilling
period has
elapsed:
• the device switches to storage mode
• the display shows the message “End”
• the buzzer sounds for the period of time set by parameter AA
• press any key to mute the buzzer; press once more to cancel the message
“End”
During storage: • the display shows the cabinet temperature
• the LEDs and are on
• the parameter rA sets the operational set point
• press several times to:
- display the message “nEg”
- exit the procedure, or leave for 15 seconds.
To interrupt the
cycle:
• press for 2 seconds
Set-Temperature Positive Blast Chilling And Storage Cycle
Prior to starting
the cycle:
• A test is run in order to check correct pin probe insertion
- if the outcome of the test is positive, the cycle will be started
- if the outcome of the test is negative, the cycle will be started in timed
mode.
To start the cycle: • ensure the device is in “stand-by” mode and no procedures are running
• press to select “PoS” and ensure the LED is flashing
• press or within 15 seconds to change the value (the setting
remains active until another cycle is selected, when the value assigned by
parameter r3 is restored)
• press : after 2 minutes, the appliance will run set-temperature positive
blast chilling and storage cycle
During chilling: • the display shows the temperature measured by the pin probe
• the LED is on
• the parameter r3 sets the blast chilling endpoint temperature
• the parameter r5 sets the maximum chilling time duration
• the parameter r7 sets the operational set point
• press several times to:
- display the maximum residual chilling time remaining
- display the message “PoS”
- display the flashing cabinet temperature
- exit the procedure, or leave for 15 seconds
CK640-A_A5_v1_20190507.indb 8 2019/5/7 15:55

9
AUAU
Telephone Helpline: 1300225960
If the temperature
measured by
the pin probe
reaches the
chilling endpoint
temperature prior
to expiry of the
maximum chilling
time duration:
• the device will switch to storage mode
• the display will show the message “End”
• the buzzer will sound for the period of time set by parameter AA
• press any key to mute the buzzer; press once more to cancel the message
“End”
If the temperature
measured by the
pin probe does
not reach the
chilling endpoint
temperature prior
to expiry of the
maximum chilling
time duration:
• chilling will continue
• the LED will flash and the LED will be on
• the buzzer will sound
• press several times to:
- mute the buzzer
- display the time elapsed since the maximum chilling time expired
- display the cabinet temperature
- display the message “PoS”
- exit the procedure, or leave for 15 seconds
When the
temperature
measured by
the pin probe
reaches the
chilling endpoint
temperature:
• the device switches to storage mode
• the LED will continue to flash and the LED will stay on
• the display will show the message “End”
• the buzzer will sound for the period of time set by parameter AA
• press any key to mute the buzzer; press once more to cancel the message
“End”
During storage: • the display shows the cabinet temperature
• if chilling had a positive outcome, the LEDs and will be on; if
chilling had a negative outcome, the LEDs and will be on and the
LED will flash.
• the parameter r9 sets the operational set point
• press several times to:
- display the message “PoS”
- exit the procedure, or leave for 15 seconds
To interrupt the
cycle:
• press for 2 seconds
Set-Temperature Negative Chilling And Storage Cycle
Prior to starting
the cycle:
• A test is run in order to check correct pin probe insertion
- if the outcome of the test is positive, the cycle will be started
- if the outcome of the test is negative, the cycle will be started in timed
mode
CK640-A_A5_v1_20190507.indb 9 2019/5/7 15:55

10
AU Telephone Helpline: 1300225960
To start the cycle: • ensure the device is in “stand-by” mode and no procedures are running
• press to select “nEg” and ensure the LED is flashing
• press or within 15 seconds: the display will show the blast
chilling end-point temperature
• press or within 15 seconds to change the value (the setting
remains active until another cycle is selected, when the value assigned by
parameter r4 is restored)
• press : after 2 minutes, the appliance will run set-temperature negative
chilling and storage cycle
During chilling: • the display shows the temperature measured by the pin probe
• the LED is on
• the parameter r4 sets the chilling endpoint temperature
• the parameter r6 sets the maximum chilling time duration
• the parameter r8 sets the operational set point
• press several times to:
- display the maximum residual chilling time remaining
- display the message “nEg”
- display the flashing cabinet temperature
- exit the procedure, or leave for 15 seconds
If the temperature
measured by
the pin probe
reaches the
chilling endpoint
temperature prior
to expiry of the
maximum chilling
time duration:
• the device will switch to storage mode
• the display will show the message “End”
• the buzzer will sound for the period of time set by parameter AA
• press any key to mute the buzzer; press once more to cancel the message
“End”
If the temperature
measured by the
pin probe does
not reach the
chilling endpoint
temperature prior
to expiry of the
maximum chilling
time duration:
• chilling will continue
• the LED will flash and the LED will be on
• the buzzer will sound
• press several times to:
- mute the buzzer
- display the time elapsed since the maximum chilling time expired
- display the cabinet temperature
- display the message “nEg”
- exit the procedure, or leave for 15 seconds
If the temperature
measured by
the pin probe
reaches the
chilling endpoint
temperature:
• the device switches to storage mode
• the LED will continue to flash and the LED will continue to stay on
• the display will show the message “End”
• the buzzer will sound for the period of time set by parameter AA
• press any key to mute the buzzer; press once more to cancel the message
“End”
CK640-A_A5_v1_20190507.indb 10 2019/5/7 15:55

11
AUAU
Telephone Helpline: 1300225960
During storage: • the display shows the cabinet temperature
• if chilling had a positive outcome, the LEDs and will be on; if
chilling had a negative outcome, the LEDs and will be on and the
LED will flash.
• the parameter rA sets the operational set point
• press several times to:
- display the message “nEg”
- exit the procedure, or leave for 15 seconds
To interrupt the
cycle:
• press for 2 seconds
Test To Check Correct Pin Probe Insertion
• Set-temperature cycles are preceded by a test step in order to check correct
pin probe insertion.
• If power is interrupted during the test, when power is restored, the test will
start again from the beginning.
The test has two stages:
• if the outcome of the first stage is positive, the second will not be run
• if the outcome of the first stage is negative, the second will be run.
• The outcome of the first stage is positive if “the temperature measured by the pin probe - the
temperature of the cabinet” is greater than the value set by parameter rc at least 3 times out of 5 (the
comparison is made every 10 s); if parameter rc is set to 0, neither the first nor second stages will be
run.
• The outcome of the second stage is positive if the difference “temperature measured by the pin probe
- temperature of the cabinet” is greater by at least 1ºC/1ºF (with respect to the previous comparison)
at least 6 times out of 8 (the comparison is made every “rd/8 s”)
If the outcome of the test is positive:
• the cycle will be activated
• the cycle will be started in timed mode
• the LED will flash
Setting The Configuration Parameters
The parameters are arranged on two levels.
To access the first
level:
• ensure the device is in “stand-by” mode and no procedures are running
• press and for 4 s: the display will show “PA”
To access the
second level:
• access the first level
• press or to select “PA”
• press
• press or within 15 s to set “-19”
• press or leave for 15 s
• press and for 4 s: the display will show “CA1”
CK640-A_A5_v1_20190507.indb 11 2019/5/7 15:55

12
AU Telephone Helpline: 1300225960
To select a
parameter
• press or
To modify a
parameter:
• press
• press or within 15 s
• press or leave for 15 s
To exit the
procedure
• press and for 4 s , or leave for 60 s
Note: Interrupt the power supply after altering the parameters.
Cleaning, Care & Maintenance
• Switch off and disconnect from the power supply before cleaning.
• Clean the interior of the appliance as often as possible.
• Do not use abrasive cleaning agents. These can leave harmful residues.
• Clean the door seal with water only.
• Always wipe dry after cleaning.
• Do not allow water used in cleaning to run through the drain hole into the evaporation pan.
• Take care when cleaning the rear of the appliance. Sharp edges can cut.
• A POLAR agent or qualified technician must carry out repairs if required.
Cleaning the condenser
• Periodically cleaning the condenser can extend the life of the appliance.
• POLAR recommend that a POLAR agent or qualified technician clean the condenser.
Cleaning the water pan
• The water pan is located underneath the evaporator at the back of the unit.
• To remove it for cleaning, simply slide out when necessary.
Alarms
Code Message Remedies Consequences
AL Minimum temperature
alarm
• Check the cabinet temperature
• Check parameters A1 and A2
The device will continue
to function normally
AH Maximum temperature
alarm
• Check the cabinet temperature
• Check parameters A3 and A4
The device will continue
to function normally
id Micro-port input alarm
(only in “stand-by” mode
and if parameter i0 is set
to 0 or 1)
• Check the causes which activated
the input
• Check parameters i0 and i1
The outcome set by
parameter i0
iA Compressor protection
input alarm (only if
parameter i0 is set to 2)
• Check the causes which activated
the input
• Check parameters i0 and i1
The compressor will be
shut down
Note: When the cause that triggered the alarm has been resolved, the device restores
normal operation.
CK640-A_A5_v1_20190507.indb 12 2019/5/7 15:55

13
AUAU
Telephone Helpline: 1300225960
Internal Diagnostics
Code Message Remedies Consequences
Pr1 Cabinet
probe
error
• See P0
parameter
• Check probe
integrity
• Check probe-
device
connection
• Check the
cabinet
temperature
Consequences if the error occurs while in “stand-by” mode:
• If parameter C11 is set to 0, it will not be possible to start
any of the cycles
• If parameter C11 is set to 1, the pin probe will function as the
cabinet probe and only timed cycles will be allowed to start
Consequences if the error occurs during a timed chilling operation:
• If parameter C11 is set to 0, the cycle will be interrupted
• If parameter C11 is set to 1, the pin probe will function as
the cabinet probe and the chilling operation will continue
Consequences if the error occurs during a set-temperature
chilling operation:
• If parameter C11 is set to 0, the cycle will be interrupted
• If parameter C11 is set to 1, the pin probe will function
as both the cabinet probe and pin probe and the chilling
operation will continue
Consequences if the error occurs during a storage operation:
• Parameter C11 is set to 0, the compressor activity will depend
on parameters C4, C5 and C6
• If parameter C11 is set to 1, the pin probe will function as
the cabinet probe and the storage operation will continue
Pr2 Pin probe
error
• The same
as for the
previous
case, but in
relation to
the pin probe
Consequences if the error occurs while in “stand-by” mode:
• Only timed operation cycles will be allowed to start
Consequences if the error occurs during a timed chilling operation:
• Chilling will continue
Consequences if the error occurs during a set-temperature
chilling operation:
• Chilling will continue in timed mode
Consequences if the error occurs during storage mode:
• Storage will continue
Troubleshooting
If your POLAR appliance develops a fault, please check the following table before making a call to the
Helpline or your POLAR dealer.
Fault Probable Cause Solution
The appliance is
not working
The unit is not switched on Check the unit is plugged in correctly and
switched on
Plug and lead are damaged Call POLAR agent or qualified Technician
Fuse in the plug has blown Replace the fuse
Power supply Check power supply
Internal wiring fault Call POLAR agent or qualified Technician
CK640-A_A5_v1_20190507.indb 13 2019/5/7 15:55

14
AU Telephone Helpline: 1300225960
Fault Probable Cause Solution
The appliance is
leaking water
The appliance is not properly levelled Adjust the screw feet to level the appliance
(if applicable)
The discharge outlet is blocked Clear the discharge outlet
Movement of water to the drain is
obstructed
Clear the floor of the appliance
(if applicable)
The water container is damaged Call POLAR agent or qualified Technician
The appliance is
unusually loud
The appliance has not been installed
in a level or stable position
Check installation position and change if
necessary
Loose nut/screw Check and tighten all nuts and screws
Technical Specifications
Model Voltage Power Current Capacity Dimensions
H x W x D Refrigerant Weight
(kg)
CK640-A 220-240V~ 50Hz 500W 4.0A 3 x GN2/3 410 x 660 x 650 R290 150g 42
Electrical Wiring
The plug is to be connected to a suitable mains socket.
POLAR appliances are wired as follows:
• Live wire (coloured brown) to terminal marked L
• Neutral wire (coloured blue) to terminal marked N
• Earth wire (coloured green/yellow) to terminal marked E
The appliances must be earthed.
If in doubt consult a qualified electrician.
Electrical isolation points must be kept clear of any obstructions. In the event of any emergency
disconnection being required they must be readily accessible.
Compliance
The product must not be disposed of as household waste. To help prevent possible harm to human
health and/or the environment, the product must be disposed of in an approved and environmentally safe
recycling process. For further information on how to dispose of this product correctly, contact the product
supplier, or the local authority responsible for waste disposal in your area.
POLAR parts have undergone strict product testing in order to comply with regulatory
standards and specifications set by international, independent, and federal authorities.
POLAR products have been approved to carry the following symbol:
All rights reserved. No part of these instructions may be produced or transmitted in any form or by any means, electronic,
mechanical, photocopying, recording or otherwise, without the prior written permission of POLAR.
Every effort is made to ensure all details are correct at the time of going to press, however, POLAR reserve the right to
change specifications without notice.
CK640-A_A5_v1_20190507.indb 14 2019/5/7 15:55

DECLARATION OF CONFORMITY
Equipment Type
Countertop Blast Chiller
Model
CK640-A
Legislation
Electrical Safety
Electromagnetic Compatibility
Standards
AS/NZS 60335.1:2011 +A1:2012 +A2:2014 +A3:2015 +A4:2017
AS/NZS 60335.2.89:2010 +A1:2013+A2:2016
EN55014-1:2006 +A1:2009 +A2:2011
EN55014-2:2015
EN61000-3-2:2014
EN61000-3-3:2013
Producer Name
Polar
Producer Address
15 Badgally Road,
Campbelltown,
NSW 2560
I, the undersigned, hereby declare that the equipment specified above conforms to the above Legislation and Standard(s).
Date
24th April 2019
Signature
Full Name
Ashley Hooper
Position
Technical & Quality Manager/ Responsible Supplier
CK640-A_A5_v1_20190507.indb 15 2019/5/7 15:55

CK640-A_A5_v1_20190507
http://www.polar-refrigerator.com/
CK640-A_A5_v1_20190507.indb 16 2019/5/7 15:55
This manual suits for next models
1
Table of contents
Other Polar Refrigeration Freezer manuals

Polar Refrigeration
Polar Refrigeration CM530-A User manual

Polar Refrigeration
Polar Refrigeration CE210 User manual

Polar Refrigeration
Polar Refrigeration U Series User manual

Polar Refrigeration
Polar Refrigeration DN492-A User manual

Polar Refrigeration
Polar Refrigeration CM530 User manual

Polar Refrigeration
Polar Refrigeration G591 User manual

Polar Refrigeration
Polar Refrigeration DN492-A User manual

Polar Refrigeration
Polar Refrigeration CE210-A User manual

Polar Refrigeration
Polar Refrigeration CM530 User manual

Polar Refrigeration
Polar Refrigeration CK640 User manual