manuals.online logo
Brands
  1. Home
  2. •
  3. Brands
  4. •
  5. Polaroid
  6. •
  7. Digital Camera
  8. •
  9. Polaroid SX-70 Alpha Model 2 User manual

Polaroid SX-70 Alpha Model 2 User manual

POLAROID
,F,.,,.,.,., '':lt(i:lir:''.:rr:
i':..l .U
F},
á.
)
t-
¡w
_ a\
r
{9,
il
¡
't 'IúÉ*,
B
Il
English
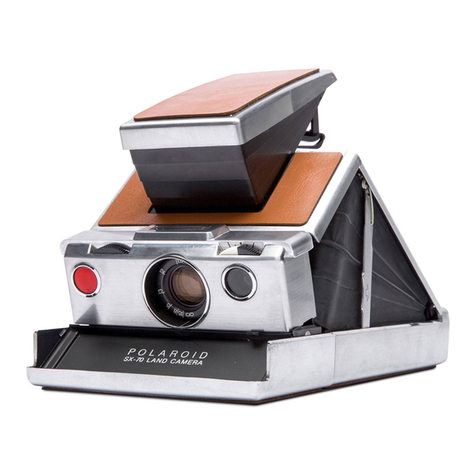
Camera parts
A. Viewfinder
B. Viewfinder caP
C. Focus wheel
D. Lighten/Darken control
E. Flash socket
F. Yellow bar to oPen film door
G. Shutter button
H. Film compartment
l. Rollers
J. Film door (shown oPen)
K. . Picture exit slot (under lront
eiect automatically. Remove it. (lf the
fiim cover does not eject, see page 10).
Picture counter: The counter (8)
on the rear of the camera moves to
"10" when a film pack is inserted
and the film door is closed. After
taking a picture, the counter will
show how many Pictures You have
left in the pack. After ten pictures an
"O" will aipear (and the flash will
not fire). lnsertion of a partly used or
empty pack will also set the counter
to "10",
To remove film pack: OPen,the
fllm door. Remove the Pack bY .
pulling on the yellow tab.
L.
M.
N.
o.
P.
a.
edge)
Distance scale
Electric eve
Lens (4 eiement, 116mm, f/8)
Connector for remote shutter
button
Tripod Socket
Serial number
Your camera also comes with an
adiustable neckstrap that attaches to
thá camera as shown on the instruc-
tions with the straP,
Ooening and closing: Hold the
camera in the Palm of the left hand
(1). Grip the small end of the view-
ñrider cap and pull it straight uP
until the cover support (see arrow)
locks (2),
To close, push the cover suPPort
toward the rear of the camera.
Press down on the viewfinder caP
slowly but firmly (3), until both sides
of the camera latch'
Loading: Use onlY Polaroid SX-70
Land film. Each pack Provides ten
pictures, and contains a batterY to
bupplv power for taking Pictures.
Pus'h -dówn on the Yellow bar (4) to
ooen the film door, Be sure the
dbvelopment rollers are clean (see
paqe 1b). lnsert a film Pack, holding
it ónly by the sides, as shown (5).
Nevei press the top or bottom
surfacés of the film pack. Push the
pack all the way in (6), until a narrow
itrip (arrow) along the edge of the
paik snaps open. Close the film
iloor (7). The film cover will then
Holding and viewing: Put the neck-
strap aróund your neck and, if nec-
essárv, adiust its length. Hold the
cameia in-your left hand (9). Thumb
and flngeré should be behind the
hinge "4". Fingers should not block
the exit slot "B", where the picture
comes out, or touch the bellows "C",
where pressure might interfere with
movement of the mechanism inside
the camera, Put your right index
finger on the focus wheel. Place your
rioht thumb behind the shutter (10),
without touching the bellows. The
striped semi-circle behind the shutter
hoüsing shows where you should
place vóurthumb while taking a picture.
i3ring your eye close to the viewfinder
andIobk thróugh the center of the
eyepiece. lf you do not see all four
corners of the square frame, center
your eye so that you do'
Focusing
The key to good pictures is accurate
focusing. Focusing means adjusting
the caméra lens to give the sharpest,
clearest image of the subject' Look
through the viewfinder and rollthe
focus wheelwith your right index
finger. There are two ways to focus -
vou can use the whole image or You
óan use the split circle in the lower
center of the viewfinder.
English
Focusing with the whole image:
lgnore the split circle. Look at the
ir-nage, concentrat¡ng on that part of
the subject that you want shaipest in
the picture. For pictures of péople,
this will_usually be the face.'As'you
roll the focus wheel back and forth,
you will note that the image will
appear alternatively sharp and un-
sharp. lt is like tuning a radio for best
reception - you should turn slightly
past the best setting once or twicé,
to be sure that you have found it.
Focusing with the split circle:
The split circle is mosi useful in dim
light and for flash pictures. Place the
circle over a vertical line in your
subject (for example a necktie, a
lapel, .a scarf, a piece of jewelry,
the edge betweeñ light arid dari('
areas). Choose a line which is the
same distance from you as the point
you want sharpest in the picture, not
behind it or in front of it.
continuous. The subject
ts now tn locus.
After focusing, reframe
your image, if necessary,
so that you see in the
viewfinder exactly what
you want in the finished
pictu re.
S,Y["¿lnfi,X'" Gfifl!"ln;.',?.r1"
\I,' circle is broken, \I-l ¡¡¡s becomes
the subject is out of
focus,
English
Distance scale: The scale around
th.e lens. (11) can be used to help you
either check camera focus againét
actual subject distance, or to set the
lens for a desired distance. Set the
correct distance mark opposite the
white line (arrow) below ihe lens.
3. Arrange groups carefutly - all per-
sons in a group should tje at a6out
the same distance from the camera,
to ensure they will be lit evenly by '
the flash.
4. Avoid reflections - do not aim the
camera directly at a mirror, window,
shiny wall, painting or other highly
reflective súrface, ás this w¡ll réfldct
the flash into the picture and spoil it.
You can avoid th¡s problem by'stand-
ing to one side and.shooting irom
an angle,
Daylight pictures
Exposure for daylight pictures is con-
trolled by an electric eye that automat-
ically sets the shutter épeed and lens
9§§ill: forthe Iight corid¡tions it
The sun should light the subject
trom the front or the side, and not
from behind. The electric'eye will
give the best exposure wheh the
lighting o.n the scene is fairly even -
abo.ut as bright on the backgiound as
on the subject.
Accurate focusing is especi-
ally important with flash: ln
addition to settinq the camera
for sharp picturesl focusinq also
affects exposure when flash is
used. The camera automatically
sets the right exposure for the -
distance to which the Iens is set
- from 27cm (10lin.) to 6m
(20ft.). lf the iutij-ect'is not at
the distance for which the
camera has been focused, the
picture may be too light or too
dark.
However, the camera can adjust
for minor errors so as to stiil
produce a well exposed flash
picture.
Flash pictures
Generally, you should use flash for in-
door pictures. Theflash range extends
from 2.7cm (10%in) to 6m (20lt.). Insert
a Flashbar into the socket ii2).'oush-
ing it in firmly. When all fivé búl'bs on
one side have been fired, turn the
Flashbar around for five more flashes.
Whenever all five bulbs on the side
facing the front have been fired. the
camera will automaticallv stoo
Lqnctioning, to prevent film wástage.
Flash pictures should not be taken -
where the atmosphere contains gases
or dustthat may be ignited by a slpark.
Four points to remember when
using flash:
1. Focus carefully - focusing affects
Trasn exposure.
2. Watch the background - for even
illumination over the picture. olace
your _subject close to'a lighi ánd
colorful background.
Watch the background: lf a large part
of the picture area consists óf á
background that is considerably
brighter or darker than the maín
subject, the electric eye will tend to
s.et the expos.ure for the background.
As a result, the subject will bé either
too light or too dark in the picture.
lf you move in close to the'subiect
the background will have less efrect
on the exposure.
.Sharpness, from near to far, in sun-
lighf : ln bright sunlight, you can get
everything sharp in a picture from a
nearby subject to a distant scene. Do
not.focus on either the near subject
or the distant scene. lnstead, just set
the lens distance scale to tñé Sm
('l5ft.) mark. Then, in briqht sunlioht.
everything from about 3m (8ft.) tó
the most distant scene will be sharp
in the picture.
English
Using flash in daylight
The electronic control circuitry in
this camera was designed to read
both the daylight and the light from
the Flashbar and combine them to
produce a properly exposed picture.
For best results, the subject should
be between 1,2-4m (4-12ft ) from the
camera. At 1,5 or 2m (5 or 6 ft.),
results are particularly impressive.
Flash can be of help in daylight
in the following situations:
1. lf the subject is in the shade and
the background is bright, the exposure
is in danger of being either too much
for the background or too little for the
subject. By adding flash, you can
create an attractive, sunny, bright
picture.
2. When the subject is lit from the
side by strong sunlight, using flash
can soften or eliminate unpleasant,
harsh shadows.
3. A face that is lit only by a blue sky
and not directly by the sun, would
have a bluish appearance. The addition
of flash provides the sense of sun-
shine.
4. ln dim light, without flash, the
shutter will remain open for a rel-
atively long exposure time, resulting
in blurred pictures. Using flash
reduces the exposure time and
results in sharp pictures.
Shooting
Hold the camera up to your eye (13)
and, having focused, frame your sub-
ject carefully in the viewfinder. Hold the
camera steady and gently press the
shutter button.
Hold the button in until the picture
comes out of the exit slot (14) and
all camera sounds stop. Remove the
picture, holding it by its wide border.
It will develop by itself. Do not bend,
squeeze or cut the picture.
Three camera holding errors you
should avoid
Fingers blocking the exit s/of (f5);
Can cause horizontal creases and
streaks in the picture. lf a piece of
film becomes jammed in the slot,
open the film door in dim light and
gently rotate the rollers to remove
the film. Never try to remove the film
with the film door closed. Forcing
the film through the picture exit slot
can damage the camera.
Fingers in front of the camera (16l:
A finger in front of the Flashbar may
reflect the flash back into the lens,
fogging the picture. Or it may block
the flash entirely, causing a dark or
black picture. A finger in front of the
electric eye may cause the camera to
set an incorrect exposure.
Fingers on the camera bellows (171:
May block movement of the mecha-
nism inside the camera, causing
pictures that are partially fogged or
outdoor pictures that are completely
white. The defect will usually occur in
the picture following the one taken
with a finger on the bellows.
The Lighten/Darken control: For
most pictures, leave the Lighten/
Darken control (18) at the normal
position "A". However, if your main
subject is too light or too dark in a
picture, you can use the L/D control
to adjust the exposure for another
picture in the same location, under
the same lighting. For a small change,
turn it one mark toward either Lighten
"B" or Darken "C"; for a greater
change, move it two marks or more.
The control automatically returns to
the normal position each time the
camera ís closed.
CIose-ups: The SX-70 camera
allows you to take pictures from as
close as 27cm (1011in.), without the
use of accessories. At that distance
the picture will show the subject at
half its actual size. You will get best
results with flash. Always hold the
English t0
camera steady. ln dim light, without
flash, you should use a tripod or
some other firm support.
The best way to get a sharp image
when close to the subject is to first
set the camera focus for the desired
distance, and then carefully move the
camera back and forth slightly until
the subject is as clear and sharp as
possible in the viewfinder.
The 121 Close-up Lens, which
fits over the camera lens, lets you
take life-size pictures of subjects as
close as 13cm (5in.) from the
camera, For more information,
contact your dealer or the nearest
Polaroid office.
Time exposures: ln dim light, the
SX-70 can make automatic time
exposures of up to about 14 seconds.
For best results indoors, the scene
should be lit fairly evenly. A bright
light or window in the scene could
"fool" the electric eye, causing the
main subject to be too dark. Place the
camera on a tripod or some other firm
support. The Polaroid Remote Shutter
Button 112 is helpful in preventing
camera movement, Press the shutter
button, holding it in until the picture
comes out of the exit slot and all
camera sounds stop, This may take
as long as l6 seconds, The camera
must be kept steaciy during the expo-
sure, or the picture will be blurred,
Keep development rollers clean:
Before loading film, examine the
rollers inside the fllm door, Dirty
rollers can cause uneven picture
development or a repeated spot
pattern across the picture.
To prevent dust from entering the
film compartment, leave an empty
film pack in the camera while you
clean the rollers. With the film door
open (f9), depress the light shield
"A", to expose the rollers "B",
Rotate both rollers and remove any
specks of dirt from them with a clean,
lint-free cloth, moistened with water,
if necessary. Pay special attention to
the raised ends "C" on the top
roller, near which dirt may collect.
The picture exit slot may be cleaned
by inserting a stiff piece of paper
(such as the film cover ejected from
a new film pack) in front of the rollers
and under the light shield. Push it until
it comes out of the picture exit slot
(20). Move it in the slot to remove any
developer chemicals that may be
trapped there. Do not use force to
open the picture exit slot.
Picture problems and their cause
Part of the picture missing: The pod
of chemicals on the film unit was
probably damaged before the film
went through the camera rollers.
Developer chemicals may leak onto
the rollers, the picture exit slot and
the back of the picture. Clean the
rollers and the exit slot. Please read
the CAUTION notice included with
each SX-70 film pack.
Fogged film: White areas in the picture
indicate that the fllm was fogged
before it was exposed in the camera.
Removing and reinserting a film pack
in the light can cause this. lf it is nec-
essary to remove a film pack from
the camera, the top piece of film will
always be fogged; pictures beneath
it may be fogged in one corner. lf
you must remove a partly used film
pack, do so in dim light.
Blurred picture: ln dim light or when
using flash, you may get a blurred
picture if either the camera or the
subject moves during the exposure.
Hold the camera steady from the
moment you press the shutter button
until the picture emerges. Generally,
your subject also should remain still
until the picture comes out of the
camera.
Camera problems and their cure
lf the camera does not eject the filn
cover or film: When you insert a
new fllm pack and close the door, or
when you press the shutter button,
the camera motor should make a
English 1l
sound and eject the film cover or a
piece of film. lf it does neither, the
battery in the film pack may be dead.
Try another pack.
lf the camera does not eject the
film cover or film, but you hear the
sound of the motor, the fault may be
with the camera or the film pack,
although not with the battery. Check
by inserting another pack, lf the fllm
cover does not come out of the second
pack, the camera may need repair.
Contact the nearest Polaroid office.
lf the viewfinder goes black for as
long as you depress the shutter
button, and no picture is ejected, the
camera's internal battery check is
indicating that your battery is too
weak to take a picture. lnsert a new
film pack.
Reminder: The camera will not
operate when a Flashbar with 5 used
bulbs facing the subject is on the
camera. l{ the camera does not operate
when an unused side of a Flashbar is
facing front, turn the Flashbar around
or insert a new one. lf you can then
take a pictúre, it means that one side
of the Flashbar was not working. lf
this should happen, please contact
the nearest Polaroid office.
lf the camera stops during a cycle:
This happens either because you are
releasing the shutter button too
quickly, instead of holding it in until
the picture comes out, or because
the battery in the film pack is weak or
dead. First, press the shutter button
aga¡n and hold it, lf the camera does
not complete its cycle, open the film
door in dim light, and pull the pack
out about 3cm (1in.). Push the pack
in again and close the film door (the
counter will reset to "10"). The camera
should complete its cycle, ejecting
the top piece of film. lf the camera
still does not function, the film pack
battery is probably dead. Remove the
pack. lnsert a new pack, or an empty
pack - most empty packs still have
some power in reserve - and the cam-
era should complete its cycle. (lf you
insert a new pack, you risk the loss
of one or more pieces of film.)
As you push in a new pack, the
film cover may stick out, so that the
door will not close. Remove the
film cover and close the door,
lf you can close the door, but the
film cover is ejected only part-way,
open the door again and move the
fllm cover forward by turning the
rollers, Never try to force the cover
through the rollers without first open-
ing the film door.
Do not try to close the camera when
it is in the mid-cycle position, as this
may damage the internal moving
mechanism, For temporary storage
or shipping, you can collapse the
camera to the point where you feel a
little resistance, but do not force it
fu rth er.
Replacement of faulty film: ll a
film pack has a dead battery or is
faulty in any other way, Polaroid will
replace it if you return it to your dealer
or to the nearest Polaroid office.
Care of your SX-70 system
Camera: Handle the camera with care
and keep it closed when you are not
using it. Keep the lens and view-
finder clean and free from finger-
marks.
Film: Store it in a cool place. Keep
the film and the loaded camera out
of direct sunlight and away from
other areas that tend to get hot, such
as the glove- or luggage-compartment
of a car in warm weather, Do not
break the seal of the film box until
you are ready to use the film.
Pictures: The brilliant pictures made
with your SX-70 system are among
the most stable and resistant to fading
ever known in photography. They are
extraordinarily durable, but you
should take care not to fold or crease
them. The finished p¡cture is sealed
within its frame against a reflective
white base that imparts a remarkably
luminous quality to the image.
There are no waste materials to
English 12
discard. Do not cut a picture or trim
its borders, as this would destroy its
structu re.
You can easily remove fingerprints on
your pictures by "misting" the sur-
face with your breath and then polish-
ing with a tissue or a soft clean
cloth.
Electronic Flash
Some electronic flash units may work
well with your camera. Others may not
be compatible with you r camera for
various reasons, and may produce
unsatisfactory results, or even damage
the camera. Before you buy an elec-
tronic flash unit, check with your
dealer or with the manufacturer of the
flash unit, to be sure the flash unit is
suitable for use with your camera. lf in
doubt, contact the nearest Polaroid
office.
To obtain information and help
lf you are unable to get good pictures,
review your instructions.
Picture problems are often due to in-
correct use of the camera. If you need
further help, and before you return
your camera for repair, please see
your dealer or contact the nearest
Polaroid office.
lf you write, please explain the nature
of the problem and, if possible,
enclose sample pictures.
lnclude your return address.
Copies and enlargements
Beautiful copies and enlarge-
ments can be made from your
favorite SX-70 pictures.
For copy service information,
contact your dealer or the
nearest Polaroid office.
Warranty
lf this camera proves defective
within three years of .original
purchase date, we will repair or,
at our option, replace it free of
charge. We will make no charge
for labor, service or parts. We
will, when we return the camera,
refund an amount approximately
equal to what it cost you to
mail itlo us by insuré.d parcel
post, if the return address is
within the country in which the
Service Center is located. We
will also supply one free pack of
film. To take advantage of this
warranty, the camera must be
sent to and repaired by one of
the Polaroid Service Centers.
This warranty does not cover
damage caused by accident or
improper use, in which case
repair will be made at a
reasonable charge.
The above warranty and pro-
visions do not affect your
statutory rights.
p¡ctures. G, Etui co¡npariimenté ré1,
L Arbum Renil fi8: ro en- l¿t"ii:iJ !1?I;]L',á'?.X'.*"'
larse Album 115. Ár;;bádó,jiaéá
..: :¿,. §i:io:Ac.c..e¡spry:l(it;1r'§¡ H. Atbum,rréf.,ft51.eo¡lÉ6t..
::.ciintaiii§,Ld.ñ§.tshadér120:.r:r..rr:tr.ádl;ñdt6..isi.r0.,r.,r,:,,,,'.].],],ttrl,i.
Close-up Lens '121 and Flash
.:r§¡ñuiiéi;:,Atéé§§óii,HdldeÍrr.,,.,:.:rl:.rps.¡argsrpo.uí.alb¡i_áf .
],,,1i¡;,..1ii¡i!¡d.M-düntrlil;áiid':,rr,'.iéf;,r{.ilÍ P..9!,r,,:,.n.mp,lét¿r.:
.:,neiir¿tó,r§h:ulié.r.§ú,tiqñ1il,2.r.r.r.rr ,rlfalb!¡m :réJill§r ,.,, :;,¡ ,;';,,. ,
J. Coffret d'accessoires
sx-zo i¿i izir compreno
un pare-soleil réf. 120, une
bonnette d'approche réf.
':i.,rr rriii ét:ú I lriiqú. iei¡i-:r, óüir'.ñra§ü;i'.
un porte-accessoires réf..
i13, un adaptateur Pour Pied
PirdtógtrPh¡quu réi 111 et
un déclencheur souPle
rét.112.
' A,DóctencheursouplerÉ1.
t12l Utile pour la pose, me-
sure environ 45cm (18Po).
B.

Other manuals for SX-70 Alpha Model 2

2

Other Polaroid Digital Camera manuals

Polaroid 636AF Instruction manual

Polaroid

Polaroid 636AF Instruction manual

Polaroid 290SL User manual

Polaroid

Polaroid 290SL User manual

Polaroid T833 - Digital Camera - Compact User manual

Polaroid

Polaroid T833 - Digital Camera - Compact User manual

Polaroid PhotoMAX PDC 1050 User manual

Polaroid

Polaroid PhotoMAX PDC 1050 User manual

Polaroid PhotoMAX PDC 1100 Technical manual

Polaroid

Polaroid PhotoMAX PDC 1100 Technical manual

Polaroid DIGITAL 320 User manual

Polaroid

Polaroid DIGITAL 320 User manual

Polaroid PDC-800 User manual

Polaroid

Polaroid PDC-800 User manual

Polaroid 180 Operating instructions

Polaroid

Polaroid 180 Operating instructions

Polaroid Automatic 210 User manual

Polaroid

Polaroid Automatic 210 User manual

Polaroid PIC 300 User manual

Polaroid

Polaroid PIC 300 User manual

Polaroid Snap User manual

Polaroid

Polaroid Snap User manual

Polaroid SP 350 User manual

Polaroid

Polaroid SP 350 User manual

Polaroid Now+ User manual

Polaroid

Polaroid Now+ User manual

Polaroid i835 User manual

Polaroid

Polaroid i835 User manual

Polaroid Q10 User manual

Polaroid

Polaroid Q10 User manual

Polaroid V35 User manual

Polaroid

Polaroid V35 User manual

Polaroid Miniportrait 204 Operating instructions

Polaroid

Polaroid Miniportrait 204 Operating instructions

Polaroid DMC User manual

Polaroid

Polaroid DMC User manual

Polaroid DMC 1e User manual

Polaroid

Polaroid DMC 1e User manual

Polaroid M203 User manual

Polaroid

Polaroid M203 User manual

Polaroid 7300AF User manual

Polaroid

Polaroid 7300AF User manual

Polaroid PhotoMAX PDC 700 User manual

Polaroid

Polaroid PhotoMAX PDC 700 User manual

Polaroid SX-70 Alpha Model 2 Installation and user guide

Polaroid

Polaroid SX-70 Alpha Model 2 Installation and user guide

Polaroid PDC 2030 User manual

Polaroid

Polaroid PDC 2030 User manual

Popular Digital Camera manuals by other brands

Samsung WB2000 user manual

Samsung

Samsung WB2000 user manual

Pentax 645 NII Operation manual

Pentax

Pentax 645 NII Operation manual

Panasonic Lumix G6 Specifications

Panasonic

Panasonic Lumix G6 Specifications

P3 International P8315 instruction manual

P3 International

P3 International P8315 instruction manual

GE J1470S Návod k použití

GE

GE J1470S Návod k použití

Okina USA LPC Series Operational manual

Okina USA

Okina USA LPC Series Operational manual

Prosilica GC Series user manual

Prosilica

Prosilica GC Series user manual

Olympus FE 310 - Digital Camera - Compact Advanced manual

Olympus

Olympus FE 310 - Digital Camera - Compact Advanced manual

JAI AM-201CL user manual

JAI

JAI AM-201CL user manual

Somogyi Home HS 91 instruction manual

Somogyi

Somogyi Home HS 91 instruction manual

LOMO Lubitel 166 General instructions

LOMO

LOMO Lubitel 166 General instructions

Zeiss VISUSCOUT 100 user manual

Zeiss

Zeiss VISUSCOUT 100 user manual

Panasonic Lumix DMC-TZ20 operating instructions

Panasonic

Panasonic Lumix DMC-TZ20 operating instructions

ARTRAY ARTCAM-264IMX-USB3-T2 Series Instruction booklet

ARTRAY

ARTRAY ARTCAM-264IMX-USB3-T2 Series Instruction booklet

Ken A Vision Aqua Flex 1470 reference guide

Ken A Vision

Ken A Vision Aqua Flex 1470 reference guide

Canon PowerShot G10 - Digital Camera - Compact Service manual

Canon

Canon PowerShot G10 - Digital Camera - Compact Service manual

Kaya Instruments JetCam quick start guide

Kaya Instruments

Kaya Instruments JetCam quick start guide

Panasonic LUMIX DMC-GM1K Basic operating instructions

Panasonic

Panasonic LUMIX DMC-GM1K Basic operating instructions

manuals.online logo
manuals.online logoBrands
  • About & Mission
  • Contact us
  • Privacy Policy
  • Terms and Conditions

Copyright 2025 Manuals.Online. All Rights Reserved.