manuals.online logo
Brands
  1. Home
  2. •
  3. Brands
  4. •
  5. POLTI
  6. •
  7. Vacuum Cleaner
  8. •
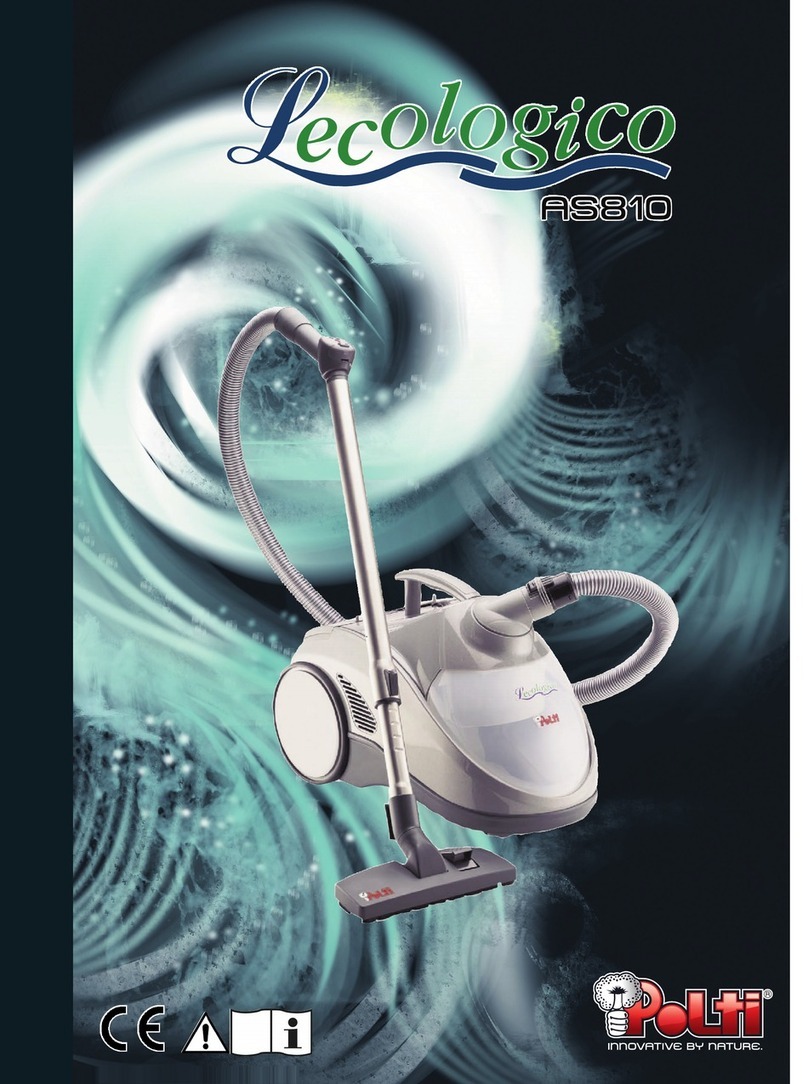
  9. POLTI LECOLOGICO AS 801 User manual

POLTI LECOLOGICO AS 801 User manual

compact
AS 801
compact
AS 801
M
N5-A
27
18b
19a
19 18 18a
17 18
3
4
16
1
11
12
13
14
15
10
2
9
8
7
21
22
23
24
25
26
20
6
5
L
F
I
A
G
J
H
BB1
C
E
D
A1
Fig.1 Fig.2 Fig.3
Fig.4 Fig.5 Fig.6
Fig.7 Fig.8
Fig.9/10
Fig.11 Fig.12 Fig.13
Fig.14 Fig.15 Fig.16
Fig.17 Fig.18 Fig.19
Fig.20 Fig.21
Lecologico AS800 - AS801 M0S07336 Ediz.1M05
COP.LECOLOGICO AS800-801 M0S07336 - 1M05.qxp 21/04/2006 12.01 Pagina 1
KEY
1) Pivoting wheels
2) Upper cover locking pins
3) Upper cover locking holes
4) Container locking pins
5) "EcoActive-Filter" water container
6) Water container handle
7) Upper cover
8) Upper cover opening button
9) Tube junction
10) Carrying handle
11) Mains ON/OFF switch
12) + button (suction power increase)
13) Suction power indicator lights
14) - button (suction power decrease)
15) Cable winder button
16) Accessories holder place
17) Air outlet filter grill
18) Opening levers for air outlet filter grill
18a) Locking pins for air outlet filter grill
18b) Locking holes for air outlet filter grill
19) Hepa filter
19a) Back sponge filter
20) "EcoActive-Filter" water filter group
21) Filter cage cover
22) Square sponge filters
23) Shaped sponge filter
24) Filter body with micropore sponge
25) Elbow tube locking ring
26) Elbow tube
27) Supply cable plug
KEY TO ACCESSORIES
A) Telescopic tube
A1) Telescopic tube spring button
B) Universal brush
B1) Brush selector
C) Flexible tube handle
D) Hose
E) Tube
F) Multipurpose nozzle
G) Lance for cleaning corners
H) Soft brush
I) Accessories holder
J) Jug for filling the container
L) Turbo brush (optional)
M)* Joker brush
N)* Parquet accessory
5-A) Water container cleaning brush
* (optional for mod. AS800)
Lecologico Compact AS800 - AS801
38
lecologico as800-801 -1m01.qxp 21/04/2006 11.49 Pagina 38
Dear Customer,
Thank You for choosing this Polti product. By choosing Lecologico, you have
thought of your family's health because Lecologico Polti is a friend of the environ-
ment, but an enemy of dust, pollen, mites and their allergens. Thanks to the EcoAc-
tive-filter, its green heart, it traps the dirt in the water which, when it is dirty, can be
poured away without the risk of dust escaping into the air.
With Lecologico Polti you can really relax. Its filtering system of 6 layers with Hepa
filter retains the smallest particles, therefore the exiting air is perfectly pure. In addi-
tion, EcoActive-Filter eliminates dusty bags and all the problems related to them.
The generous accessory set will allow you to face cleaning problems, solving them
quickly and easily.
Before using Lecologico, read these instructions carefully.
What is EcoActive-Filter?
EcoActive-Filter is the "green" heart of Lecologico and consists of a revolutionary
water filter. The EcoActive-Filter employs the natural purifying strength of water to
catch the dirt, avoiding irritating contact with dust and harmful dispersion of dust into
the environment.
It is specifically the flow of water contained in the special filter and its bubbling that
make the cleaning operations with Lecologico much more effective.
What is HEPA filter?
Lecologico is more than a vacuum cleaner, it is also an air purifier. In fact, it is
equipped with a special and very powerful HEPA filter, already used in professional
applications where the maximum hygiene is necessary. It is able to retain the
thinnest dust, pollen, mites and other micro-organisms.
This unit conforms with EC-directives 89/336 as amended by 93/68
(EMC) and 73/23 as amended by 93/68 (low voltage).
Polti S.p.A. reserves the right to change equipment or accessory specification wi-
thout prior notice.
Lecologico Compact AS800 - AS801
39
lecologico as800-801 -1m01.qxp 21/04/2006 11.49 Pagina 39
PP
PPRR
RREE
EECC
CCAA
AAUU
UUTT
TTII
IIOO
OONN
NNSS
SS
KEEP THESE INSTRUCTIONS
• Read these instructions for use carefully
before using the appliance.
• Any use which does not comply with these
instructions will invalidate the warranty.
• The wiring system to which the appliance
is connected must always comply with the
laws in force.
• Before connecting the appliance, make
sure that the mains voltage is the same as
the voltage indicated on the data label of
the appliance and that the power outlet is
connected to earth
• Always turn off the appliance at the on/off
switch before unplugging it.
• If the appliance is left unused, always dis-
connect it from the mains. Never leave the
appliance unattended with the cable
plugged into the mains.
• Always make sure the appliance is un-
plugged before performing maintenance
work of any kind
• Do not pull the power cord out of the
socket, but grasp the plug itself to avoid
damage to the socket.
• Do not allow the power cord to be twisted,
crushed, stretched, or come into contact
with sharp or hot surfaces.
• Do not use the appliance if the power ca-
ble or other important parts are damaged.
• Do not use electric extension leads that
are not authorized by the manufacturer, as
they may cause damage or fire.
• If it is necessary to replace the power sup-
ply cable, please refer to the nearest Polti
authorised service centre, since the use of
a special tool is necessary.
• Never touch the appliance with wet hands
or feet with the cable plugged into the
mains.
• Do not use the appliance when barefoot.
• Do not use the appliance near a bathtub,
shower or container full of water
• Never immerse the appliance, the cable or
the plugs in water or another liquid.
• Use of the appliance in places where there
is a danger of explosions is prohibited.
• Do not use the product with toxic sub-
stances.
• Do not lay the hot appliance on surfaces
sensitive to heat.
• Do not leave the appliance exposed to
wind or rain.
• Do not place the appliance near a live ele-
ment, an electric stove or any other source
of heat.
• Do not expose the appliance to extreme
temperatures
• Never let children or people who are not
familiar with how the appliance works use
it.
• Do not press the buttons hard or with a
pointed object such as a pen.
• Always rest the appliance on a stable sur-
face.
• In case of accidental fall of the appliance it
is necessary to have it checked by an au-
thorized Service Centre as the internal
safety features may have been affected.
• In case of breakdown or malfunction
switch off the appliance and never attempt
to disassemble it, but refer to an author-
ized Service Centre.
• In order to avoid prejudicing the safety of
the appliance, use only original spare
parts and accessories approved by the
manufacturer.
• Do not wind the power cord around the ap-
pliance, especially when the appliance is
still hot.
• Do not use the appliance to suck up acids
or solvents, as these might cause serious
damage to the appliance and above all do
not suck in explosive dust or liquids, as
these could cause explosions on coming
into contact with the inside components of
the appliance.
• Do not vacuum up toxic substances.
• Do not vacuum up burning or incandes-
cent objects such as embers, ash or other
material in which combustion is taking
place.
• Do not vacuum up detergents or other
substances which could generate foam in-
side the water container, as this could
Lecologico Compact AS800 - AS801
40
lecologico as800-801 -1m01.qxp 21/04/2006 11.49 Pagina 40
cause malfunctioning.
• Do not vacuum up liquids
• Water tank can be filled with tap water.
• Do not vacuum up materials such as ce-
ment, chalk etc. which solidify once they
came in contact with water thus damaging
the appliance
• During refilling with water, switch off and
disconnect the appliance from the mains.
• It is necessary to keep the unit in horizon-
tal position during operation.
• Do not direct the steam jet on electrical
appliances.
• Leave the appliance to cool down before
cleaning it.
• Before storing the appliance be sure that it
has completely cooled down.
• This appliances is equipped with safety
devices which are to be replaced only by a
suitably qualified technician.
CC
CCOO
OORR
RRRR
RREE
EECC
CCTT
TTUU
UUSS
SSEE
EEOO
OOFF
FFTT
TTHH
HHEE
EE
PP
PPRR
RROO
OODD
DDUU
UUCC
CCTT
TT
This appliance is intended for home use for
sucking solids as described and in accor-
dance with the instructions provided in this
manual. Please read these instructions care-
fully and keep them, as you may find them
useful in future.
Polti declines liability for any damage or
accident derived from any use of Leco-
logico which is not in conformity with the
instructions contained in this booklet.
AA
AATT
TTTT
TTEE
EENN
NNTT
TTII
IIOO
OONN
NN
Directive 2002/96/EC (Waste Electrical and
Electronic Equipment - WEEE): information
for users
This product complies with EU Directive
2002/96/EC.
The crossed-out wastebasket symbol on the
appliance means that at the end of its useful
lifespan, the product must be disposed of
separately from ordinary household wastes.
The user is responsible for delivering the ap-
pliance to an appropriate collection facility at
the end of its useful lifespan.
Appropriate separate collection to permit re-
cycling, treatment and environmentally com-
patible disposal helps prevent negative im-
pact on the environment and human health
and promotes recycling of the materials
making up the product. For more information
on available collection facilities, contact your
local waste collection service or the shop
where you bought this appliance.
PP
PPRR
RREE
EEPP
PPAA
AARR
RRAA
AATT
TTII
IIOO
OONN
NNFF
FFOO
OORR
RRUU
UUSS
SSEE
EE
• Push the upper cover opening button (8)
which is on the upper cover (7)
• Lift the upper cover turning it upwards as
indicated in fig. 1.
• Fill the "EcoActive-Filter" water container
(5) by using the jug supplied (J), carefully
respecting the exact amount of water indi-
cated on it (fig.2) (400 ml).
For correct operation, it is important
that the amount of water is the one con-
templated in the jug capacity, neither
lower nor higher.
• Put the upper cover (7) back taking care
that the two pins (2) on the cover (7) en-
gage with the two holes (3) on the appli-
ance, pushing the button (8) again.
• Insert the tube (E) into the junction (9)
turning it clockwise until it connects (fig.3).
OO
OOPP
PPEE
EERR
RRAA
AATT
TTII
IIOO
OONN
NN
• Unwind the cable until it is completely out-
side its storage compartment by pulling
the plug (27) towards you (fig.4).
• Connect the plug to the mains.
• Position 1 of the indicators lights (13) will
start to flash. Your appliance is now in a
"stand-by" position (fig.5).
• Push the mains On/Off switch (11) (fig.6),
Lecologico will start to operate at minimum
speed, the first stage of the indicator lights
will change from flashing to constant. The
mains On/Off switch (11) can be pushed
with your foot without bending down.
• The power levels are four. We suggest use
Lecologico Compact AS800 - AS801
41
lecologico as800-801 -1m01.qxp 21/04/2006 11.49 Pagina 41
at the minimum level for curtains, at the
medium-low for couches, armchairs and
pillows, medium-high for carpets and high
for floors and hard surfaces (ceramic,
marble etc.).
• To increase the speed, push the + button
(12), each press on the button + (12) will
increase the motor power by one level.
• The increase by one level is indicated by
the illumination of one further stage of the
indicator lights.
• By pushing the - button (14), at each press
the motor power will decrease and one
stage will switch off.
• To take the appliance back to the "stand-
by" position, push the mains On/Off switch
(11), the first stage of the indicator lights
(13) will start to flash again.
• To start vacuum cleaning again, push the
mains On/Off switch (11) again.
• Do not vacuum up any detergent or foamy
substance. They could prejudice the cor-
rect operation of the appliance.
HH
HHOO
OOWW
WW
TT
TTOO
OO
EE
EEMM
MMPP
PPTT
TTYY
YYAA
AANN
NNDD
DD
CC
CCLL
LLEE
EEAA
AANN
NN
TT
TTHH
HHEE
EE
WW
WWAA
AATT
TTEE
EERR
RR
TT
TTAA
AANN
NNKK
KK
• Switch off the appliance at the mains
switch (11) and disconnect the power sup-
ply cable from the mains.
• Disconnect the tube from the junction by
turning it anticlockwise (fig.3).
• Push the opening button (8) on the upper
cover (7).
• Lift the cover (7) by turning it upwards as
indicated in fig.1.
• Lift the container handle (6) by taking it to
the height of the tube hole as in fig.7.
• Take out the container (5) by pulling it out
of the appliance (fig.8)
• Pull the water filter cage (20) upwards and
then pull it out (fig. 9-10).
• Empty the container (5) and rinse it.
• Unhook the elbow tube locking ring (25)
by pulling it outwards (fig.11).
• Pull the elbow tube (26) from the filter
body (24) until it slips off (fig.12).
• Divide all the components as described in
the key and then rinse them under running
water (if the sponge filter is damaged, re-
place it by contacting a Polti Authorized
Service Centre)
• Before putting the sponge filters (22-23)
back, wring them by using a cloth so as to
dry them perfectly.
• Reassemble the water filter group (20) by
repeating the operation in reverse order.
NOTE: before reassembling the water filter,
make sure that all the parts have been
properly dried.
• Put the filter group (20) back into the con-
tainer (5) so as to insert the elbow tube
(26) between the two projections of the
container (fig.13).
• Gently push the water container handle (6)
until the two slots on the handle fit with the
two pins (4) on the appliance (fig.14).
• Before storing the appliance or before
using it again, make a drying cycle as
described in the "Drying cycle" para-
graph.
• A cleaning brush (5-A) is supplied for easy
cleaning of the water container (5); it may
also be used to clean the appliance’s hose
connections and the inside of tools.
NOTE: Do not use the brush for cleaning the
outside of the appliance.
BB
BBII
IIOO
OOEE
EECC
CCOO
OOLL
LLOO
OOGG
GGII
IICC
CCOO
OO
Bioecologico is available for sanitising while
using the suction function. It is a scented an-
tibacterial product with natural-based anti-al-
lergenic substances. If it is added regularly
to the water in the water container (5) of Le-
cologico, it will prevent the proliferation of
bacteria and micro-organisms and inhibit the
action of allergens. In addition to assuring a
sanitising action, Biecologico will eliminate
smells due to the presence of dust in the wa-
ter, leaving a pleasant smell of cleanness in
the room.
Use:add 8 ml each time you fill the water-
container.
Bioecologico is sold by Polti dealers or by
our authorised Assistance Centres.
Bioecologico is available in the mountain
pine or citrus.
Lecologico Compact AS800 - AS801
42
lecologico as800-801 -1m01.qxp 21/04/2006 11.49 Pagina 42
DD
DDRR
RRYY
YYII
IINN
NNGG
GG
CC
CCYY
YYCC
CCLL
LLEE
EE
Warning: make the drying cycle with the
water container empty.
The drying cycle eliminates possible water
particles present in the filters and in the suc-
tion tubes of the container (5). The purpose
of this process is to avoid interventions of
the humidity sensor, which interrupts the op-
eration of the appliance.
The humidity sensor acts in protection of the
Hepa filter preventing humidity particles from
reaching it, damaging its function.
• Move the two air outlet filter grill opening
levers (18) at the same time by pushing
them towards the inside (fig.15) so as to
allow the air outlet filter grill (17) to un-
hook.
• Remove the Hepa filter (19) as described
in the "Cleaning or replacing the Hepa fil-
ter" paragraph.
• Remove the back sponge filter (19a).
• Connect the supply cable plug (27) to the
mains.
• The first stage of the suction power indica-
tor lights (13) on the handle will start to
flash.
• To reactivate the appliance, keep the
mains ON/OFF switch (11) pushed until
the machine reaches the maximum speed.
• The appliance will keep on working as
long as the humidity sensor feels the pres-
ence of water in the circuit.
• When the sensor no longer feels water in
the circuits of the appliance, it will auto-
matically go to the stand-by position and
the indicator lights (13) will start to flash.
• Put the Hepa filter (19) and the air outlet
filter grill (17) back in place.
• If you want to use the appliance again, fill
the water container (5) as indicated in the
"Preparation for use" paragraph, other-
wise store the appliance with the container
(5) empty.
HH
HHUU
UUMM
MMII
IIDD
DDII
IITT
TTYY
YYSS
SSEE
EENN
NNSS
SSOO
OORR
RR
• If the sensor measures some humidity, the
machine will stop and the 4 lights on the
indicator lights (13) will start to flash alter-
nately first to last and viceversa.
• To reactivate the appliance, keep the
mains ON/OFF switch (11) pushed until
the machine reaches the maximum speed.
• The appliance will keep on working as
long as the humidity sensor feels the pres-
ence of water in the circuit.
• When the sensor no longer feels water in
the circuits of the appliance, it will auto-
matically go to the stand-by position and
the indicator light (13) will start to flash.
• Reassemble the Hepa filter (19) and the
air outlet filter grill (17), inserting first the
two pins (18a) into the locking holes (18b)
(fig.16).
Warning: make the drying cycle with the
water container empty.
UU
UUSS
SSII
IINN
NNGG
GG
TT
TTOO
OOOO
OOLL
LLSS
SS
Tools may be connected directly to the hose
(D) or to the telescopic tube (A).
Using the telescopic tube (A)
The tube is about 60 cm long when closed, 1
m when extended to its greatest length. To
increase or decrease length, press the catch
positioned as shown in fig. 6 and extend or
reduce length as desired.
Using the joker brush (M)*
The Joker brush may be used to vacuum up
solids or a limited amount of liquids on any
kind of surface.
Using the parquet accessory (N)*
Position the Joker brush (M) on the parquet
accessory (N) as shown in figure 17. Apply
the tool to the brush, following the direction
of the arrow so that it is aligned properly and
they connect together.
To release the parquet accessory from the
Joker brush, pull the two levers on the sides
of the frame outward and lift the brush
(fig.18).
* (optional for mod. AS800)
Using the universal brush (B)
Connect the brush to the telescopic tube. If
you move the selector on the brush (B1)
Lecologico Compact AS800 - AS801
43
lecologico as800-801 -1m01.qxp 21/04/2006 11.49 Pagina 43
pressing with a foot, you can change the
suctioning surface without bending down.
The position with bristles extended is recom-
mended for all non-carpeted floors.
The position without bristles is recom-
mended for carpets.
Multipurpose nozzle (F)
The multipurpose nozzle is recommended
for cleaning upholstery surfaces such as the
joints of sofas, armchairs, mattresses, car
upholstery, etc.
Lance for cleaning corners (G)
The lance (G) is recommended for thorough
vacuum cleaning of hard-to-reach spots
such as skirting boards and folds in sofas,
armchairs, upholstered furniture and car up-
holstery.
Soft brush (H)
The soft brush has soft bristles for dusting
delicate surfaces such as picture frames,
books, etc.
Using the accessories holder (I) and the
accessories holder place (16)
The accessories holder may be used to
fasten tools onto the body of the appliance
or the handle.
Installation on the handle:
Hook one of the accessories holder rings to
the handle. Insert the tools you want to keep
handy in the rings (fig.19).
Installation on the appliance body:
Slide the accessories holder guide into the
groove on the back of the appliance as
shown in figure 20, proceeding to anchor the
tools as described above. You may perform
the same operation to store the universal
brush (B) with the telescopic tube (A) at-
tached to it.
AA
AAUU
UUTT
TTOO
OOMM
MMAA
AATT
TTII
IICC
CC
CC
CCAA
AABB
BBLL
LLEE
EE
WW
WWII
IINN
NNDD
DDEE
EERR
RR
Before putting the vacuum cleaner away,
rewind the power cable by pressing the but-
ton (15), as shown in fig.21, being careful to
accompany it during winding.
GG
GGEE
EENN
NNEE
EERR
RRAA
AALL
LLMM
MMAA
AAII
IINN
NNTT
TTEE
EENN
NNAA
AANN
NNCC
CCEE
EE
Always make sure the appliance is un-
plugged before performing maintenance
work of any kind.
Cleaning the “EcoActive-Filter” water fil-
ter cage (20) and sponge filters (22-23).
We recommend that you clean after every
use.
• Switch off the appliance by the mains
ON/OFF switch (11). Disconnect the
power supply cable from the mains.
• Push the upper cover opening button (8).
• Lift the cover (7) by turning it upwards as
in fig.1.
• Lift the container handle (6) by taking it to
the height of the tube hole as indicated in
fig.7.
• Remove the container (5) by pulling it out
of the appliance (fig.8).
• Pull upwards the water filter group (20)
and then pull it out (fig.9-10).
• Empty the water container (5) and rinse it.
• Unhook the elbow tube locking ring (25)
by pulling it towards the outside (fig.11).
• Pull the elbow tube (26) from the mi-
crospore sponge filter body (24) until it
slips off (fig.12).
• Divide all the components as described in
the key and then rinse them under running
water (if the sponge filter is damaged, re-
place it contacting a Polti Authorized Ser-
vice Centre).
• Before putting the sponge filters (22-23)
back, wring them by using a cloth so as to
dry them perfectly.
• Reassemble the water filter group (20).
NOTE: before reassembling the water fil-
ter, make sure that all parts have been
properly dried.
• Put the filter group (20) back into the con-
tainer (5) so as to insert the elbow tube
(26) between the two projections of the
container (fig.13).
• A cleaning brush (5-A) is supplied for easy
cleaning of the water container (5); it may
also be used to clean the appliance’s hose
connections and the inside of tools.
Lecologico Compact AS800 - AS801
44
lecologico as800-801 -1m01.qxp 21/04/2006 11.49 Pagina 44
NOTE: Do not use the brush for cleaning the
outside of the appliance
Cleaning or replacing the Hepa filter
• Move the two air outlet filter grill opening
levers (18) at the same time by pulling
them towards the inside so as to allow the
air outlet filter grill (17) to unhook (fig.15).
• Remove the HEPA filter (19) from its loca-
tion, tap it and, if necessary, replace it with
an original Polti spare part.
• Reassemble the Hepa filter (19) and the
air outlet filter grill (17), inserting first the
two pins (18a) into the locking holes (18b)
(fig.16).
NOTE: the filter lasts about 100 hours
(about 6 months) in normal domestic use.
If the suction power noticeably decreases,
replace the filter even before the 100 hours.
EE
EELL
LLEE
EECC
CCTT
TTRR
RRII
IICC
CCAA
AALL
LLSS
SSAA
AAFF
FFEE
EETT
TTYY
YY
No earth required.
Ensure the mains voltage suits your appli-
ance.
Fitting the mains plug important
The wires in the mains lead are coloured in
accordance with the following code:
• Blue: Neutral
• Brown: Live
The wire which is coloured BLUE must be
connected to the Terminal which is marked
with the letter “N” or coloured BLACK.
The wire which is coloured BROWN must be
connected to the Terminal which is marked
with the letter “L” or coloured RED.
It is important that the outer sheath is
clamped correctly into the 3-pin plug.
If in doubt consult your local Service Dealer
or qualified electrician before the machine is
used.
A 13 AMP FUSE MUST BE FITTED TO THE
MAINS
PLUG.
Lecologico Compact AS800 - AS801
45
lecologico as800-801 -1m01.qxp 21/04/2006 11.49 Pagina 45
Lecologico Compact AS800 - AS801
46
TT
TTRR
RROO
OOUU
UUBB
BBLL
LLEE
EESS
SSHH
HHOO
OOOO
OOTT
TTII
IINN
NNGG
GG
TROUBLE CAUSE SOLUTION
The suction switches off during
use and the 4 indicator lights
flash alternately.
The suction hose or the elbow
tube are obstructed.
The suction power is too high
for the type of surface.
Take out any obstructions in the
tubes.
Keep the mains ON/OFF switch
pushed until the 4 indicator
lights go back to constant light
from flashing, taking the suction
power to the speed previously
set.
The suction switches off during
use and the 4 indicator lights
flash simultaneously.
Intervention of the humidity
sensor because the filters and
tubes are not dry enough.
Intervention of the humidity
sensor because of too much
water in the container.
Intervention of the humidity
sensor for accidental anom-
alous movement of the appli-
ance during use.
Operate as described in the
"Drying cycle" paragraph.
Empty the container and oper-
ate as described in the "Drying
cycle" paragraph. Fill the con-
tainer again by using the jug
supplied.
Empty the container and pro-
ceed as described in the"Drying
cycle" paragraph.
The drying cycle lasts more
than 3 minutes.
The humidity sensor does not
work correctly.
Contact the nearest Polti autho-
rised After-sales centre
lecologico as800-801 -1m01.qxp 21/04/2006 11.49 Pagina 46
NOTE
47
lecologico as800-801 -1m01.qxp 21/04/2006 11.49 Pagina 47

Other POLTI Vacuum Cleaner manuals

POLTI Vaporetto FOCUS User manual

POLTI

POLTI Vaporetto FOCUS User manual

POLTI FORZASPIRA C150 User manual

POLTI

POLTI FORZASPIRA C150 User manual

POLTI vaporetto smart 35 User manual

POLTI

POLTI vaporetto smart 35 User manual

POLTI FORZASPIRA C 110 User manual

POLTI

POLTI FORZASPIRA C 110 User manual

POLTI Vaporetto SMART 100 B User manual

POLTI

POLTI Vaporetto SMART 100 B User manual

POLTI SE110 User manual

POLTI

POLTI SE110 User manual

POLTI FORZASPIRA D-POWER SR550 User manual

POLTI

POLTI FORZASPIRA D-POWER SR550 User manual

POLTI VT HANDY 15 User manual

POLTI

POLTI VT HANDY 15 User manual

POLTI unico MCV80 total clean & turbo User manual

POLTI

POLTI unico MCV80 total clean & turbo User manual

POLTI EcoSteamVac Dual User manual

POLTI

POLTI EcoSteamVac Dual User manual

POLTI Forzaspira LECOLOGICO ALLERGY TURBO User manual

POLTI

POLTI Forzaspira LECOLOGICO ALLERGY TURBO User manual

POLTI VAPORETTO POCKET User manual

POLTI

POLTI VAPORETTO POCKET User manual

POLTI VAPORETTO COMFORT User manual

POLTI

POLTI VAPORETTO COMFORT User manual

POLTI FORZASPIRA C 115 PLUS User manual

POLTI

POLTI FORZASPIRA C 115 PLUS User manual

POLTI Vaporetto Lecoaspira FAV 80 TURBO... User manual

POLTI

POLTI Vaporetto Lecoaspira FAV 80 TURBO... User manual

POLTI Vaporetto SMART 45 User manual

POLTI

POLTI Vaporetto SMART 45 User manual

POLTI Vaporetto SV205 User manual

POLTI

POLTI Vaporetto SV205 User manual

POLTI Forzaspira User manual

POLTI

POLTI Forzaspira User manual

POLTI VAPORETTO COMFORT User manual

POLTI

POLTI VAPORETTO COMFORT User manual

POLTI LECOLOGICO AS 805 User manual

POLTI

POLTI LECOLOGICO AS 805 User manual

POLTI ASPIRA AS404 Parts list manual

POLTI

POLTI ASPIRA AS404 Parts list manual

POLTI Vaporetto SMART 100_B User manual

POLTI

POLTI Vaporetto SMART 100_B User manual

POLTI Forzaspira Slim SR110 User manual

POLTI

POLTI Forzaspira Slim SR110 User manual

POLTI unico MCV85 total clean & turbo User manual

POLTI

POLTI unico MCV85 total clean & turbo User manual

Popular Vacuum Cleaner manuals by other brands

Xiaomi G11 quick start guide

Xiaomi

Xiaomi G11 quick start guide

SEVERIN AH 7910 - ASPIRATEUR SANS FIL Instructions for use

SEVERIN

SEVERIN AH 7910 - ASPIRATEUR SANS FIL Instructions for use

Nilfisk-Advance Nilfisk GD 2000 Specifications

Nilfisk-Advance

Nilfisk-Advance Nilfisk GD 2000 Specifications

Rowenta MINI SPACE RO1823R1 manual

Rowenta

Rowenta MINI SPACE RO1823R1 manual

Zelmer Clarris Twix 2750 user manual

Zelmer

Zelmer Clarris Twix 2750 user manual

Piranha APACHE JCV-5001 instruction manual

Piranha

Piranha APACHE JCV-5001 instruction manual

Bissell CROSSWAVE 3279 Series manual

Bissell

Bissell CROSSWAVE 3279 Series manual

Eureka AS1050 Series quick start guide

Eureka

Eureka AS1050 Series quick start guide

Eureka Optima 430 Series quick start guide

Eureka

Eureka Optima 430 Series quick start guide

Morphy Richards IB70041 instructions

Morphy Richards

Morphy Richards IB70041 instructions

hecht 8330 Instructions for use

hecht

hecht 8330 Instructions for use

Vax W87-DV series user guide

Vax

Vax W87-DV series user guide

COOLFORT CF-3040 instruction manual

COOLFORT

COOLFORT CF-3040 instruction manual

Samsung VCJG Series user manual

Samsung

Samsung VCJG Series user manual

Rasonic RVC-B51/W Operation manual

Rasonic

Rasonic RVC-B51/W Operation manual

Hilti VC 150-6 X manual

Hilti

Hilti VC 150-6 X manual

Atrix Omega Supreme Plus Forensic Series instruction manual

Atrix

Atrix Omega Supreme Plus Forensic Series instruction manual

YATO YT-85720 Original instructions

YATO

YATO YT-85720 Original instructions

manuals.online logo
manuals.online logoBrands
  • About & Mission
  • Contact us
  • Privacy Policy
  • Terms and Conditions

Copyright 2025 Manuals.Online. All Rights Reserved.