READ AND KEEP THESE INSTRUCTIONS FOR FUTURE REFERENCE
FAILURE TO FOLLOW THESE WARNINGS AND INSTRUCTIONS CAN RESULT IN SERIOUS INJURY OR DEATH TO USERS, ESPECIALLY CHILDREN.
WARNING
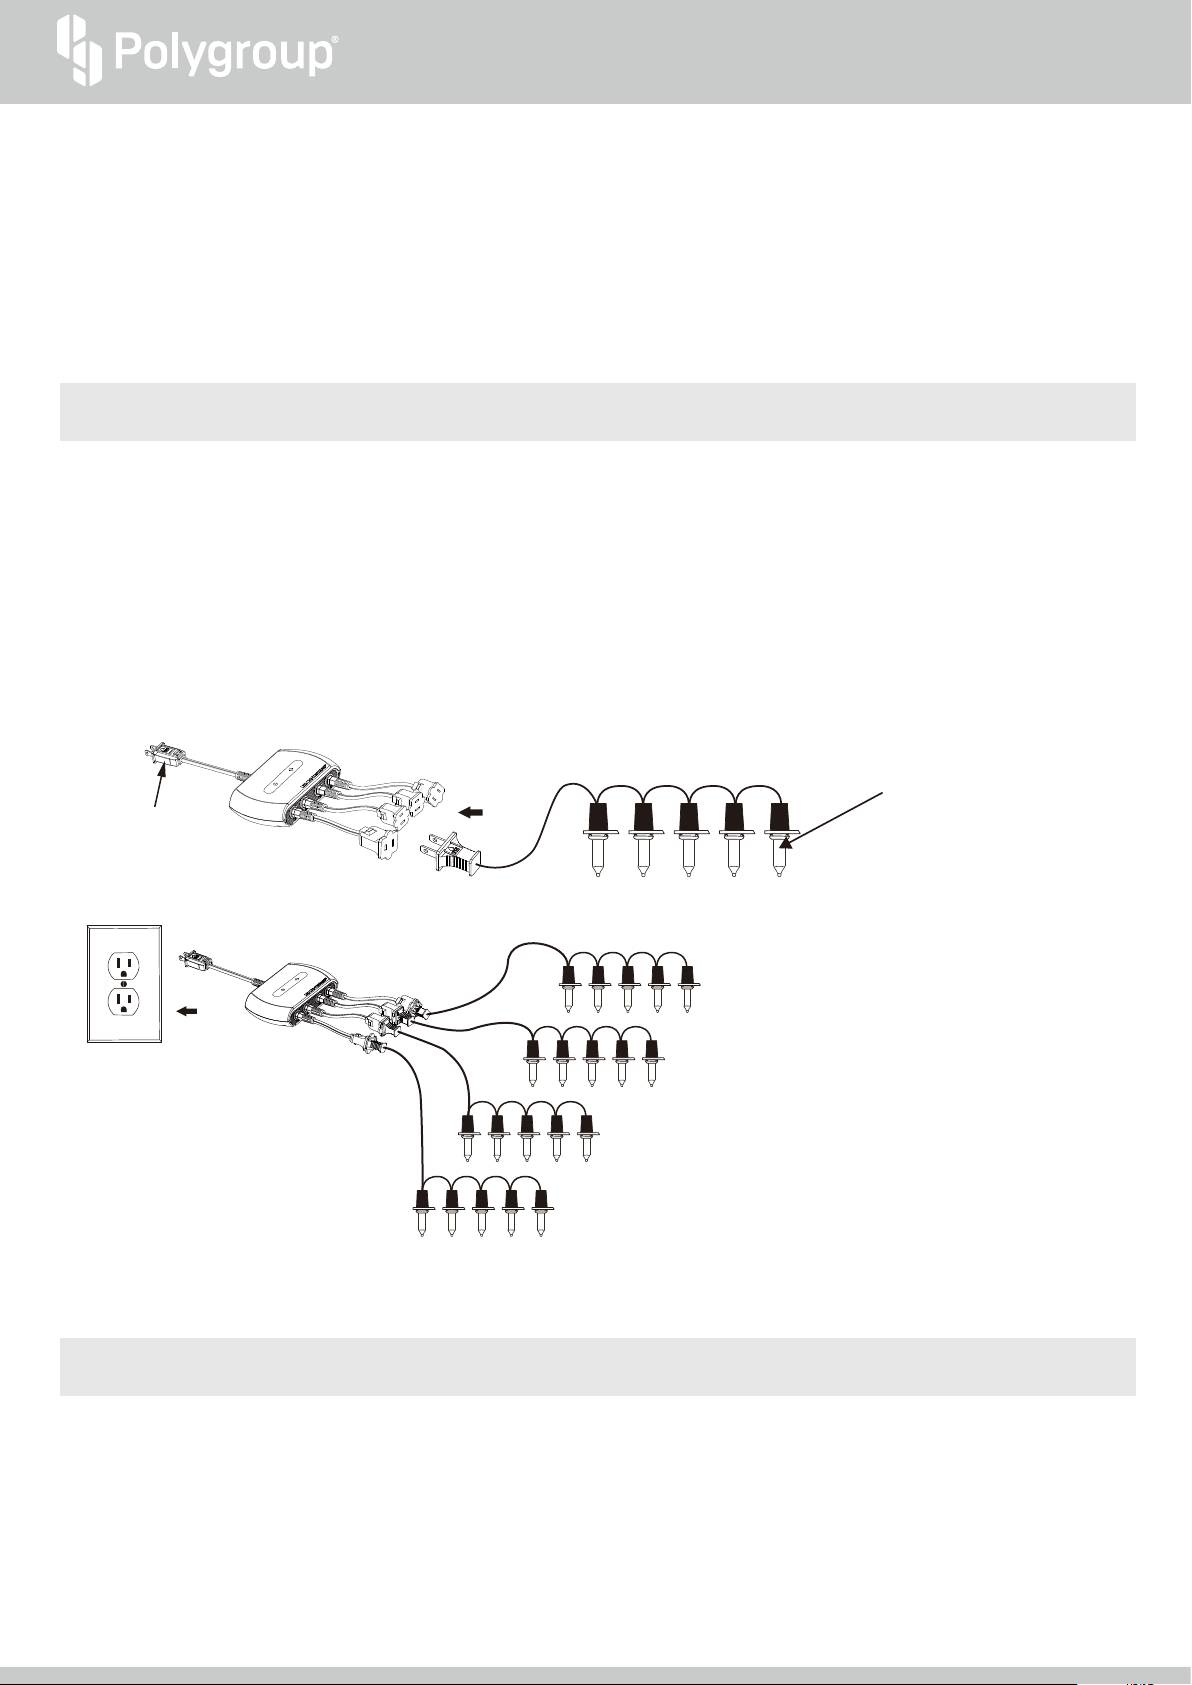
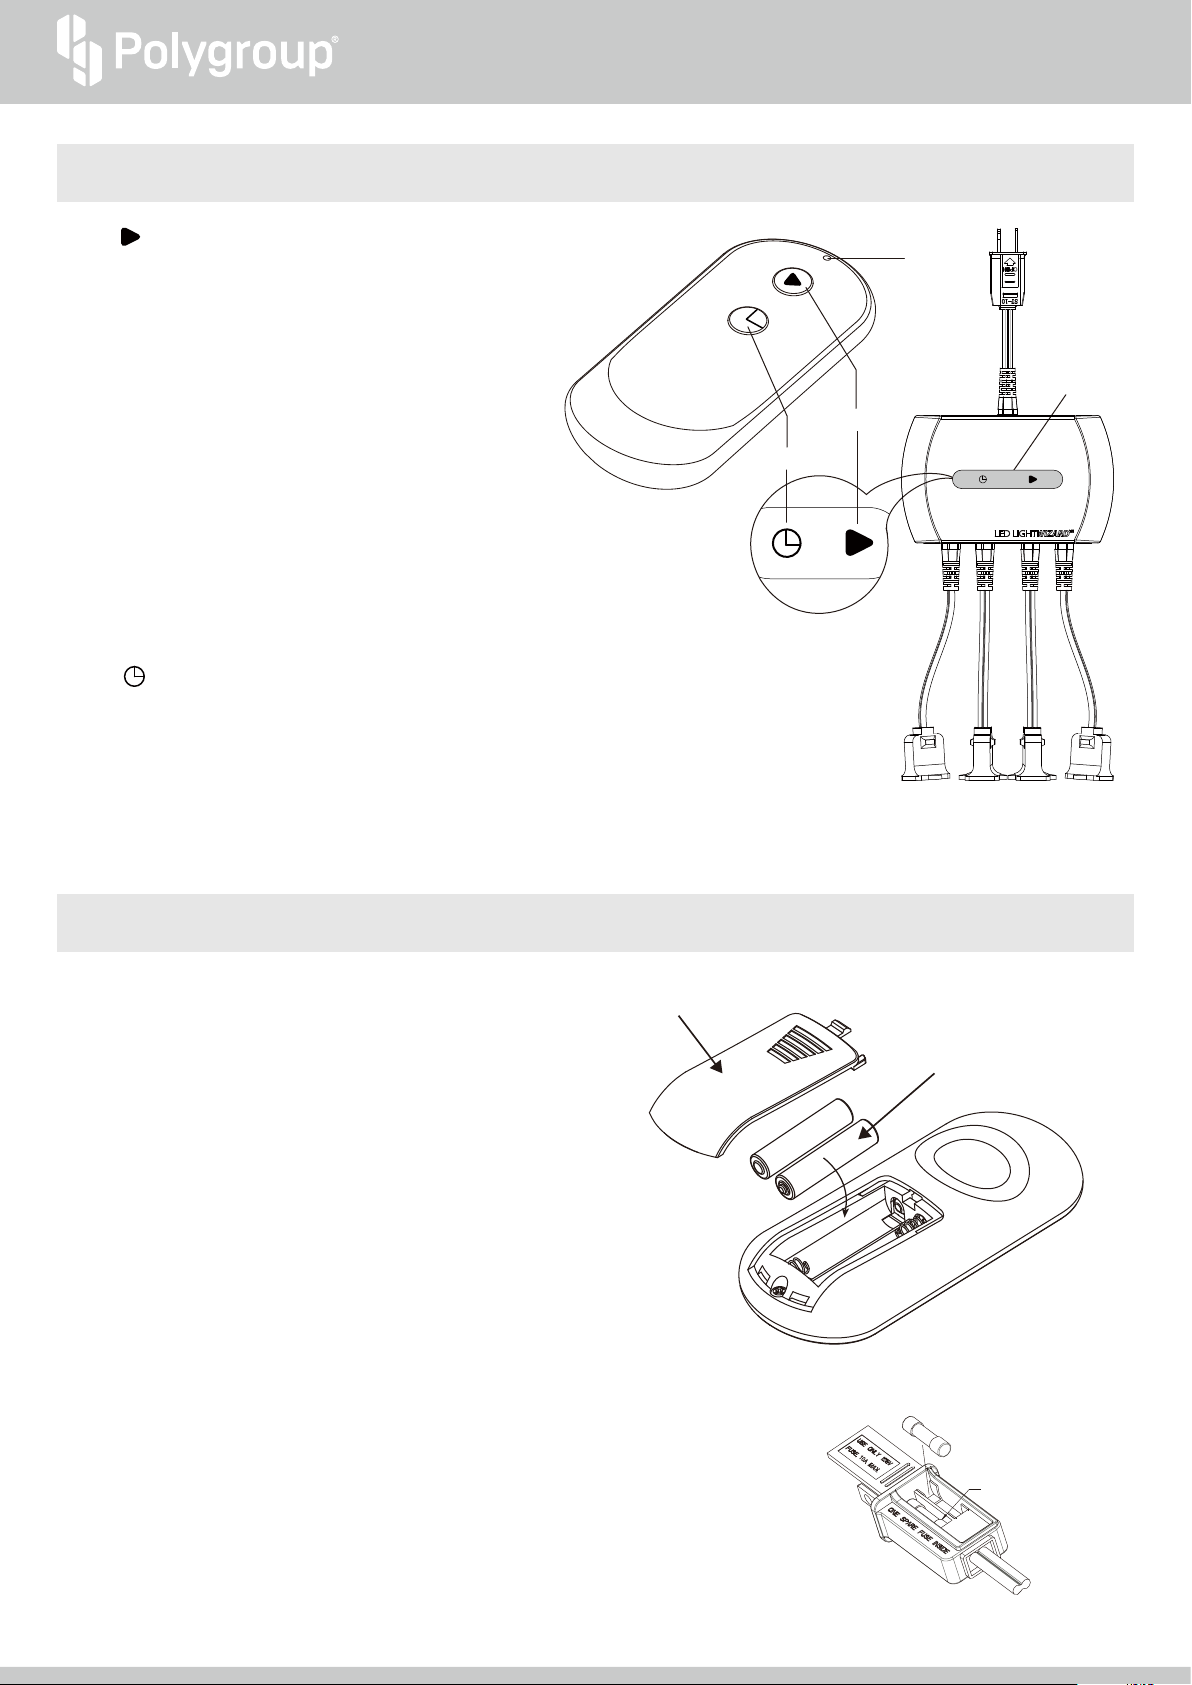
ILLUMINATIONS™
LED LIGHTWIZARD™
WARRANTY
Thank you for your purchase of Polygroup®products! We do hope that you are happy with what you received, but we know sometimes it’s necessary
to exchange or return an item. Therefore, Polygroup®offers a 30-day limited warranty on this product*.
We are happy to repair your defective item or replace it with an item that is equal to the purchase price of the item, given that:
●You are the original purchaser for products purchased directly from an authorized retailer or wholesaler of Polygroup®products;
●The item was purchased within the last 30 days;
●The item was purchased during its intended season;
●Proof of purchase can be provided, and
●The item is in its original packaging.
If
you
meet
these
requirements,
please
contact
us
at
(email)
[email protected] or
(phone)
1-888-919-0070 so
that
we
may
forward
you
a
quality assurance form.
* Note: Warranty is not extended to items that are purchased from seasonal stores as they generally sell items with an "all sales final" policy.
Warranty is also not extended to close-out, second quality, or resold products (i.e. garage sales, online auctions, or online retailers not purchased
directly from Polygroup®). Any issues with items purchased from these types of vendors/sellers will need to be addressed through them.
IMPORTANT SAFETY INSTRUCTIONS
When using electrical products, basic precautions should always be followed including the following:
READ AND FOLLOW ALL SAFETY INSTRUCTIONS.
1. Do not use seasonal products outdoors unless marked suitable for indoor and outdoor use. When used outdoors, this product must be connected
to a Ground Fault Circuit Interrupting (GFCI) outlet. If one is not provided, contact a qualified electrician for proper installation.
2. This seasonal use product is not intended for permanent installation or use.
3. Do not mount or place near gas or electric heaters, fireplace, candles or other similar source of heat.
4. Do not secure the wiring of the product with staples or nails, or place on sharp hooks or nails.
5. Do not let lamps rest on the supply cord or on any wire.
6. Disconnect the product from power source when leaving the house, when retiring for the night, or if left unattended.
7. This is an electric product - not a toy! To avoid risk of fire, burns, personal injury and electric shock, it should not be played or placed where small
children can reach it.
8. Do not use this product for other than its intended use.
9. Do not hang ornaments or other objects from cord, wire, or light string.
10. Do not close doors or windows on the product or extension cords as this may damage the wire insulation.
11. Do not cover the product with cloth, paper or any materials not part of the product when in use.
12. This product can be used by children ages 8 years and above, and people with reduced physical, sensory or mental capabilities, if they have been
given the right supervision or instructions concerning the use of the product in a safe way and understand the hazards involved. Children should
not play with the product. Cleaning and user maintenance should not be made by children without supervision.
13. Risk of fire: the supply cord, adapter, plugs and/or connectors cannot be replaced or modified. If either is damaged, the product should be disposed.
14. Strobe lights have been known to trigger seizures in people with photosensitive epilepsy.
15. Read and follow all instructions that are on the product or provided with the product.
SAVE THESE INSTRUCTIONS.
OWNER′S MANUAL
1
DISTRIBUTED BY: Polygroup®Trading Limited
Unit 606, 6/F, Fairmont House, 8 Cotton Tree Drive, Central, Hong Kong.