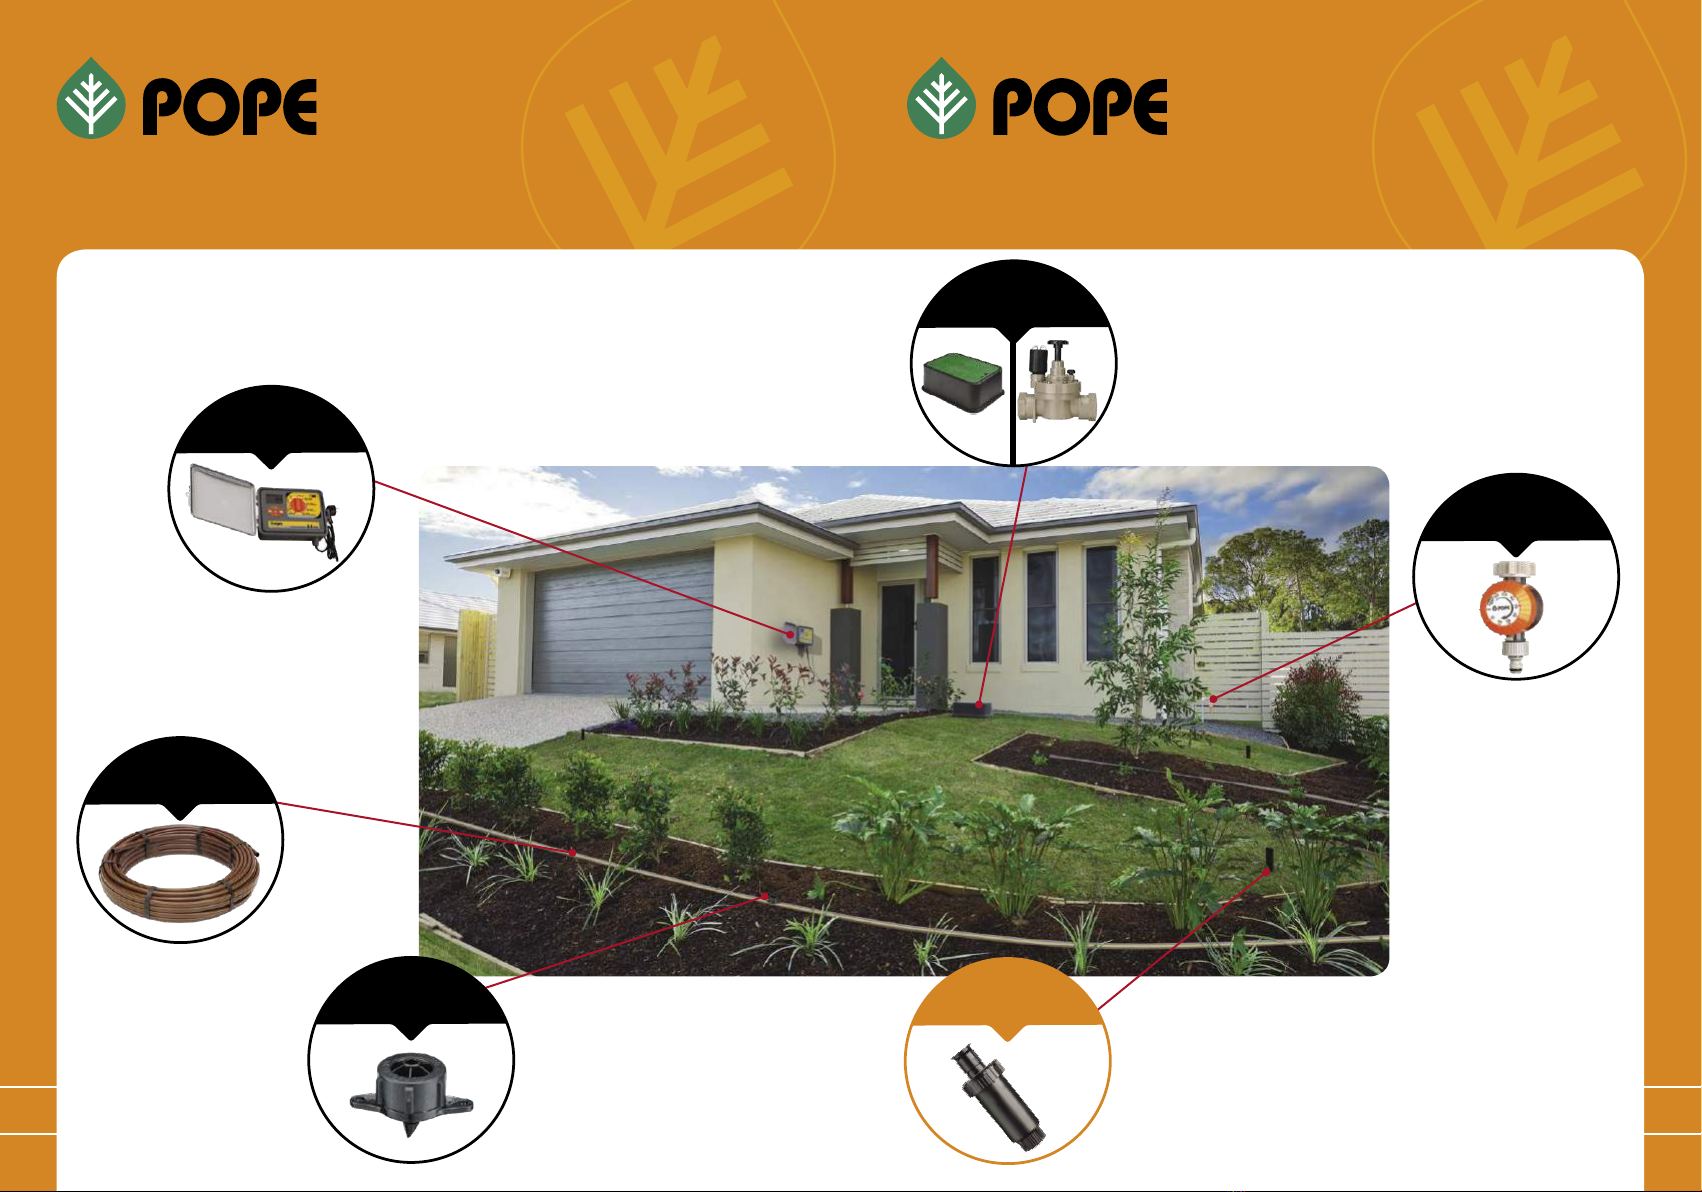
INSTALLATION OF LAWN POP-UP SYSTEMS
INSTALLATION OF LAWN POP-UP SYSTEMS
13 14
Tap nuts have a thread to
meet the input device and then
the tail has a barbed adaptor
to run into your system.
Secure the barb connection
with a locking clamp.
Directors have a threaded end
to attach to solenoid valves.
The barbed end (tail) then
connects to your system. These
come in multiple configurations
to suit your valve size but also
the size of your poly tube.
Depending on your source
connection, you will then
choose how to connect to the
rest of the system.
These ttings are used to connect
from your source into the start of
your irrigation system. For pop-up
systems, it is recommended
to use Loc-Sure® clamps. You
will need to use these for each
connection in the rest of your
irrigation system.
You should then consider how you will
protect your system from pressure,
ingress or leaks. You should consider
using a combination of all 3 protection
devices for your irrigation system.
345
SOURCE TO
SYSTEM FITTINGS SYSTEM PROTECTION
Loc-Sure®clamps ensure a
long lasting connection for
use when products are buried
under ground. As a general
rule, metal clamps under
ground, plastic clamps
above ground.
Poly pipe is used throughout
your irrigation system as the
connector between devices.
Tap nuts have a thread to meet
the input device and then the
tail has a barbed adaptor to run
into your system. Secure the
barb connection with a locking
clamp. These can also be used
in the middle of a system to
connect to filters or pressure
reducers.
A pressure reducer is used to limit the
amount of pressure that the system
receives. This helps with fittings blowing
out, poly tube breaking or emission
devices from misting or not performing
as specified. Every irrigation should
try to add a pressure reducer to ensure
long life and correct performance.
Filters are used to stop dirt and particles
from clogging the emission devices in
your system. If you are having problems
with pop-ups not rising or drippers not
dripping, it could be clogged with debris.
Inline taps are an easy way to add
emergency control to your irrigation
system. They can be added with locking
or Loc-Sure®clamps at any point in the
system before the pop-up sprinklers.
Threaded fittings are used to connect to
threaded watering devices. The thread type
will depend on what your output device
uses. Threaded fittings come as tees and
elbows to suit your system design.
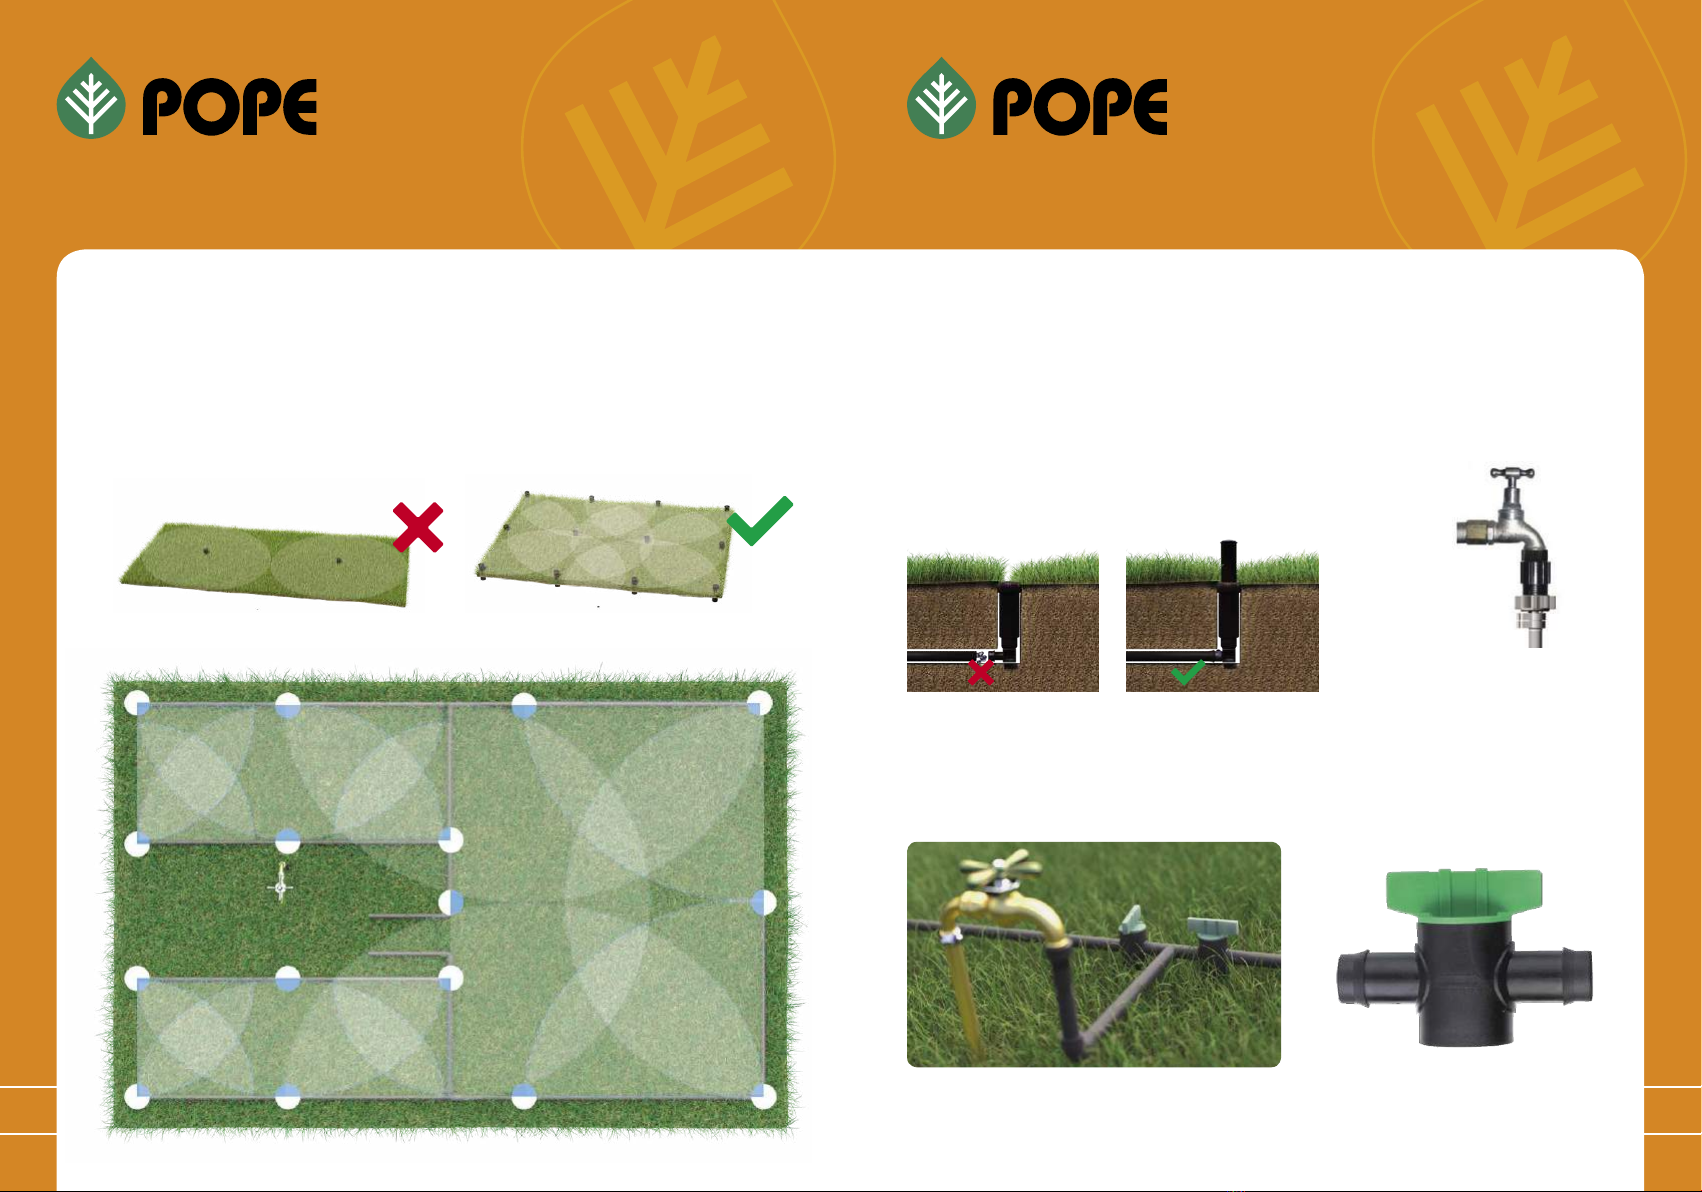
You will then need a collection of ttings
and pipes to layout and connect your
system. Choose from a variety of ttings
to direct water where it is required.
6
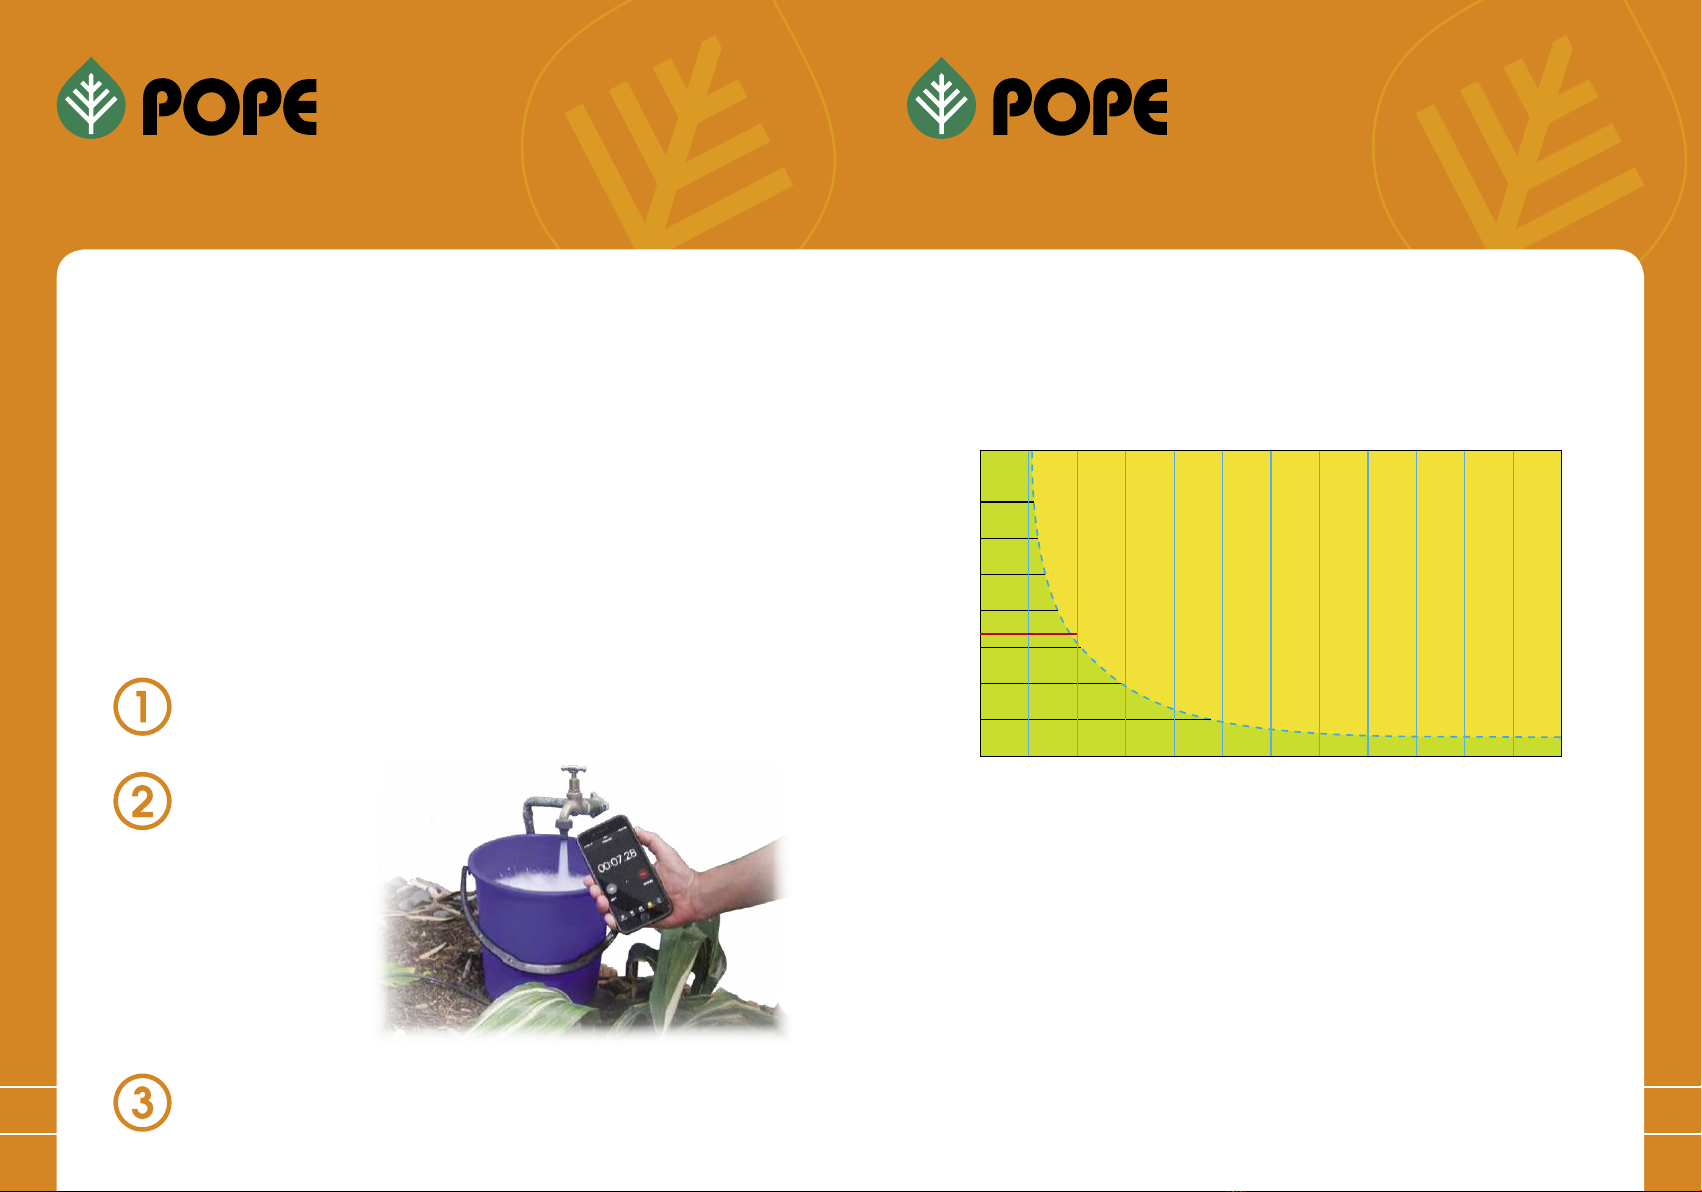
At this stage, you need to
decide what water source you
will be running your irrigation
system from.
WATER SOURCE
1
Taps have different outlet sizes
from 15mm to 25mm.
The water meter or water source
is installed by your local council
on your property. You may need
to consult a qualified plumber or
irrigation installer if you want to
connect to this source.
Next, you need to choose how
or if you will automate your
irrigation system. You can
use either a tap timer, or a
solenoid valve connected to a
controller. Please see the
‘Automating Your System’
guide for more information.
2
SOURCE
CONNECTION
SYSTEM
CONNECTION
A tap timer is an alternative
to a full automatic system. It
will allow you to run separate
programs and start times.
Tap timers have limited flow
compared to a 25mm solenoid
valve which means you may
need to run more zones. You
may also have less control
over watering times than a full
auto system.
Solenoids act like gates that
control the flow of water into your
system. A coil magnetises and
pulls open a rubber diaphragm
letting water pass through.
25mm solenoid valves should
be used when considering
pop-ups or other systems that
require a large amount of
water flow.
LAYOUT FITTINGS
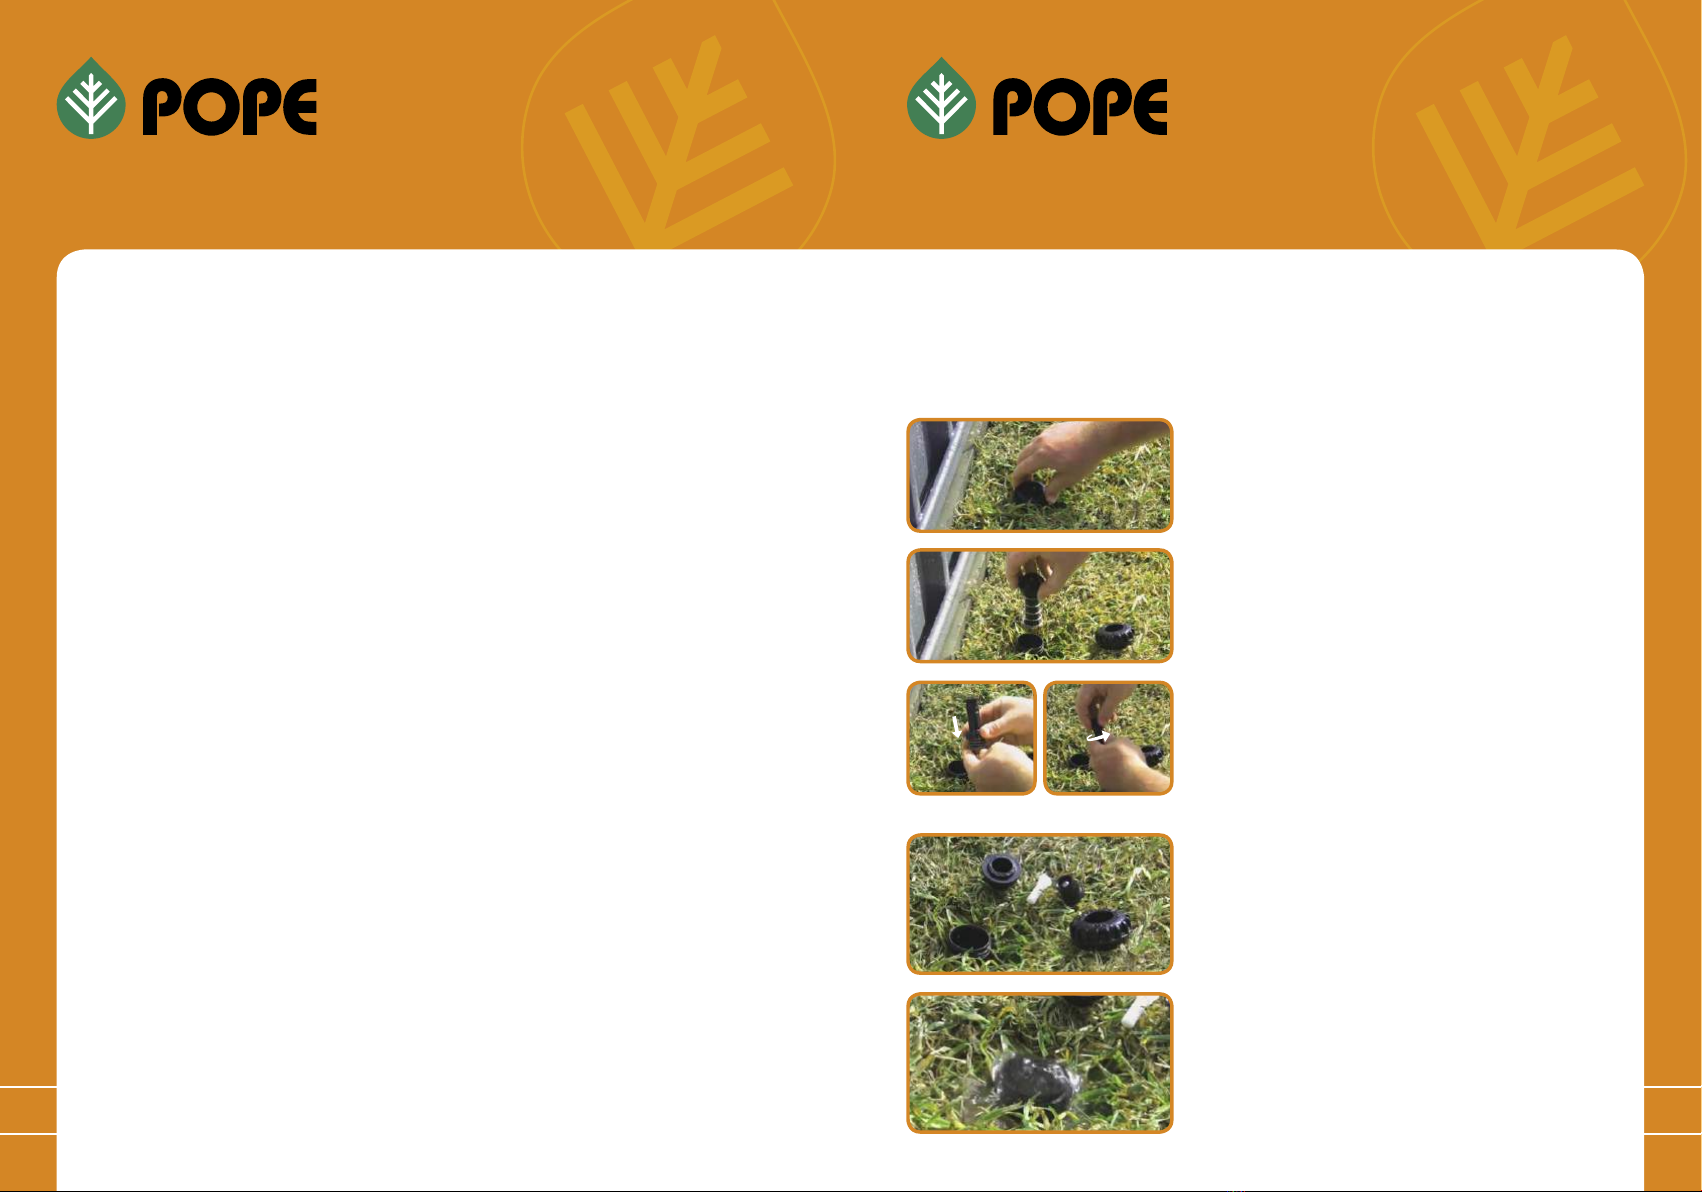
Your nal step is to choose an emission
device (sprinkler). Your sprinkler choice
will depend on the pattern or spray type
that you require.
7
EMISSION DEVICES
Thread tape is used around
thread connections to add
an extra membrane of leak
prevention. You will need to
do multiple wraps to get a
tight fit. Do not over-tighten.
Overall Pop-up System
CHOOSE FROM THE FOLLOWING