manuals.online logo
Brands
  1. Home
  2. •
  3. Brands
  4. •
  5. Porsche
  6. •
  7. Automobile
  8. •
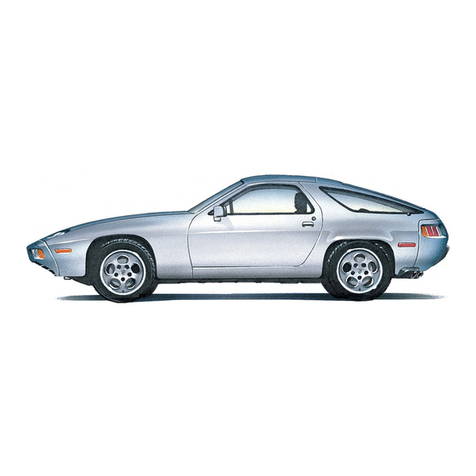
  9. Porsche 928 1979 User manual

Porsche 928 1979 User manual

4683.21 2.2 M 5/78 Model 1979
© Dr. Ing. h. c. F. Porsche
Aktiengesellschaf
t
Al
l
right
s reserved.
Printed in Germany U.S.-Order-No. W 42-608-174-1
Canada-Order-No. W
42-608-174-101
Your car may have
al
l or some of the components
described in
thi
s manual.
Shoul
d you
fin
d explana•
tions of a feature or equipment not
installe
d in your
car, your Porsche dealer
wil
l be
gla
d to assist
you
.
Also check
wit
h your dealer on other
availabl
e op•
tions or
equipment
.
NOTE TO
OWNER
S
In Canada, this manual is also
availabl
e in French.
Volkswage
n Canada Ltd.
To obtain a copy contact your dealer or
writ
e
to
: Porsche Customer
Assistance
/
Assistance a 1a
Clientel
e Porsche
NOTE AUX PROPRIETAIRES
192
0 E g l i n t o n A v e . E a s t
Au Canada on peut se procurer un
exemplair
e de ce Scarborough
Manuel en francais aupres au
conccscionnair
e ou du:
Ontari
o M1L 2M2
Text,
illustration
s and
specification
s in
thi
s manual
are based on the information
availabl
e at the time
of
printing
.
It has always been Porsche's
polic
y to
continuousl
y
make technical improvements at any
tim
e during the
model year and
specification
s are subject to change
without
notice
.
Judging by the car
yo
u have chosen,
you are a
motoris
t of a special
breed, and
yo
u are
probabl
y no nov•
ice
whe
n it
come
s to
automobiles
.
You
r Owner's Manual
contain
s a
host of useful
information
. Please
read this manual
befor
e
yo
u
driv
e
your new Porsche.
Acquain
t
your
•
self
wit
h
you
r
car'
s
feature
s and
know
ho
w to
operat
e
you
r Porsche
more safely. The better
yo
u
kno
w
your Porsche, the more pleasure
you
wil
l
experienc
e
drivin
g
you
r
new car.
Alway
s
carr
y
you
r Warranty & Main•
tenance
bookle
t
wit
h
yo
u
whe
n
yo
u
take
you
r Porsche to an
authorize
d
dealer for
service
. It
provide
s
you
r
Service
Advise
r
wit
h the
informa
•
tion he needs and enables him to
record each
service
.
The Owner's Manual and the War•
ranty & Maintenance
recor
d
belon
g
with the car. They should be left in
the
vehicl
e
whe
n
sold
,
t
o make all
operating, safety and
maintenanc
e
service
informatio
n available
t
o the
new owner.
For your own protection and longer
service life of
you
r car, please heed
all
operatin
g
instruction
s and spe•
cial
cautions
.
Ignorin
g them
coul
d
result in
seriou
s mechanical failure
or even
physica
l injury.
-pads 41 E
-pedal 34 Electrical
syste
m
HAZAR
D
warnin
g
ligh
t
29
Headlight
s
63, 67, 68
60-6
8
Headligh
t
dimmer/flashe
r
19
-
syste
m
77
Emergenc
y
flashe
r
(HAZARD
)
2
9
Headligh
t
washe
r
lever/reservoi
r
... . 20,
5
1
-
warnin
g lights
23-2
5
Emergenc
y
servic
e
47
Headligh
t
switc
h
19
Brake-in-hint
s
41
Emergenc
y
startin
g
39, 69
Heater/ventilatio
n
control
s
30-3
2
Bulb
s -
replacin
g
63-6
7
Emergenc
y
towin
g
69
Highbeam/lowbea
m
lever/ligh
t
19,2
2
Buzzers
9,
14
Emission
contro
l
syste
m
71-7
3
Hoo
d release
36
Index
A
Acceleratio
n
kick-dow
n
Accelerator pedal
Adjusting
headlight
s
Ai
r
compresso
r
c
Capacitie
s
78
Engine -
compartmen
t
-
hoo
d release
-
numbe
r
46
36
6
0, 42, 48, 49,
78
74-7
8
Cassett
e radio
35
-oil 4
Catalyti
c
converte
r
53,
70-7
2
-
specification
s
Caution
s
Cente
r
consol
e
Centra
l
doo
r
lockin
g
46
17
11
F
Centra
l
warnin
g light
syste
m
2
5
Fan -
radiato
r
23
39
Changin
g a
whee
l
58-5
9
Fan
switc
h
31
39
Chassi
s
numbe
r
6
Filling
capacitie
s
78
67
Cigarett
e
lighte
r
29
Flasher -
emergenc
y
29
57
Cleanin
g
44, 45
Fog lights
26, 64, 67
Ai
r
conditionin
g
30-3
2
Clutc
h
37
Fuel -
econom
y
40
Ai
r
cleane
r
55
Collapsibl
e
spar
e
tir
e
57
-
fille
r
ca
p
54
Alternato
r
warnin
g
ligh
t
24
Coolan
t
temperatur
e
gaug
e
2
3
-
gaug
e
23
Antenn
a
35
Coolin
g
syste
m
51
, 52, 79
-
recommendation
s
43, 54
Antifreez
e
42,
51
, 79
Corrosio
n
preventio
n
4
2
-tank
54, 78
Anti-thef
t alarm
10
Fuse panel
62
Ashtrays/light
s
29, 66
Fuses and relays
61
Automati
c
garag
e
doo
r
41
Automati
c
spee
d
contro
l
Automati
c
transmissio
n
21
38,
39
D
G
Automati
c
transmissio
n
f
lu
i
d (ATF) 50
Dashboar
d
17
Gas
statio
n
informatio
n
84-8
7
Defogging/defrostin
g
17,26,27,30-3
2
Gasolin
e -
octan
e
rating
s
43, 54, 74
Dimension
s
79
Gear
ratio
s
75
Directiona
l
signal
s
19, 22
Gearshiftin
g
37
B
Door
s locks
9-11
,
4
3
Glov
e
boxe
s
9, 28, 29
Drivin
g hints
8
Batter
y
42, 60
Brak
e -
booste
r
34
H
-
flui
d
53
-
parkin
g 34, 39
4
w
Warning/indicato
r lights
22-2
5
Washe
r
syste
m
20,
51
,
5
5
Weight
s
76
Wheel
s
42, 56, 76
Whee
l changing
58, 59
Windo
w
switche
s
11,1
7
Windshiel
d
washe
r
reservoi
r
51
Windshield/wipe
r
washe
r lever
20
Winte
r
operatio
n
32, 42, 43
l/J
Identificatio
n plates 6
Ignition/steerin
g lock 14
Instrument
cluste
r 12, 18
Instrument
illuminatio
n 18, 19
Intensive
windshiel
d
washer
/
switch/reservoi
r 20, 55
Interior lights
11
, 60
Intermittent
wipe
r
interva
l
20
Jack
47
Jack lifting
point
s
58, 59
K/L
Key
s 9, 10
Kickdow
n -
acceleratio
n 39
Lane changer 19
Lights -
ashtray
s 66
-
fo
g 26, 64, 67
-
interio
r
11
, 65
-license plate 65
-
parkin
g 19, 64
-switch 19
-tail 66
-turn signal 22, 64, 65
-
vanit
y
mirro
r 28
-
warning/indicato
r
22-2
5
Locks
9-14,4
3
Loudspeake
r balance
contro
l 34
Luggage
compartmen
t 12, 36
M/O
Maintenanc
e 47
Manual
transmissio
n 37, 81
Mechanical fan 23
Mirror
s 27, 28
Octan
e
rating
s 43, 54, 74, 78
Odomete
r 26
Oi
l
changing/checkin
g 48, 49
-
filte
r 49
-
grade
s 43, 78
-
pressur
e
gauge/warnin
g
light
s . . 24
-
transmissio
n 50
P
Paint
numbe
r 7
Parking
brak
e lever 34
Parking
lights/leve
r 19, 64
Performanc
e 77
Polishin
g 44, 45
Power antenna 35
Powe
r
steerin
g
flui
d 55
Power
window
s
10,1
7
Pressur
e -
tire
s 56, 76
R
Radiato
r fan 23, 46, 51
Radio 35
Rear seats 12
Rear
windo
w
defogger/defroste
r 26
Rear
windo
w
wipe
r
switc
h 26
Rear
vie
w
mirror
s 27
s
Saf
e
drivin
g hints 7, 8
Safet
y
belt
s 15, 16
Safet
y
bel
t
warnin
g light 29
Seats
,
front/rear/electri
c 12, 13
Selecto
r lever 38, 39
Shif
t
point
s 37
Slidin
g
roo
f -
electri
c 33
Spar
e tire -
collapsibl
e 57
Specification
s -
engin
e
74-7
7
Spee
d
contro
l -
automati
c 21
Speedomete
r 22
Startin
g
hints/engin
e 14, 40
Steerin
g lock 9,
12-1
4
Su
n
visor
s 28
T
Tachomete
r 22
Technical data
74-8
3
Tire
s
41,4
2
Tire
size/pressur
e 56, 76
Tool kit
4
7
Towin
g 39, 69
Transmissio
n
37-39
, 50, 75
Tri
p
odomete
r
2
6
Turn
signa
l
lights/leve
r 19, 22, 64, 65
U
Undercoatin
g
4
2
Unleade
d fuel 43, 54, 70
Upholstery
,
car
e of 43, 44
V
Vanit
y
mirro
r 28
Vehicl
e
identificatio
n 6
Ventilation/heate
r
control
s
30-3
1
Voltmete
r 24
5
Locatio
n
o
f
Chassi
s
Seria
l
Number
, Paint and Engine
Numbe
r
When ordering spare parts or submitting
inquiries, always quote chassis and engine
number to ensure correct and prompt ser•
vice.
Chassis number
In accordance with Federal Safety Regula•
tions, the chassis number of your car is lo•
cated on the left windshield post and can be
seen from the outside.
6
Engine number Paint number
The engine number is stamped on the front The paint number is on the doorjamb on the
reinforcing rib in the top half of the crank- driver's side.
case.
Dear Porsche
Owner
A lot has gone into the manufacture of your
Porsche, including advanced engineering
techniques, rigid quality control and de•
manding inspections. These engineering and
safety features will be enhanced by you . . .
the safe driver
.
who knows his car and all controls,
who maintains his vehicle properly,
who uses his driving skills wisely.
Safety Compliance Sticker
The Safety Compliance Sticker is your assur•
ance that your Porsche complies with all
Federal Motor Vehicle Safety Standards
which were in effect at the time the vehicle
was manufactured. It is located on the door-
sill on the driver's side.
The sticker also shows the month and year
of production and the chassis number of your
car (perforations) as well as the Gross
Vehicle Weight Rating and the Gross Axle
Weight Rating.
You will find helpful hints in this manual on
how to perform most of the checks listed on
the following page. If in doubt, have these
checks performed by your Porsche dealer.
7
Before going on a trip . . . In the drivers
sea t. .
. On the highway . ..
1 - Be sure
tire
s are
inflate
d
correctly
.
Loo
k
for
bruise
s and
tir
e
wear
.
2 -
Se
e that
whee
l
bolt
s or nuts are not
loose
o
r
missing
.
3 -
Chec
k
engin
e oil
level
, add if
neces
•
sary.
Mak
e it a
habi
t to have
engin
e oil
checked
wit
h
ever
y
secon
d fuel
filling
.
4 -
Chec
k
coolan
t level to assure
sufficien
t
engine
cooling
.
5 - Be
sur
e
yo
u have a
wel
l
charge
d bat•
tery. Each
cel
l
shoul
d be
fille
d to level
with
distille
d
water
.
6 -
Chec
k
brak
e
flui
d
level
. If
to
o
low
, have
brake
syste
m
checked
.
7 -
Replenis
h
windshiel
d
washe
r
fluid
.
8 - Replace
wor
n or
cracke
d
wipe
r blades.
9 - See that all
window
s are
clea
r and
un
•
obstructed
.
10-Chec
k
whethe
r
headligh
t and tail light
lenses are
clean
.
11 -
Chec
k under car
fo
r
leaks
.
12 - Be sure all
light
s are
workin
g and
head
•
lights are aimed
correctly
.
8
1 -
Depres
s plate in
cente
r of
steerin
g
whee
l
to check
whethe
r
hor
n
i
s
working
.
2 -
Positio
n seat
fo
r
eas
y reach of
controls
.
3 -
Adjus
t inside and
outsid
e rear
vie
w mir•
rors
.
4 -
Us
e
safet
y
belts
.
5 -
Chec
k
operatio
n of
foo
t and
parkin
g
brakes.
6 -
Chec
k all
warnin
g und
indicato
r lights
whe
n
startin
g the
engine
.
7 - DO
NO
T leave
ca
r
idlin
g
unattended
.
8 - Lock
door
s
fro
m
inside
,
especiall
y
wit
h
children in the car.
Have the
engin
e
oil
, the
coolan
t level and the
ATF (in
car
s
wit
h
automati
c
transmission
)
checked
regularly
, even
inbetwee
n the
re
•
commended
maintenanc
e
intervals
.
1 -
Alway
s
driv
e
defensively
. Expect the
un
•
expected
.
2 - Use
signal
s to
indicat
e
turn
s and lane
changes.
3 - Turn on
headlight
s at
dusk
.
4 -
Alway
s
kee
p a safe
distanc
e
fro
m the car
in
fron
t of
you
,
dependin
g on
traffic
, road
and
weathe
r
conditions
.
5 - Reduce
spee
d
durin
g night
hour
s and
in
•
clemen
t
weather
.
6 -
Observ
e
spee
d
limit
s
an
d
obe
y
highwa
y
signs.
7 -
Whe
n
tired
,
ge
t off
th
e
highway
,
sto
p
and
tak
e a rest. Turn the
engin
e off. DO
NOT sit in the
ca
r
wit
h
engin
e
idling
.
See
warnin
g on Engine Exhaust.
8 -
Whe
n
stoppe
d or
parked
,
alway
s
se
t the
parking
brake
.
9 -
Whe
n
stalle
d or
stoppe
d
fo
r
repairs
,
move the car
wel
l off the
road
.
Se
t the
emergency
flashe
r and
us
e
roa
d
flare
s
o
r
other
warnin
g
device
s
t
o
war
n
othe
r
mo
•
torists.
Turn the engine off before you attempt any
checks or repairs on the car.
Do not invite car
theft
!
A
n
unlocke
d car
wit
h
th
e
ke
y
i
n
th
e
ignitio
n
switch invites car
theft
.
A
steerin
g
whee
l lock and a buzzer alarm
are
standar
d
equipmen
t in
you
r Porsche. The
buzzer
wil
l
soun
d if
yo
u
ope
n the
driver'
s
door
whil
e the
ke
y is
stil
l in the
ignitio
n lock.
It is
you
r
reminde
r to pull
th
e
ke
y out of the
ignition lock and lock the
doors
.
D
o not
remov
e
th
e
ke
y
fro
m
th
e
steerin
g
lock
whil
e
yo
u are
drivin
g or as the car is
rolling to a
stop
. The
steerin
g
colum
n is lock•
ed
whe
n
yo
u
remov
e
th
e
key
,
an
d
yo
u
wil
l
not be able to steer the car.
The
ne
w
forma
t
o
f
th
e
maste
r
an
d
auxiliar
y
keys makes
unauthorize
d
duplicatio
n of the
keys
virtuall
y
impossible
. This
means
,
how
•
ever, that
yo
u
yoursel
f
wil
l not
b
e able
t
o get
replacement
key
s cut, unless
ordere
d
fro
m
the
manufacturer
.
Shoul
d
yo
u need
ne
w
keys
,
yo
u must give
the key number. This
numbe
r is
note
d on
th
e
plastic tag on the
keys
.
Kee
p this
ta
g in a
safe place - not in
th
e
vehicle
.
a Master key
b
Auxiliar
y key
c Rear seat
glov
e box key
Keys
A set of
thre
e
key
s
com
e
wit
h
you
r Porsche
(see
illustration)
.
a -
maste
r key
fo
r
ignitio
n lock,
doo
r locks,
luggage
compartmen
t lock and
glov
e
com
•
partment lock
b
-auxiliar
y
ke
y
fo
r
ignitio
n lock,
doo
r locks
and
luggag
e
compartmen
t lock
c -
ke
y
fo
r rear seat glove
bo
x lock
Key light
The master
ke
y has a
built-i
n
flashligh
t in the
key
head
. The beam
fro
m a small bulb in the
key head
illuminate
s the
lowe
r part of the
ke
y
stem.
The
flashligh
t is on as long as
th
e
contac
t
button is
depressed
.
The
flashligh
t is
powere
d by a 1.5
Vol
t
butto
n
battery.
Whe
n the beam
begin
s
t
o
fade
, re•
place the
battery
,
becaus
e an old battery may
leak and damage your clothes.
9
Black key
illuminated)
Locks
Ke
y
function
s Red key
drive
r and
front-seat
,
passenger
door
s
ignition/steerin
g
luggage
compartmen
t
fuel
ca
p
glov
e
compartmen
t
black
ke
y
onl
y -
activat
e alarm by locking and
deactiv
•
ate alarm by
unlockin
g
red
ke
y
onl
y - lock and unlock
withou
t
activatin
g alarm
black
ke
y and red
ke
y
black
ke
y and red
ke
y - alarm must be deactivated
red
ke
y
onl
y
black
ke
y
onl
y
Note: A door that has been locked
wit
h the black key cannot be opened
wit
h the red key,
withou
t setting off the
alarm
. A door that has been
locke
d
wit
h the red
key can be opened
wit
h either key.
Anti-theft alarm
(optional equipment)
If
you
r Porsche is
equippe
d
wit
h an
anti
-
theft alarm
system
,
yo
u
wil
l
b
e
give
n
th
e
tw
o
keys
illustrat
e and
describe
d
above
.
The alarm
syste
m is
activate
d
whe
n
th
e
driver or
front-sea
t
passenge
r
doo
r is
locke
d
with the
blac
k
key
.
Openin
g the
drive
r
o
r
front-seat
passenge
r
doo
r
b
y any other
means
whe
n the alarm
syste
m is
activated
,
will
produc
e an
intermitten
t high noise
fo
r
about 30
seconds
.
The same alarm is also
triggere
d
whe
n an
attempt is made to
ope
n the
luggag
e
com
•
partment lid or
th
e
engin
e
hood
. The engine
cannot be started while the alarm system is
activated.
The alarm system can only be deactivated by
unlocking the driver or front-seat passenger
door with the black key.
The red
ke
y can be used to lock and unlock
the
door
s
whe
n
activatio
n of the alarm is not
necessary, or
whe
n the car is
bein
g
serviced
.
The
fue
l
ca
p can
onl
y
b
e
unlocke
d
wit
h
th
e
red
key
.
The
glov
e
compartmen
t lock can
onl
y
b
e
un
•
locked
wit
h the black key.
Either
ke
y can
b
e used
fo
r
th
e
luggag
e
com
•
partment lock
whe
n the alarm is deactivated.
Either
ke
y can be used in the
ignition/steer
•
ing lock.
Kee
p
th
e plastic tags
wit
h the
ke
y
number
s
in a safe place -
NO
T IN THE
CAR
!
10
With the central door locking system,
bot
h
driver and
passenge
r
door
s can
b
e locked
o
r
unlocked
simultaneousl
y
fro
m the
driver'
s
side. The car
i
s
safel
y locked
whe
n
butto
n
"A" is fully
dow
n on
bot
h
doors
. If
butto
n
"A"
o
f one
doo
r
i
s not
full
y
down
,
ope
n
tha
t
door again and
clos
e
doo
r
firmly
. To lock or
unlock
bot
h
door
s
fro
m the
outside
, use
either
th
e
maste
r or
auxiliar
y
ke
y on the
driver's
side
.
T
o lock
o
r unlock
bot
h
door
s
from the
inside
,
tur
n
handwhee
l
"B
"
o
n
th
e
driver's
side
.
Doors
To open
door
s
fro
m outside,
pul
l the
reces
•
se
d
doo
r
handle
.
Central door locking system
The central door locking system operates on
vacuum generated by the engine. A
reservoi
r
allows the locking
syste
m to be
actuate
d
about
fiv
e
time
s after the
engin
e is
turne
d
off. To
reactivat
e the
system
,
operat
e the
engine
fo
r a
fe
w
seconds
. Each
individua
l
door lock can be
operate
d
manuall
y
whe
n
there is no
vacuu
m in the
reservoir
.
Always drive with locked doors to prevent
inadvertent opening of a door from the in•
side, especially with small children in the car.
To open
door
s
fro
m inside, pull the
recesse
d
handle
"C
"
abov
e
armrest
.
The armrests have a
built-i
n
storag
e
com
•
partment.
T
o
ope
n
compartment
, press
kno
b
in hand
cut-ou
t and
til
t
armres
t
outward
. To
close,
til
t
compartmen
t
towar
d
doo
r
panel
.
Power windows -
onl
y
wor
k
wit
h
ignitio
n
on
.
To
ope
n
o
r
clos
e
th
e
windows
,
depres
s
th
e
rocker
switche
s
i
n
th
e
cente
r
consol
e
i
n
fron
t
of
th
e
shif
t
lever
.
Caution: Remove the ignition key to shut off
power to the window switches when the
vehicle is not attended by a responsible
person.
Interior lights
The
tw
o
interio
r lights
operat
e
independ
•
ently
fro
m each
other
. The
tw
o lights have a
built-in
rocke
r
switc
h
whic
h is
operate
d by
tilting
th
e lamp
lens
. There are
thre
e lens
positions:
"a
" - light
o
n
wit
h
fron
t
door
s
o
r
luggag
e
compartment
doo
r
open
.
"b
" - light off.
"c
" - light
remain
s on
continuously
.
11
Front seats
Correc
t seat
positionin
g
i
s
importan
t
fo
r
saf
e
and
comfortabl
e
driving
.
Therefore
, the
sea
t
and the
backres
t angles in
you
r Porsche are
fully
adjustable
.
Seat adjustment
T
o
mov
e the
sea
t
forwar
d
o
r
backward
, pull
the
lockin
g
leve
r
a
t
th
e
fron
t
o
f
th
e
sea
t
up
.
Now
slid
e the seat
t
o the
desire
d
position
.
Let the lever go, and
mov
e the seat
slightl
y
back and
fort
h to make
sur
e it is
securel
y
engaged.
Do not attempt to adjust the driver's seat
while driving! The seat may suddenly jerk
forward or backward causing loss of control.
Backrest release
The
backres
t can
b
e
folde
d
forwar
d
fo
r
eas
y
access
t
o
th
e rear
seats
.
T
o
release
,
pres
s
the
lockin
g
butto
n on the
sid
e of the back•
rest
(arrow
)
and
, at the same
time
,
til
t the
backrest
forward
.
Whe
n the
backres
t is
tilte
d
back, the lock
wil
l
engag
e
automatically
.
Backrest adjustment
Turn
handwhee
l
o
n
th
e
outboar
d
sid
e
o
f
th
e
seat
(arrows)
,
wit
h
you
r
bod
y
weigh
t
take
n
off
th
e seatback.
Front passengers should not ride in a moving
car with the seatback reclined. Safety belts
offer maximum protection only with the seat-
back in an upright position.
For
maximu
m
legroo
m and
unobstructe
d
vie
w
of
th
e
instruments
,
th
e
steerin
g
whee
l and
the
instrumen
t
cluste
r unit can
b
e
unlocke
d
(arrow)
,
adjusted
, and
the
n
re-locked
.
Rear seats -
luggag
e
compartmen
t
The
backrest
s of the rear seats can be
tilte
d
forward
t
o
provid
e
additiona
l
luggag
e
space
.
Unsna
p the
luggag
e
compartmen
t
cove
r
fro
m
the
uprigh
t rear seat
backrest
s and the rear
cross
wall
.
To release
backrest
, pull the lever on
sid
e
of the
backres
t up
and
, at the same
time
,
til
t
the
backres
t
forward
.
12
a backward/forward
b height
c backrest angle
Electric seats
(optional equipment)
The rocker switches for a smooth three-way
seat adjustment are located at the outboard
side of the seat.
To permit easy access to the rear, the seat
will slide forward automatically when the
backrest in folded down (with ignition on or
off). The seat will remain in a position that
permits comfortable entry to the front, when
the backrest is tilted back to its upright po•
sition and securely locked.
Manual operation
If the electric mechanism fails, the seat can
be moved forward or backward by pushing
the locking lever under the front of the seat
toward outboard side of seat. Slide the seat
to the desired position and let the lever go.
move the seat slightly back and forth to
make sure it is securely engaged.
13
Ignition/Starter Switch with
Steering Lock
The
steerin
g
i
s
equippe
d
wit
h
a
n
anti-thef
t
ignition lock.
For your safety, fasten safety belts.
Manual Transmission:
-
Mov
e
gearshif
t
leve
r to Neutral.
Automatic transmission:
-
Mov
e
gearshif
t
leve
r to Neutral or Park.
Never start or let the engine run in an
en
•
closed unventilated area. Exhaust fumes from
the engine contain carbon monoxide which
is a colorless and odorless gas. Carbon
monoxide can be fatal if inhaled.
Ther
e are 4
ke
y
positions
:
0 - Steering locked.
Al
l
electri
c
circuit
s
wired
throug
h the
ignitio
n
switc
h are
turned off. The
ignitio
n
ke
y can
onl
y be
withdrawn
i
n
th
e
"0
"
position
. The
park
•
ing
light
s can be
operate
d in this
positio
n
by
pushin
g the
tur
n signal
indicato
r lever
up or
dow
n (also see
"Parkin
g
lights")
.
1 - Steering unlocked. In
thi
s
position
, the
following
electri
c
circuit
s
wire
d
throug
h
the
ignitio
n are
operational
:
headlights
,
windshield
wiper
,
rea
r
windo
w
wiper
,
windshield/headlight
washers
, rear
win
•
dow
defogger
,
sunroof
,
radi
o
an
d
ciga
•
rette
lighter
. The
instrumen
t
cluste
r
illu
•
mination
wil
l
com
e
o
n
an
d can
onl
y
b
e
turned off
wit
h
ke
y
i
n
positio
n
"0"
.
2 - Ignition on, steering unlocked.
Al
l
electri
c
circuits are
operational
.
Wit
h the
engin
e
stationary,
th
e
centra
l
warnin
g light and
all
individua
l
warnin
g lights
locate
d in
both
combinatio
n
instrument
s
wil
l light
up
fo
r a bulb check.
3 - The starter is operated by
turnin
g the
ignition
ke
y
t
o the
right
.
A
s
soo
n
a
s
th
e
engine
starts
,
releas
e the
key
. It
wil
l
spring back
t
o
positio
n
"2"
.
Wit
h the
engin
e
running
, the
centra
l and
individua
l
warning lights
shoul
d
g
o
out
. The
STO
P
LAMP
wil
l
g
o out after
depressin
g the
brake
peda
l and the PARK
BRAK
E light
after
full
y
releasin
g
th
e
parkin
g
brak
e
(see
"centra
l
warnin
g light
system")
.
While the
engin
e is
cranking
, the cir•
cuits
fo
r
headlight
s and
wiper/washe
r
motor are
interrupted
.
The
starte
r
shoul
d not
b
e
operate
d
fo
r
mor
e
than 10 to 15
second
s at a
time
. If the
engin
e
does
no
t
star
t the
firs
t
tim
e
o
r
stall
s
a
t
an
y
time, the
ignitio
n
wil
l have
t
o
b
e
switche
d off
and
the
n on
again
. The
non-repea
t lock in the
switch
prevent
s
th
e
starte
r
fro
m
bein
g
operat
•
ed
whe
n the
engin
e is
runnin
g
an
d thus
fro
m
being
damaged
.
T
o
remov
e
th
e
ke
y and
t
o
loc
k
th
e
steerin
g
turn
th
e
ke
y back
t
o
positio
n
"0
"
an
d pull
i
t
out. Turn
th
e
steerin
g
whee
l until
i
t
locks
.
If
yo
u leave the
ke
y in the
ignition/steerin
g
lock, the buzzer
wil
l
soun
d
whe
n the
driver'
s
door is
opened
. This is
you
r
reminde
r to
remove the
key
.
Se
e also Starting Hints and Break-in Period.
The steering column will lock when you re•
move the key. Therefore do not remove the
key while you are driving or as the car is
rolling to a stop.
14
Inertia Real
Safet
y Belt
For your and your passenger's protection,
wear safety belts at all times while the car
is in motion.
You
r Porsche is
equippe
d
wit
h a
safet
y
bel
t
for each
fron
t and rear seat.
The inertia reel
safet
y
bel
t
provide
s
safet
y
with
freedo
m of
movement
. It
adjust
s
auto
•
matically to
you
r size and
movement
s as
long as the pull on the
bel
t is
slow
. A
sudde
n
motion locks the belt.
Rapid
deceleratio
n
durin
g hard
brakin
g or a
collision locks
th
e
belt
. The
bel
t
wil
l also
lock
whe
n
yo
u
driv
e up or
dow
n a
stee
p hill
or in a
shar
p
curve
.
To release a locked belt, lean back to
tak
e
the
bod
y
pressur
e off the belt.
A shoulder belt should not be worn by a
person less than 4'
7"/1.4
0 m in height,
or with an erect seating height of less than
2'
5"
/ 74 cm, because the belt would not be
in its most protective position and may there•
fore increase the possibility of injury in a
collision.
For maximum safety and protection, we re•
commend that small children travel in the
rear seats.
Whe
n
drivin
g
i
n
foreig
n
countries
,
th
e
wear
•
ing of
safet
y
belt
s may be
require
d by law.
Safety belt warning system
A
n
audio-visua
l
warnin
g
syste
m
i
s
intercon
•
necte
d
wit
h the
driver'
s
safet
y belt.
Whe
n the
ignitio
n
i
s
turne
d on, the
warnin
g
light in the
cente
r
consol
e and
th
e buzzer
will
com
e on
fo
r
abou
t 6
seconds
. The buzzer
will go off as
soo
n as the
drive
r has
buckle
d
up. The
warnin
g light
wil
l go off after 6
sec
•
onds.
Fastening the belt
Si
t back in
you
r seat so
tha
t
you
r
bod
y is
supported
b
y the
backrest
.
Gras
p the
bel
t
tongue and pull the
bel
t in a
slo
w
continuou
s
motion
acros
s
you
r chest an lap. Insert
th
e
belt
tongu
e into the anchor
housin
g on
th
e
inboard side of
th
e seat. Push
dow
n until
securely locked
wit
h
a
n
audibl
e
click
.
Be sure the belts are not twisted.
15
Adjusting the belt
For
bes
t
protection
,
belt
s
shoul
d
fi
t
snugl
y
across lap and chest. If
bel
t has
to
o much
slack, pull
shoulde
r
sectio
n in
directio
n of
arrow to make sure the
bel
t is
draw
n
snu
g
around
you
r
hips
.
Mak
e sure the
shoulde
r
bel
t
doe
s not
pres
s
against
soli
d or
fragil
e
items
, such as ball
point
pens
,
pipe
,
lighte
r
o
r
glasses
.
Do not wear the belts loosely.
Do not strap in more than one person with
each belt.
16
Releasing the belt
To unfasten belt, push
th
e red release
butto
n
marked PRESS.
Bel
t
tongu
e
wil
l
sprin
g
ou
t
of anchor
housing
.
To store
lap/shoulde
r belt,
allo
w
bel
t to
win
d
up on
retracto
r as
yo
u
guid
e
bel
t
tongu
e to
its
stowe
d
positio
n
o
n
doo
r
post
.
Mar
k
sec
•
tion
acros
s
you
r lap
wit
h
moveabl
e
sto
p
t
o
keep
bel
t
tongu
e
fro
m
slidin
g
dow
n
whe
n
belt is
woun
d up.
The
bel
t of
th
e unoccupied passenger seat
should
alway
s
b
e
full
y
woun
d up,
wit
h belt
tongue in stowed
position
. This
reduce
s the
possibility of the
bel
t
tongu
e
becomin
g a
striking
objec
t in
cas
e of a
sudde
n
stop
.
Belt care
Belt
s that have been
subjecte
d to
excessiv
e
stretch
force
s in an
acciden
t
shoul
d be
replaced.
If
belt
s
sho
w
damag
e to
webbing
,
bindings
,
buckles
o
r
retractors
,
the
y
shoul
d
b
e
re
•
placed.
If
belt
s do not
wor
k
properly
, see
you
r
authorized
deale
r to have
the
m
repaire
d or
replaced.
Do not
modif
y or
disassembl
e the
safet
y belts
in
you
r car.
Kee
p
belt
s
clean
. If
the
y
nee
d
cleaning
,
use a
mil
d
soa
p
solution
,
bu
t do not
remov
e
belts
fro
m
car
.
D
o
no
t use
othe
r
cleanin
g
agents
a
s
the
y
wil
l
weake
n
th
e
webbing
.
Never bleach
o
r
dy
e
safet
y
belts
.
Do not
allo
w
safet
y
belt
s to
retrac
t until
they are
completel
y
dry
.
Dr
y
belt
s
i
n
shade
.
The seatbelt should not be used to hold a
child's seat as the diagonal belt will not
provide the needed protection.
Dashboard panel
and center console
1 Side
windo
w
defogger/defroste
r
vent
s
2 Instrument
cluste
r
3 Radio
4
Heatin
g and
ventilatio
n
control
s
5
Cente
r air
vent
s
(coole
d air
only
)
6 Reset
butto
n
fo
r
centra
l
warnin
g light
7
Glov
e
compartmen
t lock
8
Sid
e
vie
w
mirro
r
adjuste
r
9 Front
hoo
d
releas
e lever
10
Hor
n
11
Emergenc
y
flashe
r
switc
h
(HAZARD
)
12 Electric
slidin
g
roo
f
switc
h
13 Power
windo
w
switc
h
14
Gearshif
t
leve
r
15
Safet
y
bel
t
warnin
g light
16
Cloc
k
17
Ope
n
storag
e shelf
17
Instrumen
t
cluste
r
1
Odomete
r
rese
t
switc
h
2 Light
switc
h
3 Fog light switch
4 Left
combinatio
n
instrumen
t
5 Turn
signa
l
indicato
r
ligh
t
6
Speedomete
r
7
Centra
l
warnin
g
ligh
t
8 Tachometer
9
Hig
h beam
indicato
r
ligh
t
10 Right
combinatio
n
instrumen
t
11 Rear
windo
w
defogge
r switch
1
2 Rear
windo
w
wipe
r
switc
h
1
3
Ignition/starte
r
switc
h
wit
h
steerin
g lock
14
Instrumen
t
illuminatio
n
contro
l
15 Turn
signal/headligh
t
dimme
r
flasher
/
parkin
g light
leve
r
1718 19 20
16
Lockin
g
leve
r
fo
r
steerin
g
column/instru
•
men
t
cluste
r
heigh
t
adjustmen
t
17
Automati
c
spee
d
contro
l
leve
r
1
8
Windshiel
d
wipe
r
an
d
windshield/head
•
ligh
t
washe
r
leve
r
19
Intensiv
e
washe
r
syste
m
switc
h
2
0
Intermitten
t
wipe
r
interva
l
contro
l
18
Light switch -
wit
h ignition on
0 - lights off
1 -
parkin
g lights on
2 -
headlight
s on and
raise
d
In
position
s 1 and 2,
th
e
followin
g
light
s are
also
on
:
-tail lights
-
instrumen
t
illuminatio
n
-
shif
t
patter
n
illuminatio
n
fo
r
automati
c
transmission
gearshif
t
leve
r
Instrument illumination control
The
brightnes
s
o
f the
instrumen
t
illumina
•
tion can
b
e
adjuste
d
b
y
turnin
g the
thumb
•
wheel
o
n the left
sid
e
underneat
h
th
e
instru
•
ment
cluster
.
dimmer flasher and parking light
lever -
wit
h ignition on
Turn signal/highbeam/lowbeam/
Turn signal indicator
Leve
r up -
righ
t
tur
n
signa
l
(arro
w 3)
Lever
dow
n - left
tur
n
signa
l
(arro
w 4)
The
tur
n
signa
l
leve
r
turn
s off
automaticall
y
when
th
e
steerin
g
whee
l is
straightene
d out
after
completin
g a
turn
.
If a turn signal bulb becomes defective, the
indicator light flashes at about twice the nor•
mal frequency.
Lane changer
T
o
indicat
e
you
r
intentio
n
whe
n
changin
g
lanes on
expressways
,
slightl
y lift or
depres
s
the
tur
n
signa
l
indicato
r
leve
r
t
o
th
e
resist
•
ance
point
. The
leve
r
turn
s off
automaticall
y
when
released
.
High beam/low beam -
wit
h
ignitio
n on and
light
switc
h in
positio
n 2, push
leve
r
forwar
d
to
selec
t high beam
(arro
w 1). The
blu
e
in
•
dicator
ligh
t
i
n
th
e
instrumen
t
cluste
r
come
s
on
whe
n high beam is
switche
d
on
.
Pull
leve
r
towar
d
steerin
g
whee
l
(arro
w
2
)
t
o
selec
t
lo
w
beam
.
Headlight dimmer flasher -
wit
h
ignitio
n on
or off
Yo
u can signal
wit
h
you
r
headlight
s
(instea
d
of horn)
b
y
pullin
g
leve
r
towar
d
steerin
g
wheel
(arro
w
2
)
t
o
poin
t
o
f
resistanc
e and
then
releasin
g it.
Repeatin
g
thi
s
operatio
n
will
flas
h the high beams
durin
g
dayligh
t and
at
night
.
Parking lights -
wit
h
ignitio
n off
Lever up -
righ
t
sid
e
parkin
g lights on
(arro
w 3)
Lever
dow
n -
left side
parkin
g lights on
(arro
w 4)
19

Other manuals for 928 1979

1

Other Porsche Automobile manuals

Porsche Cayenne Turbo S User manual

Porsche

Porsche Cayenne Turbo S User manual

Porsche CAYMAN - User manual

Porsche

Porsche CAYMAN - User manual

Porsche 911 TURBO - 1975 WORSHOP Instruction Manual

Porsche

Porsche 911 TURBO - 1975 WORSHOP Instruction Manual

Porsche Panamera GTS Instruction Manual

Porsche

Porsche Panamera GTS Instruction Manual

Porsche 911 GT3 2021 User manual

Porsche

Porsche 911 GT3 2021 User manual

Porsche Cayenne 2005 User manual

Porsche

Porsche Cayenne 2005 User manual

Porsche Cayenne S User manual

Porsche

Porsche Cayenne S User manual

Porsche CAYENNE DIESEL User manual

Porsche

Porsche CAYENNE DIESEL User manual

Porsche 928 GTS MODEL 93 - Quick start guide

Porsche

Porsche 928 GTS MODEL 93 - Quick start guide

Porsche 911 CARRERA - 2003 User manual

Porsche

Porsche 911 CARRERA - 2003 User manual

Porsche 911 2020 User manual

Porsche

Porsche 911 2020 User manual

Porsche 912E 76 Operating and installation instructions

Porsche

Porsche 912E 76 Operating and installation instructions

Porsche 911 CARRERA - 2002 User manual

Porsche

Porsche 911 CARRERA - 2002 User manual

Porsche 911 CARRERA - 1999 User manual

Porsche

Porsche 911 CARRERA - 1999 User manual

Porsche 718 Boxster Release note

Porsche

Porsche 718 Boxster Release note
Porsche 911 GT3 - User manual

Porsche

Porsche 911 GT3 - User manual

Porsche 718 Cayman GT4RS 2023 User manual

Porsche

Porsche 718 Cayman GT4RS 2023 User manual

Porsche 911 CARRERA - 2001 User manual

Porsche

Porsche 911 CARRERA - 2001 User manual

Porsche 944 Instruction manual

Porsche

Porsche 944 Instruction manual

Porsche 928S - 1985 WIRE DIAGRAM Quick start guide

Porsche

Porsche 928S - 1985 WIRE DIAGRAM Quick start guide

Porsche 911 CARRERA 4 - User manual

Porsche

Porsche 911 CARRERA 4 - User manual

Porsche 911 CARRERA 4 - User manual

Porsche

Porsche 911 CARRERA 4 - User manual

Porsche 911 GT3 - User manual

Porsche

Porsche 911 GT3 - User manual

Porsche Boxster S User manual

Porsche

Porsche Boxster S User manual

Popular Automobile manuals by other brands

Subaru 2006 B9 Tribeca owner's guide

Subaru

Subaru 2006 B9 Tribeca owner's guide

Jeep Grand Cherokee 2012 owner's manual

Jeep

Jeep Grand Cherokee 2012 owner's manual

Mercury Cougar 2000 owner's guide

Mercury

Mercury Cougar 2000 owner's guide

Oldsmobile SILHOUETTE GTK 2004 Getting to know

Oldsmobile

Oldsmobile SILHOUETTE GTK 2004 Getting to know

Chevrolet Optra 2005 owner's manual

Chevrolet

Chevrolet Optra 2005 owner's manual

Chrysler 2010 Sebring user guide

Chrysler

Chrysler 2010 Sebring user guide

Mazda 2015 CX-5 Brochure & specs

Mazda

Mazda 2015 CX-5 Brochure & specs

Toyota LAND CRUISER - BROCHURE 2011 brochure

Toyota

Toyota LAND CRUISER - BROCHURE 2011 brochure

Chevrolet 1994 Astro Passenger owner's manual

Chevrolet

Chevrolet 1994 Astro Passenger owner's manual

BMW M3 CONVERTIBLE 2001 manual

BMW

BMW M3 CONVERTIBLE 2001 manual

Toyota Solara  guide operating manual

Toyota

Toyota Solara guide operating manual

Pontiac 2001 Bonneville owner's manual

Pontiac

Pontiac 2001 Bonneville owner's manual

Pontiac Montana SV6 2008 owner's manual

Pontiac

Pontiac Montana SV6 2008 owner's manual

GMC 2003 Envoy XL owner's manual

GMC

GMC 2003 Envoy XL owner's manual

Kia RIO 2020 manual

Kia

Kia RIO 2020 manual

Toyota HIGHLANDER 2010 Quick reference guide

Toyota

Toyota HIGHLANDER 2010 Quick reference guide

Hyundai SONATA 1995 owner's manual

Hyundai

Hyundai SONATA 1995 owner's manual

SSANGYONG Korando 2013 manual

SSANGYONG

SSANGYONG Korando 2013 manual

manuals.online logo
manuals.online logoBrands
  • About & Mission
  • Contact us
  • Privacy Policy
  • Terms and Conditions

Copyright 2025 Manuals.Online. All Rights Reserved.