For further information please contact Portable pace on 01449 782123 or email info@portablespace.co.uk
FLAT PACK STORE ASSEMBL INSTRUCTIONS
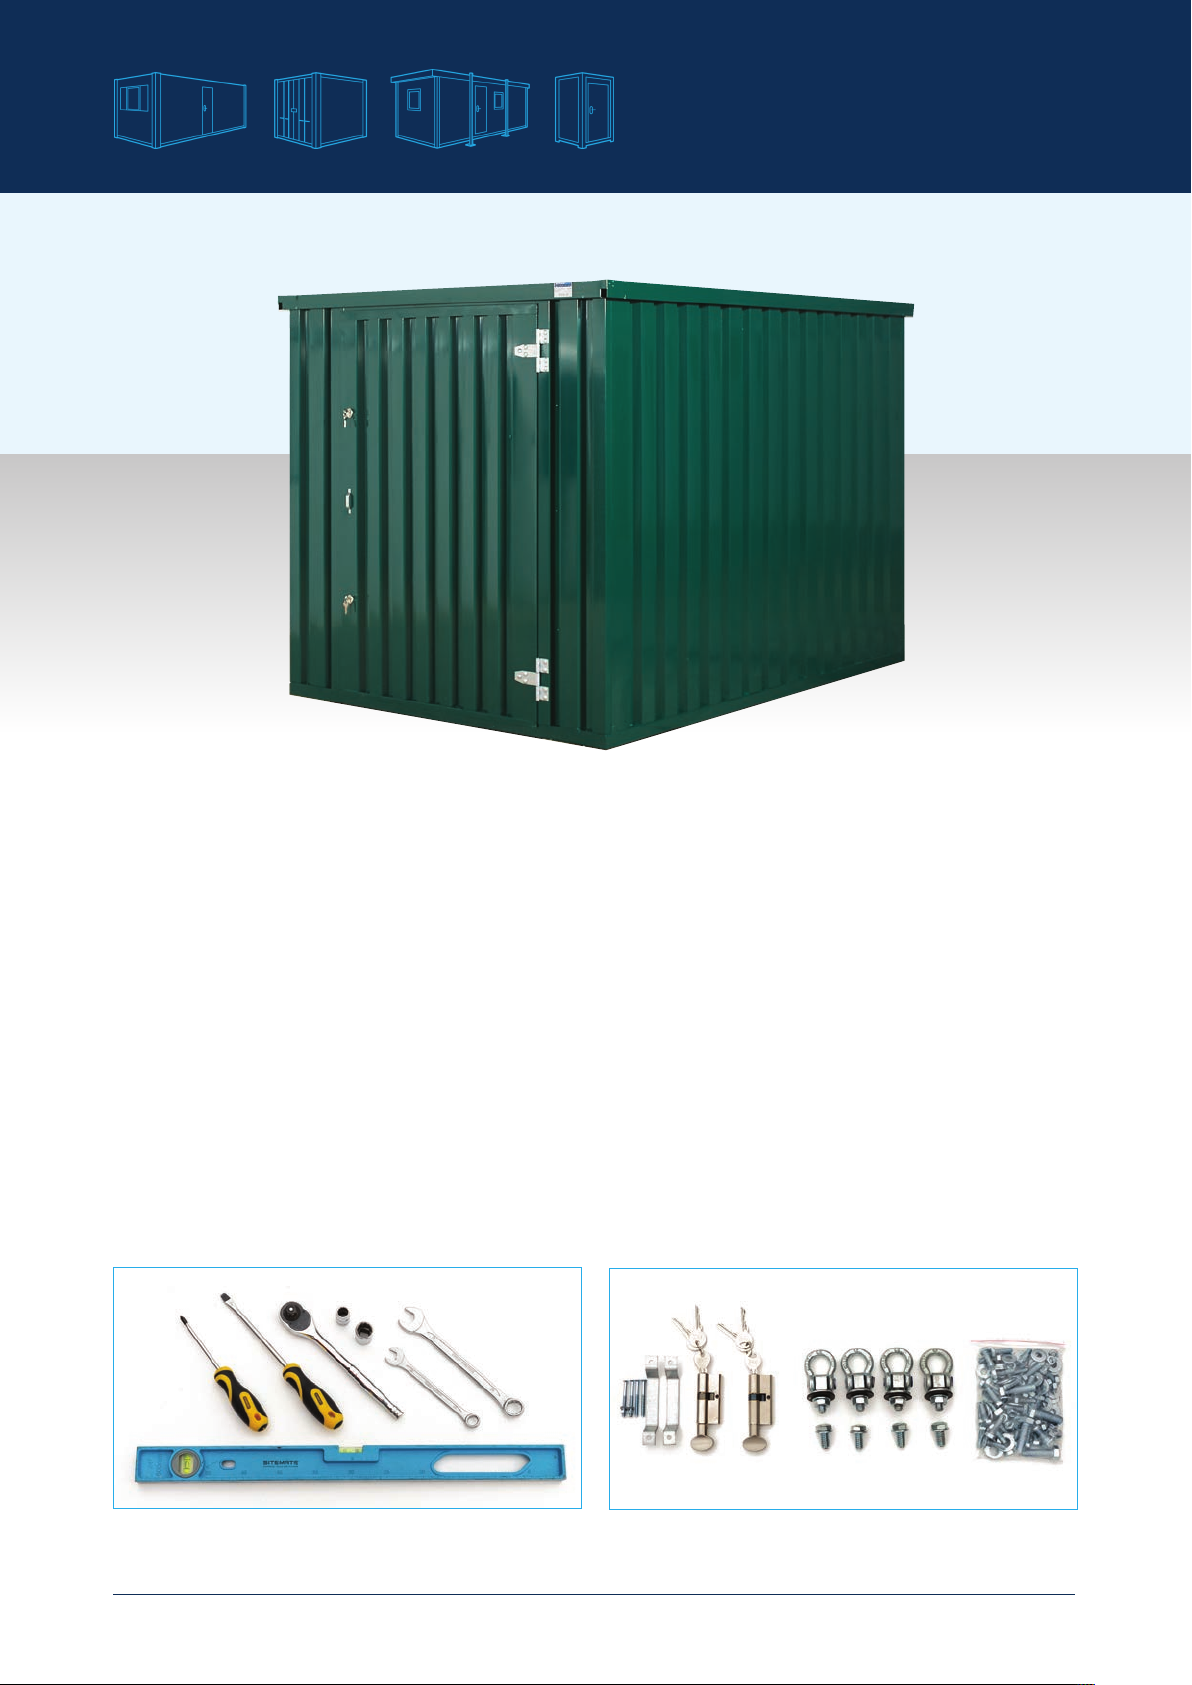
Store 2m 271kg
CONTAINER PARTS
Container Rear Panel 30kg 1 Piece
Container ide Panel 26kg 2 Piece
Door Panel 51kg 1 Piece
Door 1 Piece
Container Roof 50kg 3 Piece
Container Chassis 88kg 1 Piece
HARDWARE PARTS
M5 Nut 2 Piece
M5 Washer 2 Piece
M8 x 25mm Bolt 28 Piece
M8 Nut 22 Piece
M8 Washer 44 Piece
Brass Door Handle 2 Piece
Countersunk M5 x 50 Bolt 2 Piece
Barrel With Key 2 Piece
M12 Washer 18 Piece
M12 x 40mm Bolt 4 Piece
M12 Nut 4 Piece
Hinge 2 Piece
M12 x 25 Bolt 14 Piece
M10 Nut 14 Piece
M10 Washer 14 Piece
Store 3m 351kg
CONTAINER PARTS
Container Rear Panel 30kg 1 Piece
Container ide Panel 40kg 2 Piece
Door Panel 51kg 1 Piece
Door 1 Piece
Container Roof 70kg 3 Piece
Container Chassis 120kg 1 Piece
HARDWARE PARTS
M5 Nut 2 Piece
M5 Washer 2 Piece
M8 x 25 mm Bolt 30 Piece
M8 Nut 22 Piece
M8 Washer 46 Piece
Brass Door Handle 2 Piece
Countersunk M5 x 50 Bolt 2 Piece
Barrel with Key 2 Piece
M12 Washer 4 Piece
M12 x 40 mm Bolt 4 Piece
M12 Nut 4 Piece
Hinge 2 Piece
M12 x 25 Bolt 14 Piece
M10 Nut 14 Piece
M10 Washer 14 Piece
Store 4m 421kg
CONTAINER PARTS
Container Rear Panel 30kg 1 Piece
Container ide Panel 54kg 2 Piece
Door Panel 51kg 1 Piece
Door 1 Piece
Container Roof 79kg 3 Piece
Container Chassis 153kg 1 Piece
HARDWARE PARTS
M5 Nut 2 Piece
M5 Washer 2 Piece
M8 x 25 mm Bolt 32 Piece
M8 Nut 22 Piece
M8 Washer 48 Piece
Brass Door Handle 2 Piece
Countersunk M5 x 50 Bolt 2 Piece
Barrel with Key 2 Piece
M12 Washer 4 Piece
M12 X 40 mm Bolt 4 Piece
M12 Nut 4 Piece
Hinge 2 Piece
M12 x 25 Bolt 14 Piece
M10 Nut 14 Piece
M10 Washer 14 Piece
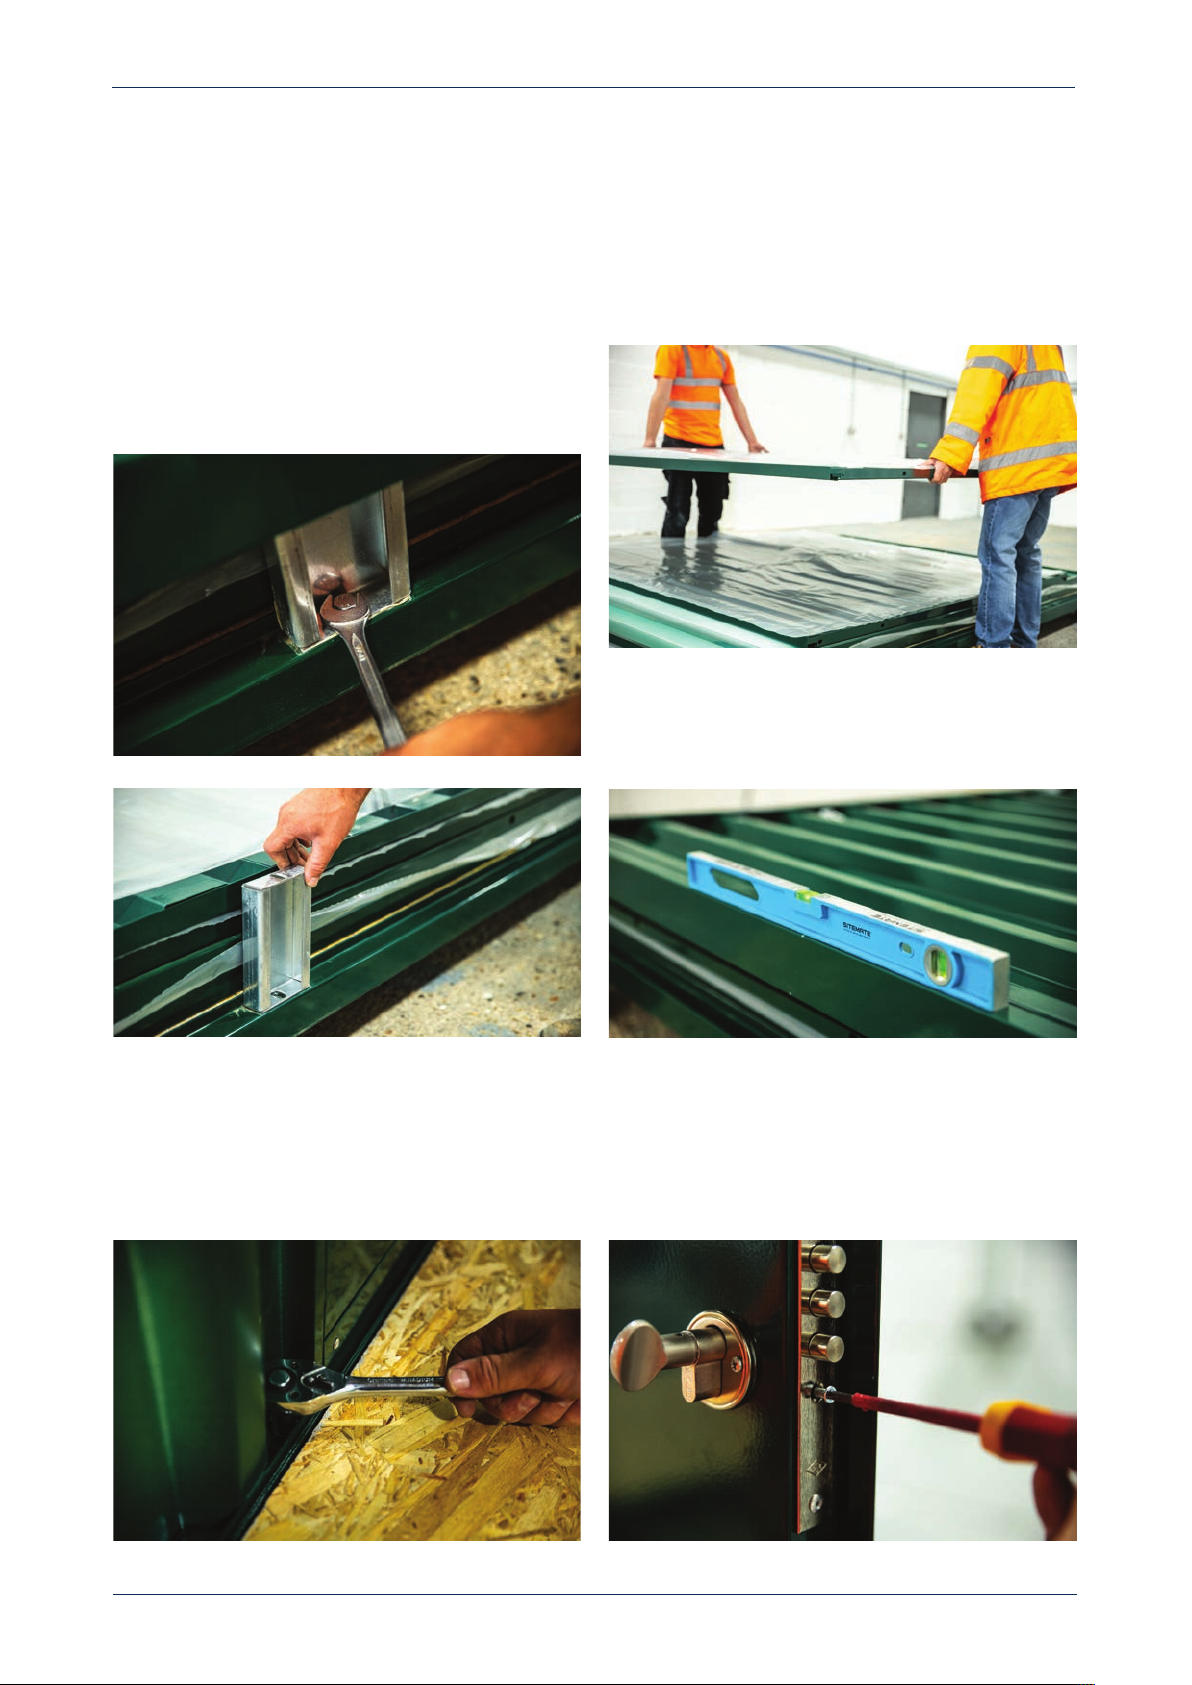
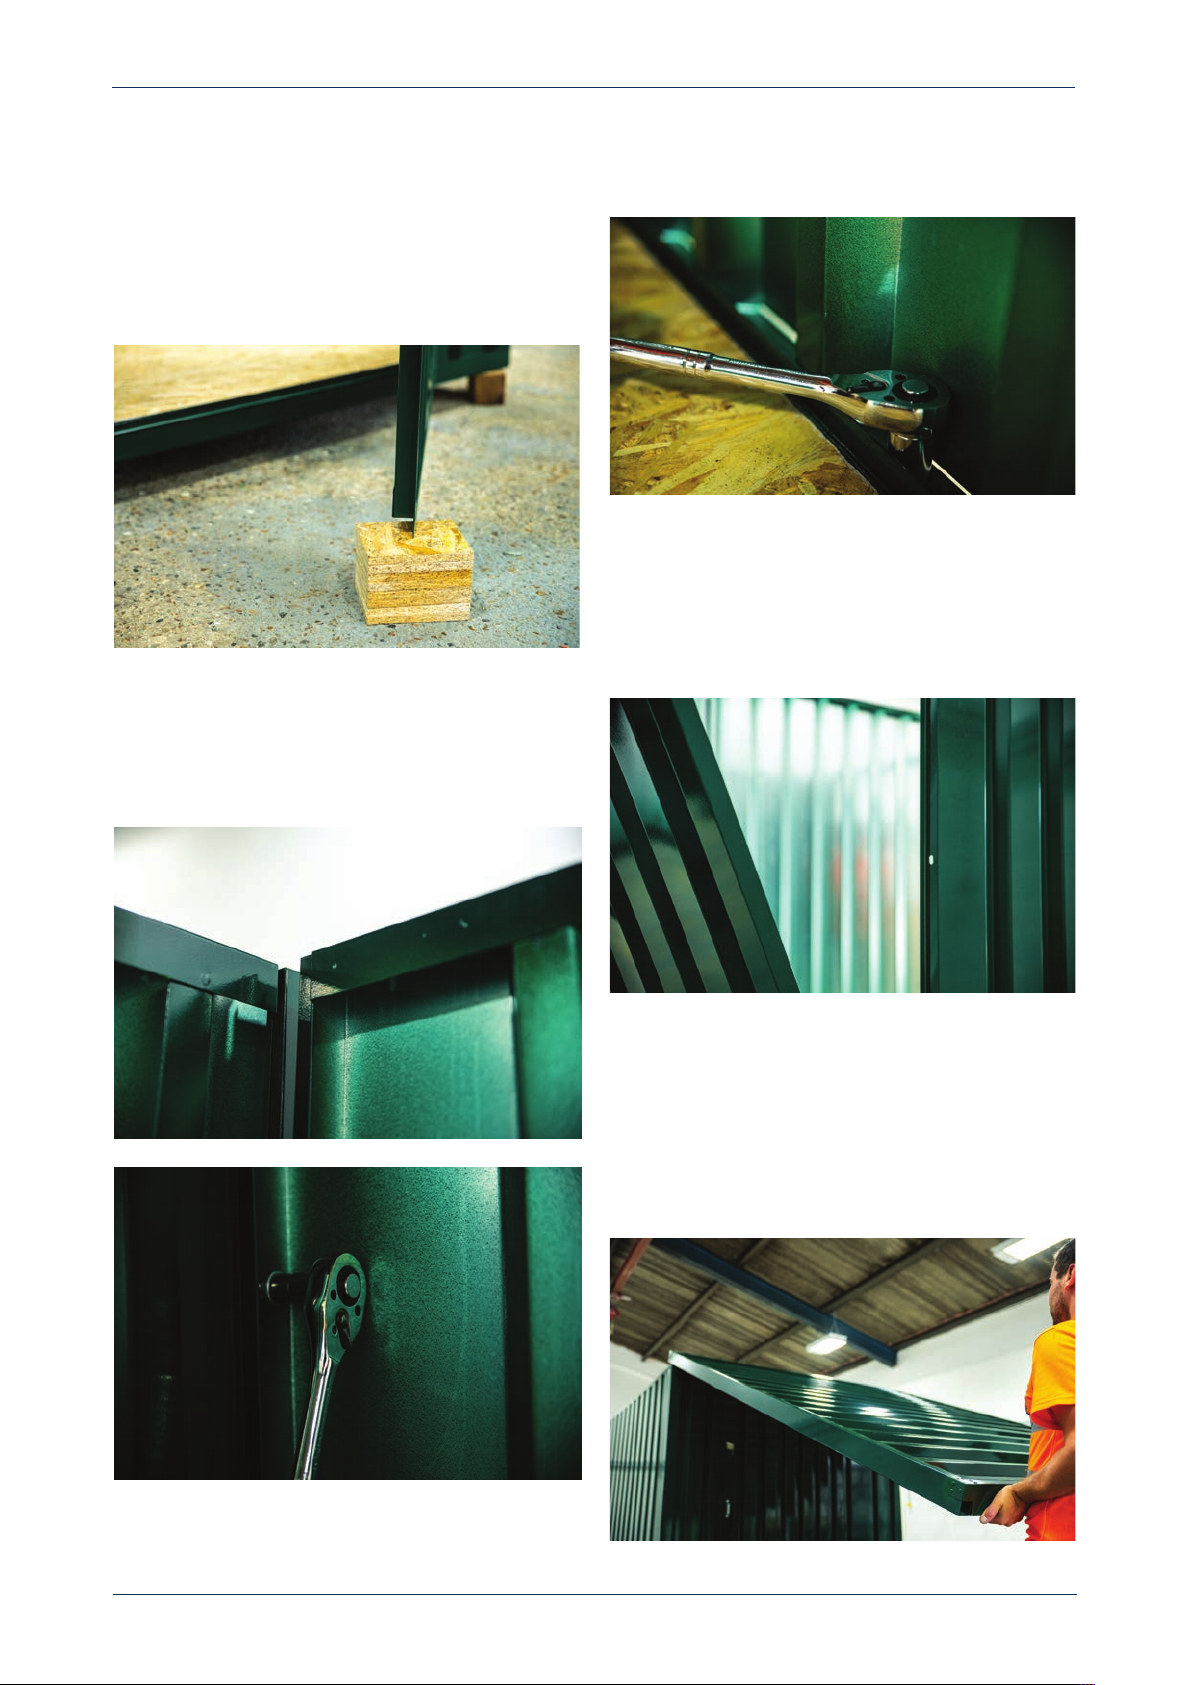
Assembly hints
1. Try to get the pack delivered as close as possible to
the erection area. If it arrives on one of our HIAB lorries,
please let the driver know and they will help by
levelling it up with you. To ensure the chassis is level, it’s
best to use each of the four corners and once level
support the base in the middle to help prevent any
sag over time.
2. Ideally concrete bases are the best option for long-
term installations although paving slabs can provide
the simplest solution. Plywood packing is ideal for small
adjustments or short/medium-term installations.
3. The erection process is made much easier when the
chassis is level at the start.
4. Don’t assemble in windy conditions as this can be
dangerous and make sure you have enough people
available to move and erect the panels safely.
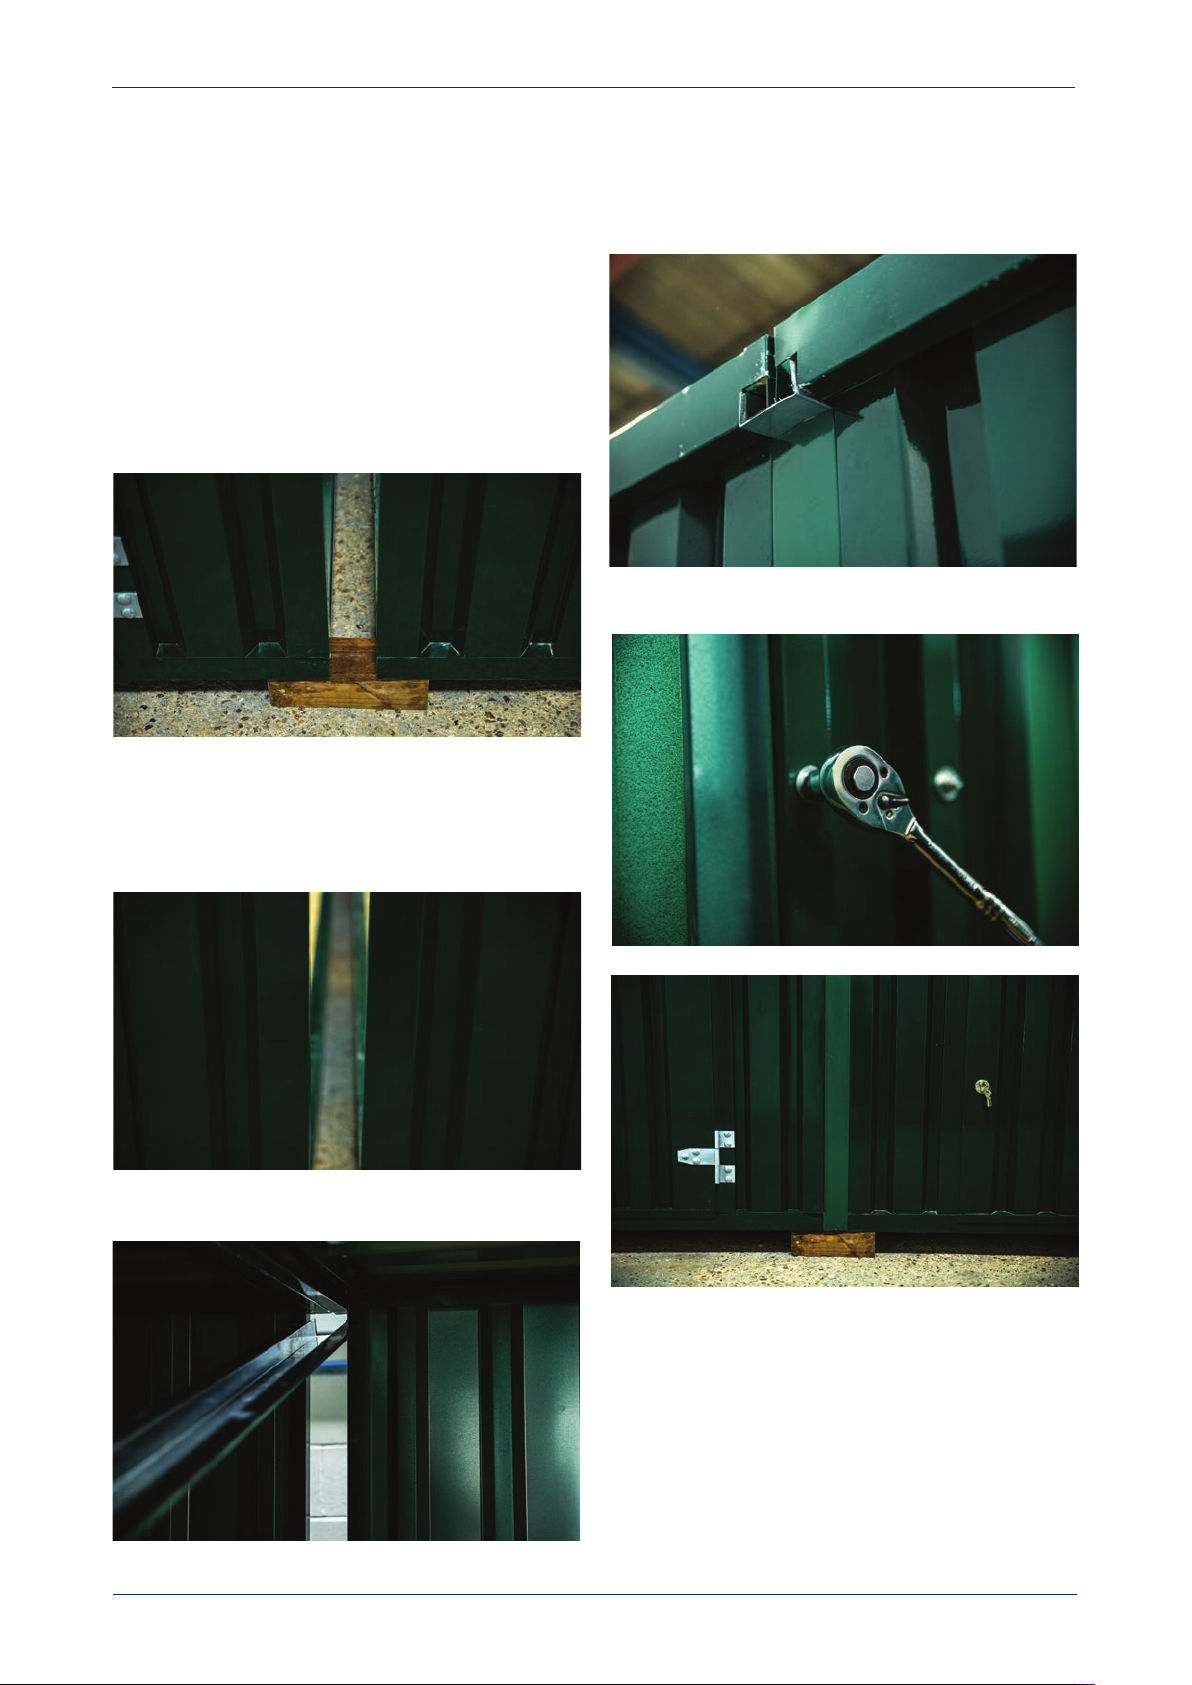
Maintenance
1. Check foundations periodically to make sure that the
unit remains level. igns that the unit might have
moved usually result in the door becoming difficult to
open or close, or the unit rocking on the pads.
2. The only moving parts are the lock and hinges which
need a light oiling on a periodic basis.
3. Check the roof from time to time and remove any
debris, especially leaves, to ensure the gutters work
correctly.
Othe info mation
1. If you keep all the packaging material, it can be used
to re-pack the unit at a later date. Otherwise please
recycle it.
2. The unit is not designed to be stacked.
3. The unit once correctly assembled, can be lifted and
moved using the lifting hooks. Please check the
security of all fixings each time before lifting.
Components fo 2m, 3m and 4m sto es