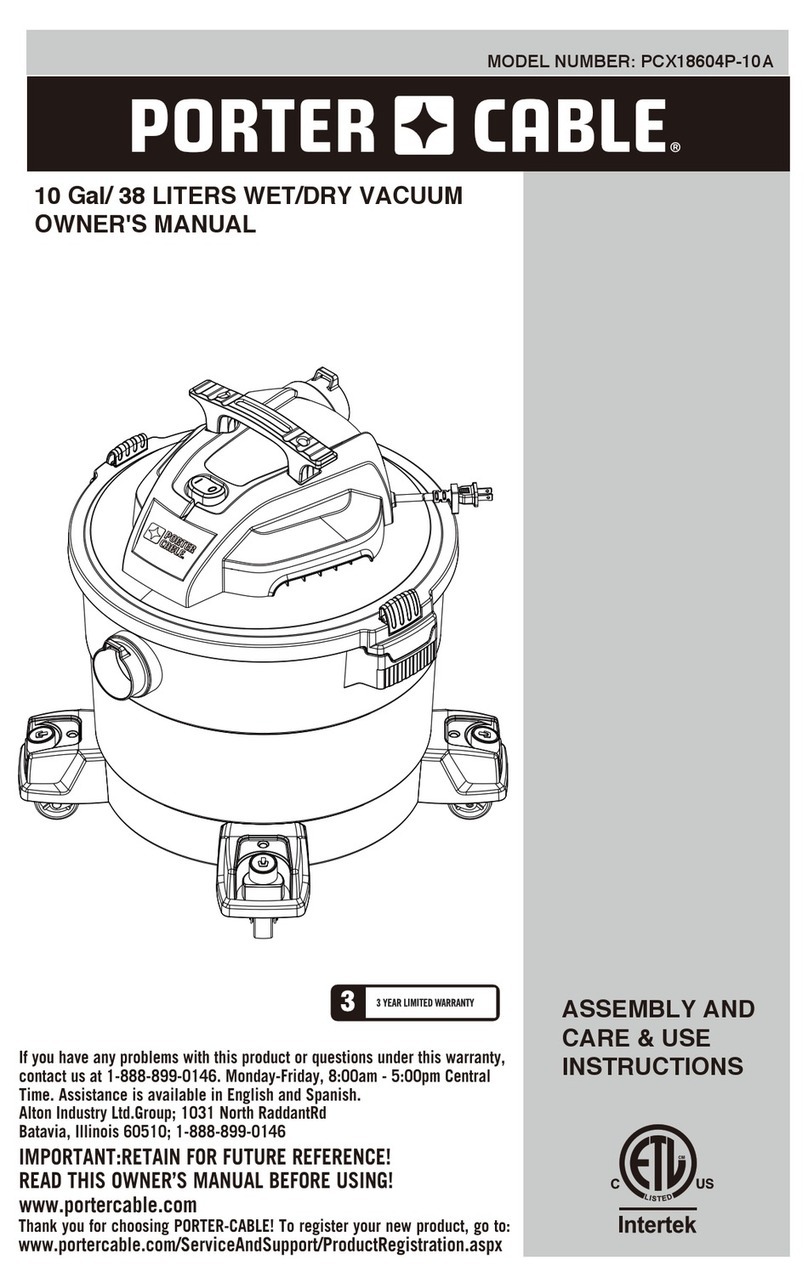
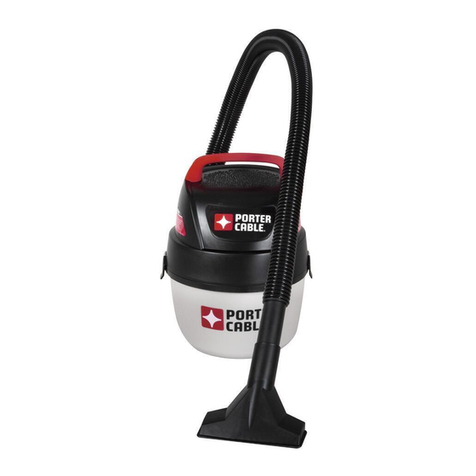
Porter-Cable PCX18301-4B User manual

15.1 Liter / 4 Gal WET/DRY VACUUM
OWNER'S MANUAL
to:
ASSEMBLY AND
CARE & USE
INSTRUCTIONS
www.portercable.com
IMPORTANT: RETAIN FOR FUTURE REFERENCE!
READ THIS OWNER’S MANUAL BEFORE USING!
If you have any problems with this product or questions under this warranty,
contact us at 1-888-899-0146. Monday-Friday, 8:00am - 5:00pm Central
Time. Assistance is available in English and Spanish.
Thank you for choosing PORTER-CABLE! To register your new product, go
www.portercable.com/ServiceAndSupport/ProductRegistration.aspx
Alton Industry Ltd.Group; 643 Innovation Dr.
West Chicago, IL 60185; 1-888-899-0146
MODEL NUMBER: PCX18301-4B

Product Specifications................................................................................................2
Package Contents......................................................................................................3
Safety Information.......................................................................................................4
Assembly....................................................................................................................6
Operating Instructions.................................................................................................6
Care and Maintenance...............................................................................................9
Troubleshooting........................................................................................................10
Expanded View and Parts List..................................................................................11
Warranty...................................................................................................................12
TABLE OF CONTENTS
PRODUCT SPECIFICATIONS
WARNING
Power 120 V / 60 Hz / 8 A
Model PCX18301-4B
Single Stage
15.1 Liter / 4 Gallon
1.5 m x 3.2 cm / 5 ft. x 1-1/4 in.
Gauge A.W.G.
14
12
SJTW18AWG 3 m / 10 ft. Length
Motor
Tank Capacity
Hose
Power cord
Extension Cord Length
0 - 15.2 m / 0 - 50 ft
15.2 m - 30.5 m / 50 - 100 ft
Use only extension cords that are rated for outdoor use. Extension cords in poor
condition or that are too small in wire size can pose fire and shock hazards. To
reduce the risk of these hazards when using an extension cord, be sure it is in
good condition and that the connection does not come into contact with liquid.
To keep power loss to a minimum, use the following table to choose the minimum
wire size extension cord.
2

3
PACKAGE CONTENTS
A
B
C
D
E
P
K
LM N
J
O
R
Q
H
GF
I
PART PART NUMBERS
JHose 1
1
K3
L
MFoam filter
O
P
Reusable dry filter
Clamp ring
1
Floor nozzle
Extension wand
13-3301
20-1200A
NDisposable filter bag 1
25-1238
20-1100
20-1100
13-1570
25-1205A
1
1
QGulper nozzle 13-1588 1
RCrevice nozzle 13-1508 1
PART DESCRIPTION
DESCRIPTION
QTY
QTY
AHandle (To be assembled before use) 1
BOn/Off switch 1
CLatch 2
DVacuum port 1
EDust tank 1
FBlowing port 1
GPower cord wrap 1
HAccessory holder 1
ICaster(To be assembled before use) 4

4
SAFETY INFORMATION
ATTENTION
IMPORTANT SAFETY INSTRUCTIONS & GROUNDING
INSTRUCTIONS
NEVER LEAVE OPERATING VACUUM UNATTENDED!
To reduce the risk of fire, electric shock, or injury:
When using an electrical appliance, basic precautions should be always followed,
including the following: READ ALL INSTRUCTIONS BEFORE USING THIS
APPLIANCE.
Read all safety rules carefully before attempting to operate. Retain for future reference.
1. Do not leave appliance when plugged in. Unplug from outlet when not in use and
before servicing. Connect to a properly grounded outlet only. See Grounding
Instructions.
2. Do not expose to rain. Store indoors.
3. Always disconnect the plug from the wall outlet before removing the tank cover.
4. Do not allow to be used as a toy. Close attention is necessary when used by or
near children.
5. Do not use with damaged cord or plug. If appliance is not working as it should,
has been dropped, damaged, left outdoors or dropped into water, contact service
center for assistance.
6. Do not pull or carry by cord, use cord as a handle, close a door on cord or pull
cord around sharp edges or corners. Do not run appliance over cord. Keep cord
away from heated surfaces.
7. Do not unplug by pulling on cord. To unplug, grasp the plug, not the cord.
8. Do not handle plug or appliance with wet hands.
9. Do not put any object into openings. Do not use with any openings blocked; keep
the openings free of dust, lint, hair and anything that may reduce airflow.
10. Keep hair, loose clothing, fingers and all parts of body away from openings and
moving parts.
11. Do not pick up anything that is burning or smoking, such as cigarettes, matches
or hot ashes.
12. Do not use without dust bag and/or filters in place.
13. Turn off all controls before unplugging.
14. Use extra care when cleaning on stairs.
15. Do not use to pick up flammable or combustible liquids such as gasoline or use
in areas where they may be present.
16. Do not use your cleaner as a sprayer of flammable liquids such as oil-based paint,
lacquers, etc.
17. Do not vacuum toxic, carcinogenic, combustible or other hazardous materials such
as asbestos, arsenic, barium, beryllium, lead, pesticides or other health
endangering materials.
18. Do not pick up soot, cement, plaster or drywall dust without filter and dust bag in
place. These are very fine particles that may affect the performance of the motor or
be exhausted back into the air. Additional dust bags are available.
DANGER
WARNING
Never operate this unit when flammable materials or vapors are present because
electrical devices produce arcs or sparks that can cause a fire or explosion.

5
SERVICING OF A DOUBLE-INSULATED WET/DRY VACUUM
IMPORTANT
In a double-insulated Wet/Dry Vacuum, two systems of insulation are provided instead
of grounding. This means that no grounding is provided on a double-insulated appliance,
nor should a means for grounding be added. Servicing a double-insulated Wet/Dry
Vacuum requires extreme care and knowledge of the system and should be done only
by qualified service personnel. Replacement parts for a double-insulated Wet/Dry
Vacuum must be identical to the parts they replace. Your double-insulated Wet/Dry
Vacuum is marked with the words "DOUBLE INSULATED" and the symbol (square
within a square) may also be marked on the appliance.
NOTE: Use only as described in this manual. Use only manufacturer's recommended
attachments.
To reduce the risk of injury from electric shock:
1.This appliance has apolarized plug (one blade is wider than the other). This plug will fit
in a polarized outlet only one way.If the plug does not fit fully in the outlet, reverse the
plug. If it still does not fit, contact a qualified electrician to install the proper outlet. Do not
change the plug in any way.
2.Unplug power cord before servicing the electrical parts of the Wet/Dry Vac.
If the supply cord is damaged, it must be replaced by the manufacturer or its service
agent or a similarly qualified person in order to avoid a hazard.
IMPORTANT
Remove the plug from the socket before performing maintenance. Before using the
machine make sure that the frequency and voltage shown on the rating plate correspond
with the mains voltage. Specifications and details are subject to change without prior
notice. The accessories shown in the pictures may vary from model to model.
19. Do not leave the cord lying on the floor once you have finished the cleaning job. It
can become a tripping hazard.
20. Use special care when emptying heavily loaded tanks.
21. To avoid spontaneous combustion, empty tank after each use.
22. The operation of a utility vacuum can result in foreign objects being blown into eyes,
which can result in eye damage. Always wear safety goggles when operating
vacuum.
23. STAY ALERT. Watch what you are doing and use common sense. Do not use
vacuum cleaner when you are tired, distracted or under the influence of drugs,
alcohol or medication causing diminished control.
24. This appliance is provided with double insulation. Use only identical replacement
parts. See instructions for servicing double insulated appliances.
25. Unplug before connecting the hose, nozzles, filters, or other accessories.
WARNING
This product can expose you to chemicals including lead,
which is known to the State of California to cause cancer, birth defects or other
reproductive harm. For more information go to www.P65Warnings.ca.gov.
WARNING:
WARNING:
This product is NOT to be used for filtering of pathogens, for example
COVID-19. Follow all local, state and federal guidance on general cleaning practices.

6
WARNING
OPERATING INSTRUCTIONS
ASSEMBLY
To reduce the risk of fire or explosion, do not operate this vacuum in areas with flammable
gases, vapors or explosive dust in the air. Flammable gases or vapors include but are
not limited to: lighter fluid, solvent-type cleaners, oil-based paints, gasoline, alcohol or
aerosol sprays. Explosive dusts include but are not limited to: coal, magnesium,
aluminum, and grain or gun powder. Do not vacuum explosive dust, flammable or
combustible liquids or hot ashes. Do not use this vacuum as a sprayer for any flammable
or combustible liquid. To reduce the risk of health hazards from vapors or dusts, do
not vacuum toxic materials.
WARNING
The operation of any utility vacuum can result in foreign objects being blown into the eyes,
which can result in severe eye damage. Always wear safety eyewear complying with
ANSI Z87.1 (or in Canada, CSA Z94.3) before starting operation.
CAUTION
To reduce risk of hearing damage, wear ear protectors when using the vacuum for
extended hours or when using it in a noisy area.This 15.1 Liter / 4 Gal wet/dry vacuum
is assembled at the factory and ready for use when you remove it from the carton. The
unit is ready for dry vacuuming or blowing. After you plug the power cord into the wall
receptacle, turn the unit “ON” by pushing the switch from
position “O” to position “I”. The “O” is the “OFF” position and the
“I” is the “ON” position.
O= OFF I = ON
INSTALLING HANDLE
To install handle
1. Place handle in recess (3)
2. Insert provided screws (1)
3. Use Phillips screwdriver to secure and tighten.
INSTALLING CASTERS
Use provided casters and insert into the bottom of caster
base as shown in Figure (A). Strong pressure required
and listen for the click to ensure locked in place.
(1)
(1)
(2)
(2)
(3)
(3)
Figure (A)

7
DRY PICK-UP
WET PICK-UP
IMPORTANT
1.To reduce the risk of damage to the vacuum, do not run motor with float in raised
position.
2.Wet pick up accessories should be washed periodically.
NOTE
A dry filter is necessary to pick up dry material. If you use your vacuum to pick up dust
when the filter is wet, the filter will clog quickly and be very difficult to clean. If the filter
gets wet, replace it before continuing to do dry pickups.
1. Remove disposable filter bag and reusable dry filter and replace it with foam filter
when you do wet pickups (See illustration).
2. This wet/dry vacuum is equipped with a float mechanism which will rise automatically
to cut off the airflow when the liquid in the tank reaches a predetermined level. When
this happens, turn off vacuum, unplug the power cord, and empty the dust tank.
You will know that the float has shut the airflow off because the suction ceases and
the motor noise becomes higher in pitch due to increased motor speed. The liquid
capacity may vary with the rate of pickup.
1. The foam filter and reusable dry filter may be used to pick up dust and dry material;
you must install both to ensure proper filtration. lf the vacuum has been used to pick
up liquids, the foam filter must be cleaned and dried before installing for dry pick up.
The filter must always be in correct position to reduce the risk of leaks and possible
damage to vac. Make sure that the filter is completely covering the filter cage and
that the clamp ring is as close to the lid as possible. Make sure there are no gaps
between the filter and the lid (See illustration). It is very important to assemble the
filter to the cage without allowing any possible leaks or tears. Any leaks will allow
the picked up debris to be blown out of the blowing port and back into the
surrounding environment.
2. When using your vacuum to pick up very fine dust, it will be necessary to empty the
dust tank and clean or replace the filter at more frequent intervals to maintain peak
vacuum performance.
Foam filter
Float in raised position
Reusable dry filter
Disposable filter bag
Clamp ring
INSTALLING DISPOSABLE FILTER BAG
1. Slide the cardboard collar opening firmly onto the vacuum port deflector until it
stops against the deflector wall.
2. Position the bag so that it is distributed around the inside of the tank.
3. Replace and secure the power head onto the tank.

8
EMPTY THE TANK
BLOWING OPERATION
WARNING
To reduce the risk of injury from accidental starting, unplug power cord before emptying
the dust tank.
1. Remove the power head assembly of the wet/dry vacuum by pulling outward on the lid
clips located on each side of the vacuum. Lift off the power head assembly.
2. Dump the tank contents into the proper waste disposal container.
Your vacuum contains a blowing feature. Follow the steps below to use your vacuum
as a blower.
1. Locate the blower port on your vacuum.
2. Insert one end of the 1.5 m x 3.2 cm / 5 ft.x1-1/4 in. hose into the blower port.
3. Turn the vacuum "ON".
WARNING
Always wear safety eyewear complying with ANSI Z87.1 (or in Canada CSA Z94.3)
when using as a blower.
WARNING
To avoid injury to bystanders, keep them clear of blowing debris.
CAUTION
Wear a dust mask if blowing creates dust which might be inhaled.
CAUTION
To reduce the risk of hearing damage, wear ear protection when using the vac/blower
for extended hours or in confined space.

9
CARE AND MAINTENANCE
FILTER REPLACEMENT
CLEANING
WARNING
To reduce the risk of injury from accidental starting, unplug power cord before changing
or cleaning filter.Your filter should be cleaned often to maintain peak vacuum
performance.
To keep your wet/dry vacuum looking its best, clean the outside with a cloth dampened
with warm water and mild soap.
To clean the tank:
STORAGE
Before storing your vacuum, the dust tank should be emptied and cleaned. The cord
should be wrapped and hung on the unit and the accessories should be kept in the
accessory holder so they can be readily available. The vacuum should be stored
indoors.
1. Dump out debris.
2. Wash tank thoroughly with warm water and mild soap.
3. Wipe with dry cloth.
IMPORTANT
To avoid damage to the blower wheel and motor, always reinstall the reusable dry filter
before using the vacuum for dry pickups and always reinstall the foam filter before
using the vacuum for wet pickups.
IMPORTANT
After cleaning, check the filter for tears or small holes. Do not use a filter with holes or
tears in it. Even a small hole can cause dust to come out of your vacuum.
Replace it immediately.
NOTE
Before installing the filter on the vacuum, clean the area of the lid so that the clamp ring
will seal the bag against the lid and stop small particles from bypassing the filter bag. If
the filter is clean and not damaged, replace it on the filter cage. If it cannot be reused,
place a new filter over the filter cage.
NOTE
Clean the filter in an open area.
WARNING
Do not remove filter cage and float. The float prevents water from entering the impeller
and damaging the motor. The cage prevents fingers from touching the moving impeller.

10
TROUBLESHOOTING
Minor problems often can be fixed without calling customer service.
Vacuum can not
run
Loss of suction,
wet pick-up
Loss of suction,
dry pick-up
No electricity
1. Full tank
2. Clogged hose
3. Clogged filter
1. Drain and clean tank
2. Remove hose and clean debris
3. Clean or replace filter
Make sure electrical outlet has voltage
(A qualified electrician may needto be contacted)
1. Full tank
2. Clogged hose
3. Clogged filter
1. Drain and clean tank
2. Remove hose and clean debris
3. Clean or replace filter
PROBLEM POSSIBLE CAUSE CORRECTIVE ACTION

11
EXPANDED VIEW / PARTS LIST
1 1
1
1
1
1
1
Handle
Top Cover
Baffle
Power Cord
Lid
Motor
2
3
4
5
6
PART DESCRIPTION QTY
Silencer Sponge
Motor Bottom Support
7 1
18
Float
19
1
1
2
1
1
1
Filter Cage
Latch
Dust Tank
Vacuum Port Deflector
Vacuum Port
10
11
12
13
14
PART DESCRIPTION QTY
Caster Dolly
Caster
15
1
4
16
On/Off Switch
17

12
WARRANTY
Alton Industry Ltd. Group
3 Years Limited Warranty
This warranty covers any defects in materials or workmanship of the enclosed
product. Alton Industry Ltd. Group will repair or replace any defective materials due to
craftsmanship of the product. This warranty does not cover any problem caused by
misuse, abuse, accidents or acts of God, such as floods or hurricanes. Consequential
and incidental damages are not covered under this warranty. Coverage terminates if
you sell or otherwise transfer the ownership. If you feel you have a defective product,
please submit a copy of your receipt to the address below and call 1-888-899-0146
for instructions prior returning this item to the store or sending back to:
Alton Industry Ltd. Group
643 Innovation Drive West Chicago, IL 60185
We will inspect the product and contact you within 72 hours to give you the results of
our inspection. We reserve the right to repair or replace the product at our discretion.
However, we may replace the product with one of similar but not exact features.
Parts and Service Information available callAlton Industry at 1-888-899-0146.
Monday-Friday, 8:00am - 5:00pm Central Time. Assistance is available in
English and Spanish.
This warranty gives you specific legal rights. You may have other rights
which vary from state to state.

NUMERO DE MODELO: PCX18301-4B
ASPIRADORA HÚMEDA/SECA
15,1 Litros / 4 Galones
MANUAL DEL PROPIETARIO
INSTRUCCIONES Y DE
MONTAJE Y DE
INSTALACIÓN Y DE
USO Y CUIDADO
www.portercable.com
IMPORTANTES:CONSERVAR PARA FUTURAS REFERENCIAS!
LEA TODAS LAS INSTRUCCIONES ANTES DE USAR SU
ASPIRADORA
Si tiene algún problema con este producto o preguntas bajo esta garantía,
póngase en contacto con nosotros en el 1-888-899-0146. De lunes a
viernes, de 8:00 am - 5:00 pm, hora del centro. La asistencia está
disponible en inglés y español.
Gracias por elegir PORTER-CABLE! Para registrar su nuevo producto, acceda a:
www.portercable.com/ServiceAndSupport/ProductRegistration.aspx
Alton Industry Ltd.Group; 643 Innovation Dr.
West Chicago, IL 60185; 1-888-899-0146

Especificaciones del producto..................................................................................14
Contenidos del paquete............................................................................................15
Información de seguridad..........................................................................................16
Montaje......................................................................................................................18
Instrucciones de operación........................................................................................18
Cuidado y mantenimiento..........................................................................................21
Resolución de problemas..........................................................................................22
Vista extendida y lista de partes................................................................................23
Garantía.....................................................................................................................24
TABLA DE CONTENIDOS
ESPECIFICACIONES DEL PRODUCTO
¡ADVERTENCIA!
Energía 120 V / 60 Hz / 8 A
Modelo PCX18301-4B
Etapa individual
15,1 Litros / 4 Galones
1,5 m x 3,2 cm / 5 ft. x 1-1/4 in.
Gauge A.W.G.
14
12
SJTW18AWG 3 m / 10 ft. de longitud
Motor
Capacidad del tanque
Manguera
Cable de electricidad
Longitud cable de extension
0 - 15.2 m / 0 - 50 pies
15.2 m - 30.5 m / 50 - 100 pies
Use solo cables de extensión eléctrica calificados para uso externo. Los cables de
extensión en mala condición o los cables muy pequeños pueden causar un incendio
o peligros de choque eléctrico, asegúrese de que estén en buena condición y que la
conexión no entre en contacto con el líquido. Para alcanzar una pérdida de
electricidad mínima, use la siguiente tabla para elegir el tamaño mínimo de cable de
extensión.
14

15
CONTENIDOS DEL PAQUETE
PARTE
NÚMEROS DE PARTES
JManguera 1
1
K3
L
MFiltro de espuma
O
P
Filtro seco reutilizable
Abrazadera de aro
1
Boquilla del piso
Vara de extensión
13-3301
20-1200A
NBolsa de filtro descartable 1
25-1238
20-1100
20-1100
13-1570
25-1205A
1
1
QBoquilla de inyector 13-1588 1
RHerramienta para hendidura 13-1508 1
PARTE DESCRIPCIÓN
DESCRIPCIÓN
CANTIDAD
CANTIDAD
AMango (para instalarse antes del uso ) 1
BInterruptor encendido/apagado 1
CLengueta 2
DOrificio de aspiración 1
ETanque de polvo 1
FPuerto de soplado 1
GEnvoltura de cable eléctrico 1
HSujetador de accesorios 1
IMoldeadore(Para montarse antes del uso) 4
A
B
C
D
E
P
K
LM N
J
O
R
Q
H
GF
I

16
INFORMACIÓN DE SEGURIDAD
¡ATENCIÓN!
INSTRUCCIONES DE SEGURIDAD Y CONEXIÓN A TIERRA IMPORTANTE
¡NUNCA DEJE LA ASPIRADORA SIN CUSTODÍA CUANDO ESTÁ EN
FUNCIONAMIENTO!
Para reducir el riesgo de incendio, descarga eléctrica o lesión:
Cuando usa un aparato eléctrico, se deben seguir las precauciones básicas que
incluyen: LEA TODAS LAS INSTRUCCIONES ANTES DE USAR EL APARATO
ELÉCTRICO.
Lea todas las reglas de seguridad con cuidado antes de intentar la operación de este
aparato. Retenga esta información para futura referencia.
1. No deje el aparato cuando está enchufado. Desenchúfelo del tomacorriente
cuando no está en uso y antes de limpiarlo. Conéctelo a un tomacorriente
adecuadamente conectado a tierra. Observe la conexión a tierra. Instrucciones.
Observe la conexión a tierra. Instrucciones.
2. No exponga el aparato a la lluvia. Guarde la aspiradora en lugares cerrados.
3. Siempre desconecte el enchufe de un tomacorriente de pared antes de sacar la tapa
del tanque.
4. No permita que los niño usen la aspiradora como un juguete. Preste mucha atención
cuando los niños la usan o cuando la aspiradora está cerca de ellos.
5. No use la aspiradora con un cable eléctrico o enchufe dañado. Conéctese con el
servicio técnico si el aparato no funciona como debe, se cayó, se danó, se dejó afuera
o se cayó en el agua.
6. No tire o tome el aparato por el cable, use el cable como manija, cierre la puerta en el
cable o tíre el cable alrededor de orillas o rincones filosos. No use el aparato sobre el
cable. Mantenga el cable alejado de superficies calientes.
7. No desenchufe tirando el cable. Para desenchufar, agarre el enchufe, no el cable.
8. No maneje el enchufe o el aparato con las manos húmedas.
9. No ponga cualquier objeto en las aberturas. No use la aspiradora con cualquiera de
las aberturas bloquedas; mantenga las aberturas libre de polvo, lienzo, pelos y
cualquier elemento que pueda reducir el flujo de aire.
10. Mantenga los pelos, ropa suelta, dedos y todas las partes del cuerpo alejados de las
aberturas y partes móviles.
11. No aspire nada que se esté quemando o eche humo, como cigarillos, fósforos o
cenizas calientes.
12. No use sin una bolsa de polvo y/o filtros en su lugar.
13. Apague todos los controles antes de desenchufar el aparato.
14. Tenga mucho cuidado cuando limpie las escaleras.
15. No use el aparato para aspirar inflamables o combustibles líquidos como gasolina o
use en áreas donde puedan estar presente.
16. No use su limpiador como un rociador de líquidos inflamables, como ser pintura de
aceite, lacas, etc.
17. No aspire materiales tóxicos, carcinógenos, combustibles u otros materiales peligrosos
como asbestos, arsénico, bario, berilio, plomo, pesticidas u otros materiales nocivos
para la salud.
¡PELIGRO!
¡ADVERTENCIA!
Nunca opera ésta unidad cuando estén presentes los materiales inflamables o vapores
porque los dispositivos eléctricos producen arcos eléctricos o chispas que pueden causar
un incendio o explosión.

17
MANTENIMIENTO DE UNA ASPIRADORA HÚMEDA/SECA CON DOBLE MATERIAL AISLANTE
¡IMPORTANTE!
En una aspiradora húmeda/seca con doble material aislante se proveen dos sistemas
de insulación en lugar de una conexión a tierra. Esto significa que no se provee ninguna
conexión a tierra en un aparato con doble material de insulación ni tampoco que se debe
añadir un medio para la conexión a tierra. El mantenimiento de una aspiradora
húmeda/seca con doble material aislante requiere mucho cuidado y concocimiento del
sistema y debe ser realizado solo por personal de servicio calificado. Las piezas de
respuesto de una aspiradora húmeda/seca con doble material aislante deben ser
idénticas a las partes que reemplazen. La aspiradora húmeda/seca con doble material
aislante está indicada con las palabras “DOBLE MATERIAL AISLANTE” y el símbolo
(cuadrado dentro de un cuadrado) puede también marcarse en el aparato.
Para reducir el riesgo de lesión de un shock eléctrico: 1.Esto aparato tiene un enchufe
polarizado (una pata es más ancha que la otra). Este enchufe encajará en un
tomacorriente polarizado de una sola manera. Si el enchufe no encaja completamente
en el tomacorriente, invierta el enchufe. Si aún así no encaja, póngase en contacto con
un electricista calificado para que instale una toma adecuada. No haga cambiar el
enchufe de ninguna manera.2.Desenchúfe el cable eléctrico antes de realizar el
mantenimineto de las partes eléctricas de la aspiradora húmeda/seca.
NOTA: Use solo como se describe en este manual. Use solo accesorios
recomendados del fabricante.
Si se daña el cable de suministro de energía, éste debe ser reemplazado por el
fabricante o su agente de servicio o una persona calificada similar para evitar el peligro.
Retire el cable de la boquilla antes de realizar el mantenimiento. Antes de usar la
máquina asegúrese que la frecuencia y el voltaje que se muestra en la placa de datos
de servicio corresponde al voltaje de suministro eléctrico. Las especificaciones y los
detalles están sujetos a cambios sin previa notificación. Los accesorios que
se muestran en las fotos pueden variar entre modelo y modelo.
18. No levante el hollín, cemento, yeso o polvo de la mampostería sin el filtro o la bolsa
de polvo en su lugar. Estas son partículas muy finas que pueden afectar el
rendimiento del motor o que pueden salir nuevamente al aire.
19. No deje el cable tendido en el piso una vez que terminó el trabajo de limpieza.
Puede convertirse en un peligro de tropiezo.
20. Tenga especial cuidado cuando vacia los tanques excesivamente cargados.
21. Para prevenir la combustión espontánea, vacie el tanque antes de usar.
22. El uso de una aspiradora de utilidad puede causar que algunos objetos extraños
vuelen a sus ojos lo que puede causar un daño ocular. Siempre use gafas de
protección cuando use la aspiradora.
23. MANTÉNGASE ALERTA. Observe lo que hace y use el sentido común. No use la
aspiradora cuando está cansado, distraído o bajo la influencia de drogas, alcohol o
medicamentos que causan una disminución de control.
24. Este aparato es provisto con doble material aislante. Use solo piezas de respuesto
idénticas. Observe las instrucciones para el mantenimiento de aparatos con doble
material aislante.
25. Desenchufe antes de conectar la manguera, boquillas, filtros u otros accesorios.
¡IMPORTANTE!
¡ADVERTENCIA!
ADVERTENCIA:
Este producto NO debe usarse para filtrar patógenos, por
ejemplo, COVID-19. Siga todas las pautas locales, estatales y federales sobre prácticas
generales de limpieza.
ADVERTENCIA:
Este producto puede exponerlo a sustancias
químicas, incluido nacimiento u otros daños reproductivos. Para obtener más
información, vaya a www.P65Warnings.ca.gov.

18
¡ADVERTENCIA!
INSTRUCCIONES DE OPERACIÓN
MONTAJE
Para reducir el riesgo de incendio o explosión, no use esta aspiradora en áreas con
gases inflamables, vapores o polvo de explosivos en el aire. Los gases inflamables o
vapores incluyen pero no se limitan a los fluídos para encendedores, limpiadores tipo
solventes, pinturas a base de aceite, gasolina, alcohol, o rociadores en aerosol. Los
polvos explosivos incluyen pero no se limitan al carbon, magnesio, aluminio, y granos o
pólvora. No aspire el polvo explosivo, líquidos inflamables o combustibles o cenizas
calientes. No use la aspiradora como un rociador para cualquier líquido inflamable o
combustible. No aspire los materiales tóxicos para reducir el riesgo de peligros de salud
debido a los vapores o polvos.
¡ADVERTENCIA!
El uso de cualquier aspiradora de utilidad puede causar que algunos objetos extraños
vuelen hacia los ojos, lo que puede causar daño ocular. Siempre use gafas de
seguridad que cumplan con ANSI Z87.1 (o en Canadá, CSA Z94.3) antes de comenzar
el uso.
PRECAUCIÓN!
Para reducir el riesgo de daño auditivo, use los protectores para los oídos cuando usa
la aspiradora en horarios prolongados o cuando la usa en una área con mucho ruido.
Esta aspiradora húmeda/seca de 15.14 Litros / 4 Galones se monta en una fábrica y
está lista para usar cuando la saca de su carton. La unidad está lista para aspirar en
seco o soplado. Después de enchufar el cable de suministro eléctrico en el receptáculo
de la pared, encienda la unidad “ENCENDIDO” empujando el interruptor desde la
posición “O” a la posición “I”. La “O” es la posición “APAGADO” y la “I” es la posición
“ENCENDIDO”.
O= APAGADOI= ENCENDIDO
INSTALACIÓN DE LA MANIJA
Para instalar la manija
1. Ubique la manija en receso (3)
2. MIntroduzca los tornillos provistos (1)
3. Use el destornillador Philips para asegurar y ajustar.
INSTALAR LAS RUEDAS
Use las ruedas provistas e introdúzcalas en la parte de
abajo de la base como lo muestra la Figura (A). Esto
requiere una fuerte presión y escuche clic para aseguarse
que se trabe en su lugar.
(1)
(1)
(2)
(2)
(3)
(3)
Figura (A)

19
ASPIRACIÓN EN SECO
ASPIRACIÓN DE LÍQUIDOS
¡IMPORTANTE!
1. Para reducir el riesgo de daño que se puede causar a la aspiradora, no ponga en
marcha el motor con el flotador en una posición elevada.
2. Los accesorios para la aspiración de
líquidso deben lavarse frecuentemente.
NOTA
Es necesario el uso de un filtro seco para levantar el material seco. Si usa su
aspiradora para levantar el polvo cuando el filtro está húmedo, el filtro se obstruirá
rápidamente y será muy difícil de limpiar. Si el filtro se humedece, reemplázelo antes
de continuar de secar las aspiraciones.
1. Retire la bolsa de filtro desechable y reutilizable filtro seco y remplácelos con el filtro
de espuma cuando aspira los líquidos (Vea ilustración).
2. Esta aspiradora húmeda/seca está equipada con un mecanismo de flotador el cual
se levantará automáticamente para parar el flujo de aire cuando el líquido del tanque
alcance un nivel predeterminado. Cuando esto suceda, apage la aspiradora,
desenchufe el cable de suministro de energía y vacíe el tanque de polvo. Sabrá
cuando el flotador haya parado el flujo de aire porque la succión para y el tono del
ruido del motor es más alto debido al aumento de velocidad del motor. La capacidad
del líquido puede variar con la velocidad de la aspiración.
1. El filtro de espuma y el filtro seco reusable puede usarse para levantar el polvo y el
material seco; debe instalar ambos para asegurar un filtrado adecuado. Si la
aspiradora se ha usado para aspirar líquidos, el filtro de espuma puede limpiarse y
secarse antes de su instalación para la recogida en seco. El filtro debe siempre estar
en la posición correcta para reducir el riesgo de pérdidas y el posible daño a la
aspiradora. Asegúrese que el filtro esté completamente cubriendo la jaula del filtro y
que la abrazadera del aro esté tan cerca de la tapa como sea posible. Asegúrese de
que no hayan espacios entre el filtro y la tapa (Vea ilustración). Es muy importante
ensamblar el filtro en la jaula sin permitir que se produzcan pérdidas o roturas.
Cualquiera de las pérdidas permitirá que los desechos levantados se vuelen afuera
del orificio de expulsión y que retornen al entorno del medio ambiente.
2. Cuando use la aspiradora para levantar polvo muy fino, será necesario vaciar el
tanque de polvo y limpiar o reemplazar el filtro con intervalos de frecuencia adicionales
para mantener el rendimiento pico de la aspiradora.
Filtro de espuma
Flotador en posición
elevada
Filtro secoreusable
Bolsa de filtro descartable
Abrazadera de aro
INSTALACIÓN DE BOLSA DE FILTRO DESCARTABLE
1. Deslice el collar de cartón abriendo firmemente en el orificio deflector de aspiración
hasta que pare contra la pared del deflector.
2. Posicione la bolsa para que se distribuya alrededor del interior del tanque.
3. Remplace y asegure la cabeza motriz en el tanque.

20
VACIADO DEL TANQUE
OPERACIÓN DE SOPLADO
¡ADVERTENCIA!
Para reducir el riesgo de lesión debido al comienzo de un accidente, desenchufe el cable
de suministro de energía antes de vaciar el tanque de polvo.
1. Remueva el montaje de la cabeza motriz de la aspiración húmeda/seca tirando hacia
afuera en los clips de la tapa ubicado en cada lado de la aspiradora.
2. Tire los contenidos del tanque en el contendido de desechos apropiados.
Su aspiradora contiene una característica de soplado. Siga los pasos mencionados
debajo para usar la aspiradora como una sopladora.
1. El puerto de soplado en su aspiradora.
2. Inserte un extremo de la manguera de 1.5 m x 3.2 cm / 5 ft. x 1-1/4 in. en el
orificio de aspiración.
3. Encienda la aspiradora en "ENCENDIDO".
¡PREVENCIÓN!
Siempre use las gafas de seguridad para cumplir la norma ANSI Z87.1 (o en Canadá
CSA Z94.3).
¡PREVENCIÓN!
Para prevenir las lesiones que se pueden causar a los transeúntes, manténgase alejado
del soplado de desechos.
¡PRECAUCIÓN!
Use una máscara de polvo si el soplado crea polvo que puede ser inhalado.
¡PRECAUCIÓN!
Para reducir el riesgo de daño auditivo, use el protector de oídos cuando usa la
aspiradora/succionadora durante períodos extensos de tiempo o en espacios cerrados.
Table of contents
Languages:
Other Porter-Cable Vacuum Cleaner manuals

Porter-Cable
Porter-Cable PCX18604P-10A User manual

Porter-Cable
Porter-Cable PCX18156 User manual

Porter-Cable
Porter-Cable PCC795 User manual

Porter-Cable
Porter-Cable 90550095 User manual

Porter-Cable
Porter-Cable 7814 User manual

Porter-Cable
Porter-Cable 7812 User manual

Porter-Cable
Porter-Cable PCX18604P-12A/8101261 User manual

Porter-Cable
Porter-Cable PCX18125P User manual

Porter-Cable
Porter-Cable PCX18115 User manual