Portfolio Outdoor 39420 User manual

Français p. 9
Español p. 17
ITEM #0338579
MODEL #39420
FLUSHMOUNT CEILING FIXTURE
1
Questions, problems, missing parts? Before returning to your retailer, call our
customer service department at 1-800-643-0067, 8 a.m. - 6 p.m., EST, Monday - Thursday,
8 a.m. - 5 p.m., EST, Friday.
ATTACH YOUR RECEIPT HERE
Serial Number Purchase Date
Lowes.com/portfolio
Portfolio® is a registered trademark
of LF, LLC. All Rights Reserved.

PACKAGE CONTENTS
2
APan 1
Socket (Preassembled to Pan (A)) 1
B
PART DESCRIPTION QUANTITY
A
B
Lowes.com/portfolio

HARDWARE CONTENTS (shown actual size)
Wire
Connector Threaded
Knob
Long
Machine
Screw
AA DD
CC
Short
Machine
Screw
BB EE FF
Qty: 3
Qty: 2
Qty: 2
Qty: 2
GND
Mounting
Bracket
Ground
Screw
(Not Shown
to size)
Qty: 1
Qty: 1
(Not Shown
to size)
3
SAFETY INFORMATION
Please read and understand this entire manual before attempting to assemble, operate or install the
product.
WARNING
• IMPORTANT: NEVER attempt any work without shutting off the electricity.
• Go to the main fuse box, or circuit breaker, in your home. Place the main power switch in the “OFF”
position and unscrew the fuse(s), or switch “OFF” the circuit breaker switch(es), that control the power
to the fixture or room that you are working on.
• Place the wall switch in the "OFF" position. If the fixture to be replaced has a switch or pull chain,
place it in the "OFF" position.
• Do not use bulbs with wattage greater than specified on this fixture.
• WARNING: California Prop. 65: This lighting fixture contains chemicals known to the state of California
to cause cancer, birth defects, and/or other reproductive harm. Wash hands after use.
CAUTION
• Read and understand all instructions and illustrations completely before proceeding with assembly and
installation of this fixture.
• If you have any doubts about how to install this lighting fixture, or if the fixture fails to operate
completely, please contact a licensed electrical contractor.
• All parts must be used as indicated in these instructions. Do not substitute any parts, leave parts out,
or use any parts that are worn out or broken. Failure to obey this instruction could invalidate the UL
listing and/or C.S.A. certification of this fixture.
PREPARATION
Before beginning assembly of product, make sure all parts are present. Compare parts with package
contents list. If any part is missing or damaged, do not attempt to assemble the product.
Estimated assembly time: 30 minutes to 1 hour
Tools Required for Assembly (not included): Phillips screwdriver, flathead screwdriver, wire strippers,
electrical tape, ladder, safety glasses, silicone caulk, caulking gun.
Lowes.com/portfolio

ASSEMBLY INSTRUCTIONS
4
Hardware Used
1
EE
FF
Hardware Used
2
AA
x 1Wire Connector
AA
1. Insert two long machine screws (DD) into the
mounting bracket (EE) before connecting
to the outlet box (not included). The two long
machine screws (DD) should protrude through
mounting bracket (EE) for securing pan (A) in
later steps. Connect the mounting bracket (EE)
to outlet box with short machine screws (BB).
Short Machine
Screws x 2
x 1
BB
Long Machine
Screws x 2
DD
EE Mounting
Bracket
DD
EE
GND
BB
Outlet Box
(Not Included)
Lowes.com/portfolio
2. Wire connection guide:
Ground wire:
• For installation in the United States:
Wrap ground wire from outlet box (not
included) around ground screw (FF) on
mounting bracket (EE) no less than 2 in. from
wire end. Tighten ground screw (FF). If
fixture is supplied with a ground wire,
connect to outlet ground wire with a wire
connector (AA).
• For installation in Canada:
If fixture is supplied with ground wire, wrap
ground wire around ground screw (FF) on
mounting bracket (EE). Tighten ground

ASSEMBLY INSTRUCTIONS
5
3
x 2
CC Threaded
Knobs
Hardware Used
Hardware Used
x 2Wire Connector
AA
4. Pass pan (A) over long machine screws (DD)
and secure with threaded knobs (CC). 44
DD
CC
A
Lowes.com/portfolio
CONNECT HOT, BLACK OR RED OUTLET SUPPLY WIRE TO: CONNECT NEUTRAL, WHITE OUTLET SUPPLY WIRE TO:
Black White
* Parallel Cord (round and smooth) * Parallel Cord (square and ridged)
Clear, Brown, Gold or Black without Tracer (colored stripes) Clear, Brown, Gold or Black with Tracer (colored stripes)
Insulated Wire (not green) with Copper Metal Conductor Insulated Wire (not green) with Silver Metal Conductor
3. Supply wire connection guide: Make wire connections, securing with wire connectors (AA), following
the reference chart listed below.
*NOTE:
When parallel wire (SPT I & SPT II) is used,
the neutral wire is square shaped and ridged
and the hot wire will be round in shape and
smooth.

ASSEMBLY INSTRUCTIONS
6
5. Screw one 100-watt medium base bulb (not
included) into socket (B).
B
45
Lowes.com/portfolio

7
CARE AND MAINTENANCE
WARRANTY
Distributor warrants products manufactured by it will be free from defects in material and workmanship
for three (3) years following the date of shipment. This warranty does not cover bulbs or finish on
outdoor product. If any of the warranted products are found by Distributor to be defective, such products
will, at Distributor’s option, be replaced or repaired at Distributor’s cost. The parties hereto expressly
agree that Buyer’s sole and exclusive remedy against the Distributor shall be for the repair or
replacement of defective products as provided herein, or, at the Distributor’s sole option, Distributor may
refund the purchase price of the products. THE FOREGOING WARRANTY IS IN LIEU OF ALL OTHER
WARRANTIES, EXPRESSED OR IMPLIED, INCLUDING THOSE OF MERCHANTABILITY, FITNESS
FOR ANY PARTICULAR PURPOSE OR INFRINGEMENT. No affirmation of Distributor, by words or
action, other than set forth in this paragraph shall constitute a warranty. Goods which may by sold by
Distributor but which are not manufactured by Distributor are not warranted by Distributor, but are sold
only with the warranties, if any, of the manufacturer thereof. This warranty does not cover labor or other
costs or expenses to remove or install any defective, repaired or replaced product. Distributor’s warranty
does not apply to any products that have been subjected to misuse, mishandling, misapplication, neglect
(including, but not limited to improper maintenance), accident, improper installation, modification
(including, but not limited to use of unauthorized parts or attachments), or adjustment or repair.
• Always be certain that electric current is turned off before cleaning this item.
• Use a soft, moist cloth with mild non-abrasive soap to clean fixture. Never use glass cleaner on
fixture, as it will damage the metal finish.
• All glass shades may be washed in a towel-lined sink with warm water and mild soap. Do not
wash shades in an automatic dishwasher.
TROUBLESHOOTING
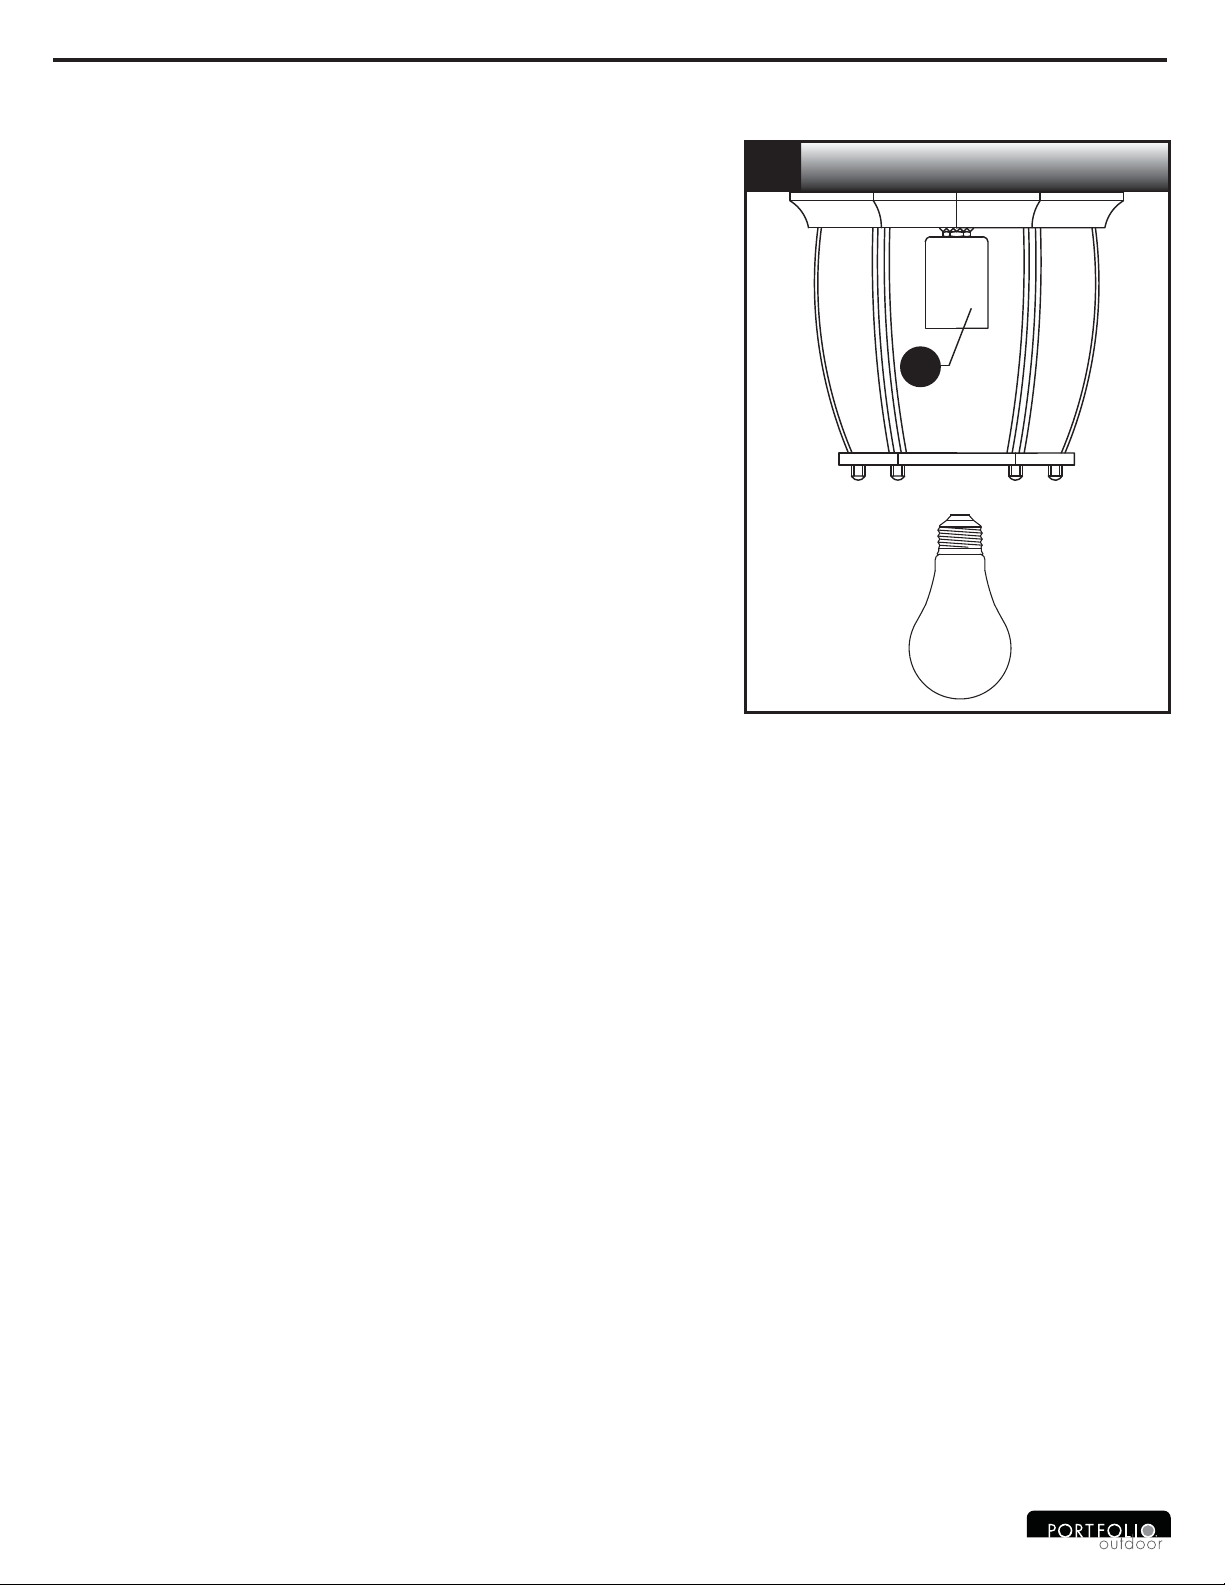
Fixture does not light. 1. Fixture may be wired incorrectly. 1. Check wiring.
2. Worn or broken bulb. 2. Replace bulb.
PROBLEM POSSIBLE CAUSE CORRECTIVE ACTION
Lowes.com/portfolio

8
REPLACEMENT PARTS LIST
For replacement parts, call our customer service department at 1-800-643-0067, 8 a.m. - 6 p.m., EST,
Monday - Thursday, 8 a.m. - 5 p.m., EST, Friday.
BB
CC
DD
EE
AA Wire Connector WC001
Short Machine Screw SCR832X050
Threaded Knob TN39040
Long Machine Screw SCR832X100
Mounting Bracket XBAR03
PART DESCRIPTION PART #
AA DD
CC
BB EE
GND
Printed in China
Lowes.com/portfolio
Portfolio®is a registered trademark of
LF, LLC. All rights reserved.
Rev. 07-18-12
This manual suits for next models
1
Table of contents
Popular Light Fixture manuals by other brands

Hayward
Hayward AstroLite ll Spa Lighting manual

Red lightning
Red lightning Classe W 575 user manual

Lightolier
Lightolier C4CEX (EXPO) SERIES Instructions for maintenance reference

JB Systems
JB Systems LED ClubHead Operation manual

Uncle Milton
Uncle Milton Moon In My Room quick start guide

elektraLite
elektraLite MY 250 user manual

Triarch
Triarch 25612 Assembly instructions

Maxim Lighting
Maxim Lighting CounterMax MX-L-120-1K quick start guide

Cedes
Cedes easyTEC easygard100 Installation and operation manual

IKEA
IKEA INREDA instructions

Acuity Brands
Acuity Brands Lithonia Lighting D-Series Wall installation instructions

planeo
planeo Ixion user manual