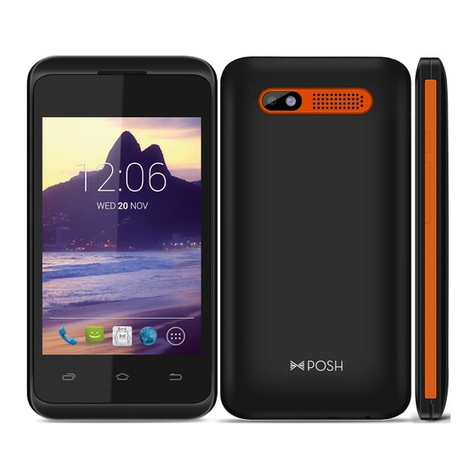
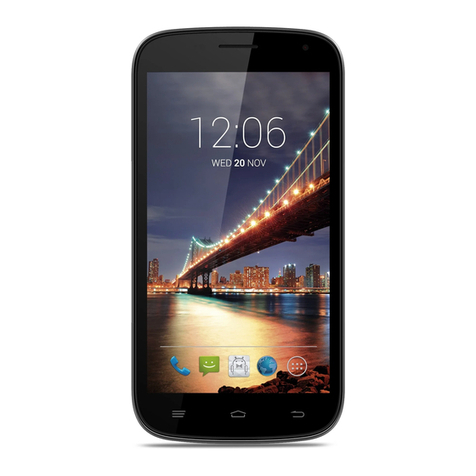
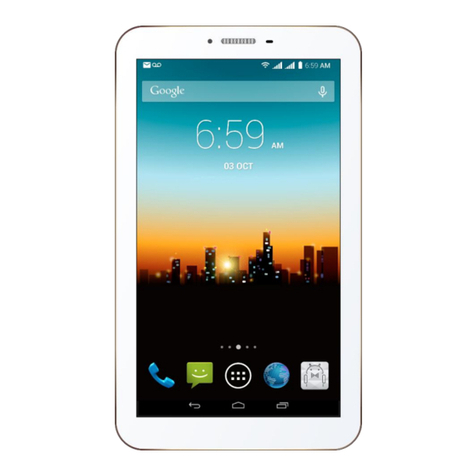
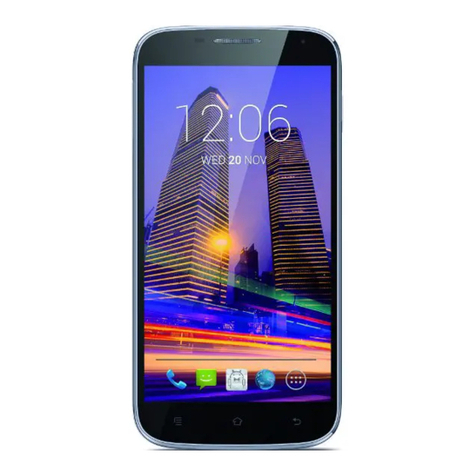
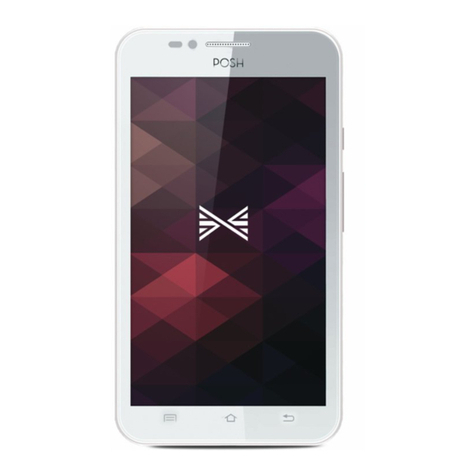
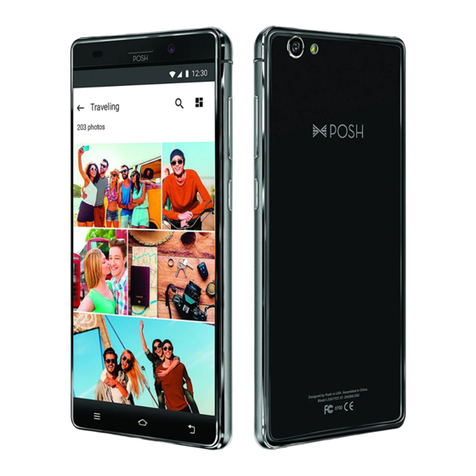
Posh Memo Pro LTE L600 User manual

0
Memo Pro LTE
L600
Users Manual

1
Introduction
Thank you for purchasing this product.
For your cellular phone works property. Please follow the instructions in this manual. To
prevent any possible incidents or malfunction, please follow all safety warnings. If
because function upgrade cause described in the manual content does not accord with
actual products, please refer to our company subsequent release of information.
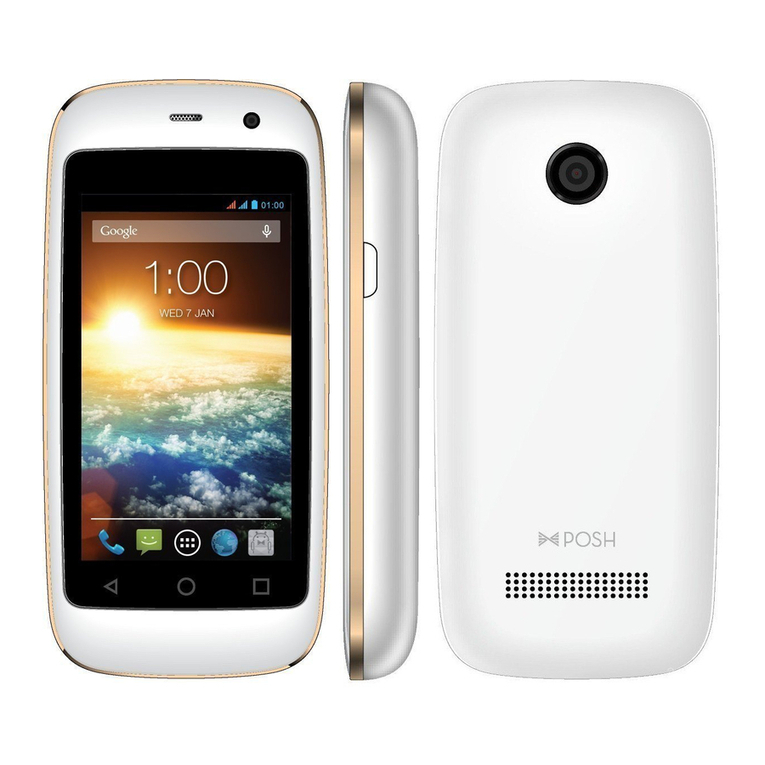
The Names and Explanation of Each Part
Appearance

2
Safety & Notice
WARNING: Please pay attention to these guidelines, it’s dangerous and may break
the law, even the manufacturer will not undertake any responsibility to the user who
does not follow with the following recommendations or improper to use the Tablet
PC.
If the tablet supports the “Flight mode” function, please set the mode as “Flight mode” on
the plane. If not support, please turn off the phone before boarding, because the phone
may cause interference in aircraft. Please
follow any restrictions on the airplane.
Switch the device off near the fuel, chemicals, or blasting areas. Keep the
device away from the children.
While driving please obey local laws and regulations with regard to Tablet
PC use. When talking on the tablet pc while driving, please obey the
following rules: Concentrate on driving and be aware of traffic conditions; if
your Tablet PC has a hands-free function, please use it in this mode. Under
poor driving conditions, please stop the car before you dial or pick up the
phone.
Switch off the Tablet PC in the hospital or other forbidden using Tablet place.
The Tablet PC will affect the normal work of electronic equipment and
medical devices, such as pacemakers, hearing aids and other medical
electronics equipment.
Non-original accessories and components are not provided with repair
warranty qualification.
Please do not disassemble your tablet by yourself, if your tablet is out of
order, please contact your supplier.
Please do not charge the Tablet PC before battery is installed. Do not
short-circuit the battery.
Tablet PC must be charged in the good ventilated and cooling environment,
and away from flammable and explosive materials.
In order to demagnetization, please keep Tablet PC away from the magnetic
material, such as disks, credit card etc.
Keep the device dry. Precipitation, humidity, and all types of liquids or
moisture can contain minerals that will corrode electronic circuits. If your
device does get wet, remove the battery, and contact with the supplier.
Do not use the Tablet PC in too high or too low temperature environment,
and do not expose the Tablet PC to strong sunlight or high humidity.
Do not use liquid or wet cloth with strong detergent to clean the device.
This Tablet PC is provided photograph, video recording and sound recording
functions; please follow the relevant laws and regulations to use those
functions. Photograph, video recording and sound recording without
authorization may violate laws and regulations.
While using the network functions, please do not download the files which
have virus, do not install any photos and ring tones which have been
damaged. If it results the phone abnormally, our company will not undertake

3
any responsibility.
Please dispose of batteries according to local regulations, please recycle when
possible. Please do not dispose as household waste.
STATEMENT: Our Company reserves the right to revise this manual content without
prior notice.
Start to use
Touch & type
Use your fingers to manipulate icons, buttons, menus, the onscreen keyboard, and other
items on the touch screen. You can also change the screen's orientation.
To select or activate something, touch it.
To type something, such as a name, password, or search terms, just touch where you
want to type. Akeyboard pops up that lets you type into the field.
Other common gestures include:
Touch & hold: Touch & hold an item on the screen by touching it and not lifting your
finger until an action occurs.
Drag: Touch & hold an item for a moment and then, without lifting your finger, move
your finger on the screen until you reach the target position. For example, you can
drag to reposition shortcuts on the Home screen.
Swipe or slide: Quickly move your finger across the surface of the screen, without
pausing when you first touch (so you don't drag something instead). For example,
you can slide a Home screen left or right to view the other Home screens.
Double-tap: Tap quickly twice on a webpage, map, or other screen to zoom. For
example, double-tap a webpage in Browser to zoom in, and double-tap again to zoom
out.
Pinch: In some apps (such as Maps, Browser, and Gallery), you can zoom in and out
by placing two fingers on the screen at once and pinching them together (to zoom out)
or spreading them apart (to zoom in).
Rotate the screen: On most screens, the orientation of the screen rotates with your
device as you turn it. You can change this Display setting.
Assemble & charge
SIM card in
Please according to the label on the phone. Make sure that the clipped corner of the SIM card
is facing the correct direction and the metallic contacts are facing the correct direction. Slide
the SIM card into the card slot until it stops.
SD card in
Slide the SD card into the SD card slot with the metallic pins facing downwards. Push the
card until it locks into place.
Warning:Use only compatible memory cards for use with this device. Incompatible
memory cards may damage the card or the device and corrupt the data stored in the
card.

4
Charge up
To charge the battery, plug in the charger connector at your tablet (USB interface) and
then plug the other end into an AC power socket.
The battery symbol indicates the charging status. While charging, the charge indicator
light will be red. When the charger indicator light turn green, the battery is fully charged.
Disconnect the charger from the tablet. Disconnect the charger from the AC power socket.
Attention: Charge the tablet in a well ventilated place in which the temperature is
from-10oC to +55oC. Use the charger provided by the manufacturer only. The use of
unconfirmed charger may lead to dangers and violate the manufacturer's warranty
clause. If the temperature is too high or too low during the charge, the device will
automatically send a warning and stop charging to avoid damage to the battery or
any danger.
Switch On and Off
Do a long press the Power on/off key to power on/off the phone.
Before inserting the SIM card, you should power off the tablet pc.
After inserting the SIM card, the screen will show the notes when the tablet is switched on.
Unlock SIM card
To avoid illegal use, the SIM card is enciphered with PIN (personal identification number )
as a protection. When this function is ON and you have already set a PIN code, you need
to type in PIN code every time the handset is switched on in order to unlock SIM card and
use the handset.
You can turn off the SIM PIN code. Yet in this situation, the SIM card can't prevent illegal
use.
Input PIN code, press arrowhead icon to erase typing error and press OK to end
typing. For example, if the PIN code is set as 1234, then type "1234" then press OK.

5
The SIM card will be locked if you type in wrong code for three times continuously. The
handset will inform you to type in PUK code.
Attention: Your network provider will set a standard PIN code (four to eight numbers) for your
SIM card. It is recommended that you change the code into a personal code as soon as
possible.
Home screen
Quick start: Home screen
The Home screen gives you all your latest information in one place. It's what you see
when you turn on the tablet. It is the equivalent of the desktop on a computer. It’s your
gateway to the main features in your phone. You can customize your Home screen with
shortcuts, widgets, folders, and wallpapers.
You need slide the Home screen left or right to view more content in other panels on the Home
screen. You can add shortcuts, widgets, folders, etc. to Home screen.
Text entry
Touch the keys of the on-screen QWERTY keyboard to enter text conveniently. You can
open this keyboard by touching a text field.
Enter text
Touch the keys on the keyboard to type.
Use the Delete key to erase characters to the left of the cursor.
When you finished typing, Press Back key to close the keyboard.
Enter Various Characters
Touch the Symbols key to switch to the numbers and symbols keyboard.
Touch on the symbols keyboard to view additional symbols.
Edit Text
You can edit the text you enter in text fields and use menu commands to cut, copy, and
paste text, within or across applications. Some applications do not support editing some or
all of the text they display. Others may offer their own way to select text you want to work
with.
Touch and hold the text field that contains the text to select the word.
Cut or copy the text.
Select Text
You can select text for cutting or copying. The selected text is highlighted in blue.
Touch and hold the portion that contains text. Some options open with icons.
Move the cursor to select the text.

6
Shortcut
To add a shortcut to Home screen
1. From Home screen, touch Launcher icon.
2. From APPS tab, you will see application menu.
3. Touch and hold an application icon until it vibrates, then back to the Home screen, and
drag it to the desired location.
To remove a shortcut on Home screen
If you want to remove the shortcut, you can touch and hold the shortcut icon on Home
screen until it vibrates, and then drag it to Remove tab.
Bluetooth
Bluetooth is a short-range wireless communications technology that devices can use to
exchange information over a distance of about 10 meters.
Turn Bluetooth on or off, search for available Bluetooth devices, and make your phone visible
or invisible to other Bluetooth devices.
1. Rename phone: check and rename device name.
2. Visibility timeout: set the time of others can find your Device.
3. Show received files: show the files download and upload.
Global Positioning System
From Settings into the location access, open the Global Positioning System satellites,
connection on the GPRS or Wireless Connection, can navigation and positioning.
Phone
Make a call
Touch phone icon on the Home screen.
In dialing screen, input number and touch Dial icon to dial the inputted number.
During a call
During a call, there are some call options available to you. These call options can be seen
only during a call. When a call is in progress, you can put it on hold, initiate a phone
conference, mute your microphone etc.

7
Touch Go to the key pad
Touch To turn on/off the speaker.
Touch Mute your voice so that the other party cannot hear you.
Touch To place a call on hold.
Touch Open dial pad to dial the second call.
Conference*
In Conference call mode, you answer the incoming call and add it to the conference in
accordance with the instructions; Hold multiparty conference; Have a private conversation
with one party and hold other parties' call; Connect one party to the other and end the
conference call; Put one party on hold; End current call and all hold on calls.
Attention: Menu items market by happen only under certain situations. Users need to
apply for opening the conference call functions to relevant service provider.
Emergency calls
You can call for emergency service as long as you are in the network coverage (check the
signal strength indication bar on the upper right side of the handset screen). If your
network provider doesn't provide roaming service in this area, there will be "Emergency
Calls " on the lock screen. If you are in the network coverage, you can have emergency
calls even without a SIM card.
Make International Calls
If you need to make an international call, do a long press on the 0 key on the virtual
keyboard until there appears the sign "+" for international call prefix, which helps you call
from any country (For example, in USA +”1”) even if you don't know the international call
prefix of that country.
You can make an international call according to the following typing order: + › country
code › complete phone number › dialing icon (type in the prefix code, and then continue to
enter the country code and complete phone number). Country code usually follows
conventional practice: German is 49, Britain 44, Sweden 46 and so on.
Answer Calls
Drag the icon to answer to answer an incoming call. If your headphone is connected to the
handset, you can use the headphone key on the headphone answer calls.
Attention: A short press of the headphone key will answer the call while a long one will
refused to answer the phone.
Contact
The Contacts application offers you to store and manage all your contacts.

8
Add a contact
1. From your Home screen, touch Contact icon or find it: Application menu > contact.
2. Touch .
3. Select a location to save.
4. Enter the information for the contact.
5. After you finish, touch DONE.
Search contacts
1. From your Home screen, touch Contact icon or find it: Application menu >Contact.
2. Touch .
3. Input to keyword search contacts.
4. The matched contacts listed phone automatically.
Additional options
From contacts list screen, Press Menu key, some additional options will be available to
you. For example, import/export, and share visible contacts.
•Delete contact: You can mark much more than one contact, and then delete these
marked contacts.
•Contacts to display: To select which contacts to display in the contacts list.
•Import/export: Copy contacts to which you want import.
•Accounts: You can synchronize your phone contacts with a synchronization
account.
•Settings: You can set Sort list by and View contact names
•Share visible contacts: You can share contacts via Bluetooth, Email, MMS, and so
on.
Contact groups
You can assign contacts to groups to get quicker access to them from the Contacts
application. It allows you to create a new group such as VIP, schoolmate, friends, family or
co-worker.
To create a new group
1. From your Home screen, touch Contacts icon or find it: Application menu >Contacts.
2. Touch Groups tab.
3. Touch .
4. Input the information of group, then touch DONE.
To assign a contact to a group
1. From your Home screen, touch Contacts icon or find it: Application menu >Contacts.

9
2. Touch Groups tab.
3. Touch a group to which you want to assign contacts.
4. Press Menu key, touch Edit in the menu that opens.
5. Touch Type person’s name to input the contact’s name, then the corresponding
contact entry will pop up, select the desired contact entry.
6. After you finish editing, touch DONE
Favorites
You can set contacts as favorites so that you can get access to them from the Contacts
application. Only the contacts stored in phone memory can be set as favorites.
To set a contact as favorite
1. From your Home screen, touch Contacts icon or find it: Application menu >
Contacts.
2. From contacts list, touch a contact which you want to set as favorite.
3. Touch . If you want to cancel the favorite, touch .
Messages
You can compose, send and receive text messages from your phone, and also can
compose, send and receive multimedia messages, which contain media files such as
pictures, videos and audios.
When you view your messages, they appear as conversations, which means that all
messages to and from a particular person are grouped together.
New message
1. From your Home screen, touch Messages icon or find it: Application menu >
Messages.
2. Touch .
3. To add recipient(s), touch , then find and mark the contact name. To add more than
one contact, mark the contact name for the desired recipients. You can also enter the
recipient’s phone number manually.
5. Touch Type text message to enter your message text.
6. If you want to insert a media file, touch , and select an attachment.
7. To send the message, touch
When editing message, press Menu key, some additional options will be available to you.
For example, add subject, and insert smiley. You can touch the options to do actions.
Delete message threads
1. From your Home screen, touch Messages icon or find it: Application menu >
Messages.
2. Touch and hold the message thread.
3. Select the conversations you want to delete.

10
4. Touch .
You can also press Menu key and touch Delete all threads to delete all message threads
from the window.
Forward a message
1. From your Home screen, touch Messages icon or find it: Application menu >
Messages.
2. Touch the conversation containing the message you want to forward.
3. Touch and hold the message you want to forward.
4. Touch forward in the menu that opens.
5. Add recipient(s), touch , Then find and mark the contact name. To add more than one
contact, mark the contact name for the desired recipients. You can also enter the
recipient’s phone number manually.
6. Touch to send the message.
Web application
Wireless Connection Networks
Wireless Connection is a wireless networking technology that can provide internet access
at distance of up to 100 meters. To use Wireless Connection on your phone, you access a
wireless access point, or “hotspot”. Some hotspots are open and you can simply connect
to them. Others are hidden or implement other security features, so you must configure
your phone so it can connect to them.
TIP: Turn off Wireless Connection when you are not using it, to extend the life of your
battery.
Connect to Wireless Connection Network
1. Touch Launcher icon, and from Application menu, touch Settings.
2. Touch Wireless Connection.
3. Check Wireless Connection to turn it on. The phone scans for available Wireless
Connection networks and displays the names of those it finds. Secured networks are
indicated with a Lock icon.
4. Touch a network to connect to it
If the network is secured, you are prompted to enter a password or other credentials (Ask
your network administrator for details)
Browser
Use your web browser to view and navigate web pages, add pages as bookmarks, and
save pages for offline reading. You can open several windows at the same time and
switch among them easily. You can also request the desktop version of a web page if you
don’t want to view the mobile version.
Open the web browser
From your Home screen, touch Browser icon or find it: Application menu > Browser.
Search and address bar

11
Multimedia
Camera
Take a photo or record a video with the camera in your phone. You can hold the camera
horizontally or vertically. Share a photo or a video with your friends, or upload your photos
and videos to a web service.
Music Player
The phone comes with a Music player that plays songs, listen to audio book and podcasts
you have stored. It gives you a host of setting options to make your listening experience
interesting.
Videos
Play video. Enter the video list, scroll the screen to browse and choose the file you want to
play.
FM Radio
The phone comes with an in-built FM Radio. You can listen to FM radio stations, and add
them to channel list. You have to plug in an earphone, as the antenna of the FM
radio. You can listen to the radio either through an earphone, or through the speaker in
the phone.
Gallery
You can view the captured images, recorded video clips, and downloaded images in the
Gallery.
Sound Recorder
You can use the sound recorder to record sounds and also select to save the recordings
in your phone.
Other application
Clock Function
The clock allows you to view time and date. You can also add an alarm, set the alarm and
turn it on. Then, the alarm can ring at a specific time you set.
• Add an alarm

12
1. From your Home screen, touch Launcher icon, then find it: Application menu >
Clock.
2. Touch .
3. You need set time, ringtone, repeat, vibrate, etc. Then, turn it on.
4. After you finish setting, touch Done. Then the alarm can ring at a specific time you set.
Calculator
Keep your calculations on your finger tips with the calculator. Using this application allows you
to make calculations. The calculator provides the basic arithmetic functions; addition,
subtraction, multiplication, and division. You can also use an advanced panel.
File manager
You can manage files, including Download, Music, and Received File. Press Add folder icon to
create a new folder or select folders to copy, move and delete.
Connect to a computer via USB
You can connect your phone to a computer with a USB cable to transfer music, pictures,
and other files between your phone’s SD card and the computer.
You cannot share your phone’s data connection and SD card via USB cable at the same
time. If you are using USB tethering, you must turn that off first.

13
Memo Pro LTE
L600
Manual de Usuario

14
Introducción
Gracias por adquirir este producto.
Para que tu Tablet PC celular trabaje adecuadamente, por favor siga las instrucciones de este
manual y para evitar posibles incidentes o mal funcionamiento, siga por favor todas las
advertencias de seguridad descrita en este manual. Si la causa de actualización de función
descrita en el contenido del manual no se correponde con los productos reales, por favor
refiérase a la información posteriormente publicada por la compañía.
Nombre y Explicación de cada parte
Apariencia

15
Seguridad & Notificación
ADVERTENCIA: Por favor preste atención a estas directrices, es peligroso y puede
violar la ley, e incluso el fabricante no asume la responsabilidad para el usuario
quien no cumpla con las siguientes recomendaciones o utilice inadecuadamente al
Tablet PC.
Si el tablet apoya la función "Modo de vuelo", por favor configure el modo de
"Modo de vuelo" en el avión. Si no apoya, por favor apague el tablet antes
del embarque, porque el tablet puede causar la interferencia en el avión.
Siga por favor cualquier restricción en el avión.
Apague el dispositivo cerca de los combustibles, productos químicos o
áreas de voladura. Mantenga el dispositivo alejado de los niños.
Mientras conduce, por favor obedezca las leyes y regulaciones locales con
respecto al uso del tablet. Al hablar por tablet mientras se conduce, por
favor obedezca las siguientes reglas: Concéntrese en la conducción y
póngase consciente de las condiciones del tráfico; Si su tablet tiene una
función de manos libres, úselo en este modo por favor. Bajo malas
condiciones de conducción, pare por favor el coche antes de marcar o
contestar al tablet.
Apague el tablet pc en el hospital u otro lugar prohibido del uso del tablet pc.
Los tabet pcs afectarán el trabajo normal de los equipos electrónicos y
dispositivos médicos, tales como marcapasos, audífonos y otros equipos de
electrónica médica.
Accesorios y componentes no originales no cuentan con la calificación de
garantía de reparación.
Por favor, no desmonte el tablet por sí mismo, si su tablet está fuera de
servicio, por favor póngase en contacto con su proveedor.
Por favor, no cargue el tablet pc antes de que la batería esté instalada.
Tenga cuidado con el cortocircuito de la batería.
El Tablet elegante debe cargarse en un ambiente ventilado y refrescante, y
ser lejos de materiales inflamables y explosivos.
Para desmagnetización, por favor mantenga que el tablet pc está lejos del
material magnético, tales como discos, tarjetas de crédito, etc..
Mantenga el dispositivo seco. La precipitación, la humedad y los líquidos
contienen minerales que pueden corroer los circuitos electrónicos. Si tu
dispositivo se moja, retire la batería y póngase en contacto con el
proveedor.
No utilice el tablet pc en un entorno de temperatura muy alta o baja, y no
exponga el tablet pc bajo luz solar muy fuerte o bajo entorno de humedad
alta.
No utilice líquidos, paño húmedo o detergente fuerte para limpiar el
dispositivo.
Este tablet móvil tiene funciones de fotografía, de grabación de vídeo y
sonido; Por favor, siga las leyes y reglamentos relacionados con el uso de

16
esas funciones. La función de Fotografía, de grabación de vídeo y sonido
sin autorización puede violar las leyes y reglamentos.
Al utilizar las funciones de red, por favor no descargue los archivos que
tienen virus, no instale fotos y tonos de llamada que han sido rotos. Si las
incorrectas operaciones de arriba han causado el mal funcionamiento del
teléfono, nuestra empresa no asume ninguna responsabilidad.
Por favor deseche las baterías conforme a las normativas locales y recíclelas
cuando sea posible. No deseche las baterías como basuras domésticas.
DECLARACIÓN: Nuestra Empresa reserva el derecho de revisar el contenido de este
manual sin previo aviso.
Comenzar a utilizar
Tocar & Escribir
Utilice sus dedos a manipular los iconos, botones, menús, teclados y otros elementos de
la pantalla táctil. También puede cambiar la orientación de la pantalla.
Para seleccionar o activar algo, tóquelo.
Para escribir algo, tales como un nombre, una contraseña, o buscar términos, toque
simplemente en donde quiere escribir. Un teclado aparece y le permite a escribir en la
área.
Otros gestos comunes incluyen:
Tocar & Mantener: Toque & mantenga un ítem en la pantalla, tocándolo sin levantar
el dedo hasta que se produzca una acción.
Arrastrar: Toque y mantenga un ítem por un momento y luego mueva el debo en la
pantalla, sin levantar el dedo, hasta que llegue a la posición de destino. Como por
ejemplo, puede arrastrar para cambiar la posición del atajo de teclado en la pantalla
de inicio.
Mover o deslizar: Mueve rápidamente el dedo por la superficie de la pantalla, no
pare por la primera vez que toca (para que no arrastre textos en cambio). Por
ejemplo, puede deslizar una pantalla de inicio hacia la izquierda o a la derecha para
ver las otras pantallas de inicio.
Doble-clic: Haga rápidamente doble clic en una página web, un mapa, u otra
pantalla para hacer zoom. Por ejemplo, haga doble clic en una página web en el
navegador para acercarla y doble clic de nuevo para alejarla.
Pellizco: En algunas aplicaciones (tales como Mapas, Navegador y Galería), puede
acercar y alejar imágenes colocando dos dedos en la pantalla a la vez y
pellizcándolas juntos (para alejar la imagen) o extendiéndolas aparte (para acercar la
imagen).
Rotar la pantalla: Para la mayoría de las pantallas, la orientación de la pantalla rota
con el dispositivo cuando lo enciende. Puede cambiar esta configuración de
visualización.
Montar & Cargar
•Entrada de tarjeta SIM

17
Por favor, utilice el dispositivo de acuerdo a la etiqueta en el teléfono. Asegúrese de que la
esquina recortada de la tarjeta SIM se ha orientado a la dirección correcta y los contactos
metálicos también. Deslice la tarjeta SIM en la ranura de la tarjeta hasta que se pare.
•Entrada de tarjeta SD
Deslice la tarjeta SD en la ranura,haciendo que las clavijas metálicas están hacia abajo.
Empuje la tarjeta hasta que se cierre en su lugar.
Advertencia: Utilice únicamente tarjetas de memoria compatibles para este dispositivo.
Tarjetas de memoria incompatibles pueden dañar la tarjeta o el dispositivo y corromper
los datos almacenados en la tarjeta.
•Cargar
Asegúrese de que la batería esté insertada en el teléfono. Para cargar a la batería,
enchufe el conector del cargador al tablet (interfaz USB) y luego conecte al otro extremo
en una toma del corriente alterna.
El símbolo de la batería indica el estado de carga. Durante la carga, el indicador de carga
se desplazará. Cuando todas las barras de desplazamiento son constantes, la batería
está completamente cargada. Desconecte el cargador del teléfono. Desconecte el
cargador de la toma del corriente alterna.
Atención: Cargue el teléfono en un lugar bien ventilado en el que la temperatura es
de-10oC a +55 oC. Utilice únicamente el cargador suministrado por el fabricante. El
uso de cargador sin confirmación pueden causar peligros y violar la cláusula de
garantía del fabricante. Si la temperatura es demasiado alta o baja durante la carga,
el dispositivo enviará automáticamente una advertencia y detener la carga para
evitar daños a la batería o peligros.

18
Encender y apagar
Aprete a largo tiempo la tecla de encender / apagar para encender / apagar el teléfono. Si el
dispositivo está encendido pero la tarjeta SIM no está insertada, la pantalla de bloqueo se
mostrará "sin tarjeta SIM"
Después de insertar la tarjeta SIM y cuando el teléfono está encendido, la pantalla
mostrará las notas a orden siguiente:
Escribir en PIN-En caso de que ha establecido el código SIM
Búsqueda -El teléfono buscará para conectar a red apropiada.
Desbloquear la tarjeta SIM
Para evitar el uso ilegal, la tarjeta SIM se cifra con PIN (número de identificación personal)
como una protección. Cuando esta función está activada y ya ha establecido un código
PIN, debe introducir el código PIN cada vez que el teléfono está encendido con el fin de
desbloquear la tarjeta SIM y usar el teléfono.
Puede desactivar el código PIN de la SIM. Sin embargo, en ese caso, la tarjeta SIM no
puede prevenir el uso ilegal.
Introduzca código PIN, aprete el icono de flecha para borrar errores de escritura y
aprete OK para terminar. Como por ejemplo, si el código PIN está establecido como 1234,
y escriba "1234" , entonces aprete OK.
La tarjeta SIM se bloqueará si escribes código incorrectamente tres veces consecutivas.
El teléfono le informará a escribir en el código PUK.
Atención: Su proveedor de red establecerá un código PIN estándar (de cuatro a ocho
números) para su tarjeta SIM. Se recomienda que cambie el código en un código personal tan
pronto como sea posible.
Pantalla de inicio
Inicio rápido: pantalla de inicio
La pantalla de inicio le ofrece toda la información más reciente en un lugar. Es lo que ve
cuando se enciende el teléfono, que sirve como el escritorio de un ordenador. Es la
puerta de entrada para que conozca a las principales funciones de su teléfono. Puede
personalizar su pantalla de inicio con tecla de acceso rápido, widgets, carpetas y fondos
de pantalla.
Tiene que deslizar la pantalla de inicio hacia la izquierda o a la derecha para ver más
contenidos en otros paneles de la pantalla de inicio. Puede agregar teclas de acceso rápido,
widgets, carpetas, etc, a la pantalla de inicio.
Ingresar texto
Toque la tecla del QWERTY de la pantalla para ingresar textos. Puede abrir este teclado a
través de tocar una área de texto.
Introducir texto
Toque las teclas del teclado para escribir.
Utilice la Tecla de borrar para borrar carácteres a la izquierda del cursor.
Al terminar de escribir, aprete la Tecla de Atrás para cerrar el teclado.
Ingresar varios carácteres

19
Toque el tecla de Símbolos para cambiar el teclado de modo números y
símbolos.
Toque en el teclado de símbolos para ver símbolos adicionales.
Editar texto
Puede editar el texto, introduzca en áreas de texto y utilice los comandos de menú a
cortar, copiar y pegar textos, dentro o a través de las aplicaciones. Algunas aplicaciones
no apoyan la edición de partes o todos los textos que muestran. Otros pueden ofrecer su
propia manera de seleccionar el texto con el que desea trabajar.
Toque y mantenga la área de texto que contiene palabras para seleccionar.
Cortar o copiar el texto
Seleccionar texto
Puede seleccionar textos para cortar o copiar. El texto seleccionado se destaca en azul.
Toque y mantenga la parte que contiene el texto. Algunas opciones se abren con
iconos.
Mueva el cursor para seleccionar el texto.
Atajo de teclado(tecla aceleradora)
A añadir un tecla aceleradora en la pantalla de inicio
1. Toque el icono del lanzador en la pantalla de inicio.
2. Encontrará el menú de aplicaciones en la tabla de APPs.
3. Toque y mantenga el icono de una aplicación hasta que se vibre, luego vuelva a la
pantalla de inicio, y arrástrelo al lugar que desea.
A quitar una tecla aceleradora desde la pantalla de inicio
Si desea eliminar la tecla aceleradora, puede tocar y mantener el icono de la tecla
aceleradora de la pantalla de inicio hasta que se vibre y luego, arrástrelo para eliminar.
Bluetooth
Bluetooth es una tecnología de comunicaciones inalámbricas de corto alcance que los
dispositivos se pueden utilizar para intercambiar información a una distancia de unos 10
metros.
Activar o desactivar Bluetooth, buscar dispositivos disponibles de Bluetooth, y hacer que su
teléfono sea visible o invisible para otros dispositivos de Bluetooth.
1. Renombrar al teléfono: compruebe y renombre el dispositivo.
2. Visibilidad de timeout: establezca el tiempo en que los demás puede encontrar su
dispositivo.
3. Mostrar archivos recibidos: muestra los archivos de descarga y subida.
Sistema de Posicionamiento Global
Desde la Configuración al acceso de la ubicación, abra el satélite Sistema de
Posicionamiento Global, conecte al GPRS o Wirelesss Connection, así puede navegar y
localizar.
Teléfono
Table of contents
Languages:
Other Posh Cell Phone manuals

Posh
Posh EQUAL S700 User manual

Posh
Posh Memo S580 User manual

Posh
Posh Pegasus 3G S400 User manual

Posh
Posh Orion S450 User manual

Posh
Posh Kick Pro LTE L520 User manual

Posh
Posh Revel S500 User manual

Posh
Posh Pegasus C350 User manual

Posh
Posh MICRO X S240 User manual

Posh
Posh Orion Mini S350 User manual

Posh
Posh L550 User manual

Posh
Posh S580A User manual

Posh
Posh Ultra 5.0 LTE User manual

Posh
Posh Ultra 5.0 LTE L500 User manual

Posh
Posh EQUAL MAX S900 User manual

Posh
Posh Icon Pro HD X551 User manual

Posh
Posh Pegasus 3G User manual

Posh
Posh Optima LTE L530 User manual

Posh
Posh Equal Max S900A User manual

Posh
Posh Equal Lite W700 User manual

Posh
Posh Orion Pro User manual