AW
AV
DETAIL AV
MAßSTAB 1 : 10
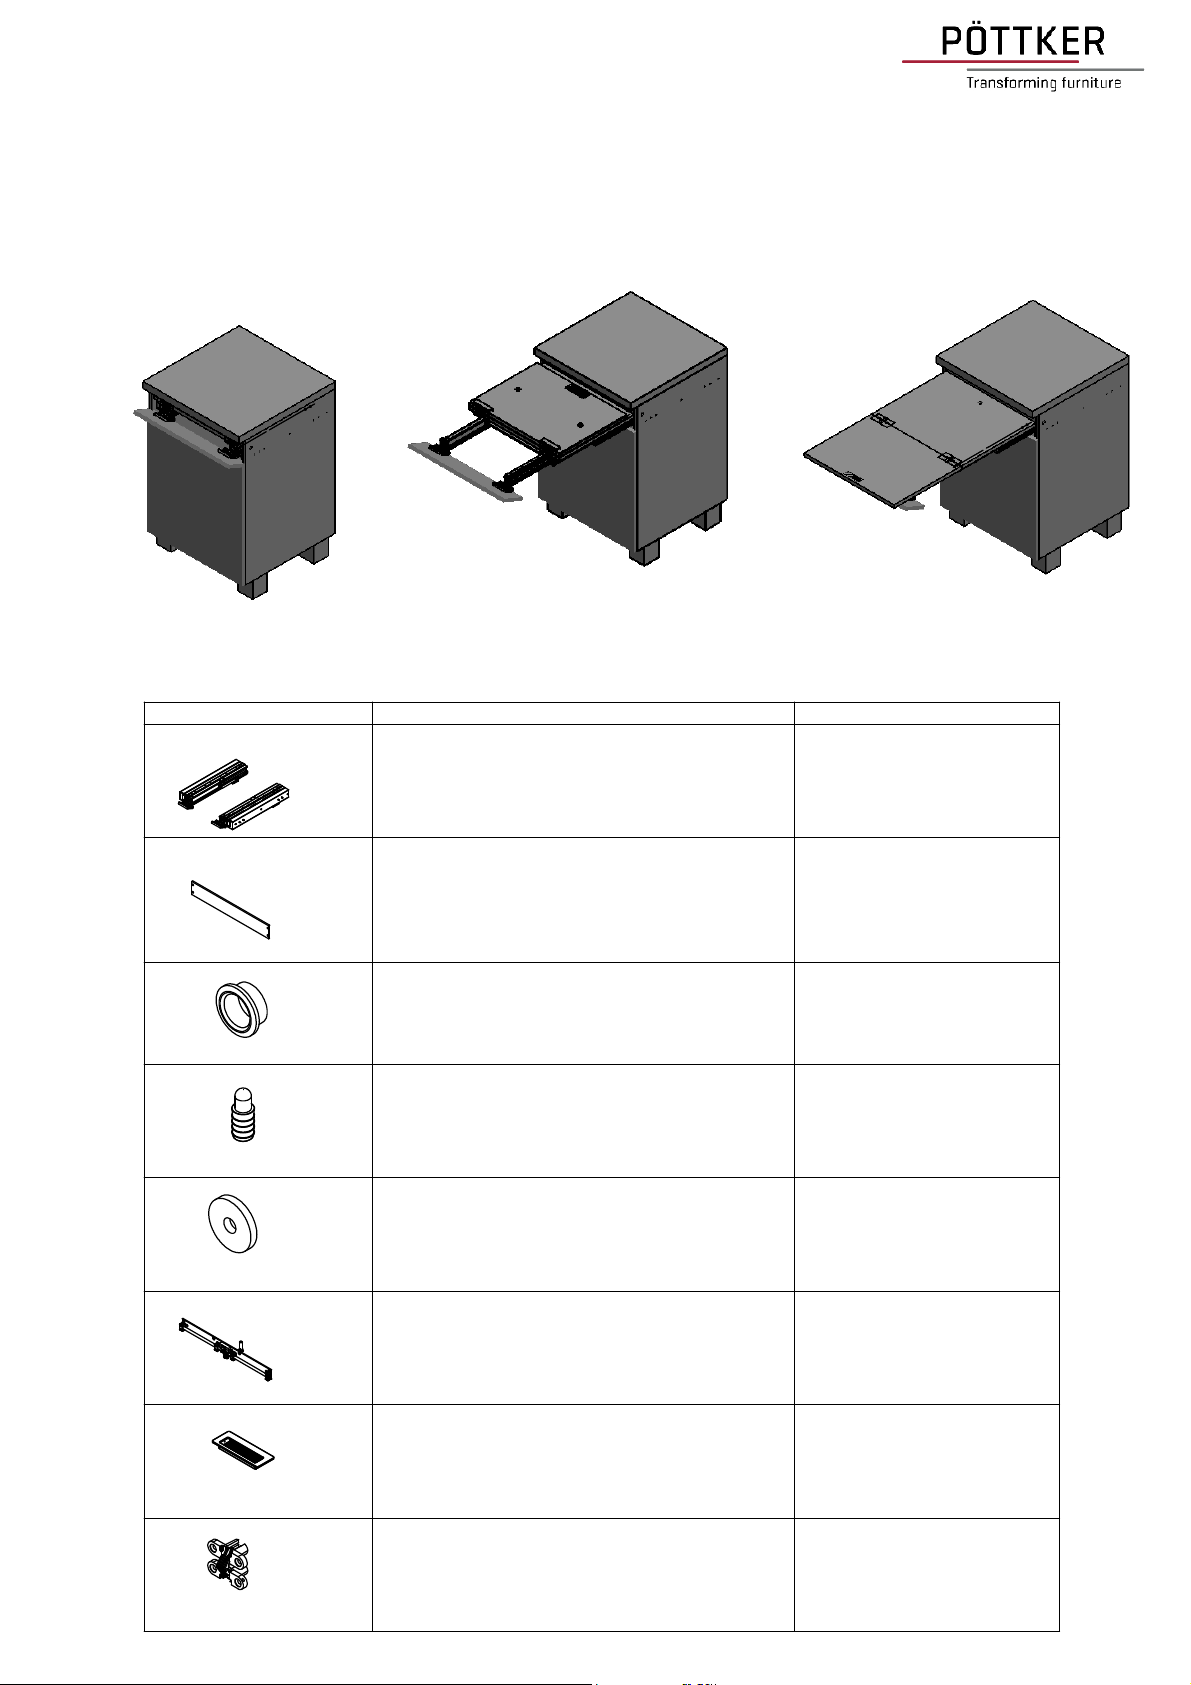
Montage Ablage
assembly rack/leaves
Montage des plateaux
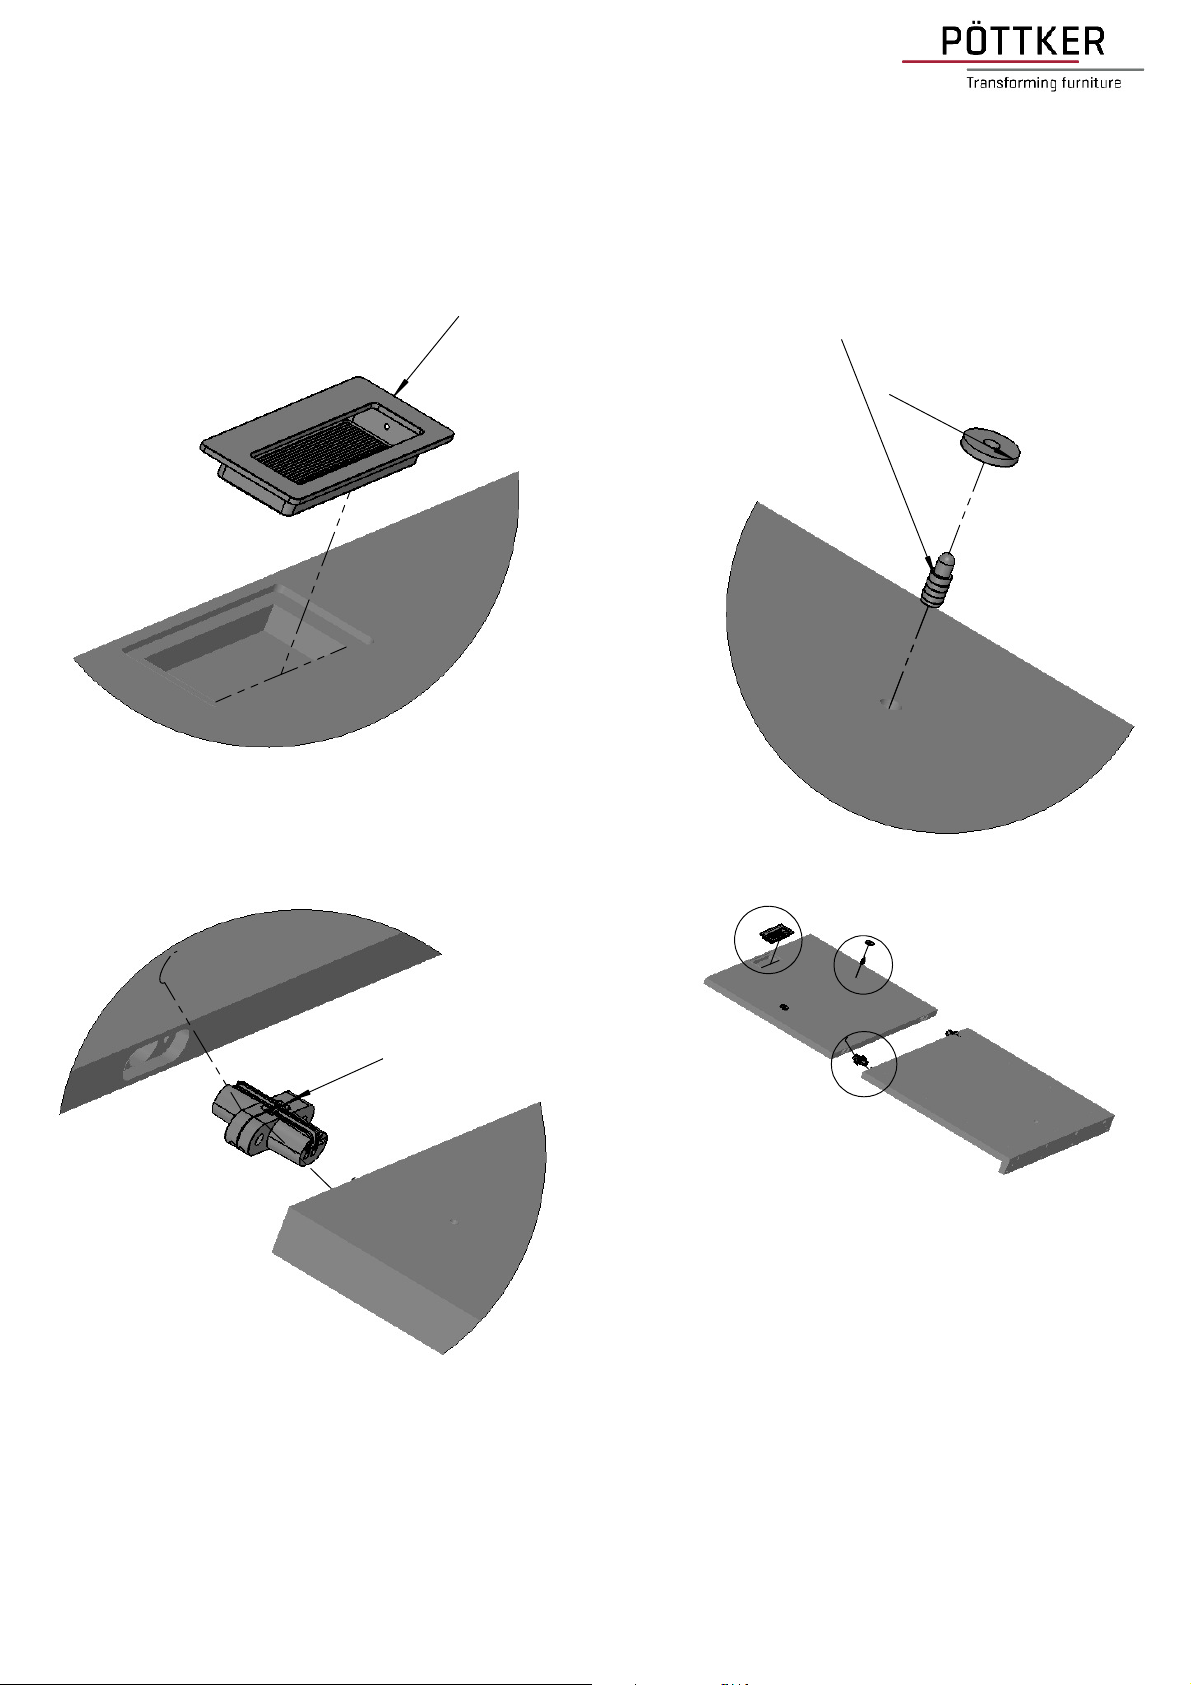
the locking system has to latch in audibly in the drillings of the corpus right and left !
Montage des plateaux :
only after this you may fix the racks/leaves
Le loquet doit s'encliqueter de façon audible. Ensuite les plateaux peuvent être fixés.
Les deux boulons en laiton doivent être enfilés dans les perçages des coulisses.
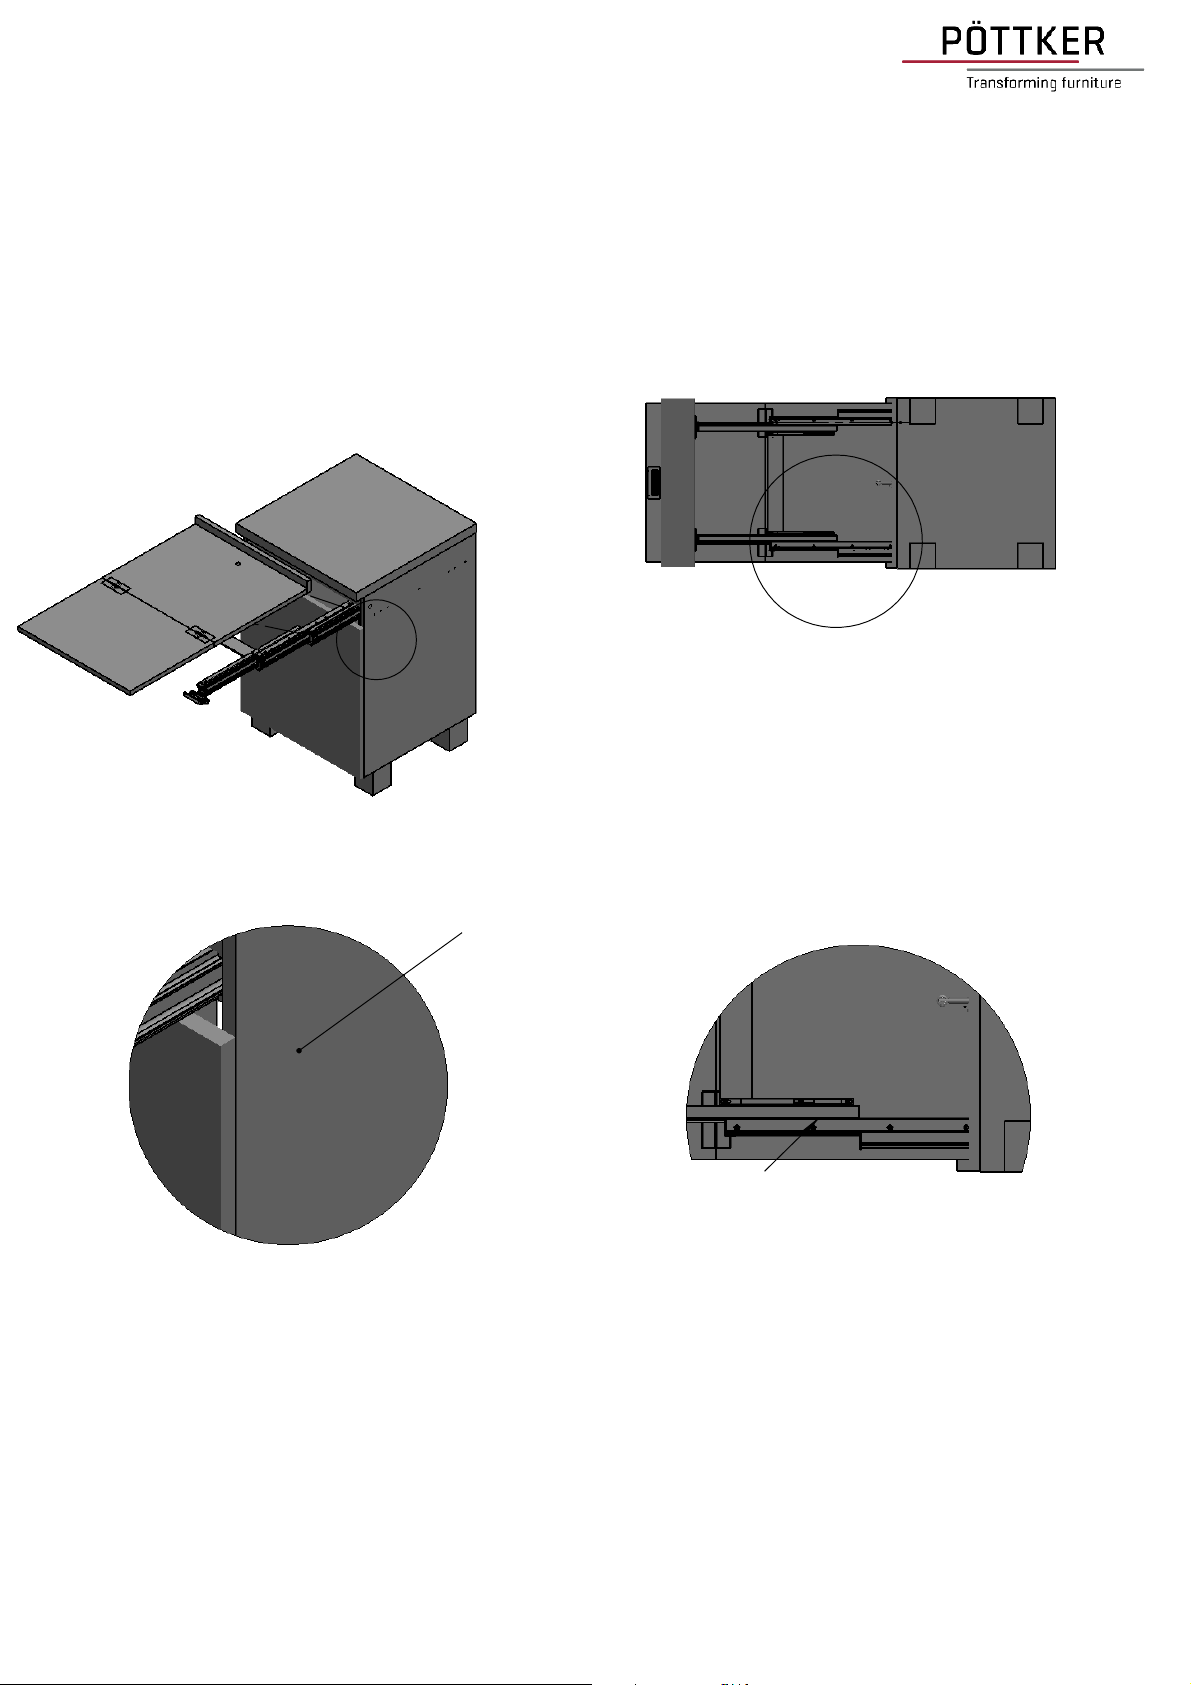
Sortir les coulisses totalement - poser les plateaux dépliés sur les coulisses.
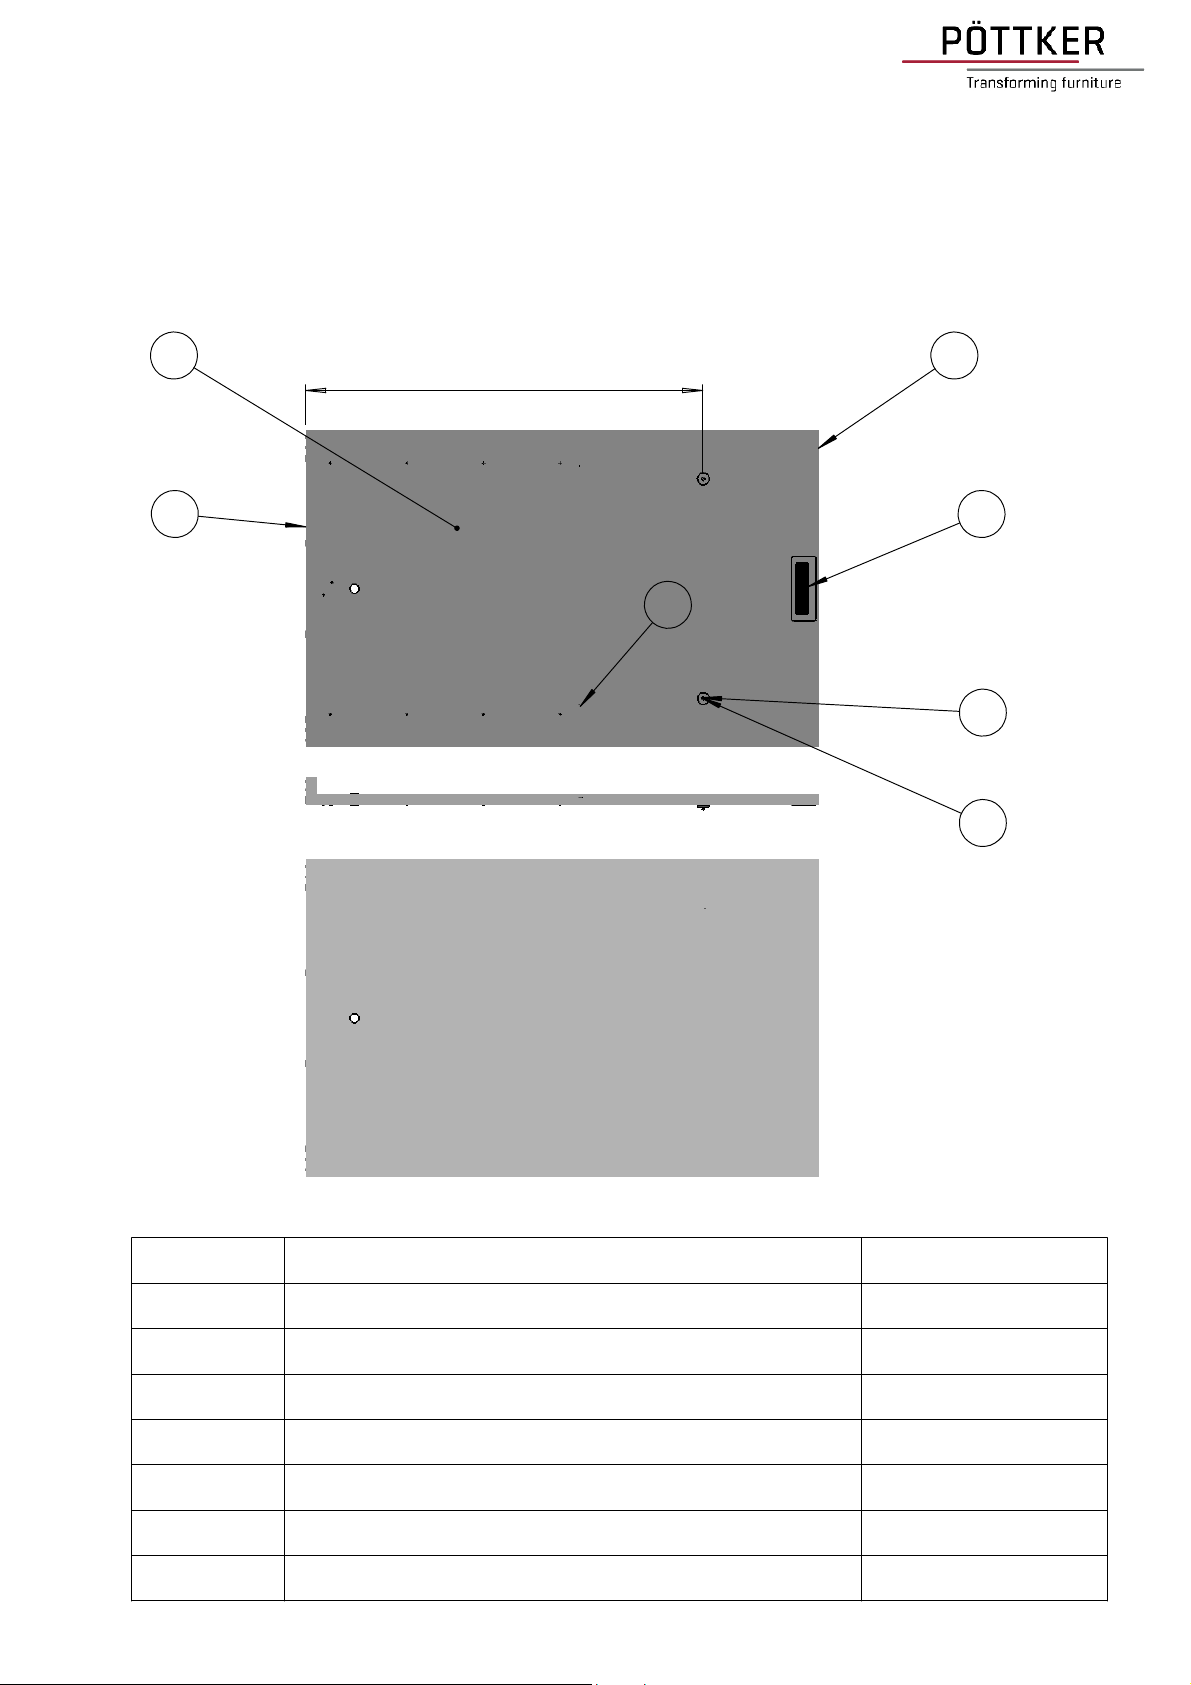
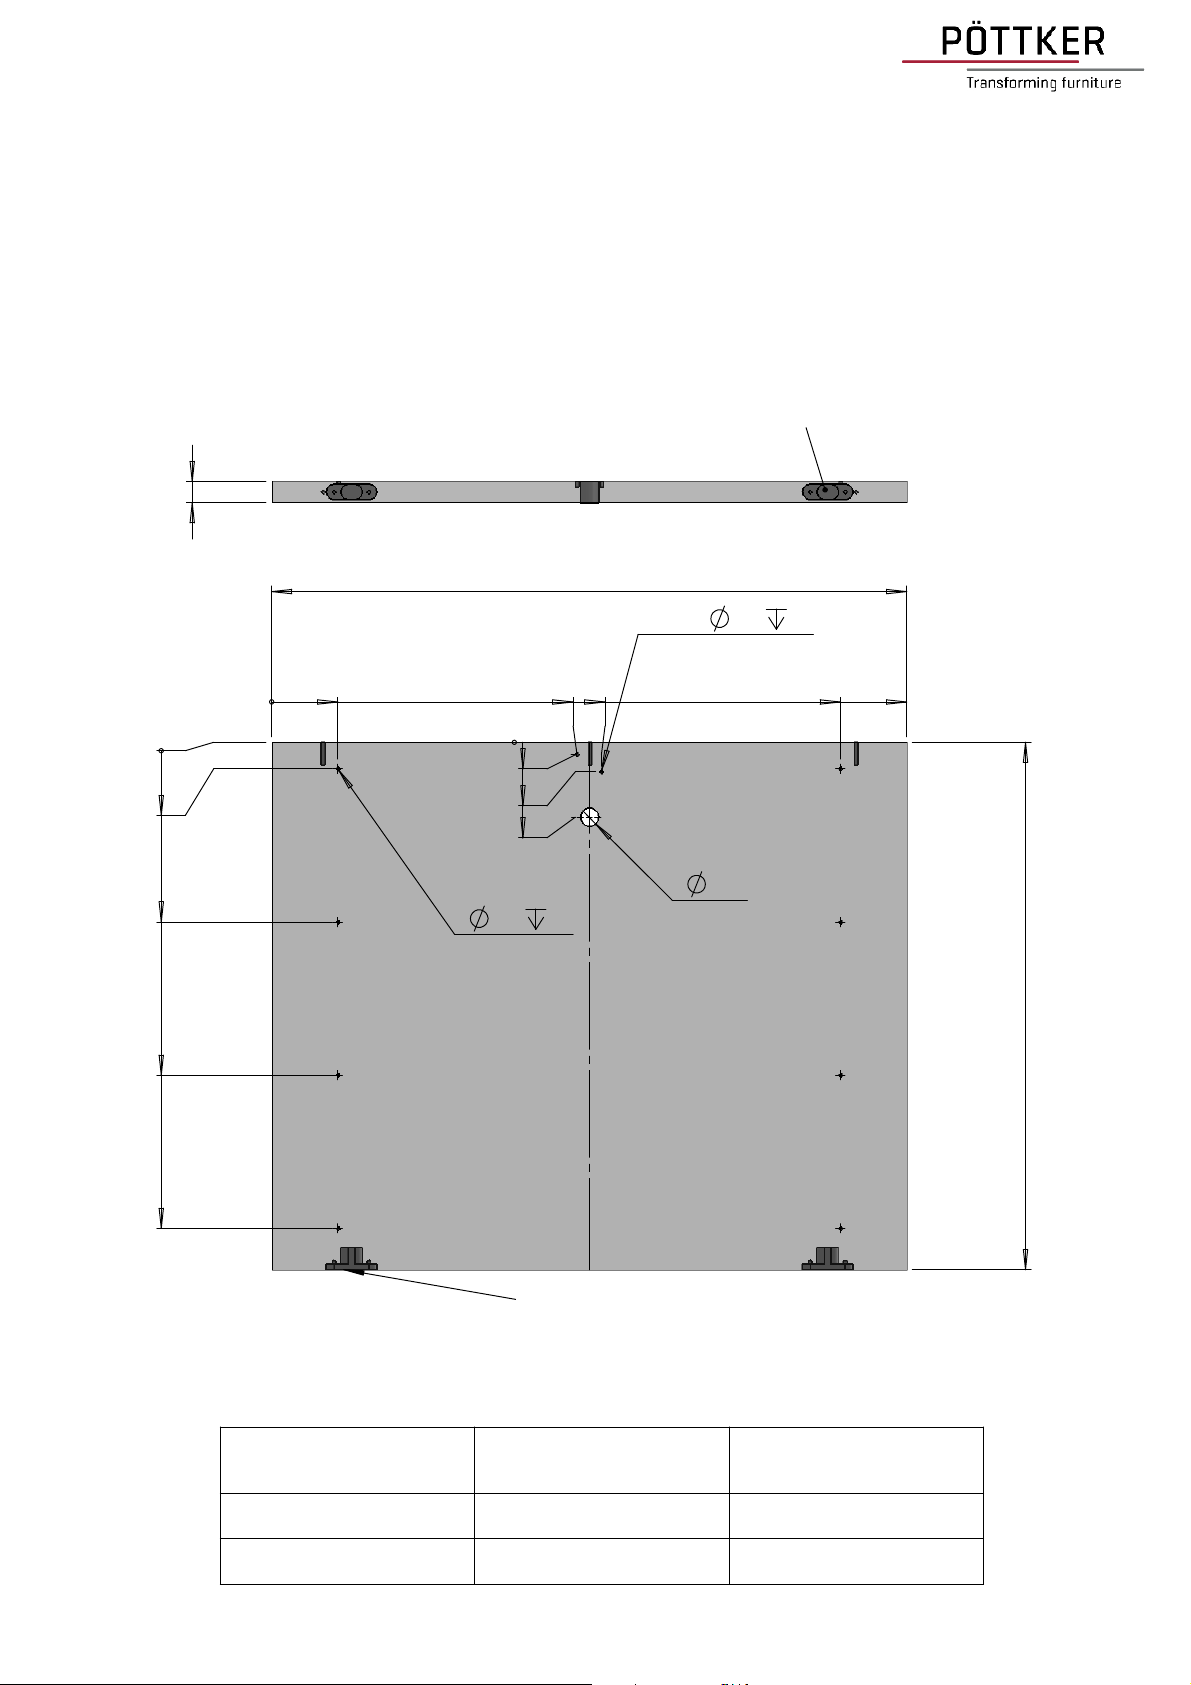
Ablage zum Korpus ausrichten und mit passenden Schrauben befestigen
Align tray for body and secure with suitable screws
Alignez plateau pour le corps et le fixer avec des vis appropriées
Montage Ablage
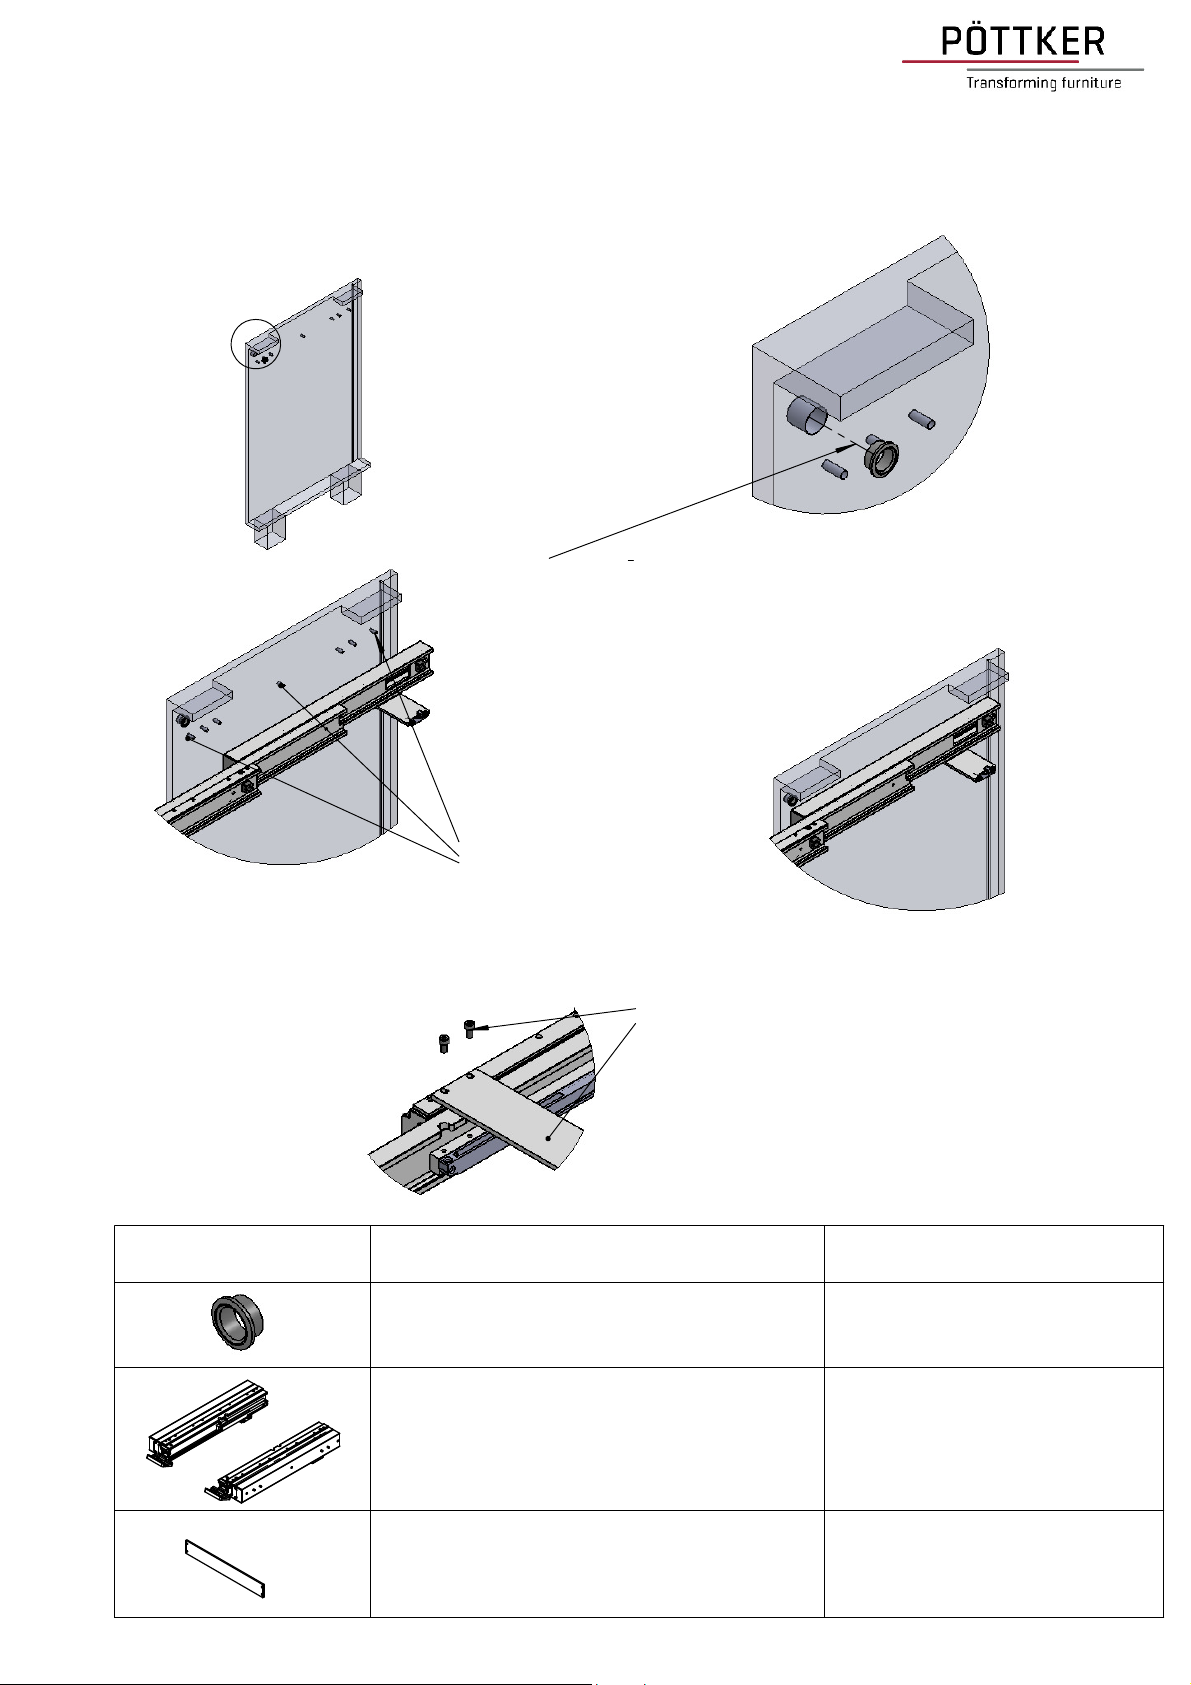
Wichtig vor dem verschrauben
Die beiden Tischdübel müssen in den Bohrungen der Schienen stecken
Der Verschluss muss auf beiden Seiten in den Z-Hülsen einrasten
Die Ablage zum Korpus und Auszug ausrichten
assembly rack / leaves:
open the slides totally - put the rack / leaves unfolde on the slides
the both dowels have to stick in the drillings of the slides
Bitte dasSchloss-Schublade vor dem verschrauben auf dem Aufzug
in den Z-Hülsen einrasten lassen und mit der Ablage ausrichten
please let the locking system latch into
both hulls before screwing to the slides
Veiller à bien enclencher les butées dans les inserts
fixés latéralement dans le caisson AVANT de fixer sur les coulisses.
www.poettker.com / info@poettker.comV1.7
Montageanleitung / Assembling instruction / notice de montage
Seite 10 VON 12
Frühstücksplatz / breakfast table / table petit dejeuner