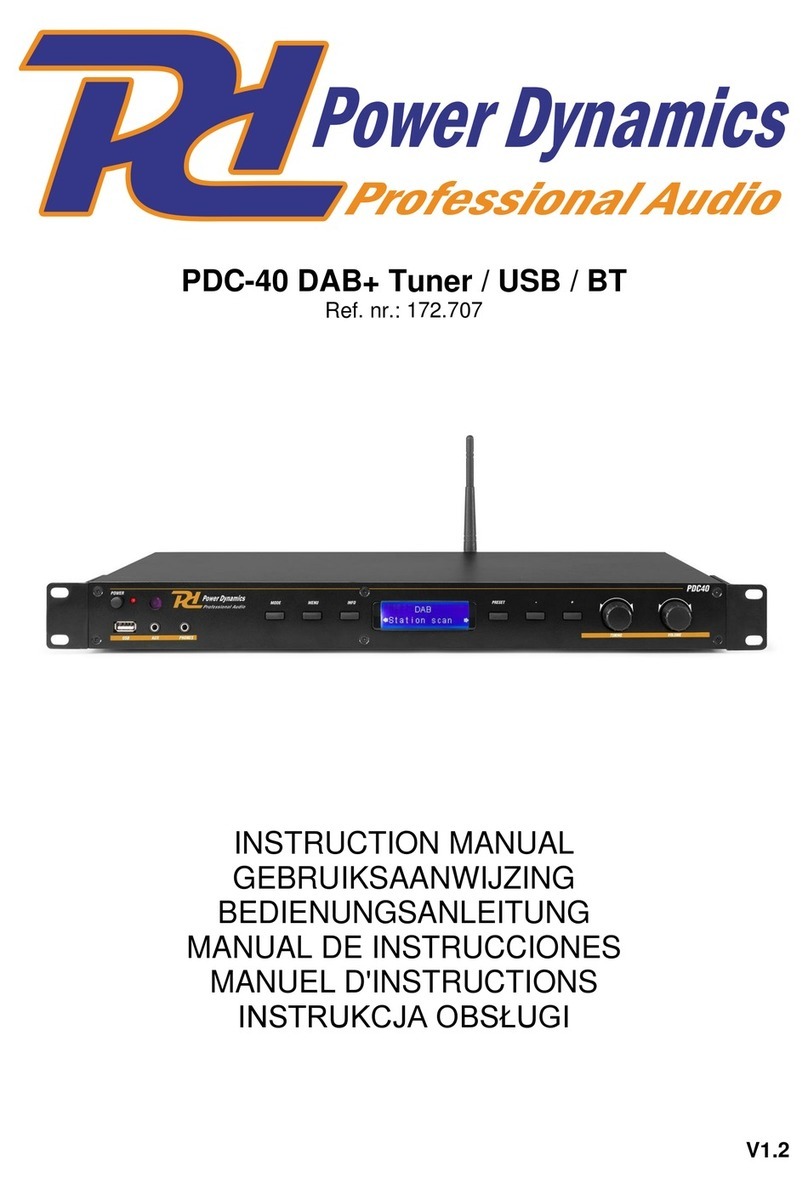
Power Dynamics pdc-30 User manual

PDC-30
DIGITAL TUNER
USER’S MANUAL
MANUEL D'INSTRUCTIONS
172.706
V1.1

2
This symbol is to alert the user to the presence of uninsulated dangerous voltages inside
the product's enclosure that may constitute a risk of electric shock.
This symbol is to alert the user to important operating and maintenance(service)
instructions in this manual and literature accompanying the product.
Caution Marking Explanation
WARNING:
C ANGES OR MODIFICATIONS TO T IS UNIT NOT EXPRESSLY APPROVED BY
T E PARTY RESPONSIBLE FOR COMPLIANCE WILL VOID T E USER'S
AUT ORITY TO OPERATE T E EQUIPMENT.ANY C ANGE TO T E EQUIPMENT
WILL VOID FCC GRANT.
This equipment has been tested and found to comply with the limits for a Class C digital device,
pursuant to part 15 of the FCC Rules.These limits are designed to provide reasonable protection
against harmful interference in a residential installation.This equipmetn generates,uses and can
radiate radio frequency energy and,if not installed and used in accordance with the instructions,may
cause harmful interference to radio communications. owever,htere is no guarantee that interference
will not occur in a particular installation.If this wquipment does cause harmful interference to radio
or television reception,which can be determined by turning the equipment off and on,the user is
encouraged to try to correct the interference by one or more of the following measures:
--Reorient or relocate the receiving anterna.
--Increase the separtion between the wquipmetn and receiver.
--Connect the equipmet into an outlet on a circuit different from that to which the receiver is
connected.
--Consult the dealer or an experienced radio/TY technicial for help.
This device complies with Part 15 of the FCC Rules.Operation is subjcet to the following two
conditions:(1)this device may not cause harmful interference,and (2)this device must accept
any interference received,including interference that may cause undesirde operation.
CAUTION:TO REDUCE T E RISK OF FIRE OR ELECTRIC S OCK,DO NOT EXPOSE T IS
APPARATUS TO RAIN OR CORDS.IF T IS APPENS,BE SURE POWER TO T E
ELCETRICAL OUTLET IS TURNED OFF BEFORE YOU TOUC OR UNPLUG T E
APPLIANCE.
Outdoor Use and Wet Location Warning
Note:
1.Important safety instructions shall be provide with each appliance.These safety instructions may be
in the form of a separate booklet,separate sheet,or part of the instruction manual.
2.
If the appliance with the power plug and coupler as disconnect device, disconnect device should
be easy to operate.
3.These instructions shall be entitled"IMPORTANT SAFETY INSTRUCTIONS"
4.The safety instructions shall include,as applicable to the particular apparatus,the in formation and
warnigns listed before.The wording is capable of being supplements,although not replaced,by
drawing or cartoons.
5.
Equipment should not have been dripping or splashing up and down but also shows the device
should not be a class, such as vases filled with liquids.
E
NG
LISH

3
Installation
* Operate the unit only from a power source as indicated on the unit or in the operating instructions.
* Overloaded AC outlets and extension cords are dangerous and so are frayed cords and broken
plugs. Call your service technician for replacement of such cords and plugs
* Audio products are provided with ventilation openings to allow heat generated during operation to
be released. lf these openings are blocked, heat build-up within the set can cause failure which
may result in a fire hazard.
Therefore:
1. Never block the ventilation openings of a unit by placing it on a bed, soft rug, etc.
2. Never place a set in a built-in enclosure unless proper ventilation is provided.
3. Never cover the opening with cloth or other material.
4. Do not install near any heat sources such as radiators, heat registers, stoves, or other apparatus
(including amplifiers) that produce heat.
To avoid personal injury:
1. The manufacturer recommends that this unit not be mounted on a wall or ceiling.
2. Carefully follow the operating instructions when making connections.
3. Do not insert tools, hands, or fingers in openings (such as tape slot), especially if the unit is
connected to a power source.
WARNING
Do not turn on your stereo system with the volume at maximum.
This will damage your speakers and void you warranty.
Getting your system ready for use
Cloose an area away from heat. Allow about three(3) inches between the cabinet back and the wall
for proper ventilation. Place your system near an AC outlet supplying common household current
(105-120V AC60 z).
Grounding or polari ation
Do not defeat the safety purpose of the polarized or grounding type plug. A polarized plug has two
blades with one wider than the other. A grounding type plug has two blades and a third grounding
prong. The wide blade or the third prong are provided for your safety. When the provided plug does
not fit into your outlet, consult an electrician for replacement of the obsolete outlet.
Power cord protection
Protect the power cord from being walked on or pinched particularly at plugs, convenience receptacles,
and the point where they exit from the apparatus.
Only use attachments/accessories specified by the manufacturer.
Carts and stands
Use only with a cart, stand tripod, bracket, or table specified by the manufacturer, or sold with the
apparatus. When a cart is used, use caution when moving the cart/apparatus combination to avoid
injury from tip-over.
Water and Moisture
The appliance should not be used near water, for example, near a bathtub, washbowl, kitchen sink,
laundry tub, in a wet basement or neat a swimming pool and the like.

4
Cleaning
The appliance should be cleaned only as recommended by the manufacturer.
Non-use periods
Unplug this apparatus during lightning storms or when unused for long periods of time.
Object and liquid entry
Care should be taken so that objects do not fall and liquids are not spilled into the enclosure through
openings.
Damage requiring service
The appliance should be serviced by qualified service personnel when:
A. The power supply cord or the plug has been damaged.
B. Objects have fallen, or liquid has been spilled into the appliance.
C. The appliance has been exposed to rain.
D. The appliance does not appear to operate normally or exhibits a marked change in performance.
E. The appliance has been dropped: or the enclosure damaged.
Servicing
Do not attempt to service the appliance beyond that which is described in the operating instructions.
All other servicing should be referred to qualified service personnel.
Outdoor antenna grounding
If an outside antenna is connected to the receiver, be sure the antenna system is grounded so as to
provide some protection against voltage surges and built up static charges. Section 810 of the
National Electrica Code, ANSI/NFPA NO.70-1984,provides information with regard to proper
grounding of the lead-in wire to an antenna discharge unit, size of grounding conductors, location of
antenna discharge unit, connection to grounding electrodes, and requirements for the grounding
electrode. See Figure 1.
1.READ INSTRUCTIONS-All the safety and operating instructions should be read before the product
is operated.
2.RETAIN INSTRUCTIONS-The safety and operating instructions should be retained for future
reference.
3.HEED WRNING-All warnings on the appliance and in the operating instructions should be adhered
to.
4.FOLLOW INSTRUCTIONS-All operating and use instructions should be followed.

5
IMPORTANT
Use of controls or adjustments or performance of procedures other than those specified herein may
result in hazardous radiation exposure.
Player Function:
1. POWER BUTTON
Press the power switch to turn the unit on. To switch the POWER off press the POWER switch
again.
2. SKIP -
Press this button to skip back to the previous selection program.
3. SKIP +
Press this button to skip next to the previous selection program.
4. STANDBY
5. IR SENSOR
Infrared signal transmitter.
6. VFD DISPLAY
7. DITITS KEYS
Numerical keys for direct selection of a title.
8. MEMORY
Memory of radio.
9. FM.ST
Press this button to change audio between mono stereo and stereo.
10. AUTO SCAN
Press this button to automatic change frequency from low to high.
11. TUNNING –
Press this button adjust the frequency from low to high.]
12. TUNNING +
Press this button adjust the frequency from high to low.
13. AM/FM
Press this button to choose the FM or AM band.

6
14. LINE OUT FM/AM ANTENNA
Antenna port.
15. LINE OUT
The audio for tuner is an output for these jacks.
16. VOITAGE SELECTOR
Set this to the correct voltage for your location standard.
17. FUSE
The FUSE if blown should only be replaced with the same 250V 5AL FUSE.
18. AC CORD
Use this cable to connect the AC mains power to the unit.
19. POWER
Select power on or standby.
20. 1-9 AND +10 KEYS
Numerical keys for direct selection of a title.
21. MUTE
Press this button to shut off the audio, press it again to activate
audio.
22. TUNE + AND TUNE - BUTTON
Press tuning + search for the frequency from low to high.
Press tuning - search for the frequency high low to low.
23. SKIP+/- BUTTON
Use the skip + button to go to the first title of the previous folder and
the skip - button to go to the first title of the next folder.
24. AUTOSCAN BUTTON
Press this button to automatic change frequency from low to high.
25. AM/FM BUTTON
Press this button to choose the FM or AM band.
26. T.ST/MO(TUNER/STEREO/MONO)
Press this button to change audio between mono stereo and stereo.
27. MEMORY
Memory of radio.

7
At first, place the batteries into the remote
control.
Open the batterycompartment.
Insert the batteries AAA(UM-4),made sure
to match+ and - of the batteries to the marks in
the battery compartment.
Close the battery cover.
NOTE: Improper use of the batteries may
cause battery leakage and corrosion. To
operate the remote control correctly,
follow the instructions below:
Do not insert batteries into the remote control in
the wrong direction.
Do not charge, heat, open or short -circuit
batteries. Do not throw batteries into a fire.
● Do not leave dead or exhausted batteries
in the remote control.
● Do not use different types of batteries
together or mix old and new batteries.
● If you do not use the remote control for a
long period of time, remove the batteries
to avoid possible damage from battery
corrosion.
● If the remote control does not function
correctly or the operating range becomes
reduced, replace all batteries with new one.
● If battery leakage occurs, wipe the battery
liquid from the battery compartment, then
insert new batteries.
The batteries can be used for one year in
normal condition.
Operation of the remote control
This is for instructions how to use the remote
control.
Distance: within 7m from the front of the
remote control sensor.
Angle: within 30
0
each direction of the front of
the remote sensor.
Notes on the remote control
● Do not drop or give the remote
control a shock.
● Do not put heavy object on the top
of the remote control.
● Do not spill water or and liquid on
the remote control.
● Don not open the remote control.

WARRANTY CONDITIONS
Power Dynamics equipment is covered by a 1-year warranty on parts and labor except for faders(90
days).The followin rules apply from the day the equipment leaves the factory:
The date on the invoice is considered to be the date the warranty be ins.
Only companies approved by Power Dynamics are allowed to work on the equipment. Warranty
becomes void when other service technicians open the equipment.
Durin warranty period, defective equipment must be sent by pre-paid mail in the ori inal box.
Power Dynamics will return the oods by pre-paid mail durin the first year of warranty; there after
the mailin cost is to be paid by the recipient.
Potentiometers have a limited lifetime and are not covered by the manufacturer for more than normal
use.
For all service enquiries, refer to your local distributor, as he is best able to help you.
SPECIFICATIONS:
Power supply: ~100-240V,60/50Hz
Dimensions : 484x45 x 252.5mm

PRECAUTIONS IMPORTANTES DE SECURITE
Le symbole de l'éclair avec une flèche dans un trian le alerte l'utilisateur sur la présence
d'une tension dan ereuse dans l'appareil. Il y a risque de déchar e électrique.
Le point d'exclamation dans le trian le alerte l'utilisateur sur la présence d'indications
d'utilisation importantes dans la notice.
Explications Etiquettes d'avertissement
AVERTISSEMENT :
LES CHANGEMENTS OU MODIFICATIONS SUR L'APPAREIL NON
APPROUVES PAR LES RESPONSABLES FONT PERDRE TOUT DROIT D'UTILISATION DE
L'APAPREIL ; TOUTE MODIFICATION SUR LE PRODUIT REND LA GARANTIE CADUQUE.
Cet appareil a été testé et est en conformité avec les appareils di itaux de classe C, conformément à
la section 15 des rè lements de la FCC. Ils sont prévus pour fournir une protection raisonnable contre
les interférences nuisibles dans des installations résidentielles. Cet appareil peut émettre une éner ie
de radio fréquence et s'il n'est pas installé selon les instructions, il peut causer des interférences dans
les communications radio. toutefois, l'absence d'interférence dans une installation particulière n'est
pas arantie. Si cet appareil cause des interférences domma eables pour la réception radio ou télé,
détectées en étei nant l'appareil, et en le rallumant, l'utilisateur est invité à essayer de corri er les
interférences en appliquant les mesures suivantes :
-- Réorienter ou repositionner l'antenne de réception.
--Au menter la distance entre l'équipement et le récepteur.
--Reliez l'appareil à une prise dans un circuit différent de celui du récepteur.
--Contactez un revendeur ou électricien.
Cet appareil est en conformité avec la section 15 des rè lements de la FCC. Son fonctionnement est
soumis aux conditions suivantes : 1) l'appareil ne doit pas causer d'interférences nocives. 2) Cet
appareil doit accepter des interférences y compris pouvant causer un fonctionnement non souhaité.
ATTENTION : POUR DIMININUER LES RISQUES D'INCENDIE OU DE DECHARGE ELECTRIQUE,
N'EXPOSEZ PAS L'APAPREIL A LA PLUIE. SI CELA SE PRODUIT, ASSUREZ-VOUS QUE LA
PRISE EST BIEN DECONNECTEE AVANT DE TOUCHER L'APAPREIL OU LA PRISE.
Avertissement utilisation en extérieur et emplacement humide
Note :
1. Les instructions importantes de sécurité s'appliquent pour tout appareil. Elles peuvent faire partie de
la notice d'utilisation ou faire l'objet d'un livret ou d'une feuille séparée.
2. Ces instructions doivent être intitulées “INSTRUCTIONS IMPORTANTES DE SECURITE".
3. Les instructions de sécurité, applicables à chaque appareil, doivent inclure les informations et
avertissements. Des rajouts peuvent être effectués, sans notifications préalables ni remplacement des
emballa es ou cartons.
4.
L'appareil ne doit pas être jeté, secoué, il ne faut pas de vases remplis de liquide.
F
RANCAIS

PRECAUTIONS IMPORTANTES DE SECURITE
Installation
* Faites fonctionner l'appareil uniquement avec une tension secteur telle qu'indiquée sur l'appareil ou
dans la notice.
* Les prises secteur ou cordons secteur en surchar e sont dan ereux. Faites appel à un technicien
pour remplacer les cordons et fiches endomma és.
* Les produits audio sont prévus avec des ouvertures e ventilation pour une évacuation de la chaleur
dé a ée pendant le fonctionnement. Si ces ouvertures sont obturées, la chaleur confinée dans
l'appareil peut causer un dysfonctionnement et créer un incendie.
En cons quence :
1. N'obstruez pas les ouvertures de ventilation de l'appareil en le plaçant une un lit ...
2. Ne placez pas l'appareil dans un rack à moins qu'une ventilation adéquate ne soit fournie.
3. Ne couvrez pas les ouvertures par un tissu ou tout autre matériau.
4. N'installez pas l'appareil à proximité de sources de chaleur telles que de radiateurs, poêles, ou
autre appareil (y compris amplificateurs produisant de la chaleur.
Pour viter toute blessure :
1. Le fabricant recommande que cet appareil ne soit pas monté sur un mur ou au plafond.
2. Respectez avec attention les instructions lors des branchements.
3. Ne faites pas tomber d'outils, ne mettez pas les mains ou les doi ts dans les ouvertures, en
particulier lorsque l'appareil est relié au secteur.
AVERTISSEMENT
N'allumez pas le système stéréo à un volume maximum.
Cela pourrait endomma er vos enceintes et vous perdriez tout droit à la arantie.
Pr paration de l'appareil
Choisissez un lieu d'installation loin de toute source de chaleur. Il faut laisser 10 cm au moins entre
l'arrière de l'appareil et le mur pour une ventilation correcte. Placez l'appareil près de la prise
d'alimentation secteur (105-120V AC60Hz).
Mise à la terre ou polarisation
Il ne faut pas enlever à la fiche polarisée ou de mise à la terre son caractère de sécurité. Une fiche
polarisée a deux broches, une plus lar e que l'autre. Une prise de terre a deux broches et une broche
de mise à la terre. La brocher lar e ou la troisième broche assurent votre sécurité.
Si la fiche livrée ne convient pas pour votre prise murale, consultez un électricien pour remplacer la
prise obsolète.
Protection cordon secteur
Proté ez le cordon secteur, évitez qu'on puisse y marcher dessus, qu'il soit pincé au niveau des
fiches.
Utilisez uniquement les accessoires et attaches spécifiés par le fabricant.

Supports
Utilisez un chariot, un pied tripode, un étrier ou une table spécifiquement
conçu par le fabricant ou soudé à l'appareil. Lorsque vous utilisez un
chariot, faites attention lors du déplacement de l'ensemble pour éviter toute
blessure s'il venait à se renverser.
Eau et humidit
L'appareil ne doit pas être utilisé à proximité d'eau, par exemple évier, lavabo, dans un endroit humide
ou près d'une piscine.
PRECAUTIONS IMPORTANTES DE SECURITE
Nettoyage
L'appareil doit être nettoyé comme spécifié par le fabricant.
P riodes de non utilisation
Débranchez l'appareil pendant un ora e ou en cas de non utilisation prolon ée.
Objets et liquides
Veillez à ce qu'aucun objet ou liquide ne tombent dans l'appareil via les ouïes d'aération.
Dommages n cessitant une intervention
L'appareil doit impérativement être réparé par un technicien habilité lorsque :
A. Le cordon secteur ou la prise secteur est endomma é.
B. Des objets ou du liquide sont tombés dans l'appareil.
C. L'appareil a été exposé à la pluie.
D. L'appareil ne fonctionne pas normalement ou présente un chan ement notable dans son
fonctionnement.
E. L'appareil est tombé, il est endomma é.
Entretien
N'ouvrez pas l'appareil pour le réparer, seul un technicien habilité y est autorisé.
Mise à la terre de l'antenne ext rieure
Si une antenne extérieure est reliée au récepteur, assurez-vous que l'antenne est bien reliée à la terre
pour proté er l'appareil de toute surtension et créer des char es statiques. Section 810 du code
nation électrique Code, ANSI/NFPA NO.70-1984, ; informations sur la mise à la terre correcte de fil
conducteur pour une déchar e d'antenne, emplacement de l'antenne, branchement aux
électroniques,, voir schéma 1
1.INSTRUCTIONS - Veuillez lire les instructions de sécurité et de fonctionnement avant toute
utilisation de l'appareil.
2.NOTICE-Veuillez conserver la notice d'utilisation pour pouvoir vous y reporter ultérieurement.
3.AVERTISSEMENTS- Il est impératif de respecter tous les conseils et avertissements présents dans
la notice.
4. INSTRUCTIONS- Toutes les instructions de fonctionnements et d'utilisation doivent impérativement
être respectées.

FACE AVANT
IMPORTANT
L'utilisation des ré la es ou l'application des procédures, autre que celle décrite dans la notice, peut
en endrer une exposition dan ereuse aux rayonnements.
Fonction Lecteur :
1. INTERRUPTEUR POWER
Appuyez sur l'interrupteur pour allumer l'appareil. Pour l'éteindre, appuyez à nouveau.
2. SKIP -
Appuyez sur la touche pour revenir au pro ramme précédent de sélection.
3. SKIP +
Appuyez sur la touche pour aller au pro ramme suivant de sélection.
4. STANDBY
5. CAPTEUR IR
Emetteur infrarou e du si nal.
6. AFFICHAGE VFD
7. TOUCHES NUMERIQUES
Touches numériques pour une sélection directe d'un titre.
8. MEMOIRE
Mémoire de la radio
9. FM.ST
Appuyez sur la touche pour commuter l'audio entre mono et stéréo.
10. AUTO SCAN
Appuyez sur la touche pour le chan ement automatique de fréquence de Low sur Hi h.
11. TUNNING –
Appuyez sur la touche pour ré ler la fréquence de Low sur Hi h.
12. TUNNING +
Appuyez sur la touche pour ré ler la fréquence de Hi h sur Low.
13. AM/FM
Appuyez sur la touche pour choisir la pla e FM ou AM.

FACE ARRIERE
14. SORTIE ANTENNE FM/AM
Port antenne
15. LINE OUT
Sortie audio pour le tuner.
16. SELECTEUR TENSION
Sélectionnez la tension adaptée au pays d'utilisation de l'appareil.
17. FUSIBLE
Tout fusible fondu doit être remplacé par un fusible identique, 250V 5AL.
18. PRISE SECTEUR - CORDON SECTEUR
Utilisez le cordon pour relier l'appareil au secteur.
INSTRUCTIONS POUR LA TELECOMMANDE ET CAPTEUR
19. POWER
Pour sélectionner Power On ou Standby (veille).
20. TOUCHES 1-9 ET +10
Touches numériques pour la sélection directe d'un titre
21. MUTE
Appuyez sur la touche pour couper le son, appuyez à
nouveau pour le réactiver.
22. TOUCHE TUNE + ET TUNE -
Appuyez sur TUNE+ pour rechercher une fréquence de
Low vers Hi h.
Appuyez sur TUNE- pour rechercher une fréquence de
Hi h vers Low.
23. TOUCHE SKIP+/-
Utilisez la touche SKIP + pour aller au premier titre du
dossier précédent et la touche SKIP -
pour aller au premier titre du dossier suivant.
24. TOUCHE AUTOSCAN
Appuyez sur la touche pour un chan ement automatique
de fréquence de Low vers Hi h.
25. TOUCHE AM/FM
Appuyez sur la touche pour choisir entre la bande FM ou
AM.
26. T.ST/MO(TUNER/STEREO/MONO)
Appuyez sur la touche pour commuter entre mono et
stéréo.
27. MEMORY
Mémoire de la radio

INSTRUCTIONS POUR LA TELECOMMANDE
Placez tout d'abord les batteries dans la
télécommande.
Ouvrez le compartiment batterie.
Insérez les batteries R03 en respectant la
polarité indiquée dans le compartiment.
Refermez le compartiment batterie.
NOTE : une utilisation incorrecte des batteries
peut les faire couler et causer une corrosion.
Pour faire fonctionner correctement la
télécommande, respectez les indications ci-
dessous :
Veillez à respecter le sens des batteries.
Ne char ez pas, n'ouvrez pas les batteries, ne
les court-court-circuitez pas. Ne les jetez pas
dans un feu.
● Ne laissez pas de batteries mortes dans
la télécommande.
● N'utilisez pas différents types de batteries
ensemble et ne mélan ez pas des batteries
neuves et anciennes.
● En cas de non utilisation prolon ée de la
télécommande, retirez les batteries pour éviter
toute corrosion.
● Si la télécommande ne fonctionne pas
correctement, ou si la portée diminue,
remplacez toutes les batteries en même
temps.
● Si la batterie venait à couler, essuyez le
liquide dans le compartiment et insérez de
nouvelles batteries.
Dans des conditions normales, les batteries
peuvent être utilisées pendant un an.
Fonctionnement de la t l commande
Instructions sur le fonctionnement de la
télécommande
Distance : 7 mètres entre l'appareil et le
capteur de la télécommande.
Angle: 30
0
dans chaque direction
Notes sur la télécommande
● Ne jetez pas la télécommande, évitez tout
choc.
● Ne posez pas d'objets lourds sur le dessus
de la télécommande.
● Ne faites pas tomber d'eau ou de liquide
sur la télécommande.
● N'ouvrez pas la télécommande.

CONDITIONS DE GARANTIE
Les produits Power Dynamics ont une garantie de 1 an sauf pour les faders (90 jours). Les
conditions s'appliquent dès que l'appareil quitte l'usine : la date sur la facture est considérée comme la
date de début de la garantie.
eules les sociétés approuvées par Power Dynamics sont autorisées à travailler sur l'appareil.
L'appareil perd toute garantie si d'autres personnes ouvrent l'appareil.
Pendant la période de garantie, tout appareil défectueux doit être renvoyé en port payé dans son
emballage d'origine.
Les potentiomètres ont une durée de vie limité et ne sont pas couverts par la garantie en cas
d'utilisation supérieure à une utilisation normale.
Pour toute demande, contactez votre revendeur.
CARACTERISTIQUES TEC NIQUES :
Alimentation : ~100-240V,60/50Hz
Dimensions : 484 x 45 x 252,5 mm

Declaration of Conformity
Manufacturer: TRONIOS BV
Bedrijvenpark Twente 415
76 2 KM - ALMELO
Tel : 31546589299
Fax : 31546589298
The Netherlands
Product number: 172.7 6
Product Description: PDC-30 Digital Tuner
Trade Name: Power Dynamics
Regulatory Requirement: EN 55 13
EN 55 2
EN 61 -3-2/3-3
EN 6 65
The product met the requirements stated in the above mentioned Declaration(s).
This certificate does not cover the aspects that may be relevant such as performance and fitness for
purpose.
ALMELO,
19- 7-2 1
Signature
This manual suits for next models
1
Table of contents
Languages:
Other Power Dynamics Tuner manuals
Popular Tuner manuals by other brands

MFJ
MFJ VersaTuner V -989D instruction manual

Sonic Nuance Electronics
Sonic Nuance Electronics TDI user manual

Kenwood
Kenwood KTC-SR901 - Digital Satellite Tuner Service manual

Harman Kardon
Harman Kardon CITATION 23 Tehnical manual

Stockcorner
Stockcorner JC-5s manual

Logik
Logik L3DAB11E instruction manual