Powercraft PCS-360LK User manual

www.servotool.com 0508-30
UK Subject to change
UK USERS MANUAL
Art. no. CDM6041
PCS-360LK

Powercraft 112Powercraft
Fig.1
1
6
7
2
3
4
5

Fig.2
Fig.4
Fig.6
Fig.3
Fig.5
Fig.7
10 Powercraft Powercraft 3

Powercraft 9
Old electrical appliances are valuable resources, which is why they do not belong
with the household refuse!
We would therefore like to ask you to support us through your active
contribution to safeguarding resources and protecting the environment by handing
in these appliances to the recycling points that have been set up - where these are
available.
Do not dispose of the power tool or the battery into household waste, fire or water.
Guarantee
The guarantee conditions can be found on the separately enclosed guarantee card.
We declare under our sole responsibility that this product is in conformity with the following
standards or standardized documents:
EN60745, EN60335
in accordance with the regulations:
98/37/EEC, 73/23/EEC, 89/336/EEC
from 01-08-2005
ZWOLLE NL
CE DECLARATION OF CONFORMITY (UK)
UK
Fig.8
Fig.10
Fig.9
4Powercraft

Powercraft 5
CORDLESS SCREWDRIVER PCS-360LK
Warning! Always read the instruction for electrical products carefully before use. It will
help you understand your product more easily and avoid unnecessary risks. Keep this
instruction manual in a safe place for future use.
THE NUMBERS IN THE FOLLOWING TEXT CORRESPOND WITH THE PICTURES AT
PAGE 2 - 4
Introduction
This screwdriver is intended for tightening and loosening screws (fig. 2 - 6). The screwdriver is
not suitable for screwdriving heavy constructions, for example repairing a big fence.
Contents:
1. Technical specifications
2. Safety instructions
3. Assembly instructions
4. Operation
5. Charging the battery
6. Maintenance
Package contents
1 Cordless screwdriver
1 Charger
1 Magnetic bit holder
8 Accessories
1 Instruction manual
1 Safety instructions
1 Warranty card
Check the machine, loose parts and accessories for transport damage.
Technical specifications
Features
Fig. 1
1. Bit holder
2. On/Off-switch
3. Softgrip
4. LED
5. Charger connection
6. Extension piece
7. Bit
Charger 3,6 V / 600 mA
Frequency 50 Hz
Battery capacity 1,1 Ah
Charging time < 5 hours
Max. torque 2,8 Nm
No-load speed 170 r/min
Weight 340 gr.
Vibration < 2,5 m/s2
1. TECHNICAL SPECIFICATIONS fications
UK
8Powercraft
Charging Li-ion battery
Fig. 10
The battery charger supplied is matched to the Li-ion battery installed in the machine. Do not
use another battery charger.
The Li-ion battery is protected against deep discharging. When the battery is empty, the
machine is switched off by means of a protective circuit: the tool holder no longer rotates.
Caution: if the On/Off switch is subject to continued use, the Li-ion battery can be damaged.
The charging procedure starts as soon as the mains plug of the battery charger is inserted into
the socket and the adapter plug is connected to the appliance (the underside of the handgrip).
• Put the adapter plug of the charger into the handle (underside)
• Plug the mains adapter into the (wall) socket
• The charging process starts; the red LED is now on
• The battery is fully charged when the red LED goes out.
• Charging the battery takes maximum 5 hours.
• During the charging procedure, the handgrip of the machine warms up. This is normal.
The Ferm machines have been designed to operate over a long period of time with a minimum
of maintenance. Continuous satisfactory operation depends upon proper machine care and
regular cleaning.
Cleaning
Keep the ventilation slots of the machine clean to prevent overheating of the engine. Regularly
clean the machine housing with a soft cloth, preferably after each use. Keep the ventilation
slots free from dust and dirt. If the dirt does not come off use a soft cloth moistened with soapy
water. Never use solvents such as petrol, alcohol, ammonia water, etc. These solvents may
damage the plastic parts.
Lubrication
The machine requires no additional lubrication.
Faults
Should a fault occur, e.g. after wear of a part, please contact your local Ferm dealer.
Environment
In order to prevent the machine from damage during transport, it is delivered in a sturdy
packaging. Most of the packaging materials can be recycled. Take these materials to the
appropriate recycling locations.
6. MAINTENANCE
5. CHARGING THE BATTERY
UK

Powercraft 7
11. Never throw the accumulator block into water or a fire – it may explode.
12. Turn the drill immediately off after the screw is fastened. Overloading and damaging the
battery or motor can be prevented this way. Use the torque to loosen the fastened screw.
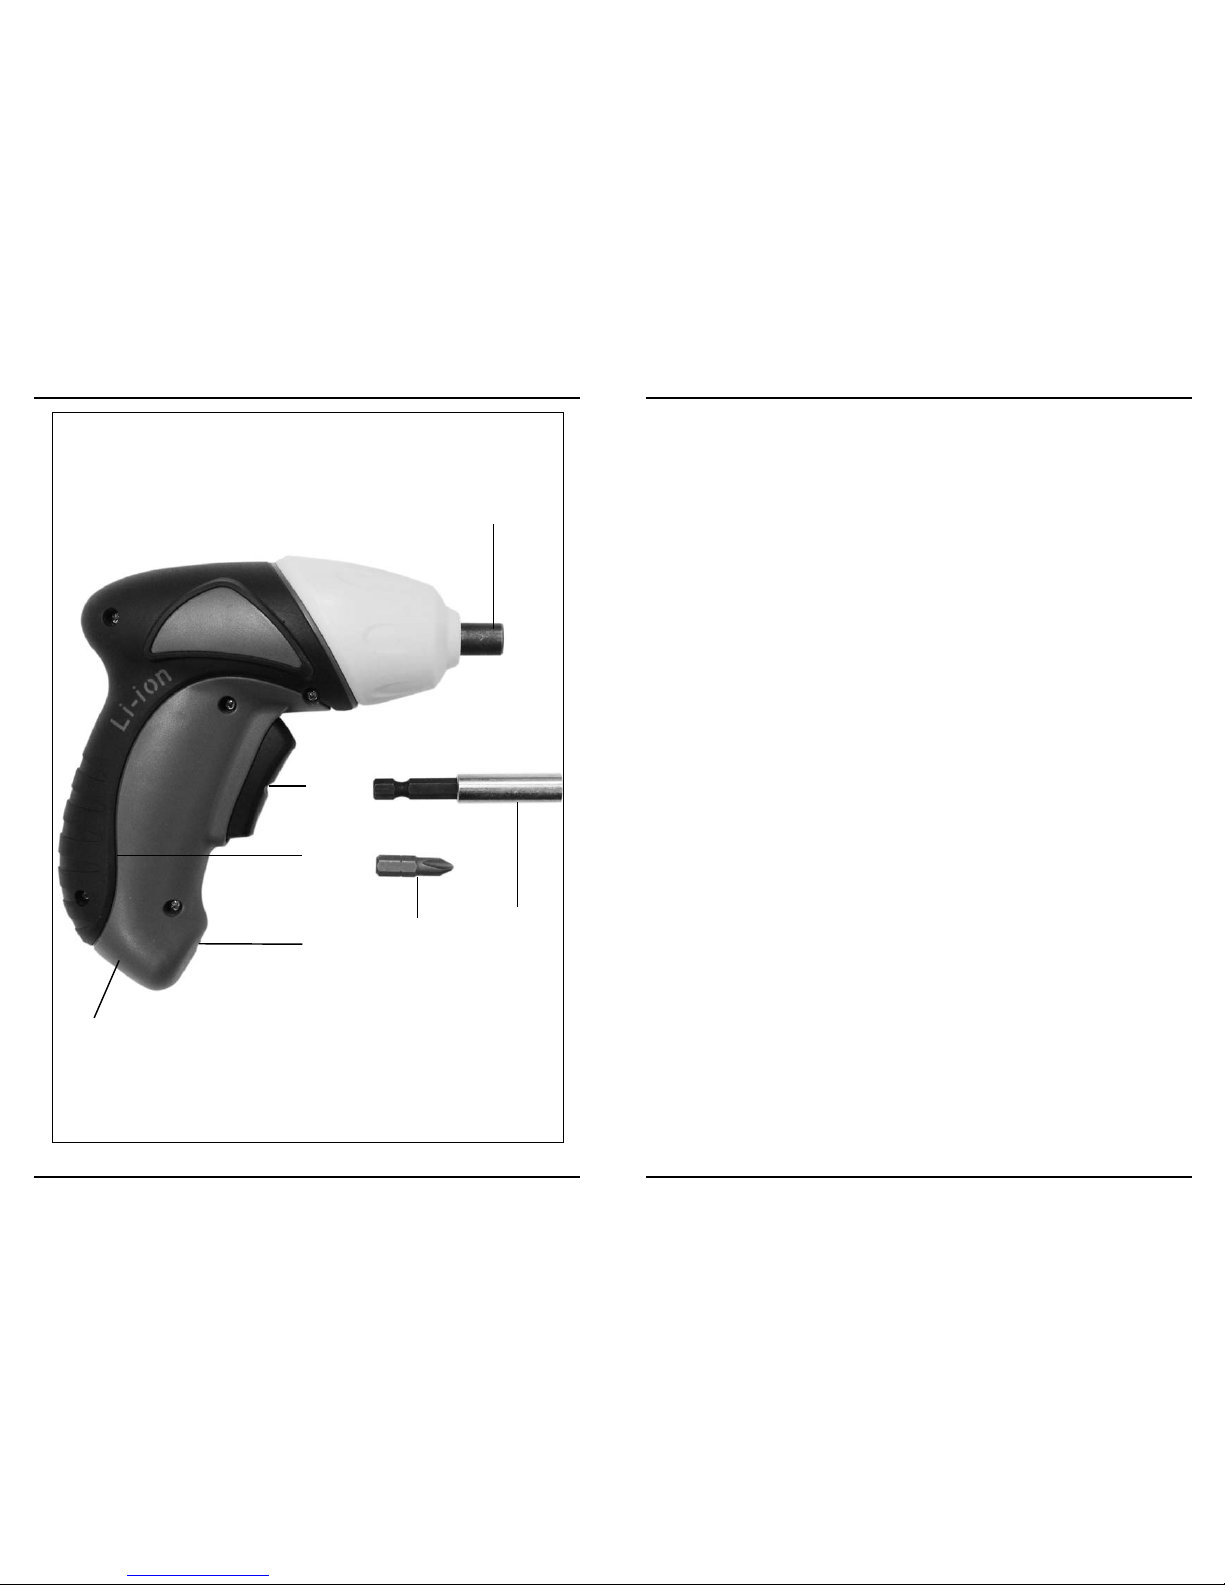
Inserting and removing bits
Fig. 1 + 7
The bits can easily be placed directly into the bit holder or on the extension piece. The
extension piece can be used for screws that are difficult to reach.
Always observe the safety instructions and applicable regulations.
Firmly hold the machine and ferm the bit with even pressure into the workpiece. Do not force
the machine. Use only bits that do not yet show any signs of wear. Worn bits have a negative
effect on the efficiency of the machine.
Locking the screwdriver
Fig. 8
The screwdriver is fitted with an automatic spindle lock feature. When the On/Off switch (2) is
not pressed, the spindle is locked. Now it is possible to use the screwdriver (even when the
battery is empty) as a manual tool.
Screwdriving
Fig. 1
To switch the tool on, press the On/Off switch (2).
- Press the tumbler switch (R) for clockwise rotation (tightening screws)
- Press the tumbler switch (L) for counterclockwise rotation (loosening screws)
To switch the tool off, release the on/off switch.
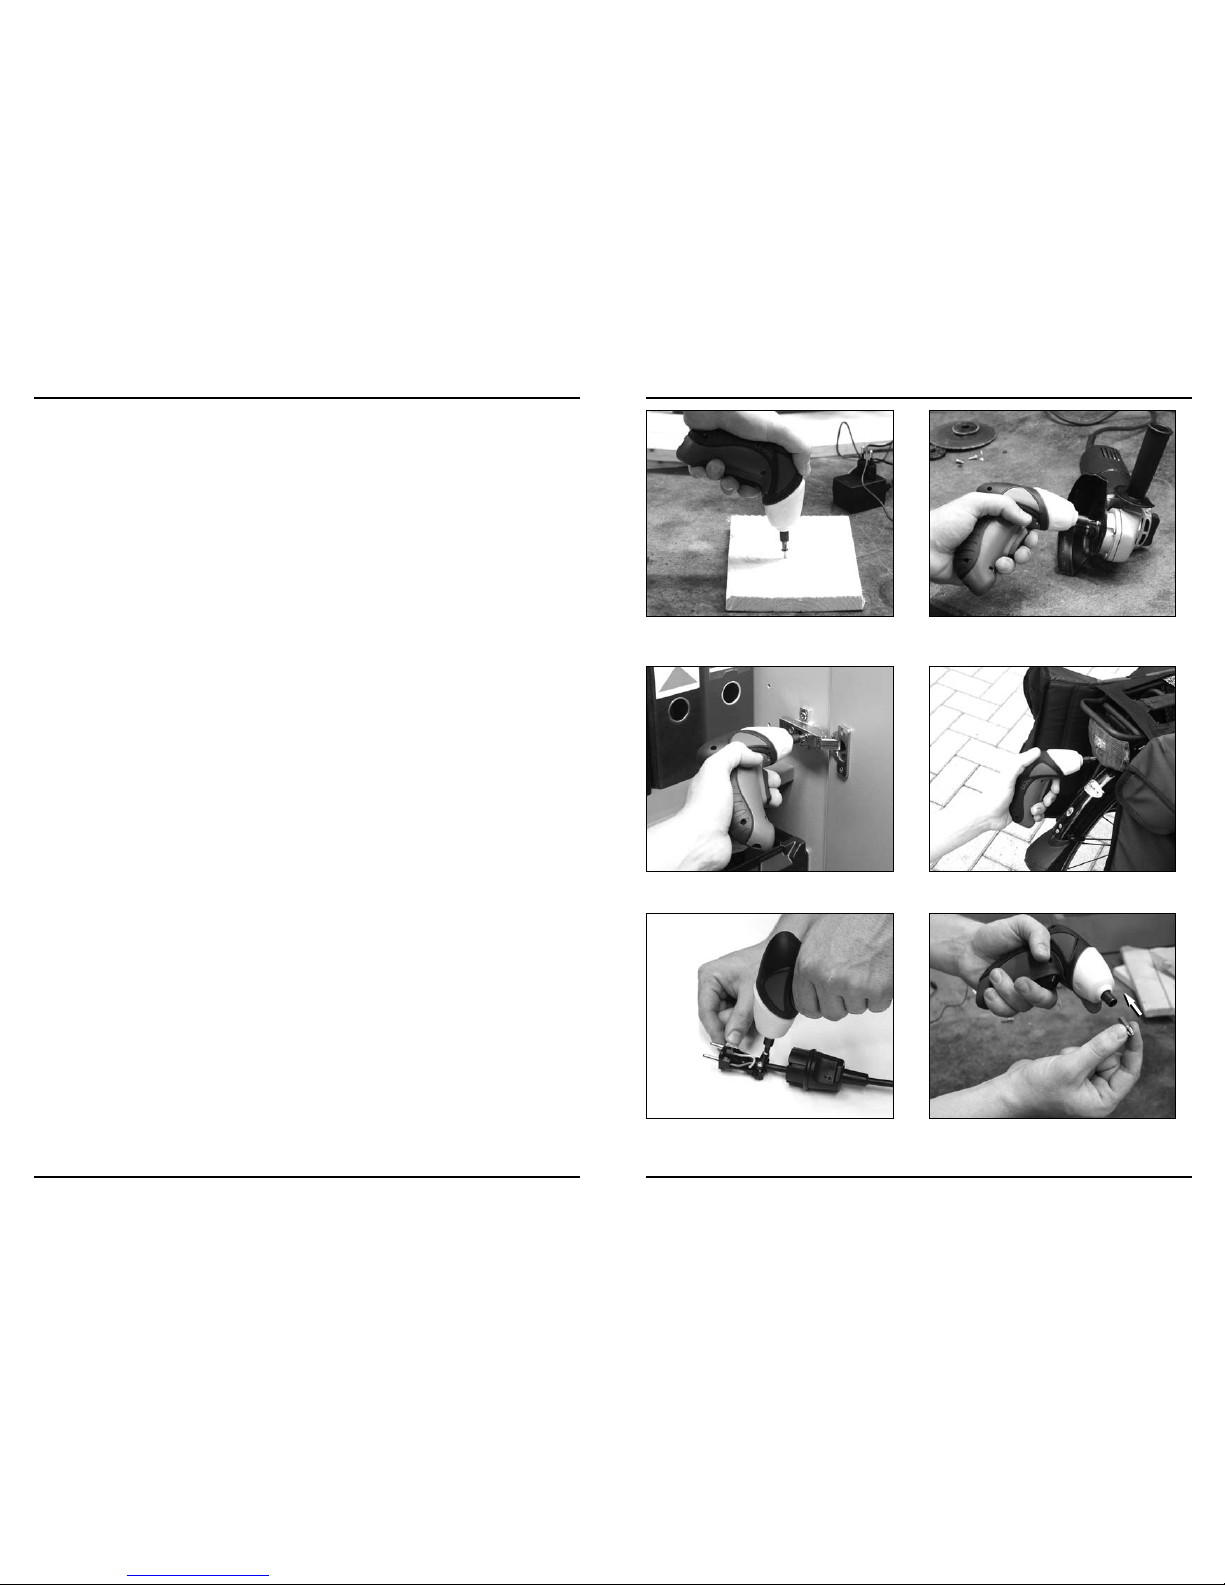
User tips for optimum use
• Always hold the tool and screwdriver bit in a straight line with the screw and always use
the correct type and size of bit.
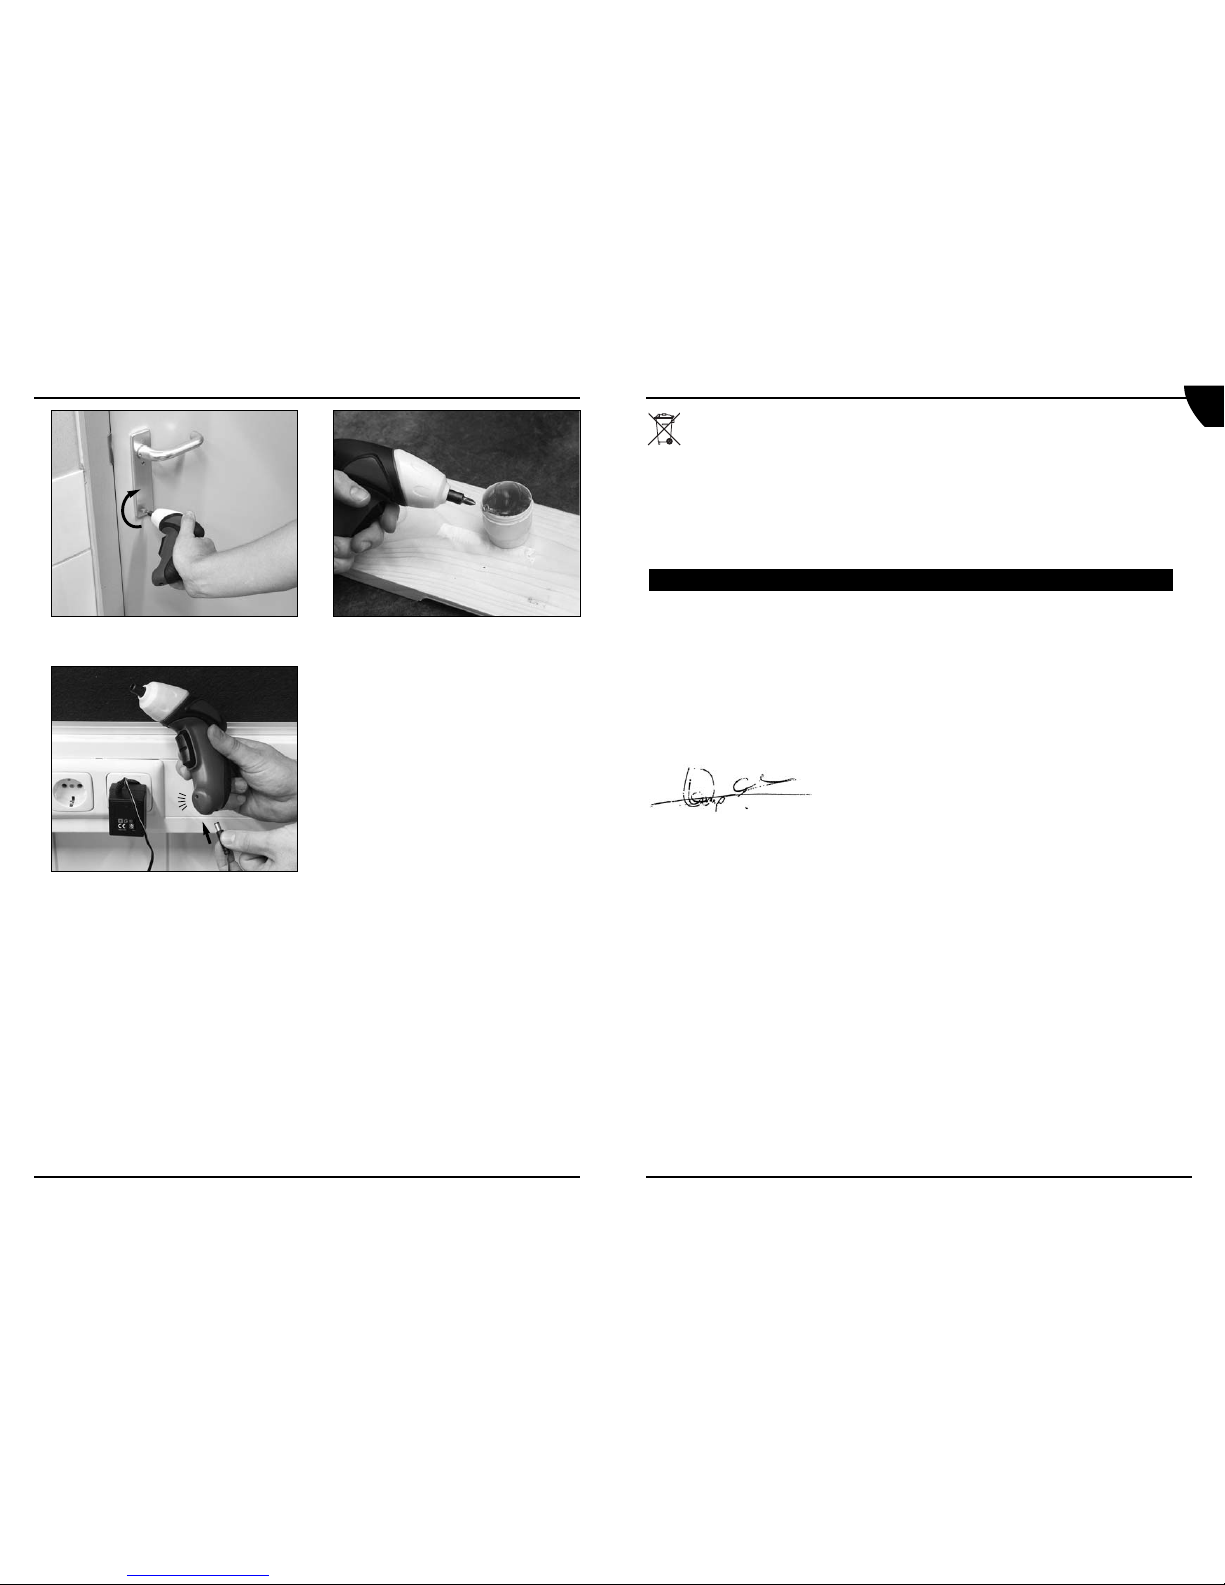
• If screws are difficult to tighten, try applying a small amount of washing liquid or soap as a
lubricant (Fig. 9).
• Use the spindle lock feature to loosen very tight screws or to firmly tighten screws.
• When screwing in wood, it is recommended to drill a hole with a depth equal to almost the
length of the screw. A pilot hole guides the screw and prevents splintering or distortion of
the work piece.
4. OPERATION
3. ASSEMBLY INSTRUCTIONS
UK
6Powercraft
The following symbols are used in these instructions for use:
In accordance with essential applicable safety standards of European directives
The charging adapter is double insulated in accordance with EN-60335;
therefore no earth wire is required.
Denotes risk of personal injury, loss of life or damage to the tool in case of non-
observance of the instructions in this manual.
Indicates electrical shock hazard.
Read instructions carefully
Indoor use only
In case of failure, the transformer is not dangerous
Thermic protector
Faulty and/or discarded electrical or electronic apparatus have to be collected at the
appropriate recycling locations.
ADDITIONAL SAFETY INSTRUCTIONS
1. Only use the accumulator block with the battery charger provided – using other chargers
could be dangerous.
2. Keep the accumulator block, tool and battery charger away from damp and wet
conditions.
3. Before using the battery charger, check all wires are properly connected.
4. If any wires on the charger are damaged, do not use it until these have been replaced.
5. When the charger is not in use it should not be plugged in. When unplugging, do not pull
the plug out by the cable.
6. If the charger breaks down or suffers from other technical problems, take it to a
recognised dealership to be checked before using it again. Any damaged parts must be
replaced.
7. Take care when handling the accumulator block, do not drop it or knock it against other
things.
8. Never attempt to repair the battery charger or accumulator block yourself; this can be
extremely dangerous. Repairs should always be carried out by a
recognised dealership.
9. Always unplug the charger before cleaning or carrying out any other maintenance on it.
10. Do not attempt to charge the accumulator block in temperatures of below 5 degrees or
above 40 degrees centigrade.
2. SAFETY INSTRUCTIONS
UK
Table of contents
Other Powercraft Power Screwdriver manuals
Popular Power Screwdriver manuals by other brands

Parkside
Parkside PAS 3.6 A1 Operation and safety notes translation of original operation manual

HIKOKI
HIKOKI WM 14DBL Handling instructions

Meister
Meister i-drill MAS36ip3 Translation of the original instructions

Milwaukee
Milwaukee M18 FUEL 2866-20 Operator's manual

Clarke
Clarke CIS100 Operating & maintenance instructions

Craftsman
Craftsman 315.111690 owner's manual