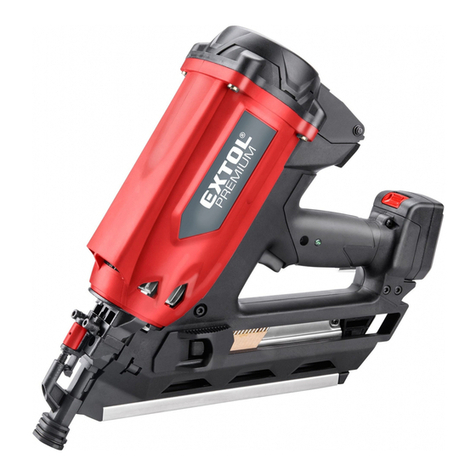
Powers Fasteners F16 Instruction Manual

•ENG BRADNAILER
OPERATING INSTRUCTION MANUAL
•DE NAGELMASCHINE
BETRIEBSANLEITUNG
•FR CLOUEUR
MODE D’EMPLOI
•NL BRAD-TACKER
GEBRUIKERSINSTRUCTIES
•ES MARTILLO CLAVADOR
INSTRUCCIONES DE USO
•IT CHIODATRICE
MANUALE DI ESERCIZIO
•GR ΚΑΚΑΡΦΩΤΙΚΟ ΜΗΧΑΝΗΜΑ
OΤHΓIEΣ AΣΦAΛEIAΣ
MODEL F16
F16
BradNailer F16 Op Man_NEW.qxd 18/8/08 1:39 PM Page 1

MODEL F16
2
English Page 8 to 16
Deutsch Seite 17 bis 26
Français Page 27 to 35
Nederlands Page 36 to 44
Español Page 45 to 53
Italiano Page 54 to 62
EΛΛHNIKA
σελιδα
63 to 75
BradNailer F16 Op Man_NEW.qxd 18/8/08 1:39 PM Page 2

109
11 12
F16
543
1
2
8
9
6
7
MODEL F16
3
A
BradNailer F16 Op Man_NEW.qxd 18/8/08 1:39 PM Page 3

8
14
B
C
9
13
9
13
14
8
MODEL F16
4
BradNailer F16 Op Man_NEW.qxd 18/8/08 1:39 PM Page 4

D
E
15
3
6
MODEL F16
5
BradNailer F16 Op Man_NEW.qxd 18/8/08 1:39 PM Page 5

F
H
8
2
2
G
2
16
5
17
MODEL F16
6
BradNailer F16 Op Man_NEW.qxd 18/8/08 1:39 PM Page 6

5
15
IJ
18
19
MODEL F16
7
BradNailer F16 Op Man_NEW.qxd 18/8/08 1:39 PM Page 7

8
MODEL F16
8
OPERATING INSTRUCTION MANUAL
ENGLISH
BRADNAILER
BradNailer F16 Op Man_NEW.qxd 18/8/08 1:39 PM Page 8

MODEL F16
9
CONGRATULATIONS!
You have chosen a Powers tool. Years of experience, thorough
product development and innovation make Powers one of the most
reliable partners for professional power tool users.
TECHNICAL DATA
F16
Sound pressure (LpA) dB(A) 85.9
1)
Acoustic power (LWA) dB(A) 92.6 2)
Hand/arm weighted vibration m/s213.6 3)
Voltage VDC 18
Actuating mode contact
actuating
Magazine angle 0°
Fasteners
type 16 Ga
length mm 19–64
shank diameter mm 1.6
angle 0°
Weight (without battery pack) kg 2.8
Battery pack 68816
Battery type NiMH
Voltage VDC 18
Capacity Ah 2.6
Weight kg 1.0
Charger 68817
Mains voltage VAC 230
Battery type NiMH
Approx. charging time min 30
Weight kg 0.5
1) KpA (sound pressure uncertainty): 3 dB(A)
2) KWA (acoustic power uncertainty): 3 dB(A)
3) This value is a tool-related characteristic value and does not
represent the influence to the hand-arm-system when using
the tool.
The influence to the hand-arm-system when using the tool will for
example depend on the gripping force, the contact pressure force,
the working direction, the adjustment of energy supply, the
workpiece and the workpiece support.
Measurement uncertainty: 3.25 m/s2
Fuses:
Europe 230 V tools 10 Amperes, mains
U.K. & Ireland 230 V tools 13 Amperes, in plugs
The vibration emission level given in this information sheet has
been measured in accordance with a standardised test given in EN
60745 and may be used to compare one tool with another. It may
be used for a preliminary assessment of exposure.
WARNING: The declared vibration emission
level represents the main applications of the
tool. However if the tool is used for different
applications, with different accessories or poorly
maintained, the vibration emission may differ.
This may significantly increase the exposure level
over the total working period.
An estimation of the level of exposure to
vibration should also take into account the times
when the tool is switched off or when it is
running but not actually doing the job. This may
significantly reduce the exposure level over the
total working period.
Identify additional safety measures to protect
the operator from the effects of vibration such
as: maintain the tool and the accessories, keep
the hands warm, organisation of work patterns.
The following symbols are used throughout this manual:
Denotes risk of personal injury, loss of life or
damage to the tool in case of non-observance of
the instructions in this manual.
Denotes risk of electric shock.
EC-DECLARATION OF CONFORMITY
F16
Powers declares that these products described under “technical
data” have been designed in compliance with: 98/37/EEC (until
Dec. 28, 2009), 2006/42/EC (from Dec. 29, 2009), 2004/108/EC,
2006/95/EC, EN 55014-1, EN 55014-2, EN 792-13, EN 12096
EN 60745-1.
For more information, please contact Powers at the address below,
or refer to the back of the manual.
BradNailer F16 Op Man_NEW.qxd 18/8/08 1:39 PM Page 9

The undersigned is responsible for compilation of the technical file
and makes this declaration on behalf of Powers.
10. March 2008
Powers Fasteners Europe BV
P. Geuvers
Managing Director
POWERS FASTENERS EUROPE B.V.
WESTRAK 208
1771 SV WIERINGERWERF
THE NETHERLANDS
TEL: +31 (0) 888-POWERS (769 377)
FAX: +31 (0)227-594 759
E-MAIL: info@powerseurope.nl
www.powerseurope.nl
POWERS FASTENERS AUSTRALASIA PTY LTD
HEAD OFFICE
FACTORY 3/205 ABBOTS ROAD
DANDENONG SOUTH VICTORIA 3175
TEL: +61 (03) 8787-5888
EMAIL: info@powers.com.au
www.powers.com.au
WARNING:
To reduce the risk of injury, read the
instruction manual.
General power tool safety warnings
WARNING! Read all safety warnings and
all instructions. Failure to follow the warnings
and instructions listed below may result in
electric shock, fire and/or serious injury.
Save all warnings and instructions for future
reference.
The term "power tool" in all of the warnings listed below
refers to your mains operated (corded) power tool or battery
operated (cordless) power tool.
1 WORK AREA SAFETY
a)
Keep work area clean and well lit.
Cluttered or dark areas invite accidents.
b)
Do not operate power tools in explosive atmospheres,
such as in the presence of flammable liquids, gases or
dust.
Power tools create sparks which may ignite the dust or fumes.
c)
Keep children and bystanders away while operating a
power tool.
Distractions can cause you to lose control.
2 ELECTRICAL SAFETY
a)
Power tool plugs must match the outlet. Never modify the
plug in any way. Do not use any adapter plugs with
earthed (grounded) power tools.
Unmodified plugs and matching outlets will reduce risk of
electric shock.
b)
Avoid body contact with earthed or grounded surfaces
such as pipes, radiators, ranges and refrigerators.
There is an increased risk of electric shock if your body is
earthed or grounded.
c)
Do not expose power tools to rain or wet conditions.
Water entering a power tool will increase the risk of electric
shock.
d)
Do not abuse the cord. Never use the cord for carrying,
pulling or unplugging the power tool. Keep cord away
from heat, oil, sharp edges or moving parts.
Damaged or entangled cords increase the risk of electric
shock.
e)
When operating a power tool outdoors, use an extension
cord suitable for outdoor use.
Use of a cord suitable for outdoor use reduces the risk of
electric shock.
3 PERSONAL SAFETY
a)
Stay alert, watch what you are doing and use common
sense when operating a power tool. Do not use a power
MODEL F16
10
MODEL F16
BradNailer F16 Op Man_NEW.qxd 18/8/08 1:39 PM Page 10

tool while you are tired or under the influence of drugs,
alcohol or medication.
A moment of inattention while operating power tools may
result in serious personal injury.
b)
Use safety equipment. Always wear eye protection.
Safety equipment such as dust mask, non-skid safety shoes,
hard hat, or hearing protection used for appropriate conditions
will reduce personal injuries.
c)
Avoid accidental starting. Ensure the switch is in the off
position before plugging in.
Carrying power tools with your finger on the switch or
plugging in power tools that have the switch on invites
accidents.
d)
Remove any adjusting key or wrench before turning the
power tool on.
A wrench or a key left attached to a rotating part of the power
tool may result in personal injury.
e)
Do not overreach. Keep proper footing and balance at all
times.
This enables better control of the power tool in unexpected
situations.
f)
Dress properly. Do not wear loose clothing or jewellery.
Keep your hair, clothing and gloves away from moving
parts.
Loose clothes, jewellery or long hair can be caught in moving
parts.
g)
If devices are provided for the connection of dust
extraction and collection facilities, ensure these are
connected and properly used.
Use of dust collection can reduce dust-related hazards.
4 POWER TOOL USE AND CARE
a)
Do not force the power tool. Use the correct power tool
for your application.
The correct power tool will do the job better and safer at the
rate for which it was designed.
b)
Do not use the power tool if the switch does not turn it
on and off.
Any power tool that cannot be controlled with the switch is
dangerous and must be repaired.
c)
Disconnect the plug from the power source and/or the
battery pack from the power tool before making any
adjustments, changing accessories, or storing power tools.
Such preventive safety measures reduce the risk of starting the
power tool accidentally.
d)
Store idle power tools out of the reach of children and do
not allow persons unfamiliar with the power tool or these
instructions to operate the power tool.
Power tools are dangerous in the hands of untrained users.
e)
Maintain power tools. Check for misalignment or binding
of moving parts, breakage of parts and any other
condition that may affect the power tools operation. If
damaged, have the power tool repaired before use.
Many accidents are caused by poorly maintained power tools.
f)
Keep cutting tools sharp and clean.
Properly maintained cutting tools with sharp cutting edges are
less likely to bind and are easier to control.
g)
Use the power tool, accessories and tool bits etc., in
accordance with these instructions, taking into account
the working conditions and the work to be performed.
Use of the power tool for operations different from those
intended could result in a hazardous situation.
5 BATTERY TOOL USE AND CARE
a)
Ensure the switch is in the off position before inserting
battery pack.
Inserting the battery pack into power tools that have the
switch on invites accidents.
b)
Recharge only with the charger specified by the
manufacturer.
A charger that is suitable for one type of battery pack may
create a risk of fire when used with another battery pack.
c)
Use power tools only with specifically designated battery
packs.
Use of any other battery packs may create a risk of injury and
fire.
d)
When battery pack is not in use, keep it away from other
metal objects like paper clips, coins, keys, nails, screws, or
other small metal objects that can make a connection
from one terminal to another.
Shorting the battery terminals together may cause burns or a
fire.
e)
Under abusive conditions, liquid may be ejected from the
battery; avoid contact. If contact accidentally occurs, flush
with water. If liquid contacts eyes, additionally seek
medical help.
Liquid ejected from the battery may cause irritation or burns.
6 SERVICE
a)
Have your power tool serviced by a qualified repair
person using only identical replacement parts.
This will ensure that the safety of the power tool is
maintained.
ADDITIONAL SAFETY INSTRUCTIONS FOR
CORDLESS NAILERS
• Always wear safety glasses.
• Always wear ear protection.
• Only use fasteners of the type specified in the manual.
• Do not use any stands for mounting the tool to a support.
• Do not disassemble or block any parts of the fastener driving
tool such as the safety yoke.
• Prior to each operation check that the safety and triggering
mechanism is functioning properly and that all nuts and bolts
are tight.
• Do not use the tool as a hammer.
MODEL F16
11
BradNailer F16 Op Man_NEW.qxd 18/8/08 1:39 PM Page 11

MODEL F16
12
Do not use the tool on a ladder.
• Never point any operational fastener driving tool at yourself or
at any other person.
• While working, hold the tool in such a way that no injuries can
be caused to the head or to the body in the event of a
possible recoil due to a disruption in the energy supply or hard
areas within the workpiece.
• Never actuate the fastener driving tool into free space.
• In the work area, carry the tool at the workplace using only
one handle, and never with the trigger actuated.
• Consider the conditions in the work area. Fasteners can
penetrate thin workpieces or slip off corners and edges of the
workpiece, and thus put people at risk.
• Do not drive fasteners close to the edge of the workpiece.
• Do not drive fasteners on top of other fasteners.
ADDITIONAL SAFETY INSTRUCTIONS FOR
BATTERY PACKS AND CHARGERS
• Make sure that the battery pack is dry and clean before
inserting it into the charger.
• Use only chargers labelled "NiMH" to charge Powers F16
NiMH battery packs.
• Never carry the charger by its cord. Never pull the cord to
disconnect from the socket. Keep the cord away from heat, oil
and sharp edges.
• Do not expose the charger to damp or wet conditions.
• Do not attempt to charge wet battery packs.
• Never attempt to open a battery pack for any reason.
• Always follow the instructions in the back of this manual for
battery pack disposal.
• When not in use, chargers and battery packs must be stored in
a dry place and locked up securely, out of reach of children.
LABELS ON CHARGER AND BATTERY PACK
In addition to the pictographs used in this manual, the labels on
the charger and the battery pack show the following pictographs:
Battery charging
Battery charged
Battery defective
Do not probe with conductive objects
Do not charge damaged battery packs
Read instruction manual before use
Use only with Powers F16 battery packs, others
may burst, causing personal injury and damage
Do not expose to water
Have defective cords replaced immediately
Charge only between 4 °C and 40 °C
Discard the battery pack with due care for the
environment
Do not incinerate the battery pack
Charges NiMH and NiCd battery packs
See technical data for charging time
PACKAGE CONTENTS
The package contains:
1 Nailer
1 Charger
2 Battery packs
1 Safety glasses
1 Instruction manual
• Check for damage to the tool, parts or accessories which may
have occurred during transport.
• Take the time to thoroughly read and understand this manual
prior to operation.
DESCRIPTION (FIG. A, PAGE 3)
Your nailer has been designed for driving fasteners into wooden
workpieces.
1
On/off switch
2
Contact trip lock-off
3
Depth adjustment wheel
4
Headlights
5
Contact trip
6
Magazine
7
Mode selector switch
8
Belt hook
9
Battery pack
CHARGER
Your charger accepts Powers F16 NiCd battery packs ranging from
7.2 to 18 V.
9
Battery pack
10
Release buttons
11
Charger
12
Charging indicator (red)
BradNailer F16 Op Man_NEW.qxd 18/8/08 1:39 PM Page 12

MODEL F16
13
ELECTRICAL SAFETY
The electric motor has been designed for one voltage only. Always
check that the battery pack voltage corresponds to the voltage on
the rating plate. Also make sure that the voltage of your charger
corresponds to that of your mains.
Your Powers F16 charger is double insulated in
accordance with EN 60335; therefore no earth
wire is required.
If the supply cord is damaged, it must be replaced by a specially
prepared cord available through the Powers service organization.
MAINS PLUG REPLACEMENT (U.K. & IRELAND ONLY)
• Should your mains plug need replacing and you are competent
to do this, proceed as instructed below. If you are in doubt,
contact an authorized Powers repair agent or a qualified
electrician.
• Disconnect the plug from the supply.
• Cut off the plug and dispose of it safely; a plug with bared
copper conductors is dangerous if engaged in a live socket
outlet.
• Only fit 13 Amperes BS1363A approved plugs fitted with the
correctly rated fuse (1).
• The cable wire colours, or a letter, will be marked at the
connection points of most good quality plugs. Attach the wires
to their respective points in the plug (see below). Brown is for
Live (L) (2) and Blue is for Neutral (N) (4).
• Before replacing the top cover of the mains plug ensure that
the cable restraint (3) is holding the outer sheath of the cable
firmly and that the two leads are correctly fixed at the terminal
screws.
Never use a light socket.
Never connect the live (L) or neutral (N) wires to
the earth pin marked E or .
USING AN EXTENSION CABLE
An extension cord should not be used unless absolutely necessary. Use
an approved extension cable suitable for the power input of your
charger (see technical data). The minimum conductor size is 1 mm2;
the maximum length is 30 m.
When using a cable reel, always unwind the cable completely.
ASSEMBLY AND ADJUSTMENT
• Prior to assembly and adjustment, always
remove the battery pack.
• Always switch off the tool before inserting or
removing the battery pack.
Use only Powers F16 battery packs and
chargers
BATTERY PACK (FIG. A, PAGE 3 & B, PAGE 4)
CHARGING THE BATTERY PACK (FIG B, PAGE 4)
When charging the battery pack for the first time, or after
prolonged storage, it will only accept an 80% charge. After several
charge and discharge cycles, the battery pack will attain full
capacity. Always check the mains prior to charging the battery
pack. If the mains is functioning but the battery pack does not
charge, take your charger to an authorised Powers repair agent.
Whilst charging, the charger and the battery pack may become
warm to touch. This is a normal condition and does not indicate a
problem.
Do not charge the battery pack at ambient
temperatures < 4 °C or > 40 °C. Recommended
charging temperature: approx. 24 °C.
• To charge the battery pack (9), insert it into the charger (11)
as shown and plug in the charger. Be sure that the battery
pack is fully seated in the charger. The red charging indicator
(12) will blink.
• When finished charging, the charging indicator will stop
blinking and remain on. The battery pack is now fully charged.
• The battery pack can be removed at any time or left in the
connected charger for a longer period of time (with a
maximum of 14 days).
INSERTING AND REMOVING THE BATTERY PACK
• Insert the battery pack into the grip until it clicks in place.
• To remove the battery pack, press the two release buttons (10)
simultaneously and pull the pack out of the grip.
BATTERY CAP (FIG B, PAGE 4)
A protective cap is supplied to cover the contacts of a detached
battery pack. Without the protective cap in place, loose metal
objects could short circuit the contacts, causing a fire hazard and
damaging the battery pack.
• Take off the protective cap (13) before placing the battery pack
(9) in the charger or tool.
• Place the protective cap over the contacts immediately after
removing the battery pack from the charger or tool.
BradNailer F16 Op Man_NEW.qxd 18/8/08 1:39 PM Page 13

MODEL F16
14
Make sure the protective cap is in place before
storing or carrying a detached battery pack.
AUTOMATIC REFRESH
• The automatic refresh mode will equalize or balance the
individual cells in the battery pack at its peak capacity.
• Battery packs should be refreshed overnight after every 10th
charge/ discharge cycle or whenever the pack no longer
delivers the same amount of work.
• To refresh your battery pack, place the battery in the charger
as usual. The red light will blink continuously indicating that
the charge cycle has started.
• When the charge cycle has completed, the light will stay on
continuously and will no longer blink. The pack is fully charged
and can be used at this time.
• If the pack is left in the charger after the initial charge, the
charger will automatically initiate the refresh mode. This mode
will continue up to 8 hours, but the battery pack can be
removed at any time during the refresh mode.
HOT/COLD PACK DELAY
When the charger detects a battery that is too hot or too cold, it
automatically starts a Hot/Cold Pack Delay, suspending charging
until the battery has reached an appropriate temperature. The
charger then automatically switches to the pack charging mode.
This feature ensures maximum battery life. The red indicator blinks
long, then short while in the Hot/Cold Pack Delay mode.
LOW BATTERY INDICATOR (FIG A, PAGE 3)
The low battery indicator is an integrated feature in the headlights
(4). It will blink 4 times to indicate that the battery pack needs to
be recharged and the tool will automatically shut down.
• Switch off the tool and take out the battery pack (9) to charge
it as soon as the indicator blinks.
The tool remains non-operational as long as a
low battery pack is attached to it.
MOUNTING THE BELT HOOK (FIG C, PAGE 4)
• Insert the belt hook (8) into the mounting hole on either side
of the tool.
• Pass the screw (14) through the mounting hole in the opposite
side. Tighten the screw.
LOADING THE TOOL (FIG D, PAGE 5)
The tool can be loaded using either of the below methods.
LOCK AND LOAD METHOD
• Lock the nail pusher (15) in the back position.
• Select a Powers brads strip: See "Technical data".
• Insert the Powers nails into the loading slot in the bottom of
the magazine (6).
• Unlatch the nail pusher by pulling rearward and carefully slide
the nail pusher forward to press against the Powers nails.
LOAD AND DRAW METHOD
• Insert the Powers nails into the loading slot in the bottom of
the magazine (6).
• Draw the nail pusher (15) back until behind the Powers nails.
• Release the nail pusher to press against the Powers nails.
UNLOADING THE TOOL
• Lock the nail pusher (15) in the back position.
• Remove the Powers nails from the magazine (6).
ADJUSTING THE DRIVING DEPTH (FIG E, PAGE 5)
The driving depth can be adjusted to the type of fastener used.
• Adjust the driving depth as required, choosing a setting from 1
(shallow) to 6 (deep).
• To reduce the depth, turn the depth adjustmentwheel (3)
clockwise.
• To increase the depth, turn the depth adjustment wheel
counterclockwise.
SELECTING THE MODE (FIG F, PAGE 6)
• To select sequential action mode, slide the mode selector
switch (8) to the left.
• To select bump action mode, slide the mode selector switch (8)
to the right.
CONTACT TRIP LOCK (FIG G, PAGE 6)
This tool is equipped with a contact trip lock-off (2) which prevents
the tool from fi ring a nail.
• To release the contact trip lock (2), pull the switch upward.
• To engage the contact trip lock, push the switch downward.
Make sure the contact trip lock (2) is engaged
and the battery pack is removed before making
any adjustments or when tool is not in
immediate use.
NO-MARK TIP (FIG H, PAGE 6)
• Place the no-mark tip (16) over the contact trip (5) when the
tool is used on wood.
• Store the no-mark tip at the holder (17) whenever it is not to
be used.
Make sure the contact trip lock (2) is engaged
and the battery pack is removed before
installing or removing the no-mark tip.
HEADLIGHTS (FIG A, PAGE 3)
This tool has headlights (4) located on each side.The headlights
will light upon inserting the battery pack and upon activating the
trigger or releasing the contact trip. The lights will automatically go
off after 10 seconds of non-operation.
BradNailer F16 Op Man_NEW.qxd 18/8/08 1:39 PM Page 14

MODEL F16
15
The headlights also function as a low battery indicator and a
jammed nail indicator. For a further explanation of these
functionalities, refer to the relating instructions in this manual.
The headlights are intended for lighting the
immediate work surface. Do not use the
headlights as the only light source.
INSTRUCTIONS FOR USE
• Always observe the safety instructions and
applicable regulations.
PRIOR TO OPERATION:
• Make sure your battery pack is (fully) charged.
PREPARING THE TOOL (FIG I, PAGE 7)
• Remove all Powers nailsfrom the magazine.
• Lock the nail pusher (15) in the back position.
• Check if the contact trip (5) and nail pusher (15) can move
freely.
• Reload the Powers nails to the magazine.
Do not use the tool if the contact trip or nail
pusher cannot move freely.
ACTUATING THE TOOL (FIG A, PAGE 3)
The tool can be operated using one of two modes: sequential
action mode or bump action mode.
SEQUENTIAL ACTION MODE
The sequential action mode is used for intermittent nailing when
very careful and accurate placement is desired.
• Select the sequential action mode.
• Release the contact trip lock (2).
• Push the contact trip (5) against the work surface.
• Pull the trigger (1) to actuate the tool.
Each trigger pull with the contact trip pushed against the work
surface will drive one nail.
BUMP ACTION
The bump action mode is used for rapid nailing on flat, stationary
surfaces.
• Release the contact trip lock (2).
• Select the bump action mode.
• To drive a single nail: Operate the tool as described for
sequential action.
• To drive several nails: Pull the trigger (1) first, and then push
the contact trip (5) repeatedly against the work surface.
Do not keep the trigger depressed when the
tool is not in use. Keep the trigger lock-off
switch rotated to the right to prevent accidental
actuation when the tool is not in use.
CLEARING A JAMMED NAIL (FIG A, PAGE 3 & J, PAGE 7)
If a nail becomes jammed in the nosepiece, the headlights (4) will
blink continuously.
• Remove the battery pack (9).
• Engage the contact trip lock (2).
• Remove all nails from the magazine (6).
• Release the latch (18) on top of the nosepiece.
• Retract the barrel (19) so the jammed nail is exposed.
• Remove the nail, using pliers if necessary.
• If the driver blade is in the down position, insert a screwdriver
into the nosepiece and push the blade back in position.
• Lower the barrel back in place.
• Re-engage the latch.
If nails become jammed in the nosepiece
frequently, have the tool serviced by an
authorised Powers service centre.
OPTIONAL ACCESSORIES
Since accessories, other than those offered by
Powers, have not been tested with this product,
use of such accessories with this tool could be
hazardous. To reduce the risk of injury, only
Powers, recommended accessories should be
used with this product.
Consult your dealer for further information on the appropriate
accessories.
MAINTENANCE
Your Powers power tool has been designed to operate over a long
period of time with a minimum of maintenance. Continuous
satisfactory operation depends upon proper tool care and regular
cleaning.
LUBRICATION
This tool requires no lubrication.
Do not lubricate the tool as it will damage the
internal parts.
BradNailer F16 Op Man_NEW.qxd 18/8/08 1:39 PM Page 15

MODEL F16
16
CLEANING
• Unplug the charger before cleaning the
housing with a soft cloth.
• Remove the battery pack before cleaning
your power tool.
• Keep the ventilation slots clear and regularly
clean the housing with a soft cloth.
TROUBLESHOOTING
If your tool seems not to operate properly, follow the instructions
below. If this does not solve the problem, please contact your
repair agent.
TOOL DOES NOT WORK
HEADLIGHTS DO NOT SWITCH ON
• Replace the battery pack.
• Release the contact trip lock.
• Remove the battery pack, wait for at least 3 seconds, then re-
insert it.
HEADLIGHTS ARE ON BUT MOTOR DOES NOT RUN
• Release the trigger or contact trip and re-depress.
• Release the contact trip lock.
HEADLIGHTS ARE ON AND MOTOR RUNS
• Please contact your repair agent.
TOOL DOES NOT DRIVE FASTENERS
• Load fasteners into the magazine.
• Make sure to use fasteners of the type specifi ed.
• Clean the nosepiece.
• Clean the magazine.
TOOL DOES NOT DRIVE FASTENERS FULLY
• Replace the battery pack.
• Adjust the driving depth.
• Choose the appropriate material or fastener length.
FASTENERS JAM IN TOOL
• Make sure to use fasteners of the type specified.
• Choose the appropriate material or fastener length.
• Replace the battery pack.
• Clean the nosepiece.
• Clean the magazine.
PROTECTING THE ENVIRONMENT
Separate collection. This product must not be
disposed of with normal household waste.
Should you find one day that your Powers product needs
replacement, or if it is of no further use to you, do not dispose of it
with household waste. Make this product available for separate
collection.
Separate collection of used products and
packaging allows materials to be recycled and
used again. Re-use of recycled materials helps
prevent environmental pollution and reduces the
demand for raw materials.
Local regulations may provide for separate collection of electrical
products from the household, at municipal waste sites or by the
retailer when you purchase a new product.
RECHARGEABLE BATTERY PACK
This long life battery pack must be recharged
when it fails to produce sufficient power on
jobs which were easily done before. At the end
of its technical life, discard it with due care for
our environment:
• Run the battery pack down completely, then remove it from
the tool.
• NiCd and NiMH cells are recyclable. Take them to your dealer
or a local recycling station.
The collected battery packs will be recycled or disposed of
properly.
BradNailer F16 Op Man_NEW.qxd 18/8/08 1:39 PM Page 16

MODEL F16
17
BETRIEBSANLEITUNG
DEUTSCH
NAGELMASCHINE
BradNailer F16 Op Man_NEW.qxd 18/8/08 1:39 PM Page 17

MODEL F16
18
HERZLICHEN GLÜCKWUNSCH!
Sie haben sich für ein Werkzeug von Powers entschieden, das die
lange Powers-Tradition fortsetzt, nur ausgereifte und in zahlreichen
Tests bewährte Qualitätsprodukte für den Fachmann
anzubieten. Lange Jahre der Erfahrung und kontinuierliche
Weiterentwicklung machen Powers zu Recht zu einem verläßlichen
Partner aller professionellen Anwender.
TECHNISCHE DATEN
F16
Schalldruck (LpA) dB(A) 85,9
1)
Schalleistung (L WA) dB(A) 92,6 2)
Gewichteter Effektivwert
der Beschleunigung m/s213,6 3)
Spannung VDC 18
Auslösemodus Kontakt
auslösung
Magazinwinkel 0°
Befestigungsmittel
Typ 16 Ga
Länge mm 19–64
Schaftdurchmesser mm 1,6
Winkel 0°
Gewicht (ohne Akku) kg 2,8
Akku 68816
Akkutyp NiMH
Spannung VDC 18
Kapazität Ah 2,6
Gewicht kg 1,0
Ladegerät 68817
Netzspannung VAC 230
Akkutyp NiMH
Ladezeit min 30
Gewicht kg 0,5
1) KpA (Schalldruck-Unsicherheitsfaktor): 3 dB(A)
2) KWA (Schalleistungs-Unsicherheitsfaktor): 3 dB(A)
3) Dieser Wert ist werkzeugspezifisch und charakteristisch und
drückt nicht den Einfluß auf das Hand-Arm-System aus, wenn
das Werkzeug verwendet wird. Der Einfluß auf das Hand-Arm-
System bei der Verwendung des Werkzeugs hängt
beispielsweise von der Greifkraft, dem Kontaktdruck, der
Arbeitsrichtung, der Einstellung der Energieversorgung, dem
Werkstück und dem Werkstückhalter ab. Messungenauigkeit:
3.25 m/s2
Mindestabsicherung des Stromkreises:
230-V-Elektrowerkzeuge 10A
Der in diesem Informationsblatt angegebene
Vibrationsemissionsgrad wurde nach Maßgabe eines
standardisierten Tests, wie in EN 60745 vorgegeben, gemessen
und kann zum Vergleich von Werkzeugen verwendet werden. Er
kann zu einer vorläufigen Einschätzung der Exposition verwendet
werden.
WARNUNG: Der angegebene
Vibrationsemissionswert steht für die
Hauptanwendungen des Werkzeugs. Falls das
Werkzeug jedoch für andere Anwendungen oder
mit anderem Zubehör benutzt oder schlecht
instandgehalten wird, kann die
Vibrationsemission verschieden sein. Dies kann
den Expositionsgrad über die gesamte
Arbeitsdauer erheblich steigern.
Eine Schätzung des Vibrationsaussetzungsgrades
sollte ebenfalls berücksichtigen, ob das
Werkzeug abgeschaltet ist, oder ob es einfach
nur eingeschaltet ist ohne für Arbeiten benutzt
zu werden. Dies kann den Expositionsgrad über
die gesamte Arbeitsdauer erheblich verringern.
Bestimmen Sie zusätzliche
Sicherheitsmaßnahmen, um den Benutzer vor
den Auswirkungen der Vibrationen zu schützen,
wie etwa: Instandhaltung des Werkzeugs und
Zubehörs, die Hände warm halten, Aufbau von
Arbeitsmethoden.
Folgende Symbole werden in dieser Anleitung verwendet:
WARNUNG: Verletzungsgefahr, Lebensgefahr
oder mögliche Beschädigung des
Elektrowerkzeuge infolge der Nichtbeachtung
der Anweisungen dieser Anleitung!
elektrische Spannung
EG-KONFORMITÄTSERKLÄRUNG
F16
Powers erklärt hiermit, dass diese unter „Technische Daten“
beschriebenen Produkte gemäß folgenden Richtlinien und Normen
konstruiert wurden:
98/37/EEC (bis 28. Dez. 2009), 2006/42/EC (ab 29. Dez. 2009),
2004/108/EC, 2006/95/EC, EN 55014-1, EN 55014-2, EN 792-13,
EN 12096, EN 60745-1.
BradNailer F16 Op Man_NEW.qxd 18/8/08 1:39 PM Page 18

MODEL F16
19
Für weitere Informationen wenden Sie sich bitte an die Adresse
weiter unten oder an eine der auf d,er Rückseite dieser Anleitung
genannten Niederlassungen.
Der Unterzeichnete ist verantwortlich für die Zusammenstellung
des technischen Dossiers und gibt diese Erklärung im Namen von
Powers ab.
10.Marz 2008
Powers Fasteners Europe BV
P. Geuvers
Direktor
POWERS FASTENERS EUROPE B.V.
WESTRAK 208
1771 SV WIERINGERWERF
THE NETHERLANDS
TEL: +31 (0) 888-POWERS (769 377)
FAX: +31 (0)227-594 759
E-MAIL: info@powerseurope.nl
www.powerseurope.nl
POWERS FASTENERS AUSTRALASIA PTY LTD
HEAD OFFICE
FACTORY 3/205 ABBOTS ROAD
DANDENONG SOUTH VICTORIA 3175
TEL: +61 (03) 8787-5888
EMAIL: info@powers.com.au
www.powers.com.au
WARNUNG: Zur Reduzierung der Verletzungsgefahr
bitte die Bedienungsanleitung lesen.
Allgemeine Warnhinweise zur Sicherheit von
Elektrowerkzeugen
WARNUNG! Lesen Sie sämtliche
Sicherheitswarnhinweise und sonstigen
Anweisungen. Die Nichteinhaltung der
nachstehend aufgeführten Warnhinweise und
sonstigen Anweisungen kann einen elektrischen
Schlag, Brand und/oder schwere Verletzungen
verursachen.
Bewahren Sie alle Warnhinweise und sonstigen
Anweisungen zur künftigen Bezugnahme auf.
Der nachfolgend verwendete Begriff "Gerät" bezieht sich auf
netzbetriebene Geräte (mit Netzkabel) und auf akkubetriebene
Geräte (ohne Netzkabel).
1 ARBEITSBEREICH-SICHERHEIT
a)
Halten Sie Ihren Arbeitsbereich sauber und gut
ausgeleuchtet.
Unordnung und dunkle Arbeitsbereiche fordern Unfälle
geradezu heraus.
b)
Arbeiten Sie mit Geräten nicht in explosionsgefährdeter
Umgebung, in der sich brennbare Flüssigkeiten, Gase oder
Stäube befinden.
Geräte erzeugen Funken, die den Staub oder die Dämpfe
entzünden können.
c)
Halten Sie Kinder und andere Personen während der
Benutzung des Gerätes fern.
Bei Ablenkung können Sie die Kontrolle verlieren.
2 ELEKTRISCHE SICHERHEIT
a)
Der Anschlußstecker des Gerätes muß in die Steckdose
passen. Der Stecker darf in keiner Weise verändert
werden. Verwenden Sie keine Adapterstecker gemeinsam
mit schutzgeerdeten Geräten.
Unveränderte Stecker und passende Steckdosen verringern das
Risiko eines elektrischen Schlages.
b)
Vermeiden Sie Körperkontakt mit geerdeten Oberflächen
von Rohren, Heizungen, Herden und Kühlschränken.
Es besteht ein erhöhtes Risiko eines elektrischen Schlags, wenn
Ihr Körper geerdet ist.
c)
Halten Sie Geräte von Regen und Nässe fern.
Das Eindringen von Wasser in ein Gerät erhöht das Risiko
eines elektrischen Schlages.
d)
Mißbrauchen Sie nicht das Kabel. Verwenden Sie das
Kabel niemals zum Tragen, Ziehen oder Trennen des
Gerätes vom Netz. Halten Sie das Kabel fern von Hitze, Öl,
scharfen Kanten oder sich bewegenden Teilen.
Beschädigte oder verwickelte Kabel erhöhen das Risiko eines
elektrischen Schlages.
e)
Wenn Sie mit einem Gerät im Freien arbeiten, verwenden
Sie nur Verlängerungskabel, die auch für den
Außenbereich zugelassen sind.
Die Verwendung eines für den Außenbereich geeigneten
Verlängerungskabels verringert das Risiko eines elektrischen
Schlages.
3 SICHERHEIT VON PERSONEN
a)
Seien Sie aufmerksam, achten Sie darauf, was Sie tun, und
gehen Sie vernünftig mit einem Gerät um. Benutzen Sie
das Gerät nicht, wenn Sie müde sind oder unter dem
Einfluß von Drogen, Alkohol oder Medikamenten stehen.
Ein Moment der Unachtsamkeit beim Gebrauch von Geräten
kann zu ernsthaften Verletzungen führen.
b)
Verwenden Sie Schutzausrüstung. Tragen Sie stets einen
Augenschutz.
Schutzausrüstung wie Staubmaske, rutschfeste
Sicherheitsschuhe, Schutzhelm oder Gehörschutz, je nach Art
und Einsatz des Gerätes, verringert das Risiko von
Verletzungen.
BradNailer F16 Op Man_NEW.qxd 18/8/08 1:39 PM Page 19

MODEL F16
20
c)
Vermeiden Sie eine unbeabsichtigte Inbetriebnahme.
Stellen Sie sicher, daß sich der Schalter in der Aus-Stellung
befindet, bevor das Gerät mit dem Netz verbunden wird.
Durch das Tragen des Gerätes mit dem Finger am Schalter oder
durch das Verbinden eingeschalteter Geräte werden Unfälle
provoziert.
d)
Entfernen Sie Einstell- oder Schraubenschlüssel, bevor Sie
das Gerät einschalten.
Ein Schlüssel, der sich in einem sich drehenden Teil befindet,
kann zu Verletzungen führen.
e)
Nicht zu weit nach vorne strecken! Achten Sie auf einen
sicheren Stand, um in jeder Arbeitsposition das
Gleichgewicht zu halten.
Dadurch können Sie das Gerät in unerwarteten Situationen
besser unter Kontrolle halten.
f)
Tragen Sie geeignete Kleidung. Tragen Sie keine weite
Kleidung oder Schmuck. Halten Sie Haare, Kleidung und
Handschuhe fern von sich bewegenden Teilen.
Lockere Kleidung, Schmuck oder lange Haare können von sich
bewegenden Teilen erfaßt werden.
g)
Falls Staubabsaug- undfangvorrichtungen vorhanden sind,
vergewissern Sie sich, daß diese angeschlossen sind und
richtig verwendet werden.
Die Verwendung von Staubfangeinrichtungen kann die mit
Staub verbundenen Gefahren verringern.
4 GEBRAUCH UND PFLEGE VON GERÄTEN
a)
Überlasten Sie das Gerät nicht. Verwenden Sie für Ihre
Arbeit das dafür bestimmte Gerät.
Mit dem passenden Gerät arbeiten Sie besser und sicherer im
angegebenen Leistungsbereich.
b)
Benutzen Sie kein Gerät, dessen Schalter defekt ist.
Ein Gerät, das sich nicht mehr ein- oder ausschalten läßt, ist
gefährlich und muß repariert werde
c)
Trennen Sie den Stecker von der Stromquelle und/oder das
Akkupaket vom Elektrowerkzeug, bevor Einstellungen
vorgenommen, Zubehör gewechselt oder
Elektrowerkzeuge verstaut werden.
Diese Vorsichtsmaßnahmen verhindern den unbeabsichtigten
Start des Gerätes.
d)
Bewahren Sie unbenutzte Geräte außerhalb der
Reichweite von Kindern auf. Lassen Sie Geräte nicht von
Personen benutzen, die damit nicht vertraut sind oder
diese Anweisungen nicht gelesen haben.
Geräte sind gefährlich, wenn Sie von unerfahrenen Personen
benutzt werden.
e)
Halten Sie Geräte in einem einwandfreien Zustand.
Kontrollieren Sie, ob bewegliche Teile falsch ausgerichtet
sind oder klemmen und ob Teile gebrochen oder so
beschädigt sind, daß die Funktion des Geräts
beeinträchtigt ist. Lassen Sie beschädigte Geräte vor dem
Gebrauch reparieren.
Viele Unfälle haben ihre Ursache in schlecht gewarteten
Geräten.
f)
Halten Sie Schneidgeräte scharf und sauber.
Sorgfältig gepflegte Schneidgeräte mit scharfen Schneidkanten
verklemmen sich weniger und sind leichter zu führen.
g)
Verwenden Sie das Elektrowerkzeug, Zubehör sowie
Werkzeug-Bits, usw. entsprechend diesen Anweisungen.
Berücksichtigen Sie dabei die Arbeitsbedingungen sowie
die durchzuführende Arbeit.
Der Gebrauch von Geräten für andere als die vorgesehenen
Anwendungen kann zu gefährlichen Situationen führen.
5 GEBRAUCH UND PFLEGE VON AKKUWERKZEUGEN
a)
Stellen Sie sicher, daß das Werkzeug ausgeschaltet ist,
bevor Sie den Akku einsetzen.
Das Einsetzen eines Akkus in ein eingeschaltetes Werkzeug
kann zu Unfällen führen.
b)
Laden Sie die Akkus nur in Ladegeräten auf, die vom
Hersteller angegeben wurden.
Für ein Ladegerät, das nur für eine bestimmte Akkuart
geeignet ist, besteht Brandgefahr, wenn es mit anderen Akkus
verwendet wird.
c)
Verwenden Sie nur die für die Werkzeuge vorgesehenen
Akkus.
Der Gebrauch von anderen Akkus kann zu Verletzungen und
Brandgefahr führen.
d)
Halten Sie den nicht benutzten Akku fern von
Büroklammern, Münzen, Schlüsseln, Nägeln, Schrauben
oder anderen kleinen Metallgegenständen, die eine
Überbrückung der Kontakte verursachen könnten.
Ein Kurzschluss zwischen den Akkukontakten kann
Verbrennungen oder Feuer zur Folge haben.
e)
Bei falscher Anwendung kann Flüssigkeit aus dem Akku austreten.
Vermeiden Sie den Kontakt damit. Bei unbeabsichtigtem Kontakt
mit Wasser abspülen. Gelangt die Flüssigkeit in die Augen, ziehen
Sie außerdem ärztliche Hilfe hinzu.
Austretende Akkuflüssigkeit kann zu Hautreizungen oder
Verbrennungen führen.
6 SERVICE
a)
Lassen Sie Ihr Gerät nur von qualifiziertem Fachpersonal
und nur mit Original-Ersatzteilen reparieren.
Damit wird gewährleistet, daß die Sicherheit des Geräts
erhalten bleibt.
ZUSÄTZLICHE SICHERHEITSANWEISUNGEN
FÜR AKKU-NAGELMASCHINEN
• Tragen Sie stets eine Schutzbrille.
• Tragen Sie stets einen Gehörschutz.
• Verwenden Sie ausschließlich die im Handbuchangegebenen
Befestigungsmittel.
• Verwenden Sie keine Ständer, um das Werkzeug an einer
Halterung zu befestigen.
• Zerlegen oder blockieren Sie niemals Teile des
Befestigungswerkzeugs, wie beispielsweise das Sicherheitsjoch.
BradNailer F16 Op Man_NEW.qxd 18/8/08 1:39 PM Page 20
Table of contents
Languages: