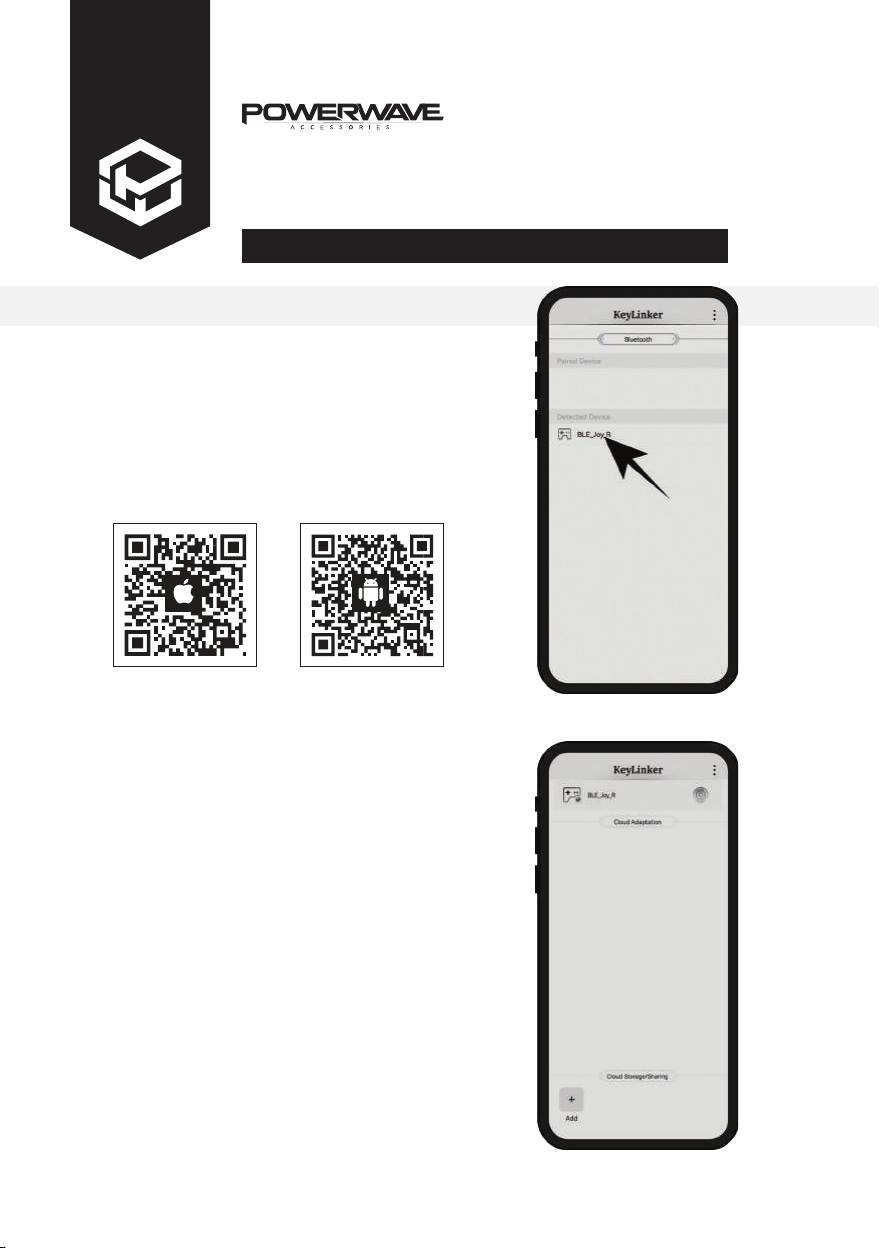
1. Scan the QR code with your smart phone to
download and install the KeyLinker App.
Updating your Joypad
If your Joypad needs to be updated (for example your
Joypads do not work properly after a Switch™ console
system update), scan the provided QR code below with
your mobile to download the KeyLinker App and follow
the update instructions, as follows:
Note: You can also use the KeyLinker App to customise
your Joypad controller settings. You can change the
button functions, adjust the joystick range, vibration
intensity and turbo settings and calibrate your Joypad.
Ensure the Bluetooth function on your phone is on
and open the KeyLinker App. Press any button on
your Joypad to wake it up, the App will search for
devices and show the detected device in list, as
shown in Figure 1.
Click the detected device to connect, once
connected successfully, it will show as in Figure 2.
To update your Joypad, click the “Settings Icon”
>“Update Device” >“Update Now” and follow the
prompts. When update is completed or there are no
updates available, if you select “Update Device”
(Figure 4) the screen will show as in Figure 8.
2.
3.
4.
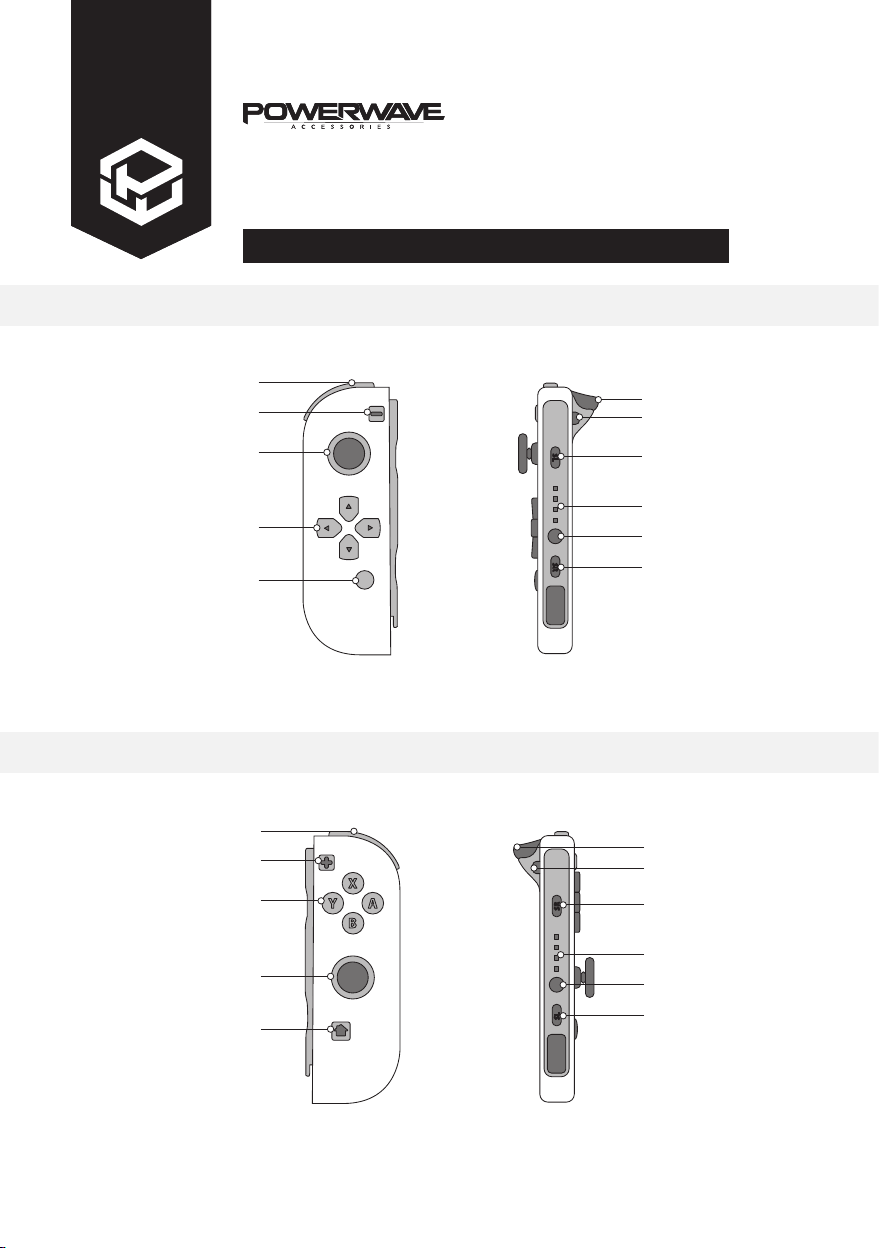
SWITCH
JOYPAD PAIR
INSTRUCTIONS
Figure 1
Figure 1
Figure 2
IOS Download Code Android Download Code