Precor P30 Console Manual

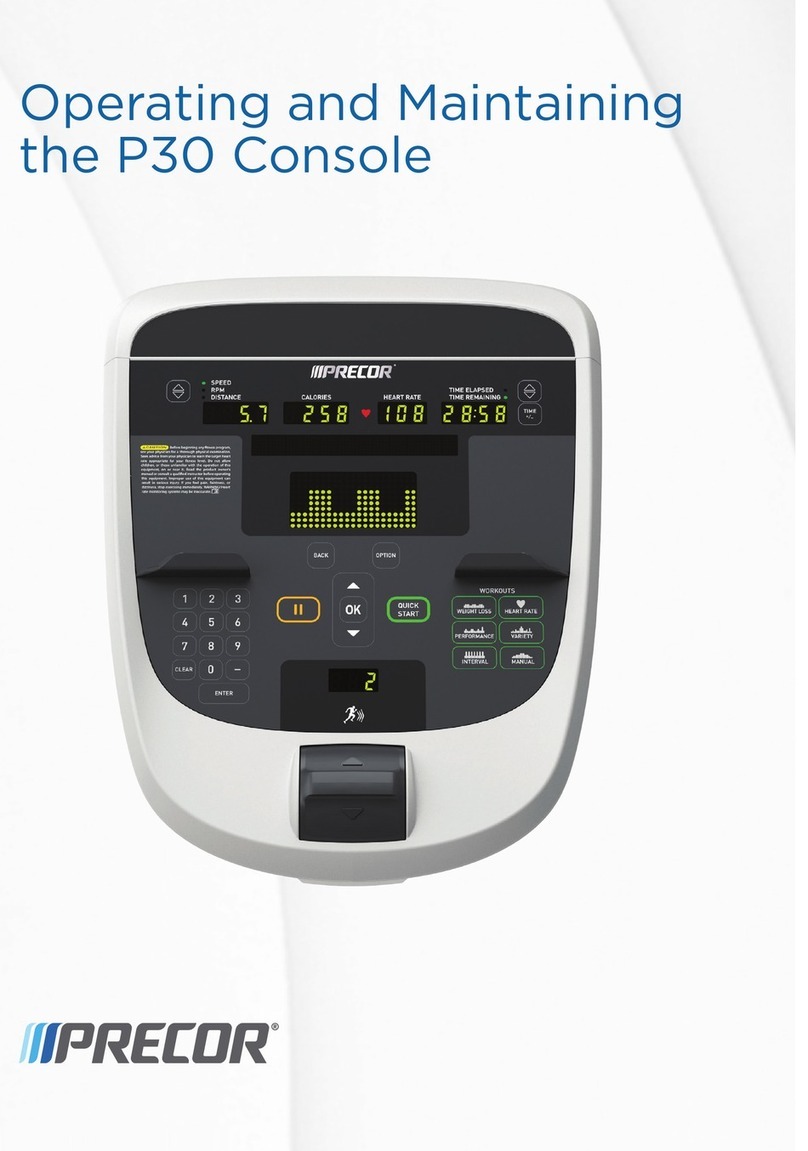
P30 Console
Operator's Guide
Equation 1:E nglis h


Table of Contents
Get Started 4
Setting Up the Console ................................................................................................................................... 4
Setting Club Parameter Values...................................................................................................................... 5
Informational Settings .................................................................................................................................... 9
User ID Entry with CSAFE Equipment...................................................................................................... 11

Get Started
Precor equipment is either self-powered or externally powered using an optional power adapter. Self-powered equipment requires the
user exercise to initialize the console. This section provides more detail about powering equipment.
Activating the Console
On self-powered equipment, when a user starts exercising, the console initializes and displays the Welcome banner. A minimum rate of
motion must be maintained to power the console. If the user does not maintain the minimum rate of motion, a shutdown process begins.
An optional AC power adapter provides sustained power to the equipment. To purchase the power adapter, contact Precor Customer
Support.
Setting Up the Console
Use the System mode to configure settings in ways that benefit your users and your facility.
Note
The information provided in this section is intended for system administrators and Precor service technicians. DO NOT share it
with exercisers or non-administrative staff.
To view the Club Parameters settings:
1. At the Welcome banner, press Pause.
2. To enter the password, press the following numbers in sequence:
5 6 5 1 5 6 5
3. Press
OK
.
4. Scroll through the club parameters using the following key
Navigational keys for the system setting modes
Key Function
Navigates the settings menu.
OK Selects a menu setting.
BACK Returns to the previous menu level without saving changes.
PAUSE Exits the System Settings mode and returns to the Welcome banner.

Setting Club Parameter Values
Use this information to customize the equipment for your setting.
Safety Code (Treadmill only)
Value Range: Enabled or Disabled
Default: Disabled
When the equipment is shipped from the factory, the safety code feature is disabled. An enabled safety code requires users to enter the
code
1 2 3 4
to use the equipment.
Select Language (All Equipment)
Value Range: English, Deutsch (German), Espanol (Spanish), Francais (French), Nederlands (Dutch), Portugues (Portuguese), Русский
(Russian), Italiano (Italian), and ニホンゴ (Japanese).
Default: English
Select your preferred language for the console display. Programming prompts are not affected by language selection. The prompts in
this section continue to appear in English. Set Units (All Equipment)
Set Units (All Equipment)
Value Range: U.S. or Metric
Default: U.S.
The equipment can display measurements in either Metric or U.S. Standard.
Important
If you change the Unit of Measure on a treadmill, be sure to check the speed setting to verify that it is correct.
Set Max Workout Time (All Equipment)
Value Range: 1 to 240 minutes (or No Limit)
Default: 60 minutes
You can set a maximum workout time per session. Choose a time limit between 1 and 240 minutes, or select No Limit if you do not want
to set a time limit. For example, if you set the time limit to 20 minutes, users can only enter a workout time between 1 and 20 minutes.
Note
The Military Performance Programs will not complete if the maximum exercise time limit is less than 40 minutes. Set the
maximum time to at least 40 minutes if you have enabled these performance programs.
Set Max Pause Time (All Equipment)
Value Range: 1 to 120 seconds
Default: 120 seconds
This setting limits how long equipment remains paused during a workout before it resets to the Welcome banner.
The optional power adapter must be connected on self-powered equipment to establish a definitive pause time limit. If the optional
power adapter is not attached and the rate of motion drops below the minimum requirements, the equipment begins its 30-second
shutdown, eliminating pause mode.

Set Cool Down Time (All Equipment)
Value Range: 0 to 5 minutes
Default: 5 minutes
Select the maximum amount of time the equipment remains in the cool down mode, which is the period of time following the completion
of a program when the user exercises at a reduced work rate.
Set Metric Default (Treadmill only)
Value Range: Off or On
Default value: Off
This setting sets the console defaults for the following workout parameters:
•Metric Defaults on or off •Average Speed •Target HR
•Percent Complete •Cal/minute •Average HR
•Time in Zone •Cal/hour •Elevation gain
•Segment Time •WATTS •Pace
•Remaining •METS •Show all
Set Speed Limit (Treadmill only)
Values 800 Line Treadmill 700 Line Treadmill
Value Range 0.5–16 mph (0.8–25.4 kph) 0.5–12 mph (0.8–20 kph)
Default 12 mph (20 kph) 12 mph (20 kph)
Set the maximum speed that a user can enter when using the treadmill.
The speed is displayed in miles per hour (mph) or kilometers per hour (kph) depending upon the units of measure (U.S. Standard or
Metric) selected earlier.
Set Incline Limit (Treadmill only)
Value Range:Max 15
Default value: 15
Set the maximum percent incline that a user can enter when using the equipment.
Hidden Programs (Treadmill and EFX only)
Value Range: Show Programs or Hide Programs
Default: Hide Programs
When set to Show Programs, all Performance Programs are available to a user through the PERFORMANCE key. These programs
include: Gerkin Fitness Test, USAF PRT, NAVY PRT, ARMY PFT, USMC PFT, and Federal Law Enforcement PEB. Remember to set
Maxi Workout Time to at least 40 minutes to enable the Military Performance Programs.
If set to HIDE PROGRAMS, when the user presses PERFORMANCE, the message WORKOUT NOT AVAILABLE will scroll in the
upper text display.

Remote Speed Control (Treadmill only)
Value Range: Able or Disable
Default Value: Disable
Auto Stop Configuration (Treadmill only)
Value Range: On and Off
Default Value: On
Precor strongly recommends that you leave this setting ON. This ensures that the treadmill will stop if it does not detect a user.
Setting Custom Workouts 1 and 2
Value Range:
ON or OFF
Default Value: OFF
You can create and save two custom workouts on your equipment.
Note
This option is not available on all equipment.
To create a custom program:
1. At the SET CUSTOM PROGRAM 1 prompt, press OK.
The program profile appears in the display and a blinking column indicates your starting point.
2. Press the down arrow key on the navigational keypad to select the column you want to change.
3. To change the height of the column, refer to the following table.
Custom Program keys
Equipment Key Name Description
Treadmill INCLINE Changes the column height and affects the Custom Program incline.
EFX (835 only) INCLINE Changes the column height and affects the Custom Program ramp incline.
Bike RESISTANCE Changes the column height and affects the Custom Program pedal resistance.
Climber RESISTANCE Changes the height of the column and affects the Custom Program step resistance.
4. When you have set the column height, press the down arrow key on the navigational keypad to move to the next column. You can
press the up arrow key to return to previous columns.
5. Continue adjusting the profile for each column.
Note
Two custom programs are available on the treadmill. Some Precor products contain only one custom program. The prompt
indicates which one you have accessed. To select a second custom program (treadmill only), press the down arrow key on the
navigational keypad, before pressing OK
in Step 6.
The Set Custom Program 2 default value is Disabled.
6. When you have finished creating your program, press OK
to save the program profile, and return to the Welcome banner. Press
BACK, to exit this setting without saving your changes to the custom profile.

Mait (Maintenance) Configuration (EFX and Treadmill only)
Value Range: On or Off
Default: On
Turns on the service light counter and enables the Active Status Light™ (ASL) to alert your staff to the operating status of the
equipment.
The counter begins at 1000 miles for treadmills and 250 hours for the EFX, and counts down with use. When it reaches zero, the ASL
turns blue and blinks, alerting you that equipment maintenance is required.
Once maintenance has been completed, press and hold the Quick Start key to reset the counter.
Set Resistance Range (Bike only)
Value Range: High, Medium, or Low
Default: High
You can set a low, medium, or high base resistance on the recumbent or upright bikes. There are 25 levels of resistance within each
base setting, but the base setting affects the overall resistance range. The following ranges are available:
High: Provides full resistance range.
Medium: Provides approximately two thirds of the resistance that is available within the high group setting.
Low: Provides approximately one third of the resistance that is available within the high group setting.
Set Crossramp Auto Level (EFX Dual only)
Value Range:0 to 20
Default: 10
Use this setting to choose a specific ramp incline so that the EFX automatically returns to that incline at the end of a workout.

Informational Settings
Information Display settings provide access to an error log, software and equipment serial numbers, and usage information.
To view the Informational settings:
1. Press Pause.
2. Enter the password:
6 5
.
3. Press Enter. The settings appear.
4. Scroll through the informational settings.
Informational Displays values
Product Value Information provided
All ODOMETER The odometer value correlates to equipment and standard of units selected in a
program.
•TRM / AMT: Cumulative units logged to date. AMT also displays vertical
strides.
•EFX: Strides logged to date.
•Bike: Revolutions logged to date.
•Climber: Floors climbed.
AMT BELT USAGE •Belt Stride Count: Tracks the number of strides on equipment.
•Stride Count Reset: Reset increases by one with each reset.
•Odometer at Last Reset: Reading at belt change. The odometer continues
to count forward after the belt change.
All HOUR METER •Number of hours that the equipment has been in use.
•Tracks elapsed minutes, but value is truncated to nearest full hour.
TRM BELT RATING Number from 0 through 10, indicating the condition of the treadmill belt. If the
current rating is 0 or 1, the belt needs to be replaced.
Note
If you have just replaced the treadmill belt, press and hold the Quick Start
key while the Belt Rating is visible to reset the Belt Rating to 10.
TRM, EFX MAINTENANCE COUNTER Keeps track of strides or miles so that the Active Status Light can alert need for
maintenance.
All UPPER BOOT SW PART NUMBER Upper board application software part number and version
All UPPER BASE SW PART NUMBER Upper base application software version
All LOWER BASE SW PART NUMBER Lower application software version
All METRICS BOARD Software number on the Metrics Board
AMT STRIDE DIAL SW PART NUMBER Stride Dial software number
All SERIAL NUMBER Used to determine exact model and type of equipment
All USAGE LOG •The number of times each program has been used and displays the
associated cumulative minutes.
•Helpful in determining user preferences in program selection.
All ERROR LOG Displays error codes detected by software. For more information, refer to Error
Log.

Error Log
This log holds a maximum of 30 errors. After the log reaches 30 errors, older errors are erased to make room for newer ones. To clear
an error from the log, press and hold the Quick Start key while the error is displayed.
Error codes Action Equipment
00-09, 11-16, 50 Turn the equipment off and on. Repeat twice. If the message still
appears, contact a Precor certified service technician.
AMT, elliptical, treadmill,
RBK, UBK, and CLM
10, 20-23, 26-28, 32, LS,
ERR, E2, E4
Contact a Precor-certified service technician. AMT, elliptical, treadmill,
RBK, UBK, and CLM
40, 42, 44-46 Logs error and displays code to user. User can continue the workout
without interruption.
AMT, elliptical, treadmill,
RBK, UBK, and CLM
80-83 Turn the equipment off and on. Repeat twice. If the message still
appears, contact a Precor certified service technician.
AMT, elliptical, treadmill,
RBK, UBK, and CLM
30, 31 Displays the error on the console to the user. Restart the equipment
or reset the E-STOP to use. Logs as a fatal error.
AMT, elliptical, treadmill,
RBK, UBK, and CLM
62, 70-77 Contact a Precor certified service technician. AMT only
78 Display the message, “Belts must be changed soon”, in place of the
standard banner text. Logs the error and allows the user to begin the
workout. Contact a Precor certified service technician.
AMT only
79 Displays the message, “Belts change required”, in place of the
standard banner text. No workout can be started. Contact a
Precor-certified service technician.
AMT only
17-20, 25, 85-88 Turn the equipment off and on. Repeat twice. If the message still
appears, contact a Precor certified service technician.
Treadmill only
29
Displays the error on the console to the user and pauses the workout.
The treadmill speed MUST return to 0 before starting again. Logs the
error.
Treadmill only
33, 35-37, 60, 62 Displays the error on the console to the user. Restart the equipment
or reset the E-STOP to use. Logs as a fatal error.
Treadmill only

User ID Entry with CSAFE Equipment
This equipment is fully compatible with CSAFE protocols. When the equipment is connected to a CSAFE master device, the user is
prompted to press ENTER
and begin an identification process. The user ID is displayed as five zeros and indicates the starting point.
The following table describes key functions while in CSAFE mode.
CSAFE access keys
Keys Function
Number Keypad Use the number keys to enter a user ID. Once you have entered the user ID number, press OK
to submit
the user ID.
CLEAR Erases individual numbers in the user ID from right to left.
OK Submit the user ID.
Note User ID entry is bypassed when the user enters five zeros. No workout statistics are recorded.
PAUSE Resets to the Welcome banner.
A message appears on the display and indicates when the user ID is accepted by the CSAFE master device. Once program selection is
complete, the user can begin exercising.

P30 Console Operator's Guide for WEB | P/N 304577-101 rev B, ENU
©2017 Precor Incorporated | February 2017
Other manuals for P30 Console
13
Table of contents
Other Precor Fitness Electronic manuals

Precor
Precor P10 Assembly Instructions

Precor
Precor P80 Console User manual

Precor
Precor 100i User manual

Precor
Precor P30 Console User manual

Precor
Precor P80 Console Assembly Instructions

Precor
Precor P30 Console Assembly Instructions

Precor
Precor UBK13 User manual

Precor
Precor PVS User manual

Precor
Precor P10 Assembly Instructions

Precor
Precor Experience P82 User manual