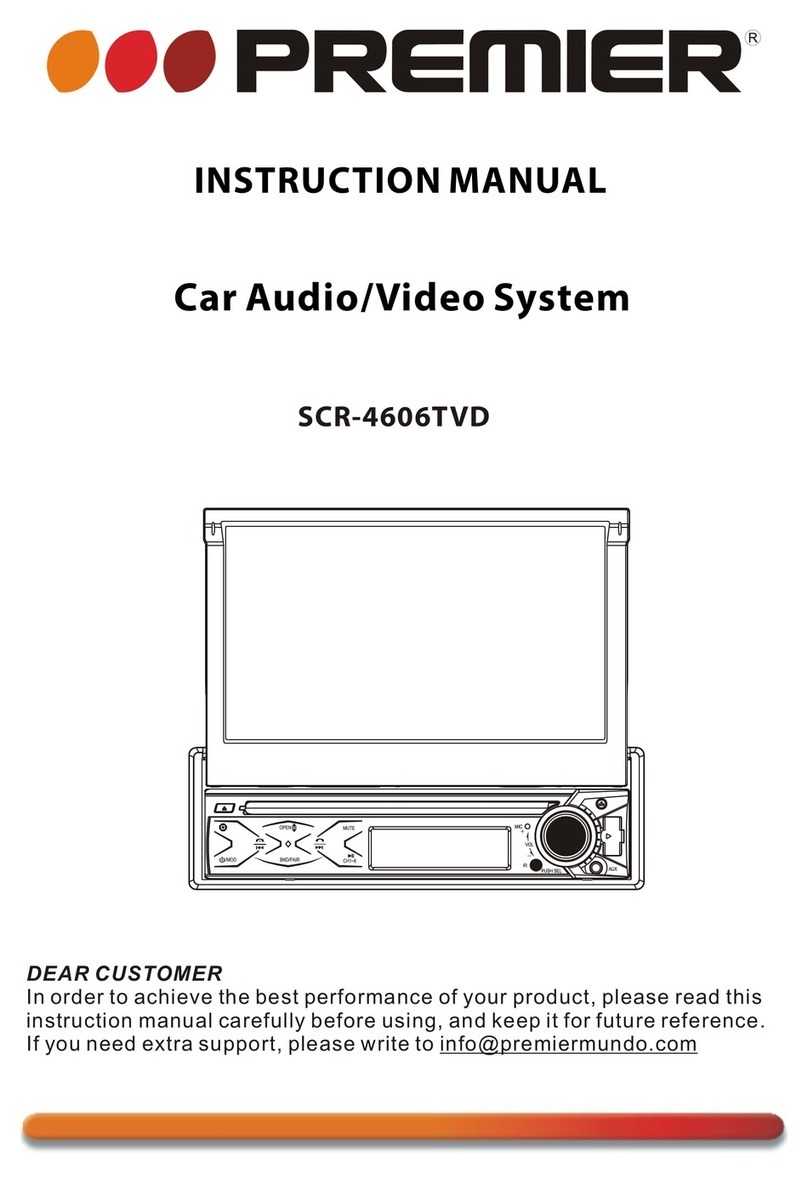
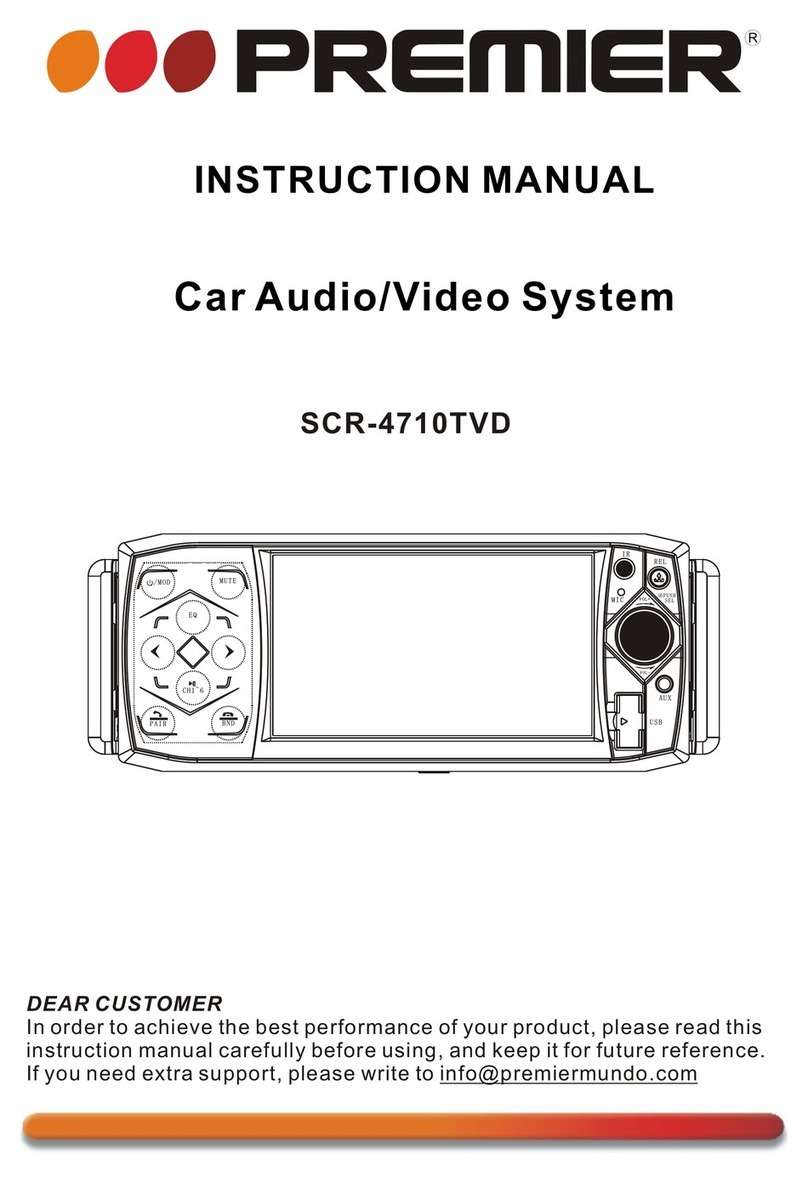
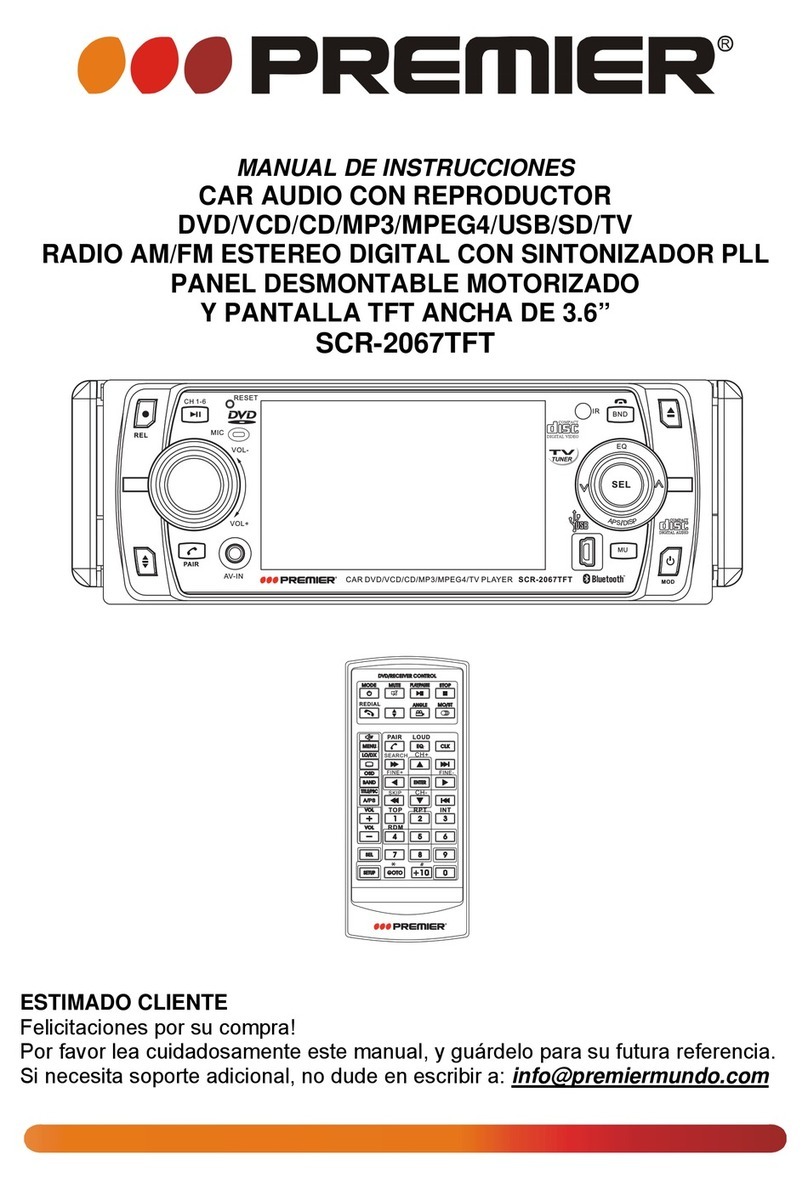
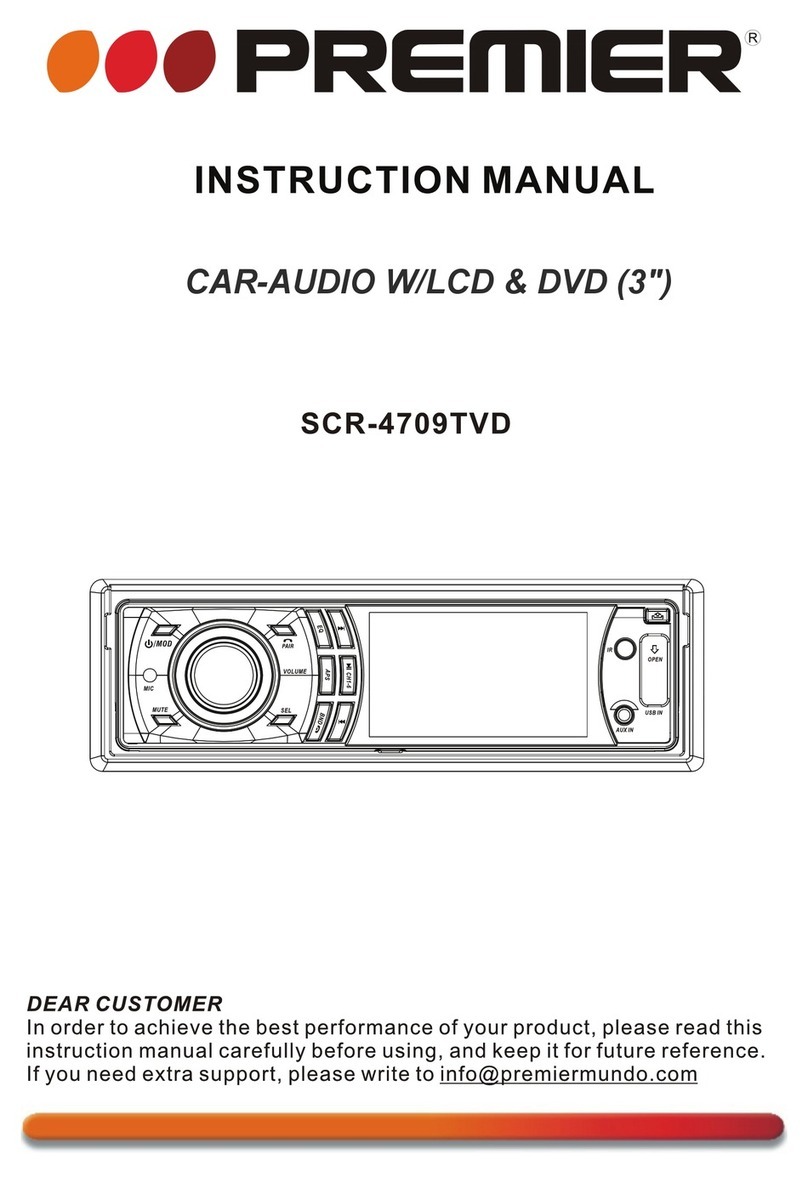
Premier SCR-0934MR User manual

MANUAL DE INSTRUCCIONES
REPRODUCTOR PARA AUTO CD/MP3
INTERFASE USB – INTERFASE SD/MMC
SCR-0934MR
ESTIMADO CLIENTE
Felicitaciones por su compra!
Por favor lea cuidadosamente este manual, y guárdelo para su futura referencia.
Si necesita soporte adicional, no dude en escribir a: info@premiermundo.com
Página 1

Página 2
USO Y MANTENIMIENTO DE LOS DISCOS COMPACTOS
CONDENSACIÓN DE HUMEDAD
En días lluviosos o en áreas muy húmedas, se puede condensar la humedad dentro del lente. En caso
de que esto ocurriese. la unidad no funcionará correctamente. Quite el disco y espere alrededor de una
hora hasta que la humedad se evapore.
ACERCA DE LOS CD’S
•Un disco sucio o defectuoso puede ser la causa de la interrupción de la
reproducción; para gozar de un óptimo sonido, maneje los discos de la
siguiente forma:
Tome el disco por el borde. Para mantenerlo limpio, no toque la
superficie.
•No pegue autoadhesivos o cinta sobre el disco
•No exponga los discos a la luz directa del sol, fuentes
de calor como ductos calientes de aire, ni los deje
dentro de un auto estacionado bajo la luz directa del
sol ya que la temperatura aumenta considerablemente
dentro del auto.
•Antes de la reproducción, lmpie los discos con un paño de
limpieza. Limpie los discos del centro hacia el borde.
•No use solventes como bencina, thinner, limpiadores
comerciales o aerosoles antiestáticos para discos análogos.
Si utiliza los discos como en la ilustración a continuación, los residuos pegajosos pueden interrumpir el
funcionamiento, causar mal funcionamiento o arruinar el disco.
No utilice CD’s alquilados o de segunda mano que puedan tener residuos pegajosos en la superficie
(por ejemplo: el pegamento de las etiquetas arrancadas, la tinta y el pegamento que se chorrea de las
etiquetas).
Hay residuos de pegamento
La tinta es pegajosa
No use CD’s alquilados con etiquetas viejas que están comenzando a
despegarse.
Página 3
Las etiquetas que están comenzando a despegarse dejan residuos pegajosos
No utilice CD’s propios con etiquetas.
Las etiquetas se pegan
No utilice CD’s con formas especiales
Utilice solamente CD’s redondos en esta unidad pues los
CD’s de forma especial pueden dañar el funcionamiento
de la unidad.
Asegúrese de usar discos con la marca:
Solo para esta unidad.
Los CD – Rs y CD – RWs cuyo proceso de grabación no haya finalizado, no pueden ser reproducidos.
(Para mayor información sobre la finalización del proceso de grabación consulte el manual de la
quemadora de CD o el manual del reproductor de CD-R/CD-RW). Además, dependiendo de la
grabación, es imposible reproducir ciertos CDs.
INSTALACIÓN
•Antes de instalar la unidad conecte los cables temporalmente asegurándose de hacerlo
apropiadamente y verifique si la unidad funciona correctamente.
•Para una instalación adecuada, use solamente los accesorios incluidos en el empaque. El uso de
otros accesorios puede ocasionar un mal funcionamiento.
•Consulte a su proveedor más cercano si la instalación requiere perforar o hacer alguna otra
modificación a su vehículo.
•Coloque la unidad en un lugar que no moleste al conductor ni en lugares que puedan lastimar a los
pasajeros si es necesario frenar abruptamente.
•La unidad no tendrá un óptimo funcionamiento si el ángulo de instalación excede los 30º de la
posición horizontal.
•No instale la unidad en lugares muy calientes, bajo la luz del sol, cerca de una salida de aire
caliente, lugares con mucho polvo o que expuestos a vibración.
•Asegúrese de quitar el panel frontal antes de instalar la unidad.

Página 4
MONTAJE FRONTAL Y TRASERO DEL DIN
Esta unidad puede ser instalada de dos formas: FRONTAL (instalación frontal convencional)
y TRASERA (instalación trasera, atornillándola a los hoyos del chasis de la unidad). Para mayor
información siga las siguientes instrucciones.
MONTAJE FRONTAL DEL DIN (MÉTODO A)
1. Tablero
2. Sujetador
Después de haber colocado el soporte en el
tablero, elija las lengüetas adecuadas al
grosor del material y dóblelas hacia dentro
para asegurar el soporte.
3. Coloque los tornillos
1. Tablero
2. Tuerca (5mm)
3. Arandela
4. Tornillo (5x25mm)
5. Tornillo
6. Cincha
Asegúrese de usar la cincha para sujetar la
parte trasera de la unidad. Esta puede ser
doblada con las manos para lograr el ángulo
deseado
7. Arandela plana
DESINSTALACIÓN DE LA UNIDAD
1. Marco
2. Para sacar el marco Introduzca los dedos
dentro del agujero frontal y jale. Cuando
vuelva a colocar el marco, coloque la parte
con orificios hacia abajo y ajústelo.
3. Sujetadores
Introduzca los sujetadores incluidos en el
empaque, dentro de los agujeros que se
encuentran a ambos lados de la unidad
hasta escuchar un chasquido, tal como se
muestra en la figura. Se puede sacar la
unidad del tablero jalando de los
sujetadores.
Página 5
INSTALACION DEL MARCO
Antes de ajustar el marco, coloque hacia abajo el lado con la etiquete
pegada, que dice “Bottom” (como se muestra en la ilustración).
Empuje el marco hasta que quede fijado al panel principal.
MONTAJE TRASERO DEL DIN (MÉTODO B)
Coloque los tornillos en los agujeros que se
encuentran a ambos lados de la unidad
asegurando la unidad al soporte incluído de
fábrica.
1. Alineé los orificios del soporte con los del
equipo y coloque dos tornillos en cada lado.
Use tornillos de 5 x 5mm o de 4 x 5mm,
dependiendo de los orificios del soporte
2. Tornillos
3. Soporte de montaje
4. Tablero
5. Gancho (quite esta pieza)
Nota: El soporte de montaje, el anillo sujetador
externo y la media funda no se usan en el método
de instalación B
ABRIR/CERRAR EL PANEL
1. Presione el botón Open
2. La abertura para el CD estará accesible
3. Después que el CD haya sido cargado o descargado coloque el panel en su posición original.
CD

Página 6
PANEL DE CONTROL DESMONTABLE
Quitar el panel de control desmontable
1. Apague la unidad
2. Presione el botón para soltar el panél
3. Quite del panel de control desmontable
COLOCAR EL PANEL DE CONTROL DESMONTABLE
1. Inserte el lado derecho del panel de control desmontable dentro de
la unidad principal.
NOTA: El panel de control desmontable debe ser colocado en la
juntura.
2. Presione el panel de control del lado izquierdo hasta que haga clic
PRECAUCION
•No inserte el panel de control desmontable del lado izquierdo pues
se podría dañar.
•Las sacudidas pueden dañar facilmente el panel de control
desmontable. Después de quitarlo, coloque el panel en una caja
para protegerlo y tenga cuidado de no dejarlo caer o someterlo a
fuertes sacudidas.
•Una vez que se ha presionado el botón para soltar el panel de control desmontable, las vibraciones
del auto pueden hacer que el panel se caiga. Para prevenir daños al panel, guárdelo en una caja
una vez que lo haya desmontado.
•El conector de la parte de atrás, que conecta el panel de control desmontable a la unidad principal,
es una pieza muy importante. Tenga cuidado de no dañarlo con las uñas,
lapiceros, destornilladores, etc.
Nota: Si el panel de control desmontable está sucio, límpielo solamente con un
paño seco. Utilice un hisopo de algodón embebido en alcohol isopropilico para
limpiar el conector en la parte trasera del panel.
SOLTAR
PANEL
PRESIONE
Conector
Página 7
CONEXIÓN ELÉCTRICA
1. Compruebe que la batería de su automóvil sea de 12V (6 tapas) con el polo negativo en tierra (si no,
necesitará un conversor).
2. Desconecte la energía antes de comenzar hacer el cableado quitando el fusible de la caja de
fusibles.
3. Conecte el cable de energía a una de las terminales extra de la caja de fusibles.
4. Conecte el cable a tierra negro a alguna parte metálica del auto. Es importante que haga buen
contacto.
5. Haga las otras conexiones como se muestra en la ilustración.
6. Si su automóvil no tiene conector ISO puede adquirirlo en cualquier negocio de accesorios para
automóviles.
Nota: EL USO INDEBIDO O UNA CONEXIÓN INCORRECTA PUEDE ANULAR LA GARANTÍA DE
ESTA UNIDAD.
Reemplazo del fusible
Para reemplazar el fusible quite el fusible quemado e inserte nuevo del mismo voltaje.
FUSIBLE

Página 8
INSTRUCCIONES DE USO
BOTÓN DE ENCENDIDO/APAGADO (POWER)
Presione el botón POWER para encender o apagar la unidad.
BOTÓN MENÚ
Presione el botón MENÚ para utilizar las siguientes funciones:
-AUDIO
Presione el botón MENÚ menos de 1 segundo praa abrir el menú Audio.
Presione varias veces el botón MENÚ para navegar entre las siguientes funciones:
VOLUME (VOLUMEN) !BASS (BAJOS) !TREBLE (MEDIOS) !BALANCE (BAL) !FADER (FAD)
Gire el volumen para ajustar el nivel deseado.
NOTA: SE SALTARÁ EL BASS Y EL TREBLE SI SE ACTIV EL MODO DSP
OTRAS FUNCIONES
Presione el botón MENÚ por más de dos segundos para abrir otra sección del menú, presione el botón
MENÚ repetidas veces para navegar por los items del menú, una vez que el item deseado se muestra
en la pantalla, utilice el volumen para ajustar la función seleccionada.
MODO DSP (ECUALIZACIÓN PREDEFINIDA)
POP !ROCK !CLASSIC !FLAT !DSP OFF
En el modo DSP OFF el ecualizador predeterminado será ajustado por medio de BASS y TREBLE.
MODO ESP (PROTECCIÓN ELECTRÓNICA ANTI-SALTO)
Puede seleccionar los segundos de ESP como se indica a continuación
ESP 12 segundos: para rutas normales
ESP 45 segundos: para rutas de malas condiciones
MODO BEEP (BEEP ON/OFF)
BEEP OFF: Desconecta el tono audible del BEEP, cuando se accede a cualquier función.
BEEP ON: Conecta el tono audible del BEEP.
MODO DE BUSQUEDA (SEEK1/SEEK2)
Seleccione el modo de búsqueda 1 o 2, utilizando el Control de Volúmen. Una vez seleccionado un
modo de búsqueda, se pueden realizar las siguientes funciones:
SEEK 1: Presione el botón del sintonizador brevemente hacia arriba o hacia abajo para aumentar o
disminuir la frecuencia de a un paso.
Presione y sostenga el botón del sintonizador hacia arriba o hacia abajo hasta que encuentre la
estación de radio deseada y deje de presionar.
SEEK 2: Presione el botón del sintonizador brevemente hacia arriba o hacia abajo para aumentar o
disminuir la frecuencia de a un paso.
Presione y sostenga el botón del sintonizador hacia arriba o hacia abajo para aumentar rápidamente la
frecuencia hasta que se suelte, la diferencia con la misma operación en SEEK 1 es que la radio no se
detendrá en ninguna estación.
Página 9
PERILLA DE VOLUMEN CODIFICADOR
Cuando la función Menú no está activada, gire esta perilla para cambiar el volúmen.
Cuando la función Menú está activada, gire esta perilla para navegar por los diferentes itemes del
menú.
BOTÓN MODE
Presione este botón para seleccionar un modo diferente, la secuencia es la siguiente:
a-Modo de sintonizador (Radio)
b-CDP/MP3 (solamente si el CD o el disco MP3 ha sido insertado)
c-USB (solamente si el USB ha sido insertado)
d-SD/MMC (solamente si ha sido insertada una tarjeta SD o MMC)
e-CDC-CD cambia el modo (solamente si esta unidad tiene estas características)
PRIORIDAD DE MODO
Cuando se inserta un USB o SD/MMC, la unidad automaticamente cambiará al modo USB o SD/MMC,
sin importar en que modo se encuentre la unidad en ese momento.
Estando en el modo USB o SD / MMC. al retirar el USB o SD / MMC, la unidad entrar automáticamente
al modo de radio.
BOTON PARA VISUALIZAR LA PANTALLA (DISP)
Estando en el modo de Radio presione este botón para ver en la pantalla la estación de radio que está
escuchando y la hora.
Ajuste del reloj
Estando en el modo de visualización del reloj, presione el botón DISP hasta que la pantalla LCD
parpadee, presione el botón VOLUMEN para ajustar la hora y los minutos.
BÚSQUEDA DE ESTACIÓN DE RADIO (SCAN)
Presione este botón y la unidad iniciará la búsqueda de estaciones de radio, las estaciones disponibles
parpadearán en la pantalla durante unos segundos.
ALMACENAJE DE MEMORIA AUTOMÁTICA/ BOTÓN DE BÚSQUEDA PREDETERMINADA (AMS)
BÚSQUEDA PREDETERMINADA: Presione el botón AMS menos de 1 segundo para buscar y dejar
todas las estaciones de radio predeterminadas en la memoria y permanezca 5 segundos en cada
estación para que se guarden en la memoria. El indicador de ubicación de la memoria en la pantalla
LCD parpadeará durante este procedimiento. Para detener la búsqueda presione nuevamente el botón
AMS.
SINTONIZADOR ARRIBA/ABAJO
Presione este botón para buscar una estación de radio. Si ha seleccionado el modo SEEK1 o SEEK2,
se pueden realizar diferentes operaciones, para más detalles refiérase al “modo de búsqueda”.
BOTÓN BAND
Presione este botón para cambiar de banda FM, MW(AM).
BOTÓN LOCAL/DX
Use este botón para cambiar entre los modos de sintonizacion Local y Distante (-DX). El modo local
mejora la recepción en algunas áreas donde la señal es demasiado fuerte.

Página 10
BOTÓN LOUDNESS
Use este botón aumentar el reforzamiento de bajos.
FM MONO/ESTÉREO
Use este botón para elegir la recepción estéreo o monaural de las estaciones de radio FM. Puede
mejorar la recepción de una estación distante seleccionando el modo MONO.
BOTÓN RESET
En caso de necesitar presionar el botón RESET, este se encuentra localizado detrás del panel frontal.
Use un lápiz o algún objeto puntiagudo no metálico para presionar este botón. El botón RESET debe
ser utilizado en los siguientes casos:
•Al finalizar la instalación inicial de la unidad
•Cuando todos los botones no funcionan
•Se muestra en la pantalla el símbolo de “error” y
“abnormal”
PANTALLA LCD
La pantalla LCD muestra la frecuencia, hora y las funciones activadas.
NOTA:
Es característica de las pantalla LCD que han estado en temperaturas bajas por un largo período,
tardan más tiempo en iluminarse que en condiciones normales, también disminuirá un poco la visibilidad
de los números. La visibilidad de la pantalla LCD volverá a la normalidad cuando la temperatura
aumente.
CONFIGURACIÓN DE LAS ESTACIONES DE RADIO (M1-M6)
Puede almacenar y seleccionar 6 estaciones de radio predeterminadas, presionando los botones M1-
M6.
PARA ALMACENAR UNA ESTACION:
1. Seleccione una banda (si es necesario)
2. Seleccione una estación moviendo el sintonizador hacia arriba o abajo.
3. Presione y sostenga por dos segundos el botón elegido para almacenar la estación de radio. El
número determinado aparecerá en la pantalla acompañado de una alarma.
PARA BUSCAR UNA ESTACION PREDETERMINADA
1. Seleccione una banda (si es necesario)
2. Presione brevemente uno de los botones predeterminados para escuchar una de las estaciones de
radio guardadas.
Página 11
REPRODUCCIÓN DE CD
CARGADO DE CD
Presione el botón para abrir hacia abajo el panel de adelante, inserte el dico en la ranura de CD, el
disco se cargará automáticamente y comenzará la reproducción.
BOTON EXPULSAR CD
Presione este botón para extraer el CD. Este botón está ubicado
detrás del panel de adelante, deberá abrir hacia abajo el panel
para acceder a este botón.
M1: REPRODUCIR/PAUSAR CD, PRIMERA PISTA
Presione este botón para pausar la reproducción del CD y vuelva a presionarlo para volver a la
reproducción normal.
Haga una pulsación larga sobre este botón para saltar a la primera pista.
M2: INTRODUCCIONES
Presione el botón para activar la función de introducciones. Los primeros 10 segundos de cada pista
serán reproducidos de manera secuencial hasta que vuelva a presionar este botón.
M3: REPETICIONES
Presione este botón para activar o desactivar la función de repetición
El indicador RPT se encenderá.
M4: REPRODUCCIÓN ALEATORIA
Al activar la función de reproducción aleatoria, las pistas del disco serán reproducdidas en orden
aleatorio. Para volver al modo de reproducción normal, vuelva a presionar este botón.
SALTO A LA SIGUIENTE O ANTERIOR PISTA
Durante la reproducción, presione el botón SALTO HACIA DELANTE por menos de un segundo para
saltar a la siguiente pista, o presione el botón SALTO HACIA ATRÁS para saltar al inicio de la pista
actual y vuelva a presionarlo para saltar a la pista anterior.
Si mantiene presionado uno de estos botones durante más de un segundo activará la función de
avance o retroceso rápido. El número de pista parpadeará en la pantalla indicándole que esta función
está activa. Libere el botón para volver a la reproducción normal.
TARJETA DE MEMORIA MMC/SD Y USO DEL DISPOSITIVO USB
ACTIVAR EL MODO DISPOSITIVO USB
1. El mini puerto USB para el dispositivo se encuentra donde muestra la ilustración (P.1)
2. Conecte el cable USB al dispositivo, tal como se muestra en la ilustración (P.2). El mensaje “USB-
DRIV” aparecerá en la pantalla, indicando que el dispositivo USB ha sido conectado correctamente y
se ha iniciado la descarga.

Página 12
3. No importa el modo en el que se encuentre el reproductor (RADIO, CDC, CD, SD/MMC, etc.), una
vez que haya conectado el USB, el equipo cambiará automáticamente al modo USB.
4. El método de reproducción de los archivos almacenados en el dispositivo USB es igual que para
reproducir archivos CD o MP3.
ATENCIÓN: El símbolo del triángulo grabado en el cable USB debe estar siempre hacia arriba para
conectarlo al mini puerto USB. Si no toma en cuenta esta advertencia podría dañar el dispositivo USB.
DETENER LA REPRODUCCIÓN USB
1. Al desconectar el disco o dispositivo USB, el reproductor cambiará automáticamente al modo Radio.
Presione el botón MODE para elegir otro modo de operación.
2. Usando el botón MODE puede elegir el modo de operación USB (siempre que haya un dispositivo
USB conectado) u otro modo cualquiera.
CUIDADO
Desconecte el dispositivo USB con delicadeza, ya que al forzarlo podría dañar permanentemente el
dispositivo y el reproductor (P.3)
COMPATIBILIDAD
Debido al rápido desarrollo del mundo tecnológico, es posible que este equipo no sea compatible con
todos los dispostivos o discos USB disponibles o futuros, especialmente aquellos que necesitan la
instalción de un controlador. Use solamente dispositivos o discos USB compatibles con este equipo.
Página 13
INGRESANDO AL MODO DE OPEARCIÓN SD/MMC
1. Presione el botón para desmontar el panel frontal (P.4)
2. La ranura para conectar la tarjeta de memoria SD/MMC está en la
parte superior del panel frontal como se muestra en la ilustración (P.5)
3. Coloque la tarjeta de memoria SD/MMC en la ranura en la dirección
correcta hasta que escuche un chasquido (Clic).
4. Cierre el panel frontal.
5. El mensaje “MEM-CARD” aparecerá en la pantalla, indicando que la
tarjeta de memoria ha sido colocada correctamente y la reproducción
de los archivos MP3 se iniciará automáticamente.
6. No importa el modo en el que se encuentre el reproductor (RADIO,
CDC, CD, SD/MMC, etc.), una vez que haya colocado la tarjeta de
memoria SD/MMC, el equipo cambiará automáticamente al modo
SD/MMC.
7. El método de reproducción de los archivos MP3 almacenados en la tarjeta de memoria SD/MMC es
igual que para reproducir archivos CD o MP3.
DETENER LA REPRODUCCIÓN DESDE LA TARJETA DE MEMORIA
1. Presione el extremo de la tarjeta SD o MMC para sacarla de la ranura. Una vez que la tarjeta SD o
MMC haya sido quitada, el equipo cambiará automáticamente al modo Radio.
2. Usando el botón MODE puede elegir el modo de operación SD/MMC (siempre que haya un tarjeta
de memoria SD o MMC) u otro modo cualquiera.
CUIDADO
1. No intente plegar o cerrar el panel frontal si la tarjeta de memoria
no está completamente introducida en la ranura, ya que podría
dañar seria y permanentemente el equipo y la tarjeta SD o MMC.
(P.6)
2. Asegúrese de colocar la tarjeta de memoria en el sentido correcto (como se indica en la ilustración
(P.7), caso contrario, podría dañar seria y permanentemente el equipo y la tarjeta SD o MMC.
ADELANTE
ATRAS

Página 14
REPRODUCCIÓN MP3 (CD-R/CD-RW/SD/MMC/DISPOSITIVO USB)
•En este manual denominaremos “Carpeta” a un directorio con archivos MP3 y “Pista” a los archivos
MP3.
•La extensión máxima para los nombres de los archivos MP3 es 16 caracteres.
•La extensión máxima para los nombres de las carpetas es 16 caracteres.
•El nivel máximo de subcarpetas es de 8 niveles.
•El número máximo de archivos que se pueden almacenar en un disco es 448.
•El número máximo de carpetas en un disco es de 128.
•Velocidad binaria y frecuencia de muestreo soportadas:
Velocidad binaria (Bit rate):
32,40,48,56,64,80,96,112,128,160,192,224,256,320KHz
Frecuencia de muestreo (Sampling Frequencies):
MPEG1 32KHz/44.1KHz/48KHz
MPEG2 32KHz/44.1KHz/48KHz and 16KHz/22.05KHz/24KHz
•Compatible con grabaciones multisesión (Sólo CD-R y CD-RW)
•Compatible con discos CD, CD-R y CD-RW.
•No es compatible con el formato de grabación Packet Write (UDF).
CARGA DE ARCHIVOS MP3 (CD, SD/MMC/DISCO USB)
Conecte el dispositivo MP3 como se ha descrito. El mensaje “MP3 xxx” aparecerá en la pantalla LCD
después de mostrar el número total de pistas, donde “xxx” es el número total de carpetas. La
reproducción se iniciará automáticamente comenzando por la primera pista de la primera carpeta. El
icono “MP3” aparecerá en la pantalla LCD.
Durante la reproducción de archivos MP3, la siguiente información será mostrada en la pantalla LCD,
en el siguiente orden, acompañada de un icono que le facilitará identificar el tipo de mensaje.
1. Número de pista actual y tiempo transcurrido de reproducción.
2. Nombre de la carpeta actual .
3. Nombre de la pista actual .
Si el disco es compatible con las etiquetas ID3, la siguiente información también será mostrada:
4. Título de la canción “SONG”.
5. Nombre del álbum “ALBUM”.
6. Nombre del artista “ARTIST”.
Cada ítem se mostrará durante 5 segundos.
NAVEGANDO POR LAS CARPETAS
Hay cuatro métodos para seleccionar una carpeta o pista:
1. USANDO LOS BOTONES DE SALTO DE PISTA
Use los botones de salto de pista hacia delante o atrás para saltar a la siguiente o anterior pista.
También puede presionar el botón AVANZAR 10 PISTAS (M6) o RETROCEDER 10 PISTAS (M5)
para avanzar o retroceder 10 pistar a la vez.
2. USANDO EL BOTÓN DE BÚSQUEDA MP3
Búsqueda por número de pista
Presione el botón de búsqueda MP3 para ingresar al modo de búsqueda. El mensaje “TRK SCH”
aparecerá en la pantalla. Si no realiza ninguna acción durante 5 segundos, el equipo volverá
automáticamente al modo normar de reproducción.
Página 15
Estando en el modo de búsqueda, presione el botón ENTER. El mensaje “001” aparecerá en la
pantalla. Use los botones VOL+ / VOL- para seleccionar la pista que desee.
El número de pista puede ser de 1, 2 o 3 dígitos. El método para seleccionar un número de pista es
el siguiente:
a) Números de un dígito
Una vez elegido el número de pista, mantenga presionado el botón ENTER por más de un
segundo para confirmar e iniciar la reproducción.
b) Número de 2 y 3 dígitos
Introduzca primero el dígito de la izquierda del número (por ejemplo, si el número es 123,
presione primero el número 1, seguidamente el 2 y finalmente el 3). Presione el botón ENTER
para cambiar la posición del dígito y repita este paso para cada dígito del número. Mantenga
presionado el botón ENTER por más de un segundo para confirmar e iniciar la reproducción.
3. BÚSQUEDA POR CARPETAS
Cuando el mensaje “TRK SCH” aparezca en la pantalla LCD, presione el botón de búsqueda MP3
nuevamente. El mensaje de la pantalla cambiará a “FILE SCH” e ingresará al modo de búsqueda
por carpetas. Presione el botón ENTER para ver la primera carpeta y use los botones VOL+ y VOL-
para cambiar de carpeta. Cuando haya encontrado la carpeta deseada, presione el botón ENTER y
el contenido de la misma será mostrado. Repita este procedimiento para navegas por las
subcarpetas hasta en 8 niveles.
Durante la búsqueda por carpetas no sólo se mostrarán las carpetas, sino también los archivos.
Para poder distinguir las carpetas de los archivos cada uno tiene un icono.
4. BÚSQUEDA ALFABÉTICA
Este modelo también cuenta con la función de búsqueda alfabética (por el nombre del archivo) para
la reproducción MP3. Presione tres veces el botón de búsqueda MP3 hasta que el mensaje “CHAR
SCH” aparezca en la pantalla. Seguidamente presione el botón ENTER. La letra “A” empezará a
parpadear en la pantalla. Use los botones de volumen para elegir la letra que desee (la primera letra
de la palabra). Presione el botón ENTER para confirmar y elija la segunda letra del nombre de su
canción. La letra “A” empezará a parpadear en la pantalla. Repita este procedimiento para las
demás letras (máximo 8). Una vez escrito el nombre de la canción, mantenga presionado el botón
ENTER por más de un segundo para iniciar la búsqueda. Si ningún archivo coincide con el nombre
que escribió, el mensaje “NOT FND” aparecerá en la pantalla.
ETIQUETAS ID3
Presione el botón BAND varias veces para ver la información de las etiquetas ID3.
Si el archivo MP3 tiene una etiqueta ID3, presione varias veces el botón BAND; cada vez que lo haga la
información cambirá de la siguiente manera:
NOMBRE DEL ARCHIVO > NOMBRE DE LA CARPETA > TITULO > ARTISTA > ALBUM
Si el archivo no tiene una etiqueta ID3, al presionar el botón BAND sólo verá el nombre del archivo y de
la carpeta. Esta información se desplazará cíclicamente a través de la pantalla durante la reproducción.
Página 16
ESPECIFICACIONES
REPRODUCTOR DE CD
Sistema Disco compacto de audio
Discos compatibles Discos compactos
Frecuencia de rastreo 44.1KHz
Cuantificación de bits 1bit
Frecuencia 5 – 20.000Hz
Número de canales 2, estéreo
Proporción S/N 70dB
RADIO
FM
Rango de frecuencia 87.5 – 107.9 MHz
Frecuencia media 10.7 MHz
Sensibilidad Más de 15dB a 30dB S/N
Separación estéreo 25dB a 1KHz
Proporción S/N 50dB
AM
Rango de frecuencia 530 – 1710 KHz
Frecuencia media 450 KHz
Sensibilidad Más de 45dB
Proporción S/N 40dB
GENERAL
Fuente de energía DC 11 – 14 V
Polaridad Negativo a tierra
Impedancia de las bocinas 4 ohms
Potencia máxima 33 Watts x 4
NOTA: Nos reservamos el derecho a realizar cambios y modificaciones sin previo aviso.
Página 17
DIAGRAMA DEL CIRCUITO

INT
RPT RDM
BND
MOD
MODEL: SCR-0934MR
PWR
INT
RPT RDM
BND
MOD
PANEL
RELEASE
BUTTON
POWER
BUTTON
BAND/
ID3 TAG
INFORMATION
BUTTON
MONO
BUTTON
LOUDNESS
BUTTON
PRESET MEMORY STATION BUTTONS
(M1-M6)
DISPLAY
BUTTON
LCD
DISPLAY
TUNING / SEEK /
TRACK UP/DOWN
BUTTONS
ENCODER
VOLUME
KNOB
LOCAL
BUTTON
FUNCTION
MENU/
MP3 ENTER
BUTTON
PANEL
FOLD DOWN
BUTTON
SCAN
BUTTON
MODE
BUTTON
AMS/
MP3 SEARCH
BUTTON
PLAY/
PAUSE
BUTTON
INTRO
SCAN
BUTTON
REPEAT
BUTTON
RANDOM
BUTTON
USB
JACK
10 TRACK UP/
10 TRACK DN
BUTTON
PWR
INT
RPT RDM
BND
MOD
INFRARED
RECEIVER
TUNING / SEEK / CD TRACK UP / DOWN BUTTON
POWER BUTTON
VOLUME UP / DOWN BUTTONS
MODE BUTTON
MENU / ENTER BUTTON
DISPLAY/ID3 TAG INFORMATION BUTTON
PRESET BUTTONS
SCAN BUTTON
MUTE BUTTON
LOCAL/DX BUTTON
PLAY / PAUSE BUTTON
RANDOM BUTTON
MP3 SEARCH / AMS BUTTON MONO BUTTON
LOUD BUTTON
INTRO SCAN BUTTON
REPEAT BUTTON
INT
RPT
RDM
TOP
BAND BUTTON
REMOTE CONTROL
PRESET MEMORY
TUN
MENU
1
4 5 6
2 3
DISP
LOUD
MUTE
LOCAL
MP3/
AMS
MONO
MOD SCN
BND
PWR
DN UP
Page 1

1.HANDLING COMPACT DISCS
MOISTURE CONDENSATION
NOTES ON CDs
P. 2
P. 3
P. 4
P. 1
P. 5
P. 6
P. 7
1.
2.
3.
4.
NOTES ON DISCS
There are paste residue.
Ink is sticky (P.5).
Stickers that are beginning
to peel away, leaving a
sticky residue (P.6).
Labels are attached (P.7).
On a rainy day or in a very damp area, moisture may condense on the lenses inside the unit. Should this occur, the unit
will not operate properly. In such a case, remove the disc and wait for about an hour until the moisture has evaporated.
A dirty or defective disc may cause sound
dropouts while playing. To enjoy optimum
sound, handle the disc as follows.
Handle the disc by its edge. To keep the
disc clean, do not touch the surface (P.1).
If you use the discs explained below, the sticky residue can
cause the CD to stop spinning and may cause malfunction or
ruin your discs.
Do not use second-hand or rental CDs that have a sticky residue
on the surface (for example, from peeled-off stickers or from
ink, or glue leaking from under the stickers).
Do not stick paper or tape on the disc (P.2).
Before playing, clean the discs with an
optional cleaning cloth. Wipe each disc from
the centre out (P.4).
Do not expose the discs to direct sunlight or
heat sources such as hot air-ducts, or leave
them in a car parked in direct sunlight where
there can be a considerable rise in
temperature inside the car (P.3).
Do not use rental CDs with old labels that are beginning to peel off.
Do not use your CDs with labels or stickers attached.
**************
*******
*******
*******
*******
*******
*******
*******
*******
****
*******
******* *******
*******
Do Not Use Special Shape CDs
Be sure to use round shape CDs only for this unit and do not use
any special shape Cds. Use of special shape CDs may cause
the unit to malfunction.(P.8).
Be sure to use CDs with disc mark
Only for this unit.
RECORDABLE
REWRITABLE
P. 8
CD-Rs and CD-RWs which have not undergone finalization
processing cannot be played. (For more information on
finalization processing, refer to the manual for your CD-R/CD-RW
writing software or CD-R/CD-RW recorder.) Additionally,
depending on the recording status, it may prove impossible to
play certain CDs record on CD-R or CD-RW.
5.
Do not use solvents such as benzine,
thinner,commercially available cleaners, or
antistatic spray intended for analog discs.
Page 2 Page 3
2.INSTALLATION
Before finally installing the unit, connect the wiring temporarily and make sure it is all connected up properly
and the unit and system work properly.
Use only the parts included with the unit to ensure proper installation. The use of unauthorized parts can
cause malfunctions.
Consult with your nearest dealer if installation requires the drilling of holes or other modifications of the vehicle.
Install the unit where it does not get in the driver's way and cannot injure the passenger if there is
a sudden stop, like an emergency stop.
If installation angle exceeds 30°from horizontal, the unit might not give its optimum performance.
Avoid installing the unit where it would be subject to high temperature, such as from direct sunlight, or from hot
air, from heater, or where it would be subject to dust dirt or excessive vibration.
Be sure to remove the front panel before installing the unit.
DIN FRONT/REAR-MOUNT
This unit can be property installed either from “Front” (conventional DIN Front-mount) or “Rear”(DIN Rear-mount
installation, utilizing threaded screw holes at the sides of the unit chassis). For details, refer to the following
illustrated installation methods A and B.
- DIN FRONT-MOUNT (Method A)
Installation the unit
1. Dashboard
2. Holder
After inserting the half sleeve into the
dashboard, select the appropriate tab
according to the thickness of the
dashboard material and bend them
inwards to secure the holder in place.
3. Screw
30°
1
7
4
23
5
6
1. Dashboard
2. Nut (5mm)
3. Spring washer
4. Screw (5x25mm)
5. Screw
6. Support Strap
Be sure to use the support strap to
secure the back of the unit in place. The
strap can be bent by hand to the desired
angle.
7. Plain washer
182
53
12
3

Page 4
BOTTOM
BOTTOM
- DIN REAR-MOUNT (METHOD B)
Installation using the screw holes on the sides of the unit.
Fastening the unit to the factory radio mounting bracket.
1. Select a position where the screw holes of
the bracket and the screw holes of the main
unit become aligned (are fitted) and tighten
the screws at 2 places on each side.
2. Screw
3. Factory radio mounting bracket.
4. Dashboard or Console
5. Hook (Remove this part)
Note: the mounting box, outer trim ring,
and half-sleeve are not used for method B
installation.
5
2
4
3
2
5
a. Frame
b. Insert fingers into the groove in the front of frame and pull
out to remove the frame. (When re-attaching the frame,
point the side with a groove down wards and attach it.)
c. Insert the levers supplied with the unit into the grooves at
both sides of the unit as shown in figure until they click.
Pulling the levers makes it possible to remove the unit
from the dashboard.
- Trim Plate Installation:
Removing the unit
a
b
c
- PANEL OPEN/CLOSE OPERATION
1
CDIN
RESET
2
1. Press Open button
2. The CD slot will be accessible.
3. After CD is loaded or unloaded return the panel to its original position.
Before attaching the trim plate, the side with a "Bottom" Label stuck
should be at down side (as shown on diagram).
Push the trim plate against the main panel until it is fitted.
Page 5
3.DETACHABLE CONTROL PANEL (D.C.P.)
Removing The Detachable Control Panel (D.C.P.).
CAUTION
DO NOT insert the D.C.P from the left side. Doing so may damage it.
The D.C.P can easily be damaged by shocks. After removing it, place it in a protective case and be careful
not to drop it or subject it to strong shocks.
When the release button is pressed and the D.C.P is unlocked, the car's vibrations may cause it to fall. To
prevent damage to the D.C.P, always store it in a protective case after detaching it.
The rear connector that connects the main unit and the D.C.P is an extremely important part. Be careful not
to damage it by pressing on it with fingernails, pens, screwdrivers, etc.
Note:
If the D.C.P is dirty, wipe off the dirt with soft,
dry cloth only. And use a cotton swab soaked
in isopropyl alcohol to clean the socket on the
back of the D.C.P.
Socket
1. Turn the Power off.
2. Press the Panel Release Button. 3. Remove the D.C.P.
Attaching the Detachable Control panel (D.C.P.)
1. Insert the right side of the
D.C.P. Into the main unit.
NOTE: The D.C.P. Must be
attached into the T-Joint.
2. Press the D.C.P. On to the
left side of middle of D.C.P.
Until a “click” sound is heard.
2.
1.
RELEASE
BUTTON
D.C.P.
PUSH

Page 6 Page 7
4. ELECTRICAL CONNECTION
a. Make sure your car battery is a 12 volt (6 filler caps) negative ground system (if not, a
converter will be necessary).
b. Before starting wiring connections, disconnect the power supply by removing the fuse from
the fuse box.
c. Connect the power wire to one of the extra terminals of the fuse box.
d. Connect the black ground wire to a metal part of the car. It is important to make good contact.
e. Make other wiring connections as shown.
f. If your car does not have ISO connector, you can procure it from any car accessory shop.
Notes: INCORRECT WIRING OR OPERATION WILL AVOID THE WARRANTY OF THIS UNIT.
Fuse Replacement:
To replace the fuse, pull out the blown fuse
from the socket. Insert a new one with same rating
(CAR UNIT BACK SIDE)
FUSE
885A885A
4 SPEAKER SYSTEM
POWER(+) RED
ANTENNA CONNECTOR
LINE OUT 1
REAR REAR
GREEN
GREEN/BLACK
VIOLET
VIOLET/BLACK
WHITE
WHITE / BLACK
GREY
GREY / BLACK
FRONT FRONT
LEFT
SP.
RIGHT
SP.
12V+ YELLOW (FUSED)
MEMORY
BLACK
GND
BLUE AUTO ANT.
RED R
WHITE L
RED R
WHITE L
LINE OUT 2
AUX-IN
RED R
WHITE L
5.GERNERAL OPERATION
POWER BUTTON
MENU BUTTON
You can operate the following function through MENU button.
Press power button to turn on/off the unit.
A. AUDIO OPERATION
press MENU button for less than 1 second to open the Audio menu.
press MENU repeatedly to navigate through the following functions:
VOLUME (VOL) -> BASS (BAS) -> TREBLE (TRE) -> BALANCE (BAL) -> FADER (FAD)
Rotate Volume Control to adjust desired level within 5 seconds.
NOTE: BASS AND TREBLE WILL BE SKIPPED IF DSP MODE IS ACTIVATED
B. OTHER OPERATION
press MENU button for more than 2 seconds to open another set of menu, press MENU
button repeatedly to navigate through the menu items, while the desired menu item is
displayed, use Volume control to adjust the selected function:
You can select the second of ESP as follow
ESP 12 second: For normal road condition
ESP 45 second: For road conditon extremely UN-EVEN.
- ESP MODE (ELECTRONIC ANTI-SKIP PROTECTION)
- DSP MODE (PRESET EQUALIZER)
POP -> ROCK -> CLASSIC -> FLAT -> DSP OFF
At DSP off mode preset equalizer will be controlled by Bass / Treble setting.
- SEEK MODE (SEEK 1 / SEEK 2)
You can choose from Seek tuning mode 1 & mode 2 by using Volume Control.
While the desired Seek tuning mode is selected, the following operations can be
performed:
SEEK1: Press the Tuning Up / Down Button briefly to increase or decrease the frequency by 1
step size.
Press and hold the Tuning Up / Down button to seek the band in up or down direction
and stop when a station is received.
SEEK2: Press the Tuning Up / Down Button briefly to increase or decrease the frequency by 1 Step
size.
Press and hold the Tuning Up / Down button increase or decrease the frequency rapidly
until the button is released, the different between the same operation at SEEK 1 mode is
that this time the radio will not stop at any station.
- BEEP MODE (BEEP ON / OFF)
BEEP OFF: disable audible beep tone when any function is accessed.
BEEP ON: enable audible beep tone.

Page 8 Page 9
MODE BUTTON
Press this button to select different mode , sequence as follow:
MODE PRIORITY
A) Tuner mode (Radio)
B) CDP / MP3 (only if a CD or MP3 disc is inserted)
C) USB (only if a USB drive is inserted)
D) SD / MMC (Only if a SD or MMC card is inserted)
E) CDC-CD Changer mode (only if this unit is equipped with this features)
Whenever a USB or SD/MMC is being inserted, unit will automatically switch to USB or
SD/MMC mode, does not matter the unit is currently in what mode.
When in USB or SD / MMC mode, if the USB or SD / MMC is being removed, unit will
automatically switch to radio mode.
DISPLAY BUTTON (DISP)
At Radio mode Press this button to view frequency of the station in listening and clock time .
Clock Adjustment
Under clock display mode, press DISP button until the LCD flashes, press VOLUME KNOB to
adjust hour & minute.
ENCODER VOLUME KNOB
When the Menu function is not activated, rotate this knob to change the volume level.
When Menu function is activated, rotate this knob to navigate through different menu items.
TUNING UP / DOWN BUTTON
Press this button to search for radio stations. Depends on whether SEEK1 or SEEK 2
mode is selected, different operations can be performed, refer to “SEEK MODE”
paragraph for detail.
BAND BUTTON
Press this button to change between band FM, MW(AM).
AUTO MEMORY STORE: press AMS button for more than 1 second to enter auto store mode. The
radio will automatically store 6 stations to the 6 preset memories of the current band. To stop auto
store, press AMS button again.
PRESET SCAN: Press AMS button for less than 1 second to scan all preset stations in the
memories of the current band and stay on each memory stations for about 5
seconds. The memory location indicator on the LCD will flash during the
process. To stop preset scan, press AMS button again.
AUTO MEMORY STORE / PRESET SCAN BUTTON (AMS)
SCAN BUTTON(SCAN)
Press this button,the radio will tune up to search stations,the available stations will blinking
and stay on the display for a few seconds.
RESET BUTTON
In case of Reset Button is located behind the front abnormal operation use a pencil tip or
other non-metallic object to press the re-set button Reset button is located behind the front
panel. Reset button is to be activated for the following reasons;
- Initial installation of the unit when all wiring is completed.
- All the control function buttons do not operate.
- Abnormal or error symbol shown on the display.
LIQUID CRYSTAL DISPLAY PANEL (LCD)
The LCD panel display the frequency, time and activated functions.
NOTE:
It is a characteristic of LCD panel that if subjected to cold temperatures for an extended
period of time, they will take longer time to illuminate than under normal conditions, in
addition, the visibility of the numbers on the LCD may slightly decrease. The LCD read-out
will return to normal when temperatures increase to a normal range.
STATION PRESET BUTTONS (M1-M6)
You can store & recall six preset radio stations by pressing M1-M6 buttons
TO STORE A STATION: 1) select a band (if needed)
2) select a station by tuning up / down button
3) hold a preset button which you want store the station for at least
2 seconds. The preset number will appear on the display
accompanied by a beeps sound.
TO RECALL A STATION: 1) select a band (if needed)
2) press a preset button briefly to recall the stored station.
RESET
RESET
Use this control to select stereo or monaural reception for FM radio stations. You can
sometimes improve reception of distant stations by selecting mono mode.
FM MONO / STEREO BUTTON (MONO)
LOCAL / DX BUTTON
This control can be used to change between Local and Distant (-DX) tuning mode. Local
mode improves reception in some areas where the signal is too strong.
LOUDNESS BUTTON
Use this LOUDNESS control to increase bass output.

Page 10 Page 11
6.CD OPERATIONS
LOADING THE CD
M1)CD PLAY/PAUSE AND FIRST TRACK BUTTON
M4)RANDOM PLAY BUTTON
INTRO SCAN BUTTON
TRACK UP AND TRACK DOWN BUTTON
Press the Panel Fold Down Button to fold down the front panel, insert the disc through CD slot,
the disc will be automatically loaded and playback will also start.
When random play mode is selected, the tracks will be played in random order, press this key
one more time to cancel random play mode.
Press this button to select Intro Scan function, the first 10 seconds of each track will be played
sequentially until this button is pressed again, then normal play will resume at the current track.
CD EJECT BUTTON
Press this button to eject the CD. Since this button is located behind the front panel, fold down
the panel before accessing this button.
Under normal play mode, press the Track Up Button for less than 1 second to skip the
playback to the next track, or press the Track Down Button for less than 0.5 seconds to return
to the beginning of the current track, press this button one more time to skip to the previous
track.
When any of these buttons is pressed for more than 1 second, the CD player will enter
Cue/Review mode, this is indicated by the flashing track number on the LCD. When the key is
released, normal play will resume.
Press this button briefly to pause CD play, press again to release pause.
Press this button long to activate First Track Function, the first song will be played.
M3)REPEAT BUTTON
Pressing this button will activate Repeat Function in the following order :
Repeat On Repeat Off
The RPT indicator will turn on.
RESET
M2)
7.MMC/SD CARD & USB DEVICE OPERATIONS
START THE USB DEVICE MODE
1.The USB mini socket is accessible as
indicated in picture 1.(P.1)
2.Plug in the USB drive / device completely by
USB adapter cable as indicated in picture 2(P.2)
and display will show “USB-DRIV” to indicate
that the USB drive / device is being plugged in
correctly & the download has begun.
3.Does not matter the unit is in what mode
(TUNER, CDC, CD, SD/MMC, etc), once a USB
drive / device is being plugged into the unit, unit
will automatically switch to USB mode.
4.All the USB files playback function is same as normal
CD or MP3 disc playback.
1.Always unplugged the USB gently from the unit, excessive
force used will cause permanent & serious damage to the
unit & the USB drive / device.(P.3)
TO STOP USB PLAYBACK
1.The USB drive / device is unplugged, the unit automatically switch to radio mode.
Or user can use mode button to switch to other mode.
2.User can use the mode button to choose USB mode (only if USB drive / device is
inserted in the unit ) or any other modes, when they are in any mode.
CAUTION
COMPATIBILITY
Due to the fast changing
Technology world, this unit may or may not
be compatible to all the USB drive / device
available with all the future technology,
especially those USB drive / device which
require to install a driver. Always choose a
compatible USB drive / device which is
compatible with this unit.
Warning: The "Triangle" marking on USB Adapter
Cable "must" alway on the top when insert to the
Panel USB Mini Socket.
Any mistake may cost the USB device damage.
USB DEVICE
USB ADAPTER CABLE
USB MINI SOCKET
USB MINI SOCKET

Page 12 Page 13
START THE SD/MMC MODE
1.Press open button to fold down the front panel.(P.4)
CAUTION
2.The SD/MMC card slot is located on top of the front panel as
indicated in (P.5).
3. Insert the SD/MMC card into the card slot in the correct direction
until a “CLICK” sound is heard.
4.Close the front panel.
5. The display will show “MEM-CARD” to indicate that the SD or
MMC card isd correctly inserted. Once the SD or MMC card is
inserted, the Mp3 file will automatically loaded & playback will also
start.
6. Does not matter the unit is in what mode (Tuner, CDC, CD, USB,
etc), once a SD or MMC card is being inserted in the unit, unit will
automatically switch to SD / MMC mode.
7. All the SD / MMC files playback function is same as normal CD or
MP3 disc playback.
P. 4
P. 6
1.Never try to fold up & close the front panel when the SD or
MMC card is not completely or properly inserted into the SD /
MMC slot, it will cause permanent & serious damage to the
unit & the SD or MMC card.(P.6)
2.Please make sure to insert the SD or MMC
card in the correct direction / orientation as
indicated in picture 7(P.7). Wrong insert will
cause permanent & serious damage to the
unit & the SD or MMC card.
Back side
Front side
P. 7
TO STOP SD/MMC CARD PLAYBACK
1.Push on the end of the SD or MMC card to eject the sd or mmc card. Once the SD or MMC
card is taken out, the unit will automatically seitch to radio mode.
2.User can use the mode button to choose SD / MMC mode (only if SD or MMC is inserted in
the unit ) or any other modes, when they are in amy mode
P. 5
There are four ways to select your favorite folder/tracks.
1. By Track Up/Down Button
Press track up/down button to skip the current tracks or Press 10 track up (M6) or 10 track down
button(M5) to skip 10 tracks at one time.
Navigating through folders and tracks
Using MP3 Search Button
8.MP3 OPERATIONS(CD-R/CD-RW/SD/MMC/USB FILES)
Loading MP3 File (CD, MMC/SD/USB Drive)
Insert the MP3 as usual, if it is an MP3 device, the LCD will show “MP3 xxx” after displaying the total track
number, where “xxx” is the total number of folders, then playback will start, beginning at first track in the first
folder. The “MP3” icon on the LCD will turn on.
During MP3 play, the following information will be shown on the LCD repetitively in the following order,
the corresponding icon will also turn on to help the user identify the message:
1. Current Track Number & Time Elapse of current track.
2. CurrentFolder Name .
3. CurrentTrackName .
If the disc is ID3 compatible, the following items will also be shown, otherwise they will be skipped.
4. Music Name “SONG” .
5. Album Name “ALBUM”.
6. Artist Name “ARTIST”.
Each item will last for about 5 seconds.
- An MP3 directory is shown in this manual as “Folder”, and an MP3 file is shown as “Track”.
- Maximum length of track name : 16 characters
- Maximum length of folder name : 16 characters
- Maximum depth of folder levels : 8
- Maximum number of tracks per disc : 448
- Maximum number of folders per disc : 128
- Supported Bit Rates & Sampling Frequencies:
Bit Rates:
32,40,48,56,64,80,96,112,128,160,192,224,256,320KHz
Sampling Frequencies:
MPEG1 32KHz/44.1KHz/48KHz
MPEG2 32KHz/44.1KHz/48KHz and 16KHz/22.05KHz/24KHz
- Multi Session Recording is supports(CD-R, CD-RW only)
- Supports CD, CDR and CDRW.
- Disc written by Packet Write (UDF) is not supported.

GENERAL
Power Supply
Polarity
Speaker impedance
Max Power
DC 11 -14V
Negative Ground
4 ohms
33Watts x 4
9.SPECIFICATIONS
CD PLAYER
REMARK :
Specifications subject to change without notice.
System
Usable disc
Sampling frequency
No of quantization bits
Frequency
Number of channels
S/N Ratio
Compact disc audio system
Compact disc
44.1KHz
1bit
5-20,000Hz
2 stereo
70dB
AM (MW)
Frequency Range
Intermediate Frequency
Usable Sensitivity
Stereo Separation
S/N Ratio
Frequency Range
Intermediate Frequency
Usable Sensitivity
S/N Ratio
87.5 - 107.9 MHz
10.7 MHz
Better than 15dB at S/N 30 dB
25 dB at 1KHz
50 dB
530 - 1710 KHz
450KHz
Better than 45dB
40 dB
RADIO SECTION
FM
Page 14 Page 15
Pressing the MP3 Search Button once will turn on track search mode, the LCD will show “TRK SCH”. If no
action is taken for about 5 seconds, normal play will resume.
At Track Search mode, press Enter Button once, the display will show “001”, use Volume up/down Control to
select the desired track.
The track number can be either 1-digit, 2-digit or 3-digit. They are selected by the following procedures.
A. 1-Digit track number
After selecting the desired track number, press Enter Button for more than 1 second to confirm,
playback will start.
B. 2-Digit and 3-Digit track number
Enter the left-most digit first (for example, if the track number is 123, enter “1” first, following by “2” and
“3”), then press Enter Button for less than 1 second to shift the number by one digit, repeat this
procedure until all digits has been entered. Long press Enter Button for more than 1 seconds to start playing.
If a wrong track number is entered, press AMS button to clear the digits. Then enter the correct number.
2. Searching by track
While the LCD is showing “TRK SCH”, press MP3 Search Button one more time, the LCD changes to “FILE
SCH”, the unit is at Folder Search mode, if no action is taken for about 5 seconds, normal play will resume.
At Folder Search mode, press Enter Button once, the first folder will be shown, use Volume up/down Control to
scroll through all folders. When the desired folder is found, press the Enter Button long to start playing the first
track under selected folder, or press the Enter Button short less than 1 seconds to display the tracks or folders
under this folder. Repeat this procedure to navigate through the folders up to 8 levels deep.
During folder search, not only folders are shown but also the tracks, but they can be easily identified because
they have their own icon display on LCD.
3. Searching by folder
This model also has song name (character) search function for MP3 disc playback, Press
MP3 search button three times until “CHAR SCH” is shown on display, then press Enter
button once, character “A” blinks, use volume up or down to select desired character (1st
letter), press Enter button to confirm your choice and second character “A” blinks to select
other letters (max, 8 characters). After entering your song name, press Enter button more
than 1 second to start the search. If no such song, “NOT FND” will be shown.
4. Searching by character
ID3 TAG
Press BAND button repeatedly to Display ID3 TAG information.
If the MP3 file is available with ID3 TAG, pressing the BAND button repeatedly will show information
in the following sequence:
FILE NAME > FOLDER NAME > SONG TITLE> ARTIST> ALBUM TITLE
If any of the ID3-TAG information is not available, pressing the BAND button repeatedly will only show
The FILE NAME & FOLDER NAME of the MP3 file and will scroll repeatedly through the display during
the playing of the MP3 file.

Page 16
10.SCHEMATIC DIAGRAM
1 2 34
A
B
4
D
C
321
D
C
B
A
L-AUX
L-INL-OUTLI-BAS
RI-BAS
RO-BAS
RR
LRRFLFD-GNDSDA
SCL
LO-BAS
L-RA L-CDP
L-LOUD
R-AUX
R-RA
R-CDP
R-LOUD
R-OUT
R-IN
R-TREL-TRE
GND
VDD
CREF
98765432114 13 12 11 10
15 16 17 18 19 20 21 22 23 24 25 26 27 28
IC401
TDA7313D
3K3
R408
3K3
R409
4K7 R403
R402
4K7
R401
68 1/2W
R423
470K R422
2K2
C404 104
C403 272M
272M
C402
224 C414
C413
224
224 C412
C411
224
C408 104
1uF
C405
10UF EC409
10UF EC406
4u7
EC404
EC402
22uF
4u7 EC405
10UF EC408
10UF EC407
1uF
C409
123
8765
4
IC901 NM4558M
R907 22K
R905
22K
22k
R911
R909 22K
R903
100
EC902
4U7
EC906
10uF
EC905
4u7
EC904
4u7
EC907
10UF
EC903
100uF
EC901
4U7
R904
22K
R913
22k
R908 22K
22k
R910
R906 22K
R912 22k
76
381
4
5
2
CON1
CDC CONN.
NC
R
L
R711
120K
R717
120K
C705
1UF
C718
1UF
C703
1UF
C707
1UF
R712
120K
R706
4K7
R4K7074
R710
120K C708
102
C711
102
C704
102
C706
102
C701
104
R503
10K
Q402
9014C
Q401
9014C
C415
104
R424
1K
R4271K
R426
470K
R434
2K2
10K
R421
10K
R425
EC411
47uF
R714
2K2
R703
4K7
R705
4K7
R707
4K7
R708
4K7
R701 12K
C401 104
R915 22
Q113
9014C
Q112
772
R186
12K
2K2
R184
47
R501
EC502
100UF
16
9
8
7
4
20
11
12
17
15
18
19
14
21
13
24
23
10 16
5
22
2
3
IC701
TDA7384
C710
474
R713
10K EC713
1UF
123
8765
4
IC501 NM4558M
R517 120K
R518 120K
R519 120K
R520 120K
R505
47K
12K
R502
R506
39K
C501
104
C503
100P
47UF
EC503
EC501
100UF
Q90 5104 1C
474
C502
R709
4K7
C702
3U3
ZD901
5.6V
R702
4K7
R/RF/R
R/L
F/L
C421
472
C420
562
R504
39K
Q701
9014G
3K3
R715
EC703
100UF
Q502
9014C
R510
2K2
R508
1K
EC108
10UF
C406
4U7
C410
4U7
Q702
9014G
Sub-W
R507
100
R914
22K
1
2
3
4
5
6
7
8 9
10
11
12
13
14
15
16
IC201 BU1923
QUAI
RDATA
VREF
MUX
VDD1
VSS3
VSS1
CMP T2
T1
VSS2
VDD2
XI
XO
NC
RCLK
EC201 2U2
C206 25p
C205
560p
XT201
4.332MHz
C203
56P
C202
56P
C201 104
EC203
47uf
R201
470 1/4W
ZD301
2V0
Q317
882
C310
102
R338
10 1/4W
R337
470 1/6W
Q314
9012G
R336
2K2
R335
10K
R334
1K
Q316
9014C
Q315
9013G
8K2
R428
R429 8K2
C423
472
C422
562
Q306
9014C EC303
4u7
C204
330p
R301
1K R302
1K2
Q301
9014C
D301
IN4148
R306
10K
R305
12K R310
3K3
R311
10K
R308
10K
R309
47K
Q305
9014c
Q303
9015c
Q304
9015c
VR301
10K
R304
10K
ZD201
5V1
1UF
C407
R414
4K7
R412
15K
R415
4K7
R413
15K
C426
104 R420
1K
C418
1UF
22K
R823
EC802 10UF
EC803 10UF
Q902
9012G
R917
12K
R916
1K
Q901
9014C
BIN F/R-F/L+F/R+F/L-R/R+NCR/R-ANT
NC
P GND
R/L+
R/L-
F LIME L
ACCINF LINE R
GND
R LINE R
R LINE L
R185
680
Q107 772
Q108
9014C
R177
12K
R176
680
21
3
OUT
GND
IN
IC103 KA7808
EC103
100UF
C122
104
R161
560 1/4W
Q105
882
ZD104
3V9
EC109
47UF
Q109 9013G
R179
3K3
R178
47 1/4W
ZD101
5V6
EC106
47UF
C124
102
EC105
47UF
EC504
1UF
RL
RR
FL
FR
R730
47K
R727 47k
R726 22K
R725
100
EC708
22uF
EC707
100UF
EC706
100uF
EC705
22uF
R732
220
R723 2K2
R721 22K
R722 47k
R731 220
R728 2K2
R72022K 47K
R724
Q704
9014C
Q705
9014C
R733
2K2
R734 2K2
R735
3K3
4321
5678
NM4558
IC702
R729 22K
R736
3K3
R749
47K
R746 47k
22K
R745
R750
100
EC712
22uF
EC711
100UF
EC710
100uF
EC709
22uF
R752
220
R743 2K2
R741 22K
R742 47k
R751 220
R747 2K2
22K
R740
R744
47K
Q706
9014C
Q707
9014C
R753
2K2
R754
2K2
R755
3K3
4321
5678
IC703 NM4558
R748 22K
R756
3K3
RL
FL
FR
RR
MUTE
Q703
9014C
MUTEMUTE
CDCL
CDCR
R-CD
L-CD
A/L
FM BAND
LOC
RDATA
FMOSC
AMOSC
RCLK
R410
390K
R411
390K
AUX-L
AUX-R
R183
560 1/6W
D147
IN4148
L701
EI-14
D701
IN4001
D702
IN4001
EC104
10UF
R716
3K3
RA-L
RA-R SMETER
RDSRFIF AFAMVT
MONO
AMOSC SDRA+
AM LOC
FM+
AGC
AM/LW
AM+
123456789 11 13 16 17 18
12 15
14
10
GNDFMLOC
19 20 21 22
GND
GND
FM OSC
FM VT
CN201 TUNER008
EC401
100UF
Q110
9012S
Q111
9014C
R182
1K
10 9
8
7
6
6
7
8
9
FUSE
20PIN SOCKET
5
4
3
2
1
CN701
20PIN-SOCKET
R314
10K
Q302
9014C
S GND
Q312
9018S
R331
100K
R332
220
AM+
AM+
AMOSC
C118
103
R307
X
1
2
3
4
5
6
7
8
9
10
11
12
13
14
15
16
17
18
19
20
21
22
23
24
25
26
27
28
29
30
31
32
33
34
35
36
37
38
39
40
41
42
43
44
45
46
47
48
49
50
51
52
53
54
55
56
57
58
59
60
61
62
63
64
65
66
67
68
69
70
71
72
73
74
75
76
77
78
79
80
81
82
83
84
85
86
87
88
89
90
91
92
93
94
95
96
97
98
99
100
IC101
DSC790NRF
1
2
3
4
5
6
7
8
9
10
11
12
13
14
15
16
17
18
19
20
21
22
CN102
22PIN
AMIF
VSSPLL
AMVOC
FMVOC
VDDPLL
VDD
NC
NC
NC
NC
NC
NC
NC
NC
NC
DIN5/SP/CONTRO
DIN6/USB_RST
DIN7/51F_RST
DIN4
DIN3
DIN2
DIN1/WOOFER
DIN0/AUX ON
DSCN3
DSCN2
DSCN1
DSCN0
DSCN4
POWER
MUTE
W-LED
ACCIN
CDEJ
TEFMUTE
CCW
EVRCLK/PIC-CLK
EVRDAT/PIC-DAT
USB_CLK
USB_DATAO
USB_DATAI
USB_READY
SSP_SENS
DSP_SENS
9279_MCS
CDPON
CLMTR
OPMTR
MCLK
MDAT
MLT
XRSTCLSW
G/LDSENS
G/EJSENS
LMTSW9279MADDR/MP3 MLT9279 MDATAO/MP3MDATAI9279MRD/MP3 MDATAORESET9279 MWE/MP3CLK
VDD
VSS
XOUT
XIN
GND
GND LCD INHLCD DOLCD CLKBEEPAVDDLCDCEUSB INCL/OP SWNC SDINEQIN RKIN 1KIN0
CDC ON
CDC DATA
SCOR
DECINT
CDPS/W
CW
REMO
RDS CLK
RDS DATA
LOC
STIN
ST/MONO
AF-MUTE
BAND1
BAND2
AGC
VDD
EQ0
EQ1
VDDPLL
FMIF
R139
33K
R138 4K7
R321
100
Q307
9014C
Q308
9014C
Q309
9014C
C302
103
R318 1K5
R317
150
D302
IN4148
EC301
0.47UF
R316
1K
R319 470
R320 1K
R8K3224
R322
2K2
Q310
9014C
Q311
9014C
C305
104
R323
1K
EC302
47UF
Q103
9014C
FMOSC
R170
100K
C306
103
C116
102
C115
220P
R141 2K2
AGC
AFMUTE
AFMUTE
LOC
AGC
VCC5V 1
2
3
4
5
6
7
8
9
10
11
12
13
14
15
16
17
18
19
20
21
22
23
24
25
26
27
28
29
30
31
32
VCC8V
VCC 3V3
R-CH
AGND
L-CH
GND
SCOR
3-DATAO
3 DATAI
MP3MLT
LIMITSW
LD S
EJ S
CLSW
XRST
MP3CLK
MLT
MDATA
MCLK
OPMTR
CLMTR
MCS
DSP S
SSP S
DECINT
S/P CON
5IF RST
U_RDY
U_DTAI
U_DTAO
U_CLK
Q102
9014C
Q101
9015C
R131
10K
R132
680
R135
1K
CDP
CDP
CD+ 8V
R175
2K2
VCC3V3
CDRCH
CDLCH
MCOR
MCOR
MP3DO
MP3DO
MP3DI
MP3DI
MP3MLT
MP3MLT
LMTSW
LMTSW
LD S
EJ S
EJS LD SCLSW
CLSW
XRST
XRST
MP3CLK
MLT
MP3CLK
MLT
R101
0
1K R102
0R103
100 R104
1K R107
100 R108
100 R109
100 R120
1K
R121
MDATA
MDATA
MCLK
MCLK
OPMTR
OPMTR
CLMTR
CLMTR
MCS MCS
DSPS
SSPS
SSPS
DSPS
DET
DN5
USBDO
USBCLK
DN7
USBCLK
LCDCLK
LCDDO
LCDINH
USBDI
USBDO
USBRDY
LCDCE
R333
2K2
FMBAND
A/L
C311
104
R142 1K
RDATA
RCLK
REMO
CDCDA
R145
470
CDCON
R920
10K
REMO
LAMP+6V
KB+5V
LAMPGND
INH
DO
CLK
CE
CCW
CW
KEY 0
KEY 1
IC/SWGND
USB+5V
UDM
UDP
REMO
LAMP+
1K
R152 LCDINH
330
R153
1K
R154
1K
R155
LCDDO
LCDCE
CCW
CW
CW
USBDI
USBRD Y
KEY0
KEY1
KEY0
KEY1
9MHz
XT101
C105
22P
C104
22P
SDIN
SDIN
R193
4K7
C120
1UF
BUZ
BUZ
POWER
POWER
D101
AREA1
D102
AREA2
D103
AREA3
D104
FM ONLY
D105
EN LW
D106
EN OIRT
D107
AMIF-SD
D108
FMIF-SD
D109
DIS RDS
D131
AF level
D110
EN TA ALARM
D112
DIS USB
D113
DIS AUX
D114
DIS CDC
D115
DIS EON
D116
DIS CT
D117
ENPRIDE
D118
DIS CLK
D120
ITALY
D121
EN CD LAST
D122
DIS 2COR
D124
EN AUT-LOC
D125
DIS DISPCLK
D126
EN MULTI-VOL
D127
OIRT3 0K
D128
EN AUXK EY
D129
EN WER
D130
DIS KEY
DSCN4
DSCN3
DSCN2
DSCN1
DSCN0
DIN2
DIN5
DIN7
DIN7
DIN6
DIN5
DIN4
DIN3
DIN2
DIN1
DIN0
DSCN3
DSCN2
DSCN1
DSCN0
DSCN4
Q106 9015C
R164
10K R163
10K
R162
100K SW2
RESET
C108
223
ZD111
3V9
VR DA
VR CLK
VR CLK
VR DA
CDEJ
R165
10K
4K7
R140
MO/ST
MO/ST
CDCDA
CDCON
CD+8V
MU
MU
R511
1K
DN1
R192
560
R191
47K
3V9
ZD103
ZD102
5V1
R190
1K
C121
104
Q404
9014C
R436
220K
EC413
1UF
R440
8K2
C430
1UF
EQIN
EQIN
CD+8V
VCC3V3
CPU +5V
Y2
Y0
7
6
5
4
3
2
1
8
9
10
11
12
13
14
15
16
Y
Y1
Y3
INH
VEE
GND
B
A
X3
X0
X
X1
X2
VDD
IC801
CD4052
C801
104
EC801
47UF R813
1K
R804
10K
R808
10K
R807
R806 C802
C803
CDC SBY
CDCL
CDCR
R810
0
R805
0
33mH
L401
L402
33mH
EQ0
EQ1
EQ0
C111
104
C102
104
C103
104
EC107
4U7
R438
10K
L101
1UH
C110
104
WOOFER
222M
C431
C432 222M
R509 470
C101
104
Q802
9014C
R812
10K
R814
1K
R156
470K
R157
1M
C106
102
R8K1627
LED1 LEDN
C119
104
R180
4K7
R339
1K
EQ1
R757
B+14V
Q318
9013S
ZD303
10V
EC306
100UF
R303
220 1/6W
R315
100
ZD110
6V2
ZD109
6V2
ZD108
6V2
ZD107
6V2
ZD106
6V2
REMO
LCDRST
LCDDO
LCDCE
LCDCLK
C112
104
C107
102
SW1
E/USW
EURUSA
LCDCLK
C109
104
C804
104
R137
100K
21
3
OUT
GND
IN
IC102 KA7808
D149
IN4001
D148
IN4001
B+14V
LAMP+
EC305
47UF
ZD302
8V2
BIN+14V
R435
82K
R5K4317
R439
10K
D150
IN4148
EC412
47UF
USB IN
CCW
CDEJ
CPU +5V
USB_IN USB IN
R151 100
EC702
47UF
EC701
2200UF
A B=1
(AUX)
A B=0
(CDC)
R803
0
R809
0
33
EC110
47UF
R205
1K
EC307
2U2
R811
47K
R188
X
R169
22K
R168
22K
R312
1K
EC403
2U2
CDCSBY
CDCSBY
R718
100K
OPTIONAL
OPTIONAL
OPTIONAL
OPTIONAL
OPTIONAL
C208
104
C207
104
DIN0
DIN1
DIN3
DIN4
DIN6
R115
1K
R119
1K
Q115 9015C
R117
4K7
R10 10 1K6
Q118 9015C
R198
4K7
R197
100K
CPU+5V
CPU+5V
DN1
DN5
DN6
DN7
USB G
SDCLK
SDCMD
SDDAT0
SD DET
SDDAT3
DN6
B+14V
CN101
33PCD
R158
100
D123
MULTI
R521
220
C123
104
C125
104
D151
IN4148
123
8765
4
IC802
NM4558B
22K
R831
R822 22K
R821 22K
R827
22K
22K
R825
R82422K
R829
22K R828
22K
EC805
10UF
EC804 47UF
R826 22K
R820
22K
EC806
47UF
EC807 4U7
EC808
4U7
R830 100
Q114
9012S
R149
22K
R150
10K R148
1K
R181
47K
EC101
22UF
EC102
100UF
C131
x
1234
CON
OUT
GNDIN
IC104 78R05
C113
103
C103
104
R523
1K
R522
10K
Q503
9014C
D501 IN4148
EC714
4U7
E4UC7715
EC717
4U7
EC716
4U7
C504
104
EC414
100UF
R441
100R
ZD401
9V1
R110
2K2
C309
104
R112
100K
R105
100K
R113
X
R114
X
8
7
6
5
4
3
2
1
CN03
8P
C114
103
LA2
CD EJ
LA1
CD
R123
470
R681 022
SW1
CD EL
AUX G
R901
220
R106
1M
R313
22K
R118
100
L101
4.7uH
C307
223
C308
104
R325
1K
R125
10K
R126
4K7
C133
103
C130
103
C209
104
AUX/CDC OPTIONAL
SUB_WFER
D152
IN4001
ON/OFF
CDC ONLYAUXONLY
CDC+AUX
10
R810 R809
R805 R803
R809 R810
R803 R805
R810
R805
R809
R803
Q504 9014S
R524
47K
EC505
100UF
D502
IN4148
EC506
4U7
R526
100K
R204
IN4001
This manual suits for next models
1
Table of contents
Languages:
Other Premier Car Receiver manuals

Premier
Premier SCR-2070TFT Operating and maintenance manual

Premier
Premier SCR-29MP3 User manual

Premier
Premier SCR-1510 User manual

Premier
Premier SCR-0471MP3 User manual

Premier
Premier SCR-5381USDR User manual

Premier
Premier SCR-60 User manual

Premier
Premier SCR-4709TVD User manual

Premier
Premier SCR-513TFT User manual

Premier
Premier SCR-5552USID User manual

Premier
Premier SCR-4710TVD User manual