Premier HTS 800 User manual


Thank you for choosing the Premier HTS 800 / 400.
The bloodlines of the HTS 800 and HTS 400 can be traced back
across the decades with an impeccable championship winning
pedigree and a spirit that harkens back hundreds of years. To
create the latest incarnaon of the HTS pipe band drum Premier
has taken the proven DNA of its predecessors and engineered
further improvement in operaon, performance and design and
once again achieved new standards in sound and build quality.
No other pipe band drum delivers the dynamic clarity, precise
arculaon, clear projecon and full tone of the HTS 800 and
HTS 400 that in your hands are proud addions to the family and
will carry the Premier name and the names of future champions
to victory for years to come.
Please take me to read the enclosed guide; whilst the ulmate
seng of this musical instrument will be up to the individual
player there are universal principles that will ensure it will
connue to perform for years to come.
CARE AND MAINTENANCE
Like any precision engineered instrument the HTS 800 / 400 will
perform at its best when looked aer, kept clean and serviced
regularly.
LUBRICATION
Keeping certain parts of the drum lubricated will ensure smooth
operaon and long life; Lithium Grease or similar is recommended
as it has increased resistance to changes in humidity and
temperature, although there are many lubricants that will suit;
simple motor oil will do the trick in an emergency.
Ensure ALL tension bolts are kept well lubricated, along with the
snare height and tension adjustment bolts on the boom mechanism
and threaded parts of the top internal mechanism. It is not
necessary to apply lubricant to the sliding blocks in the internal
mechanism as these are self-lubricang.
MOISTURE
The instrument is designed for outdoor use but it is important to
keep dry where possible and always dry off aer use and before
storage. Stainless steel, chrome and polished aluminium may
oxidize and tarnish if not properly cared for. Keep a small towel
to hand and make sure you always put away dry. Excessive
exposure to moisture can cause heads to de-laminate.
CLEANING
The shell and metal work may be cleaned using commonly
available household cleaning products such as furniture polish.
DO NOT USE ABRASIVE CLEANERS,CUTTING COMPOUND
OR BLEACH.
If in doubt consult the cleaning product manufacturer and test
a small inconspicuous area first. The hoops, rings and shell are
lacquered therefore over use of cleaning products could
gradually wear away this protecve layer.
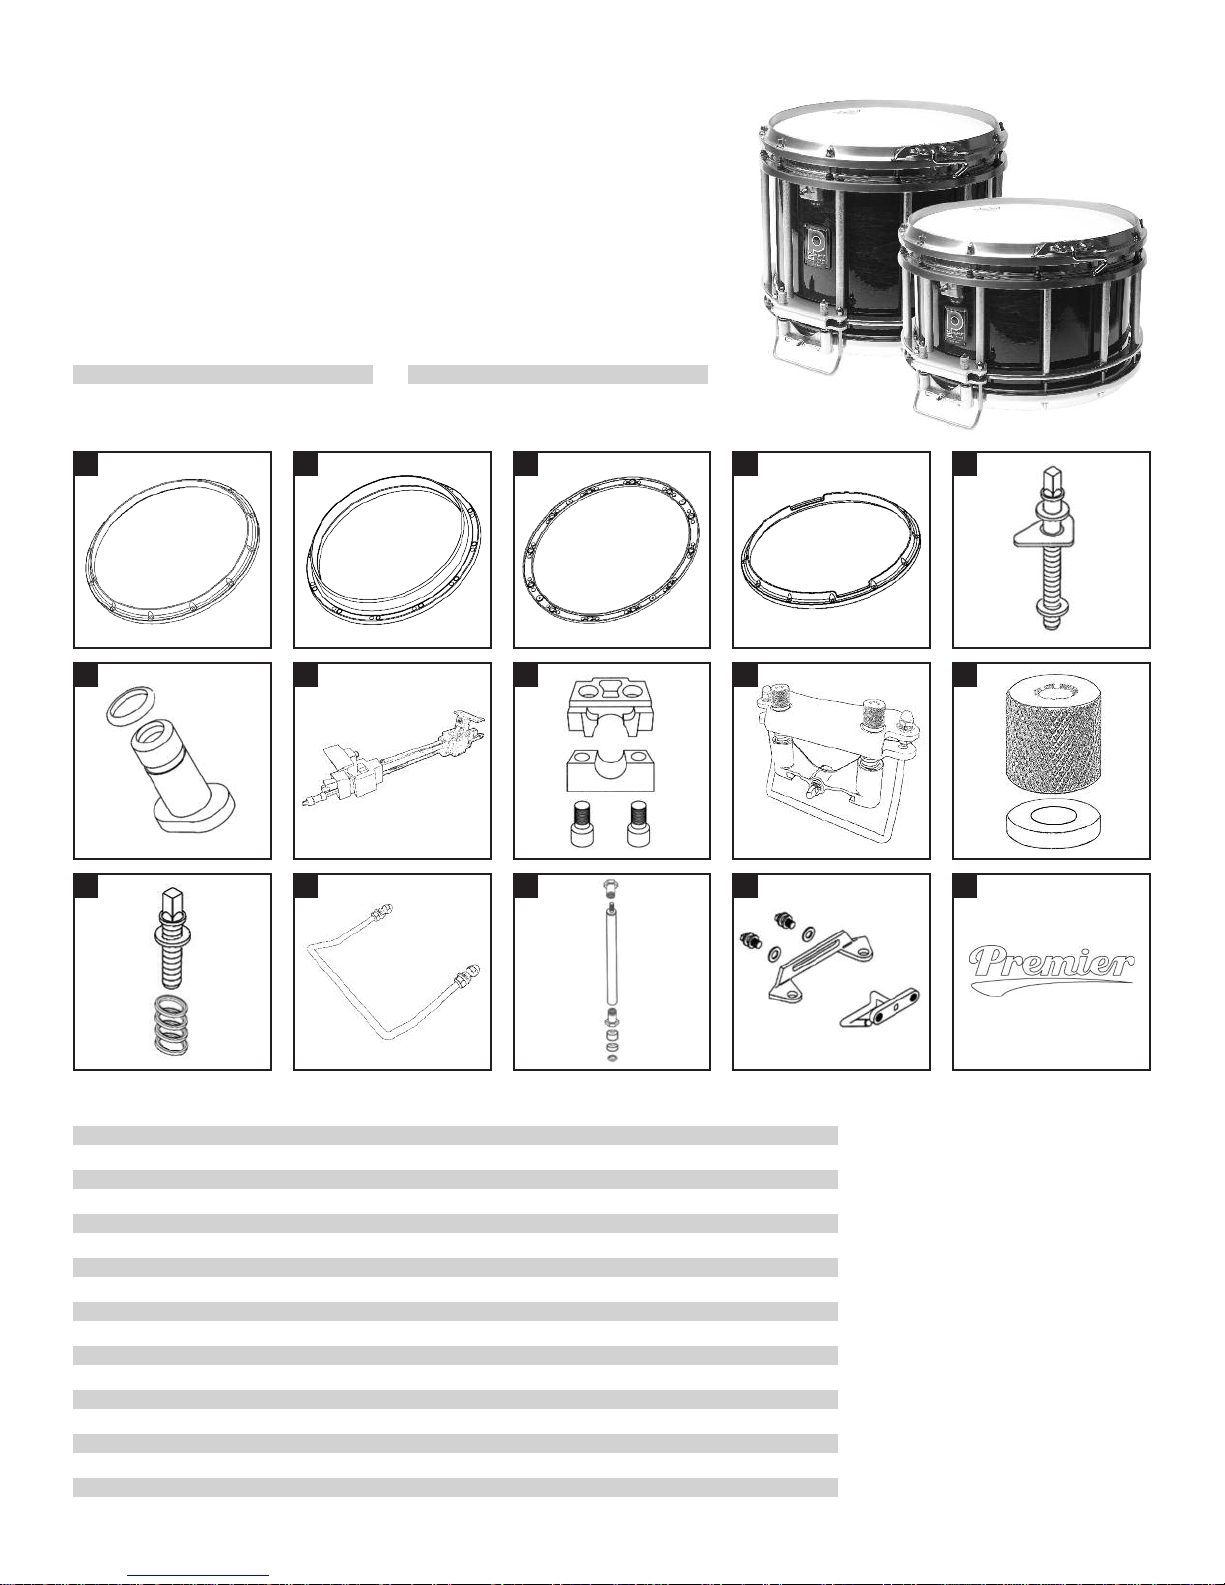
CHANGING HEADS AND WIRES
Always use Premier sized heads (there are many heads available
on the market; please consult your retailer for suitability of
parcular heads). Snare wires are available from your retailer
and should be changed periodically, depending on personal
preference and amount of use. Where possible change all heads
and wires in the corps together as this will make it easier to set
the drums to sound similar.
STORAGE
Always store the instrument in a protecve bag or case, taking
care to store where temperature and humidity are fairly
consistent. Heads are parcularly sensive to changes in
temperature and may burst if tension is applied when the
instrument is stored in a locaon of changeable temperature.
REGULAR CHECKS
When you remove the instrument from storage always check
the tension and height adjustments on both snare strainers and
of all tension bolts. Sympathec vibraons will somemes work
tension bolts and snare wires loose. The small rubber ‘o’ rings on
the tension bolts are designed to hold the bolt in place even if it
works loose, so take care not to lose these.
TENSIONING AND SETTING
The instrument is designed to arrive requiring only minor
adjustments to head tension and snare seng to be ready to
play. The following points should be considered a guide; every
drummer is different, and the HTS 800 / 400 is versale in the
way it sounds. Take me to understand the seng of the drum
and it will provide years of playing pleasure.
HTS 800 / 400
Hig -Tension Snare Drums

1 2 3 4 5
6 7 8 9 10
11 12
Ref Part No De cription Quantity per Pack Quantity per Drum
0800 0400
1800/10 HTS Batter Hoop / Die-cast, Polished 111
2800/09 HTS Suspension Ring / Die-cast, Polished 111
3800/18 HTS Intermediate Ring / Die-cast, Polished 111
4800/11 HTS Snare Hoop / Die-cast, Polished 111
5044190C HTS 50mm Tension Bolt 6 24 24
6700/21 HTS Tension Bolt Insert 6 12 12
7800/02 HTS Top Snare Strainer 111
8800/50 HTS Top Snare Retaining Block 222
9800/04 HTS Bottom Snare Strainer 222
10 800/66 HTS Bottom Snare Adjuster Nut 444
11 800/68 HTS Bottom Snare Tension Bolt 422
12 800/67 HTS Snare Guard 222
13 700/13SBA HTS 12” Down Tube 2 12 -
350/13SBA HTS 7” Down Tube 2-12
14 700/08 HTS Carry Hook 111
15 700/68 Premier Logo 180mm Decal / Metallic Silver 21-
350/68 Premier Logo 115mm Decal / Metallic Silver 2-1
Drum eads Code
14” Premier Cybermax Head 8337C
14” Ambassador Snare Head 8E1214
Snare Wires Code
HTS Top Snare Wire 0677
HTS Bottom Snare Wire 0678
13 14 15
Replacement spares and accessories are available from your local Premier
dealer. This informaon serves as a guide for commonly requested parts owing
to natural wear and tear.
Be sure that any replacement parts are o cial Premier products. The code for
each of these can be found below. We do not recommend fing third-party
parts to this instrument.
Spares & Accessories

When replacing your drumheads, always take care and aenon to ensure it is fied
correctly.
ALWAYS:
•SEAT THE DRUMHEAD AND BATTER/SNARE HOOP CORRECTLY FOR
OPTIMUM PERFORMANCE.
• KEEP THE TENSION BOLTS LUBRICATED.
• APPLY CAREFUL AND EVEN TENSION TO ALL TENSION BOLTS. UNEVEN
TENSION MAY CAUSE BREAKAGE.
THE TENSIONING OF DRUMHEADS MAY TAKE A FEW DAYS TO REACH MAXIMUM
PERFORMANCE; DO NOT RUSH THE PROCESS OF FITTING AND APPLYING TENSION TO
HEADS.
CHANGING A DRUMHEAD
1 Wipe the bearing edge with a clean dry cloth.
2 Replace the head and BATTER/SNARE HOOP and apply gentle, even tension using
the opposites method (illustraon 1.1).
3 Tap the head lightly, approximately 1’’ (25mm) from each tension bolt to ensure
a similar pitch at each point and make sure wrinkles gradually disappear. The head
should resonate and ‘speak’ clearly.
4 Place the palm of your hand in the middle of the head and place your other hand
on top (illustraon 1.2) and press down gently with the weight of your body. You may
here a ‘crack’ or ‘pop’. This helps to seat the head within the hoop and on the bearing
edge.
BOTTOM HEAD
5 Apply further even tension unl the boom head sounds ‘right’. You will achieve
the best snare response with a relavely ght head; some experience and trial and
error will help you determine what works for you.
TOP HEAD
6 Slowly take the drumhead upto the required pitch by turning the tenion bolts a
maximum of 1/8 of a turn as the tension increases. This will take me but produces
more effecve results.
7 To check that tension is being applied evenly, we recommend to use a tuning
block, or by using the bu end of a drumsck, to gauge the gap between the BATTER
HOOP and SUSPENSION RING (illustraon 1.3). You may also look at the SUSPENSION
RING inserts to gauge how far through the tension bolt are traveling; this will help you
understand how much tension is being applied at each point. The use of a torque
device is not recommended.
8 It will take a few days to apply the desired tension to the top head and it is crucial
to not rush this process.
1.1 T e opposites met od for even tuning of
t e drum ead
1.2 Applying pressure to t e middle of t e
drum ead
1.3 C ecking even tension wit t e bu end
of a drumsck
Replacing Drumheads

Seng the snare wires is as important to the overall sound as the tensioning of the
heads.
BOTTOM SNARE WIRES
1 Locate the boom snare wire correctly on its retaining pins (illustraon 1.4) and
adjust the tension on both sides unl you have taken up the slack. Ensure the snare
wire is located centrally; this will give the most flexibility in adjustment.
2 For the perfect response, the boom snare wire must achieve maximum contact
with the head. Turn the BOTTOM SNARE ADJUSTER NUTS (illustraon 1.5) in pairs
to adjust the height of the snare wire.
3 Gauge the amount of contact visually and then tap the wires gently as you adjust
them to make sure of full contact across the head.
4 Finally adjust the tension to achieve the desired sound. Too much tension on the
boom snare wire will choke the sound; too lile will cause excessive buzz and rale
and may allow the wires to disengage totally.
TOP SNARE WIRES
The TOP SNARE STRAINER features two external tension bolt adjustments; for height
and tension. These are indicated by the sckers on the shell of the drum.
1 Check that the top snare is located correctly on the TOP SNARE STRAINER
(illustraon 1.6). Set the snare wire into a neutral posion by dropping the height of
the snare unl it sits free. Also loosen the tension (illustraon 1.7).
2 Start with the tension of the snares. Apply gentle tension unl you can feel light
resistance. Holding the drum key loosely will allow you to feel the wires take up
tension.
TAKE CARE NOT TO OVER-TIGHTEN THE SNARE WIRES
3 Adjust the height of the snare wire unl it makes good contact against the baer
head. An even contact is required, too much or too lile contact will affect the
response.
THE ABOVE IS A GUIDE TO THE BASIC SETTING OF THE SNARES. FURTHER FINE
ADJUSTMENT MAY BE REQUIRED; TAP THE DRUMHEAD WITH THE STICK HELD
LOOSELY AND ADJUST ACCORDINGLY TO ACHIEVE THE DESIRED SOUND.
1.4 Locate t e boom snare wire correctly
on its retaining pins
1.5 Turn t e BOTTOM SNARE ADJUSTER
NUTS to alter t e eig t
1.6 Locang t e top snare on t e TOP
SNARE STRAINER
1.7 TOP SNARE STRAINER eig t
adjustment (s own wit s ell removed)
Setting the Snares

Premier Music International Limited
Premier is dedicated to creang percussion instruments of only the highest possible quality. Because we are con-
stantly improving, updang and introducing new products, and because we also may be subject to material changes
outside of our control, we reserve the right to change product specificaons as necessary without prior noficaon.
Premier Music International Limited
Kibworth Business Park, Kibworth Har ourt,
Lei estershire, LE8 0EX, UK
Tel: +44 (0)116 279 1444 Fax: +44 (0)116 279 1241
Email: info@premier-per ussion. om
© 2009 Premier Musi International Limited O/M HTS.0609
Premier is dedicated to creang percussion instruments of only the highest possible quality. Because we are constantly
improving, updang and introducing new products, and because we also may be subject to material changes outside
of our control, we reserve the right to change product specificaons as necessary without prior noficaon.
Models covered by t is manual:
HTS 800 (0800)
HTS 400 (0400)
This manual suits for next models
1
Table of contents
Other Premier Drum manuals