Premier HV 13 User manual

Operating Instructions
Mode d’emploi
Bedienungsanleitung
Gebruiksaanwijzing
Instrucciones de funcionamiento
Modo de usar
Istruzioni per l’uso
HV 13
HV 15
HV 17
Premiere Products
2-9
10-17
18-25
26-33
34-41
42-49
50-57

2
Introduction
Premiere launched the first of its extensive range of floorcare products over 70 years ago.
Its first range of cleaning and maintenance machines came onto the market in 1966 and
are now second to none for efficiency and design. For literature covering the complete
range of both wet and dry vacuums and rotary polishers please ring our head office in
Cheltenham.
Quality Control Procedures
Theinspectionofcomponentpartsandfinishedmachinesisgovernedbydetailedperformance,qualityand
electricalsafetyspecifications.Testresultsare recordedandallquality assurancesystemsandrecords are
approvedandinspectedby The British Standard Institution in accordance with:-
BS EN ISO 9002 : 1994
Approvals
Detailsof certificationsapplicableto individualmodelsaregiven intheSalesBrochurewhichisavailable
uponrequest.
British Standards Institution
B.S.5415
Parts 1 and 2
230 volt models
R.W. TÜV e.V.
tested to V.D.E. 0700
Part 1/2.81 and
part205/2.87
Certificate No. FM 1933
QAS34/228
Machine Care
Themanufactureofsafeanddependablemachineryisnotsimplyaquestionofcheckingproceduresatthe
endofthe production line. It isreliantupon in-built quality at designstageand rigid control on thespecifica-
tionofeverycomponentpart.
Asowner/operatorofaPremieremachine,continuedreliabilityandperformancenowdependsuponthe
caretaken in keeping yourmachine well maintained.
•Theplug of the supplycordshallberemovedfrom the socket-outlet beforecleaningtheapplianceor
undertaking maintenance operations.
•Thepowercordhas to be regularly inspected for signs of damage.Ifthepowersupplycordisdamaged,it
has to be replaced.
•Afteruse,thewholemachine,includingthecable,shouldbecleanedwithaDAMPcloth using a dilute
solutionofPremiere M.P.9. Multi-purpose cleaner.Allsurfaces should then be polishedwitha clean duster
untiIdry.
•DONOTuseaciddescalers,abrasivesorpowerfulsolventssuchaspaintstrippers,whichmayscratch,
etch or dull surfaces.
•Padsandbrushes should be washed immediatelyafteruseinasolutionof M.P.9 Multi-purpose cleaner
and hot water.
•Rinsethoroughlyand allow to drip dryatnormalroomtemperature.Accessoriesclogged with spirit based
solventwaxshould be scrubbed cleanusingPremturps or Premiere W.S. 70waxstripper in accordance
with instructions given on the product label.

•Storeinadry place.
•Toensureefficientmotorcooling,theairintakearoundthechrome motor cover should be kept clear of dirt,
dust and fluff using a dry brush.
•Leavingyourmachinestandingonbrushes,driveplatesorpadswhennotinuse,evenforshortperiods,
willdistortand damage the accessoriesanddestabilisethemachinein operation.
•Continueduseduringavoltagereductionwillcauseoverheatingandmayresultinthemotor burning out. If
anoticeable drop in voltagesupply occurs, it isadvisable to switch offand investigate.
•Heelingthe machine whilst inoperationbyraisingorlowering the handle excessivelyinordertoincrease
thepressurebetweenthebrushorpadandthefloor,candamageboththemachine and the floor covering.
Warning
Theplug shouldnotbesubjected tounduestressby pullingonthesupply cord.
3
Important
Thespecificationchartdetailswhichmodelsareavailableforalternativepowersuppliesi.e.220v,110v,
50Hzor60Hz.Sinceadifferentplugandfuseratingmay be required it is essential to specify the power
supplywhenorderingyour machine.
6Ifthe plug fitted totheapplianceisnotcorrect for your socketoutletsitshouldbecutoff and the correct
plugfitted.DESTROY the removed plugwhichwill be dangerous if pluggedintoa live socket.
7Formouldedplugs,replacement fusecoversmust bethesame colourastheoneoriginallysupplied.
NEVERusewithfuse cover omitted.
Cables and Extension leads
Eachmachineis designed for use withaspecifiedcable.Similarlythespecification and length of any
extensionleadiscriticaltothe safe and efficient operation of all Premieremachines.Westronglyadvisethat
onlycablesandextensionleadssuppliedbyPremiereareused.
SeeGuaranteesectionon page 8.
Before Use
1Checkthatthevoltagestampedonthe serial plate is the same as
yoursupplyvoltage.
2Thewiresin the mains lead of theseappliancesarecoloured in
accordancewiththefollowingcode:Greenandyellow:Earth/
Blue: Neutral /Brown:Live.
3Asthecoloursofthewiresinthemainsleadsoftheseappliances
maynotcorrespondwith the coloured markings identifying the
terminalsin your plug,proceedasfollows:
Thewirewhichiscolouredgreenandyellowmustbeconnected
tothe terminal in theplug which is markedwith the letter Eor by
theearthsymbol,orcolouredgreenorgreen/yellow.Thewire
whichiscolouredbluemustbeconnectedtotheterminalwhichis
markedwith the letter N orcolouredblack. The wire whichis
colouredbrownmustbeconnectedtothe terminalwhichis
markedwith theletterLor colouredred.
4A230Vpowersupplyrequiredtheuseofa 3-pinfusedplug.
5 Fuse rating 13 amp.
NBLUE
LBROWN
EGREEN & YELLOW
WARNING - The HV 13, HV 15 & HV 17 must be earthed.

4
1
2
Fitting/Removing Accessories
For all HV Models
1Tiltmachinebackwardssothathandlerestsonfloorandbaseof
machineisexposed-DIAGRAM1.
2Offerupaccessorysothattriangularformalignswiththatof
mating drive.
3Rotateaccessoryanticlockwisetosecure-DIAGRAM2.
4 Place machine in upright position.
5Rotateaccessoriesclockwisetoremovefrommachine.
WARNING
Theseapplianceshavebeendesignedforusewithaccessories
supplied by Premiere.
Thefittingofalternativeaccessoriesmayaffectbothsafetyand
performance.
To fit Anti-splash Ring - DIAGRAMS 3 and 4.
1Tiltmachinebackwardssothathandlerestsonfloorandbaseof
machineisexposed.
2Offerupanti-splashringensuringthatcut-outportion(A)withits
adjacentretainingbrackets(B)ispositionedatbaseofmachine.
3Slideringupwardsuntilretainingbrackets(B)locateoverbrush
guardatbaseofmachine.
4Pulltopofringforwardandlocateretainingbracket(C)over
brushguardattopofmachine.
5Fitaccessoryinnormalmanner.
6 Place machine in upright position.
7Beforeoperatingmachineensurethatretainingbrackets(B)and
(C)arelocatedoverbrushguard.
8Toremoveringreversefittingprocedure.
34
C
B
A
C
B
A

5
Fitting Solution Tank- DIAGRAMS 5, 6 and 7
1Removethreeplasticcoversandscrewsatrearofchromemotor
cover.Firmlyanchormountingblock(G)in positionusingthree
screwsprovided.
2Alignslotsinbracket(D)withinsertsinsideofmachinehandle.
Usingtwoscrewsprovidedlightlyclampbracketintoposition.Do
notfullytightenbracketatthisstage.
3Locatelowertankmountingbracketoverblock(G)onchrome
coverandsecurebypushingretainingpin(B)throughboth
sectionsuntillocked.
4Locateupperbracketaroundmachinehandleshaftandsecureby
pushingretainingpin(A)throughbothsectionsuntillocked.
5Connectplastictube(C)tofeedpoint(F)onmachinebase.
To fit Control Cable
6Screwconnector(J)ofcontrolcable(H)ontotankplungerrod(K)
andHANDtightenagainstfixedlocknut(L)-DIAGRAM6.
7Slidecableloopoverlefthandflowcontrollever(E)andlocatein
groove-DIAGRAM5.
8Slidebush(M)oncontrolcable(H) into slot in bracket (D) and
tightenhandnut(N)tosecure-DIAGRAM7.
9 With handle in the UPRIGHT position, lightly push bracket (D)
downuntilany free play incontrolcable(H)iseliminated. Firmly
tightenbracketscrewsandcoverscrewheadswithsnapcaps
provided.
Donotapplyexcessiveforcewhenadjustingbracketforfreeplay.
Note:IfyourmachinedoesnothavelocatingholesinsideOfhandle
oratrearofchromemotorcovertoenablefixingofeitherthecable
bracket(D)ortankmountingblock(G)pleasering01242243421
andspecifythemodelnameshownonthemotorcoverlabelandthe
serialnumberstampedontheserialplatelocatedonthebase
castingunderneaththehandlepivot.
Operating Solution Tank
1Alwaysfillsolutiontankinuprightposition.
2Theusefulcapacityofthetankforcalculatingdilutionrateswhen
mixingcleaningsolutionis 11 litres.
3Tooperate,gentlyraiseflowcontrollever(E)whilstmachineis
running.
4 To empty:
a.Disconnectplastictube(C).
b.Unscrewhandnut(N)andslidebush(M)oncontrolcable(H)
fromslotinbracket (D).
c.Slidecableloopfromflowcontrollever(E).
d.Removeretainingpins(A)and(B).
e.Unscrewcap,pouroutcleaningsolutionthenrinse.
5
6
7
E
D
H
A
B
C
F
G
H
J
KL
M
N
D
H

6
Operation of PV.4 Series
Proceedasfollows:
1 Ensure that handle is in upright position.
2 Selectandfitappropriateaccessory.
3 Operatecablestowagequickreleaseandremovecablefrom
stowage-DIAGRAM8.
4 Checkthat powersupplyisthe sameasthatstamped onthe
serialplateonthe machine.
5 Plugmachine into power socket.Check that neon lampon top of
handle is illuminated.
6 Standbehindandpresshandlepositioninglever(A)andlower
handletoacomfortableoperatingposition.Releaselever(A)-
DIAGRAM9.
Note:Thispositionmustbemorethan40degreesfromthevertical
forthepowertobeavailabletothemotor.
7 Withindexfingerspresson/offleverlockbuttonstounlockon/off
levers-DIAGRAM9.
8 Presseitheronbothoftheon/offleverstostartthemachine.
9 Ensurethatmains cable is well clearoftheareatobecleaned.
10Raiseandlowerhandletoguidemachinetotherightorleftas
required.
Note:Thisoperationdoesnotrequiremovementofthehandle
positioninglever(A).
Theresponseofthemachine,particularlythehighspeedmodelsis
extremelypositiveandit is inadvisable to attempt to guide the
machinebyoperationofthehandlepositioninglever(A).
11Oncompletionreleaseon/offlever.
12Operatehandlepositioninglevertoreturnhandletoupright
position.
13Removeplugfrompowersocketandstowcableoncable
stowage.
14Removeaccessory.
Pleasenote:flowcontrollever(B)isforusewithsolutiontankonly-
DIAGRAM9.
8
9
Operation of overload switch
- only fitted to certain High Performance Models
-DIAGRAM10
Shouldthemachinebesubjectedtoanoverloadconditionthe
overloadswitchwilltripout.Itcanberesetafterapprox.30seconds
bypressingtheREDbuttoninthecentreofthemachinehandle.
Themachinecanthenbeusedagainwithoutdelay.(Abadly
maintainedmachineandaccessoriesmayartificiallyinducean
overload-refertomachinecarePage2.)
10

7
Cleaning Methods
PremiereProductsmanufactureoverfiftydifferentcleaningandmaintenancechemicalsdesignedtocope
witheverycleaningtask.DetailedinformationontherangeandapplicationofPremierecleaningchemicals
andequipmentisavailablefromourlocalrepresentativeorheadofficeinCheltenham.
To Polish Floors
1Vacuumfloortoremovedirtanddust.
2Removeblackmarks,scuffmarksandsuperficialdirtusingspraycleaningmethodinconjunctionwitha
sprayunitand appropriatefloormaintenancepad.
3Operatemachineinasweepingactionbyraisingorloweringthehandle.Afinegradepolishingpadshould
beused.
To Burnish Floors
1Vacuumfloortoremovedirtanddust.
2Remove black marksandscuffmarks.
3Mix a solutionofemulsionpolishor recommended maintenanceproductinaspray unit andapplyafine
mist to a small area of floor.
4Operatemachineinasweepingactionusingtheappropriatefloormaintenancepad.Continueuntilareadry
thentreatthenextarea.
Servicing
AlthoughyournowPV.4shouldgive many years of trouble free operation, anannualservicebyourengineer
isrecommended to minimise the riskofan inconvenient and untimelybreakdown.
Shoulda fault occur,thefollowingcheckingprocedure may provideanimmediatesolution.
DONOTexceedthebasiccheckssuggestedhere.
Noliabilityisacceptedandboth the guarantee and approvals are invalidated ifrepairsarecarriedoutother
thanbya Premiere Products ServiceEngineeroranapprovedservice agent.
Ifaservice call is required ring01242243421 and specify the modelnameshown on the cmotor coverlabel
andtheserialnumberstampedonthe serialplatelocatedonthebasecastinglocatedonthebase casting
underneath the handle pivot.
If the machine will not start
•Theplug of the supplycordshallberemovedfrom the socket-outlet beforecleaningtheapplianceor
undertaking maintenance operations.
•Thepowercordhas to be regularly inspected for signs of damage.Ifthepowersupplycordisdamaged,it
has to be replaced.
•Ifneonlightisdullornotworking,replace fuse in plug, ensuring that it is held tightly by the fuseholder.
•Checkpowersupply from the socketbysubstitutinganotherelectricalappliance.
•Checkifoverloadswitchhastripped,if soreset.
Ifmotorrunshot andlackspower
•CheckairintakearoundChromemotorcoverisclear.

Iffusespersistentlybloworoverloadswitchconstantlytrips.
•Removeanyextensioncablesandtryagain.Ifthemachinethenoperatescorrectlypleasecontactour
servicedepartmentimmediatelyregardingthecorrectspecificationofextensionleadtobeused.
•EnsurePV.4modelinquestionisbeingusedinitscorrect role.SVR 15 MD Machines should not be used
forstrippingorscrubbing.motorworksharderrequiringmorecurrent.
•Anexcessivebuildupofpolish/dirtonthefloorproducesastickysurface.Toovercomethisdrag,the
motorworksharderrequiringmorecurrent.Thiscanblowfusesparticularlywhenusinghighvelocity
burnishingmachines.Stripawaypolish/dirtandretreatthefloorusingastandardvelocityscrubbing
machine.
•Dirtyorcloggedbrushesandpadscanproducethesameeffectandshouldbecleaned.
If machine unbalanced in operation
•Ifmachineisleftstandingonthebrushorpadtheycanbecomedistorted.Substituteanalternativeor
detachthedamagedaccessoryandallowittoregainitsshape.
•Brushesandpadsshouldbeaneventhicknessandtheaccessorychosenshouldbesuitableforthetask.
•Damagedorwornoutaccessoriesshouldbereplaced.
Guarantee
AllmachinesmanufacturedbyPremiereProductsMachineDivisionareguaranteedforaperiodofTWELVE
MONTHSfromthedateofpurchasebytheuseragainstallfaultsinmaterialsorworkmanship.Thisperiod
canbeextendedtoTWOYEARSprovidedaservicecontractistakenoutatthetimeofpurchase.
TheGuaranteeisnottransferable.TheliabilityundertheGuaranteecoverstherepairorreplacementofthe
machineorpartthereoffoundtobedefective.
Noliabilityisacceptedforinsignificantdeviationsfromnormalstandardwhichwouldnotaffectthevalueand
safeoperationofthemachineorfordamagecausedbychemicalorelectrochemicalactionofwaterorany
otherabnormalenvironmentalinfluences.Noliabilityisacceptedfordamagetoanycomponentcausedby
accident,misuse,neglectorthroughthemachinebeingoperatedonavoltageotherthanthatstatedonthe
serialplate.
NoproductliabilityisacceptedandbothGuaranteeandapprovalsareinvalidatedifrepairsarecarriedout
otherthanbyaPremiereProductsServiceEngineeroranapprovedserviceagent.
NoproductliabilityisacceptedandbothGuaranteeandapprovalsareinvalidatedifreplacementpartsother
thanthosesuppliedbyPremiereProductsareusedduringrepair.Theserviceengineeroragentisentirely
responsibleforensuringthefittingofthecorrectreplacementpartsappropriatetothemodelbeingrepaired.
Thedecisionastowhetherthecomponentpartormachinewillberepairedorreplacedrestsentirelywith
PremiereProducts.WheredefectivepartshavebeenrepairedorreplacedtheGuaranteewillnotbe
extendedbeyonditsoriginalterm.
AllfaultypartswhichhavebeenreplacedunderthetermsoftheGuaranteewillbecomethepropertyof
PremiereProducts.
ClaimsrelatingtodamagecausedtootherpropertyorpersonswillnotbeentertainedunlessPremiere
Productsarespecificallyrequiredtodosobylaw.
AnyclaimunderthetermsoftheGuaranteeissubjecttoprovisionofproofofpurchase.
NoliabilityisacceptedfortheuseorapplicationofPremiereProductsmachinery,outsidethespecific
recommendationsgiveninthecompany’sprintedpublications.
NoliabilityisacceptedbyPremiereProductsforanyadvicegivenbydistributorsorserviceagentswhich
exceedsthespecificrecommendationsgiveninthecompany’sprintedpublications.
Wecontinuetoreservetherighttoalterthedesignsofanyproductsaspartofafurtherprocessofimprove-
ment,anditemssuppliedmaythereforevaryfromthoseillustratedinthispublication.
8

HeaIth and Safety at Work Act 1974
Part1Section6OftheActrequiresthatmanufacturersensure,insofarasisreasonablypracticable,thatall
articlesmanufacturedaredesignedandconstructedtobesafeandwithoutrisktohealthwhencorrectly
used.
AIlmachineproductsproducedbyPremiereProductsaremanufacturedandtestedtotherelevantBritish
Standardsand in accordancewithmajorEuropeanstandard requirements. Theyareaccompaniedby
operatinginstructionswhichshouldbereadcarefullybythepersonoperatingthemachineandresponsible
forthecleaningoperation.Additionalcopiesareavailable on application quoting model numbers. Although
ourproductsaresafewhencorrectlyused,therearepointswhichshouldbecarefullynotedbythe
responsiblepersonortheSafetyOfficer.
1Themachinemustbedisconnectedfromthemainssupplybeforeanymaintenanceworkisundertaken.
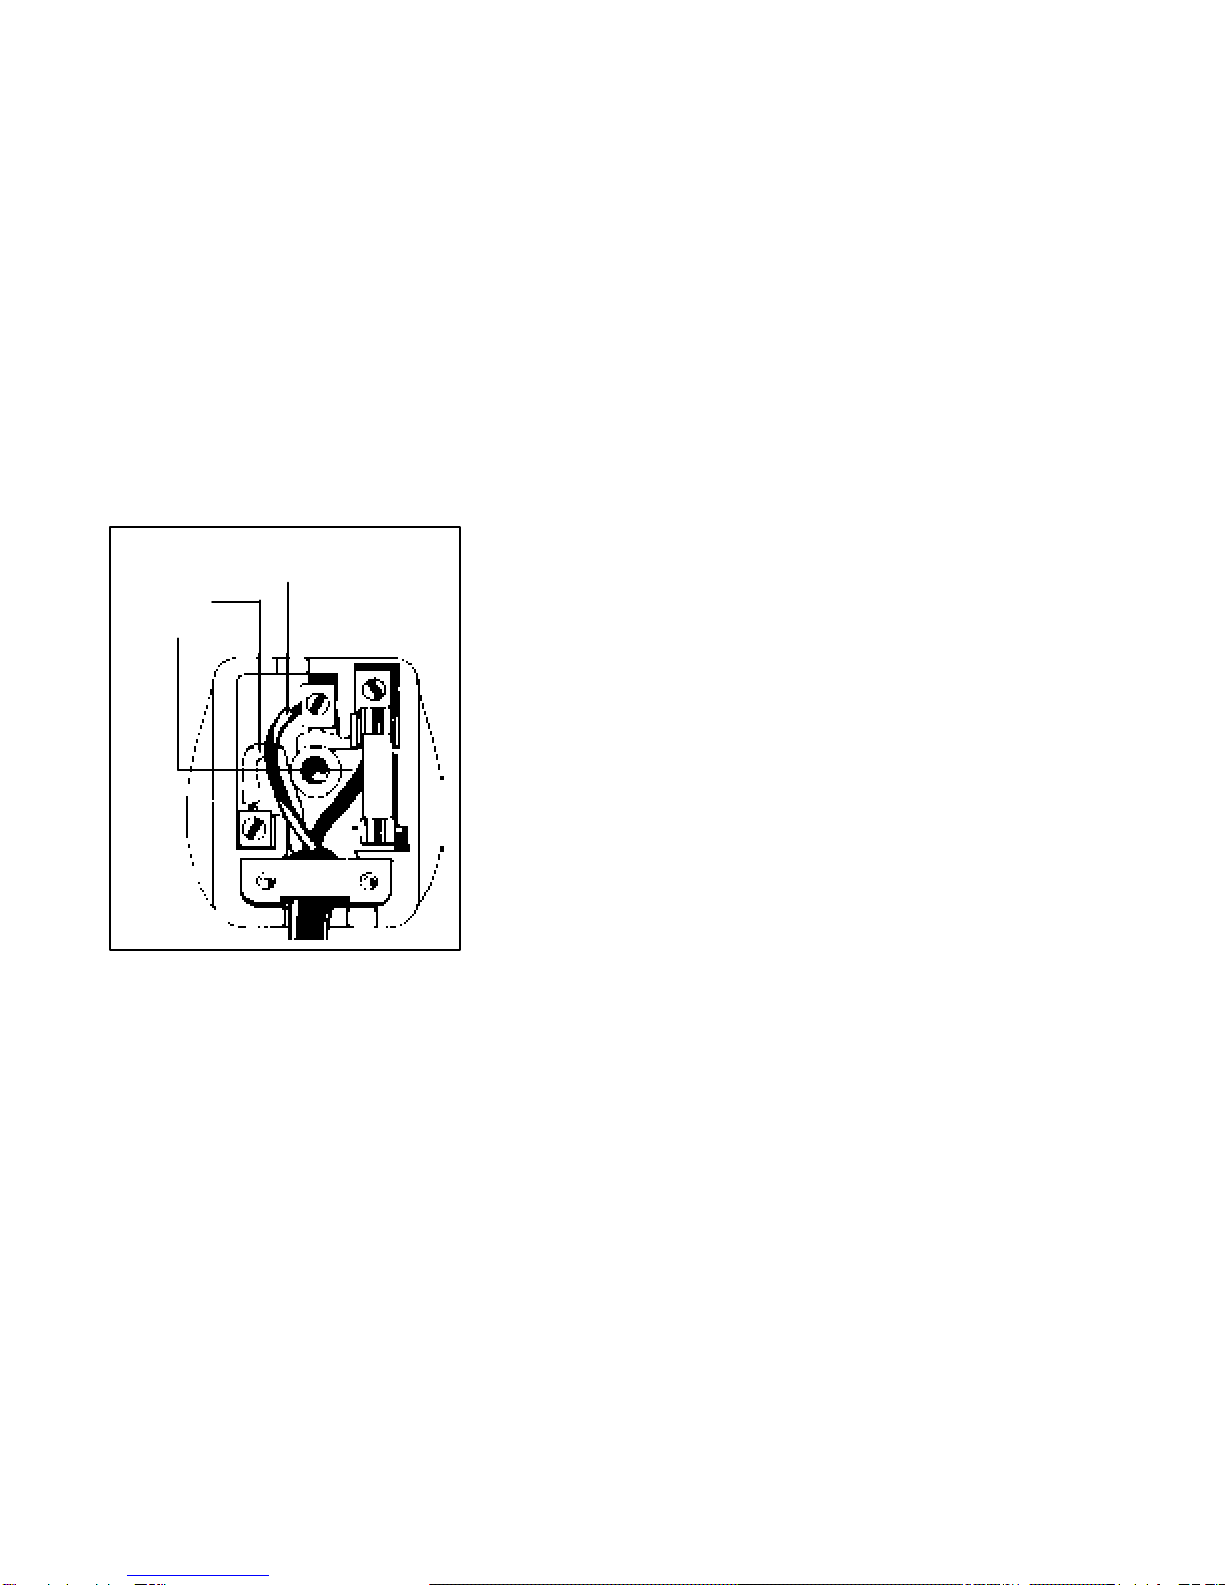
2Theappropriatefused plug to the applicable nationalstandardandthe requirements of the machine should
befittedtothesupply cable and checks should be made fromtimetotimetoensurethat the cable is not
frayedandisfitted securely. If in doubt consult Premiere Products.
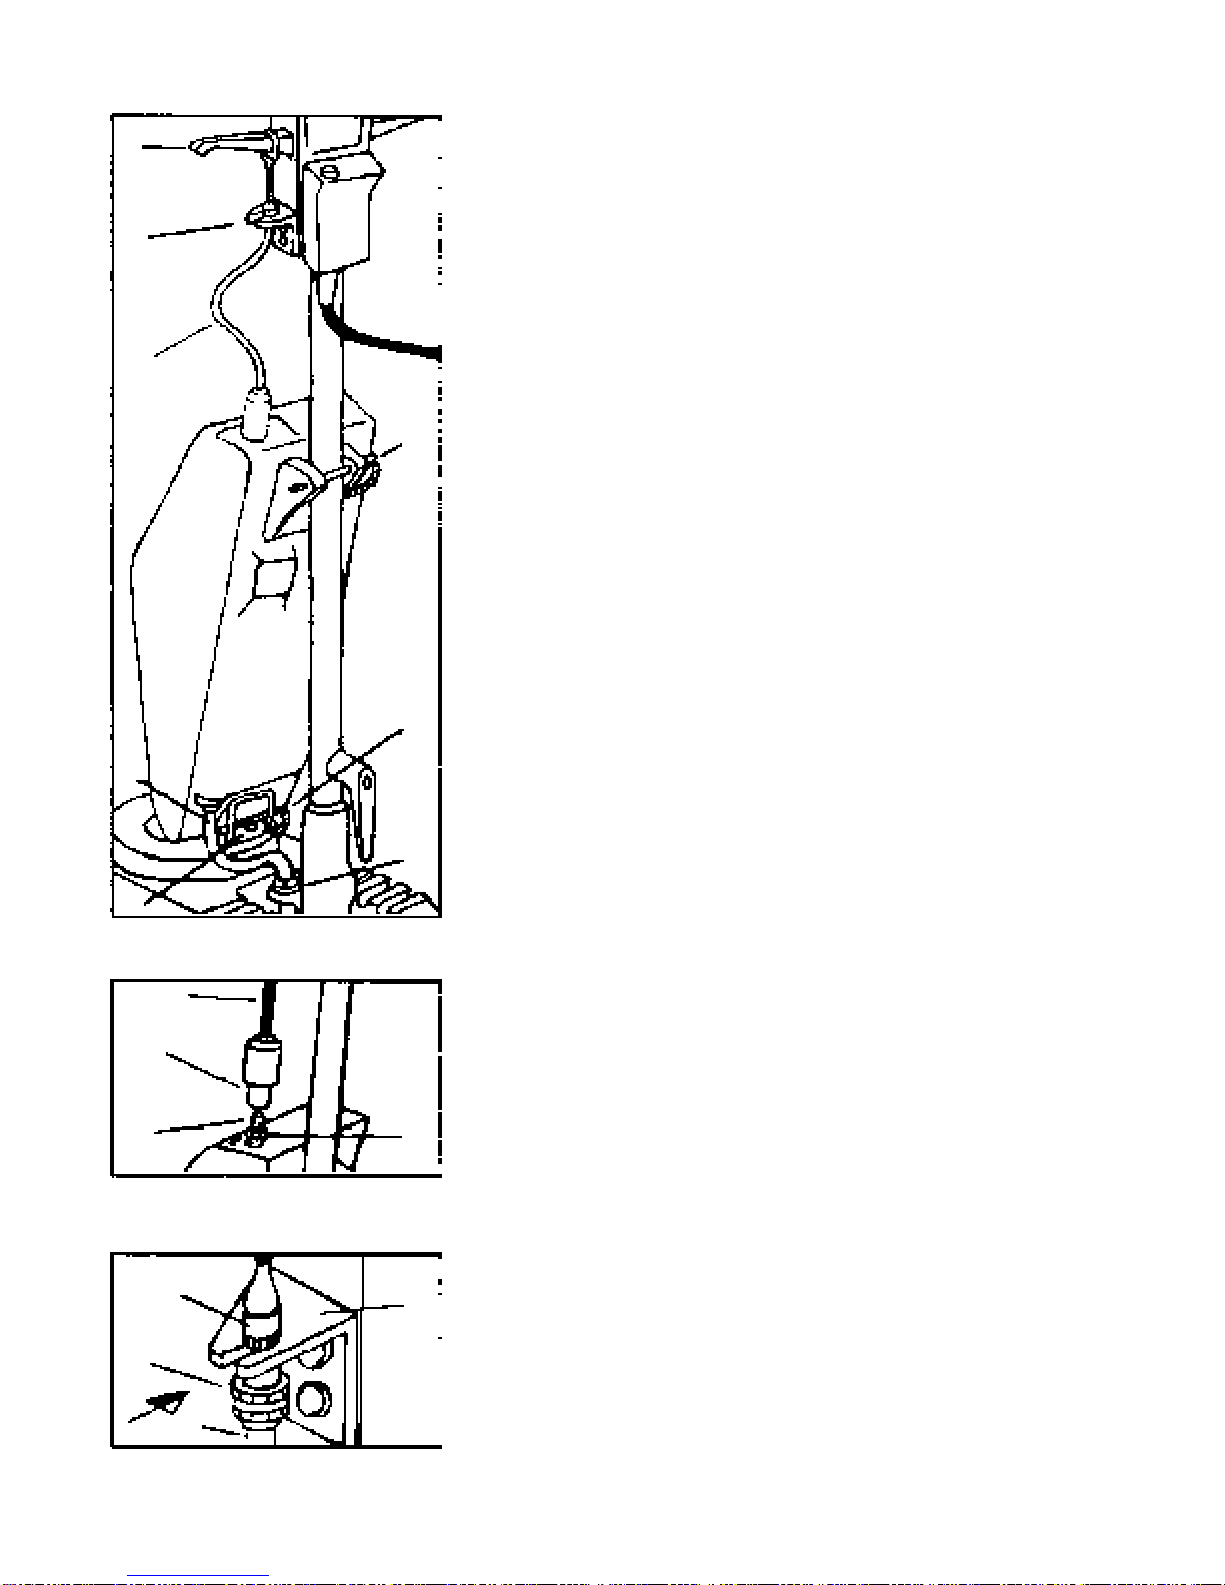
3Ensurethatthecableisnotcrushed,overstretchedordamaged by any sharp object. Do not use if mains
cableisdamaged or frayed and haveitreplacedbyaPremiereProductsService Engineer or approved
Serviceagent.
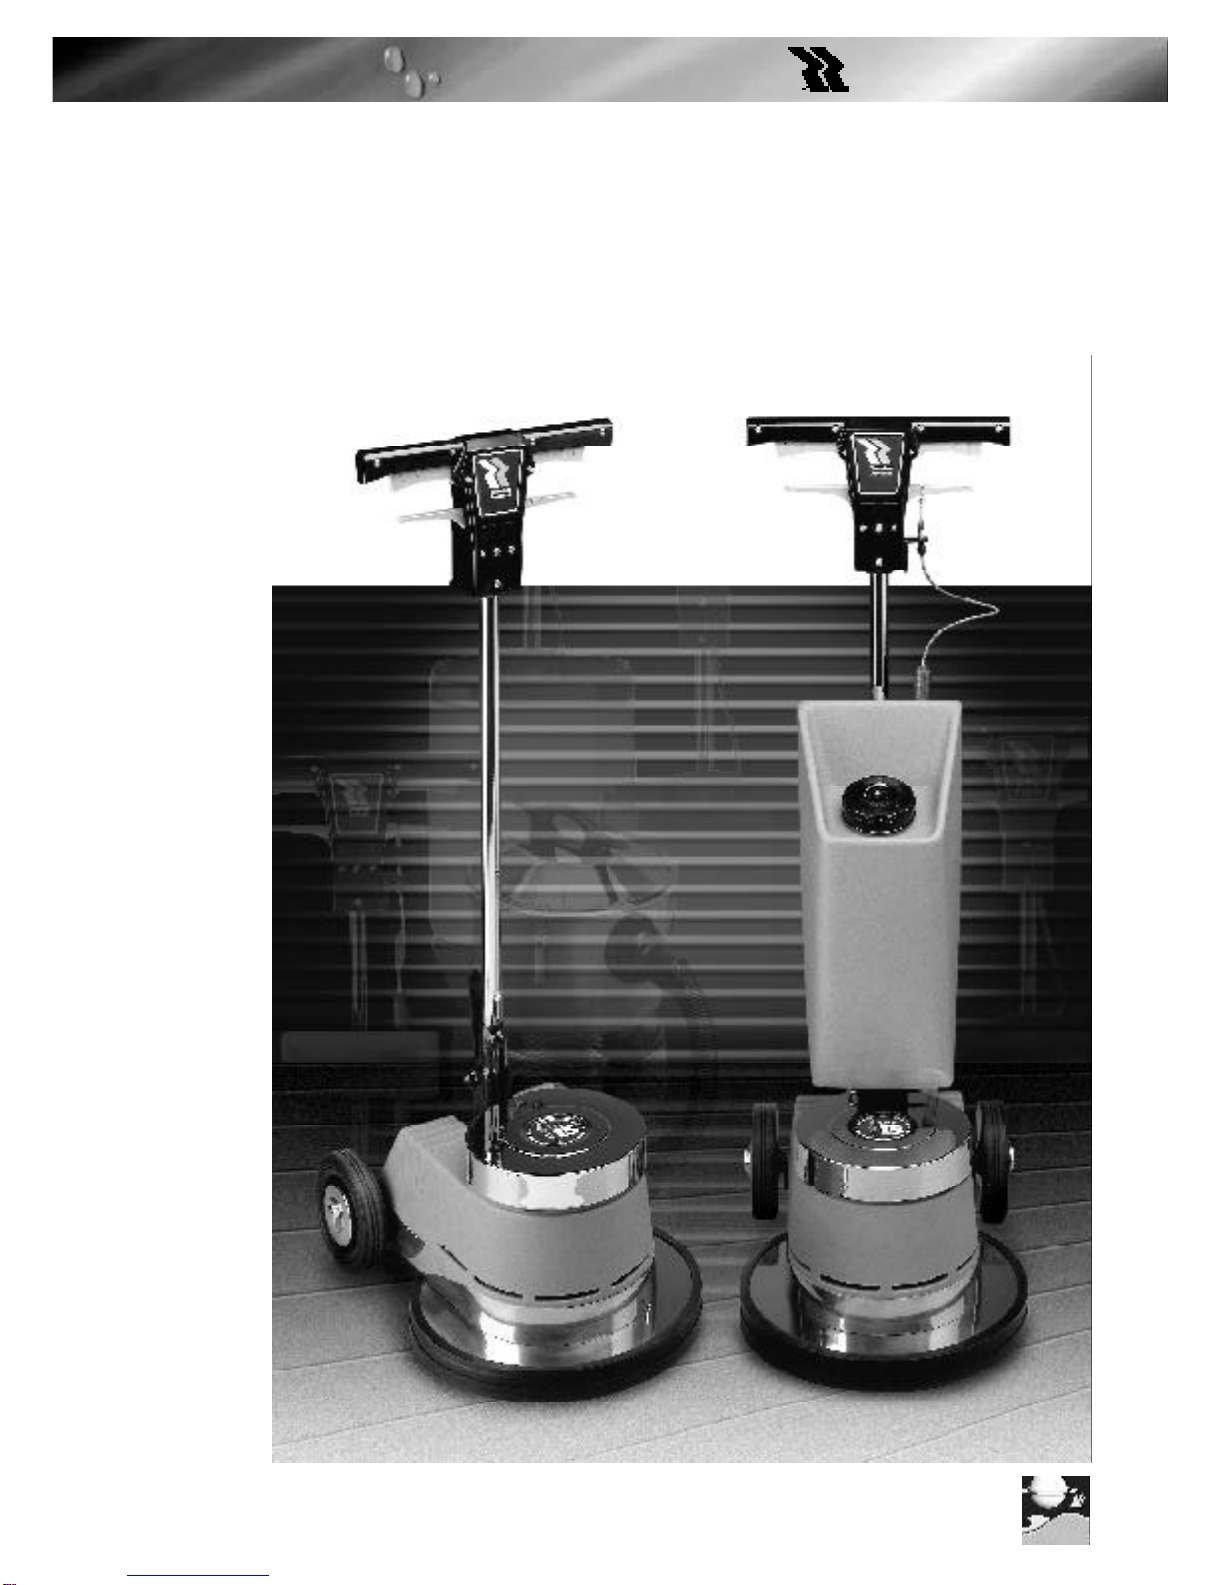
4The DVU140&DVU 190aredesignedfor dryuseonly.Any attempttopickup liquidssuchascoffee
spillagesmayirreparablydamage the motor and create an electrical hazard.
5Nochange or adaptation shouldbemade to the machine withoutfirstconsulting Premiere Products.
6Themachineshouldnotbeusedforthecollectionofdangerous,toxicorhazardousmaterialsorused
whereexplosivevapours or dust are present.NoliabilityisacceptedbyPremiereProducts for any advice
givenbydistributorsor service agents regarding the use of Premiere Productsmachineryinspecialistor
hazardousenvironment.TheentireresponsibilityfortheuseofPremiereProducts machineryinspecialist
environmentsrests withtheend user,theirappointedSafety Officerorthepersonresponsibleforsuch
mattersat theuserspremises.Referencesshould bemadeto‘EnvironmentalHygiene SeriesGuidance,
NoteNo, EH10Asbestos-hygienestandards andmeasurementsofairbornedust concentrations.You
shouldalsoobtain and read a copyofthe Health and Safety atWorkbooklet No 22 ‘Dust Explosionin
Factories’andbothof these manuals are published by the Health andSafetyExecutive.Thefollowing
publicationsshouldalso be obtained andread:Technical Data Note 14 Health‘Dustin lndustry’ published
by the Department of Employment and Productivity.
BS5345Part1 - ‘Selection, Installation and Maintenance of Electrical Apparatusforuseinpotentially
explosiveatmospheres’publishedbyBritishStandardsInstitution.‘Dust Explosions and Fires’ by K. N.
Palmer, published by Chapman & Hall.
7 If a fault should develop, the machine should be clearly marked ‘OUT OF ORDER’ and the supervisor or
Safety Officer notified.
lfindoubtaboutanyoftheaboveorifyourequirefurtherinformationcontact your Iocal Factory Inspector.
Electricity at Work Regulations 1989
Theregulationrequiresthateach andeverypiece ofelectricalapparatus intheworkplaceberegularly
testedforelectricalsafety,be clearlyidentifiedand thatatraceable recordoftestingbeestablishedand
maintained.
Guidanceshould be obtained fromthe Safety Officer.
9

10
Entretien des machines
Lafabricationdemachinesfiablesetsansdangernereposepassimplementsurdescontrôleseffectuésàla
findelachaînede production.Elledépend d'unequalitéincorporée dansl'étude,ainsiqued'uncontrôle
rigoureuxdesspécificationsdetouslesélémentsconstitutifs.
Atitredepropriétaire ou d'utilisateur d'une machine Premiere, les performances etlafiabilitéconstantesde
votremachinedépendentdesonbonentretien.
•Laprise du fil d'alimentationdevraêtre retirée du socledela prise enfichable avantde commencer le
nettoyagedel'appareilou d'entreprendre toute opération de maintenance.
•Lecâbled'alimentationdevra être inspecté régulièrement afin devérifiers'iln'est pas endommagé. S'il est
endommagé, il faudra le remplacer.
•Aprèschaquel'emploi, la machine complète,câblecompris, doit être nettoyée avecunchiffon HUMIDE;
utiliserune solutiondiluéede produitdenettoyageuniversel PremiereM.P.9.Lessurfaceschroméeseten
acierinoxdoiventensuiteêtrepoliesavecunchiffonpropre,jusqu'àcequ'ellessoientsèches.
•NEJAMAISutiliserdesdécapants acides,desabrasifs oudessolvants puissantstelsquelesdécapants
pourpeintures,quirisquentd'érailler,d'attaqueroudeternirlessurfaces.
•Laverimmédiatementaprès l'emploi les disques etlesbrossesdansunesolutionde prouit de nettoyage
universelM.P.9,dissousdans l'eau chaude. Rincer à fondetlaisserégoutter et sécher à la température
ambiante.Lesaccessoiresempâtéspardesencaustiquessolvantesàbased'alcooldoiventêtrenettoyés
enbrossantavecdelatérébenthinePremturpsou du décapant pour encaustiques Premiere W.S.70
conformémentaumoded'emploi figurant sur l'étiquette du produit.
Introduction
Il y a déjà plus de 70 ans que "Première" a lancé le "premiere-né" de son ample gamme de
produitsd'entretienpoursols.Sa première gamme de matérielsdenettoyageetd'entretien,
mise sur le marché en 1966, demeure à ce jour inégalée en ce qui concerne efficacité et
conception. Si vous désirez une documentation sur la gamme complète d'aspirateurs
poursurfacessèchesethumidesainsiquedecireusesrotatives,téléphonez à notre Siège
de Cheltenham.
Le contrôle de qualité
L'inspectiondespiècesdétechéesetdelamachineàsonstadefinalestrégléepardesspécifications
détailléesenmatière de fonctionnement, dequalitéet de sécurité électrique. Lesrésultatsdes essais sont
enregistrésettouteslesprocéduresdecontrôledequalitéetlesdocumentsinhérentsdoiventêtre
approuvésetvérifiéspar"theBritishStandardsInstitution" (Institut de la Norme Britannique) conformément
aux:-
BS EN ISO 9002 : 1994
Homologations
Lesdétailssurles homologations des modèles différents se trouvent dans lesbrochuresqu'onpeutobtenir
surdemande.
British Standards Institution
B.S.5415,
Parties 1 et 2
pourlesmodèles230 V
R.W. TÜV e.V.
testésàV.D.E.Partie 1 2/81
V.D.E. Partie2052/87
Modèles 230 V
Certificate No. FM 1933
QAS34/228

•Rangerdansunendroit sec.
•Pourassurerle bon refroidissement dumoteur,maintenir exempte de saletés, depoussièreet de
peluchesl'admission d'airquientourelecapot chromédumoteur(utiliserune brossesèche).
•Enlaissantlamachinereposersursesbrosses,sesplateauxd'entraînementousesdisqueslorsqu'elle
n'estpasutilisée - même durant debrèvespériodes-onrisquededéformer et d'endommager les
accessoires,ainsiquededéséquilibrerlefonctionnement delamachine.
•Encontinuantàemployerlamachine durant une baisse de tension, on risquedefairesurchaufferle
moteur,et même de legriller. S'il survientune chute de tensionsecteur notable, il estrecommandé de
mettrel'appareilhors tension et derechercherlacausedecette baisse.
•Eninclinant la machine enfonctionnement, c'est-à-dire en relevantou en abaissant excessivementle
manchepouraugmenter la pression entrel'accessoirede nettoyage et le sol,onrisque d'endommager la
machineetlerevêtement de sol.
Avertissement
Ilnefautpastropchargerlafiche en tirant sur le câble d'alimentation.
11
Avant l'utilisation
1 Vérifiez que la tension imprimée sur la plaque de série est la même que celle de votre alimentation au
secteur.
2Lacouleurdesfilsdescâblesausecteurde cesappareilssuitlecodesuivant:Vertetjaune:Terre/Bleu:
Neutre/Marron: Sous Tension.
3Si les couleurs desfilsdescâblesausecteur de ces appareilsnecorrespondentpasauxcouleurs
identifiantlesbornesde votre prise, procédez de la façon suivante :Lefilquiestcodévertetjaunedoit
êtreconnectéà la borne de laprisemarquée de la lettre Eoudusymbole à la terreoudela couleur verte
ouverte/jaune.Lefilquiestcodébleudoit être connecté à la borne de la prise marquée de la lettreNou
delacouleurnoire.Lefilquiestcodé marron doit être connecté à la borne de la prise qui estmarquéede
lalettre L ou dela couleur rouge.
Important
Letableaudespécificationindiqueendétaillesmodèlesdisponiblespourlesdifférentespuissances
d'alimentationcommepar exemple 220V, 110V,50Hzou 60Hz. Il est essentielquevous précisiez la
puissancede l'alimentationlorsquevouscommandez votreappareilétantdonné qu'ilestpossibleque la
priseetlefusiblenécessairessoientdifférents.
4Sila prise montée sur votreappareilne convient pas à votrepriseenfichable, elle devra être retiréeet
remplacéeparunepriseconvenable.DETRUISEZlaprise que vous avez ôtée qui deviendrait
dangereuseunefoisbranchéedans uneprisesous tension.
5En ce qui concernelesprises moulées, le couvercledesfusibles de remplacement devraêtre de la même
couleurqueceluifourni au départ. NE JAMAIS utiliser sans que lecouverclesoitenplace.
Câbles et Rallonges
Chaqueappareilestconçupourêtre utilisé avec un câble déterminé. De même,laspécificationainsiquela
longueurde toute rallonge estcritique au fonctionnement efficaceet en toute sécuritédes appareils
Premiere.Nousrecommandonsd'utiliseruniquementdescâblesainsiquedes rallongesfournispar
Premiere.Consultez la sectionse rapportant à laGarantie page 16.
NOTICE: Les appareils suivants doivent être mis à la terre:
HV 13, HV 15 & HV 17.

12
Montage et démontage des accessoires
PourtouslesmodèlesHV
1Inclinerlamachineversl'arrièredemanièreàcequelemancherepose
surlesoletquel'onvoielabasedelamachine.-SCHEMA1
2Présenterl'accessoiredemanièreàcequelaformetriangulaire
etleplateaud'accouplementsoientalignés.
3Fairepivoterl'accessoiredanslesenscontrairedesaiguilles
d'une montre pour le fixer. - SCHEMA 2
4Placer la machineenpositionverticale.
5Fairepivoterlesaccessoires,danslesensdesaiguillesd'une
montrepour les retirerdelamachine.
AVERTISSEMENT
Cesappareilsontétéconçuspourl'emploiavecdesaccessoires
fournisparPremiere.
L'utilisationd'autresaccessoiresrisquedeserépercutersurla
sécuritéetsurlesperformances.
Montage de la bague anti-éclaboussures - SCHEMAS 3 and 4.
1 Incliner la machine vers l'arrière de manière à ce que le manche
reposesurlesol et que l'on voie labasedela machine.
2Présenterlabagueanti-éclaboussuresens'assurantquelapartie
découpée(A)etsessupportsderetenueadjacents(B)se
trouventsurlabasedelamachine.
3Fairepivoterlabagueverslehautjusqu'àcequelessupportsde
retenue(B)s'engagentau-dessusdelaprotectiondebrosse,en
partieinférieuredelamachine.
4Tirerlapartiesupérieuredelabagueversl'avant etpositionnerle
supportderetenue(C)au-dessusdelaprotectiondebrosse,en
haut de la machine.
5Monterl'accessoiredelamanièrehabituelle.
6 Remettre la machine à la verticale.
7Avantd'utiliserlamachine,s'assurerquelessupportsderetenue
(B)et(C)setrouventbienau-dessusdelaprotectiondebrosse.
8Pourretirerlabague,reprendrelesopérationsci-dessusdans
l'ordreinverse.
1
2
34
C
B
A
C
B
A

13
Montage du réservoir a solution
- SCHEMAS - 5, 6 and 7
1Retirerlestroiscouverclesenplastiqueetlesvisquisetrouventà
l'arrièreducapotchromédumoteur.Ancrerfermementleblocde
montage(G)enplaceàl'aidedestroisvisfourniesdanscebut.
2Alignerlesfentesdusupport(D)surlesinsertsquisetrouventen
partielatéraledumanchedelamachine.Al'aidedesdeuxvis
fournies,serrerlégèrementlesupportenplace.Nepasresserrer
complètementlesupportàcestade.
3Placerlesupportdemontageinférieurduréservoir(G)surle
couverclechromé,etlefixerenpoussantlagoupillederetenue
(B)àtraverslesdeuxsectionsjusqu'àcequ'elleseverrouille.
4Monter le supportsupérieurautourdumanche de lamachineetle
fixerenpoussantlagoupillederetenue(A)àtraverslesdeux
sectionsjusqu'àcequ'elleseverrouille.
5Raccorderle tube en plastique(C)aupointdeprélèvement (F)
quisetrouvesurla basedela machine.
Montageducâblede commande
6Visserleconnecteur(J)ducâbledecommande(H)surle
plongeur(K)duréservoiretresserrerALAMAINcontrelecontre-
écroufixe(L).SCHEMA6.
7Fairecoulisserlaboucledecâbleau-dessusdulevierdecommandede
débitdegauche(E)etl'introduiredanslarainure.SCHEMA5.
8Faire coulisser le manchon (M)surle câble de commande(H)
puisdanslafentedusupport(D)etresserrerl'écroumanuel(N)
pour fixer. SCHEMA 7.
9AprèsavoirmislemancheenpositionVERTICALE,pousser
légèrementverslebaslesupport(D)pourreprendretoutjeu
éventuelducâbledecommande(H).Resserrerfermementles
visdusupportetrecouvrirlestêtesdevisaveclescouvre-visen
plastiquefournis.
Nepasappliqueruneforceexcessivelorsqu'onrèglelejeudusupport.
Note:Silamachinen'estpasdotéedetrousdepositionnement
suriecôtédumancheouàl'arrièreducapotchromédumoteurpour
lafixationdusupportdecâble(D)oudublocdemontagede
réservoir(G),veuillezappelervotreagentoudistributeuretspécifier
lenomdumodèlefigurantsurl'étiquetteducapotdumoteur,ainsi
quelenumérodesériepoinçonnésurlaplaquesignalétiquequise
trouvesurlabasemoulée,souslepivotdumanche.
Fonctionnement du réservoir à solution
1Leréservoirdoittoujoursêtreremplienpositionverticale.
2Lacapacitéutileduréservoir(pourlecalculdestauxdedilution
delasolutiondeproduitdenettoyage)estde11litres.
3Pouractionner,releverdoucementlelevierrégulateurdedébit(E)
quandlamachineestenroute.
4Pourvider:
aDéconnecterletubeenplastique(C).
bDèvisserl'écrou(N)etfairecoulisserlemanchon(M)surlecâble
decommande(H)à partir de la fente du support (D).
cFairecoulisserlaboucledecâbleàpartirdulevierrégulateurde
débit (E).
dRetirerlesgoupillesderetenue(A)et(B).
eDévisserlebouchon,viderleréservoir,puislerincer.
5
6
7
E
D
H
A
B
C
F
G
H
J
KL
M
N
D
H

14
Fonctionnement de la protection contre
les surcharges
-quin'équipequecertainsmodèleshautementperformants
-SCHEMA10
Encasdesurchargeauniveaudelamachine,cetteprotectionse
déclenche.Onpeutlaréarmer30secondesplustardenvironen
appuyantsurle bouton ROUGE quisetrouveaucentrede la
poignée de la machine. On peut ensuite réutiliser immédiatement
lamachine.(Unemachineetdesaccessoiresmalentretenus
risquentdeprovoquerdessurchargesartificielles-consulterla
sectionsurl'entretiendelamachine,page10.)
Mode d'emploi des appareils de la Série PV 4
Procédercommesuit:
1 S'assurerquelemancheestenpositionverticale.
2 Sélectionneretmonterl'accessoireapproprié.
3 Agirsurlacommandededéroulementrapidedu câble et retirer
le câble de son point de rangement. - SCHEMA 8.
4 S'assurerquel'alimentationsecteurcorrespondàcellequifigure
sur la plaque signalétique de la machine.
5 BrancherlamachinedanslaprisedecourantS'assurerquele
voyantnéonquisetrouveenhautdumanches'allume.
6 Setenirderrièrelamachineetappuyersur le levier de
positionnementdumanche(A);abaisserlemanchejusqu'à
obtentiond'unepositiondetravailconfortable.Relâcherlelevier
(A). SCHEMA 9.
Note:Cette position doitêtre à plusde 40° dela verticale pour que
le moteur soit alimenté en énergie.
7 Aveclesdeuxindex,appuyersurlesboutonsdeblocagedes
leviersmarche/arrêtpourlesdébloquer.SCHEMA9.
8 Appuyersurl'undesleviersousurlesdeuxpourlancerla
machine.
9 S'assurerquelecâbled'alimentationsecteurestbiendégagéde
lasurfaceànettoyer.
10Relever et abaisser le manchecommeil convient pour guiderla
machineversladroiteoulagauche.Note:Pourcetteopération,
ilestsuperflud'agirsurlelevierdepositionnementdumanche
(A).Lesréactionsdelamachine,surtouts'ils'agitd'unmodèleà
hautevitesse,sontextrêmementpositives;ilestdéconseilléde
tenterdeguiderlamachineenagissantsurlelevierde
positionnementdumanche(A).
11Alafindunettoyage,relâcherleleviermarche/arrêt.
12Agirsur le levier depositionnementdumanchepourramener le
mancheàlaverticale.
13Débrancherl'appareildelaprisedecourantetrangerlecâble
sursonsupport.
14Retirerl'accessoire.
NB.:Lelevierrégulateurdedébit(B)nes'utilisequ'enconjonction
avecleréservoirsolution.-SCHEMA9.
8
9
10

15
Méthodes de nettoyage
LasociétéPremiereProductsfabriqueplusdecinquanteproduitschimiquesdifférents,correspondantà
touteslestâchesd'entretien/nettoyage.Notrereprésentantlocalseferaunplaisirdefournirdesinformations
détailléessurlagamme et les applications des produits chimiques et desmatérielsdenettoyagePremiere.
Onpeutégalements'adresserànotresiègesocialdeCheltenham.
Lustrage des sols
1Passeràl'aspirateurpourbiennettoyeretdépoussiérer.
2Eliminer lesmarquesnoires etdefrottement,ainsi quel'encrassementsuperficielenutilisantlaméthode
denettoyageparpulvérisationsenconjonctionavecunpulvérisateuretundisqued'entretiendesols
appropriée.
3Actionner la machine enlui imprimant unmouvement de balayage enrelevant ou en abaissantla poignée.
Ilestrecommandéd'utiliser un disque de lustrage à grain fin.
Polissage/encaustiquage des sols
1Passerlesolàl'aspirateurpourlenettoyeretledépoussiérer.
2 Eliminer les marques noires et de frottement.
3Préparerunesolutiond'encaustiqueenémulsionouautreproduitd'entretienrecommandédansun
pulvérisateur,etl'appliquerenfinbrouillardsurunepetitepartiedusol.
4 Imprimer à la machine un mouvement de balayage et utiliser le disque d'entretien de sois approprié.
Continuerjusqu'àcequelasurfacesoitsèche,puispasseràlasurfacesuivante.
Entretien/réparations
VotrenouveauP.V.4devraitvousgarantirdenombreuses années d'utilisation sans ennuis. Néanmoins, nous
recommandonsde lefaireentretenir annuellementparl'unde nostechniciens,afindeminimiserlesrisques
depanneàun moment particulièrement peu pratique. En cas d'incident, lescontrôlessuivantsvousoffriront
peut-êtreune solution immédiate.N'allezpasAU-DELAdes contrôles debasesuggérésci-après.
Lasociétén'admetaucuneresponsabilité,etlagarantie et les homologations sont instantanément annulées,
encasde réparation effectuée par untiersautrequ'untechnicienduServicePremiere ou un agent
d'entretien/réparationshabilité. Pour toute intervention, veuilleztéléphonerà votre distributeur localen
spécifiantlenomdu modèle qui figure sur l'étiquetteducapotdu moteur ainsi que le numérodesériequi est
poinçonnésurlaplaquesignalétique, laquellesetrouve surlabase moulée,souslepivotdumanche.
Si la machine ne démarre pas:
•Laprise du fil d'alimentationdevraêtre retirée du socledela prise enfichable avantde commencer le
nettoyagedel'appareilou d'entreprendre toute opération de maintenance.
•Lecâbled'alimentationdevra être inspecté régulièrement afin devérifiers'iln'est pas endommagé. S'il est
endommagé, il faudra le remplacer.
•Silevoyantnéon brille peu ou ne s'allumepas,remplacerle fusible de la prise ens'assurantqu'ilest
solidementmaintenudansleporte-fusible.
•Al'exceptiondesprises moulées, on peut également vérifierlecâblageà l'intérieur de la prise.
•Vérifierl'alimentationdelaprisedecouranten branchant un autre appareil électrique.
•Vérifiersila protection contre lessurchargess'est déclenchée. Dans l'affirmative, ilfaudrala réarmer.
Silemoteurchauffeexcessivementetmanquedepuissance
•S'assurerquelaprised'airquientourelecapotchromédumoteurestbiendégagée.

Silesfusiblesclaquent constamment,OuSila protectioncontrelessurcharges se
déclenchesanscesse
•Retirertouteslesrallongeséventuellesetremettreenmarche.Silamachinefonctionnecorrectement,s'adresser
immédiatementànotreserviceencequiconcernelesspécificationsducâblederallongeàutiliser.
•S'assurerquele modèle P.V.4 est utilisécommeil convient. Il ne fautpasutiliser les machines à vitesse
ultra-élevéeouRotovacpourledécapageoulenettoyage.
•Uneaccumulationexcessived'encaustiqueoudesaletésurlesolproduitunesurfacecollante.Poursurmonterce
problème,lemoteurfonctionnedavantageetexigedoncplusdecourant.Cecirisquedefaireclaquerdesfusibles,
surtoutlorsqu'onutilisedesmachinesàpolirultra-rapides.Encecas,décaperlesolpouréliminerl'encaustiqueet
lasaleté,puisletraiterànouveauavecunemachineànettoyeràvitessenormale.
•Lesbrossesetlesdisquesencrassésoucolmatésrisquentdeproduirelemêmeeffet:ilfautdonclesnettoyer.
Silamachinesedéséquilibrependantlefonctionnement:
•Sionlaisselamachinereposersurunebrosseouundisque,ceux-cirisquentdesedéformer.Ilfautalors
lesremplaceroudétacherl'accessoireendommagéetlelaisserreprendresaformenormale.
•Lesbrossesetlesdisquesdevraientposséderuneépaisseuruniforme,etl'accessoiresélectionnédevrait
convenirautravailàeffectuer.
•Ilfauttoujoursremplacerlesaccessoiresendommagésouusés.
Garantie
Toutesles machinesfabriquéesparla DivisionMachinesdePremiere Productssontgarantiescontre tous
défautsde matériel ou dofabricationpour une periode deDOUZEMOIS à compter dela date d'achat par
l'utilisateur.Ce délai peut êtreportéà DEUX ANS siuncontrat d'entretien est concluau moment de l'achat.
Lagarantie n'est pas transférable.Ellecouvrelaréparationou le remplacement delamachineoudeparties
delamachinequi s'avéreraient défectueuses.
Lagarantien'impliquepaslaresponsabilitéd'anomaliesmineuressansconséquencesurlavaleurdela
machineoulasécuritédesonfonctionnementnilaresponsabilitédedommagescausésparréaction
chimiqueouélectrochimique,par l'eau ou toutes autres conditions ambiantes anormales.
Lagarantien'impliquepas la responsabilité de dommages causésàtoutepartie de la machine du fait
d'accidents,d'emploiabusif, de négligence oud'utilisationde la machine sur unetensionautre que celle
indiquéesurlaplaque signalétique.
Ence qui concerne laréparation des appareils PremiereProducts en dehors duRoyaume-Uni, la
responsabilitéàl'égard du produit incombeentièrementaudistributeurPremiereProducts agréé.
Sedespièces do rechange autres quecellesfourniesparPremiereProductssont utilisées pour effectuer la
réparation,touteresponsabilitéàl'égardduproduitseradéclinéeetlagarantieetleshomologations
deviendrontcaduques. Il est del'entière responsabilité du distributeurPremiere Products agréé deveiller à
cequelespiècesderechange correctes soient montées sur le modèle entraind'êtreréparé.Ilappartient
égalementaudistributeur de s'assurer quelesdivers techniciens ou agents demaintenancenommés par lui
sontdûmentqualifiésetquetouslestravauxréaliséssatisfontauxnormesdequalitéet de sécurité les plus
strictes.
Ladécisionde réparer ou de remplacerunélémentdonnéoulamachine revient exclusivement à Premiere
Products.Laréparationouleremplacementdepièces défectueuses n'entraînent pas une prolongation de
garantieau-delà dudélaipréalablement établi.Touteslespièces défectueuxquiontétéremplacésparun
distributeursous lestermesdela garantiedeviendrontlapropriété dudistributeur.Toutesles pièces
défectueuxquiont été remplacées par PremiereProductsencasd'unefautedefabrication qui a été
reconnuparPremiereProductsdeviendrontlapropriétédePremiereProductsn'importesionlefournit
directement ou indirectement.
PremiereProductsneprendrapasenconsidérationlesréclamationsconcernantdesdommagesmatériels
oucorporelscausésà des tiers, sauf si la loi l'exige.
Touteréclamationfaite au titre delagarantie devra être accompagnée d'unepiècejustificative d'achat. Toute
responsabilitéest déclinée encasd'utilisationdesappareils en dehorsdesrecommandationsspécifiques
fourniesdansladocumentationdelasociété.Premiere Products déclinera toute responsabilité si les
conseilsdonnés par les distributeurs ouréparateursdevaient aller au-delà desrecommandations
spécifiquesfournies dansladocumentationde lasociété.
16

Santé et Sécurité au Travail
Entant que fabricant, PremiereProductsveille,danslamesure du possible, àcequetoussesarticles
soientconçus etfabriquésdansunsouci de sécuritéetàce qu'ils neprésententpasde risques pourla
santés'ils sont utilisés correctement.Tous les appareils proposéspar Premiere Products sontfabriqués et
testésconformément aux normesbritanniquesappropriéesetaux principales normeseuropéennes.Ilssont
accompagnésd'unmoded'emploiquidoitêtreconsultéattentivementparlapersonnechargéede
l'operationetdel'entretien de l'appareil. Pour se procurer d'autres exemplaires, onfairelademandeen
rappelantlesnumérosde modèle.
Bienquenosappareilsneprésententpasdedangers'ilssontutiliséscorrectement,lespointssuivants
devrontêtre soigneusement notés par l'opérateuroule responsable de lasécurité.
1Il estimpératifdedébrancherl'appareil dusecteuravanttouteintervention demaintenance.
2Monter surlecâble d'alimentationunefichecorrespondant àlanormenationaleapplicableetaux
conditionsdefonctionnementdel'appareileteffectuerdesinspectionsrégulièrespourvérifierquelecâble
esten bonétatet bienassujetti.Encas d'incertitude,veuillezconsulterunconcessionnaireouun
distributeur Premiere Products agréé.
3Veilleràcequele câble d'alimentation ne soit pas écrasé, tenduexcessivement,niendommagéparun
objectcoupant.Nopas utiliser l'appareil si le câbleestendommagéou usé. Faire remplacer ce dernier
parunconcessionnaireouun distributeurPremiereProducts agréé.
4Le DVU 140 &DVU190 sont conçus pouruneutilisation à sec uniquement.Toute tentative d'aspiration de
liquides,ducaférenverséparexemple,pourraitendommager irrémédiablement le moteur et constituer un
dangerélectrique.
5Nepas apporter de modifications àl'appareiletnepasl'adaptersans consulter au préalable un
concessionnaire ou un distributeur Premiere Products agréé.
6L'appareilne devra pas êtreutilisépour collecter des matériaux dangereux,toxiquesou présentant des
risques,ni dansdesendroitsou despoussièresouvapeurs explosivessontprésentes.Premiere Products
déclinetouteresponsabilitéconcernantlesconseilsoffertsparlesagents, distributeursouagents/
ingénieursd'entretien nommés pareux-mêmes,encequi concerne l'utilisationdesmachinesPremiere
Productsdans des environnementsspécialisésoudangereux.
7 En cas de panne, faire apparaître clairement la mention "EN PANNE" sur l'appareil et avertir le chef de
service ou le responsable de la sécurité.
Pourtouteassistancecomplémentaire,consulterundistributeurPremiereProductsagréé.
17

18
Maschinenpflege
DieQualitätssicherungbeiderHerstellungvonbetriebssicherenundzuverlässigenMaschinenumfaßtweit
mehralsdieEndkontrolle am Ende des Fertigungsverfahrens; sieerforderteinehochqualitätige Konstruktion,
diestrengsten Auflagen undQualitätskontrollenhinsichtlichjedesBestandteils und erstrecktsichaufjede
Produktionsphase.
DiePflegeundWartung der Maschine nach dem Verkauf ist jedoch genausowichtigfüreinenproblemlosen
BetriebunddieBeibehaltungderMaschinenleistung.AlsBesitzeroderVerwendereinerPremiere-Maschine
bittenwirSiedeshalbumBeachtungdernachstehendenPflegean-weisungen.
•VorderReinigungdesGerätsodervorWartungs-undReparaturarbeitenmußderSteckerdes
StromkabelsausderSteckdosegezogenwerden.
•DasStromkabel istregelmäßigaufAnzeichenvon Schädenzukontrollieren.Wenndas Stromkabel
beschädigtist,mußes ausgewechselt werden.
•Nach Gebrauch ist die gesamte Maschine einschließlich Kabel mit einem FEUCHTEN Tuch und
verdünntemPremiere-Mehrzweckreiniger M.P.9 zureinigen. Chrom- und Edelstahlteilesollten dann mit
einemsauberenPolierlappentrockengeriebenwerden.
•KEINEsäurehaltigenKesselsteinEntfernungsmittel,Scheuermitteloderscharfen Lösemittelwie
Farbenbeizeverwenden,diedie Oberflächen zerkratzen, anfressen oder abstumpfen.
•Alle Zubehörteile mit verdünntem Premiere-Mehrzweckreiniger M.P.9 und einem FEUCHTEN Tuch reinigen.
•DasGerätaneinemtrockenenOrtaufbewahren.
•ZurGewährleistung einer IeistungskräftigenMotorkühlungachtenSiebitte darauf, daßdieKühlungsschlitze
freivonSchmutz,StaubundFlusensind.Reinigen Sie diese mit einer trockenen Bürste.
Einführung
Premiere Products führte ihre ersten Bodenpflegeartikel vor mehr als 70 Jahren ein. Ihre
ersten Maschinen und Geräte für die Bodepflege kamen 1966 auf den Markt. Heute gilt
ihreaktuelle Serie alsBeweisunübertroffener Leistung undKonstruktionsgüte. Für weitere
Auskunft über die vollständige Auswahl von Trocken- und Naßstaubsaugern sowie
Poliermaschinen wenden Sie sich bitte an unser Hauptbüro in Cheltenham.
Qualitätskontrolle
DieKontrolle von Teilen und fertigemProduktunterliegt festen Leistungs-, Qualitäts-und
Sicherheitsspezifikationen.AllePrüf-undMessergebnissewerdenerfaßt.DieAbnahmeder
QualitätssicherungssystemeundPrüfprotokolledurchdenBritischenNormenausschußerfolgtun
Übereinstimmung mit:-
BS EN ISO 9002 : 1994
Zulassungen
Dieauf die einzelnen Modelle zutreffendenZulassungenund Bescheinigungen sind ineinem
LeistungsüberblickZusammengefaßt;einExemplardieserLeistungsbeschreibungistaufAnfrageerhältlich.
British Standards Institution
B.S.5415
Teil 1 und 2
FürModellevon230 V
R.W. TÜV e.V.
geprüft nach VDE 0700 Teil 1 2/81
VDE Teil 205 2/87
FürModellevon230 V
Certificate No. FM 1933
QAS34/228

•Padsund Bürstensolltennach jedemGebrauchsofortin einerLösungvonM.P.9Multi-ZweckReiniger
undheißem Wassergereinigtwerden. WaschenSiediePads undBürstendanachmitklaremWasseraus
und lassen Sie sie bei Zimmertemperatur trocknen. Zubehörteile, die mit einem herkömmlichen Wachs
(aufSpiritusbasis) verstopft sind, sollten mitPremturpsoder Premiere W.S.70 Wachsentfernergereinigt
werden;beachtenSiehierbeidie Anweisungenaufdem Etikett.
•VermeidenSiedie Maschine auf einer Bürste,PadoderTreibtellerstehenzulassen,wenn die Maschine
nichtinBetriebist.SchonkurzeZeiträumekönnenzuVerformungenundBeschädigungenderPadsund
BürstenführenunddieHandhabungderMaschinenegativbeeinflussen.
•EinKippenderMaschine ist unbedingt zu unterlassen; dieses kann zu einerBeschädigungderMaschine
unddesBodenbelagsführen.
•DerEinsatzderMaschinebeierhöhterSpannungführtzurÜbererwärmungdesMotorsundkann
Motorschädenhervorrufen.Beieinem, merklichen Anstieg der Zufuhrspannung ist es deshalb
empfehlenswert,dieMaschineauszuschaltenund dieUrsachezu überprüfen.
19
Vor dem Gebrauch
1Überprüfen,daßdieaufdemTypenschildangegebeneSpannungderVersorgungsspannunginIhrem
Hauseentspricht.
2DieAderndesNetzkabels dieserGerätesind farblichwiefolgt gekennzeichnet:GrünundGelb-Erde/Blau
- Nulleiter/Braun - Phase.
3Dadie Farben der AderndesNetzkabels dieser Geräte mit denFarbkennzeichnungendes von Ihnen
verwendetenSteckersnichtinjedemFallübereinstimmen,verfahrenSiewiefolgt:Diegrün/gelbeAderan
dieAnschlußklemme im Steckeranschließen, die mitdem Buchstaben Eoder dem Erdungssymbol oder
derFarbeGrün oder Grün/Gelb markiertist.Die blaue Ader an dieAnschlußklemmeanschließen, die mit
demBuchstaben N oder derFarbe Schwarz markiert ist.Die braune Ader andie Anschlußklemme
anschließen,die mit dem Buchstaben Loderder Farbe Rot markiertist.
WichtigerHinweis
DerSpezifikationstabelleistzuentnehmen,welcheModellefürandereNetzspannungen(d.h.220V,110V,
50Hz oder60Hz) lieferbarsind.Dadafür einandererSteckerundeinandererSicherungsnennstrom
erforderlichseinkönnen,mußbeiderBestellungderMaschinedieNetzspannungangegebenwerden.
4Wennderam Gerät installierte Netzstecker nicht in die am EinsatzortvorhandenenSteckdosenpaßt,muß
dieserabgeschnittenund ein passender Steckermontiertwerden.DenentferntenStecker WEGWERFEN,
daereineernsteGefahrdarstellt,sollteerineine Steckdoseeingestecktwerden.
5BeiangeformtenSteckernmüssendieErsatzsicherungshalterdieselbeFarbewiedieoriginalen
aufweisen.SicherungshalterAUFKEINEN FALL weglassen.
Kabel und Verlängerungskabel
JedeMaschineist für ein bestimmtesKabelausgelegt. So ist auch dieSpezifikationund Länge eines
eventuellverwendetenVerlängerungskabelsausschlaggebend für den sicheren und effizienten Betrieb aller
MaschinenvonPremiere.Wirrateneindringlichdazu,nur Kabel und Verlängerungskabel von Premiere zu
verwenden.SieheGarantieauf Seite 24.
WARNUNG: Die folgenden Maschinen müssen geerdet sein :
HV 13, HV 15 & HV 17.

20
An/Abbau von Zubehörteilen
Für alle HV Modelle
1NeigenSiedieMaschinenachhinten,bisdieFührungstangeauf
dem Boden liegt und die Unterseite der Maschine freiliegt - BILD 1
2DasZuberhörteilaufdiedreickigeFormdesAntriebsstutzen
ausrichten.
3DasZubehörteilgegendenUhrzeigersinndrehen,biseine
kraftschlüssigeVerbindungbesteht-BILD2
4RichtenSiedieMaschinewiederauf.
5ZurAbnahmedesZubehörteils,diesesimUhrzeigersinndrehen.
WARNUNG
UnsereMaschinensindfürdenGebrauchmitPremiere
Zuberhörteilenkonstruiertworden.
DerGebrauchvonalternativenZuberhörteilenkanndahersowohl
dieLeistung,wieauchdieSicherheitderMaschinebeeinträchtigen.
Montage des Anti-Spritzringes - BILD 3 und 4.
1NeigenSiedieMaschinenachhinten,bisdieFührungsstangeauf
demBodenliegtunddie UnterseitederMaschine freiliegt.
2DenAnti-Spritzringsoausrichten,daßderAusschnitt(A)mitden
beidenHalterungen(B)sichamhinterenEndederMaschine
befindet.
3SchiebenSiedenAnti-Spritzringnachoben,bisdaßdie
Halterungen(B)aufdemBürstenträgeraufliegen.
4ZiehenSie den Ring nachobenundschiebenSiedie Halterung
(C)überdenBürstenträger.
5BringenSieweitereZubehörteilean,wieBürste,Padusw.
6RichtenSiedieMaschinewiederauf.
7VergewissernSiesichvordemStart,daßdieHalterungen(B)
überdemBürstenträgerliegen.
8EntfernenSiedenAnti-SpritzringinumgekehrterFolge.
1
2
34
C
B
A
C
B
A
This manual suits for next models
2
Table of contents
Languages: