EDT Series
Quick Guide
MA-5191C-1
21-10-2021
5/ 25
Powering Your Challenge
3.- REMOTE CONNECTION
Check if your device (PC, laptop, etc.) has the appropriate network configuration to make the connection and, if
necessary, modify it accordingly. If not, please ask authorised personnel for assistance.
In order to access the charger, you need to know the IP address of the specific unit. Each device connected to
the same network (including the PC or device through which you want to connect to the charger) must have its
own IP address, different to the other devices. You must know the IP address of the charger to which you want
to connect. (The following example figures show examples with IP 100.0.0.100 and 100.0.0.0.123, but in your
case you must enter the specific IP address of the charger to which you are connecting. By default, the charger
is configured with a remote IP address 200.0.0.1).
You should also know whether the charger is available from your location, i.e. whether the communications
infrastructure allows you to access the charger. The procedure would be as follows:
Step
no. 1 Connect the device with which it is going to communicate (PC etc.) to the same network as the charger is
connected. You may need to set up specific links on your computer (PPP, VPN, etc.)
Step
no. 2
Optional but recommended.
Verify the connection to the charger by pinging the IP address
of the charger on your device. If there is no connection to the
charger, double check all the above steps and ask authorised
personnel for assistance.
PING command successful
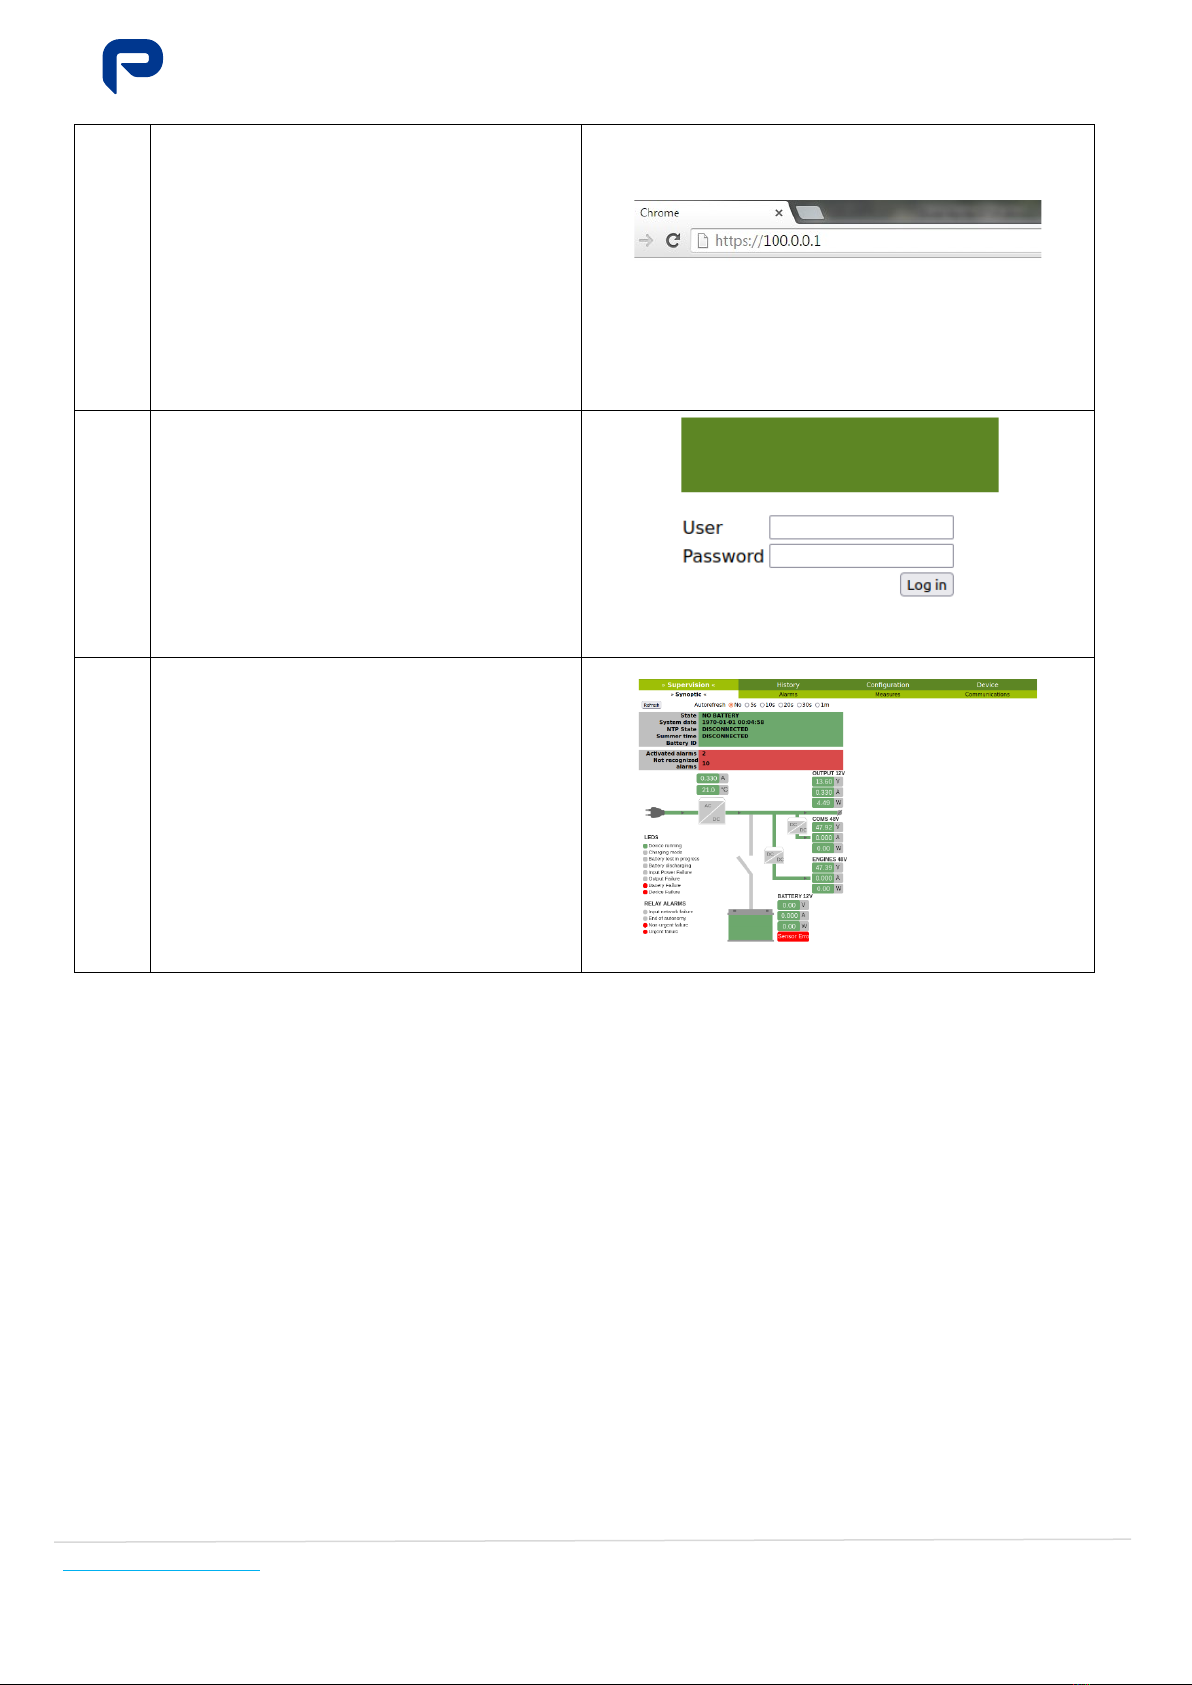
Step
no. 3
Launch the Internet browser and enter the remote address of
the charger.
Mozilla Firefox (26.0 or higher)
Chrome (29.0 or higher)
Internet Explorer (11.0 or higher)
For more details, please refer to the Communications Operation
IP address in browser
Step
no. 4
Select the user and enter your username and password to
authenticate and access the web page.
Note: if the charger does not have access to the LDAP server,
remember that the username and password would be:
User: consulta
Password: consulta
If you are denied access, verify that you have the required
permissions on the LDAP server and contact authorised
personnel.
PRIOR TO ANY MANIPULATION OF THE EQUIPMENT, YOU MUST HAVE READ THE USER'S MANUAL
COMPLETELY AND FULLY UNDERSTOOD THE FUNCTIONALITY OF THE EQUIPMENT.
DO NOT TAMPER WITH OR PERFORM ANY ACTION ON THE EQUIPMENT AND/OR ITS
CONFIGURATION WITHOUT BEING ABSOLUTELY CERTAIN THAT YOU UNDERSTAND THE
IMPLICATIONS OF SAID ACTION.
PLEASE NOTE THAT INCORRECT HANDLIN
G/CONFIGURATION MAY RENDER THE CHARGER
INOPERATIVE AND/OR DAMAGE THE BATTERIES AND EQUIPMENT CONNECTED TO THE CHARGER.