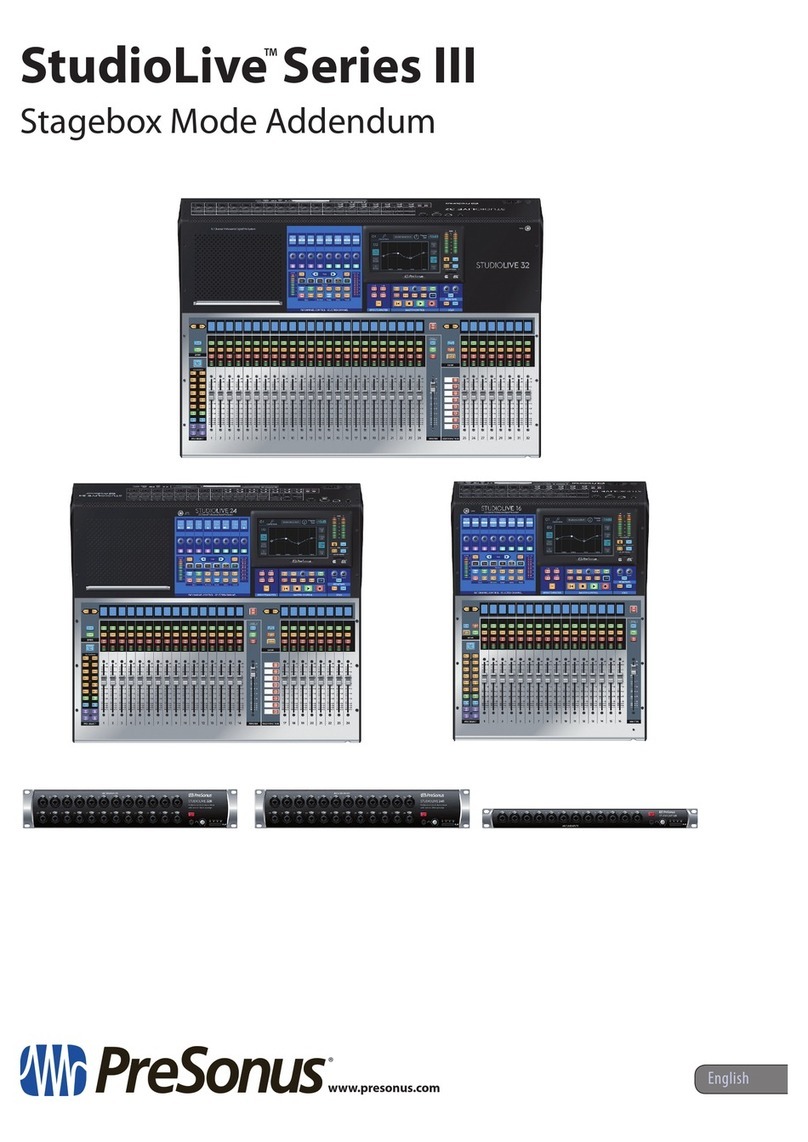
PRESONUS studiolive III series Installation and operating instructions

StudioLive™ Series III
Studio One DAW Control Addendum
www.presonus.com
®
English

Table of Contents
1 Introduction — 1
2 Getting Started — 1
3 Controlling Studio One — 2
3.1 Making the Connections — 2
3.2 Channel Controls — 3
3.2.1 Arming Tracks — 3
3.3 Fat Channel Controls — 4
3.4 Touchscreen Controls — 5
3.4.1 Inserts — 6
3.4.2 Sends — 7
3.4.3 Cue Mixes — 8
3.5 Mix Management — 8
3.6 Metering — 8
3.7 Control Link — 9
3.8 Transport — 9
3.8.1 Transport Screen (Software Control Mode) — 10
3.9 General Session Tools — 11
3.9.1 Views — 11
3.9.2 Save and Undo — 11
3.9.3 Quick Keys — 12
3.10 Active Mixer Controls — 13

1
1 Introduction
StudioLive™ Series III
Studio One DAW Control Addendum
1Introduction
Your StudioLive Series III console mixer provides extensive hardware
control over Studio One. Control channel faders and automation,
plugin parameters, transport functions, and more.
We suggest that you use this addendum to familiarize yourself with the
features, applications, and correct connection procedures for your StudioLive
mixer before trying to connect it to your computer to control Studio One.
This will help you avoid problems during installation and setup.
2Getting Started
To begin using your StudioLive Series III mixer as a controller for
Studio One, connect it to an available Ethernet port on the same
router to which your computer is connected (wired or wirelessly)
or directly to an Ethernet connection on your computer.
StudioLive 32SC
Laptop running Studio One
Control
Audio
Please Note: At the time of publication, remote control over USB is not supported. You
must network your mixer and your computer to use DAW mode in addition to connecting
USB for audio transport so that your StudioLive can used as an audio interface.
Important: If you are hardwiring your computer to the same router as your mixer, you
must disable the wireless connection on your computer. UCNET does not support dual
network connections.
Note: Ethernet-to-Thunderbolt and Ethernet-to-USBC adapters are also supported.
Ethernet-to-USB adapters will not allow your computer to network to a StudioLive mixer.

2
3 Controlling Studio One
3.1 Making the Connections
StudioLive™ Series III
Studio One DAW Control Addendum
3Controlling Studio One
3.1 Making the Connections
1. Once you have networked your mixer and your computer, the next step is to
launch Studio One. Studio One will automatically detect your mixer, no setup
within the application is required.
2. Press the UCNET button on your StudioLive mixer.
3. Tap on the Software Control menu on the Touchscreen and select Studio One
from the drop-down list.
4. Press the DAW button on your mixer to start DAW control mode.
Power User Tip: DAW mode can be toggled on and off at will, allowing you to
control your mixer’s DSP engine and switch back to controlling Studio One with the
touch of a button.
You are now ready to control Studio One!
MonitorFX D
FX B
EFFECTS MASTER MASTER CONTROL
IP Address: 169.254.107.71
Renew Lease
Control Network Transport Controls
Self Assn. Manual SD Card Software Control
Studio One 4.1.4.51037 macOS x64
16.5.199.69
RedStick -PreSonusAudio
Comp Gate
FX CFX D
FX AFX B
EFFECTS MASTER MASTER CONTROL
-2
-12
-24
-36
-48
-65
Main Studio
Mixer Nickname:
None
Mackie Control Emulation (Logic)
HUI Control Emulation (Pro Tools)
IP Mode:
Dynamic
Renew Lease
Software Control
Self Assn. Manual SD Card
Studio One (RedStick-PreSonusAudio)
Software Control:
Studio One
None
Studio One (RedStick-PreSonusAud
MonitorFX D
FX B
EFFECTS MASTER MASTER CONTROL
Permissions
Recording Device:
SD Card

3
3 Controlling Studio One
3.2 Channel Controls
StudioLive™ Series III
Studio One DAW Control Addendum
3.2 Channel Controls
1. Track Name. Displays the track/bus name that the channel strip functions are
controlling.
2. Track Number. Displays the track/bus number that
the channel strip functions are controlling.
3. Automation Mode. Displays the currently selected
automation mode for the track.
4. Pan Position. Displays the track’s current pan position.
5. Select button. This button selects the corresponding track
or bus in Studio One and changes color to match the channel
color codes you have chosen in your session.
6. Solo. Isolates the corresponding track’s output signal in the mix.
7. Mute. Mutes the corresponding track’s output signal in the mix.
8. Meters. Displays the corresponding channel’s signal level.
9. Touch-Sensitive Fader. This 100 mm motorized fader can be used to control
volume levels for any channel or bus in your mix.
3.2.1 Arming Tracks
While Input mode is active in the Fat Channel, press and hold the button below the
Record screen to enter Record Arm Mode. This will allow you to arm multiple tracks
for recording by pressing their select buttons.
When a track is armed for recording, the track name will color-invert on the scribble
strip display to indicate its arm status. Individual track arming can also be controlled
from the Touchscreen and the Fat Channel. See Sections 3.3 and 3.4 for more
information.
Power User Tip: Pressing and holding the Record Arm Mode button in the Fat Channel
also allows you to quickly check the record arm status of all the tracks in your session.
While holding the Record Arm Mode button, the Select button for any track that is already
armed for recording will turn red.
kick
Read
11
2
3
4
5
6
7
8
9
Page
(Insert)
Input Mic/Line Assign
Channel
Stereo Preset
Comp Gate
Processor EQ / Dyn -2
-12
-24
-36
-48
-65
PAN
Center
<C>
Monitor Record Edit
INPUT
Input 1
OUTPUT
Main L-R
AUTO
Mode
Read
Record
kick
Read
1

4
3 Controlling Studio One
3.3 Fat Channel Controls
StudioLive™ Series III
Studio One DAW Control Addendum
3.3 Fat Channel Controls
Press Input in the Fat Channel to access the following Channel controls:
Please note: Because of their unique Fixed Mode Fat Channel design, this functionality is
not available for the StudioLive 32SX and StudioLive 32SC.
INPUTPAN
Input 1
OUTPUT
Main L-R
AUTO
Mode
Read<C>
Edit
RecordMonitorCenter
1234567
1. Pan. Use the encoder to adjust the panning of the currently selected
channel. The current pan position will be displayed on the scribble strip
display. Press the button to reset the pan position to the center.
Power User Tip: Panning can also be adjusted using the value encoder and the
touchscreen on your mixer. See Section 3.4 for more information.
2. Monitor. Press this button to enable monitoring on the selected
channel. Press and hold it to enable monitoring on multiple channels
at once by pressing the Select buttons on the desired channels.
3. Record. Press this button enable record arm on the selected channel. Press
and hold it to arm multiple channels for recording by pressing the Select
buttons on the desired channels. See Section 3.2.1 for more information.
4. Edit. Press this button to open the Control Link editor for your
StudioLive mixer in Studio One. From this window, you can assign any
function in your session to the knobs and buttons in the Fat Channel
section on your mixer. See Section 3.7 for more information.
5. Input. Turn the encoder to change the Input for the selected channel.
6. Output. Turn the encoder to change the Output for the selected channel.
7. Automation Mode. Turn the encoder to change the Automation
mode for the selected channel. This mode can also be changed
from the touchscreen, see Section 3.4 for more information.
Page
(Insert)
Input Mic/Line Assign
Channel
Stereo Preset
Processor EQ / Dyn
OL
-2
-12
-24
-36
-48
-65
Level
Ch 1
1
Ch 2
2
Ch 4
3
Ch 4
4
Ch 5
5

5
3 Controlling Studio One
3.4 Touchscreen Controls
StudioLive™ Series III
Studio One DAW Control Addendum
3.4 Touchscreen Controls
When any track is selected in Studio One, the following controls
are available on your StudioLive mixer’s Touchscreen:
3
4
5
7
8
9
6
2
1
16
10 11 12 13 14
15
1. Track Name. Displays the name of the currently selected Track.
2. Input. Displays the Input source for the currently selected
Track (Audio or MIDI input depending on track type).
3. Mute. Mutes the currently selected Track.
4. Solo. Isolates the currently selected Track.
5. Record Arm. Enables currently selected Track for recording.
6. Monitor. Enables input monitoring for currently selected Track.
7. Pan. Displays pan position. Tap to select and use the Value encoder to adjust.
8. Type. Displays Track type.
9. Output. Displays the Output destination for the currently selected Track.
10. Metering. Displays the metering for the currently selected Track.
11. Inserts. Displays the channel inserts. Tap the plus sign to insert a plug-in.
Tap the plug-in name to instantiate its window in Studio One and its controls
on the StudioLive Fat Channel. See Section 3.4.1 for more information.
12. Insert Scroll. Use these arrows to scroll through additional channel inserts.
13. Sends. Displays the currently selected channel’s sends. Tap the plus sign to add a
new Send. Tap any send in the list to engage Aux Sends mode on the StudioLive
Fat Channel to adjust the send level. See Section 3.4.2 for more information.
14. Sends Scroll. Use these arrows to scroll through additional channel sends.
15. Automation Modes. Tap to select the automation
mode for the currently selected Track.
16. Channel Settings. Tap to open the Channel Settings window. From here you
can change the color of the currently selected track as well as its name.

6
3 Controlling Studio One
3.4 Touchscreen Controls
StudioLive™ Series III
Studio One DAW Control Addendum
3.4.1 Inserts
You can add and edit plug-ins to your session from the Touchscreen by pressing the
Add Insert button.
Power User Tip: You can also open the Add Insert Screen by pressing the Load button in
the Fat Channel.
This will open the Add Insert screen on your mixer.
The Add Insert window in Studio One will also open.
Select the plug-in you would like to insert by touching it on the Touchscreen or
clicking it in Studio One.
Tap the “X”to cancel.
Power User Tip: Press the Processor On button to disable or enable the currently selected
channel’s FX Chain.
Inserts Sends
Pro EQ
Gate
Compressor
Reverb
Main Out
Drums
-72
-48
-36
-24
-12
-6
0
6
10
Input 1
Kick
M S
Drums
(Insert)
Assign Stereo Preset
Comp Gate
EQ / Dyn
FX CFX D
FX AFX B
EFFECTS MASTER
-2
-12
-24
-36
-48
-65
Ch 4
3
Ch 4
4
Ch 5
5
Ch 6
6
Ch 7
7
Recording Device:
SD Card
FX CFX D
FX AFX B
Track 1: Add Insert
Bitcrusher
Binaural Pan
Channel Strip
Chorus
Compressor
Dual Pan
Expander
Bitcrusher
Chorus
Channel Strip
Page
(Insert)
Input Mic/Line Assign
Channel
Stereo Preset
Processor EQ / Dyn
OL
-2
-12
-24
-36
-48
-65
Level
Center
<C>
Monitor Record Edit
Input 1 Main L-R
Processor

7
3 Controlling Studio One
3.4 Touchscreen Controls
StudioLive™ Series III
Studio One DAW Control Addendum
3.4.2 Sends
You can add and edit sends to your session from the Touchscreen by pressing the
Add Sends button.
This will open the Add Sends screen on your mixer and
the Add Sends window in Studio One.
Select the send you would like to insert by touching it on the Touchscreen or clicking
it in Studio One.
Tap the “X”to cancel.
The first eight sends for every channel are also available on the faders by pressing
the Mix 1-8 buttons. This will bring up the corresponding send slot for every channel.
The active bus name for each will be displayed below the track name.
If no bus is active for the currently selected send slot on any given channel, this
middle field will be blank.
Power User Tip: Press the Main Mix button to return to the main Studio One mix.
Inserts Sends
Pro EQ
Gate
Compressor
Reverb
Main Out
Drums
Write
Latch
Touch
Read
Off
Auto
-72
-48
-36
-24
-12
-6
0
6
10
S
FX CFX D
FX AFX B
-24
-36
-48
-65
Track 1: Add Send
Bus 2
Bus 1
Bus 3
Bus 4
Bus 2
Bus 4
Bus 3
Sub/Matrix Sub/Matrix
Sub/Matrix Sub/Matrix
Sub/Matrix Sub/Matrix
Sub/Matrix Sub/Matrix
Sub/Matrix Sub/Matrix
BANK
Mix 1
Mix 3
Mix 5
Mix 7
Mix 2
Mix 4
Mix 6
Mix 8
Mix 9 Mix 10
Ch 1
Bus 1 Reverb Bus 5
Ch 2 Ch 3 Ch 4
Mix 1

8
3 Controlling Studio One
3.5 Mix Management
StudioLive™ Series III
Studio One DAW Control Addendum
3.4.3 Cue Mixes
The first eight Cue Mix sends for every channel are available on the faders by
pressing the Mix 9-16 buttons. This will bring up the corresponding Cue Mix send for
every channel across the faders.
Power User Tip: Press the Main Mix button to return to the main Studio One mix.
3.5 Mix Management
StudioLive DAW Control mode allows you to filter which
channels you view locally on the mixer:
By default, the USER layer is active when you enable DAW mode and every channel
type is displayed on your StudioLive mixer.
Press the Inputs button to view Input channels only.
Press the Aux Inputs button to view the FX Channels.
Press the DCA Groups button to view the VCA Channels.
Press the Mix / FX Masters button to view the Bus Masters.
Power User Tip: On the StudioLive 24 and StudioLive 32, the FX Channels, VCA Channels,
and Bus Masters will be displayed on the last bank of eight faders. In this way, you can
split up large mixes and have access to critical channels quickly and easily.
Use the Next and Prev buttons to view more channels.
3.6 Metering
Metering is a critical part of the production process. Studio One’s meters visually
display audio levels according to your choice of metering style, and you can meter
these levels at various stages in the signal path. For your convenience, these
same meters are available on your StudioLive mixer and are scaled as follows:
•Bottom Green LED: -48 dBVU to -7 dBVU
•Middle Green LED: -6 dBVU to +9 dBVU
•Top Red LED: +10 dBVU
Power User Tip: The top “clip” LED will remain illuminated for 5 seconds after the signal
drops below -0.5 dBFS

9
3 Controlling Studio One
3.7 Control Link
StudioLive™ Series III
Studio One DAW Control Addendum
3.7 Control Link
Click on the pull-down menu in the Control Link display and select UCNET
Remote to launch the StudioLive Fat Channel USER layer editor window.
Right-click on any control in the Control Link window and select
“Assign Command”to customize your Fat Channel USER layer.
Press the USER button to access these controls remotely from your StudioLive.
3.8 Transport
1 2 3 4
1. Return to Zero. Returns playback to the start position. Press with Option
for Rewind. Press with CTRL to navigate to the previous marker.
2. Stop. Stops playback. Press with Option for Fast Forward.
Press with CTRL to navigate to the next marker.
3. Play. Starts playback at current position.
4. Record. Starts Record at current position.
Press the Tap button to turn the Metronome on or off.
When DAW Mode is active, the Transport on your StudioLive mixer will
always control your Studio One session. However, you have two options for
control when you are in Live Mixing mode and DAW mode is inactive.
Page
(Insert)
Mic/Line Assign
Channel
Stereo Preset
Comp Gate
EQ / Dyn
FX CFX D
FX AFX B
EFFECTS MASTER
-2
-12
-24
-36
-48
-65
Ch 4
3
Ch 4
4
Ch 5
5
Ch 6
6
Ch 7
7
Recording Device:
SD Card
Studio One 3.9.9.9.45025 OSX x64
10.0.0.3
PreSonus 225

10
3 Controlling Studio One
3.8.1 Transport Screen (Software Control Mode)
StudioLive™ Series III
Studio One DAW Control Addendum
From the UCNET screen, you have the option to select which recording device the
Transport will control: SD Card or Software Control.
When SD Card is active, the Transport will control the SD Capture session when DAW
mode is inactive. When Software Control is active, the Transport will control the
connected Studio One session whether DAW mode is active or not.
3.8.1 Transport Screen (Software Control Mode)
While Software Control mode is active, pressing the Edit button in the Live Recording
section will open the Transport screen:
2
4
5
7
6
3
1
8910 11 12 13 14 15 16
1. Session Name. Displays the current session’s name.
2. Current Position. Displays the current position of the playback cursor.
3. Loop Length. Displays the current loop length.
4. Time Signature and Tempo. Displays the time signature
and tempo of the current Studio One session.
5. Record Mode. Tap to enable / disable Record Replace Mode.
6. Preroll. Tap to turn Preroll on or off.
7. Click. Tap to turn Click on or off.
8. Previous Marker. Tap to go to the previous marker.
9. Rewind. Tap and hold to rewind playback position.
10. Fast Forward. Tap and hold to fast forward playback position.
11. Next Marker. Tap to go to the next marker.
12. Return to Zero. Tap to return the playback cursor to the zero position.
13. Stop. Tap to stop playback.
14. Play. Tap to start playback.
15. Record. Tap to engage record.
16. Loop. Tap to turn looping on or off.
MonitorFX D
FX B
EFFECTS MASTER MASTER CONTROL
IP Address: 169.254.107.71
Renew Lease
Control Network Transport Controls
Self Assn. Manual SD Card Software Control
Studio One 4.1.4.51037 macOS x64
16.5.199.69
RedStick -PreSonusAudio
Monitor
Sends
Reverb
Main Out
Drums
Write
Latch
Touch
Read
Off
Auto

11
3 Controlling Studio One
3.9 General Session Tools
StudioLive™ Series III
Studio One DAW Control Addendum
3.9 General Session Tools
In addition to remotely controlling various aspects of your session, your
StudioLive also provides more general controls to simplify your Studio
One workflow. This section describes these additional functions.
3.9.1 Views
The four FX Mute buttons on your StudioLive allow you to open
and close the following views in your Studio One session:
•FXA Mute: Open/Close Inspector
•FXB Mute: Open/Close Editor
•FXC Mute: Open/Close Mixer
•FXD Mute: Open/Close Browser
3.9.2 Save and Undo
Press Store to save your session.
Press Recall to undo the last action.
Power User Tip: Press SHIFT + Recall to Revert your Session to a previous version.
MonitorFX D
FX B
EFFECTS MASTER MASTER CONTROL
IP Address: 169.254.107.71
Renew Lease
Self Assn. Manual SD Card Software Control
Monitor
MASTER CONTROL
Renew Lease
Control Network Transport Controls
Self Assn. Manual SD Card Software Control
RedStick -PreSonusAudio

12
3 Controlling Studio One
3.10 Active Mixer Controls
StudioLive™ Series III
Studio One DAW Control Addendum
3.9.3 Quick Keys
The User Function buttons can be assigned to any key command in Studio One. To
program your favorite commands:
1. While DAW Mode is active, press the Home button.
2. Touch the System icon on the Touchscreen.
3. Touch the User Assign Buttons icon the Touchscreen.
4. Assign functions to any of the eight User Function buttons
by pressing the Edit button next to the corresponding
User Function button name in the Touchscreen.
3.10 Active Mixer Controls
While Studio One Control mode is active, the following
mixer controls will still function as active controls for your
StudioLive mixer, rather than your Studio One session:
•Monitor Bus Controls
•Solo Bus Controls
•Tape Controls
•Talkback Controls
Power User Tip: When a PreSonus Audio Interface with onboard Talkback (Quantum- or
Studio 192-series) is selected as the audio interface for your Studio One session, the
StudioLive Talkback controls the Studio One / Interface Talkback, not the StudioLive.
MonitorFX D
FX B
EFFECTS MASTER MASTER CONTROL
IP Mode:
IP Address: 169.254.107.71
Dynamic
Renew Lease
Control Network Transport Controls
Self Assn. Manual SD Card Software Control
16.5.199.69
RedStick -PreSonusAudio
FX CFX D
FX AFX B
TB
1
Ch. 1
PreampGa.. 17 dB
System User Profiles Audio Routing Talkback Edit
Utils Soft PowerCapture
System
Permissions User But ton Assgins
FirmwareFat Ch Load/Paste
Link Aux Mutes Bluetooth Reg.
User Button Assgins

© 2019 PreSonus Audio Electronics, Inc. All Rights Reserved. AudioBox, CoActual, DigiMax, Eris, FireStudio, Nimbit, PreSonus, QMix, Riff to Release, Sceptre, StudioLive, Active
Integration, and XMAX are trademarks or registered trademarks of PreSonus Audio Electronics, Inc. Capture, Impact, Mixverb Presence, RedLightDist, SampleOne, Studio One, and
Tricomp are trademarks or registered trademarks of PreSonus Software Ltd. Mac and Mac OS are registered trademarks of Apple, Inc., in the U.S. and other countries.Windows is a
registered trademark of Microsoft, Inc., in the U.S. and other countries. Other product names mentioned herein may be trademarks of their respective companies. All specifications
subject to change without notice...except the recipe, which is a classic.
Dinner is Served
Added bonus: PreSonus’previously Top Secret recipe for…
Rice Dressing
Ingredients:
•1 lb ground beef
•1 lb chopped chicken liver
•1 onion (diced)
•2 green peppers (diced)
•4-6 celery stalks (diced)
•2 garlic cloves (minced)
•¼ C. chopped fresh parsley
•3 C. chicken stock
•6 C. cooked rice
•1 Tbs. oil
•Salt and pepper to taste
•Cayenne pepper to taste
Cooking Instructions:
1. In a large pot, heat oil on medium high and add meat, salt, and pepper to taste. Stir until meat begins to brown.
2. Lower heat and add all vegetables. Cook until onions are transparent and celery is very tender. Add stock as necessary to
prevent burning.
3. Stir in cooked rice. Add remaining stock and simmer on low until ready to serve.

18011 Grand Bay Ct. • Baton Rouge,
Louisiana 70809 USA• 1-225-216-7887
www.presonus.com Part# 70-22000069-C
®
StudioLive™ Series III
Studio One DAW Control Addendum
Other manuals for studiolive III series
8
Table of contents
Other PRESONUS Mixer manuals
Popular Mixer manuals by other brands

Cleveland
Cleveland MKEL-40-T Operator's manual

Honeywell
Honeywell HON 985A manual
Bifinett
Bifinett KH 1109 Operating and safety instructions
Rotel
Rotel U3774CH Instructions for use
SYNQ AUDIO RESEARCH
SYNQ AUDIO RESEARCH SMP 8.2 - V1.0 manual

KitchenAid
KitchenAid KSM90PS - Ultra Power Stand Mixer parts list


