prestomusic p10 User manual

User Manual
p10
HI-RES MUSIC STREAMER

2 3
Introduction
Thank you for choosing the Presto Music streamer, which we hope brings many hours
of enjoyment listening to your favourite music at the highest quality resolution. By
controlling the streamer from the Presto Music app you will be able to explore some
of the nest music making, curated by our expert editorial team, and learn more about
the history of the music and the artists who perform it. The only limit on streaming the
highest resolution audio is the capability of your internet connection.
What’s in the box
Main Unit x 1
User’s Manual x1
3.5mm Mini Jack to RCA cable x 1
Optical cable x 1
USB cable x 1
Power adapter x 1
Main Features
• Stream music direct through your Wi-Fi network.
• Free iOS and Android apps available for mobile devices.
• Free Windows and Mac apps available for desktop and laptop computers.
Specifications
Connectivity: Wireless network IEE802.11 b/g/n 2.4G
WPS (for setup)
Bluetooth 5.0 (for setup only)
Power Input: 5V-1A micro USB input
Audio Output: Analog 3.5mm or Toslink Optical
Music Source: Presto Music App
Frequency Response: 20Hz to 20kHz
Sample Rate: Up to 24bit, 192 kHz
Dimensions: 95mm x 53mm x 18mm
Weight: 0.07kg (o.16lb)
Interface
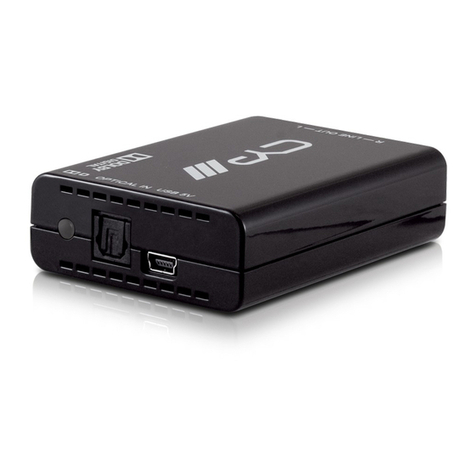
• LED status light - solid blue indicates connected, ashing indicates ready to setup.
• WPS button - button for pairing to internet hub. Also acts as a reset button when
held for longer than 10 seconds.
• Aux-Out - analog 3.5mm out.
• Optical-Out - digital audio output.
• Power input - 5V/1A micro USB input.

45
Setup
Installing the streamer should only take a few minutes, and can be done through any
device that is running the Presto Music app and has Bluetooth. Alternatively, if you are
using a computer you can connect to your home network using the WPS button on the
streamer box. You only need to do it once, and when the streamer is recognised on
your Wi-Fi network you will be able to control it through multiple devices, as long as
they are connected to your network. The streamer takes data directly from your Wi-Fi
network, meaning that the devices are only used to control it.
Option 1 - Aux-Out to Amplier
Use the 3.5mm jack on the streamer to connect to one of your amplier’s line inputs,
using the cable provided (or your own equivalent cable). The input on your amplier
could be labelled ‘Audio in’, ‘Auxiliary In’, or ‘Aux In’, or you could use inputs labelled as
CD, Radio, TV audio.
Note: Please be cautious if using an input designed for a record player/turntable,
which might be labeled ‘Phono’, as these are often designed to boost the low-level
signal from record players, and could potentially damage your amplier.
Option 2 - Optical-Out to DAC (Digital to Analogue Converter)
Remove the square cover from the optical port on the streamer and connect the
optical cable (or your own equivalent) to your DAC. The optical cable may come with a
small plastic cap which should be removed.
Connect the USB cable to the plug provided and connect your streamer to the mains
power (you should now see a ashing blue light on the front centre of the streamer,
initially quite fast and then a bit slower).
Connecting the streamer to your home Wi-Fi network
The following step only needs to be done once for the streamer. Once this step is done
all installations of the app on dierent devices and computers will be able to see and
control the streamer.
If you have an iOS or Android device we strongly advise using this method to set up.
VERY IMPORTANT - Before proceeding past this point, ensure that:
• Bluetooth is switched on in your device.
• Your phone is connected to your home Wi-Fi network and not running o a
mobile data (eg. 3G, 4G or 5G) connection.
• The Streamer is powered on and ashing blue (at a rate on 1 ash per second).
1. Download the Presto Music streaming app, which is available in the Apple and
Android app stores.
2. Open the app and log in using your existing Presto Music account details (email and
password) - if you do not already have an account you can create one at this point.
3. Click on Settings cog in the top right corner.
4. Next to Streamer click ‘Add’, then click ‘Continue’.
5. Select ‘Music Streamer’.
6. Select your wireless network and enter your Wi-Fi password.
7. Wait whilst your streamer connects to your network (probably 20-30 seconds).
Success is indicated by a solid blue light on the streamer, and a message in the
app prompting you to rename your streamer. You can give it a new name or leave
it blank, in which case it will be named simply ‘Streamer’. You can rename it later if
you choose to do so.
8. Updating the rmware on the streamer: Upon successful installation, the app may
prompt you to upgrade the rmware on your streamer. It is important that you do
this to update the streamer with the latest version - it will only take a few minutes.
Make sure the streamer is not disconnected during this procedure.
9. If you turned on Bluetooth specically for the the setup you can now turn it o again.
10. You can switch the audio output between the device and the streamer in the
settings menu.

6 7
WPS setup
If you do not have a mobile device and will be controlling the streamer from the Win-
dows or Mac desktop app you will need to use the WPS button on the streamer and
on your router to in order to add the streamer to your home network. The app is not
needed for this process.
1. Press the WPS button on your streaming box - the blue light should start ashing
rapidly.
2. Press the WPS button on your home Wi-Fi router.
3. After a few seconds the blue light should stop ashing and remain solid blue.
4. Open the app, click on the settings cog, in the Audio Output section choose
“Change”, and the streamer should now be visible. NOTE: it may take a couple of
seconds for it to show on the list of output options.
Audio Settings
Volume control
You can adjust the output volume of the streamer in the audio output section of the
settings menu, or from the speaker icon when listening. For best results we recom-
mend leaving the streamer output on full volume and adjusting the volume on your
amplier accordingly when listening.
Firmware Updates
From time to time the application will notify you in the app when there is a new rm-
ware version available. It’s recommended to update rmware whenever available as
this might not only correct bugs or improve security, but also can add new features or
services.
Troubleshooting
Status of the blue light
O The streamer is not connected to power.
Solid Setup is complete, the streamer is connected to your
Wi-Fi network and ready to be used.
Slow ash (1 ash per second) The streamer is waiting to be set up on your Wi-Fi
network. Please follow the instructions on the previous
pages to set it up.
Rapid ash (around 3 ashed per
second)
The streamer is either connecting or re-connecting
to your network. Please wait for it to complete this
process (it may take a few minutes).
Problem Things to try...
When trying to install the streamer I
click add ‘Add’ and then ‘continue’, it
searches and then says ‘No streamers
found’.
Bluetooth is not enabled on your mobile device. Please
check Bluetooth in enabled and try again.
If the light on the streamer is solid blue, it means your
streamer is already set up on your Wi-Fi network. You
should only need to add it once.
When trying to install the streamer, it
cannot nd my network.
The streamer might be too far away from the router,
try moving it closer.
I cannot see my streamer in the ‘Audio
Output’ options in settings.
It can take up to 10 seconds for the streamer to appear
in the ‘Audio Outputs’ page, so please wait a short
while.
Check that the device you are using is on the same Wi-
Fi network which you set the streamer up on.

8
Problem Things to try...
The light on the streamer is not on
at all.
The blue light has deliberately been set quite dim so
as to be unobrusive, and can be hard to see in bright
sunlight. Check that it is denitely not on.
No blue light at all suggests there is no power going
to the streamer. Check it is connected to the power
supply. If possible try alternative cables and plugs to
rule out any issues with those.
I’ve changed my Wi-Fi password on my
router, how do I update the streamer?
If your router is no longer recognising the streamer
please hold down the WPS button for 10 seconds,
until the blue light is ashing, and repeat setup. This is
similar to a factory reset.
I cannot hear any sound. Make sure the lead connecting the streamer to your
amplier is properly inserted, the correct output on the
amp is selected and the volume is not set to zero.
Check in the apps settings menu that the streamer
volume control in the app is set to full.
You can plug a standard pair of headphones directly
into the streamer to help diagnose where a problem
may be.
The audio keeps buering and
stop-starting.
Check that your router has a good connection and
other devices in the house are working well.
Press the WPS button on the back of the streamer and
wait for streamer to recover (it will take a few minutes
and should go solid blue once complete).
You will also need to close the app on your device and
re-open it, then select the streamer in ‘Audio output’.
If you have any further questions please email us at

FCC Caution.
§ 15.19 Labelling requirements.
This device complies with part 15 of the FCC Rules. Operation is subject to the following two
conditions: (1) This device may not cause harmful interference, and (2) this device must accept
any interference received, including interference that may cause undesired operation.
§ 15.21 Information to user.
Any Changes or modifications not expressly approved by the party responsible for compliance
could void the user's authority to operate the equipment.
§ 15.105 Information to the user.
Note: This equipment has been tested and found to comply with the limits for a Class B digital
device, pursuant to part 15 of the FCC Rules. These limits are designed to provide reasonable
protection against harmful interference in a residential installation. This equipment generates
uses and can radiate radio frequency energy and, if not installed and used in accordance with the
instructions, may cause harmful interference to radio communications. However, there is no
guarantee that interference will not occur in a particular installation. If this equipment does cause
harmful interference to radio or television reception, which can be determined by turning the
equipment off and on, the user is encouraged to try to correct the interference by one or more of
the following measures:
-Reorient or relocate the receiving antenna.
-Increase the separation between the equipment and receiver.
-Connect the equipment into an outlet on a circuit different from that to which the receiver is
connected.
-Consult the dealer or an experienced radio/TV technician for help.
RF warning for Mobile device:
This equipment complies with FCC radiation exposure limits set forth for an
uncontrolled environment. This equipment should be installed and operated withminimum distan
ce 20cm between the radiator & your body.
Table of contents
