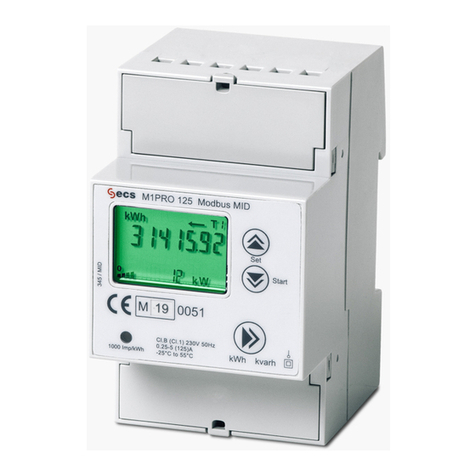
PRESTON PRESSURE ALT-621 User manual

ALT-621
ASP-621
Digital Indicators
OPERATION AND
MAINTENANCE MANUAL
pr stonpr ssur .com
Revision 5, December, 2019

PRESTON PRESSURE LLC
ALT-621/ASP-621
USER AND MAINTENANCE MANUAL
TABLE OF CONTENTS
Page
Warranty and Liability Stat m nt--------------------------------------------- 2
1. G n ral Information------------------------------------------------------------------- 3
1. Description --------------------------------------------------------------------- 3
2. Models covered --------------------------------------------------------------- 3
3. Speci ications ------------------------------------------------------------------ 4
4. Front Panel Description ------------------------------------------------------- 5
2. Op ration -------------------------------------------------------------------------------- 6
3. Calibration Proc dur s ---------------------------------------------------------------- 7
1. Altimeter Calibration ---------------------------------------------------------- 7
2. Airspeed Calibration ----------------------------------------------------------- 10
4. Maint nanc and Troubl shooting --------------------------------------------------12
1. Annual Maintenance ----------------------------------------------------------- 12
2. Troubleshooting ---------------------------------------------------------------- 12
1

WARRANTY AND LIABILITY STATEMENT
Preston Pressure warrants its products against de ects in workmanship and material under
normal, intended use or a period o two years rom the date o purchase.
Preston Pressure’s limit o liability shall be to repair or replace the product at their
discretion. Transportation shall be pre-paid to the Preston Pressure actory or authorized
service acility. Preston Pressure shall not be liable or any consequential damage
expense.
This warranty shall be void i the product has been repaired or altered in any way that
adversely a ects its per ormance or reliability. This warranty shall be void i the product
has been subject to abuse, misuse, contamination, negligence, accident, shipping damage,
or improper operation.
Preston Pressure reserves the right, at its own discretion, to make changes in materials,
designs, inish, or speci ications, without obligation to install or incorporate such changes
in products previously manu actured.
This warranty shall, at Preston Pressure’s option, become void i the ownership is
changed, unless the prior owner or proposed owner obtains written approval o
continuation o coverage prior to the change o ownership.
Preston Pressure reserves the right to revise this manual and to make changes to content
rom time to time in the content thereo , without obligation to noti y any person o such
revision.
This device complies with part 15 of the
FCC Rules. Operation is subject to the following
two conditions: 1) This device may
not cause harmful interference, and 2) this
device must accept any interference received,
including interference that may
cause undesired operation.
2

CHAPTER 1
GENERAL INFORMATION
The ALT-621 is a digital display tester used to test aircra t altimeters. Altitude is
displayed in eet and meters, with increments o 2, and 5 eet.
The ASP-621 is a digital display tester used to test aircra t airspeed indicators. Airspeed
is displayed miles per hour, kilometers per hour, and knots.
This manual is valid for th following mod ls:
ALT-621-35 (altimeter with 35,000 eet capability)
ALT-621-50 (altimeter with 50,000 eet capability)
ASP-621-350 (airspeed with 350 knot capability)
ASP-621-650 (airspeed with 650 knot capability)
3

SPECIFICATIONS
Display Typ : LCD
Display Siz : 2.53” X 0.53” (64.5mm X 13.5mm)
Physical dim nsions: 3.3” (8.4cm) wide x 3.5” (8.9cm) tall x 0.7” (1.8cm) deep on ace; rear can is
3.15” (7.7cm) diameter x 3.05” (7.75cm) deep
Mounting hole pattern: 2.5” x 2.5” (6.35x6.35cm)
Fitting threads are 1/8 inch NPT (national pipe thread)
ALT-621 W ight: 0.6 lb (270 grams)
ASP-621 W ight: 0.7 lb (320 grams)
Voltag : 12VDC, positive center
Curr nt draw: 150 mA
Oth r F atur s:
Leak test eature: 2 minutes, selectable down to 30 seconds
VSI (vertical speed indicator) 20 to 10000
Th ALT-621 and ASP-621 indicators can b mount d in any position, at any angl .
Not : Th ALT-621 and ASP-621 indicators do NOT hav th pr cision r quir d to
t st RVSM altim t r syst ms.
Th ALT-621 and ASP-621 indicators ar NOT int nd d for flight or us in aircraft.
4
Digital Altim t r:
Rang for ALT-621-35: -1000 to 35,000 50,000 eet (-305 to 10,670 meters)
Rang for ALT-621-50: -1000 to 50,000 eet (-305 to 15,240 meters)
R solution: 1- oot increments, all metric resolution is in 1-meter increments
Units Display d: Feet, Meters , mBar, inHg
T mp ratur rang : 32 degrees F to 125 degrees F (0 C to 51 C) limited by LCD display
Digital Airsp d:
Rang for ASP-621-350: 20 – 350 Knots, 34 – 648 KPH, or 21 – 402 MPH
Rang for ASP-621-650: 20 – 650 Knots, 34 – 1203 KPH, or 21 – 748 MPH
R solution: 1 MPH, 1 KPH, 0.1 Knot
T mp ratur rang : 32 degrees F to 125 degrees F (0C to 51 C) limited by LCD display

Front Pan l D scription
The UNITS button is used to toggle between the various units o measurement.
The UNITS button on the ALT-621 will toggle between a display o eet, meters, mbars,
and inHg.
The UNITS button on the ASP-621 will toggle between a display o MPH, KPH, or
Knots.
The EXIT button is used to exit out o the leak check mode.
The LEAK CHECK will begin a 120 second timer, and the display will also show the
gain or loss o altitude or airspeed experienced during the displayed time period. I the
operator wishes to select a di erent length o time, the Leak Check button may be
pressed repeatedly, which will cause a reduction in the timer counter in 30-second
increments. The timer will not toggle above 120 seconds nor under 30 seconds. Once the
time is selected, press the Units button to start the timer.
The LIGHT button will toggle the display backlight ON or OFF.
Note: there is no method provided to turn the power on or o . I this unction is
necessary, an external switch will have to be added.
5

CHAPTER 2
OPERATION
Prior to using the ALT-621 or ASP-621 indicator, the user should read this manual in its
entirety.
Select the desired units o pressure measurement by pressing the UNITS button as
needed.
A leak check may be initiated by pressing the LEAK CHECK button. This will display a
120 second timer, and the display will also show the gain or loss o altitude or airspeed
experienced during the displayed time period. I the operator wishes to select a di erent
length o time, the Leak Check button may be pressed repeatedly, which will cause a
reduction in the timer counter in 30-second increments. The timer will not toggle above
120 seconds nor under 30 seconds. Press the Units button to start the timer.
At the end o a leak check cycle, or to abort the cycle, the EXIT button may be pressed,
which will return the display to the normal operating mode.
6

CHAPTER 3
CALIBRATION PROCEDURES
Th r comm nd d calibration int rval for th ALT-621 and ASP-621 indicators is
on y ar. I at any time during regular use the unit becomes unreliable or out o correct
operating calibration, it must be repaired and/or re-calibrated be ore continuing its use.
The ALT-621 is easy to calibrate. There are 4 set points used in the calibration o the
altimeter (the ALT-621-50 has 7 set points). This enables the altimeter to have a greater
degree o accuracy, allowing it to sel -correct to the nearest calibrated set point.
Note: the calibration actors are stored in the microcontroller’s EEPROM memory. This
memory does not need battery back-up. The calibration will not be lost when power is
removed.
Altim t r Calibration Proc dur s
1. Apply power to the ALT-621. Go to the mBar display, and allow the unit to warm up
or a minimum o 15 minutes.
2. Connect a known altitude pressure standard to the Vacuum Port.
3. Press the Exit and Leak Check buttons simultaneously. The display will change to:
Cal? No Y s
4. Press the Leak Check button to proceed with calibration, or select the Exit button to
exit out o the calibration mode without any changes being made.
5. At this point the display will read:
Goto
0 F t
This is to noti y the technician that the current calibration point is 0 eet. To select a
di erent calibration point, press the backlight button (the button will not activate the light
while in Cal mode).
There are 4 calibration points: 0, 10,000, 20,000, 30,000 (the ALT-621-50 has 3
additional set points at 40,000, 45,000, 50,000) eet. When the desired calibration point is
displayed, press the Units button.
The display will read:
7

Altitude number (in eet)
In ^ xxx v
(Where Altitude is the sensed altitude in eet, and xxx is the current calibration value.)
Writ down th calibration valu so it can b r -s t if n d d!
The In is above the Units button. Press this button when ready to input the selected
correction value, as described in the next step.
6. Go to a pressure that corresponds to the selected calibration point (re erenced rom
29.92 inHg/ 0 eet), as read rom a pressure standard. When the altitude is stable or
approximately 15 seconds, note the altitude displayed on the ALT-621 display in
calibration mode.
I the displayed altitude is lower than the standard, press the Exit button as needed to
incrementally raise the altitude to be equivalent to the standard.
I the displayed altitude is higher than the standard, press the Leak Check button as
needed to incrementally lower the altitude to be equivalent to the standard.
As the altitude is adjusted, note that the displayed correction actor also changes, and the
change is in increments smaller than the altitude. Use this to ine-tune the altitude as
close as you can to the standard.
When the ALT-621 altitude matches the standard as close as possible, wait another 15
seconds to ensure that the internal mathematical iltering corrections have been done. I
satis ied with the results, press the Units button to save the selected correction, and the
display will automatically proceed to the next calibration level.
7. Repeat the procedure in step 6 at each requested altitude: 10000, 20000, 30000, 40000,
45000, and 50000 eet as needed
8. A ter entering the calibration value o the highest altitude, pressing the Units button
will change the calibration to the VSI calibration mode. Select a vertical descent speed
(5,000 eet is suggested) on the calibration test equipment and activate it. The ALT-621
will indicate the calculated VSI value. Adjust i needed by pressing the Exit or Leak
Check buttons. When inished, press the Units button. The VSI calibration value will be
saved.
9. A ter the VSI calibration has been entered, the display will brie ly read “Finish d Cal”
and then re-start. There is no need to re-cycle power.
H lpful Not s: By pressing the Light button the calibration can be cycled through the
various calibration points o 0, 10,000, 20,000 eet, etc. This is handy or use in those
cases when only one range is in need o calibration. Note, however, that the unit must be
within less than 5,000 eet o the selected range in order to save the new value. This
eliminates accidentally saving a value when in the incorrect pressure range.
8

Note: Allowable error tolerances are as ollows:
Altitude +/-Error Altitude +/-Error
-1000
0
500
1000
1500
2000
3000
4000
6000
8000
10000
12000
5
5
5
5
6
7
7
8
10
15
20
22
14000
16000
18000
20000
22000
25000
30000
35000
40000
45000
50000
25
27
30
32
35
38
45
51
57
63
70
ALT-621 S/N
FOR TEST
ALTITUDE
DISPLAY
ALTITUDE
FOR TEST
ALTITUDE
DISPLAY
ALTITUDE
- 1000 14000
0 16000
500 18000
1000 20000
1500 22000
2000 25000
3000 30000
4000 35000
6000 40000
8000 45000
10000 50000
12000 n/a n/a
Calibrated by: ___________ Date: ________________
Next Calibration Due Date: ______________________
9

Airsp d Calibration Proc dur s
1. Apply power to the ASP-621 display and allow unit to warm up or a minimum o 15
minutes.
2. Connect a known pressure standard to the Pressure and Static ports. Both ports should
be sensing the same pressure. The calibration steps 6 and 7 will be repeated once or each
sensor. The irst time is or the Pressure port sensor, and the second time or the Static
port sensor.
3. Press the Exit and Leak Check buttons. The display will change to:
Cal? No Y s
4. Press the Leak Check button to proceed with calibration, or select the Exit button to
exit out o the calibration mode without any changes being made.
5. At this point the display will read:
Goto 0
F t
Press the Units button to continue.
The display will read:
Pt XXX (Pitot sensor and Altitude)
In ^ xxx v
Writ down th calibration valu so it can b r -s t if n d d!
The In is above the Units button. Press this button when ready to input the selected
correction value, as described in the next step.
6. Using the pneumatics o the test box or an attached pressure standard, go to a pressure
o 1013.25 mBar (sea level pressure o 0 eet), as read rom the pressure standard. When
the pressure is stable or approximately 15 seconds, note the pressure displayed on the
ASP-621 display in calibration mode.
I the displayed pressure is lower than the standard, press the Exit button as needed to
incrementally raise the pressure to be equivalent to the standard.
I the displayed pressure is higher than the standard, press the Leak Check button as
needed to incrementally lower the pressure to be equivalent to the standard.
As the pressure is adjusted, note that the displayed correction actor also changes, and the
change is in increments smaller than the pressure. Use this to ine-tune the pressure as
close as you can to the standard.
1

When the pressure matches the standard as close as possible, wait another 15 seconds to
ensure that the internal mathematical iltering corrections have been done. I satis ied
with the results, press the Units button to save the calibration.
7. I this is the irst sensor calibration (the Pitot sensor), the display will indicate again the
same display as in step 5. Repeat steps 5 and 6 or the Static sensor. A ter the second
calibration point has been entered, the display will go blank and then re-start rom the
very beginning o the program as i the unit had just been turned on.
8. When a satis actory calibration is obtained at this test point, go through each test point
in the ollowing chart, and enter the corrected value at each point. (The correction chart
may be photocopied, cut out, and ixed to the test box or handy re erence.)
TEST DISPLAY TEST DISPLAY
AIRSPEED AIRSPEED AIRSPEED AIRSPEED
40 Kts 250 Kts
60 Kts 275 Kts
80 Kts 300 Kts
100 Kts 325 Kts
120 Kts 350 Kts
140 Kts 375 Kts
160 Kts 400 Kts
180 Kts 425 Kts
200 Kts 450 Kts
225 Kts 500 Kts
Calibrated by: ___________ Date: ________________
Next Calibration Due Date: ______________________
1

CHAPTER 4
MAINTENANCE AND TROUBLESHOOTING
Normal maintenance is limited to per orming calibration checks, and re-calibration i
necessary. Re er to the ollowing chart o symptoms, causes, and repair comments:
SYMPTOMS POSSIBLE CAUSES COMMENTARY
Display shows garbage Microcontroller had a
power brown-out
Re-cycle power.
Display never inishes
initializing
Bad solder joint or sensor Return unit to actory.
Display restarts when a
pump switch is toggled
Low Voltage condition, or
electrical inter erence is
a ecting the instrument
A capacitor may need to be
placed across power supply,
or use higher amperage
power supply.
Displays do not turn on Low voltage Veri y power to unit.
Removal o rear ittings may damage the indicator!
I a rear itting seems to be too tight, and there is danger o damaging the plastic case,
ollow these instructions to prevent irreversible damage to the indicator:
1. Disconnect power and external tubing, and remove indicator rom test unit.
2. Remove ront keypad panel. (Some older units have this panel glued in place. I
this is the case, care ully cut around the top and bottom keypad edges, then insert
a thin prying kni e, and gently pry top panel until released.)
3. Remove small screws on display, then pull out electronic circuits.
4. Remove small screws used on power connector.
5. Disconnect internal tubing (mark tubes to match with ittings or reassembly).
6. Push itting out rom the inside.
7. (Older, non-production units: Use deep socket wrench to hold internal itting
while removing rear itting.)
8. Reassemble indicator. (Note: the screws or the power connector are longer than
the screws or the display.)
1
This manual suits for next models
1
Table of contents
