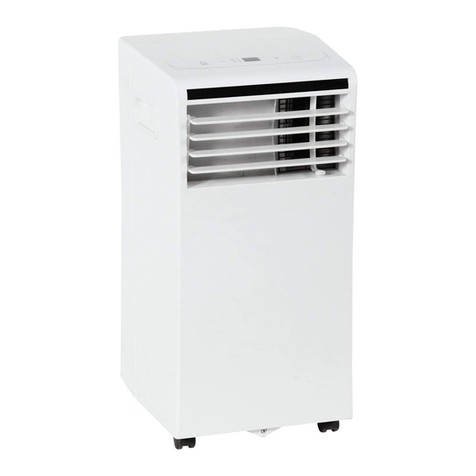
Prinetti IA5036 User manual

PORTABLE 2.7kW
AIR CONDITIONER
WITH WI-FI
IA5036
INSTRUCTION MANUAL
Please read and save all instructions to ensure safe and effective use of this Appliance

02
Contents
Important Safety and General Instructions 03
Before First Use 08
Parts List Diagram 09
Assembly Instructions 12
Using your Air Conditioner 14
Cleaning, Care and Maintenance 25
Frequenty Asked Questions 28
Warranty Information 30

03
Important Safety and General Instructions
Read this manual thoroughly before first use, even if you are familiar with this type
of product.The safety precautions enclosed herein reduce the risk of fire, electric
shock and injury when correctly adhered to. Please keep this user manual in
a safe place along with your purchase receipt and carton for future reference.
If applicable, pass these instructions and packaging on to the next owner of
the appliance.Always follow basic safety precautions and accident prevention
measures when using an electrical product.
1. Read all instructions before using the Prinetti®Portable Air Conditioner with
Wi-Fi.
2. Close supervision is necessary when any appliance is used by or near children.
3. Do not use the Air Conditioner for other than its intended purpose.
4. Before turning on the Air Conditioner, ensure the electrical voltage and circuit
frequency correspond to those indicated on the appliance.
5. Ensure your electrical outlet is properly installed and earthed and complies with
your local electrical safety requirements.
6. To reduce the risk of electrocution, never operate the appliance with wet hands;
never submerge the unit in water or spill liquids into the unit. Do not use it in a
bathroom or laundry, or where it can be splashed with water.
7. Do not use the Air Conditioner near open windows as rain may cause electric
shock.
8. Do not pull or carry by the cord, use the cord as a handle, close a door on the
cord, or pull the cord around sharp edges or corners. Keep the cord away from
heated surfaces.
9. Do not route the cord under carpet,rugs furniture or other appliances where it
may become a trip hazard.
10. This appliance is intended to be used indoors for household use only.
11. Do not use an extension cord unless completely necessary with this product. If
an extension cord is used please ensure that it has a rating equal or exceeding
the rating of this appliance.
12. If the supply cord or plug is damaged, do not use the appliance. Please return
to your place of purchase along with your receipt for a refund or exchange.
13. Do not cover the appliance whilst in use. If it is covered there is a risk of fire.
14. Improper installation may result in the risk of a fire, electric shock and/or injury
to person.
15. Do not use the mains plug to start and stop the unit; always use the POWER
button to start and stop the unit.

04
General Safety Instructions (cont)
16. This appliance is not intended for use by persons (including children) with
reduced physical, sensory or mental capabilities or lack of experience and
knowledge, unless they have been given supervision or instruction concerning
use of the appliance by a person responsible for their safety. Children should be
supervised to ensure they do not play with the appliance.
17. Switch off and unplug the power cable before servicing or cleaning the Air
Conditioner.
18. Always unplug the Air Conditioner when not in use.To disconnect from the
power supply, grip and pull from the power socket. Never pull by the cord.The
power plug must be removed from the power socket before cleaning, servicing,
maintenance or moving the Air Conditioner.
19. The manufacturer is not responsible for any eventual damages caused by
improper or faulty use.
20. The installation of a residual current device (safety switch) is recommended
to provide additional safety protection when using electrical appliances. It
is advisable that a safety switch with a rated residual operating current not
exceeding 30mA be installed in the electrical circuit supplying the appliance.
See your electrician for professional advice. Usage conditions and restrictions
21. This appliance is intended for air conditioning domestic environments. It
is not suitable for commercial, industrial or trade use. Do not use it for any
other purpose (such as drying clothes, cooling food, etc.), and only use it as
described in this manual.
22. These instructions are not intended to cover every possible condition and
situation.As with any electrical appliance, common sense and caution are
therefore always recommended when installing, operating and maintaining the
unit.
23. Do not use the unit outdoors.
24. This appliance is not intended to be used with an external timer or a separate
remote control system.
WARNING: Do not cover! Do not cover the Air Conditioner or obstruct any air
inlet or outlet grilles. Obstructing these openings causes a fire hazard, reduces the
operating efficiency and may lead to malfunction or damage.
25. Do not insert any objects, or your fingers, into the air outlet, and make sure to
warn children of the dangers.
26. Do not leave the appliance unattended when in use.

05
General Safety Instructions (cont)
27. The use of attachments not recommended or sold by the manufacturer may
cause fire, electric shock or injury.
28. Set the unit to maximum cooling and high speed ventilation for the initial
startup, then adjust the unit down to a more comfortable setting as required.
29. Do not direct the airflow onto plants or animals, as long and direct exposure to
cold air from the Air Conditioner could adversely affect them.
30. Never remain directly exposed to the flow of cold air for a long time, as
direct and prolonged exposure to cold air from the Air Conditioner could
be dangerous for your health.Take particular care in rooms where there are
children, old, or sick people.
31. When moving the Air Conditioner, always switch off and disconnect the power
supply, and move it slowly. Keep the unit upward during transport and storage.
32. Make sure the appliance is disconnected from the power supply when it will not
be used for a long time and before carrying out any cleaning or maintenance.
33. Keep the air filter clean. Do not use the unit without the air filter fitted. Using it
without air filter could cause an excessive accumulation of dust or waste on the
inner parts of the device with possible subsequent failures.
34. The Air Conditioner has no user-serviceable parts contained inside. Do not
attempt to disassemble, modify or conduct repairs on this unit. It has been built
in accordance with relevant safety and performance standards.An electrical
specialist must carry out all repairs. Contact our after sales support centre for
advice on service.
35. Unplug the appliance immediately if you notice any smoke, odour or strange
sounds coming from the unit. Contact the after sales support line for advice.
36. This appliance contains a flammable refrigerant. Do not open the appliance. In
case of damage or malfunction, turn off the appliance, disconnect the power
supply and call our after sales support centre for a service.
37. Install the appliance according to the instructions in this manual and national
wiring regulations. Improper installation may result in the risk of fire, electric
shock and/or injury.
WARNING: Electric shock hazard! Before installation or servicing, ensure the unit is
switched off and disconnected from the power outlet to prevent possible injury.
38. When deciding on an installation place, keep in mind that the area must be
flat, the air outlets must not be covered up, and there must be a power outlet
nearby.

06
General Safety Instructions (cont)
39. Do NOT install/use the appliance in the following areas:
• outdoors or where water is likely to splash
• near a bath, shower, laundry basin or swimming pool
• in an area where oil is likely to splash
• near a hot gas or electric burner, or sources of fire
• near sources of heat, or exposed to direct sunlight
• in an area where furniture or other objects can obstruct the airflow
• in the presence of flammable substances or vapour such as alcohol,
insecticides, petrol, etc.
• at a dry cleaner’s premises.
40. There must be a clearance of at least 30cm between the appliance and
any walls, furniture, curtains or any other obstacles (refer to diagram below).
Maintaining this minimum 30cm clearance is essential; failure to keep that
distance can result in the unit malfunctioning or causing injury.
> 30 cm > 30 cm
41. The air exhaust can be installed in a vertical or horizontal sliding window (refer
to diagram below).

07
General Safety Instructions (cont)
42. Air exhaust installation instructions follow on pages 14–15. Keep the length of
the air exhaust hose to the minimum length necessary during operation.
43. Place the unit on a flat surface to reduce the risk of it tipping over. Do not tilt the
unit, always keep it upright during installation and use.
44. We accept no responsibility for any eventual injuries or damages caused by
improper installation, faulty use or failure to follow the instructions.
WARNING: Combustible & Dangerous. This symbol alerts you to
take care as the appliance contains a flammable refrigerant:
R290 (propane). Take extra care when installing the unit and when
carrying out maintenance. R290 is a colourless and odourless
hydrocarbon gas. It is an efficient refrigerant with a low Global Warming Potential
(GWP) and no potential for ozone depletion.
While R290 is highly flammable, there will be no risk of burning and explosion if
the appliance is properly installed and maintained following all instructions and
safety advice in the supplied manual.
45. The room in which this Air Conditioner is installed must have a minimum area of
more than 12m2.This unit is designed for use in a room of approximately
15-20m2size.
46. The appliance shall be stored in a well-ventilated area without continuously
operating sources, such as open flames, an operating ignition gas appliance or
an operating electric heater. Do not expose the appliance to high heat, sparks
and open flames.
47. Do not pierce or burn the appliance.
48. Be aware that refrigerants may not contain an odour.
49. This Air Conditioner has been fully charged with refrigerant at the factory. Should
a recharge become necessary, it may only be recharged by a professional installer.
Disposal
This Air Conditioner contains a flammable refrigerant, which must be removed
before disposal. Contact your municipal authorities for any codes or regulations
concerning the disposal of such materials.
At the end of its working life, do not throw this appliance out with your household
rubbish. Electrical and electronic products contain substances that can have
a detrimental effect on the environment and human health if disposed of
inappropriately. Observe any local regulations regarding the disposal of electrical
consumer goods and dispose of it appropriately for recycling and recovery of the
refrigerant.

08
Before First Use
Please ensure you follow the steps below before using the Air Conditioner. We
recommend you keep the original packaging for storing your Air Conditioner when
not in use.
1. Unpack the product but keep all packaging material until you have made sure
your new Air Conditioner is undamaged and in good working order. Plastic
wrapping can be a suffocation hazard for babies and young children so
ensure all packaging material are out of their reach.
2. Remove the twist-tie which is securing the electrical cord. Uncoil the cord and
straighten it to remove any kinks. Do not use the product if these parts are
damaged. In case of damage, phone the After Sales Support Line on
1300 777 137.
3. For your safety, read all instructions carefully, even if you are familiar with the Air
Conditioner.

09
Parts List Diagram
1. Control Panel
2. Front Panel
3. Louvre
4. Power Cord And Plug
5. Drainage Outlet
6. Air Inlet
7. Exhaust Air Outlet
8. Castor Wheels
9. Rubber Drainage Stopper
(Not Pictured)
1
3
2
5
4
6
7
8

10
Parts List Diagram (cont)
10. Flexible Exhaust Hose
11. Air Conditioner Exhaust Hose
Connector
12. Window Exhaust Hose Connector
13. Adjustable Window Slider
(Suits 67.5cm – 123cm Windows)
14. Remote Control (2 x AAA Batteries
Included)
15. Dowels x 2 (Not Pictured)
13
10
14
11 12

11
Parts List Diagram (cont)
1. Power On/Off
2. Temperature Up
3. Temperature Down
4. Operation Mode
5. Fan Speed
6. Timer On/Off
7. Water Full Indicator
8. High Fan Speed Indicator
9. Low Fan Speed Indicator
10. Timer On/Off Indicator
11. LED Display
12. Cooling Indicator
13. Dehumidifying Indicator
14. Fan On/Off Indicator
1. Power On/Off
2. Timer On/Off
3. Operation Mode
4. Fan Speed
5. Temperature Up
6. Temperature Down
NOTE: Do not drop the remote
control.
NOTE: Do not place the
remote control in a location
exposed to direct sunlight.
7
5
8 9 10 11 12 13 14
1 2 3 4 5 6
6
4
1
2
3

12
Assembly Instructions
Installing the Air Exhaust Hose
1. Fit the Air Conditioner exhaust
hose connector and window
exhaust hose connector to the
flexible exhaust hose by gently
twisting them into place in a
clockwise direction. (Fig. 1).
Fig. 2 Fig. 3
2. Insert the fixing clip of the Air Conditioner exhaust hose connector into the
openings at the back of the Air Conditioner (Fig. 2).
3. For temporary installation (using fan mode only), lead the window end of the
exhaust hose connector out of an open window. (Fig. 3).
NOTE: Ambient air will still be able to enter the room this way.To cool the room
effectively, the window kit must be properly installed.
IMPORTANT: For best performance, keep the length of the air exhaust hose to
the minimum length necessary during operation.
WARNING: Do not operate the unit in this way during damp or wet weather
conditions.
Fig. 1
clockwise

13
Assembly Instructions (cont)
Installing the Window Kit
The window kit has been designed to fit most standard ‘horizontal’ and‘vertical’
window applications, but for certain types of windows it may be necessary for you
to improvise/modify some aspects of the installation procedure.
• Adjust the window slider to the length of a horizontally (or height of a vertically)
opening window (Fig. 4) and fix it with a dowel (Fig. 5).
Fig. 5
Fig. 6
Window height
min: 67.5cm
max: 123cm
Window width
min: 67.5cm
max: 123cm
Fig. 4
• Fit the slider to the bottom of the window sill (or to the side of the window, if it
opens vertically), then close the window.
• Fit the window exhaust hose connector through the opening to the outside
(Fig. 6).
dowel

14
1. Before switching the unit On for the first time, make sure you have properly
installed the exhaust hose and window kit (see pages 13 and 14 for installation
instructions). Install 2 x AAA batteries (included) into the remote control,
following the polarity markings shown on the remote control.
2. Find a place for the Air Conditioner where
there is a power outlet nearby, ensuring
that the unit is positioned at minimum
30cm away from any surface on all sides.
3. Install the exhaust hose and window kit so
that the hot exhaust air is expelled to the
outside (Fig. 7).
4. Ensure the rubber drainage stopper at the
back of the Air Conditioner is properly in
place to block the drainage outlet.
5. Plug the Air Conditioner into a power outlet and switch On.
NOTE: Do not connect the Air Conditioner to a powerboard, double adaptor or
socket with multiple outlets that are being used by other appliances.
6. Press the POWER button and the unit will begin operating.
Room size
It is important to use the right size Air Conditioner in the room you want to cool.This
appliance is suitable for cooling rooms of 15m2–20m2size.
Exhaust hose
This MUST BE CONNECTED and hot air expelled to the outside for the appliance to
work properly. Keep the hose as short as possible.
Noise
As the compressor is inside the room, a portable Air Conditioner makes more noise
than a split system, where the compressor is outside.
For best cooling efficiency, keep blinds and curtains closed during the sunniest
part of the day. Close off any fireplace damper, floor and/or wall vents so cool air
does not escape through the chimney or duct work.
Moving the Air Conditioner
Take care when moving the appliance as water collected as condensation may
spill out. Ensure drainage outlet is empty before moving the Air Conditioner.
Using Your Portable Air Conditioner
Fig. 7

15
Using Your Portable Air Conditioner (cont)
Switching On/Off
After switching On, allow 30 seconds for cool air to flow through the louvres.
Avoid starting the Air Conditioner within 3 minutes after switching it Off, and avoid
switching it Off within 3 minutes after switching it On.
Cooling Mode
Press the MODE button until the cooling mode indicator illuminates.
Press the DOWN (-) or UP (+) button repeatedly to set the desired room
temperature between 16°C and 31°C.
NOTE: If the current temperature in the room is lower than the temperature
selected, the Air Conditioner will not begin cooling until the temperature in the
room rises above the set temperature.
NOTE: The Air Conditioner has a built-in thermostat and will cycle Off and On
depending upon the ambient temperature of the room. This is NOT a product fault.
Fan Speed Selection
Press the SPEED button to select the fan speed: High or Low.
NOTE: For best cooling efficiency, make sure that:
• Curtains/blinds are closed if your room is directly exposed to the sun.
• The Air Conditioner is located away from any heat source.
Dehumidifying Mode
Press the MODE button until the dehumidifying mode indicator illuminates.
The unit will automatically set the fan to Low speed and maintain the room
temperature at 2°C lower than the current room temperature (within the 16°C to
31°C range).
This removes excess moisture from the air leaving it feeling fresher and less humid.
Fan Mode
Press the MODE button until the fan mode indicator illuminates.
Press the SPEED button to select the fan speed: High or Low.
NOTE: In Fan Mode, only the fan will operate to circulate air. There will be no
cooling effect.

16
Timer Operation
The Air Conditioner has a 24 hour timer, which you can set to start the unit at a
later time, or to switch Off the unit automatically.
On-Timer Setting
Ensure the Air Conditioner is connected to a power outlet (and switched on), but
the unit turned Off (in standby mode and not operating). Press the TIMER button
and the TIMER indicator light will illuminate to confirm the timer is ready for use.The
operation panel will now display (01), which is 1 hour.This is the number of hours
before the Air Conditioner will automatically turn On. Select the desired number
of hours to pass before you want the Air Conditioner to automatically turn On, by
using the UP and DOWN buttons. Once you have made your selection, press the
TIMER button again to confirm the selected time and to start the timer countdown.
You are able to program a time for the Air Conditioner to turn on at anytime
between 01-24 hours.To deactivate the timer, press the TIMER button until the TIMER
indicator light turns off.
Off-Timer Setting
With the Air Conditioner turned On and operating, press the TIMER button and
the TIMER indicator light will illuminate to confirm the timer is ready for use.The
operation panel will now display (01), which is 1 hour.This is the number of hours
before the Air Conditioner will automatically turn Off. Select the desired number
of hours to pass before you want the Air Conditioner to automatically turn Off, by
using the UP and DOWN buttons. Once you have made your selection, press the
TIMER button again to confirm the selected time and to start the timer countdown.
You are able to program a time for the Air Conditioner to turn off at anytime
between 01-24hrs.To deactivate the timer, press the TIMER button until the TIMER
indicator light turns off.
Water Full Alarm
Water that forms as condensation during cooling will
drop into an in-built drip tray. When the water level in the
drip tray is getting full, an automatic water level sensor
illuminates the water full indicator on the control panel to
alert you that the drip tray needs to be emptied.
Should the water full indicator light up during operation,
follow the steps below:
• Place a pan under the water drainage outlet at the
bottom of the unit.Alternatively, attach a water drain
hose (not supplied) to the drainage outlet (Fig. 8).
Using Your Portable Air Conditioner (cont)
Fig. 8

17
Using Your Portable Air Conditioner (cont)
• Remove the rubber drainage stopper and drain all water out of the tray.
• Replace the rubber drainage stopper to the drainage outlet.
WARNING: Do not continue to operate the Air Conditioner when the water full
indicator light is illuminated. This can cause damage to the Air Conditioner.
Wi-Fi Control
The Prinetti®2.7kW Portable Air Conditioner features Wi-Fi technology, which
allows you to control the Air Conditioner remotely at work, or on the go, so that
on your arrival your home is comfortably cool.The Portable Air Conditioner works
in conjunction with your smart device, using your home Wi-Fi network router to
communicate with the Air Conditioner.
Controlling the Air Conditioner remotely is very easy.You will need:
• An Android smartphone or tablet, or an Apple iPhone or iPad.
• An internet connection at your home.
• A Wi-Fi network router set up at home.
• You must also have the Smart Life app installed or updated on your smart
device.This app is available from Google Play Store or Apple App Store.
Initial Set Up
Upon installation of your new Portable Air Conditioner, or when you have changed
your mobile device or wireless router, you will have to set up the communication
channel between the devices. In order to do this, make sure you have the Smart
Life app installed on your mobile device, your Wi-Fi router is switched on and your
mobile device connected to your home Wi-Fi network.
7. Open the Apple® App Store or Google Play Store.
8. In the search field, type “Smart Life”.
9. Download the application showing the Smart Life icon
(see Fig. 9).
10. Install the application and create an account to proceed.
NOTE: An account must be set up in order to access all the Air Conditioner
control application features.
Fig. 9

18
Using Your Portable Air Conditioner (cont)
Connecting Your Smart Device
To connect the Air Conditioner to the control
application via Wi-Fi, follow the steps below:
1. Open the control application “Smart Life” on your
smart device and select the “sign up” option to
create an account (see Fig. 10).
2. Press the “Agree” option once you have read and
understood the user agreement and privacy policy
(see Fig. 11).
Fig.10
Fig.11

19
3. Enter a valid email address to create an account
name and press the “Get Verification Code” option
for a verification code to be sent to your email
address (see Fig. 12).
4. Retrieve the six-digit verification code from your
email account and enter it into the control
application (see Fig. 13).
Using Your Portable Air Conditioner (cont)
Fig.12
Fig.13

20
Using Your Portable Air Conditioner (cont)
5. Create a password which must have a
minimum of 6 characters and contain at least
one letter and one number. Press the “Done”
option once you have entered your selected
password (see Fig. 14).
6. Once logged into your account, press the
“+ Add Device” option found in the top right
corner of the control application home screen
(see Fig. 15).You will then be directed to the
next screen with additional instructions. Ensure
the Air Conditioner is plugged in and turned
on at the power outlet.The Air Conditioner
does not need to be turned ON at the control
panel at this time.The Air Conditioner should
be left in standby mode (plugged in at the
power outlet with the power outlet switch
turned on) while performing the pairing
exercise.
Fig.14
Fig.15
Table of contents
Popular Air Conditioner manuals by other brands
Sharp
Sharp CVP12PX - Ha Sh 11500 Btu Portable Air... Installation and operation manual
Samsung
Samsung MH18VP2-09 Owner's instructions
Dometic
Dometic Blizzard NXT H540315 installation instructions
Amana
Amana PGB**C installation instructions

Panasonic
Panasonic S-22MZ1H4A operating instructions
Friedrich
Friedrich Twin Temp EM24L34 Specifications
