Prismiq Media player User manual
MediaPlayer UserGuide

PRISMIQ and the PRISMIQ logo are trademarks of PRISMIQ, Inc. in the United
States of America. Other company or product names mentioned herein may e
trademarks of their respective owners.
The example companies, organizations, products, domain names, email addresses,
logos, people, places, and events depicted herein are fictitious. No association with
any real company, organization, product, domain name, email address, logo, person,
place, or event is intended or inferred.
© 2003 PRISMIQ, Inc. All rights reserved. 330-0050-006
(888) 880-1583
PRISMIQ MediaPlayer User Guide
2

Table of Contents
PRISMIQ MediaManager Software . . . . . . . . . . . . . . . . . . . . . . . . . 4
Overview . . . . . . . . . . . . . . . . . . . . . . . . . . . . . . . . . . . . . . . . . . 4
Starting MediaManager . . . . . . . . . . . . . . . . . . . . . . . . . . . . . . . 7
My Media Files . . . . . . . . . . . . . . . . . . . . . . . . . . . . . . . . . . . . . . 8
Video and Audio Playlists and Image Slideshows . . . . . . . . . . . 10
Internet Radio (MediaManager) . . . . . . . . . . . . . . . . . . . . . . . . 15
We Bookmarks . . . . . . . . . . . . . . . . . . . . . . . . . . . . . . . . . . . . 17
Stock Data . . . . . . . . . . . . . . . . . . . . . . . . . . . . . . . . . . . . . . . . 18
Weather Locale Information . . . . . . . . . . . . . . . . . . . . . . . . . . . 19
PRISMIQ MediaPlayer . . . . . . . . . . . . . . . . . . . . . . . . . . . . . . . . . 21
Navigating Basics . . . . . . . . . . . . . . . . . . . . . . . . . . . . . . . . . . . 21
Remote Control . . . . . . . . . . . . . . . . . . . . . . . . . . . . . . . . . . . . 22
Turning on the MediaPlayer . . . . . . . . . . . . . . . . . . . . . . . . . . . 23
PRISMIQ MediaPlayer Start Screen . . . . . . . . . . . . . . . . . . . . . 24
PRISMIQ MediaPlayer Main Menu . . . . . . . . . . . . . . . . . . . . . . 25
Home . . . . . . . . . . . . . . . . . . . . . . . . . . . . . . . . . . . . . . . . . . . . 25
Video . . . . . . . . . . . . . . . . . . . . . . . . . . . . . . . . . . . . . . . . . . . . 27
Video Playlists . . . . . . . . . . . . . . . . . . . . . . . . . . . . . . . . . . . . . 28
Advanced Video Features . . . . . . . . . . . . . . . . . . . . . . . . . . . . .30
Audio . . . . . . . . . . . . . . . . . . . . . . . . . . . . . . . . . . . . . . . . . . . . 31
Audio Playlists . . . . . . . . . . . . . . . . . . . . . . . . . . . . . . . . . . . . . 32
Internet Radio (MediaPlayer) . . . . . . . . . . . . . . . . . . . . . . . . . . 33
Images . . . . . . . . . . . . . . . . . . . . . . . . . . . . . . . . . . . . . . . . . . . 33
Slideshows . . . . . . . . . . . . . . . . . . . . . . . . . . . . . . . . . . . . . . . . 34
We . . . . . . . . . . . . . . . . . . . . . . . . . . . . . . . . . . . . . . . . . . . . . 37
Chat . . . . . . . . . . . . . . . . . . . . . . . . . . . . . . . . . . . . . . . . . . . . . 38
Update Firmware . . . . . . . . . . . . . . . . . . . . . . . . . . . . . . . . . . . 41
Technical Specifications . . . . . . . . . . . . . . . . . . . . . . . . . . . . . . . . 43
PC Requirements for MediaManager Software . . . . . . . . . . . . . . . 44
PRISMIQ MediaPlayer User Guide
3

PRISMIQ MediaManager Software
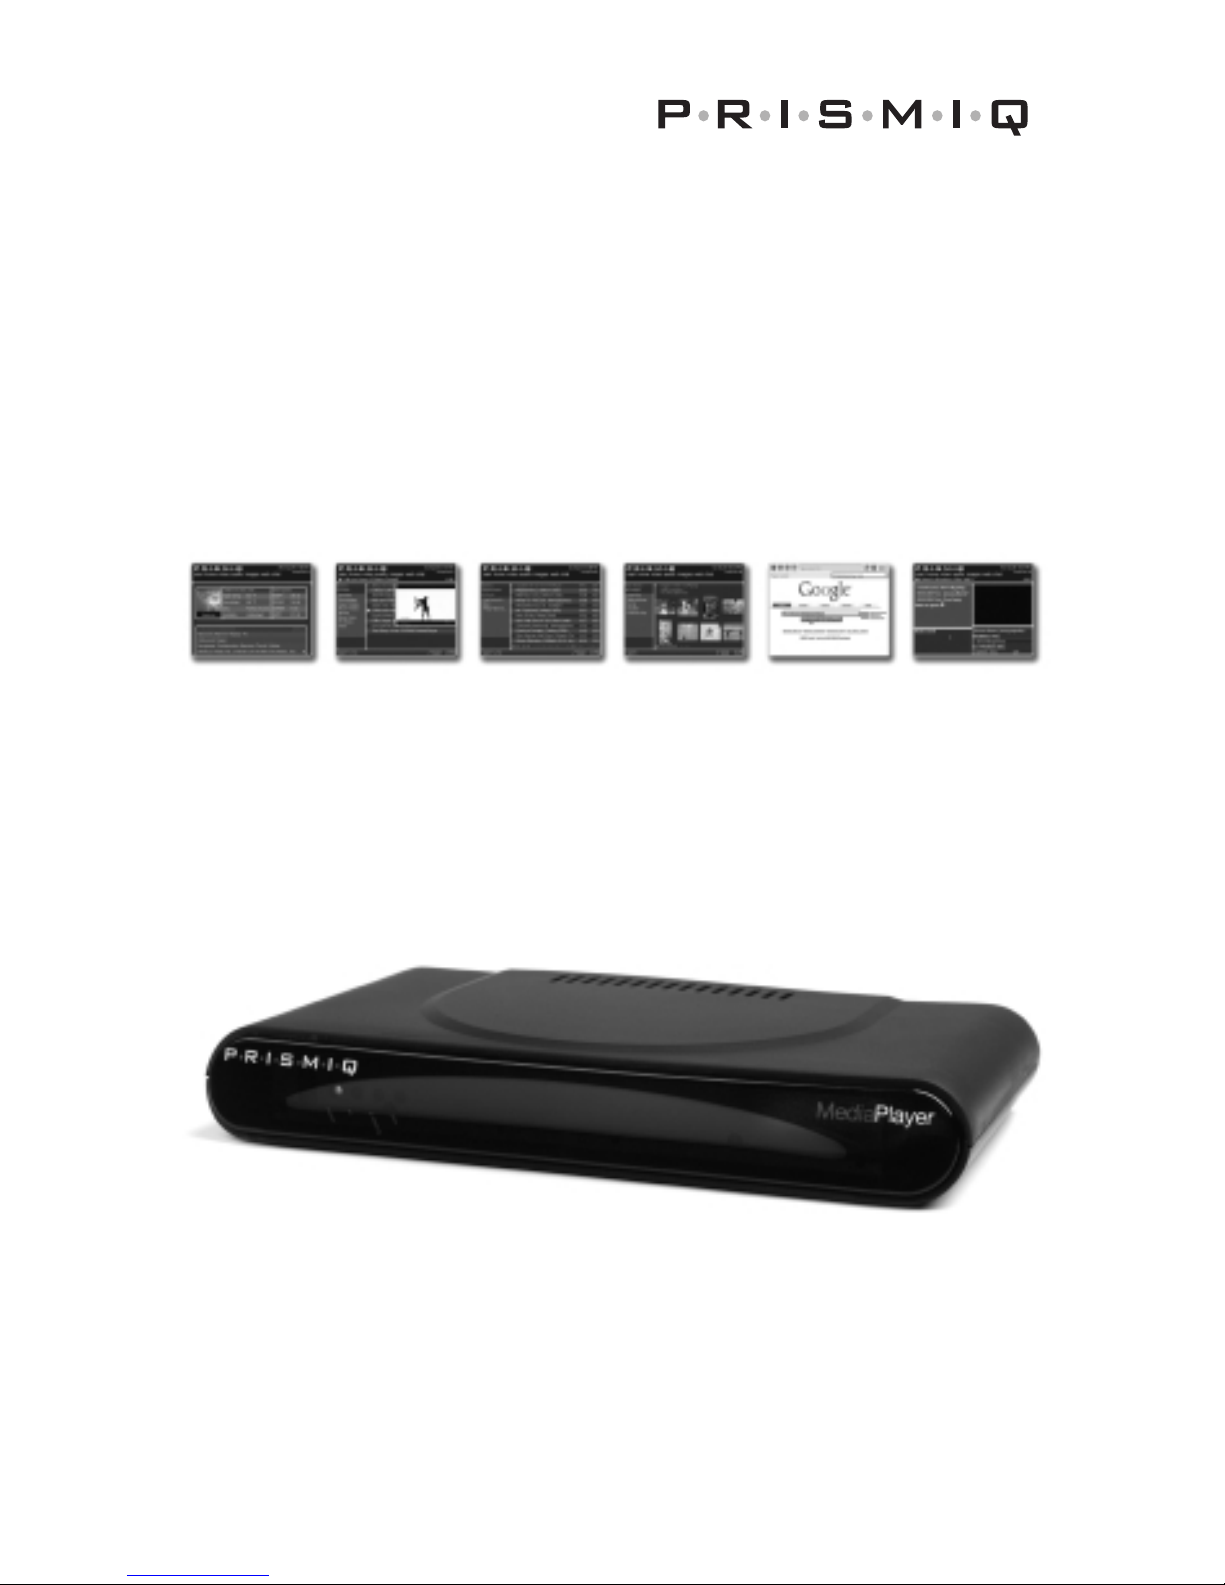
The PRISMIQ MediaManager software installs from the PRISMIQ
CD onto your Windows- ased PC and allows you to organize and
set up content for the MediaPlayer. You can manage your media files
and many other functions from this software, including: MPEG-1,
MPEG-2, MPEG-4 or AVI* video files; MP3, WMA, and WAV audio
files; Internet radio stations; and JPEG image files. You can also set
up custom information (live weather, stocks, etc.) for display on the
MediaPlayer Home screen on the TV.
This section assumes that you have already installed the PRISMIQ
MediaManager software using the instructions in the Setup Guide. If
you have not done this yet, please do so now. Then return to this sec-
tion to start using the MediaManager.
Overview
Media content is organized into the following categories:
My Media Files
Contains all video, audio, image and Internet radio station files import-
ed to the MediaManager. This is one of the two top level categories,
along with “My Custom Info.”
• All Video
A su set of “My Media Files,” containing video files.
• All Audio
A su set of “My Media Files,” containing audio files and Internet
radio station listings.
• Internet Radio
A place to add your favorite Internet radio stations (for example,
http://www.shoutcast.com). Default stations are provided.
• All Images
A su set of “My Media Files," containing JPEG digital photos.
• Playlists and Slideshows
Create, edit, and delete Playlists, which contain selected video or audio
files from ”My Media Files.” “Internet Radio” appears as a selection on
the Audio Playlist in the MediaPlayer. You can also create and edit
image Slideshows using JPEG images and adding audio.
• Watched Folders
A tool that will automatically scan and save, without user
intervention, assigned PC directories and categorize files into
Playlists and Slideshows.
*AVI is a general audio-video format designator. The PRISMIQ MediaPlayer can play Motion-JPEG (OpenDML) and
DivX® encoded video files. DivX is a registered trademark of DivX Networks. The DivX video play ack technology pro-
vided in the PRISMIQ MediaPlayer is not provided or approved y DivX Networks and may result in a lower quality
video and audio output than a DivX randed solution.
PRISMIQ MediaPlayer User Guide
4

My Custom Info
Contains all customiza le We , stock, and weather information that
displays on the MediaPlayer Home screen. This is one of the two top
level categories, along with “My Media Files.”
• Web Bookmarks
Add, edit, and delete your favorite We sites.
• Stock ata
Add and delete stock market information to display on the
MediaPlayer Home screen.
• Weather Locale
Enter your zip code, city, and state for local weather information to
display on the MediaPlayer Home screen. In Canada, enter your
postal code, city and province.
About Video Audio Image
and Internet Radio Station Files
To make your video, audio, image, and Internet radio station files
availa le for play on the MediaPlayer, you must first scan them into
MediaManager. Refer to the “My Media Files” in the MediaManager
section on page 8 for details.
Once you’ve scanned and saved your files, you can organize them
into Playlists and Slideshows. Refer to the “Video and Audio Playlists
and Image Slideshows” section on page 10 for details.
In addition to your saved playlists, you can also set up “Watched
Folders” that MediaManager will scan regularly for new and changed
media files.
Note: Image files can e organized into Slideshows. Please see “Slideshows” in the
MediaManager section on page 12 for more details.
Right-click Menus
Throughout the MediaManager software, right-clicking rings up a
context menu (or series of menus) with more options. For example,
you can right-click on “All Audio” and choose to add a new Playlist, or
right-click on a video file and choose to delete the file, or you can
right-click on an Internet radio station file to play that station.
PRISMIQ MediaPlayer User Guide
5

Double-clicking on MediaManager Content
When you dou le-click on a video, audio, image, or Internet radio
station file, the file will open in the Windows application that you've
associated for that type of media.
When you dou le-click on a Web bookmark, your We rowser will
open with the We site you saved.
When you dou le-click on a stock symbol or weather location, your
We rowser will open with stock market or weather information.
Display of Media Content Information
You can change the way media content information is displayed
in the following ways:
• Column Order
Drag a column left or right past other columns to change the
order in which it appears.
• Column Size
Drag the order etween columns left or right to change the
size of columns.
• Item Sort
Click on a column header to sort items in ascending or
descending order.
• Manual Sort
Drag and drop files within Playlists/Slideshows to adjust the order
of files to your liking.
Resizing the MediaManager Window
Click and drag the lower right corner of the MediaManager window
to increase or decrease its size. (Or you can select the minimize
or maximize uttons /in the top right corner of the MediaManager
window.)
PRISMIQ MediaPlayer User Guide
6

Starting MediaManager
To start MediaManager:
• Dou le-click the PRISMIQ MediaManager icon in the system tray
(lower right corner of desktop).
– OR –
• Use the Windows “Start” menu to locate “PRISMIQ MediaManager”
in the “Programs” menu, and click on it.
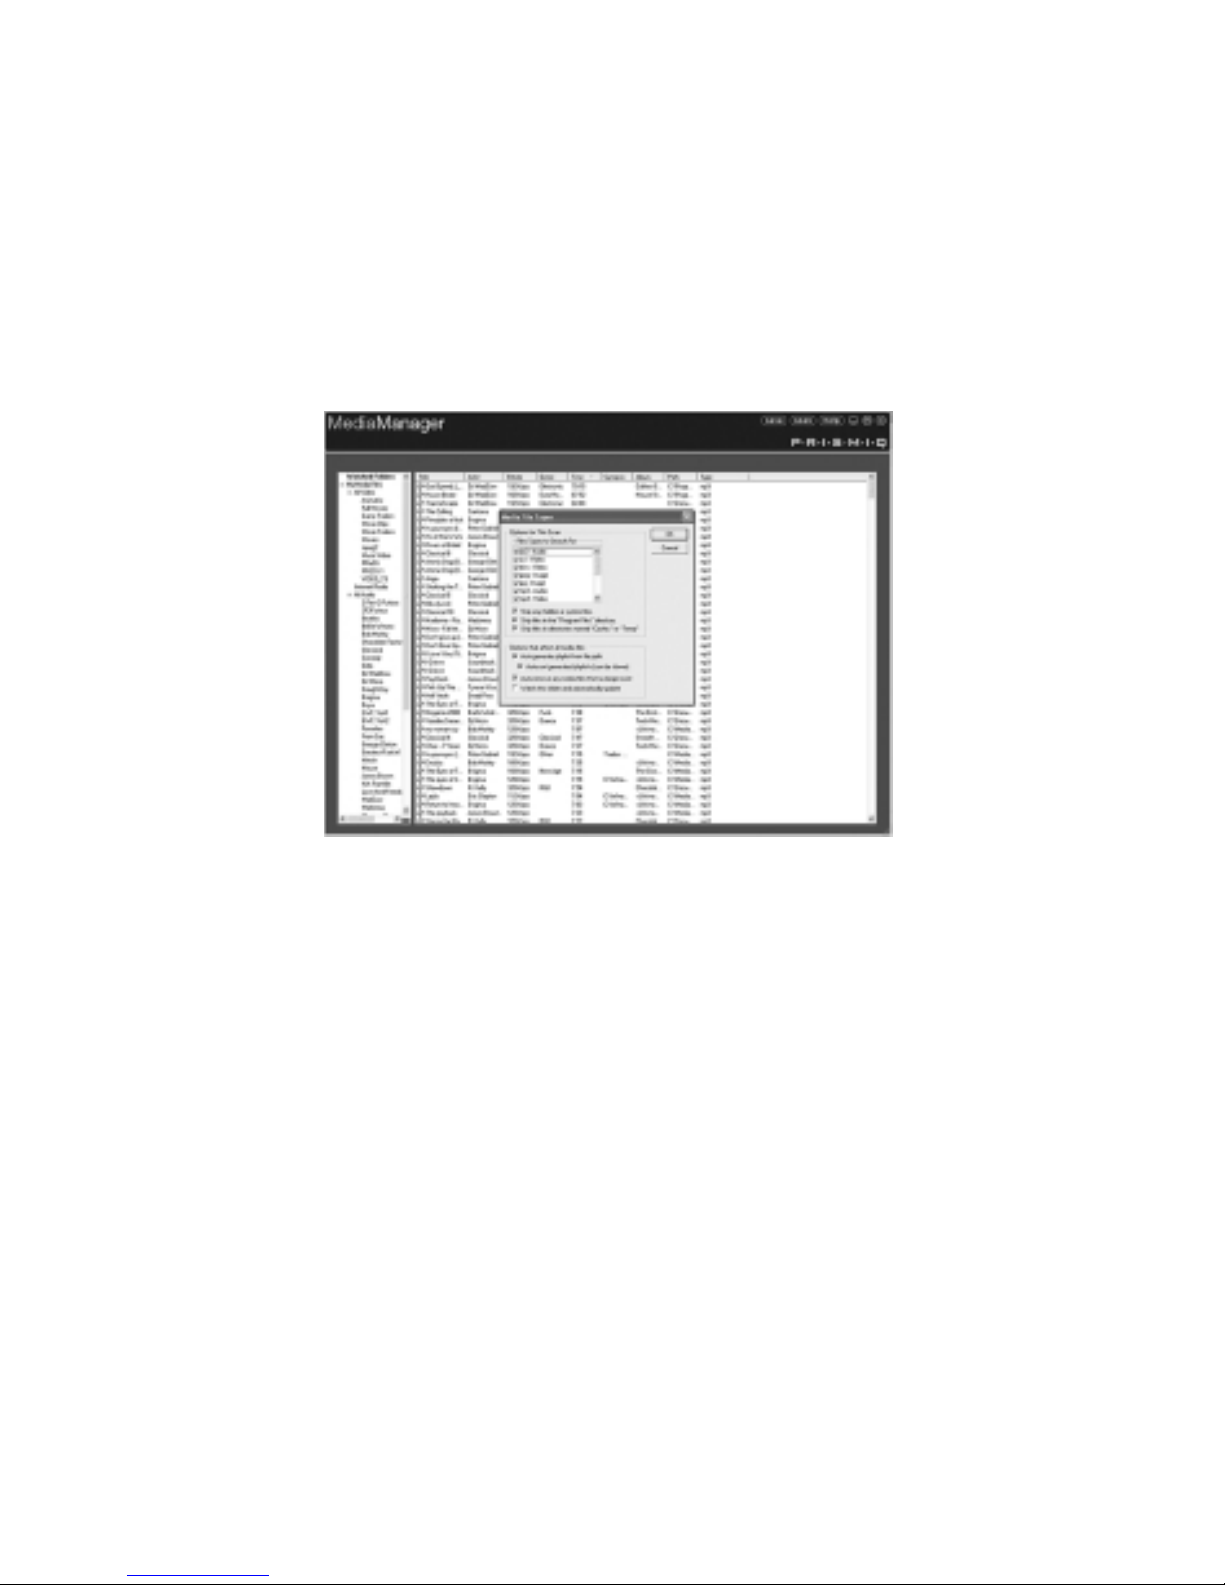
The MediaManager window appears.
Media categories.
Save any changes (such as new Playlists).
Search and scan for media files to incorporate into MediaManager.
Display instructions on how to use MediaManager software
(Ado e Acro at Reader required).
Minimize the MediaManager window.
Maximize the MediaManager window.
Close the MediaManager window and exit the
MediaManager program.
Change column order, size, or item sort.
Items in a media category.
PRISMIQ MediaPlayer User Guide
7
1
2
3
4
5
6
7
8
9
19
2345 6 7
8
My Media Files
To egin managing video, audio, and image files as well as Internet
radio source locations, you must first scan them into the MediaManager
program. The resulting list will display in the top level category “My
Media Files.” While these files are all handled similarly, you’ll find a
separate section for Internet radio stations. Audio and video files are
categorized into Playlists, and photos and images are categorized into
Slideshows.
To scan your media files to the MediaManager:
1. Click the “Scan” utton in the top right of the window to search for
media files to ring into the MediaManager. Media files are not
moved or deleted from their original location. The “Browse for
Folder” menu appears.
2. Once you find the folder that contains the media files you want to
add, click on that folder name. The folder name is highlighted.
3. Click the “OK” utton. The menu for selecting what type of files
to find appears.
4. Check which media types to find (e.g., MP3, MPEG, JPEG, etc.).
5. Click the “OK” utton.
The media files in the folder you selected appear in the
MediaManager window.
• To select several files at once, hold down the SHIFT or CTRL key
while choosing files.
Note: MediaManager supports the following media file types:
For Video: MPEG-1, MPEG-2, MPEG-4, VOB, and AVI*
For Audio: MP3, WMA, WAV, AC3, MPEG audio
For Images: JPEG
*AVI files currently played are DivX®compati le. DivX is a registered trademark of DivX Networks. The DivX video
play ack technology provided in the PRISMIQ MediaPlayer is not provided or approved y DivX Networks, and may
result in a lower quality video and audio output than a Divx randed solution.
PRISMIQ MediaPlayer User Guide
8

To delete media files from “My Media Files”:
Option 1: Using right-click menus
1. Click on “My Media Files.” This highlights “My Media Files.”
2. Right-click on the media file you want to delete. The right-click
menu appears.
3. Select “Delete.”
4. A set of dialog oxes will prompt you to 1) "Remove from Playlist?"
and then 2) "Move to the recycle in?”
5. Select if you want the file to e deleted from the MediaManager
and if you want the file sent to the recycle in.
• If you choose to "Remove from Playlist," the file will no longer
appear in “My Media Files.”
• If you choose to "Move to the recycle in," the file will no longer
appear in "My Media Files," will e sent to the recycle in, and will
no longer appear in the PC’s directory structure.
Option 2: Using the Delete key
1. Click on the media file you want to delete. The file name is highlighted.
2. Press the Delete key on your key oard. A set of dialog oxes will prompt
you to 1) "Remove from Playlist?" and then 2) "Move to the recycle in?”
3. Select if you want the file to e deleted from the MediaManager
and if you want the file sent to the recycle in.
• If you choose to "Remove from Playlist," the file will no longer
appear in “My Media Files.”
• If you choose to "Move to the recycle in," the file will no longer
appear in "My Media Files," will e sent to the recycle in, and will
no longer appear in the PC’s directory structure.
Note: Deleting a media file from “My Media Files” will also delete it from any Playlist
to which you may have added it.
• To select several files at once, hold down the SHIFT key or Ctrl key
(for multi-select) when choosing files.
PRISMIQ MediaPlayer User Guide
9

Video and Audio Playlists and Image Slideshows
You can organize your video and audio files into Playlists, and image files
into Slideshows. Once you’ve created a Playlist or Slideshow, you can add
or remove files from “My Media Files.” Playlists can contain only one media
type – either video files or audio files, ut not oth.
To create a new Playlist:
1. In the left windowpane, highlight either All Video or All Audio, and
right-click. The right-click menu appears.
2. Select “New” from the menu. A folder appears with “My new
playlist” as edita le text.
3. Name the Playlist.
4. Press ENTER to set the Playlist name.
The new Playlist you created is highlighted.
You can also add to Playlists automatically y using the Watched
Folders feature. This function will automatically scan and save files in
particular computer folders you designate whenever new files are
added to it.
To scan a folder and create a new Playlist automatically:
1. Click “Scan.”
2. Browse for the folder you want and select it.
3. A dialog ox opens allowing you to check which media file
types you want.
• Remem er, only the same file types (i.e., audio or video) can
e incorporated into a Playlist; audio and video files cannot e
com ined in a Playlist.
4. Select the type you want and click OK. The folders are
automatically added as a Playlist to the appropriate category (e.g.,
folders on the hard drive containing audio files will e added to the
audio Playlists designated, and folders within a folder eing
scanned will e grouped into Playlists ased on the Windows
folder names).
Note: You can “import” playlists from third-party programs that conform to the M3U,
M3Uextended or PLS playlist formats y right-clicking on “All Audio” and selecting
“Import.”
PRISMIQ MediaPlayer User Guide
10

PRISMIQ MediaPlayer User Guide
11
To add a file to your Playlist:
1. In the left windowpane, select All Video, All Audio or Internet
Radio. A list of files appears in the right windowpane.
2. Right-click on the file you want to add to your Playlist. A right-click
menu appears.
3. Select “Add to” and point to the Playlist you want to add this file.
4. Click on the Playlist to which you added the file. The file you
added appears in your Playlist.
– OR –
You can drag and drop the file to add it to the Playlist.
1. Drag-and-drop the audio or files you want to add to the Slideshow.
2. Click “Save” found in the upper right corner of the MediaManager
window.
• You can select several files at a time y using the Shift and CTRL
keys and highlighting the different files you want.

To delete a file from a Playlist:
First select the Playlist you want to delete it from, then do one
of the following:
Option 1: Using right-click menus
1. Click on "My Playlists." This highlights "My Playlists."
2. Right-click on the file you want to delete. The right-click menu
appears.
3. Select "Delete."
4. A set of dialog oxes will prompt you to 1) "Remove from Playlist?"
and then 2) "Move to the recycle in?"
5. Select if you want the file to e deleted from the MediaManager
and if you want the file sent to the recycle in.
• If you choose to "Remove from Playlist," the file will no longer
appear in "My Playlists."
• If you choose to "Move to the recycle in," the file will no longer
appear in "My Media Files," will e sent to the recycle in, and will
no longer appear in the PC’s directory structure.
Option 2: Using the Delete key
1. Click on the file you want to delete. The file name is highlighted.
2. Press the Delete key on your key oard. A set of dialog oxes will
prompt you to 1) "Remove from Playlist?" and then 2) "Move to the
recycle in?"
3. Select if you want the file to e deleted from the MediaManager
and if you want the file sent to the recycle in.
• If you choose to "Remove from Playlist," the file will no longer
appear in "My Playlists."
• If you choose to "Move to the recycle in," the file will no longer
appear in "My Media Files," will e sent to the recycle in, and will
no longer appear in the PC’s directory structure.
To create a Slideshow:
1. Right-click on “All Images” in the left windowpane on
MediaManager. A right-click menu appears.
2. Select “New” from the menu. “My new Slideshow” appears as
edita le text.
3. Rename the Slideshow.
4. Press ENTER to set the Slideshow name.
The new Slideshow has een created.
PRISMIQ MediaPlayer User Guide
12

To add an Image file to a Slideshow:
1. Click on All Images. All of the image files you’ve imported into the
MediaManager appear.
2. Drag-and-drop the image files you want to add to the Slideshow.
3. Click “Save” found in the upper right corner of the MediaManager
window.
Note: Alternatively, you can right-click on an image and select “Add to” to place it in a
particular Slideshow.
To delete an Image file from a Slideshow:
First select the Slideshow from which you would like to delete an
image, and then do one of the following:
Option 1: Using right-click menus
1. Right-click on the file you want to delete. The right-click menu
appears.
2. Select “Delete.”
3. A dialog ox appears, asking “Are you sure you want to delete
<filename> from the Slideshow?”
4. Select if you want the file to e deleted from the Slideshow. The
image file will still appear in “All Images.”
– OR –
Option 2: Using the Delete key
1. Click on the file you want to delete. The file name is highlighted.
2. Press the Delete key on your key oard. A dialog ox appears, ask-
ing "Are you sure you want to delete <filename> from Slideshow?"
3. Select if you want the file to e deleted from the Slideshow. The
image file will still appear in “All Images.”
PRISMIQ MediaPlayer User Guide
13

Additional Settings for Slideshows
After you create a Slideshow:
1. Right-click on the Slideshow you want to associate audio with
when in Slideshow mode and click on “Settings.” A Slideshow set-
tings dialog ox appears. This lets you align your selected slides
with the corresponding audio you’ve selected.
2. Left-click in the check ox for “Automatically show slides.”
3. Choose a time increment etween 2 and 60 seconds for the dis-
play of each image, and input that num er in the ox shown.
4. Left-click in the check ox for “Play music during slideshow.”
5. Select the song or playlist you want to accompany your Slideshow
from the titles in the pull-down menu.
6. Click “Save” found in the upper right corner of the MediaManager
window.
Note: The audio titles in the pull-down menu are a list of the audio files that you have
already scanned into the MediaManager. To play audio during Slideshows, you must
first scan audio files into the MediaManager. To learn how to scan audio files, please
see page 8.
PRISMIQ MediaPlayer User Guide
14

Internet Radio
You can select radio stations from any We site that streams MP3
files in the “Playlist” (.pls) file format or Live365’s format. They then
will appear and play on the MediaPlayer as part of the “Audio” screen.
Some examples of these We sites are http://www.shoutcast.com;
http://www.live365.com; http://www.radio-locator.com and
http://www.somafm.com.
To add an Internet radio station:
1. Open the MediaManager and select the Internet Radio
su -category under “My Media Files.”
2. Go to a We site that streams MP3 files in the .pls file format and
rowse through the different stations listed.
3. Select the station you want and drag-and-drop into MediaManager.
A dialog ox appears asking you to enter a name for the new sta-
tion in the Station Name text ox. The station URL already
appears in the appropriate text ox.
4. Enter a name and click OK.
– OR –
1. In the Internet radio station We site, right-click on the station
you want and select “Copy Shortcut” or “Copy Link Location.”
2. Select the Internet Radio folder in the MediaManager and right-
click in the window. A dialog ox appears asking you to enter a
name and URL for the station.
3. Type in a name in the Station Name text ox, and press CTRL-V
to paste the copied URL to the Station URL text ox.
4. Click OK.
The station URL appears in the MediaManager window and is now
availa le at the MediaPlayer user interface on the TV.
PRISMIQ MediaPlayer User Guide
15

To delete an Internet radio station:
Option 1: Using right-click menus
1. Open the MediaManager and find the Internet Radio su -category.
2. Right-click on the station you want to delete. The right-click menu
appears.
3. Select “Delete.”
The radio station is deleted.
Option 2: Using the Delete key
1. Click on the radio station URL you want to delete. The file name
is highlighted.
2. Press the Delete key on your key oard.
The radio station URL is deleted and it no longer appears in the
Internet Radio list.
Watched Folders
With Watched Folders, you can select specific folders on your hard
drive to e automatically scanned y MediaManager software whenev-
er a new media file is added to those specific folders. Watched
Folders can contain audio, video, image files, or any com ination of
the three. Your Playlists and/or Slideshows will appear at the
MediaPlayer user interface on the TV without having to manually
“Scan” and “Save” on MediaManager ack at the PC.
To add a Watched Folder:
1. Open the MediaManager and select the Watched Folders
su -category a ove “My Media Files.”
2. Right-click in the Watched Folder windowpane, and select “New.”
3. Browse to the folder you want to watch, and click OK.
4. Choose the types of media you want MediaManager to scan for
and click OK.
Note: The Watched Folders feature is only supported on Windows 2000, XP Home,
and XP Pro.
PRISMIQ MediaPlayer User Guide
16

To delete a Watched Folder:
Option 1: Using right-click menus
1. Open the MediaManager and find the Watched Folder
su -category.
2. Right-click on the folder you want to delete. The right-click
menu appears.
3. Select “Delete.”
The Watched Folder is deleted.
Option 2: Using the Delete key
1. Click on the folder you want to delete. The folder is
highlighted.
2. Press the Delete key on your key oard.
The Watched Folder is deleted from the Watched Folders list.
Web Bookmarks
You can enter your favorite We sites for display under “My Bookmarks”
on the We screen on the MediaPlayer’s TV user interface.
To add a bookmark:
1. Click on “We Bookmarks” to highlight this media category.
2. Right-click in the area that lists your ookmarks. A right-click
menu appears.
3. Select “New” from the menu. A dialog ox appears to add a new
ookmark.
4. Enter a name for your ookmark and the We site address (URL).
5. Click OK when you are done with your entry.
Your entry appears in your We Bookmarks and will e accessi le
from the MediaPlayer’s We screen at the TV user interface.
17
PRISMIQ MediaPlayer User Guide

PRISMIQ MediaPlayer User Guide
18
To delete a bookmark:
Option 1: Using right-click menus
1. Right-click on the ookmark you want to delete.
The right-click menu appears.
2. Select “Delete.”
The ookmark is deleted.
Option 2: Using the Delete key
1. Click on the ookmark you want to delete. The file name
is highlighted.
2. Press the Delete key on your key oard.
The ookmark is deleted.
Stock Data
Home Screen Information Entry
You can select up to 20 stock sym ols to appear on the MediaPlayer
Home screen.
To add a stock:
1. Click on “Stock Data” to highlight this media category.
2. Right-click in the area that lists your stocks and select “New.”
A dialog ox appears to add a new stock sym ol.
3. Enter the stock name and sym ol.
4. Click the OK utton when you are done with your entry.
Your entry appears in your Stock Data.

PRISMIQ MediaPlayer User Guide
19
To delete a stock:
Option 1: Using right-click menus
1. Right-click on the stock you want to delete.
The right-click menu appears.
2. Select “Delete.”
The stock is deleted.
Option 2: Using the Delete key
1. Click on the stock you want to delete.
The file name is highlighted.
2. Press the Delete key on your key oard.
The stock is deleted.
Weather Locale Information
Home Screen Information Entry
You can select one location to appear in the weather locale information
section of the MediaPlayer Home screen.
To add a weather location:
1. Click on "Weather Locale" to highlight this media category.
2. Right-click in the area that lists your locations. A dialog ox
appears to add a new location.
3. Enter your zip code, city, and state (for Canada, enter your postal
code, city and province).
4. Click the OK utton when you are done with your entry.
Your entry appears in your Weather Locale information.

PRISMIQ MediaPlayer User Guide
20
To customize the information within
the weather info box on the TV:
1. Right-click on “Weather Locale” under “My Custom Info.”
2. Choose “Properties” to ring up the Weather Display Properties.
3. Uncheck or check items you want displayed on the TV.
4. Click OK to close the Weather Display Properties.
5. Click “Save” on MediaManager to save your changes.
To delete the weather location:
Option 1: Using right-click menus
1. Right-click on the location listing to delete. The right-click menu
appears.
2. Select “Delete.”
The city is deleted.
Option 2: Using the Delete key
1. Click on the city you want to delete. The city name is highlighted.
2. Press the Delete key on your key oard.
The weather location is deleted.


