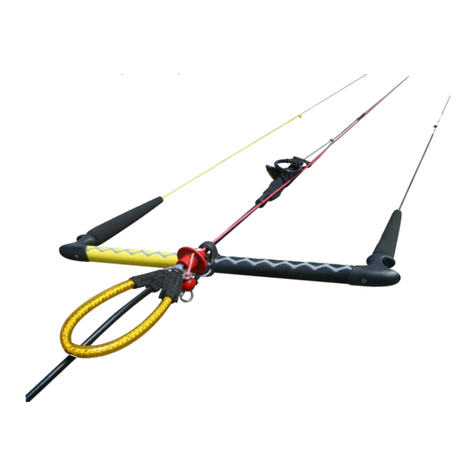
PRISM+ TENSOR User manual

TENSOR
USER MANUAL
Please ReaD CaReFUllY BeFORe FlIGHT

Welcome
Congratulations on your purchase of the Tensor, a sophisticated
land-based power kite that converts easily from dual-line bar to
quad-line handle control for the best of both worlds. You’re going
to have great time with your new gear, but first things first: The Ten-
sor is designed to develop significant pull and if used improperly
could cause serious injury or death. Before flying your kite for the
first time it’s critical that you read and understand the instructions
in this flight manual to ensure safe use and long-lasting enjoyment
of your kite.
We strongly recommend initially testing the power of the kite in
very low wind conditions (less than 10mph/16kph) Starting out with
an unfamiliar kite in strong wind conditions can lead to unexpected
and dangerous situations for yourself and others. Please read this
guide thoroughly before your first flight and follow the instructions
carefully. If you ever give the kite to someone or resell it, be sure to
pass on this manual as well.
TABLE OF CONTENTS
Warning 4
Safety Systems 6
Control Bar Safety System 6
Handle Safety Systems 8
Quick Release 9
Reconnecting 9
Parts & Equipment Diagram 10
First Flight 12
Where to Fly 12
The Wind Window 13
Bars Versus Handles 14
Control Bar Mode 14
Handle Mode 14
Converting 15
Control Bar Launch 16
Reverse Launch 17
Steering with the Bar 18
Control Bar Landing 19
Landing & Securing 18
Handles Launch 20
Steering with Handles 20
Handles Landing 22
Rigging & Adjustment 23
Brake Line Adjustment 23
Power Adjustment 24
Care & Repair 25
Sail Care 25
Flying Line Care 26
Getting Sand Out 26
Repairs & Spare Parts 27
Warranty 27

• Kite flying can be dangerous and can result in serious injury including paralysis
and death. You are responsible for your own safety and the safety of others
around you when using this product.
• This product has NOT been designed or certified to allow you to fly or jump into
the air. Never use this kite or any Prism product to jump, fly (paraglide) or pull
you into the air as you will seriously increase the risk of serious injury, paralysis
or death.
• This product has not been designed for use on water; it does not have the safe-
ty systems or flotation necessary for safe operation on water. Do not use this
equipment to pull yourself on or through water as you will seriously increase the
risk of serious injury or drowning.
• This kite is designed for experienced pilots only. If you are not specifically
experienced with power kiting we strongly advise learning the basics from
a qualified instructor or school.
• Never use this product in high winds over 18mph/30kph. Do not underestimate
the power of your kite and if you are not sure of the conditions do not risk fly-
ing.
• Never fly with people downwind of you. A loose kite can seriously injure or kill
innocent bystanders; never use this kite in a crowded area and never leave your
kite unattended.
• Never allow yourself or anyone else to get between the control bar/handles
and the kite when using this product.
• To avoid cuts or abrasions, never grab the strained lines during flight.
• Under no circumstance should you anchor yourself to the kite or a fixed object
when flying.
• Never use lines whose length, breaking strength or other characteristics are
not appropriate to control the kite. Lines can wear easily and you are respon-
sible for inspecting and replacing lines regularly, even under normal use. Flying
your kite with twists in the lines creates friction which weakens the lines. A
line that breaks under tension can cause serious injury, paralysis or death. We
strongly recommend wearing a helmet, gloves, shoes, protective eyewear and
pads when using this product.
• Never let anyone fly this kite before making them read and understand the
manual and these warnings.
• You MUST pass on this manual with the kite if you sell or give it away
at a later date.
• This kite is equipped with safety systems to de-power the wing in an emer-
gency or dangerous situation. However these systems are not automatic; they
are passive and need to be deployed by the user. Read the manual carefully BE-
FORE use to fully understand the safety systems. Always pre-flight and test your
safety systems before every use; they could save your life in an emergency.
• Always check your lines and all parts of this product for damage before and
after use. If damaged, you must replace the part in question before use.
• Not suitable for children under 12 years of age. Older children should only use
the kite after extensive instruction and under constant supervision by an adult.
• Any liability claim resulting from use of this product towards the manufacturer,
distributor or dealers is excluded.
WARNING
4 5

WARNING: This kite is equipped with safety systems to de-power the wing in an
emergency or dangerous situation. However these systems are not automatic;
they are passive and need to be deployed by the user. Be sure you fully under-
stand the safety systems before you fly. Always inspect and test your safety
systems before every use; they could save your life in an emergency.
The control bar safety system lets you let go of the bar to instantly de-power your
kite without losing the kite. Always inspect and test your safety systems before
flight (see Fig. 1).
To use, attach the wrist strap to either wrist before flight. To de-power the kite in
flight, let go of the control bar with both hands at any time. The kite will partially
collapse and settle to the ground. Once the kite has landed, simply pick up the
bar and you’re ready to fly again. This method can also be used for an easy way
to land the kite directly downwind when finished flying.
Fig. 1: Control Bar Safety
SAFETY SYSTEMS
CoNTRol BAR SYSTEM
6 7

To use, secure the two wrist straps (kite killers) to your wrists before launch. To de-
power the kite, just let go of the handles and the kite will collapse and settle to the
ground (see Fig. 3.a). To re-launch, simply pick up the handles and you’re ready to
fly again (see Fig. 3.b).
WRIST STRAP RELEASE: In an emergency, if it is necessary to fully re-
lease from the kite, pull the red tabs on the wrist straps to disconnect from
the kite. Be sure that there is nobody downwind who could be injured by
a loose kite or its rigging.
land with handles
Launch with handles
Fig. 2.a: Using the Quick Release
In certain emergency situations it may be necessary to jettison the kite alto-
gether. To release yourself from the kite completely, grab the red plastic safety
stopper at the middle of the bar (see Fig. 2.a) and push it away from you, discon-
necting the kite, bar and lines from your wrist leash. Be sure that there is nobody
downwind who could be injured by a loose kite or its rigging.
Reconnecting the Quick Release
To reconnect the quick release, insert the
cord loop through the webbing loop on the
wrist strap, then engage the steel trigger
back into the red plastic trigger housing as
shown (see Fig. 2.b).
QUICK RElEASE
Fig. 2.b: Reconnecting Quick Release
HANDlE SAFETY SYSTEMS
Fig. 3.b: Pick Up Handles and You’re Ready to Fly Again
Fig. 3.a: Killed Kite by Releasing the Handles
8 9

COLOR KEY
AMain bridles
BIntakes
CTrailing edge
DBrake lines
EMain lines
FBrake bridles
GBrakeline adjust knot ladder
HPower adjust knot ladder
IDirt-out: sand & water drain
IMPORTANT:
Familiarize yourself with the safety features of your kite such as kite killer
and the quick release system prior to your first flight! Your kite should come
complete and ready to fly with the equipment listed below.
• Sail and bridles
• Backpack/duffel bag for storage
• Red and blue primary flying lines
• Yellow secondary flying lines (brake lines)
• Control bar with machined aluminum center joiner,
quick release and safety wrist strap
• Molded removable handle inserts for Handle Mode with brakeline pigtails
• Two safety wrist straps (Kite Killers) for Handle Mode
• Allen wrench for bar set screws
• Extra set screws - 2
• Flight Manual
PARTS OF THE KITE
PARTS &
EQUIPMENT
I
I
H
H
C
D
D
E
A
G
G
B
E
A
F
F
10 11

safe/ideal for flight not safe for flight
Where to Fly
Your choice of flying field is the single most important ingredient for success
with your kite, and most troubles come from picking a spot where the wind is
turbulent and gusty from obstacles in its path. Like whitewater in a river, wind
that flows past trees, buildings and hills becomes gusty and choppy and can
make controlling your kite difficult or dangerous.
The best possible place to fly is a beach or field with wind blowing from off the
water (see Fig. 4.a). If you have such a place available, it’s worth the extra travel
time to get there because you’ll learn to fly in literally a fraction of the time. If
you have to fly inland, look for wide open fields with no trees, buildings, or hills
for at least a half mile upwind.
Remember, flying safely is YOUR responsibility. Never fly your kite in extreme
conditions or winds that are stronger than its rated range. Never fly your kite
near power lines, storms, roads, railways, people or animals. If you have ANY
doubts about the safety of your flying situation, don’t risk it! One slip, or a broken
line, and you or a bystander could be seriously hurt.
The Wind Window
The flight area of the kite is called the Wind Window. The wind window extends
in a semi-circle from the left to the right side of the pilot. In the middle of the
wind window, known as the Power Zone, the kite will fly fastest and generate
the most pull.
As it reaches the edge of the window it will pull less and come to a stop. The
zenith, directly above the pilot at the top of the wind window, is the best place to
“park” the kite when you want to rest your arms and minimize the pull
(see Fig. 4.b).
In a normal launch, the kite is flown from the ground through the middle of the
wind window up to the zenith. This will result in near maximum pull. For this
reason, it is very important prior to launch to check that the lines are attached
correctly, safety systems are in place, and that the appropriate kite is being
flown given the strength of the wind. Make your first flights in very light winds
(less than 10 mph/16kph) until you are familiar with the power and handling of
the kite.
Fig. 4.b: Wind Window
landing area
landing area
power zone
zenith
Fig. 4.a: Where to Fly
FIRST FlIGHT
For questions, replacement parts or repairs:
WWW.PRISMKITES.COM
For questions, replacement parts or repairs:
WWW.PRISMKITES.COM
For questions, replacement parts or repairs:
WWW.PRISMKITES.COM
For questions, replacement parts or repairs:
WWW.PRISMKITES.COM
For questions, replacement parts or repairs:
WWW.PRISMKITES.COM
12 13

BARS vERSUS HANDlES
The Tensor is uniquely designed to be flown either on two lines with a control
bar, or on four lines with independent quadline handles. The special control
bar has a machined aircraft alloy center ferrule which when disconnected al-
lows easy conversion into two quad-line handles without need for a separate
line winder.
Control Bar Mode:
Allows comfortable left-right two-line steering for less experienced pilots. Cen-
ter safety line connects to brakelines on the kite, allowing easy reverse launch
and instant de-power to kill the kite for landing and emergencies (see Fig. 5.a).
Handle Mode:
Independent braking with each hand allows greater maneuverability and tighter
turns, allowing you to stay in the power zone for more continuous power. Brake
line control also allows subtle changes to the curvature of the wing to maximize
pull in all parts of the wind window (see Fig. 5.b).
Converting from Bars to Handles
To convert from bar mode to handle mode (see Fig. 6):
1) Use the supplied Allen wrench to remove the two screws at the middle of
the bar from the machined center joiner. Slide the two halves of the bar off
the joiner.
2) Insert the two molded handle ends into the open ends of the handles, line up
the screw holes, and secure with the Allen wrench and two set screws.
3) Next, untie the two yellow brake lines from the center line and use a Lark’s
Head knot to tie each one to the tail on its corresponding handle. Check that
none of the lines are tangled or twisted. IMPORTANT: Be sure that the Right
brake line leads to the Red handle, and the Left line leads to the Blue handle.
Fig. 5.b: Handles
Fig. 6: Bar to Handle Conversion
Fig. 5.a: Control Bars
14 15

The kite is already set up with lines and control bar pre-attached. First unfold the
sail and lay the kite on the ground so that the bridle lines are facing up and air in-
takes are facing away from the wind. If necessary weigh the trailing edge down
with some sand or sand bags in order to keep in it place. Carefully separate the
bridle lines and lay the main bridles and the brake bridles in the direction of the
wind, making sure there are no tangles. Hold the control bar at the middle and
unwind the lines as you walk directly upwind. When the lines are fully unwound
make sure that all four are parallel and untwisted. The red line and red side of
the bar should be on the right.
Attach the Velcro safety strap to one wrist and be sure it’s not tangled around
your flying lines.
Control Bar Launch
The control bar should be held shoulder width apart with the right hand on the
red side and the left hand on the blue side (see Fig. 7).
To launch, pull on the control bar evenly and take a few steps backwards. If the
wind is light, you may need to give the control bar one or more good pulls to
inflate the wing and achieve lift off. The kite will inflate and should accelerate
straight upward to the zenith. If the kite swerves to one side, correct its course
by steering with the bar as shown below.
launch with bar
land with bar
Fig. 7: Launching with the Control Bar
CoNTRol BAR lAUNCH
Reverse Launch
If you land the kite on the ground with its leading edge down, you can launch it in
reverse by pulling on the center line (see Fig. 8). This pulls in the brake lines and
causes the kite to lift off backwards. As it rises, pull one end of the bar to pivot it
in place, then let the center line go and steer it normally into the air.
Fig. 8: Reverse Launch with Bar
16 17

Steering with the Bar
By pulling on one side of the control bar you will turn the kite in that direction.
A left-hand pull will make the kite turn left and a right-hand pull will turn it right
(see Fig. 9.a). If you continue to hold the turn, the kite will make a full loop. When
the bar is returned to a neutral position the kite will continue straight in whatever
direction it’s pointed until it slows at the edge of the wind window.
NOTE: After turning through one or more loops, the lines will be twisted around
each other. This is no problem as the Spectra lines are designed to be slippery
enough to slide past each other so you can still control the kite when twisted.
To untwist the lines, simply fly loops in the opposite direction until the lines are
once again parallel.
Landing with the Bar and Securing the Kite
The safety strap on your wrist is not just for emergencies. It also lets you easily
de-power and land the kite whenever you want. Whenever you let go of the bar,
the kite will collapse and settle to the ground. Wait till the kite is laying in a safe
position on the ground, remove the safety strap from your wrist and secure the
kite by pushing the ground stake through webbing loop at the quick-disconnect
as shown (see Fig. 10.a).
The edge of the wind window may also be used for landing in strong winds since
the kite will not have to settle as far. When the kite is a short distance from the
ground, let the bar go and the kite will collapse. Then let the kite settle to a safe
position and secure it as described above.
Wind
stake
stake Wind
Fig. 10.b: Securing with Control Bar and Stake (viewed from above)
launch with bar
land with bar
Fig. 10.a: Landing with Bar
CoNTRol BAR lANDING
Fig. 9.a: Steering with the Bar
18 19

pilot’s perspective side view
Position the kite downwind, weight the trailing edge down, and unwind your
lines as described in launching with the control bar (see Fig. 11.a).
Before launch, attach the handle safety straps to each wrist. The handles should
be held at their upper ends as shown in the illustration. The brake lines should
be slack with the lower ends of the handles pointing forward.
To launch, pull on back both handles simultaneously and if necessary take a
few steps backwards at the same time. As the kite inflates and lifts off, hold
the handles evenly in front of you and steer the kite straight up to the top of the
wind window.
Steering with Handles
To make a basic turn simply pull on one handle to turn in one direction. Pulling on
the left handle turns the kite left and pulling right turns it right. Hold the handles
evenly in front of you and the kite will continue straight in the direct it’s pointed
until it reaches the edge of the wind window.
With handles you can make a tighter turn by pulling the handle and pivoting the
lower handle end toward you at the same time to activate the brake line (see Fig.
11.b). By combining pulling and pivoting movements with the handles, the kite
can be controlled quite precisely and turned within its wingspan if desired.
The brake lines should always be returned to their initial (slack) position after a
steering maneuver to maintain forward drive. Hold both handles close together
in front of you to ensure full control.
When both brake lines are pulled simultaneously by tilting both handles toward
the pilot, the lift of the kite will be interrupted and it will begin to fly backwards.
In light to moderate winds you can land the kite this way, using the brakes as
necessary to ensure a steady backwards flight down to the ground.
land with handles
Launch with handles
Fig. 11.a: Launching with Handles
Fig. 11.b: Steering with Handles
launch/up
landing/down
right turn
left turn
HANDlES lAUNCH
pilot’s perspective side view
pilot’s perspective side view
pilot’s perspective side view
20 21

Fig. 12.a: Light Wind Landing
In lighter winds, pull evenly on both brake lines and the kite will back down to
the ground (see Fig. 12.a).
In stronger winds, the safety straps on your wrist lets you easily de-power and
land the kite whenever you want. Whenever you let go of the handles, the kite
will collapse and settle to the ground. Wait till the kite is laying in a safe position
on the ground, remove the safety straps from your wrists and secure the kite
by pushing the ground stake through webbing loop at the quick-disconnect as
shown (see Fig. 12.b).
Brake Line Adjustment
To fine-tune your Tensor you can adjust the length of the brake lines that control
the bottom edge of the wing. This may also become necessary over time as the
main flying lines stretch slightly. The brake lines can be shortened or lengthened
by moving the lark’s head knots that connect the flying lines to the handles and
to the kite’s bridle. We suggest you become familiar with the flying characteris-
tics of the kite before making these tweaks, as precise adjustment is based on
experience and personal preference. The length of the brake lines should be
adjusted at the knot ladder at the end of the brake bridle. Factory setting is on
the third knot (see Fig. 13). This should be good to start with in bar mode and in
handle mode.
Bar mode: when you fly your Tensor on the bar the brake should be quite loose
for best maneuverability. It is important that the brake lines hang loosely even
in the tightest turn. If you notice that the lines do get tight in turns move the loop
on the knot ladder to a looser position. If you are having difficulties to reverse
launch your Tensor move the loop to a tighter position.
Handle mode: If the brake lines are (always) tight when you fly the kite you
should move the loop to a looser position. If pulling in the brake line with the
handle does not cause the kite to turn move the loop to a tighter position. You
should be able to reverse launch the kite by pulling the brake lines. If that is not
the case move the loop to a tighter position on the knot ladder.
Adjusting the brake lines in handle mode does require some experience. Allow
yourself some time to find out which settings work best for you.
Wind
stake
stake Wind
Fig. 12.b: Securing with Handle and Stake (viewed from above)
Fig. 13: Brake Line Adjustment
factory setting
brake tighter
brake looser
kite
factory setting
brake tighter
brake looser
kite
lANDING WITH HANDlES RIGGING & ADjUSTMENT
land with handles
Launch with handles
22 23

Power Adjustment
The main bridles on your Tensor are equipped with a knot ladder that allows
you to fine-tune the power of the kite in different wind conditions (see Fig. 14.a).
The kite will fly well through its wind range on the neutral setting, but you can
increase or decrease the pull by changing the setting as shown. In strong winds
you may wish to reduce pull to keep it controllable, so move the power adjust-
ment to the light setting. To increase pull in light to medium winds, move it to the
strong setting. Changing the power setting will also affect how the kite turns, so
once you have some experience with the kite feel free to experiment to find set-
tings that work for your personal flying style.
The materials in your Tensor are durable and designed for a long
life with minimal maintenance. Here are few tips to keep it healthy:
Never fly the kite over people or objects such as fences, cars, etc. Bystanders
and animals could be injured and property or the kite itself may incur damage.
Never step on the kite or the lines or drag the kite over the ground. Beware
of sharp objects, shells or fences and never lay the kite down on top of them.
Give your kite a pre-flight inspection before each flight to be sure safety sys-
tems are properly assembled, nothing is tangled and your bridle and flying lines
aren’t worn.
Avoid letting the air intake openings of the kite hit the ground first in a hard nose-
dive. This can cause sudden pressure that exceeds the capacity of the cham-
bers and may lead to damage of the internal cells.
Keep the sail out of the sun when not in use to keep the colors from fading. Beach
sand is abrasive and will wear on bridles and fittings, so do what you can to dust
off the sand after a session at the beach. Compressed air works great for this
if it’s available, and a freshwater rinse is a good idea if your kite has been
swimming in salt water.
Keep your kite out of hot car trunks and avoid using solvents to clean
the sail as they can dissolve the adhesives in the seams.
Sail Care
DO NOT dry clean, iron, bleach, or machine wash.
Spot clean with cloth and water only. Do not use detergents
or other cleaning agents.
Do not dry in direct sunlight or UV rays.
Pack the kite only when it is completely dry and press excess air out of
the bag. If you find a small tear in your sail it can often be quickly and eas-
ily repaired with Tedlar sail repair tape, available from our online store
at www.prismkites.com
light neutral strong
light neutral strong
light neutral strong
light neutral strong
light neutral strong
light neutral strong
light neutral strong
light neutral strong
light neutral strong
CARE & REPAIR
Fig. 14.a: The Bridle’s Power Adjustment
24 25

Flying Line Care
Your high-tech Spectra fiber flying lines are critical to the safe enjoyment of
your kite. A broken line at the wrong time could result in serious injury. Inspect
your lines every time you wind or unwind them for frayed spots that could com-
promise their strength and replace them immediately if they are worn. Do not
attempt to tie a broken line back together as this will reduce its strength.
Avoid flying with lots of twists in your line as this will cause wear sooner.
Watch out for other kites in the area to be sure they don’t cut your lines. Inex-
pensive single-line kites with nylon lines can cut you out of the sky instantly due
to the higher melting point of their line material.
Spray your lines down with fresh water from time to time to remove abrasive
sand and dirt.
Getting Sand Out of Your Kite
Your Tensor canopy is equipped with two Velcro-closure openings at the wing-
tips along the trailing edge which can be used to drain sand out of the kite if it
has been flown extensively on a beach (see Fig. 15). To use, open the closures
and slide the fabric tongue out to prevent it from closing. Fold the kite in half and
shake all the sand down and out the wingtips. With the dirt-outs open, small
amounts of sand can also be shaken out in flight.
Repairs & Spare Parts
If you should damage your kite while hard at play, don’t despair! There’s almost
nothing that can’t be fixed on a kite, and usually you can do it yourself in a few
minutes or less.
If you break, lose, or wear out a part, you can order a replacement from our
online store and replace it yourself in a minute or two. Most sail tears can be
patched strong as new with our near-invisible Tedlar repair tape, also available
from our online store. This material has an ultra- strong adhesive that resists the
effects of the sun for the life of your sail. For spare parts go to our support area at
www.prismkites.com
Fig. 15: Removing Dirt and Debris from your Parafoil
Contact Us
Prism Designs, Inc.
4214 24th Ave W.
Seattle, WA 98199
206-547-1100 office
206-547-1200 fax
www.prismkites.com
At Prism our warranty is pretty simple: If you’re not happy, we’re not happy, and
we’ll do what it takes to make things right. If the retailer from whom you pur-
chased is unable to help, drop us a line and we’ll get things sorted out. Damage
due to normal wear and tear (or those occasional moments of bad judgement)
can almost always be repaired for a reasonable charge.
WARRANTY
26 27

For questions, replacement parts or repairs:
WWW.PRISMKITES.COM
For questions, replacement parts or repairs:
WWW.PRISMKITES.COM
For questions, replacement parts or repairs:
WWW.PRISMKITES.COM
For questions, replacement parts or repairs:
WWW.PRISMKITES.COM
For questions, replacement parts or repairs:
WWW.PRISMKITES.COM
WWW.PRISMKITES.COM
© 2010 Prism Designs Inc. • 4214 24th Ave. West, Seattle Washington 98199
Table of contents
Other PRISM+ Aircraft manuals
