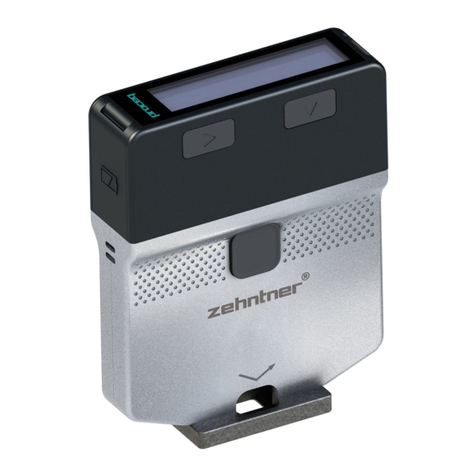
Proceq Zehntner ZG8150 User manual

ZG8150
Inline
Glossmeter
Technical
Manual

10/08/2020 © Copyright 2020, PROCEQ SA
Document Information
Document Revision: 1.0
Revision Date: -
Document State: Released
Company: Proceq SA
Ringstrasse 2
CH-8603 Schwerzenbach
Switzerland
Classification: Manual for inline user
Revision History
Rev
Date
Author, Comments
0.8
Feb 6, 2020
CSAR
- Initial document
SGIA
- Add drawings
0.9
April 30, 2020
PEGG
- New formatting and text revision
1.0
August 10, 2020
PEGG
- Corrections and final formatting

10/08/2020 © Copyright 2020, PROCEQ SA
Content
1Introduction ......................................................................................................... 1
1.1 Scope of this document ............................................................................................. 1
2Mounting of the device........................................................................................ 2
3Dimensional Drawings ........................................................................................ 3
3.1 Mounting Example –with custom mounting plate ..................................................... 4
3.2 Mounting Tolerances ................................................................................................. 5
4Connection setup ................................................................................................ 6
4.1 USB connection setup ............................................................................................... 6
4.2 RS232 connection setup ........................................................................................... 7
4.3 Firmware update........................................................................................................ 8
5Communication protocol .................................................................................... 9
5.1 Command and return string....................................................................................... 9
5.2 Transaction ID (TID) .................................................................................................. 9
5.3 Parameter “AngleBinary” ......................................................................................... 10
5.4 Invalid measurement values.................................................................................... 10
6Commands..........................................................................................................11
6.1 2 –AdvancedMeasureValue ................................................................................... 11
6.2 3 –StartScan Measurement.................................................................................... 11
6.3 5 –StopScanMeasurement ..................................................................................... 12
6.4 8 –SetFlash............................................................................................................. 13
6.5 12 –GetFlash .......................................................................................................... 13
6.6 16 –StartContinuousMeasurement......................................................................... 14
6.7 18 –StopContinuousMeasurement ......................................................................... 14
6.8 28 –GetIsOnStandard............................................................................................. 15
6.9 53 –LaserEnable..................................................................................................... 16
6.10 56 –Error................................................................................................................. 16
6.11 64 –ResetDevice .................................................................................................... 17
6.12 70 –AdvancedUserCalibration................................................................................ 18
6.13 78 –AcceptUserCalibration..................................................................................... 18

10/08/2020 © Copyright 2020, PROCEQ SA
Legal Notices
This document can be changed at every time and without any prenotification or announcement.
The content of this document is intellectual property of Proceq SA and prohibited to be copied
neither in a photomechanical or electronic way, nor in excerpts, saved and/or be passed on to other
persons and institutions.
The features described in this instruction manual represent the complete technology of this
instrument. These features are either included in the standard delivery or available as options at
additional costs.
Illustrations, descriptions as well as the technical specifications conform to the instruction manual at
hand at the time of publishing or printing. However, Proceq SA policy is one of continuous product
development. All changes resulting from technical progress, modified construction or similar are
reserved without obligation for Proceq to update.
Some of the images shown in this instruction manual are of a pre-production model and/or are
computer generated; therefore the design/features on the final version of this instrument may differ
in various aspects.
The instruction manual has been drafted with the utmost care. Nevertheless, errors cannot be
entirely excluded. The manufacturer will not be liable for errors in this instruction manual or for
damages resulting from any errors.
The manufacturer will be grateful at any time for suggestions, proposals for improvement and
references to errors.

10. August 2020 © Copyright 2020, PROCEQ SA 1
1 Introduction
The ZG8150 is a glossmeter for use in a production test system. With a dedicated cable it can be
connected to a USB or RS232 interface on the host (e.g. PC). For that a dedicated cable is used and
the device has to be configured accordingly.
1.1 Scope of this document
This document is an instruction manual for the ZG8150 Inline Glossmeter.
It describes in technical details, the mounting and explains the connection setup, the protocol format,
the command set and their parameters, the answer-strings of the device as well as possible error
reports.

10. August 2020 © Copyright 2020, PROCEQ SA 2
2 Mounting of the device
To integrate the ZG8150 into a production line, the device can be mounted to fixtures or robotic
arms.
To facilitate the mounting, the device has a threaded hole on the top and two mounting guide holes.
Follow the steps
Remove cap for mounting
Cap can be pierced with a drill and put back on
Drill diameter: 4.5mm + 6mm

10. August 2020 © Copyright 2020, PROCEQ SA 3
3 Dimensional Drawings

10. August 2020 © Copyright 2020, PROCEQ SA 4
3.1 Mounting Example –with custom mounting plate
The following example shows how the ZG8150 can be mounted on a custom made mounting plate,
which allows versatile mounting options to robot arms or fixtures.
NOTE:
This mounting plate is for reference purposes to make your integration easier and not available as
a product.

10. August 2020 © Copyright 2020, PROCEQ SA 5
3.2 Mounting Tolerances
In order to guarantee the specified performance, the device shall be mounted to fulfill the following
mounting tolerances.

10. August 2020 © Copyright 2020, PROCEQ SA 6
4 Connection setup
The glossmeter has a USB connection and can be connected to a USB or RS232. Interface on
the host (e.g. PC). For that a dedicated cable is used and the device must be configured
accordingly.
4.1 USB connection setup
To connect the device to a USB port a USB type C to type A cable is used. The device needs
to be setup for USB connection.
Connector
Type
Description
Setting
Value
1
A (male)
Plugged on PC side
Baudrate
115200
2
C (male)
Plugged on device side
Data Bits
8
Stop Bits
1
Parity
None
Flow Control
None

10. August 2020 © Copyright 2020, PROCEQ SA 7
4.2 RS232 connection setup
To connect the device to a RS232 port the RS232 connection kit is used.
This consists of
1. a USB Y-cable
2. a USB-to-RS232 converter
3. a gender changer adapter
Connector
Type
Description
1
A (female)
Plugged to the RS232 adapter
2
C (male)
Plugged on device side
3
A (male)
Plugged to power 5V (e.g. PC side)
In order to communicate to a RS232 port the device needs to be setup for RS232 communication
(see section 6).
The serial port of the computer has to be set to the following communication settings:
Setting
Value
Baudrate
115200
Data Bits
8
Stop Bits
1
Parity
None
Flow Control
None

10. August 2020 © Copyright 2020, PROCEQ SA 8
4.3 Firmware update
A firmware update can only be performed view a USB connection. Therefore the USB connection
setup (see 4.1) is required.
If the device is used in USB setup, the device can be connected to a PC via USB and the firmware
can be updated using the “pqUpgrade” tool.
If the device is used in RS232 setup, the device needs to be configured for USB setup first.
There are two ways to switch to USB connection setup:
1. Using a command string (see 6.4) After the communication is set to a USB connection
setup, the device resets and starts in the selected communication setup.
2. Press the measurement button of an unplugged device. Plug in the USB cable (USB set-up)
connected to the PC and wait 10s before release the measurement button. Then the update
tool “PqUpgrade” will find the device. “PqUpgrade” will start the device in USB virtual com
port setup. In order to return to the same communication setup as before the update a reset
is required.

10. August 2020 © Copyright 2020, PROCEQ SA 9
5 Communication protocol
The communication with the ZG8150 is completely string based. All commands are composed of
ASCII-character strings. This allows an easy control of the device, for example with a commercially
available terminal program such as “HyperTerminal”.
5.1 Command and return string
The communication works synchronous, with the following communication scheme:
3. A command is sent to the device
4. The command is executed
5. and a return string is sent from the device
Only after a complete sequence a new command is accepted.
In scan mode or continuous mode another scheme is used:
6. a command to start the scan mode or continuous mode is sent to the device
7. the device starts the respective mode
8. and sends data, until the mode is stopped
Only after this mode is stopped, new commands can be sent.
A command string is basically structured like this:
CMD | TID | PARAMS:
Name
Description
CMD
The command defines which operation is executed.
TID
The transaction ID can be used to identify a communication transfer.
PARAMS
The parameters are added after the TID. The number of parameter can
differ from command to command.
For separation of the different values the pipe character “|” (ASCII 0x7C) is used.
As terminator is the character colon “:” (ASCII 0x3A) used.
e.g. 2|xy|3:
5.2 Transaction ID (TID)
The recommended value ranges of the 2 ASCII characters are following:
0x21…0x2F
0x3B…0x40
0x42…0x7B
0x7D…0x7E
Return strings from device which are not triggered explicitly by user side will use only ASCII
numbers (0x30…0x39).

10. August 2020 © Copyright 2020, PROCEQ SA 10
5.3 Parameter “AngleBinary”
The parameter “AngleBinary” includes the information which geometries are selected. The value
corresponds to binary coded integer (active high) and the bit field is as follows:0x21…0x2F
Angle 3 (A2)
Angle 2 (A1)
Angle 1 (A0)
Value
0 (inactive)
0 (inactive)
1 (active)
1
0
1
0
2
0
1
1
3
1
0
0
4
1
0
1
5
1
1
0
6
A0 always denotes the smallest angle according to the perpendicular to the measuring plane.
For example a device with the geometries 20°/60°/85°, A0 would be 20°, A1 = 60°, A2 = 85°.
5.4 Invalid measurement values
It can happen that a measurement return values smaller than zero.
Value
Meaning
-1
No measurement value
-2
Overflow

10. August 2020 © Copyright 2020, PROCEQ SA 11
6 Commands
In this section the command strings supported by the glossmeter are listed. Some possible access
by commands not described is provided for other use than inline (e.g. factory
configuration/calibration/diagnostic).
6.1 2 –AdvancedMeasureValue
This command executes a single measurement.
Command: 2
Command string: 2|TID|AngleBinary:
Return string: 2|TID|AngleBinary|Unit|ValueAn:
Parameter:
AngleBinary Angle combination
ValueAn Measured value per angle n (n = 0…2), format %4.1f
Unit GU or %
Example
Send
2|xy|3:
Command: 2
TID: xy
AngleBinary: 3 (angle A0 and A1)
Receive
2|xy|3|GU|91.2|94.5:
Command: 2
TID: xy
AngleBinary: 3 (angle A0 and A1)
Uint: GU
Measured values: A0 = 91.2, A2 = 94.5
6.2 3 –StartScan Measurement
This command starts the scan measurements until the device receives the stop command. Scan
measurement mode executes measurements at the fastest possible rate and sends them
consecuteively. Do not send other commands while scan mode is active. If you want to sent another
command, first execute the StopScanMeasurement command.
Command: 3
Command string: 3|TID|AngleBinary:
Return string: 3|TID|AngleBinary|Unit|ValueAn:
Parameter:
AngleBinary Angle combination
ValueAn Measured value per angle n (n = 0…2), format %4.1f
Unit GU or %
Example
Send
3|xy|2:
Command: 2
TID: xy
AngleBinary: 2 (angle A1)

10. August 2020 © Copyright 2020, PROCEQ SA 12
Receive
3|xy|2|GU|70.5:
3|00|2|GU|70.9:
3|01|2|GU|71.0:
3|02|2|GU|70.7:
…
Command: 2
TID: xy, 00, 01, 02, …
AngleBinary: 2 (angle A1)
Uint: GU
Measured values:
A1 = 70.5, 70.9, 71.0, 70.7, …
6.3 5 –StopScanMeasurement
This command stops the scan measurements.
Command: 5
Command string: 5|TID:
Return string: 5|TID:
Example
Send
5|xy:
Command: 5
TID: xy
Receive
5|xy:
Command: 5
TID: xy

10. August 2020 © Copyright 2020, PROCEQ SA 13
6.4 8 –SetFlash
This command provides write access to angle independent settings.
Command: 8
Command string: 8|TID|Index|Data:
Return string: 8|TID:
Parameter:
Index Index of the setting (see Index table in 6.5)
Data Value of the particular setting
Example
Send
8|xy|710|1000:
Command: 8
TID: xy
Index: 710
Data: 1000
Receive
8|xy:
Command: 8
TID: xy
6.5 12 –GetFlash
This command provides read access to angle independent settings.
Command: 12
Command string: 12|TID|Index:
Return string: 12|TID|Data:
Parameter:
Index Index of the setting
Data Value of the particular setting
Index
Name
Description
500
Serial Number
Read only string.
503
Angle Binary
Read only supported angles.
Value range: 1-7 (integer)
710
MsrIntervalTime
Measure interval time for continuous
mode.
Possible values in milliseconds: 500,
1000, 1500, 2000, 2500, 3000, 3500,
4000, 4500, 5000
1100
UsbSettings
Communication setting.
USB setup: 0 (integer)
RS232 setup: 1 (integer)
1560
Units
Measurement units
Gloss units: 0 (integer)
Percent: 1 (integer)

10. August 2020 © Copyright 2020, PROCEQ SA 14
Example
Send
12|xy|710:
Command: 12
TID: xy
Index: 710
Receive
12|xy|1000:
Command: 12
TID: xy
Data: 1000
6.6 16 –StartContinuousMeasurement
This command starts the continuous measurements until the device receives the stop command.
Command: 16
Command string: 16|TID|AngleBinary:
Return string: 16|TID|AngleBinary|Unit|ValueAn:
Parameter:
AngleBinary Angle combination
ValueAn Measured value per angle n (n = 0…2), format %4.1f
Unit GU or %
Example
Send
16|xy|3:
Command: 16
TID: xy
AngleBinary: 3 (angle A0, A1)
Receive
16|xy|3|GU|85.3|87.6:
16|35|3|GU|87.5|89.4:
16|36|3|GU|89.4|92.3:
16|37|3|GU|91.2|94.5:
…
Command: 16
TID: xy, 35, 36, 37, …
AngleBinary: 3 (angle A0, A1)
Uint: GU
Measured values:
A0 = 85.3, 87.5, 89.4, 91.2, …
A1 = 87.6, 89.4, 92.3, 94.5, …
6.7 18 –StopContinuousMeasurement
This command stops the continuous measurements.
Command: 18
Command string: 18|TID:
Return string: 18|TID:
Example
Send
18|xy:
Command: 18
TID: xy
Receive
18|xy:
Command: 18
TID: xy

10. August 2020 © Copyright 2020, PROCEQ SA 15
6.8 28 –GetIsOnStandard
This command returns the information if the device is placed on the working standard or not.
Command: 28
Command string: 28|TID:
Return string: 28|TID|Data:
Parameter:
Data 0 = is not on standard, 1 = is on standard
Example
Send
28|xy:
Command: 18
TID: xy
Receive
28|xy|1:
Command: 18
TID: xy
Data: 1 (is on standard)

10. August 2020 © Copyright 2020, PROCEQ SA 16
6.9 53 –LaserEnable
This command enables or disables the laser of the glossmeter.
Command: 53
Command string: 53|TID|Data:
Return string: 53|TID:
Parameter:
Data 0= disable laser, 1= enable laser
Example
Send
53|xy|1:
Command: 53
TID: xy
Data: 1 (enable laser)
Receive
53|xy:
Command: 53
TID: xy
6.10 56 –Error
This command returns the error of any command.
Command: 56
Command string: -
Return string: 56|TID|Command|Error:
Parameter:
Command Command caused the error
Error Error code
Example
Name
Description
-1
UNDEFINED_ERROR
0
NO_ERROR
1
OPCODE_NOT_FOUND
No command with this code
exists.
9
NO_STANDARD_VALUE
No valid standard value is used.
10
DEVICE_NOT_ON_WORKING_STANDARD
Device is not placed on the
working standard.
12
VALUE_OUT_OF_RANGE
Value is out of range.
13
PARSE_ERROR
The format of the send string is
not correct or wrong send
parameters are used.
14
PARAMETER_ERROR
The index of a setting is wrong.
30
NO_ACCESS_RIGHTS
The user has no accees rights.
31
ACCESS_DENIED
No access because it is not
possible to access the resource.
Other manuals for Zehntner ZG8150
1
Table of contents
Other Proceq Accessories manuals

