Profoto AcuteB 600 User manual

AcuteB 600
User´s Guide

2
For more information, visit www.profoto.com
AcuteB 600
AcuteB 600
For more information, visit www.profoto.com
3
SAFETY PRECAUTIONS!
Read and follow all safety instructions below carefully to avoid injuries or damages!
Make sure that this user guide always accompanies equipment!
Profoto products are intended for professional use!
Generator, lamp heads and other parts are only intended for indoor photographic use.
Do not place or use the equipment where it can be exposed to moisture, for instance thorough condensation,extreme
electromagnetic fields or in areas with flammable gases or dust!
Do not expose the equipment to dripping or splashing
Do not place objects filled with liquids on the equipment.
Donot storethe generatorcloseorbelowthe freezingpoint,which canleadtolossof capacityandrisk ofcondensation
when used in a warmer surrounding immediately.
Do not connect accessories from other brands!
Equipment must only be serviced or repaired by authorised and competent service personnel!
Changes or modifications not expressly approved by the party responsible for compliance Profoto could void the
user’s authority to operate the equipment.
WARNING – Electrical Shock Hazard – High Voltage!
Connect generator to grounded mains outlet!
Only use Profoto extension cables!
Do not open or disassemble generator or lamp head! Equipment operates with high voltage.
Generator capacitors will be electrically charged for a considerable time after being turned off.
Do not touch modeling lamp or flash tube when mounting umbrella metal shaft in its reflector hole, risk of contact
with live electrical socket!
Disconnect lamp cable between generator and lamp when changing modeling lamp or flash tube!
CAUTION – Burn Hazard – Hot Parts!
Donottouchhotpartswithbarefingers!Modelinglamps,flashtubesandcertainmetalpartsemitstrongheatwhenused!
Do not point modeling lamps or flash tubes too close to persons.Light components may on rare occasions explode
and throw out hot particles!
Make sure that rated voltage for modeling lamp corresponds with technical data of user guide regarding power supply!
NOTICE – Equipment Overheating Risk
Remove transport cap from lamp head before use!
Do not obstruct ventilation by placing filters, diffusing materials, etc. directly over glass cover modeling lamp or
flash tube!
FINAL DISPOSAL
Equipment contains electrical and electronic components that are harmful to the environment.
Equipment may be returned to Profoto distributors free of charge for recycling according toWEEE.
Followlocallegalrequirementsfor separate disposalofwaste,for instanceWEEEdirectivefor electricalandelectronic
equipment on the European market, when product life has ended!

4
For more information, visit www.profoto.com
AcuteB 600
AcuteB 600
For more information, visit www.profoto.com
5
Table of Contents
Nomenclature ............................................7
Brief Instructions .......................................8
Connecting Lamp Heads ............................8
Battery and Battery Charging.....................8
Changing Battery Fuse...............................9
Changing Battery .......................................9
Energy Control .........................................10
Choice of Modeling Lamp ........................10
Connecting Camera & Flash Meter...........10
Recycling.................................................10
Photocell..................................................10
Signals, Audible & Visual..........................10
Safety Functions ......................................11
Reliability Test..........................................11
Color Temperature ...................................11
Flash Duration .........................................11
Lamp Heads ........................................... 11
Radio Receiver.........................................11
PocketWizard Wireless Freedom ..............13
Battery Facts ...........................................13
Warranty..................................................14
Accessories .............................................14
Technical Data.........................................15
Thank you for choosing Profoto.
Follow the instructions in this booklet to use your new product.
Thanks for showing us your confidence by investing in an AcuteB 600 generator.For more than
threedecadeswe havesoughttheperfect light.What pushes us is the convictionthatwecanoffer
even the most demanding photographer yet better tools.
Before our products are shipped we have them pass an extensive and strict testing program.
We check that they pass the quality and capacity levels the most demanding photographers
require. For this reason our flash equipment is the standard in most rental studios in New York
and Tokyo and the most rented flash all over the world.
Quality of Light
The Profoto system consists of different generators built and designed to meet the needs of
the most demanding photographers. Yet the most important thing is the light you create, and
it is essential that the system you use offers the freedom to do that. The light source, both the
flash tube and the modeling light, is placed high and free in the flash head.This makes it easier
for you to adjust the light and use your creativity. Most reflectors can be moved forward or
backward in relation to the optical centre of the light source, effectively narrowing or widening
the spread of the light and changing the intensity and fall-off characteristics as well. Every
single reflector and accessory creates its special light and the unique Profoto focusing
system offers you the possibility to create your own light with only a few different reflectors.
Enjoy your Profoto product!

6
For more information, visit www.profoto.com
AcuteB 600
AcuteB 600
For more information, visit www.profoto.com
7
Nomenclature
[1] Lamp Head Socket
[2] Charge Socket : CHARGE
[3] Modeling Light Power Socket : EXT
[4] Radio Receiver (Only on AcuteB 600R model)
[5] Sync Socket : SYNC
[6] Photo/IR-cell
[7] Photocell Switch : SLAVE
[8] Ready Lamp & Test Button
[9] On/Off Switch : ON
[10] Battery Indicator
[11] Modeling Light Switch : MODEL
[12] Energy Control, fine adjustment : ENERGY
[13] Energy Control : ENERGY
[14] Audible Signal On/Off : SOUND
-1
[14]
[1] [2] [3]
[5]
[6]
[7]
[8]
[9]
[10]
[11]
[12]
[13]
[4]
Profoto AcuteB R
CHARGE EXT SLAVE
SYNC
MODELENERGYENERGY ON
SOUND
EXT
OFF
BAT
MAX
-4
-2
MAX
-2
-1

8
For more information, visit www.profoto.com
AcuteB 600
AcuteB 600
For more information, visit www.profoto.com
9
Brief Instructions
• Connect the lamp head to the lamp head
socket.
• Press the switch ON [9] to start.The ready
lamp [8] will light up when the generator
is ready.
• Choose the desired energy level with the
controls ENERGY [12,13 ].
The generator will automatically dump if
the energy level is lowered.
• Connect sync cord or flash meter to the
sync socket SYNC [5].
• Activate the photo/IR cell [6] by pressing
the button SLAVE [7].
• Activate the audible signal by pressing the
button SOUND [14].
• Pressingthetestbutton[8]willtriggeraflash.
• The Battery Indicator [10] shows the battery
charge level.
• There are three modes for the modeling
light. Press the switch MODEL [11] to EXT
for external power for modeling
light or press MODEL [11] to BAT
for battery use only for the modeling light.
If you don’t want modeling light switch
MODEL [11] to OFF.
• To set radio channel,within 30 seconds
from power on, press and hold the
PocketWizardTransmitter TEST button
(up to 4 seconds) until flash triggers. If
using a Sekonic meter with Radio module
as a Transmitter,press the measure button
repeatedly within the 30 second
learning period until the flash triggers.
• Press and hold down the button ON [9] for
2 seconds to turn off the generator.
The generator automatically turns off after
120 minutes when not in use.
Connecting Lamp Head
One lamp head can be connected to the lamp
head socket.When connecting the lamp head
plug to the lamp head socket, align the dots on
the plug with the white dot on the generator
panel. Push the plug all the way in. Secure by
turning the locking ring on the plug clockwise.
Battery and Battery Charging
The battery can be charged separately or with
the battery in place through the mains outlet by
using the standard Profoto Charger 1A which
takes 5 hours to charge the battery or the
Profoto Charger 2A which charge the battery
within 2.5 hours. The generator can be used
during charging and cannot be used without a
battery inplace.Thebatterywillnotdeteriorate
from being charged frequently or from being
chargedwhennotfullydischarged.Thebattery
indicator [10] shows the charge level and is
updated when the generator is turned on or
when triggering a flash. If all three indicators
arelit,pressthetestbutton[8]totriggera flash,
then the battery indicator will be updated. The
environmentinfluencesthecapacityofboththe
generatorandthebattery,forexampleextreme
cold decreases the battery charging capacity,
for more details please read“Battery Facts”.
Changing Battery Fuse
The 40 A fuse holder is placed on top of the
battery. Pull the fuse out. Use fuses that are
recommended, for more details please read
“Technical Data”. Push the new 40 A fuse all
the way into the fuse holder.
Changing Battery
The battery has a cassette for rapid exchange.
To release the battery, squeeze the two safety
clamps and pull the battery out. Push the new
battery all the way into the generator, make
sure the text “This side up”on the battery is up.
To properly secure the battery, make sure you
hear a ”click“ from each safety clamp.
CHARGE
40 A
Battery
Charge
Socket
®
This side up.
PULL Squeeze
Squeeze
Profoto AcuteB R
CHARGE EXT
Generator
Charge
Socket
>
>
CONNECTING LAMP HEAD
BATTERY CHARGING
GENERATOR CHARGING
CHARGE
40 A
CHANGING BATTERY FUSE
CHANGING BATTERY
Release battery
®
Click!Click!
PUSH
CHANGING BATTERY
Insert battery

10
For more information, visit www.profoto.com
AcuteB 600
AcuteB 600
For more information, visit www.profoto.com
11
Energy Control
The energy output is regulated over seven
f-stops.The energy can partly be adjusted with
the ENERGY switch [13] in 2 f-stop increments,
from 1/1 down to 1/16 of the total energy
(equivalent to five f-stops) and also via the
ENERGYdial[12]forfine-grainedenergycontrol
in 2/10 f-stop increments.
Choice of Modeling Light
First set the MODEL [11] to EXT or BAT. The
maximum modeling light is 65W. Profoto uses
a 65 W high efficient halogen lamp equivalent
to a 90 W standard halogen lamp. Acute/D4
and Acute2 heads can be used with a special
adapter, supplied by Profoto. The modeling
light is constant and does not vary with the
energy chosen.
EXT:Continuous65W modelinglightispossible
when the ProfotoAdapter 85 W is connected to
mainsoutletand modelinglight selectorswitch
is set to EXT. No power will be discharged from
thebatteryiftheadapteris connectedtomains
outlet.A fully recharged battery in this position
gives you up to 160 full power flashes and
unlimited usage of modeling light, for more
details please read“Technical Data” .
BAT: In this position the modeling lamp is
connected to the battery. This position is to
be used when working on location. A fully
recharged battery in this position gives you
up to 160 full power flashes or 50 minutes
modeling light time.
OFF: If the switch is set to OFF, the modeling
light is off.
Connecting Camera & Flash Meter
ThesyncsocketSYNC [5] allows the cameraor
flashmeter tobeconnected.The 5 m syncCord
can be extended with sync extension cords.
Further sync connections can be made with
the Profoto sync interconnection cable or by
so called “hard wiring”.
Recycling
The recycling time is approximately 2.6
seconds at full energy if the battery is fully
charged. When extremely short recharging
times are required, for instance when rapid-
firing a continous series of frames, choose
lower energy settings. The lowest energy
setting offers the fastest recycling rate (0.09
sec.or 10 flashes/sec.).
Photocell
The built-in photocell [6] will sense flash
release as well as IR-signals from most IR-
transmitters. The photocell is disabled when
the SLAVE switch [7] is switched off.
Signals,Audible & Visible
The charge indicator [10] is updated when a
flash is triggered. When all indicators light up
the generator has no charging value – fire a
flash.When the energy output is changed the
white ready lamp [8] and the modeling lamp
turns off thus indicating that dumping or
charging of the energy is in progress. A short
“beep” can be heard when the generator is
ready. Switching the SOUND switch [14] can
turn off this signal. If a flash is fired before the
generator is fully charged a long “beep” can be
heard thus indicating an underexposed frame.
Safety Functions
If the generator overheats, the recharging
will slow down or stop. After a while, when
the temperature has gone down sufficiently,
the generator will start recharging as normal.
The generator automatically shuts down if the
battery level is too low to protect it from deep
battery discharge. The 40 A fuse mounted on
the battery cassette protects it from short
circuit damage.
Reliability Testing – The R-Test
TheProfoto R-testguaranteesthatallproducts
leaving the factory meet the very high
standards required of professional equipment
by professional photographers. The R-test
is a rigorous performance test that Profoto
generators are put through – 360 full power
flashes are released during one hour, which
is equivalent to 10 rolls of 35 mm film. After
the test the equipment is examined to see
that all parts have kept a normal operating
temperature and are not malfunctioning in any
way. All Profoto products are subjected to the
R-test prior to being shipped.
Color Temperature
The AcuteB 600 is perfectly suited for digital
and critical analogue shoots. The color
temperature is constant with a variation of a
maximum of +/-150 °K. Flash to Flash color
precision, +/-50 °K. Color temperature in
between MAX to -4 +/-150 °K.
Combining flash tubes and/or glass covers with different
coatings can make even more distinctive color temperature
adjustments.
Flash Duration
In order to reduce the flash duration use
ENERGY control [13], for more details please
read “Energy Control”and“Technical Data”.
Lamp Heads
Lamp heads that can be used together with
AcuteB 600 are AcuteB Head and Acute/D4
Ring. Acute/D4 Head and Acute/D4 Twin can
be used with a 12 V 65W lamp together with a
special adapter supplied by Profoto.
Remember to change back the special adapter before
reconnecting to a non battery powered Acute generator.
Radio Receiver
The optional built-in sync radio receiver is
available in 315 Mhz (Japan), 344 MHz (USA)
and433MHz(Europe).Theyarecompatiblewith
allPocketWizardTransmittersandTransceivers
working on the same frequency! The Radio
module built-into the generator is a learning
PocketWizard Receiver with 32 channels.
Pleasemakesuretousethefrequencyallowedinyourcountry.
Theradioreceiverhasalearningfunctionwhich
means that during 30 seconds from power on,
it will try to detect a trigger signal on any of
the 32 channels. If a trigger signal is detected,
the radio receiver will lock to that channel.
If no trigger is detected, the radio receiver
will default to the previously used channel.
Actual photo shooting with radio should not be
performed during the 30 second learn period
since the result may be unpredictable due
to the channel learning process. It can also
learn multiple zones on the Quad-Triggering
channels, 17 through 32. This provides the
NOTICE
NOTICE
NOTICE
>

12
For more information, visit www.profoto.com
AcuteB 600
AcuteB 600
For more information, visit www.profoto.com
13
photographerwith the conveniencetoactivate
or deactivate the flash unit(s) wirelessly in four
separately controllable zones (ABCD) without
leaving the camera position.
To teach the generator a receive Channel
and Zone*follow these steps:
• Select the desired channel and zone on a
PocketWizard (Transmitter or transceiver).
• Power off the generator and wait 5 seconds.
• Power on the generator.
• Within 30 seconds, press and hold the
PocketWizardTransmitter TEST button
(up to 4 seconds) until flash triggers.If
using a Sekonic meter with radio module
as a transmitter, press the measure button
repeatedly within the 30 second learning
period until the flash triggers.
Example:
The teaching Transmitter is set to channel 17
withzonesA,B,andCselected.If the generator
is taught this combination it will trigger from
any Transmitter set to channel 17 with zonesA,
B, or C selected. It will not trigger if only zone
D is selected on the Transmitter. It will trigger
if zones A and D are selected.
To teach the generator to trigger in only one
zone make sure the teaching Transmitter
has only one zone selected. Be aware that
while teaching a channel,other PocketWizard
transmitters should refrain from triggering to
prevent the receiver locking to the incorrect
channel. While this is highly unlikely, 1 in 32
chance,and onlyduringthe30secondlearning
period) it is still possible. The generator radio
receiver is always in operation while the
generator is powered on. It is possible to use
the photo slave or a sync cord in addition to
radio triggering.
For best radio operation do the following:
• Keep power,sync,and lamp head cords
away from the antenna.
• MaintainlineofsightbetweentheTransmitter
and generator whenever possible.
• When hiding the generator from view try to
not hide it behind or against metal or water
filled objects as this affects radio range.
• KeeptheTransmitter’s antennaparallelwith
thegeneratorantenna.
This equipment has been tested and found to comply with
the limits for a Class B digital device, pursuant to part 15
of the FCC Rules. These limits are designed to provide
reasonable protection against harmful interference in a
residential installation. This equipment generates, uses
and can radiate radio frequency energy and, if not installed
and used in accordance with the instructions, may cause
harmful interference to radio communications.
However, there is no guarantee that interference will not
occur in a particular installation. If this equipment does
cause harmful interference to radio or television reception,
which can be determined by turning the equipment off and
on, the user is encouraged to try to correct the interference
by one or more of the following measures:
- Reorient or relocate the receiving antenna.
-Increasetheseparationbetweentheequipmentandreceiver.
- Connect the equipment into an outlet on a circuit different
from that to which the receiver is connected.
- Consult the dealer or an experienced technician for help.
PocketWizard
Wireless Freedom
PocketWizard Plus2 is a 4 channel
radio transceiver for
wireless synchronization
from a distance up to
100 m (1 600 feet) via
digital encoded radio
signals.Thistransceiveris
compatiblewithdedicated
Sekonic® flash meters,
PocketWizard®transmitters,
transceivers and Profoto products
with built-in radio receiver. The PocketWizard
Plus 2 transceiver for wireless synchronization
is available through Profoto. Visit www.
pocketwizard.com for further information.
PocketWizard Wireless Freedom Offers
• Studiooron-locationshootswithout unreliable
anddisturbingPCcords.
• A handy solution for triggering cameras,
flash units or both simultaneously from
behind a camera or from a remote location.
• Alightmeterthatwirelesslytriggersalloronly
selectedelectronicflashunitsandmeasures
thelightsimultaneously,caneventriggera
camera. (SekonicL-358,L-608orL-558)
• All this wireless technology built into your
photo equipment, ready for you to control
remotely.
The PWDF system is available in three different versions,
315 Mhz (Japan), 344 MHz (USA) and 433 MHz (Europe).
If you are in any doubt about the frequency allowed in
your country, please get in contact with the local Profoto
distributor BEFORE you activate the radio slave transmitter.
It is strictly forbidden by law to use these frequencies in
other countries and it is impossible to use both versions
in combination.
Battery Facts
About battery lifetime and how to prolong it
The generator is equipped with one of the best
long-life batteries with special characteristics
to support very short recycling times. This
battery type does not suffer from so called
memory effects known from old cellular
phones. In fact, the battery is negatively
affected by complete discharge and recharge
cycles. On the other hand, frequent charges
have a positive effect.The battery life can vary
from two hundred recharges up to several
thousand. With optimal care the battery can
last up to 3.5 years.With normal usage, it will
last 1–3 years. Nevertheless, if the battery is
fully discharged every time it is used,it will still
keep its capacity for 250–350 recharges.
Factors that will prolong the battery life
Charge the battery as often as possible. This
is valid using either a Profoto Charger 1A or
Profoto Charger 2A. If the battery is to be stored
for periods longer than 30 days, make sure to
rechargethebatterycompletelypriortostorage.
Thelifeisdoublediflessthan50%ofthebatteries
capacity is used before recharge.If only 25% of
the batteries capacity is used before recharge,
the lifetime increases 8 times, i.e. make sure to
charge the battery as often as you can.Only use
Profotointelligentchargers.
Factors that will shorten battery life
The battery is left fully discharged for long
periods. High battery temperature. Usage of
non-Profoto chargers.
NOTICE
NOTICE
>
>

14
For more information, visit www.profoto.com
AcuteB 600
AcuteB 600
For more information, visit www.profoto.com
15
At what temperatures can the generator
be used, charged and stored?
The preferred long term usage surrounding
temperature is within the range +5 ºC to
+30 ºC (+40 ºF to +86 ºF). The generator can
be shortly used when the temperature of the
battery is within the range of -20 ºC to +40 ºC
(-4 ºF to +104 ºF). The capacity of the battery
decreases dramatically when the battery
temperature falls below freezing 0 °C (+32 ºF).
Thegeneratorand batteryhavea greatthermal
mass which will maintain the operational
temperature for a long time.Use the protective
case to keep the generator warm when used
at low temperatures.
Because of this heavy mass, it can take several hours for a
cold battery to restore operational temperature.
Never charge the battery if the battery temperature is below
0 °C (+32 ºF) or above +40 ºC (+104 ºF). Do not store the
unit in hot or cold conditions prior to use. The battery itself
must have the right temperature, it is not sufficient that the
surrounding temperature is within the correct range.Do not
expose thegeneratortodirectsunlightand/orextremelyhigh
temperatures for longer periods than one hour. Keep the
generator protected from snow, water, moisture and dirt.
Warranty
AllProfotogeneratorsandheadsareindividually
tested before they leave the company and
guaranteed for a period of two years with the
exceptionofflashtubes,glasscovers,modeling
lamps and cables.Profoto is not responsible for
technical malfunctions created by improper
use or accessories made by other companies.
If you have any technical problems please get
in contact with an authorized Profoto AcuteB
service station.
Accessories
• AcuteB Head*
• Acute/D4 Head**
• Acute/D4Twin**
• Acute/D4 Ring*
• AcuteB Kit Bag
• PocketWizardTransceiver
• Profoto Adapter 85W
• Profoto Charger 1A
• Profoto Charger 2A
• Shoulder Strap
• Limited usage of Special Light Heads
Please consult with your local dealer or
distributor for specific information.
*Accessories available.
** Special adapter needed for modeling light.
Accessories available.
Technical Data
Specifications
Energy: 600 Ws
Energy Control: Over a seven f-stop range. In 2/10 step adjustments
F-stopat2m(ISO100/21°): 64.2 with Magnum 50° reflector
Recycling: 0.09–2.6 s
Flash Capacity: Ws: 600 300 150 75 37 18 9
Energy: Max -1 -2 -3 -4 -5 -6
Flashes:160 320 600 1200 2 000 4 000 8 000
Modeling Light: 65 W continuous modeling light
Flash Duration (t0,5): Ws: 600 150 37
Time: 1/1 000 1/2 700 1/6 800
Energy Precision: 1/75 f-stop flash to flash
Energy Range: Ws: 600 300 150 75 37 18 9
F-stop: 1/1 1/2 1/4 1/8 1/16 1/32 1/64
Ev: Max -1 -2 -3 -4 -5 -6
Battery: 12 V 5Ah. Non spillable lead/acid battery
Battery Indicators: 1/1, 1/2,and 1/4 indicators for battery status
Charging Time: 5 h (standard Profoto Charger 1A), 2.5 h (Profoto Charger 2A)
Auto dumping: Yes
Fuse: 40A
Lamp Head Socket: 1 socket
Radio: Optional built-in Radio with 32 channel / 4Zone for remote operation
Radio Range: Up to 100 m
Sync Socket: 1 socket
Sync Voltage: Compliant to ISO 10330 Standard
Measurements
Size: 19 x 19 x 13 cm including handle (7.5 x 7.5 x 5”)
Weight: 4.9 kg, including battery (10.8 lbs)
Specifications subject to change. Not responsible for typographical errors.
NOTICE
>

www.profoto.com
334009-32-Printed in Sweden
Other manuals for AcuteB 600
2
Table of contents
Other Profoto Portable Generator manuals

Profoto
Profoto AcuteB 600 User manual

Profoto
Profoto Pro-B4 1000 Air User manual

Profoto
Profoto Pro-8a 2400 Air User manual
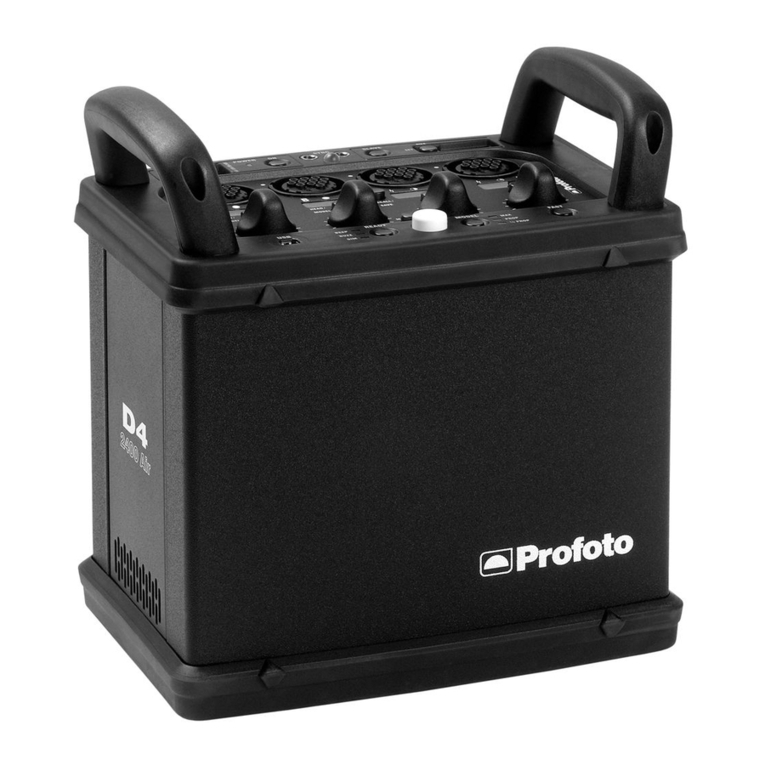
Profoto
Profoto D4 User manual

Profoto
Profoto Pro-8a 1200 Air User manual
Profoto
Profoto Acute2R User manual
Profoto
Profoto Pro-8a Generator Pro-8a 1200 Air User manual
Profoto
Profoto Pro-B2 User manual
Profoto
Profoto Pro-7b head User manual
Popular Portable Generator manuals by other brands

Ayce
Ayce PDS 5500 Operator's manual

King Canada
King Canada POWER FORCE KCG-12000GE instruction manual
SG GROUP
SG GROUP 1000W instructions
Honeywell
Honeywell HW5500 - 5500 Portable Generator owner's manual

Krüger Technology
Krüger Technology KGVG4001 instruction manual
Beckhoff
Beckhoff EK1914 operating manual

