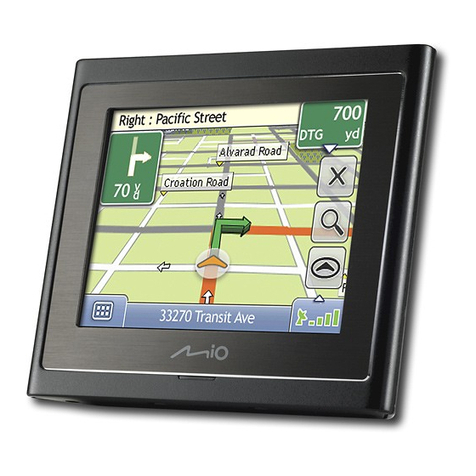
ProGin N-380 User manual

N-380
SiRF star III
GPS GPRS ENTERTAINMNET
User Manual
ProGin Technology Inc.
12F-1,No.5,Lane 7,De-an St.,Lingya District,
Kaohsiung 802,Taiwan
TEL:886-7-7278885 WEB:www.progin.com.tw
FAX:886-7-7214117 E-mail:info@progin.com.tw

N-380UserManual
08/18/2008 V1.0
Copyright©1998-2008 ProGin
1
Preface
Precautions
For safety, we strongly recommend that you never operate the GPS navigation system
while driving.
Furthermore, attention should be paid to the following basic precautions when operating the
ProGin N-380:
● The SD card should be removed only after you press the power button to shut down the unit.
Never pull out the SD card while the N-380 is operating.
● Never press the power button repeatedly or continuously. Otherwise, the unit could be
damaged.
● Never expose the ProGin N-380 to strong sunlight or heat for extended periods of time. The
acceptable operating environment of the ProGin N-380 is 0~70°C and 0~90% humidity. The
acceptable storage environment is -10~80°C and 0~90% humidity.
Also, when operating the GPS functions of the ProGin N-380, these additional precautions apply:
● This system functions as a reference for navigation only, and should never be used for
accurate measurements of direction, distance, location, etc.
● For GPS satellite positioning to work, stay at the same location until the positioning process is
complete. It is best to stay in an open, uncovered location. This positioning process may need
more than 10 minutes.
● When the system is located in a building or a tunnel, or is close to a high obstacle, the system
may temporarily be unable to provide positioning and navigation information.
● Any radio transmitters (including mobile phones) might interfere with GPS satellite signals,
thereby resulting in incorrect positioning information.
● If your car is equipped with sheathing paper or explosion-proof plaster, these features might
interfere with the quality of the GPS signal.

N-380UserManual
08/18/2008 V1.0
Copyright©1998-2008 ProGin
2
● Route planning advice is for reference only. Road properties (such as one-way status and turn
restrictions) may change according to local conditions, and therefore may not be consistent
with the information given by the N-380. You should comply with all local traffic regulations and
drive as local road conditions require. When the ProGin N-380 is placed inside a car, it should
be positioned in place by means of a car tripod. Avoid positioning the ProGin N-380 in the
positions below:
Driver’s line-of-sight Any position where it is not fixed in place
A position where an airbag is located
Getting Started
1. External Components
1.1Front

N-380UserManual
08/18/2008 V1.0
Copyright©1998-2008 ProGin
3
No. Assembly Components Description
(1) 4.3″Touch Screen TFT LCD
Displays menus, lists, photos, videos and more.
The screen is touch sensitive.
(2) Power Indicator light Indictes whether the unit is power on
1.2 Back
No. Assembly Components Description
(1) Built-In Speaker Play Stereo sound when earphone is not plug in
(2) JTAG Port To interface the firmware of the unit
(3) Reset Key Forcibly resets the unit to its factory default settings
(4) BNC antenna adapter For external antenna connection
(5) Pen/Stylus Use to control the unit through the touch screen
(6) Holder Slot Position to attach the surface mounting adapter
1
2
4
3
5
6

N-380UserManual
08/18/2008 V1.0
Copyright©1998-2008 ProGin
4
1.3 Right
2
3
1
No. Assembly Components Description
(1)
USB Interface Connects the N-380 to a PC and to recharge the
battery
(2)
Adjustment Knob Adjustment Knob Adjusts sound volume and
backlight brightness
(3)
Earphone Jack Earphone Jack Connects the unit to stereo
headphones (3.5 mm)
AC/DC Power Adapter Specifications:
Dimension 76mm(L)×43mm(W)×30mm(H)
Input Voltage 100V~240V
Output Voltage 4.75~5.25V
Net Weight 130 g
Storage Temperature 0°C ~ +40°C
Operating Temperature 0 ~ +40°C
Storage relative temperature 45 ~ 85%
Operating relative humidity 45~85%

N-380UserManual
08/18/2008 V1.0
Copyright©1998-2008 ProGin
5
1.4 Top
1 3
4
2
No. Assembly Components Description
(1) Pen/Stylus Use to control the unit through the touch
screen
(2) Internal GPS Antenna Receives GPS satellite signals
(3) External Antenna Jack Allows for connection of an optional external
antenna for better GPS signal reception.
(4) Power Button Used to power the unit on and off
1.5 Left
1
2
No. Assembly Components Description
(1) SD Card Slot Used to expand the memory of the unit
with an SD Card [See Note 2]
(2) SIM Card Slot Insert SIM card will perform GPRS functions
[Note 2] The ProGin N-380 can support an SD card with a maximum capacity of 4GB

N-380UserManual
08/18/2008 V1.0
Copyright©1998-2008 ProGin
6
[Inserting an SD Card]
With the card facing forward, align the card with the slot to insert it in place.
When removing the SD card, first confirm that the SD card is idle and then press its top edge
slightly to release it. Finally pull out the card.
[Notice]
● Do not place anything other than an SD card in the SD Card Slot.
● When outside the N-380, the SD card should be repacked properly to avoid dust and humidity.
1.6 Bottom
2. Powering the ProGin N-380
2.1 Power On
2
1
To power the ProGin N-380, press the Power Button (1) gently and wait for approximately 5
seconds. The Power Indicator Light (2) will glow green. This means the unit is ready to use.
2.2 Power Off

N-380UserManual
08/18/2008 V1.0
Copyright©1998-2008 ProGin
7
2
1
To shut down the ProGin N-380, press the power button (1). The unit and power indicator light (2)
will shut down immediately.
3. Accessories
3.1 USB Charger Adaptor (Optional)
The USB Charger Adaptor is used to recharge the battery of the ProGin N-380. To use the
adapter, insert the USB plug into the adapter. Insert the other end of the cable (mini USB) into
the unit’s USB port. Then plug the adapter into a standard 100V~240V AC power outlet, as
shown in the figure below.
If the N-380 is turned on during charging, the Power Indicator Light will glow red. Once charging
starts leave the adapter connected until the Power Indicator Light glows green. This means that
the battery is fully charged. If the N-380 is turned off during charging, the Power Indicator Light will
not glow, but the battery will still be charged. The charging process may need several hours.

N-380UserManual
08/18/2008 V1.0
Copyright©1998-2008 ProGin
8
3.1.1 USB Cable Charger
3.2 Automobile Adapter
[Notice] The Automobile Adapter should not be connected to a vehicle when the vehicle is being
started. Otherwise, the instantaneous current impact might damage the N-380.
The Automobile Adapter is used to recharge the battery of the ProGin N-380 from the power
available in vehicle cigarette lighters. To use the adapter, plug the adapter into the USB port of
the N-380. Then plug the adapter into a standard 12VDC vehicle cigarette lighter.
If the N-380 is turned on during charging, the Power Indicator Light will glow red. Once charging
starts, leave the adapter connected until the Power Indicator Light glows green. This means that
the battery is fully charged. If the N-380 is turned off during charging, the Power Indicator Light will

N-380UserManual
08/18/2008 V1.0
Copyright©1998-2008 ProGin
9
not glow, but the battery will still be charged. The charging process may need several hours.
3.3 Mounting System
A mounting system is included with the ProGin N-380. The parts of this system are:
1. A suction cup mount with swivel and tilt arms
2. A base plate(Optional)
The suction cup mount will attach the N-380 to a surface. In case the desired mounting surface is
not capable of holding the suction cup, the base plate (2) may be used to provide an appropriate
mounting surface.
[Notice] Some local ordinances do not allow objects to be mounted to an automobile windshield
or other automobile windows. If you wish to use the N-380 in an automobile and such
ordinances exist in the jurisdictions in which you will be driving, then mount the N-380 to
the automobile’s dashboard.
1 2Optional base plate
3.3.1 Assembling the Mounting System
1. Align the clip on at one end of the suction cup mount with the slot on the back of the
unit.
2. Push the clip into the narrow section of the slot until it snaps into place.
Suction Cup
Slot
Clip
Tilt and swivel
kt

N-380UserManual
08/18/2008 V1.0
Copyright©1998-2008 ProGin
10
3.3.2 Mounting Instructions
1. For a tight grip, the mounting surface should be cleaned of dirt and oil.
2. If the mounting surface cannot be used with the suction cup, it may be possible to use the
base plate to create an appropriate surface. If so, use the adhesive on the base plate to
attach the plate to the mounting surface. (Note that the adhesive on the base plate is
difficult to remove once it is mounted.)
3. Place and press the suction cup against the mounting surface or base plate. While
maintaining pressure, push on the lever near the suction cup until the suction cup grips the
surface tightly.
4. Adjust the swivel/tilt arms by loosening the adjustment nuts and turning the swivel cradle to
obtain the best viewing and GPS reception position. Then tighten the nuts to hold the arm
in place once it is snapped into the slop of the unit.
Windshield Mounting Position Dashboard Mounting Position
3.3.3 Disassembling the Mounting System
•To remove the suction cup from the mount surface, push the level near the suction cup in the
opposite direction from that used to attach it and pull on the suction release tab to break the
vacuum seal.
•To remove the unit from the suction cup mount, release the clip and slide the clip to the wide
portion of the slot.
Caution: Be sure to check the adhesiveness of the suction cup every time the mounting system is
used. Aging and temperature fluctuation inside a car will eventually loosen the seal of the suction
cup. A loose seal could allow the N-380 to fall.

N-380UserManual
08/18/2008 V1.0
Copyright©1998-2008 ProGin
11
Connecting the ProGin N-380 to a Computer
1.Using N-380 as Card Reader Device
Under Windows XP version or higher there are no drivers required, all devices will be
auto-detected including SD Card drive.
1.1 Connecting to a Computer via USB
Insert an SD card as shown below
(1) Correct insertion direction of SD Card
Correct insertion
direction of SD
Card
(2) Connect the unit via USB to a computer as show below。
(3) Once the unit is connected to a computer using operating system of Window XP or higher via

N-380UserManual
08/18/2008 V1.0
Copyright©1998-2008 ProGin
12
USB cable, the computer will auto detect the unit and its SD card drives if present.
2. Transferring Files with an SD Card
For large files such as movies, it may be faster to transfer files to the N-380 by writing them directly
from a computer to an SD card (not included). To do this, place the SD card into an SD card
reader/writer (not included) and connect the reader/writer to the computer. The computer should
be able to recognize the reader/writer and should automatically mount the file system stored on
the card. (If this does not happen, consult the documentation for your reader/writer.) When the
file system is mounted, the files can be transferred via typical file operations. When all files are
transferred, unmount the card’s file system and remove the reader/writer from the computer.
Then remove the card from the reader/writer and insert the card into the N-380. The files will
then be available for use.
3. File Format Conversion Software
In order for some files to play on the ProGin N-380, they must be converted into formats that the
unit can read. To convert files, use the following steps:
1. Refer to the “shareware reference” folder on the included CD to select a software download
website. Visit the site using a Web browser.
2. Select and download conversion software for the file formats you want to convert (for example,
converting RealMedia format to MPEG-4 or MP3 format).
3. Install the downloaded software.
4. Use the software to convert your files.
5. Copy the converted files to the ProGin N-380 or to an SD card.
[Remark] The use of downloaded software may be restricted to a trial period. If you want to use it
for longer than this period, you should register or purchase the software.
Operating Instructions
1. Introduction
1.1 Common Interface Items

N-380UserManual
08/18/2008 V1.0
Copyright©1998-2008 ProGin
13
Many screens used in the N-380 have the same basic structure. Some of the items common to
many N-380 screens are shown below:
1.2 Popup Menus
Many of the functions of the ProGin N-380 have file-browsing capabilities. On a browsing screen,
pressing the File Operation button (shown below) will bring up a popup menu listing all of the
operations that can be performed on the file. These functions may include: Copy to Flash, Copy
to Storage and Delete.
Use the popup menus as follows:
● Press the touch screen on the File Operation button to activate the popup menu.
● Press the touch screen on the appropriate item in the menu to perform the function you want.
A confirmation dialog box will be displayed. To continue with the operation, press the touch
screen on the Yes button.
● Press the touch screen on the Exit button to close the menu.

N-380UserManual
08/18/2008 V1.0
Copyright©1998-2008 ProGin
14
Popup menu
File Operation
button
To confirm the
operation,
Press the Yes
button
2. Main Menu

N-380UserManual
08/18/2008 V1.0
Copyright©1998-2008 ProGin
15
No. Function Description
(1) GPS
Pressing this activates the GPS system, which provides
clear directions with intelligent turn-by-turn voice
instructions, point-to-point maps, zoom-in/out, and
scrolling
(2) Movie Pressing this activates the movie browser, which allows
you to play videos stored on the N-380
(3) Music Pressing this activates the music browser, which allows
you to play audio files stored on the N-380

N-380UserManual
08/18/2008 V1.0
Copyright©1998-2008 ProGin
16
(4) Photo Pressing this activates the photo browser, which allows
you to see photos stored on the N-380
(5) eBook Pressing this activates the eBook browser, which allows
you to read text files stored on the N-380
(6) Internet (optional)
Pressing this activates the web browser for Internet
connection, which allows you to use the mobile online
services. The first time connection requires one-time
setup of GPRS configuration according to the
requirements of your network/service operator.
(7) e-Mail Box (optional) Pressing this to activate email functions via Internet
connections
(8) Next Page Pressing this to display the next page of System Setting
menu.
(9) ProGin logo Pressing this displays basic information about the N-380
unit
(10) Signal Strength
Indicator (optional)
Displays the signal strength of the GPRS networks at the
current location. Pressing this displays the menu of
GPRS configuration setting.
(11)Power Pressing this displays the current charge state of the
battery
(12)Sound Displays the current volume level. Pressing this displays
the sound settings screen
(13) Clock Displays the current time of day. Pressing this displays
the Clock settings screen
(14)Bluetooth (optional) Mobile phone hand free
(15) System
Pressing this displays the System Settings menu, which
allows you to view and change system parameters,
including sound, backlight, memory, time and date and
power management
(16)Previous Page Pressing this to display the first page of System Setting
menu.
3. System Settings
Press the System button in the main menu to display the System Settings menu. Each of the
buttons on this menu leads to another screen that displays information about the current system

N-380UserManual
08/18/2008 V1.0
Copyright©1998-2008 ProGin
17
configuration and, in some cases, allows you to change it. Use the Next Page and Prev Page
buttons to navigate between the two pages of the menu. All of the screens accessible from this
menu are described in this section.

N-380UserManual
08/18/2008 V1.0
Copyright©1998-2008 ProGin
18
3.1 Volume
Drag this slider
to adjust sound
volume
Use this to
indicate whether
a sound will be
played when the
touch screen is
tapped. If the
spot is green,
then the sound
will be played
3.2 Backlight
Use this to
indicate whether
the backlight
should be turned
off under
different power
sources. A green
spot indicates
that the backlight
will be disabled
These set
the backlight
timeout
Drag this slider
to adjust the
backlight
brightness

N-380UserManual
08/18/2008 V1.0
Copyright©1998-2008 ProGin
19
3.3 Date/Time
Use the pull
down menus
to adjust time
zone region,
date and time
The green spot
indicates the
daylight savings
time function is
on.
3.4 Memory
Shows the
portion of
NAND flash
memory
currently
being used
Shows the
portion of SD
card memory
currently being
used
3.5 Power
Indicates the
current state of
the charge on
the battery
Table of contents
