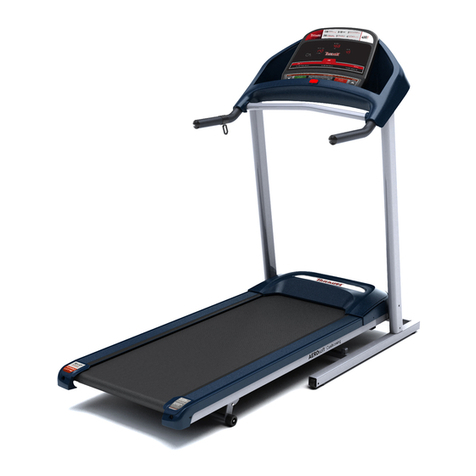
ProLinx homeTro JF-H-40DA User manual

Foldable Treadmill
User Manual
Please put the red safety key on the digital panel before turning on,
otherwise the treadmill will display E07 problem.

English
German
Italian
Spanish
French
02-15
16-29
30-43
44-57
58-71
CONTENTS

FITSHOW Installation Procedure
Scan the QR code on the right
http://tshow.com/qr
Start Using FITSHOW
Jump to the App Store to download and install Open the App, allow permission
based on the system prompt
Login to the App, please use the mobile number or email to register for the new
user
Please ll in the correct email or mobile phone number to make sure you can
retrieve your password and username via them.
Attentions

2US/UK
CATALOG
Product Brief Introduction
Safety Precautions & Warning Instructions
Main Parameters & Conguration List
Installation Instructions
Remote Control Function Description
Fitness Advice & Guidelines
Product Manual
Product Maintenance
Common Troubleshooting Methods
03
04
06
07
09
10
11
13
15

3US/UK
Product Brief Introduction
Product Model: JF-H-40DA
Mobile Phone
Bracket
Non-slip Mat Sidebar
Security Lock
Left Upright Tube
Calorie Distance
LED Digital Display
Acrylic
Time
Speed
Motor Upper Cover Protection
Cap of Upright
Tube
Running Belt Rearfoot
Pad Foot Guard
Forefoot Pad
Motor Lower Cove
Left Handrail Tube
Right Handrail Tube
Dashboard Components
Right Upright Tube

4US/UK
Safety Precautions & Warning Instructions
Please read the instructions carefully before use and pay attention to the following
safety precautions:
Prohibited!
·
The treadmill is suitable to be placed indoors to avoid moisture, do not splash water on the
treadmill, and do not place any foreign objects.
· Before exercising, please wear suitable sportswear and sports shoes. It is strictly forbidden
to exercise on the treadmill without wearing shoes, and it is best to stretch the whole body
before exercise.
·
The power plug must be grounded reliably, and the socket must have a dedicated loop to avoid
sharing it with other electrical equipment.
· Kids should stay away from the machine to avoid accidents.
·
Should avoid long-time overload operation, otherwise, it will cause damage to the motor and
controller, accelerate the aging of the bearing, running belt, and running board. Do the maintenance
of this machine regularly.
·
Reduce indoor dust, maintain a certain indoor humidity, and avoid strong static electricity,
otherwise, it may interfere with the normal operation of the electronic watch and controller.
· Please turn o the power of the treadmill after exercise.
· Please keep indoor air circulation when using the treadmill.
·
Please clip the safety lock cable clip to the garment liner during exercise, so as to stop the
machine safely and quickly in an emergency.
·
If you feel unwell or have abnormalities during use, please stop exercising immediately and
consult a doctor.
·
After using silicone oil, it must be placed out of the reach of children to avoid serious con-
sequences by accidental ingestion.
· Do not use the product in a state where the outside of the product is cracked, damaged, or peeled
off (the internal structure is exposed), or when the welding part is peeled off. In order to avoid
accidents or injuries.
· Do not jump up and down during exercise. Otherwise, you may fall and get injured.
·
Do not use or store the machine in wet places such as outdoors, near bathrooms, and places
exposed to water droplets.
· Do not use or store it in places exposed to direct sunlight, high-temperature places such as around
stoves, or on heating appliances such as electric heating carpets. Otherwise, it may cause electric
leakage or re.
·
Do not use it when the power cord or power plug is damaged or the jack of the socket is loose.
Otherwise, it may cause electric shock, short circuit, or re.
·
Do not damage or forcibly bend or twist the power cord. At the same time, don't place heavy
objects on it, and don't let the line be pinched. So as not to cause re or electric shock.

5US/UK
·
Do not use this machine by two or more people at the same time, and please be careful not to
let people around you get close to the machine during use. Otherwise, it may cause accidents or
injuries due to falling.
·
Do not use it if you cannot express your consciousness or operate it yourself. In order to avoid
accidents or injuries.
· Avoid contact with water and liquids! Do not expose the main body or operating parts to water or
liquids. Otherwise, it may cause electric shock or re.
· People who do not usually exercise should not do vigorous exercise suddenly.
· Do not use this product after eating, feeling tired, just after exercise, or when your physical strength
is abnormal. Otherwise, it may harm your health.
· This product is suitable for family use, not suitable for schools, gymnasiums, and other places with
a large number of people. Otherwise, there is a risk of injury.
· Do not use it while eating or doing other activities.
·
Do not use it after drinking alcohol or when you feel that your behavior has become dull. So as not
to cause an accident or injury.
·
Do not put hard objects in your clothing pockets. Please take off valuables such as watches,
bracelets, mobile phones, and sharp objects such as keys and knives before use to avoid damage to
the items or cause physical injury.
·
Before use, please check whether foreign objects such as needles, trash, or water are attached to
the power plug. So as not to cause electric shock, short circuit, or re.
·
Do not use it with wet hands! Do not unplug or insert the power plug with wet hands. So as not to
cause electric shock or injury.
· Pull out the power plug! When not in use, pull out the power plug from the socket. In order to avoid
the deterioration of the insulation due to dust and moisture, which may lead to electric leakage and
res.

6US/UK
Main Parameters & Conguration List
The main technical parameters
Serial
number Parameter name Description
1 Rated voltage US: 120V/60Hz; UK: 220-240V/50-60Hz
2Motor specication 81 #/4800rpm
3 Control method Acrylic touch type, Meter touch type,
Remote controller, APP
4 Display method LED, APP
5 Product unfolded size 1265*645*115mm (L.*W.*H.)
6 Speed range 0.6-8.7mph(1-14 km/h)
7 Running belt size 1000*400mm (L.*W.)
8 Product N.W./G.W. N.W.: 27kg; G.W.: 32kg
9 Package size 1430*750*150mm (L.*W.*H.)
10 FCC ID 2A48IJF-H-40DF
Packing materials list
Serial
number Name Quantity(PCS)Serial
number Name Quantity(PCS)
1 Main engine 1
2 Accessory package 1
Accessories package list
Serial
number Name Quantity(PCS)Serial
number Name Quantity(PCS)
1 L-type wrench (6#) 1 4 Remote control
(Flatbed style) 1
2 Security lock 1 5 Mobile phone bracket 1
3 Product manual 1 6 Power cord 1
Accessories package list

7US/UK
Installation Instructions
Product Erection Instructions
Take the product out of the box, remove the
outer PE bag, and place it on at ground.
Turn the left and right armrests clockwise
to level.
Grasp the upright pipe with your hands
and rotate it in the direction of the arrow.
After reaching the designated position,
tighten the screw assembly of the joint
in a clockwise direction until the upright
pipe does not shake. (The same method
on the other side)
Insert the power plug into the US: 120V/60Hz; UK: 220-240V/50-60Hz socket and turn the
power switch to the symbol position. After the light is on, you can start using the product.
Take out the mobile phone holder and
safety lock from the accessory bag, align
the phone holder with the rectangular slot
at the back of the instrument and inserted
and fastened. Place the safety lock in the
center of the yellow position.
Security Lock
1
4
3
2
5

8US/UK
The slotted screwdriver
insertion position
Note: Product Fuse Specication 100V-230V/15A, Φ5*20mm
1. As shown in step 1 on the left, pull out the power plug from the power socket. Use a at-blade
screw- driver to remove the safety socket from the power socket.
2. As shown in step 2 on the left, take out the fuse in the direction shown in the gure to replace
it, and insert it again.
The way to replace the fuse when the treadmill fails.
6
6

9US/UK
Remote Control Function Description
1. Emergency Stop Button: Press this button when an emergency occurs or an emergency
stop is required.
2. Start/Stop Button: When the power is turned on, the panel displays 000. You can press this
button to start the machine. When you want to stop exercise, you can press this button to safely
stop.
3. Mode Button: Press this button to switch speed, time, calories, etc.
4. P1-P12 Range Value Button: Press this button to switch the automatic motion mode of the
P1-P12 range value.
5. Time Plus Button: Press this button to increase the exercise time, or adjust the speed,
calories, and distance in manual mode.
6. Time Minus Button: Press this button to reduce the exercise time, or adjust the speed,
calories, and distance in manual mode.
7. Speed Plus Button: Press this button to increase the exercise speed, or adjust the speed,
calories, and distance in manual mode.
8. Speed Minus button: Press this button to reduce the exercise speed, or adjust the speed,
calories, and distance in manual mode.
9. Speed Shortcut Button: Press this button to adjust to the corresponding speed.
Speed Shortcut
Button
P1-P12 Range
Value Button
Mode Button
Speed Plus Button
Start/Stop Button
Time Minus Button
Emergency Stop Button
Time Plus Button
Speed Minus button

10US/UK
· Warm-up: 5 to 10 minutes of warm-up exercise before each use of the machine.
· Breathing: Breathing should not be shielded during exercise. In general, inhale through the nose and
exhale through the mouth when preparing to restore the movement. Breathing and movement should
be coordinat- ed. If you feel short of breath, stop exercising immediately.
· Frequency: There should be a 48-hour rest for the muscles after exercising, and it is best to do the
same training at intervals of one day.
· Intensity: The training content is determined according to the individual's physical condition, and then
practice with the principle of gradual loading. The soreness will slowly disappear while exercising.
· Diet: In order to protect the digestive system, after eating, you must wait more than one hour before
you can exercise. After training, you must wait more than half an hour before eating. Drink less water
during exercise,
especially avoid drinking a lot of water, so as not to increase the burden on the heart and kidneys.
Stretching exercises:
No matter what speed you run, it’s best to do stretching exercises rst to warm your body and stretch
your muscles more easily. So walk for 5 to 10 minutes to warm up, then stop and do stretching
exercises 5 times as follows, each leg do it for 10 seconds or more each time. Do it again after the
exercise is over.
1. Stretch down
Bend your knees slightly, and bend your body slowly, letting your back
and shoulders relax, and repeat 3 times. (See Figure 1)
2. Hamstring stretch
Sit on a clean cushion, straighten one leg and retract the other leg so
that it is close to the inner side of the straight leg. Try to touch the toes
with your hands, hold for 10-15 seconds. Then relax, each leg repeats
this three times. (See Figure 2)
3. Stretching the calf and Achilles tendon
Stand with both hands supporting the wall or table, with one foot
behind, keep your hind legs upright and your heels on the ground, tilt
towards the wall or table, hold for 10-15 seconds. Then relax, each leg
repeats this three times. (See Figure 3)
4. Ankle extension
Hold fixed support with your right hand to grasp the balance, then
stretch your left hand to your back, grab your left ankle and slowly pull
up to the hip position until you feel the muscles in front of your thighs
are tight, hold for 10-15 seconds. Then relax, each leg repeats this
three times. (See Figure 4)
5. Stretching the inner thigh muscles
Sit with the bottom of the legs facing each other, with the knees facing
outwards, grasp the feet with both hands and pull them towards the
groin, hold for 10-15 seconds. Then relax, and repeat the procedure 3
times. (See Figure 5)
Fitness Advice & Guidelines

11US/UK
This treadmill is easy to use and has few adjustment parameters.
The nouns used in the manual are:
· Treadmill parameters: speed value.
· Sports parameters: distance value, calorie value, time value.
· Sports mode: manual mode and program mode.
Manual mode - The amount of exercise is not set in the exercise mode.
Program mode - The amount of exercise is set in the exercise mode.
Product Manual
a.Brief description
b.LED Digital Display
c.Smart Button
Time Calorie/DistanceSpeed Display
1 Start/Stop Button 4 Range Value Button
2 Speed Plus Button 5 Mode Button
3 Speed Plus Button 6 Speed shortcut button
US: Display show - mph
The specic design of this product is as follows:

12US/UK
· Power supply voltage: US: 120V/60Hz; UK: 220-240V/50-60Hz;
· The minimum speed: 0.6 mph(1km/h);
· The maximum speed: 8.7 mph(14km/h);
· The shortest time in manual mode is 5 minutes, and the longest exercise time is 99 minutes;
· The maximum exercise time in automatic mode is 99 minutes;
· The maximum calorie consumption in automatic mode is 999 kcal.
Automatic mode:
Before the exercise, check whether the power source is plugged in, whether the safety lock is in
place, and whether the power switch is turned on. In the standby state, the window displays 0:00,
and the countdown starts 3 seconds after pressing the power button, and the window displays 0.6
mph(1km/h). When the timer starts, it will stop automatically after 99 minutes, and the calorie
value will continue to change. You can adjust the speed by pressing the speed plus and minus
buttons, the minimum is 0.6 mph(1km/h), and the maximum is 8.7 mph(14km/h).
Manual mode:
1.Press the mode button on the electronic watch, the panel displays H-1, and the time 30
minutes ashes, press the plus and minus buttons to adjust the time, the minimum is 5 minutes,
the maximum is 99 minutes. After nishing the setting, press the start/stop button on the panel
to start 3 seconds countdown movement.
2.Press the mode button on the electronic watch twice, the panel displays H-2, and the distance
1.0 ashes. Press the plus and minus buttons to adjust the distance. After nishing the setting,
press the start/stop button on the panel to start 3 seconds countdown movement.
3.Press the mode button on the electronic watch three times, the panel displays H-3, and the
calorie 50 ash- es. Press the plus and minus buttons to adjust the calories, the minimum is 20
kcal, and the maximum is 999 kcal. After nishing the setting, press the start/stop button on the
panel to start 3 seconds countdown move- ment.
d.Operating Parameters
e.Sport Mode
1 Start/Stop Button 4 Range Value Button
2 Speed Plus Button 5 Mode Button
3 Speed Plus Button 6 Speed shortcut button
UK: Display show - km/h
The specic design of this product is as follows:

13US/UK
3. Adjusting the tightness of the running belt
All treadmills must be adjusted before leaving the factory and after installation, but after a period
of use, there may be slack, such as the user feels pause and slippery when running. When this
phenomenon occurs, follow the clockwise direction Adjust the adjusting bolts of the running belt
Running board Running
board
Lubricating oil
Running belt
After the running belt has been used for a period of time, it must be lubricated with a specially
congured methyl silicone oil.
1. Recommendations
· Use less than 3 hours per week, lubricate once every 5 months
· Use 4-7 hours a week, lubricate once every 2 months
· Use more than 7 hours a week, lubrication once a month
Don’t use an excessive amount of lubricating agent. It is not that the more lubricant, the better
eect. Reasonable lubrication is an important factor to increase the service life of the treadmill.
2. Lubrication method
The way to check whether you need to add lubricant is to grab the running belt and touch the
center of the back of the running belt with your hands as much as possible. If there is silicone
oil (a little damp feeling) inside the running belt, it means no need to add lubricant. If the running
board is dry and no silicone is felt in the running belt, you need to add lubricant.
A.The steps of applying lubricant to the running board; (As shown in the gure)
B.Stop the running belt and fold the machine;
C.Lift the running belt on the back of the mainframe, extend the oil can into the running belt
movement position as much as possible. Spray silicone oil on the inside of the treadmill, and
apply silicone oil on both sides of the running belt, then start the treadmill with a speed 1km/h to
evenly spread the lubricant. Lightly step on the running belt from left to right, the lubricant can
be completely absorbed by the running belt after a few minutes.
Lubricating
Product Maintenance

14US/UK
in half circle. If the running belt is too loose when your feet are on the running belt, the running
belt and rollers will slip. But it is also not good if it is too tight, it may increase the load on the
motor and damage the motor, running belt, and rollers.
4. Running belt deviation adjustment
All treadmills need to be adjusted before they are shipped from the factory and after they are
installed. However, after a period of time, they may still run o the track. There may be several
reasons for this phenomenon:
1).The host is not placed at;
2).The user's feet are not in the center of the running belt during exercise;
3).When the user exercises, the feet are not evenly stressed, which will articially cause the
running belt to deviate. It can be restored to a normal state after a few minutes of no-load
running. For the deviation of the running belt that cannot be automatically restored, you can
use the 6mm Allen key in the accessory kit to adjust step by step with a quarter of a circle as
the unit. The deviation of the running belt is not covered by the warranty. The user can perform
maintenance according to the instruction manual. The deviation will seriously damage the
running belt, so it must be discovered and corrected in time.
The running belt shifts to the
right, tighten the right side
Fine adjustment of the left
and right balance
The running belt shifts to the
left, tighten the left side
Fine adjustment of the left
and right balance
1. Running belt skidding: When a person is running, the running belt has the phenomenon of
idling or momentary pause;
2. Adjusting the running belt: Tighten the screws on the left and right sides of the running belt,
turn it clockwise three times, and then adjust according to the deviation direction of the running
belt. If it shifts to the right, adjust the right side; if it shifts to the left, adjust to the left side, until
the running belt is centered.
Note: Whether it is to adjust the running belt's elasticity or oset, it should be adjusted when the
machine is no-load running at the lowest gear speed, and the rotation of the adjusting bolt is half
a turn, while adjusting and observing to avoid causing machine damage.

15US/UK
Common Troubleshooting Methods
Display
fault code Fault Fault judgment Solution
E02 Motor overvoltage
protection
1. The user's grid voltage is unstable
and the peak voltage is very high;
2. Wrong setting of wheel diameter
value;
3. The controller is damaged;
1. Need to add an external lter
voltage stabilizer;
2. Reset the wheel diameter value, try not to
exceed the rated voltage of the motor;
3. Replace the controller;
E03 Overcurrent
protection
1. Excessive load;
2. There is a foreign body stuck in the
motor or roller;
3. The roller is not lubricated enough and
the resistance increases;
4. The controller is damaged;
5. The motor is damaged and the
resistance increases;
1. Reduce the load, try not to exceed the rated
load;
2. Remove stuck foreign objects;
3. Increase lubricant;
4. Replace the controller;
5. Replace the motor;
E04 The main motor is
in an open circuit
1. The main motor is not connected
or loose;
2. The main motor is in an open
circuit and damaged;
3. The controller is in an open circuit and
damaged;
1. Reinforce the motor connection line;
2. Replace the motor;
3. Replace the controller;
E06 Communication
error
1. The main connection line interface
of the upper and lower control is loose;
2. The main connection line interface of
the upper and lower control is damaged;
3. The electronic watch is damaged;
4. The controller is damaged;
1. Reinforce the connection line interface;
2. Replace the main connection line of the upper
and lower control;
3. Replace the electronic watch;
4. Replace the controller;
E07/--- The safety switch
is o
1. The safety switch is not installed;
2. The induction wire of the safety switch
is damaged;
3. The safety switch interface of the
electronic meter is damaged;
1.Install the safety switch;
2.Replace the induction wire of the safety switch;
3.Replace the electronic watch;
E0C
The power tube
has broken through
the explosion-proof
protection
1. The power transistor is broken
down and the controller is damaged; 1. Replace the controller;
Other problems and troubleshooting methods:
1.The electronic watch has no display
a: Check whether the power cord is plugged in properly, whether the power switch is turned on, and whether the fuse on the
controller is blown;
b: Whether the 4-core wire of the electronic watch and the controller is well connected;
c: Whether the controller and transformer are well connected;
2.The motor can't start
a: Please check whether all connecting wires are connected properly;
b: Please observe the error signal appearing on the electronic panel;
3.The touch screen is not sensitive
a: Please check whether the touch screen is wet;
b: Whether there is sweat on your hands;

16DE
KATALOG
Produktbeschreibung Einführung
Sicherheitsfragen und Warnhinweise
Hauptparameter und Kongurationsliste
Installationsanleitung
Funktionsbeschreibung der Fernbedienung
Fitness-Ratschläge und Richtlinien
Bedienungsanleitung
Produktwartung
Allgemeine Methoden zur Fehlerbehebung
17
18
20
21
23
24
25
27
29

17DE
Produktbeschreibung Einführung
Handyhalterung
Rutschfeste
Matte
Seitenleiste
Sicherheitsschloss
Linke aufrechte
Röhre
Kalorien/
Entfernung
LED-Digitalanzeige
Acryl
Zeit
Geschwindigkeit
Obere
Motorabdeckun
Schutzkappe
des Aufrechten
Rohrs
Laufgürte Rückfußpolster Fußschutz
Vorderfußpolster
Untere
Motorabdeckung
Linke
Handlaufröhre
Dashboard-Komponenten
Rechte Aufrechte Röhre
Rechter Handlaufschlauch
Produktmodell: JF-H-40DA

18DE
Sicherheitsvorkehrungen und Warnhinweise
Bitte lesen Sie die Anweisungen vor dem Gebrauch sorgfältig durch und
beachten Sie die folgenden Sicherheitsvorkehrungen:
Verboten!
· Das Laufband kann in Innenräumen aufgestellt werden, um Feuchtigkeit zu vermeiden, kein
Wasser auf das Laufband zu spritzen und keine Fremdkörper zu platzieren.
· Tragen Sie vor dem Training geeignete Sportbekleidung und Sportschuhe. Es ist strengstens
verboten, ohne Schuhe auf dem Laufband zu trainieren, und es ist am besten, den ganzen Körper
vor dem Training zu dehnen.
· Der Netzstecker muss zuverlässig geerdet sein und die Steckdose muss über eine eigene Schleife
verfügen, um eine gemeinsame Nutzung mit anderen elektrischen Geräten zu vermeiden.
· Kinder sollten sich von der Maschine fernhalten, um Unfälle zu vermeiden.
· Sollte ein längerer Überlastbetrieb vermieden werden, da sonst der Motor und die Steuerung
beschädigt werden und die Alterung des Lagers, des Laufriemens und des Trittbretts beschleunigt
wird. Führen Sie die Wartung dieser Maschine regelmäßig durch.
· Reduzieren Sie den Staub in Innenräumen, halten Sie eine bestimmte Luftfeuchtigkeit in
Innenräumen aufrecht und vermeiden Sie starke statische Elektrizität. Andernfalls kann der normale
Betrieb der elektronischen Uhr und Steuerung beeinträchtigt werden.
· Bitte schalten Sie das Laufband nach dem Training aus.
· Bitte halten Sie die Luftzirkulation in Innenräumen aufrecht, wenn Sie das Laufband verwenden.
· Bitte befestigen Sie die Kabelklemme des Sicherheitsschlosses während des Trainings am
Kleidungsstück, um die Maschine im Notfall sicher und schnell anzuhalten.
· Wenn Sie sich während des Gebrauchs unwohl fühlen oder Anomalien haben, brechen Sie das
Training sofort ab und konsultieren Sie einen Arzt.
· Nach der Verwendung von Silikonöl muss es außerhalb der Reichweite von Kindern aufbewahrt
werden, um schwerwiegende Folgen durch versehentliche Einnahme zu vermeiden.
·
Verwenden Sie das Produkt nicht in einem Zustand, in dem die Außenseite des Produkts Risse
aufweist, beschädigt oder abgezo- gen ist (die innere Struktur liegt frei) oder wenn das Schweißteil
abgezogen wird. Um Unfälle oder Verletzungen zu vermeiden.
·
Springen Sie während des Trainings nicht auf und ab. Andernfalls können Sie fallen und verletzt
werden.
·
Verwenden oder lagern Sie die Maschine nicht an feuchten Orten wie im Freien, in der Nähe von
Badezimmern oder an Orten, die Wassertropfen ausgesetzt sind.
·
Verwenden oder lagern Sie es nicht an Orten, die direktem Sonnenlicht ausgesetzt sind, an
Orten mit hohen Temperaturen, z. B. in der Nähe von Öfen, oder auf Heizgeräten wie elektrischen
Heizteppichen. Andernfalls kann es zu elektrischen Leckagen oder Bränden kommen.
· Verwenden Sie es nicht, wenn das Netzkabel oder der Netzstecker beschädigt ist oder die Buchse
der Steckdose locker ist. Andernfalls kann es zu Stromschlägen, Kurzschlüssen oder Bränden
kommen.
Table of contents
Languages:
