Prolux TOUR HAZER User manual
http://prolux.net.ua
1
TOUR HAZER
USER MANUAL
Thank you for having chosen our company’s haze machine. For your own safety, please read this user

http://prolux.net.ua
2
manual carefully before installing the device.
Attention
To keep your machine in good working order please remember to:
●Use only water-based, non-toxic haze liquid.
●Keep the machine clean.
●Turn the power off before adding liquid.
●Turn the power off when not in use.
Also...
●Always make sure that you are connecting to the proper voltage , and that the line voltage you are
connecting to is not higher than that stated on the decal or rear panel of the fixture.
●This product is intended for indoor use only.
●To prevent risk of fire or shock , do not expose this unit to rain or moisture.
●Make sure there are not flammable material close to the unit while operating.
●The unit must be installed in a location with adequate ventilation, at least 20in (50cm) from adjacent
surfaces. Be sure that no ventilation slots re blocked.
●Always disconnect from the power source before servicing or replacing fuse and be sure to replace
with same fuse size and type.
●In the event of a serious operating problem. Stop using the unit immediately. Never try to repair the
unit by yourself. Repairs carried out by unskilled people can lead to damage or malfunction. Please
contact the nearest authorized technical assistance center. Always use the same type spare parts.
●Never connect the device to a dimmer pack.
●Make sure the power cord is never crimped or damaged.
●Never disconnect the power cord by pulling or tugging on the cord.
VOLUME : when the haze ready to emit , press the button VOLUME, the haze will emit continuously.
Press again ,it stops working.
Manual : press the button MANUAL , the haze will emit, hold pressing and the haze will emit
continuously. Release it stop working.
Routine Maintenance and common faults
Periodically clean your machine to reduce replacement parts and repair expenses.
1. The poor fog liquid can cause blockage, it is recommended to use high quality fog liquid.
2. The machine might be blocked due to high concentration fluid, not clean fluid or overheat, so regular
care and maintenance can ensure long-term use. After about 40 hours continually use, please use 80%
distilled water and 20% white vinegar to remove the accumulated impurities inside the heat pipe , as
following:
1)washing the pipe in the tank and the filter head.
2)Pour out the fog liquid , replacing the cleaning liquid ( 80% distilled water and 20% white vinegar),
turn on the power , keep it operating till the cleaning liquid runs out.
3. If the fog turns less, and the pump makes noise, or can not spray fog, you should turn off the power
immediately and at the same time check the fluid tank, fuse and power plug. If all of these are normal,
please connect the power with the plug and try again, if the problems still can not be solved, you should
contact supplier.
Note : Before replacing a fuse , disconnect power cord. Always replace with the same type and rating of
fuse.
Connecting A bunch of machines
1
6
http://prolux.net.ua
3
● You will need a serial data link to run shows using a DMX-512 controller or to run shows on two or
more units set to sync in master/slave operating mode. The combined number of channels required by
all the units on a serial data link determines the number of units the data link can support.
● Units on a serial data link must be daisy chained in one single line. Also , connecting more than 32
units on one serial data link without the use of a DMX optically-isolated splitter may result in
deterioration of the digital DMX signal . The maximum recommended cable-run distance is 500
metes .The maximum recommended number of units on a serial data link is 32.
Cable Connectors
Cables must have a male XLR connector on one end and a female XLR connector on the other end
setting up DMX control
Step 1: connect the male connector of the DMX cable to the female connector (output) on the controller.
Step 2: connect the female connector of the DMX cable to the first unit’s male connector (input).
Note : it doesn’t matter which unit address is the first one connected. We recommend connecting them
in terms of their proximity to the controller, rather than connecting the lowest fixture number first , and
so on.
Step 3: connect others in the chain from output to input as above . Place a DMX terminator on the output
of the final unit to ensure best communication.
DMX Reference ( 2-channle mode)
Channel 1: control volume output
Channel 2: control fan speed
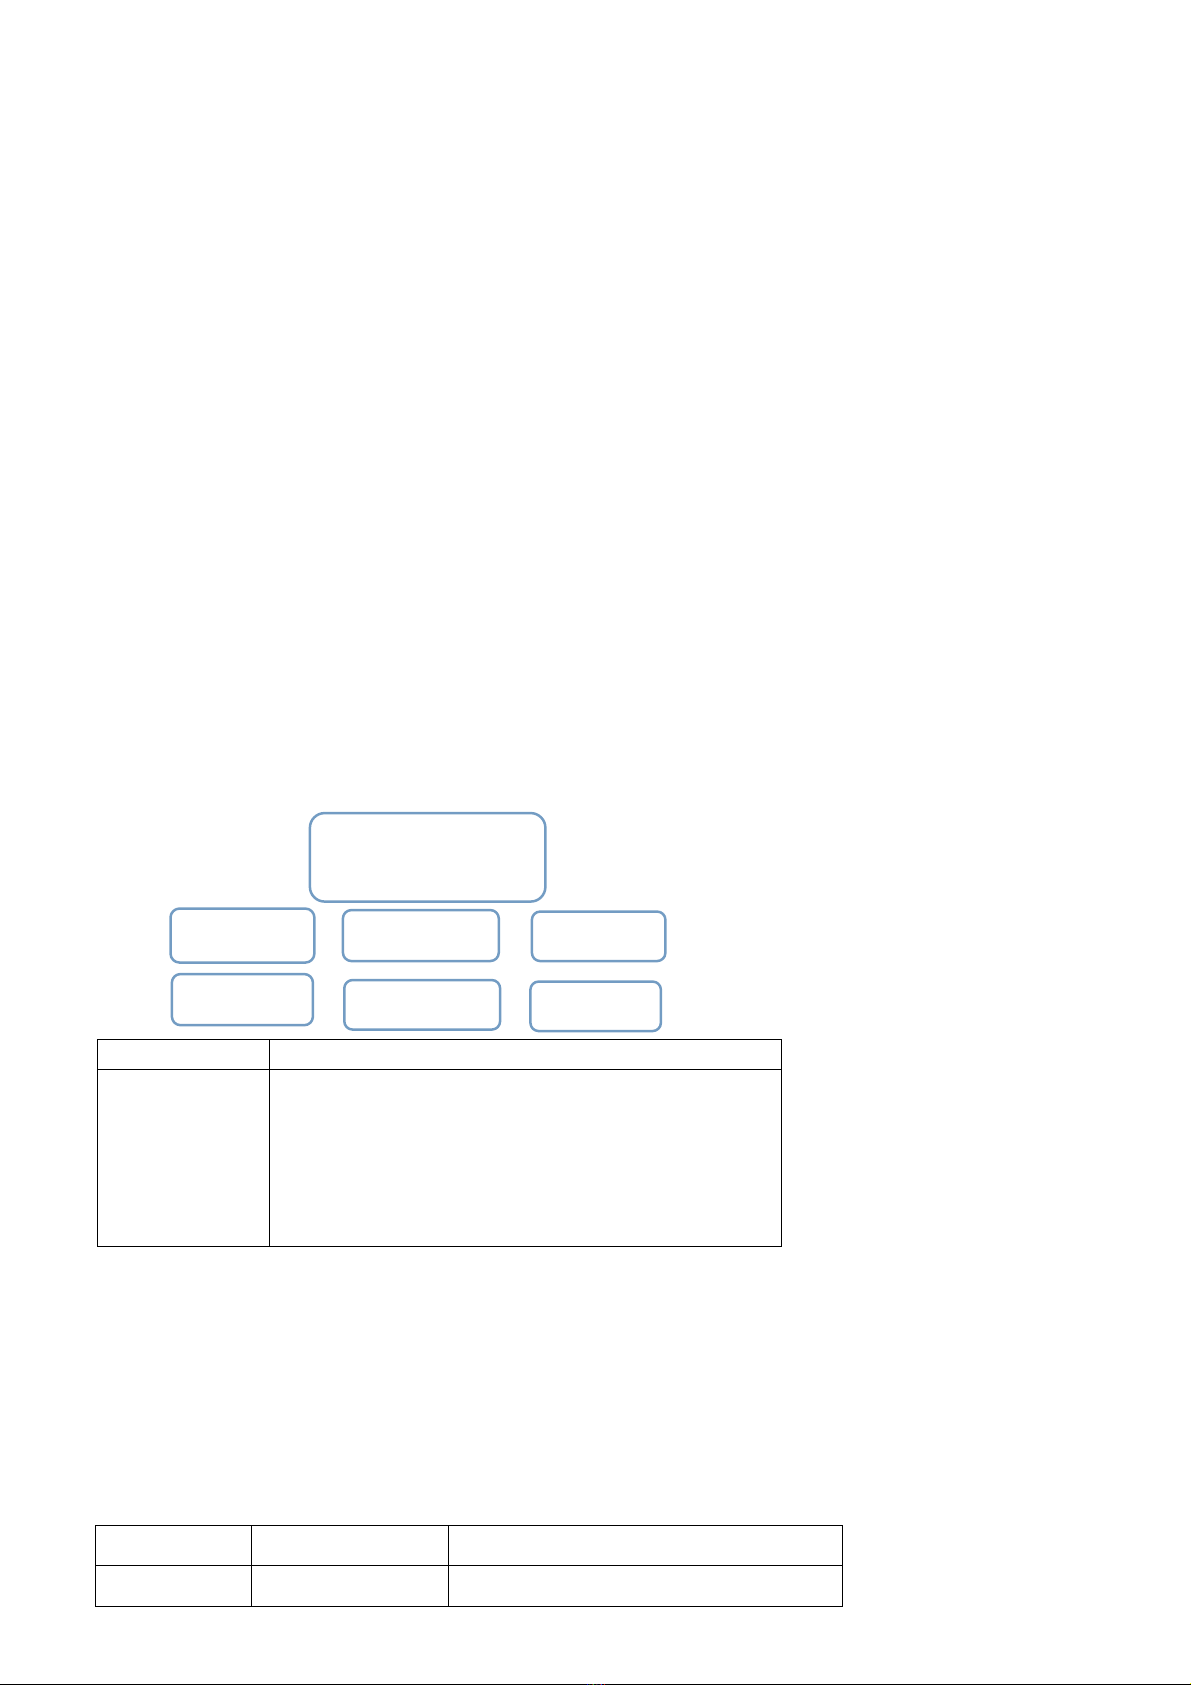
LCD DISPLAY
Button
Function
FUNCTOIN
UP
DOWN
TIMER
VOLUME
MANUAL
Enters the programming mode
Value adjustment upward
Value adjustment downward
Starts the timer controlled operation
Starts or stops all operation
Press and hold for manual haze output
●To navigate the LCD control menu options, use the FUNCTION button to scroll through the various
menu options. Then to scroll through a menu options selectable values , use the UP/DOWN buttons .
Press FUNCTION button to save any changes made and return to navigation the menu.
●Note : once a DMX signal is received , manual mode is deactivated and the buttons TIMER, VOLUME
and MANUAL are locked.
Control Panel FUNCTION Structure
Interval
10-200(seconds)
Pause time between timed output
Duration
10-200(seconds)
Duration time of timed operation
Ready
Haze
FUNCTION
N
UP
DOWN
TIMER
VOLUME
MANUAL
3
4

http://prolux.net.ua
4
DMX-512
1-512
Set the starting DMX address
Volume
1%-100%
Set the volume output
Fan speed
1-100
Set the fan speed
Warming up : means the machine is heating.
Ready Haze : means the machine can emit the haze .
Interval 10-200s : press the button FUNCTION, till it shows Interval set
10s-200s, you can set the interval haze emission timer from 10-200 seconds by the Button UP or
DOWN.
Duration 10-200s : press the button FUNCTION, till it shows Duration set 10-200s, you can set the
continuous haze output from 10-200 seconds by
the buttons UP or DOWN.
TIMER : when the interval time and duration time set, press the
button TIMER, the machine starts to work, when press again it stops working. Duration/Interval time
you have just set shows in the LCD display .
DMX -512 : press the button MENU, it will show DMX-512 001-512, you Can set the desired DMX
address by the buttons UP or DOWN.
Volume 1%-100% : press the button FUNCTION, till it shows Volume set 1-100% , you can set the
volume from 1%-100% by the Button UP or DOWN.
Fan Speed 1-100 : press the button FUNCTION, till it shows Fan Speed Set 1-100 ,you can set the fan
speed from 1 to 100 by the Button UP or DOWN.
Main Features
●DMX controllable water-based haze machine.
●Haze output and blower speed adjustment.
●Timer with interval and duration settings.
●6 button control panel with LCD display.
●Optional low liquid shutdown.
●3/5-pin DMX connectivity.
●6-position moveable haze guide for directional output control.
●2-channel DMX control ( fan speed , output volume).
Technical parameters:
Power consumption : 2000W
Voltage : AC220V 50/60Hz
Warm-up time: 30 seconds
Tank capacity : 5 L
Liquid consumption : 200min//L(30%) 120Min/L( 100%)
DMX channels : 2 channel
3/5-pin DMX input /output
Weight : 16kg
Setting Up
Step 1 : place the machine on a flat surface and in suitable large area with at least 50cm open space
around the machine .
Step 2 : fill the liquid tank with quality water-based , non-toxic haze liquid.
Step 3 : connect the machine to suitable rated power supply.
Step 4 : the LCD menu will now display “warming up ” in preparation for use . Warming can take up to
30 seconds.
Step 5: when it is ready , the LCD menu will display “Ready Haze”, and at this point, you could manually
start making haze by holding down the MANUAL button on the control panel.
Step 6 : to turn off the machine, unplug the unit from its power source.
5
Table of contents


