Promise Thunderbolt 3 Dock TD-300 User manual

Thunderbolt™ 3 Dock TD-300
Product Manual

Before attempting to connect, operate or adjust this product,
please save and read the User’s Manual completely. The
style of the product shown in this User’s Manual may be
different from the actual unit due to various models.
Safety Instructions
Always read the safety instructions carefully:
• Keep this User’s Manual for future reference
• Keep this equipment away from humidity
• If any of the following situation arises, get the equipment
checked by a service technician:
• The equipment has been exposed to moisture.
• The equipment has been dropped and damaged.
• The equipment has obvious sign of breakage.
• The equipment has not been working well or cannot
get it to work according to the User’s Manual.

Copyright
This document contains proprietary information protected
by copyright. All right are reserved. No part of this manual
may be reproduced by any mechanical, electronic or other
means, in any form, without prior written permission of the
manufacturer.
Trademarks
All trademarks and registered trademarks are the property of
their respective owners or companies.

Regulatory Compliance
FCC Conditions
This equipment has been tested and found to comply with
Part 15 Class B of the FCC Rules. Operation is subject
to the following two conditions: (1) This device may not
cause harmful interference. (2) This device must accept
any interference received and include interference that may
cause undesired operation.

IntroductIon
.................................................................. 1
Features
........................................................................ 1
Package contents
......................................................... 2
system requirements
..................................................... 2
sPeciFications
................................................................ 2
Hardware
...................................................................... 3
DisPlay conFiguration
.................................................... 5
multi-monitor conFiguration
........................................... 5
WinDoWs os
.................................................................. 5
extenD moDe
.................................................................. 6
troubleshooting
............................................................ 7
macos .......................................................................... 9
auDio conFiguration
..................................................... 10
Contents

1
Introduction
The Thunderbolt™ 3 Dock TD-300 provides extra connectivity
and versatility to various peripherals for your computer.
Connections for Thunderbolt devices, HDMI monitor, USB
3.0 devices, Ethernet, SD memory card, and audio speakers,
headphones and microphone are all available in this compact
docking station. In addition, Thunderbolt 3 Power Delivery (PD)
enables charging for Thunderbolt 3 enabled notebook computers
that support PD. All required software are embedded in the
device, so set up is plug and play for all devices.
Use the docking station to add one or two monitors (Thunderbolt
3 and HDMI monitors) to mirror your primary screen or extend the
desktop for expanded visibility of applications.
The Thunderbolt 3 PD Dock is best suited for professional
digital media content creators and engineers working with high-
resolution, high-bandwidth, and graphically intensive images,
video, CAD drawings, and medical imagery.
Features
» »Slim and fashionable design
» »Thunderbolt 3 technology
» »Upstream Port: Thunderbolt 3
» »Downstream Port: USB 3.0 Type-A x5 (One port supports BC 1.2)
» »Video output: HDMI output resolution up to 4K@60Hz
» »Gigabit Ethernet port
» »Upstream PD Charging: up to 60W
» »Combo input/output audio jack
» »Supports SD 3.0 card reader

2
Package Contents
» »Thunderbolt™ 3 Dock TD-300
» »AC/DC Adapter
Input: 100-240V
Output: 20V/6.75A
» »Quick Start Guide
» »Thunderbolt™ 3 Cable (50 cm/19.7 inch)
System Requirements
Supported Operating System
» »Windows®10
» »macOS®
Interface Thunderbolt 3, 2 ports
HDMI connector
USB 3.0 Type-A connector, 5 ports, including one
with BC 1.2 power charging
Video HDMI 2.0: 4K@60Hz
Audio Combination Audio In/Out Mini Plug Jack
Ethernet 10/100/1000 BASE-T
Power Adapter Input: AC 100 - 240V
Output: DC 20V / 6.75A
Environment Operating Temperature: 0 ~ 40°C (32 ~ 104°F)
Storage Temperature: -20 ~ 70 °C (-4 ~ 158°F)
Compliance FCC
Dimensions 230 * 88 * 27 mm (9.1 * 3.5 * 1.1 in)
Weight 450 g (0.99 lb)
Specications

1 2 3 4 5 6
3
# Front Panel Description
1 Power LED This will light green when the power cable
is attached and the device is receiving
power.
2 Thunderbolt 3
link LED
This will light blue when there is a valid
Thunderbolt 3 connection established.
3 SD 3.0
Card Reader
Insert SD memory card for data transfer.
4/5 USB 3.0 Use USB cable with Type A connector
to connect USB 3.0 devices. USB 3.0
is backward compatible with older USB
devices. Note that the USB port on the left
supports enhanced device charging for
smart phones, etc.
6 Audio In/Out Connect headphones, speakers and
headphone/microphone sets for audio
output and input.
Hardware

# Rear Panel Description
7 USB 3.0 Use USB cable with Type A connector
to connect USB 3.0 devices. USB 3.0
is backward compatible with older USB
devices.
8 Gigabit Ethernet Use Ethernet cable to connect to local
network for network and Internet access.
9 Thunderbolt 3 Use Thunderbolt 3 cable to connect
Thunderbolt 3 equipped monitor or other
devices.
10 Thunderbolt 3
with Power
Delivery
Use Thunderbolt 3 cable to connect
Thunderbolt 3 equipped devices. This
port includes power delivery to use for
charging notebook computers or other
devices that support Thunderbolt 3 power
delivery for battery charging.
11 HDMI 2.0 Use HDMI cable to attach HDMI
equipped monitor.
12 DC Power In Insert DC power connector and plug
power adapter into suitable power
source.
7 8 9
10
11 12
4

# Rear Panel Description
7 USB 3.0 Use USB cable with Type A connector
to connect USB 3.0 devices. USB 3.0
is backward compatible with older USB
devices.
8 Gigabit Ethernet Use Ethernet cable to connect to local
network for network and Internet access.
9 Thunderbolt 3 Use Thunderbolt 3 cable to connect
Thunderbolt 3 equipped monitor or other
devices.
10 Thunderbolt 3
with Power
Delivery
Use Thunderbolt 3 cable to connect
Thunderbolt 3 equipped devices. This
port includes power delivery to use for
charging notebook computers or other
devices that support Thunderbolt 3 power
delivery for battery charging.
11 HDMI 2.0 Use HDMI cable to attach HDMI
equipped monitor.
12 DC Power In Insert DC power connector and plug
power adapter into suitable power
source.
5
Display conguration
Multi-monitor conguration
Once»the»extra»monitors»are»connected,»they»can»be»congured»
to Mirror mode, Extend mode or set the primary display.
Windows OS
To»change»display»settings»for»multi-monitor»conguration»in»
Windows, follow these steps:
1. Position the mouse anywhere on the Windows Desktop,
2. Right-click and select Display Settings.

6
Extend Mode
1. Access Display Settings menu (see ”Multi-monitor
conguration”»on»page»5).
2. Select the preferred monitor at top of the page.
3. Select Multiple Displays > Extend these displays.
4. Click Apply»to»conrm»and»exit.
5. Once the setting is completed, simply drag and drop the
application icons or the opened windows to the add-on
monitor. However, some applications may not support to
display on the extended desktop.

7
Troubleshooting
Cursor disappeared
If the status remains in the extended mode but the docking station
is disconnected, the desktop will still be panned to the add-on
monitor. The cursor may not be found on the primary monitor in
such a case. If it happens, connect the add-on monitor through the
docking station again or keep moving the mouse.
Video playback in extended mode
If the video playback quality is poor or low performance in
extended mode, please playback it on the primary monitor
instead of the add-on monitor.
Mirror Mode
1. Access Display Settings menu (see ”Multi-monitor
conguration”»on»page»5).
2. Select the preferred monitor at top of the page.
3. Select Multiple Displays > Duplicate these displays.
4. Click Apply»to»conrm»and»exit.

8
Set the Primary Monitor
1. Access Display Settings menu (see”Multi-monitor
conguration”»on»page»5).
2. Select the preferred monitor at top of the page.
3. Check the box to Make this my main display.
Note
For some computers, you may need to disable
the main display by unchecking the box of
Extend the desktop onto this monitor or
Extend my Windows desktop onto this monitor.
4. Click Apply»to»conrm»and»exit.
9
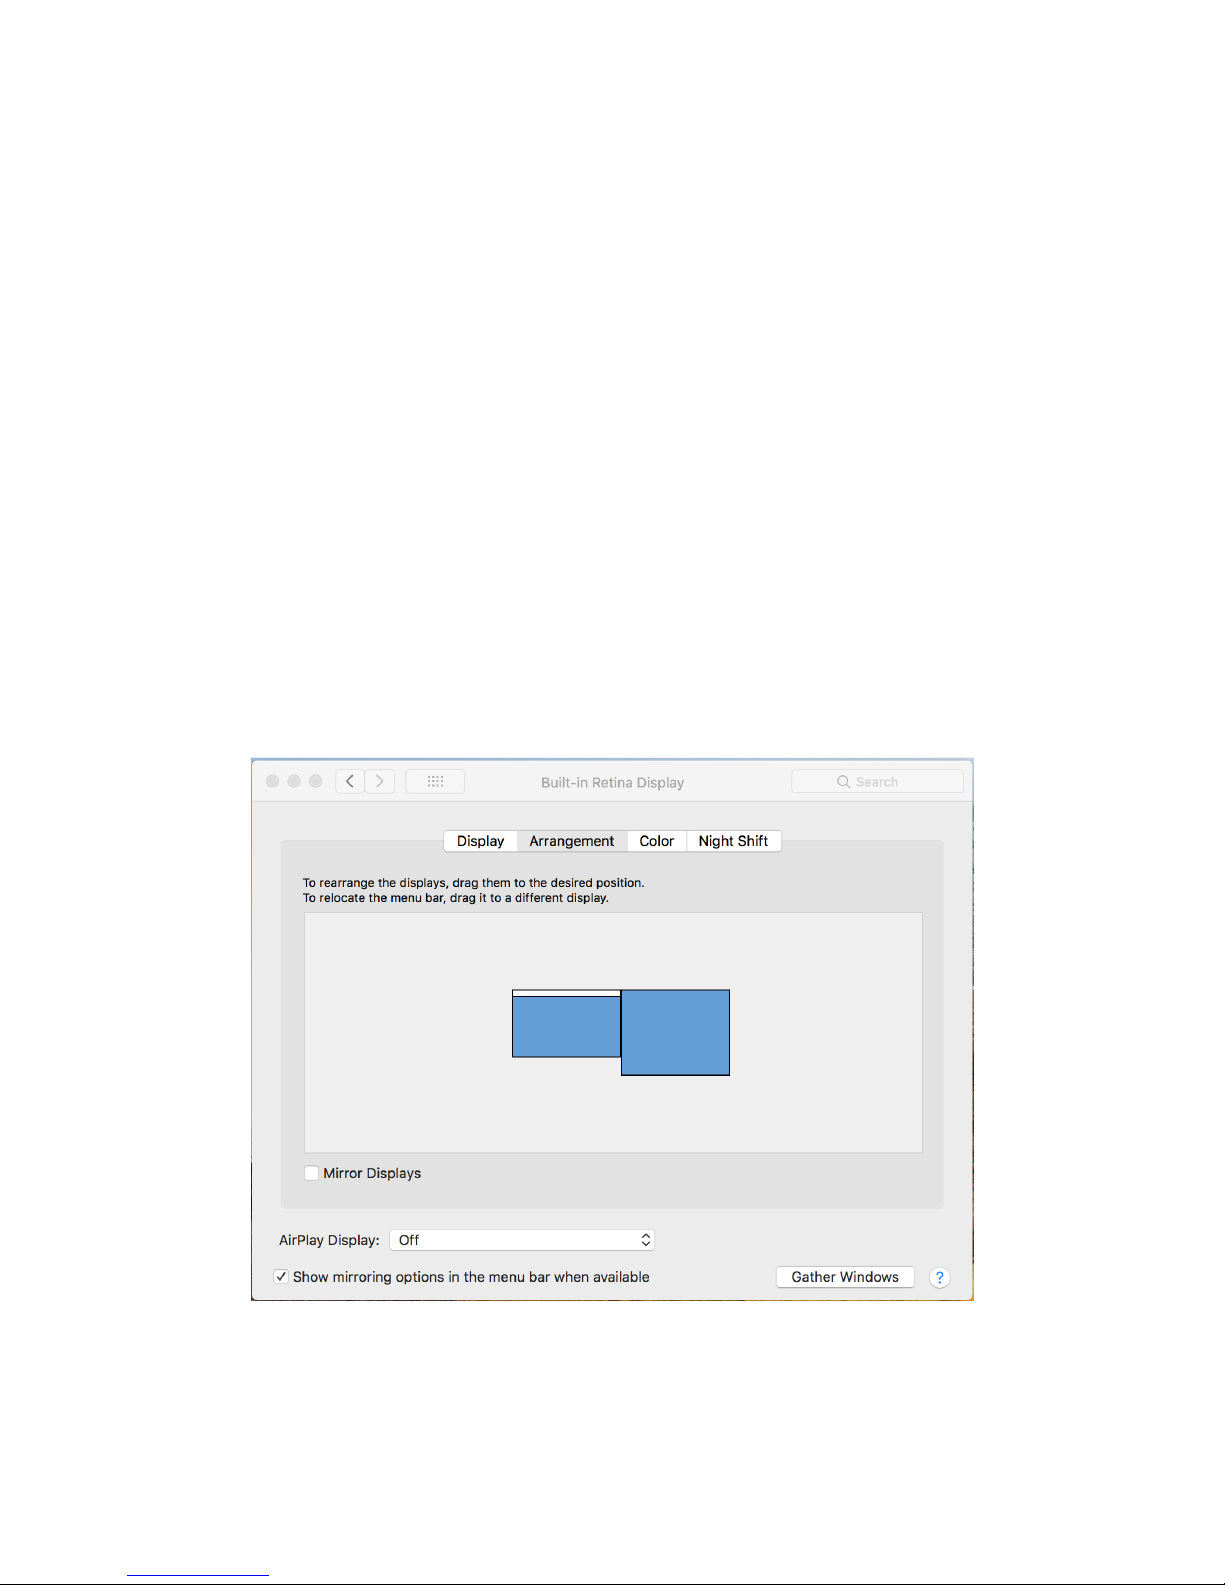
macOS
1. Click on the Apple icon in the top left corner of the screen
and select System Preferences…/ Displays.
2. To rearrange the displays, drag them to the desired position.
To»relocate»the»menu»bar,»drag»it»to»a»dierent»display.
To switch to Mirror Mode, check the Mirror Displays box.

10
Audio conguration
By default, when the docking station is connected to a computer,
the»audio»conguration»may»be»changed»to»USB»(Multimedia)»
Audio Device automatically (this setting depends on models). If it
does not work, follow the steps below to setup.
1. Open Control Panel and then select the hardware and
sound icon.
2. Click Sound > Manage audio devices and then select USB
Audio Device.
Table of contents


