Promotech Mini Spider User manual

JEI DRILLING & CUTTING SOLUTIONS LTD
Unit 21 Empire Business Park, Enterprise Way
Burnley, Lancashire, BB12 6LT
Tel: 00 44 1706 229490 Email: sales@jeisolutions.co.uk
OPERATOR’S MANUAL
M
Mi
in
ni
i
S
Sp
pi
id
de
er
r
WELDING CARRIAGE

Contents
1. GENERAL INFORMATION............................................................................................... 3
1.1. Application................................................................................................................. 3
1.2. Technical data............................................................................................................ 3
1.3. Equipment included ................................................................................................... 4
1.4. Dimensions................................................................................................................ 5
1.5. Design ....................................................................................................................... 6
2. SAFETY PRECAUTIONS.................................................................................................. 7
3. STARTUP AND OPERATION........................................................................................... 9
3.1. Operating................................................................................................................... 9
3.2. Troubleshooting........................................................................................................11
4. MAINTENANCE...............................................................................................................12
5. ACCESSORIES...............................................................................................................13
5.1. Battery 5.2 Ah...........................................................................................................13
5.2. Battery charger .........................................................................................................13
5.3. Power supply and power cord...................................................................................14
5.4. Auxiliary magnet blocks ............................................................................................15
5.5. Cable anchor ............................................................................................................16
6. WIRING DIAGRAM..........................................................................................................17
7. DECLARATION OF CONFORMITY.................................................................................18
8. QUALITY CERTIFICATE..................................................................................................19
9. WARRANTY CARD..........................................................................................................20

Mini Spider
This document is protected by copyrights.
Copying, using, or distributing without permission of JEI Group Ltd is prohibited.
3
1. GENERAL INFORMATION
1.1. Application
The Mini Spider is a battery-powered welding carriage designed to make fillet welds
by using MIG/MAG torches. It is clamped to the surface with permanent magnets.
An optional magnet blocks increase the clamping force. An optional power supply
can be used to connect the carriage to a 110–240 V power source.
1.2. Technical data
Voltage
18 V DC, 5.2 Ah
Power
25 W
Welding position (according to EN ISO 6947 and AWS/ASME)
PA / 1F
PB / 2F
Torch type
MIG/MAG
Torch diameter
16–22 mm (0.63–0.87″)
Maximum allowed cable weight for horizontal work
8 kg (18 lbs)
Minimum workpiece thickness
4 mm (0.16″)
Ground clearance
4 mm (0.16″)
Horizontal pulling force
150 N
Cross slides adjustment range
0–21 mm (0–0.83″)
up-down, left-right
Horizontal speed*
5–110 cm/min
(2–44 in/min)
Weight (without the battery)
7.6 kg (16.8 lbs)
* When the battery is fully charged.
Mini Spider
This document is protected by copyrights.
Copying, using, or distributing without permission of JEI Group Ltd is prohibited.
4
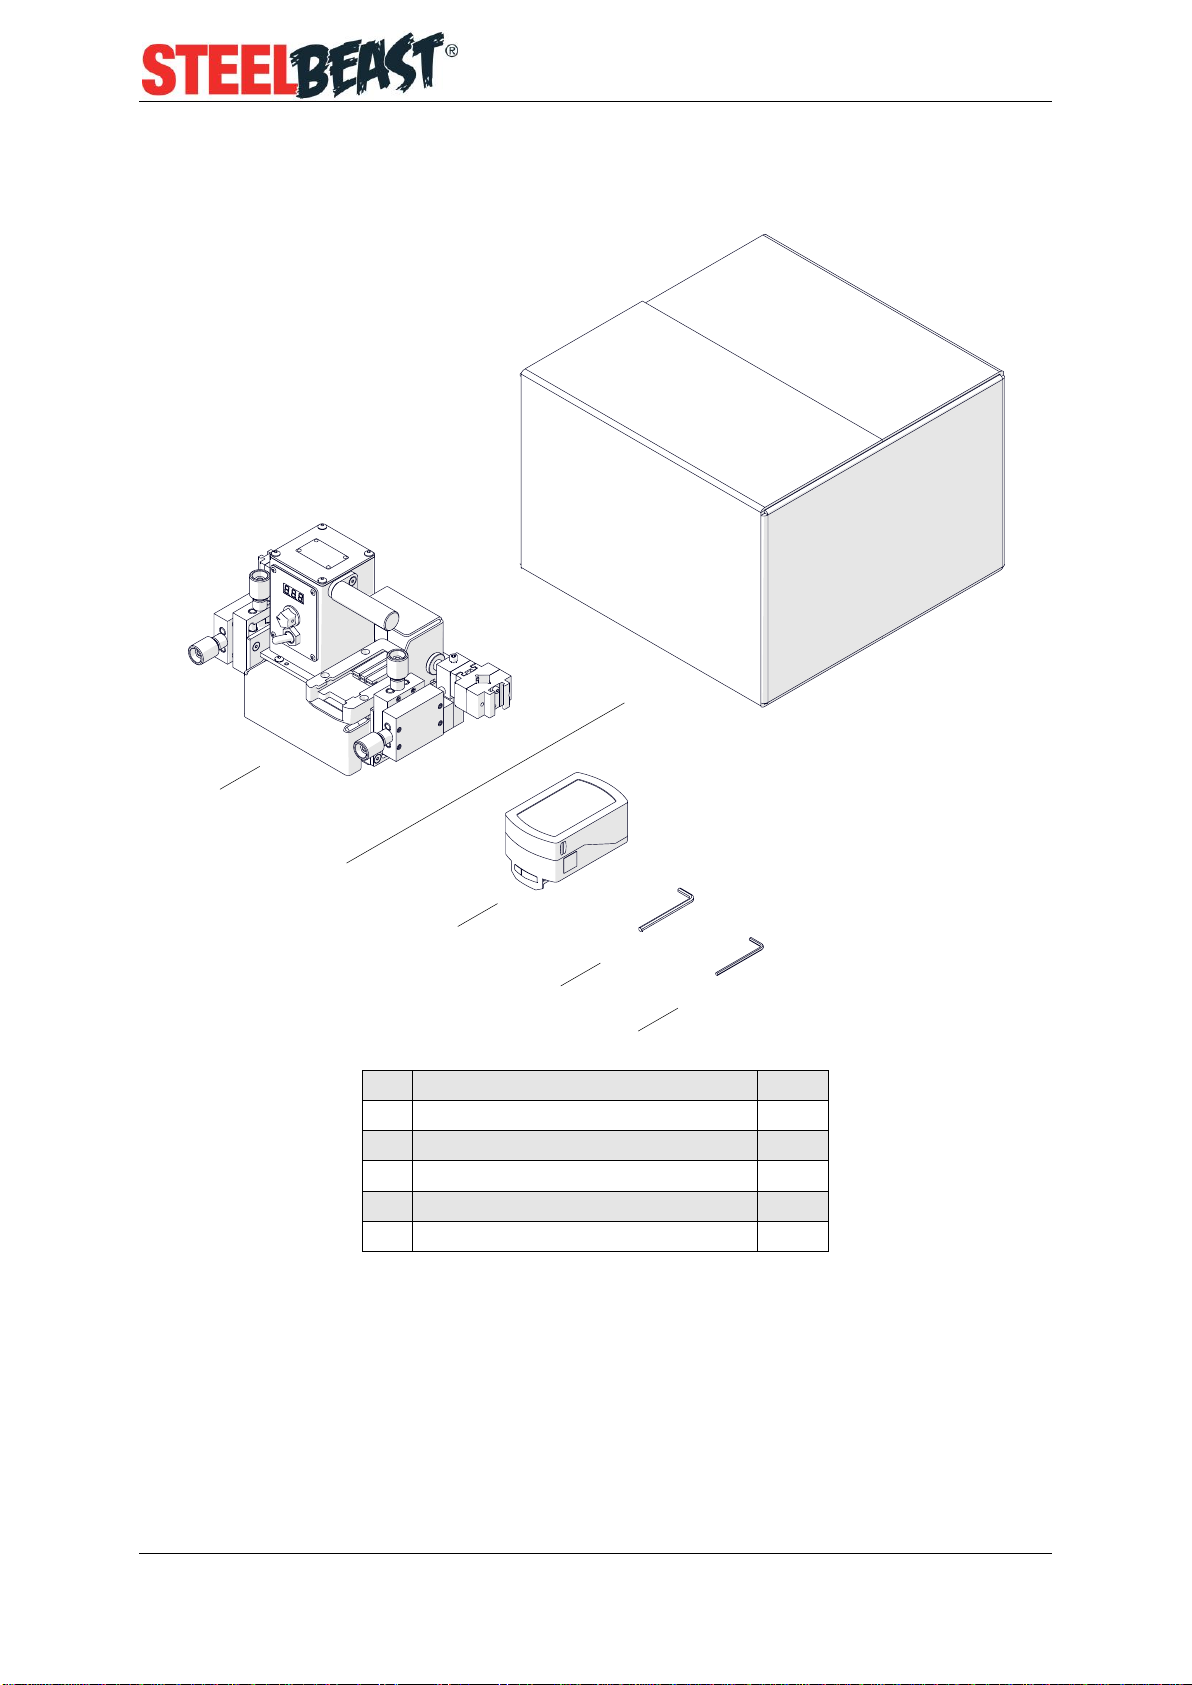
1.3. Equipment included
1
Carriage
1 unit
2
Cardboard box
1 unit
3
Battery
1 unit
4
4 mm hex wrench
1 unit
5
3 mm hex wrench
1 unit
–
Operator’s Manual
1 unit
2
3
4
1
5
Mini Spider
This document is protected by copyrights.
Copying, using, or distributing without permission of JEI Group Ltd is prohibited.
5
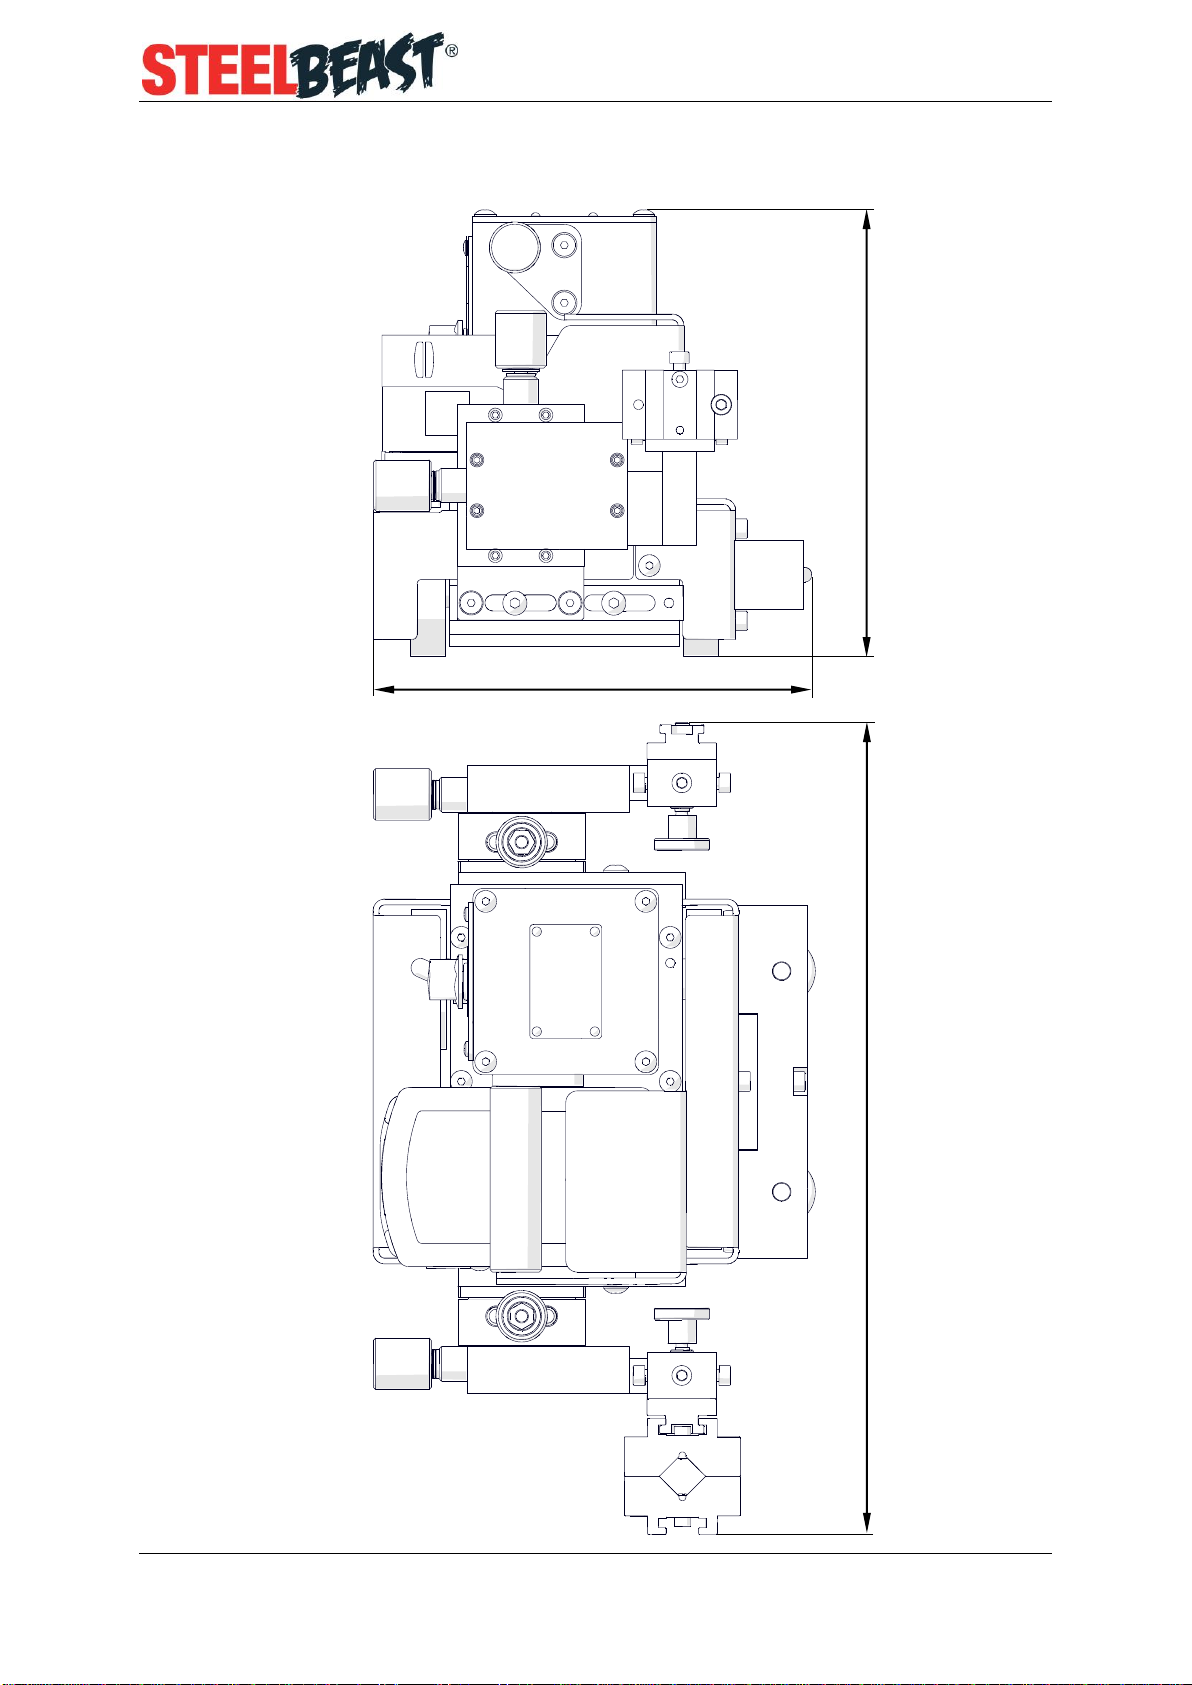
1.4. Dimensions
350 mm (13.8″)
194 mm (7.6″)
191 mm (7.5″)
Mini Spider
This document is protected by copyrights.
Copying, using, or distributing without permission of JEI Group Ltd is prohibited.
6
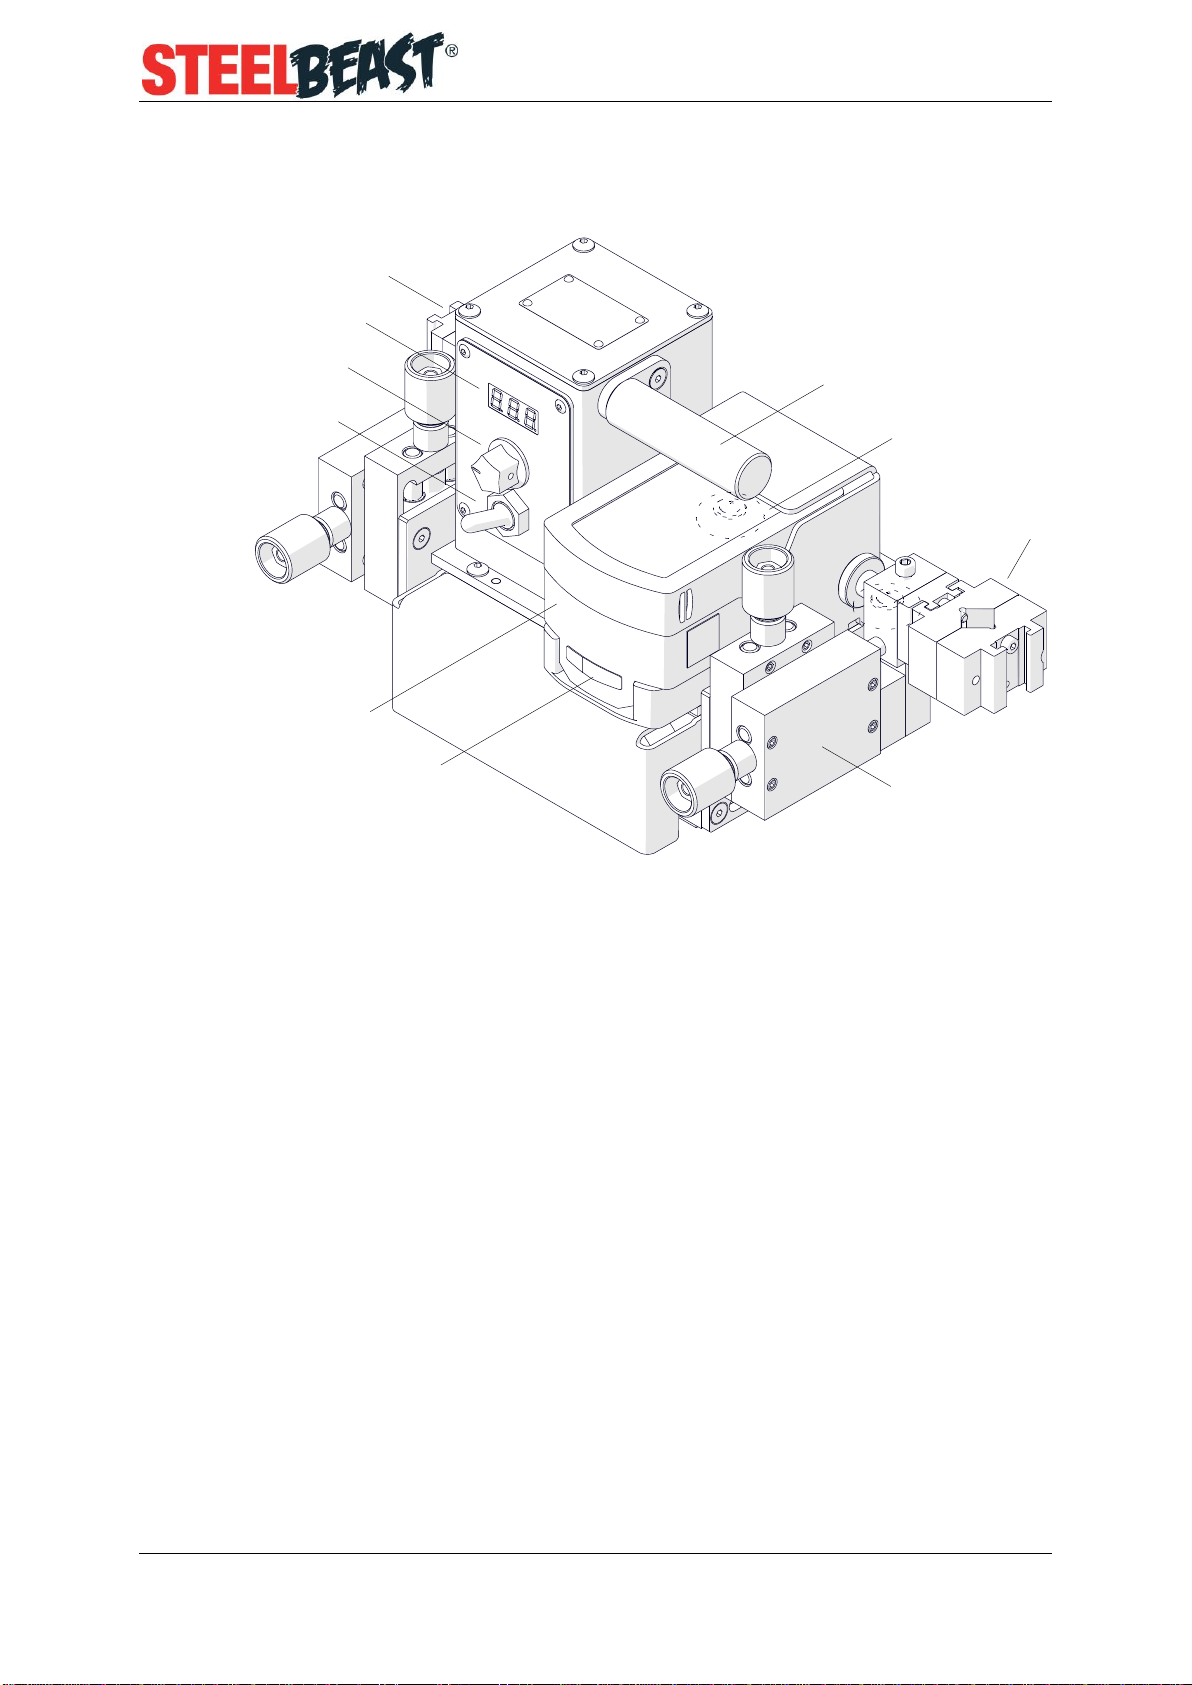
1.5. Design
Travel direction switch
(Left / O / Right)
Guide roller (×2)
LED display
Carrying handle
Cross slide (×2)
Speed knob
Battery
Torch holder
Torch holder bracket (×2)
Charge indicator

Mini Spider
This document is protected by copyrights.
Copying, using, or distributing without permission of JEI Group Ltd is prohibited.
7
2. SAFETY PRECAUTIONS
1. Before you start, read this Operator’s Manual and complete occupational safety
and health training.
2. Use only in applications specified in this Operator’s Manual.
3. Make sure that the carriage has all parts and they are genuine and not damaged.
4. Make sure that the specifications of the power source are the same as those
specified on the rating plate.
5. When you use a power supply, connect it to a correctly grounded power source.
6. Do not carry the carriage by the cords, and do not pull them. This can cause
damage and electric shock.
7. Keep untrained bystanders away from the carriage.
8. Before each use, ensure the correct condition of the carriage, battery, power supply,
power source, cords, control parts, rollers, and wheels.
9. Before each use, make sure that no part is cracked or loose. Make sure to maintain
correct conditions that can have an effect on the operation of the carriage.
10. Keep the carriage dry. Do not expose it to rain, snow, or frost.
11. Keep the work area well lit, clean, and free of obstacles.
12. Do not use near flammable materials, or in explosive environments.
13. Move and put the carriage by using the carrying handle.
14. Put the carriage so that all four wheels are on the surface. Make sure that no
contact is between the surface and chassis.
15. Install the battery / power supply only after you set the travel direction switch to the
middle position.
16. Install only torches whose diameter matches the diameter of the torch holder.
17. Make sure that the torch cables are not on the surface. Hang them to decrease the
load on the carriage. Use only cables whose weight is not more than 8 kg (18 lbs).
18. At heights, use a protection to not let the carriage fall.
19. Do not stay below the carriage that is put at heights.
20. Use ear and eye protection (helmet, shield, and screen), gloves, and protective
clothing. Do not use loose clothing.
21. Do not try to stop the travel by hand. To stop, set the travel direction switch to the
middle position.
22. Maintain only after you remove the battery / power supply.

Mini Spider
This document is protected by copyrights.
Copying, using, or distributing without permission of JEI Group Ltd is prohibited.
8
23. Repair only in a service center appointed by the seller.
24. If the carriage falls, is wet, or has any damage, stop the work and promptly send
the carriage to the service center for check and repair.
25. Do not leave the carriage unattended during work.
26. If you are not going to use the carriage, remove it from the worksite and keep it in
a safe and dry place.
Mini Spider
This document is protected by copyrights.
Copying, using, or distributing without permission of JEI Group Ltd is prohibited.
9
3. STARTUP AND OPERATION
3.1. Operating
Put the battery into the charger. Let the battery charge until the light on the charger
stops flashing and stays on.
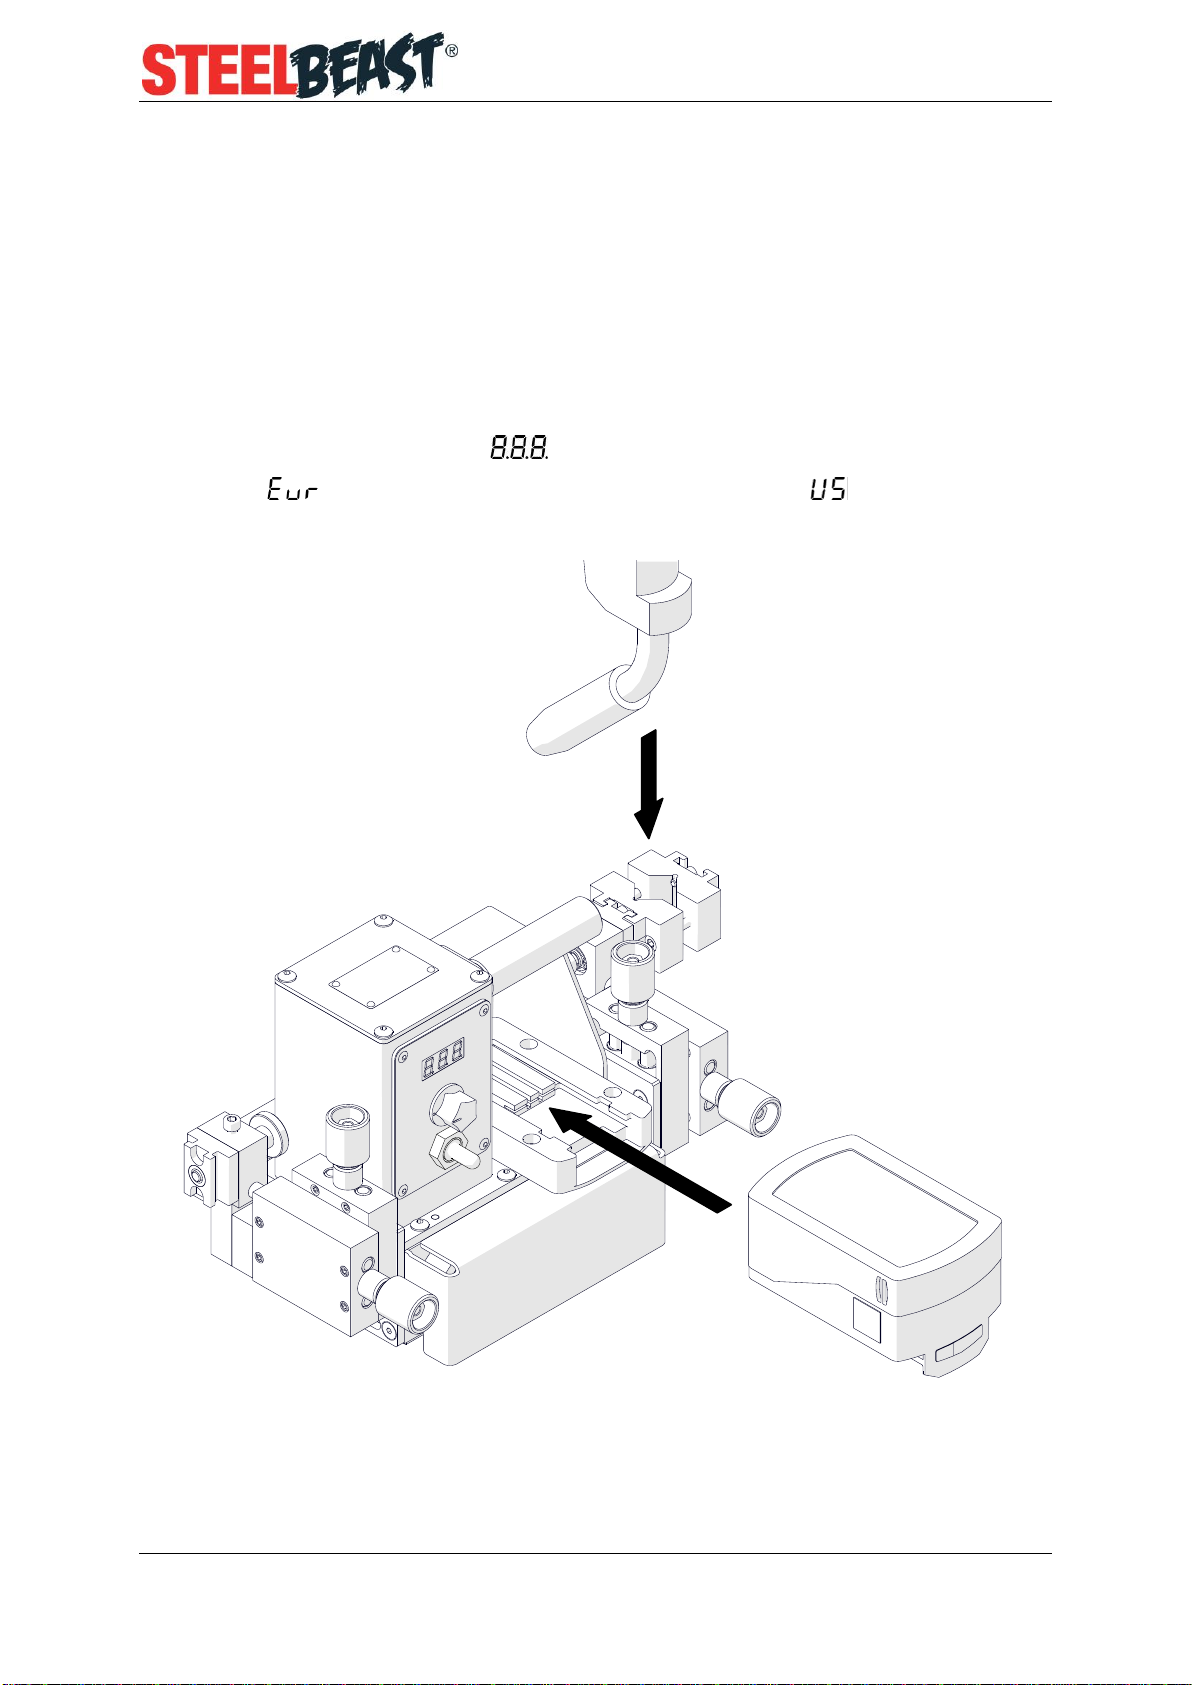
Use the carrying handle to move the carriage to the worksite. Set the travel
direction switch to the middle position (1) and put the battery onto the carriage (2).
Then, the display comes on ( ). Next, if the unit of speed is set to centimeters
per minute, shows. If the unit is set to inches per minute, shows.
Use the 3 mm and 4 mm hex wrenches to tighten the torch in the holder (3).
3
2
1
Mini Spider
This document is protected by copyrights.
Copying, using, or distributing without permission of JEI Group Ltd is prohibited.
10
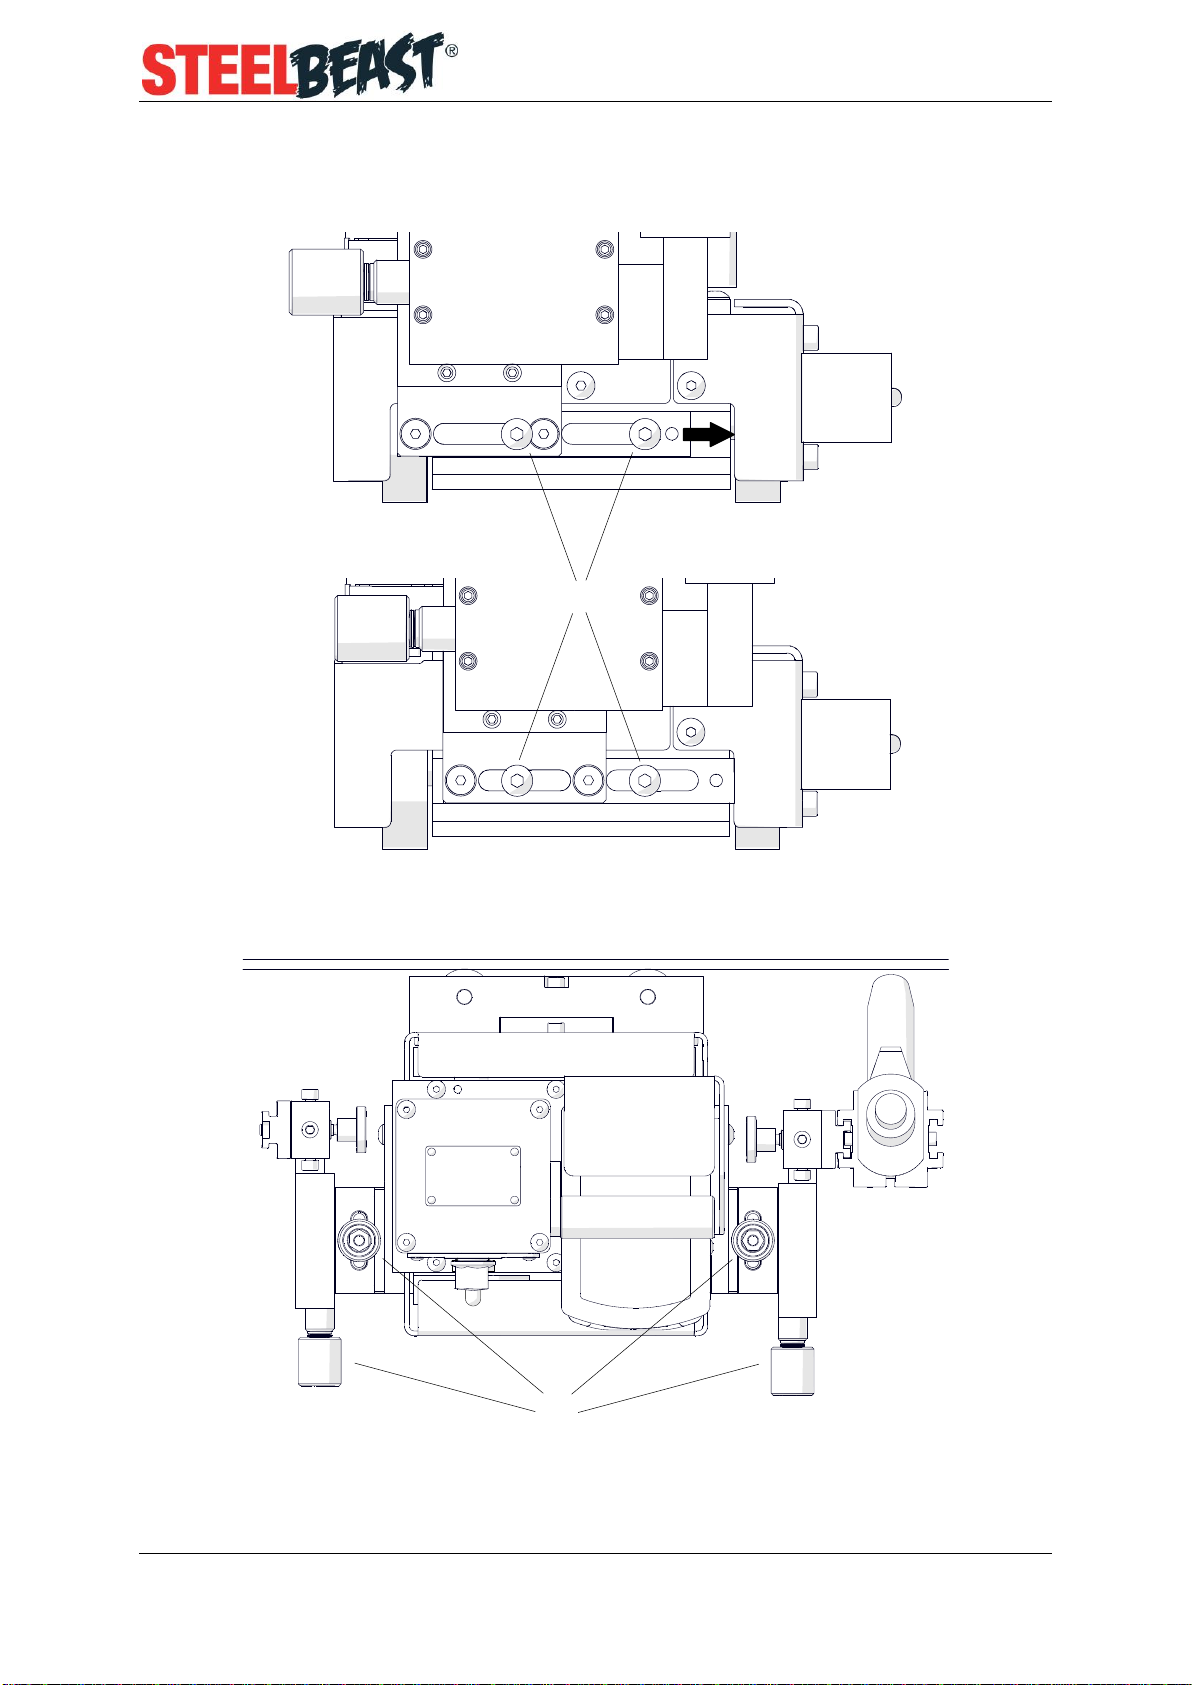
To work in narrow spaces, adjust the position of the cross slides. On the two sides,
loosen the screws (4). Then, move the cross slides (5) and tighten the screws (4).
Put the carriage so that the rollers are on the workpiece. Then, use the knobs (6) to
put the torch in the welding joint.
4
5
6

Mini Spider
This document is protected by copyrights.
Copying, using, or distributing without permission of JEI Group Ltd is prohibited.
11
Use the speed knob to set the required speed. Use the travel direction switch to
select a direction of travel. This will start the travel with the speed that is shown.
To stop the travel, set the travel direction switch to the middle position.
If you do not use the carriage for 2.5 minutes, it goes to the sleep mode. To go
back from the sleep mode, use a travel direction switch. When the battery is
discharged, the travel stops. Then, recharge the battery. To check the charge level,
press the button on the charge indicator.
After the work is finished, remove the battery / power supply.
3.2. Troubleshooting
Message
Problem
Solution
Not all display segments are on after
powering.
Contact service center for check
and repair.
Speed is shown in centimeters per
minute instead of inches per minute.
Contact service center.
Speed is shown in inches per minute
instead of centimeters per minute.
Contact service center.
Travel direction switch is not set to the
middle position when powering.
Set the travel direction switch to
the middle position.
Battery discharged. The carriage
stops.
Charge the battery or replace to
a fully charged.

Mini Spider
This document is protected by copyrights.
Copying, using, or distributing without permission of JEI Group Ltd is prohibited.
12
4. MAINTENANCE
Each day:
1. Clean the chassis, rollers, and wheels.
2. Make sure that the rollers rotate freely.
3. Clean the torch nozzle. Replace if damaged.
4. Examine the battery. Replace if damaged.
Each month:
1. Make sure that the knob and the switch work as intended. Replace if loose or
damaged.
2. Examine cables and cords. Replace if damaged.
3. Tighten screws if loose.
Mini Spider
This document is protected by copyrights.
Copying, using, or distributing without permission of JEI Group Ltd is prohibited.
13
5. ACCESSORIES
5.1. Battery 5.2 Ah
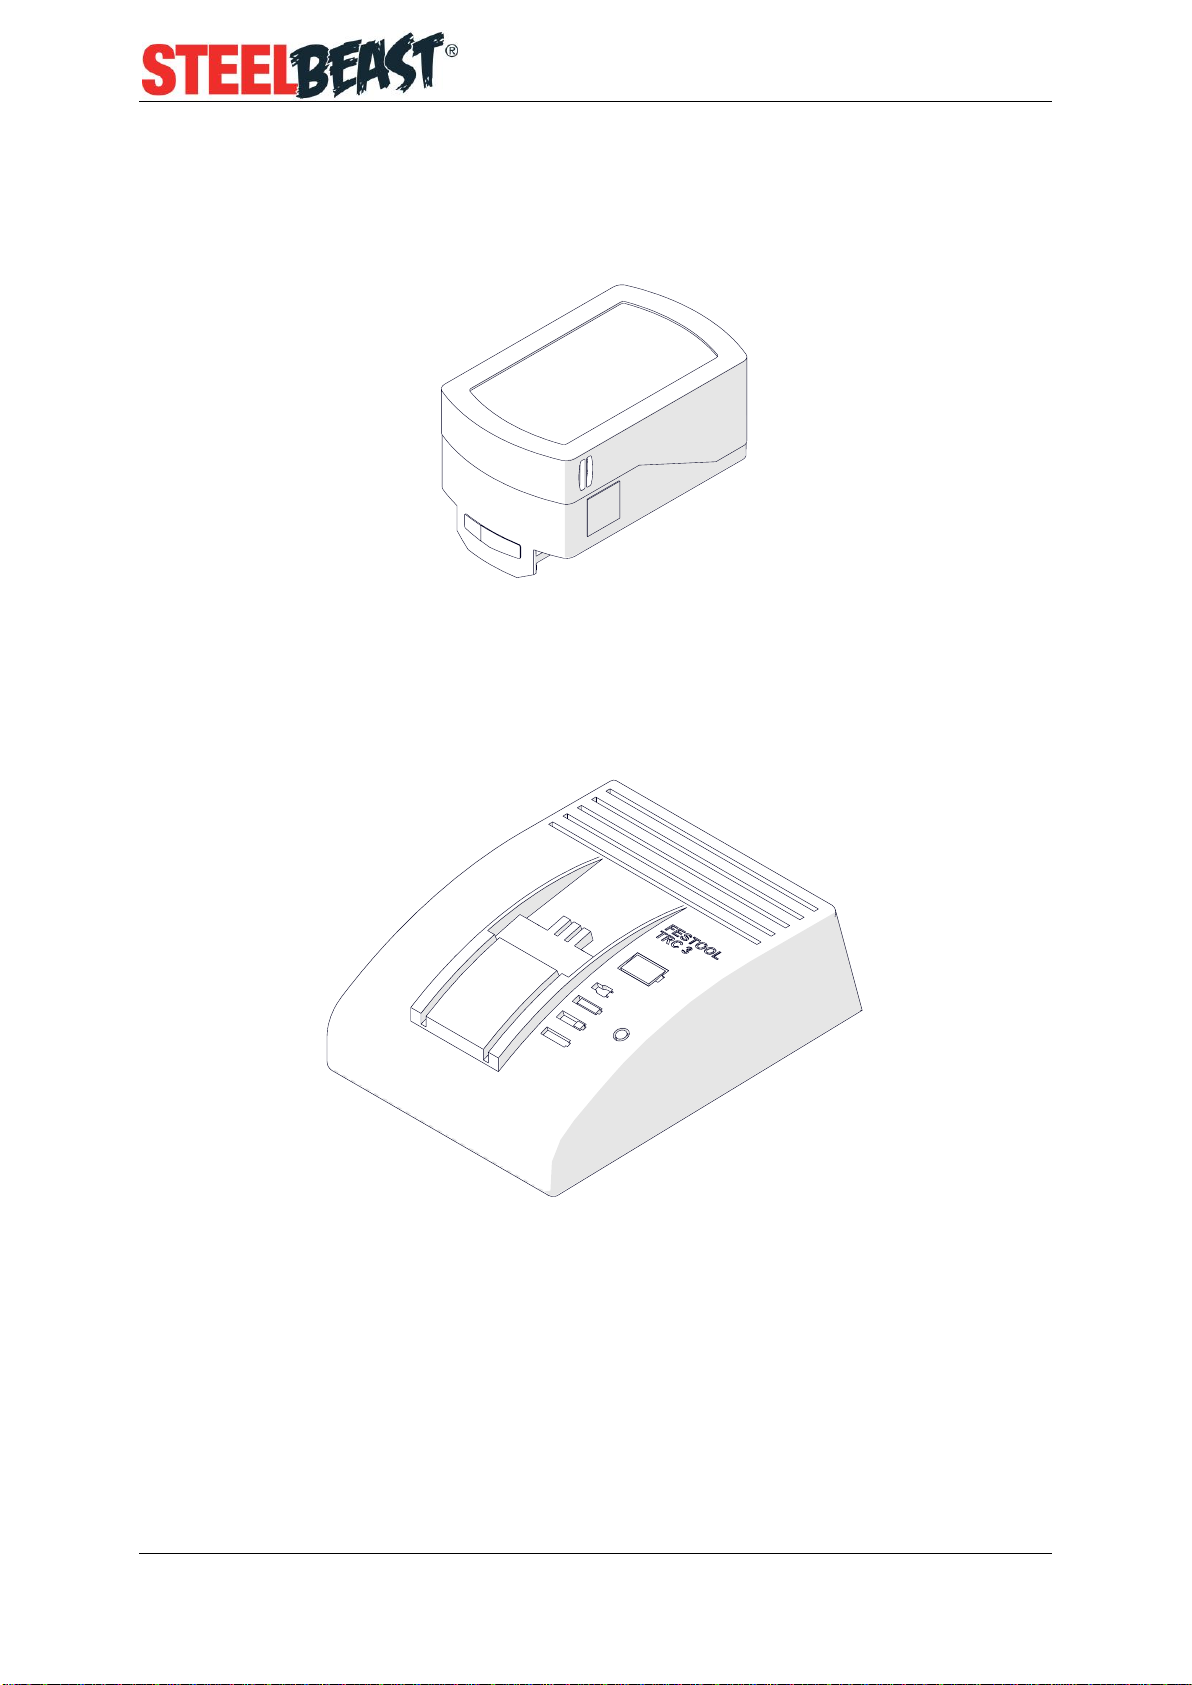
5.2. Battery charger
Recharges the battery from 220–240 V or 120 V power source.
Part number:
LDW-000006 (220–240 V, 50/60 Hz)
LDW-000007 (120 V, 60 Hz)
Part number:
AKM-000086
Mini Spider
This document is protected by copyrights.
Copying, using, or distributing without permission of JEI Group Ltd is prohibited.
14
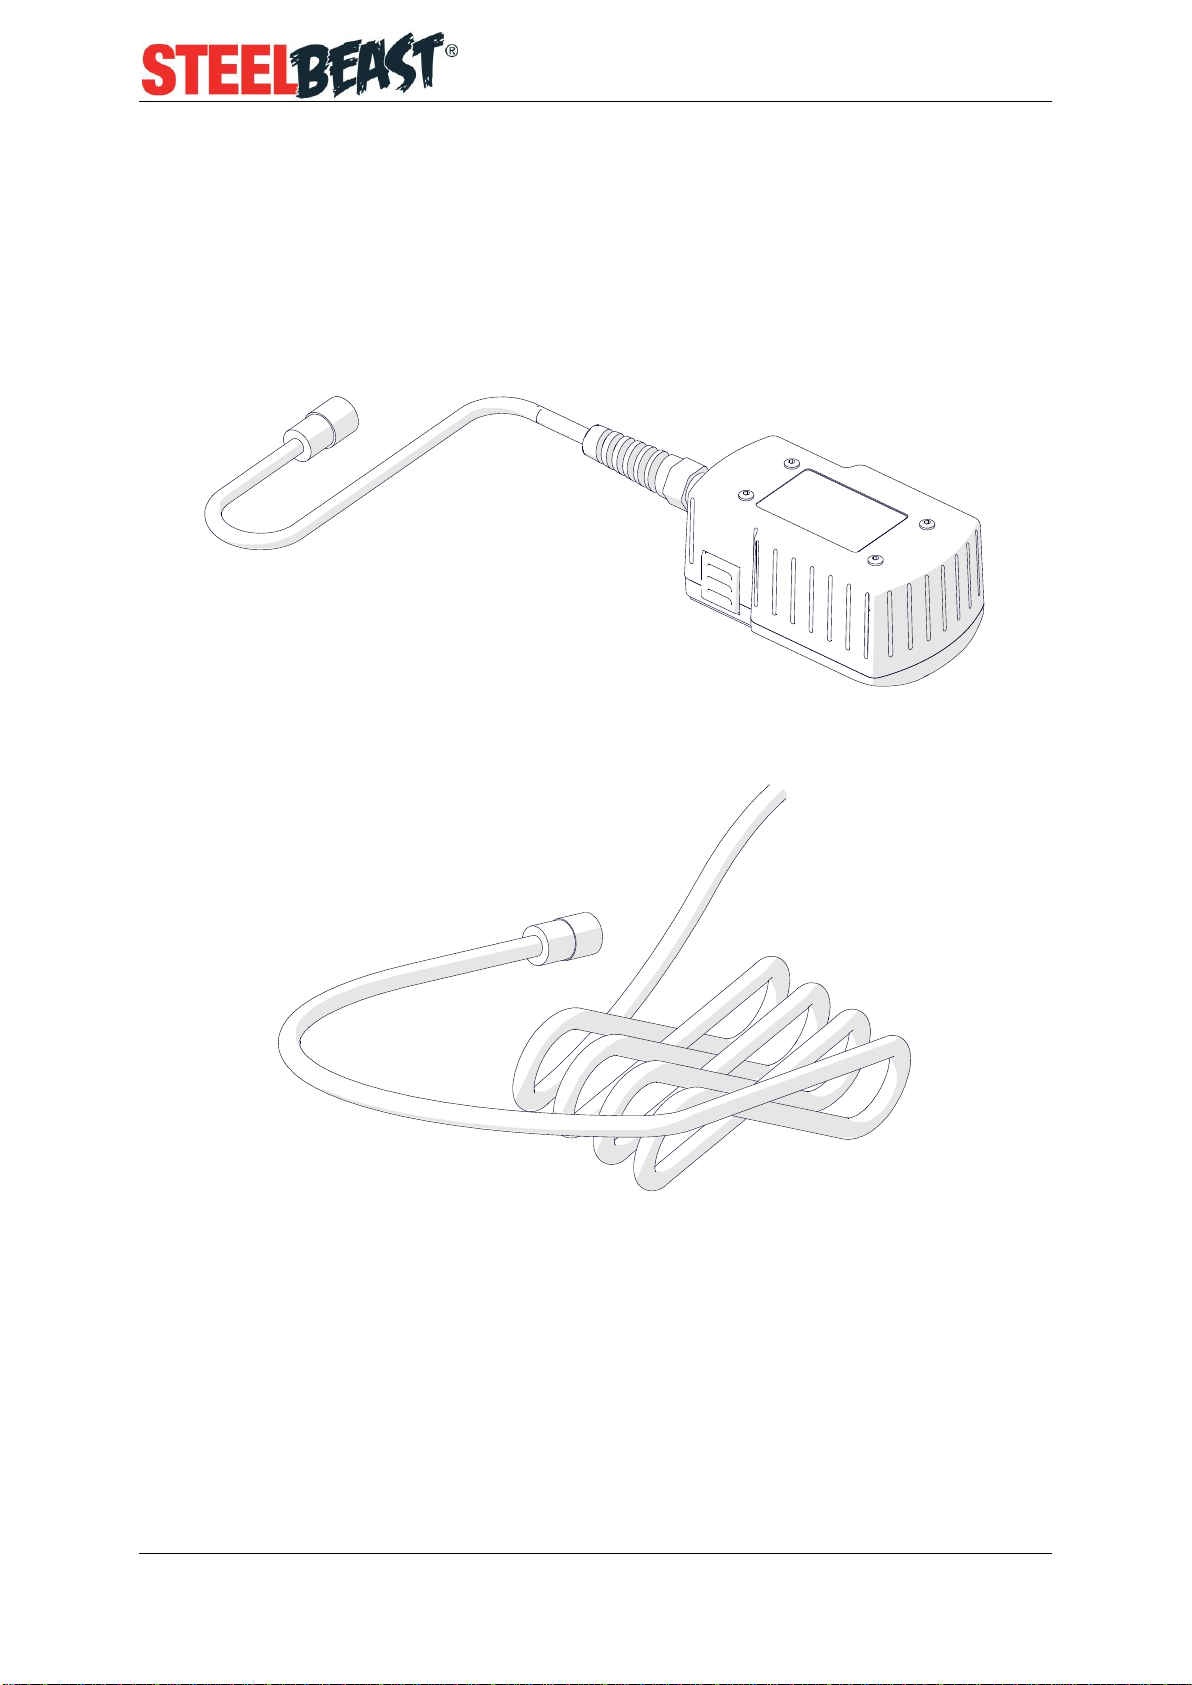
5.3. Power supply and power cord
Allows connecting the carriage to a110–240Vpower source instead using the
battery. The length of the power cord is 3 m (10 ft).
Part number (power supply):
ZSL-0526-20-00-00-0
Part number (power cord):
PWD-0466-18-00-00-0 (230 V CEE)
PWD-0466-21-00-00-0 (230 V AU)
PWD-0466-31-00-00-0 (230 V IN)
PWD-0466-16-00-00-0 (115 V USA)
PWD-0466-28-00-00-0 (115 V UK)
Mini Spider
This document is protected by copyrights.
Copying, using, or distributing without permission of JEI Group Ltd is prohibited.
15
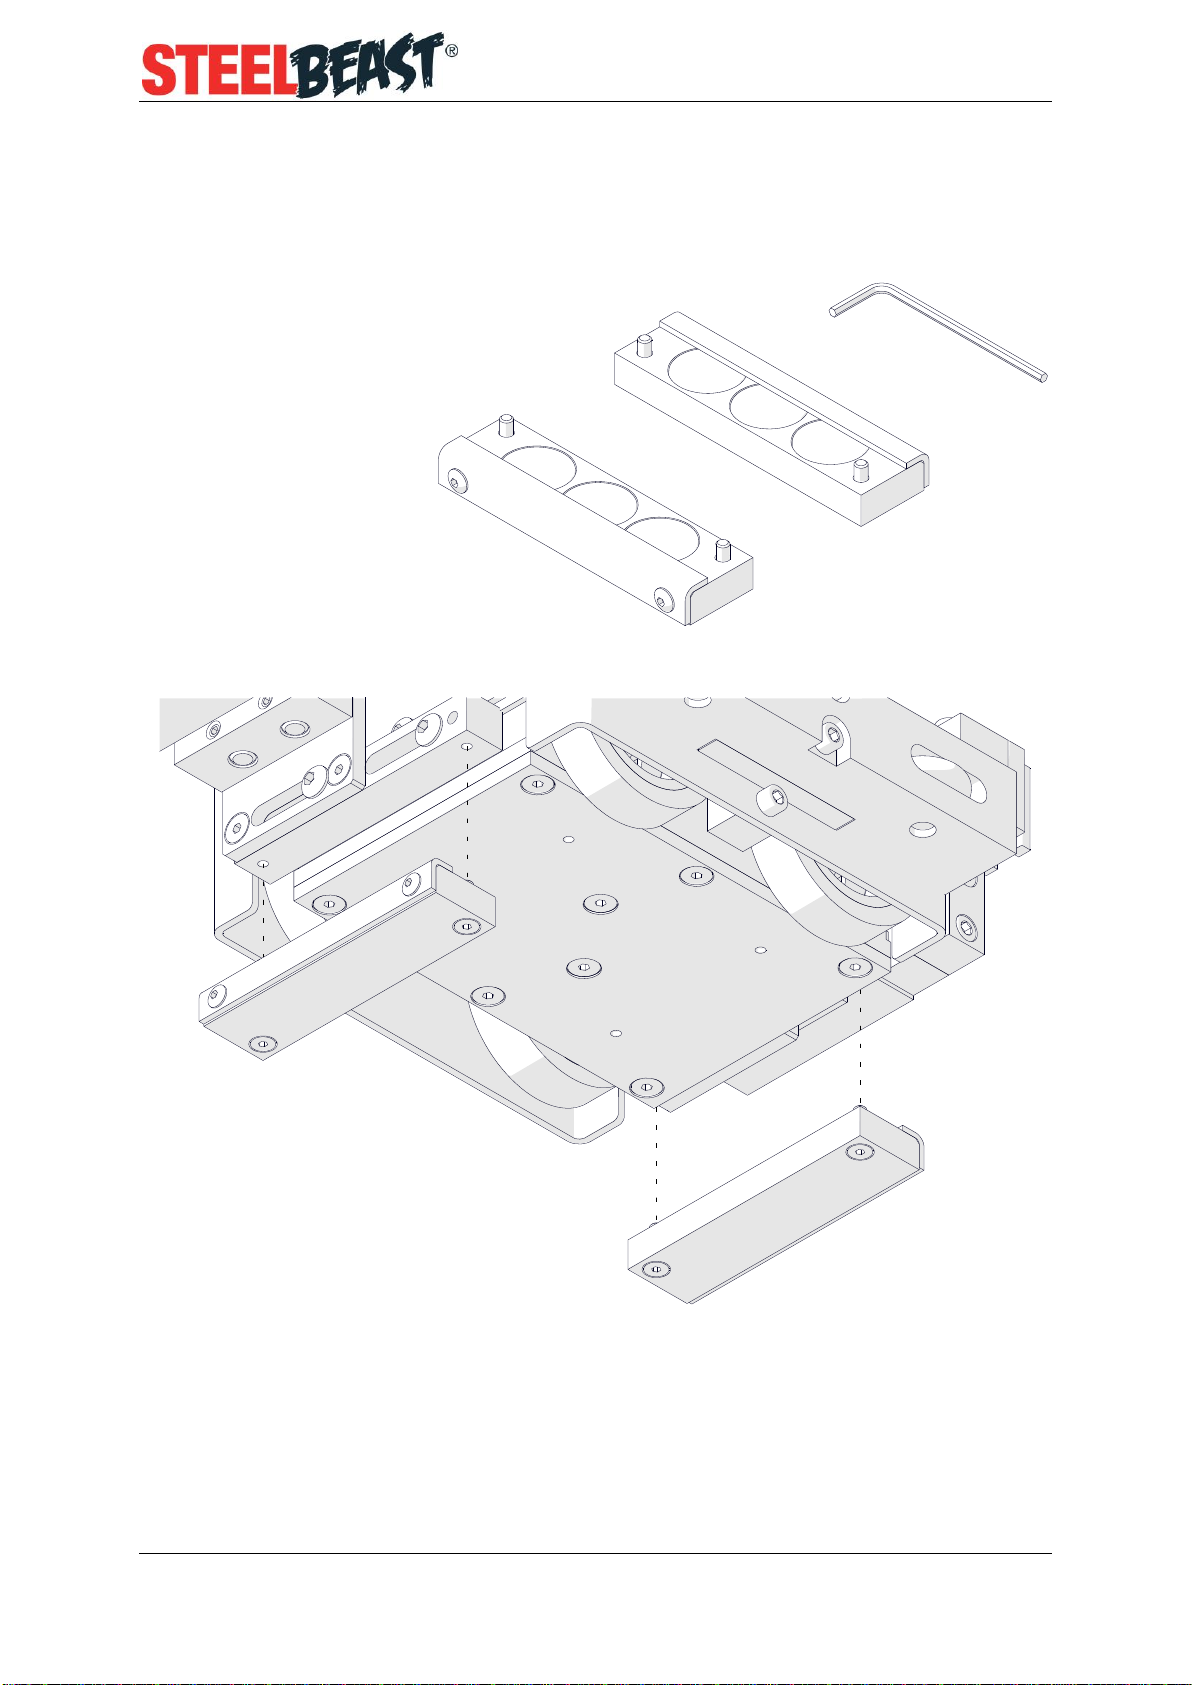
5.4. Auxiliary magnet blocks
The blocks increase the clamping force of the carriage.
Use the 2.5 mm hex wrench to attach the blocks to the carriage.
Part number:
ZST-0655-09-00-00-0
(holding force: 2×50 N)

Mini Spider
This document is protected by copyrights.
Copying, using, or distributing without permission of JEI Group Ltd is prohibited.
16
5.5. Cable anchor
Attaches the gas cables and the power cord to decrease the load applied on the
torch holder. Install the anchor on the carrying handle.
Part number:
PDT-0526-21-00-00-0

Mini Spider
This document is protected by copyrights.
Copying, using, or distributing without permission of JEI Group Ltd is prohibited.
17
6. WIRING DIAGRAM

Mini Spider
This document is protected by copyrights.
Copying, using, or distributing without permission of JEI Group Ltd is prohibited.
18
7. DECLARATION OF CONFORMITY
EC Declaration of Conformity
We
JEI Group Ltd
T/A JEI Drilling & Cutting Solutions Ltd
Unit 21 Empire Business Park
Enterprise Way, Burnley
Lancashire, BB12 6LT
declare with full responsibility that:
Mini Spider Welding Carriage
is manufactured in accordance with the following standards:
•EN 12100
•EN 60204-1
•EN 60974-10
and satisfies safety regulations of the guidelines: 2014/30/EC, 2014/35/EC, 2006/42/EC.
Person authorized to compile the technical file:
David McFadden, Managing Director
Burnley, 11 October 2018 ___________________________
David McFadden

Mini Spider
This document is protected by copyrights.
Copying, using, or distributing without permission of JEI Group Ltd is prohibited.
19
8. QUALITY CERTIFICATE
Machine control card
Mini Spider Welding Carriage
Serial number .....................................................................
Electric test
Type of test
Result
Name of tester
Insulation electrical strength test
(1000 V, 50 Hz)
...................................
Date
Continuity test of the protective earth system
…........ Ω
...................................
Signature
Quality control .................................................
Adjustments, inspections
Quality control .................................................

Mini Spider
This document is protected by copyrights.
Copying, using, or distributing without permission of JEI Group Ltd is prohibited.
20
9. WARRANTY CARD
WARRANTY CARD No...........
.......................................................................... in the name of Manufacturer warrants
the Mini Spider Welding Carriage to be free of defects in material and workmanship
under normal use for a period of 12 months from the date of sale.
This warranty does not cover wheels as well as damage or wear that arise from
misuse, accident, tempering, or any other causes not related to defects in workmanship
or material.
Date of production.........................................................................................................
Serial number................................................................................................................
Date of sale ...................................................................................................................
Signature of seller..........................................................................................................
1.00 / 22 October 2018
WE RESERVE THE RIGHT TO MAKE CHANGES IN THIS MANUAL WITHOUT NOTICE
Table of contents
Other Promotech Welding System manuals

Popular Welding System manuals by other brands

Migatronic
Migatronic OMEGA2 300 user guide

Oerlikon
Oerlikon CITOTIG 250 AC/DC Safety Instructions for Operation and Maintenance

Everlast
Everlast Power i-MIG 315 Operator's manual

Longevity
Longevity ForceCut LP-100 operating manual

Thermal Arc
Thermal Arc FABRICATOR 210 Service manual

Miller
Miller Multimatic 220 AC/DC quick reference


BOC
BOC Smoothcut Plasma 40 operating manual

Badger Welder
Badger Welder M22 Operation manual

Everlast
Everlast POWERARC 141STL Operator's manual

Lincoln Electric
Lincoln Electric Power Wave C300 Operator's manual

Abicor Binzel
Abicor Binzel TIG ABITIG MT operating instructions

Rothenberger
Rothenberger ROWELD P 250 A Instructions for use