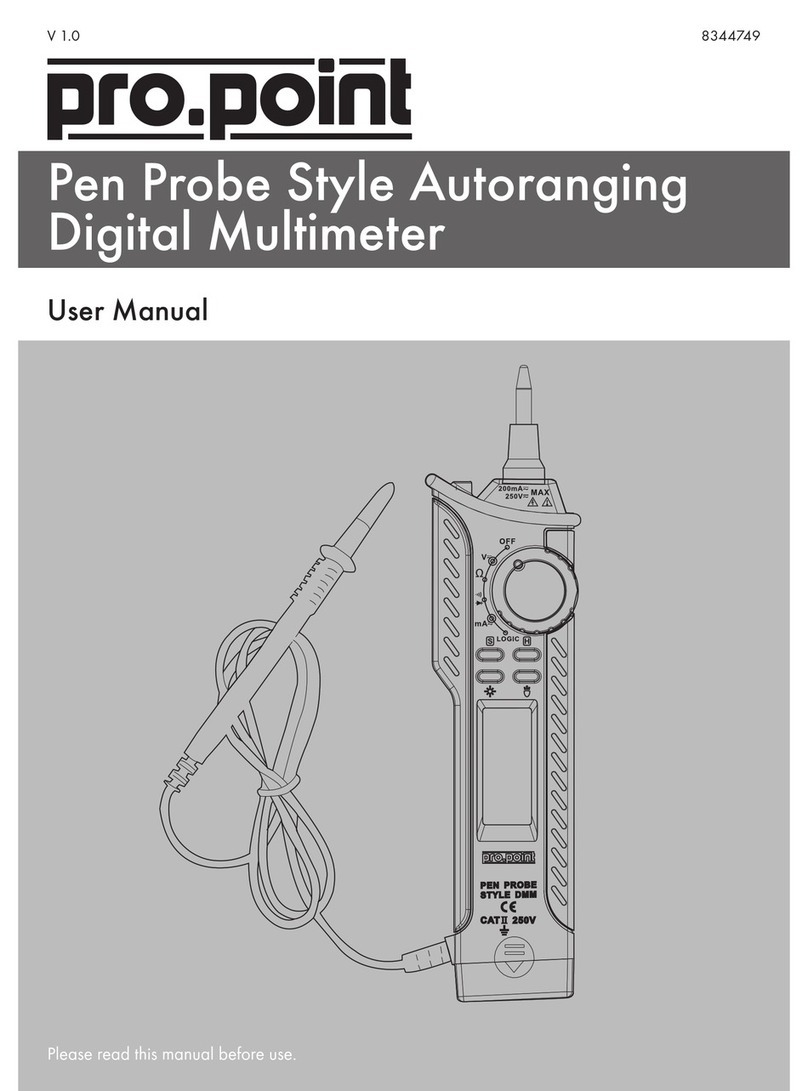
PROPOINT 9011495 User manual

V1.0 9011495
Please read and understand all instructions before use. Retain this manual for future reference.
.

9011495 Pen-Probe-Style Autoranging Digital Multimeter V1.0
2 For technical questions call 1-800-665-8685
Display 3-1/2 digit LCD with a maximum reading of 1,999
Polarity Auto polarity indication
Over-range Indication "OL" shown on the display
Sampling Rate 3 times per second
Power Single standard 9V battery
Low Battery Indication is displayed when the battery voltage drops
below the operating voltage
Auto Power Off If the meter is not operated for about 15 minutes, it
will turn off automatically and stay in Sleep mode.
Operating Temperature
0°C to 40°C, < 75%RH
Storage Temperature -20°C to 60°C, < 85%RH
Accessories 9V battery, owner's manual
FUNCTION
RANGE RESOLUTION
DC Voltage 200mV ± (0.5% + 2)
2V - 20V - 200V ± (0.7% + 2)
300V ± (0.8% + 2)
Input impedance: about 10M
Max. permitted input voltage: 300V DC
AC Voltage 2V ± (0.8% + 3)
20V - 200V ± (1.2% + 3)
300V ± (1.5% + 3)
Input impedance: about 10M
Frequency: 40Hz - 400Hz
Max. permitted input voltage: 300V AC

V1.0 Pen-Probe-Style Autoranging Digital Multimeter 9011495
Visit www.princessauto.com for more information 3
DC Current 20mA ± (1.2% + 3)
200mA
Max. permitted input current: 200mA DC, overcurrent will
blow the fuse
AC Current 20mA ± (1.5% + 5)
200mA
Frequency: 40Hz - 400Hz
Max. permitted input current: 200mA AC, overcurrent will
blow the fuse
Resistance 200 ± (1.2% + 3)
2k , 20k , 200k , 2M ± (1.0% + 2)
20M ± (2.0% + 2)
Diode test Open circuit voltage: approximately 1.5V
Test current: approximately 0.5mA
Audible
continuity Built-in buzzer sounds if resistance is less than 50 .
Built-in buzzer might sound if resistance is between 50 and
120 .
Built-in buzzer does not sound if resistance is greater
than 120 .
Please familiarize yourself with the hazard notices found in this manual.
A notice is an alert that there is a possibility of property damage, injury
or death if certain instructions are not followed.
DANGER! This notice indicates an immediate and specific hazard that
will result in severe personal injury or death if the proper
precautions are not taken.
WARNING! This notice indicates a specific hazard or unsafe practice
that could result in severe personal injury or death if the
proper precautions are not taken.
CAUTION! This notice indicates a potentially hazardous situation that
may result in minor or moderate injury if proper practices are
not taken.

9011495 Pen-Probe-Style Autoranging Digital Multimeter V1.0
4 For technical questions call 1-800-665-8685
NOTICE! This notice indicates that a specific hazard or unsafe
practice will result in equipment or property damage, but
not personal injury.
This compact digital multimeter is used for measuring DC and AC
voltage, DC and AC current, resistance, diode, continuity, and logic level.
This meter was designed for the homeowner, hobbyist, and professional
needing to make electrical and electronic equipment measurements.
WARNING! Read and understand all instructions before using this
tool. Keep this manual for the safety warnings and precautions,
operating, inspection and maintenance instructions. When using
this tool, basic precautions should always be followed to reduce
the risk of personal injury and/or damage to the equipment. Note
that when this manual refers to a part number, it refers to the
parts list included. Before allowing someone else to use this tool,
make sure they are aware of all safety information.
1. Keep your work area clean and well lit. Cluttered and dark areas
invite accidents.
2. Operate in a safe work environment. Do not use machines or air
tools in damp or wet locations. Do not expose to rain.
3. Keep children, bystanders and visitors away from the work area. Do
not let them handle tools or extension cords. No one should be in
the work area if they are not wearing suitable protective equipment.
4. Store unused equipment. When not in use, tools must be stored in
a dry location to prevent rust. Always lock up tools and keep them
out of reach of children.
1. Dress properly, wear protective equipment.
2. Do not over reach; keep proper footing and balance at all times.
Proper footing and balance enables better control of the tool in
unexpected situations.

V1.0 Pen-Probe-Style Autoranging Digital Multimeter 9011495
Visit www.princessauto.com for more information 5
3. Stay alert, watch what you are doing and use your common sense.
Do not operate any machine or tool when you are tired, under the
influence of drugs, alcohol or medications.
This meter has been designed according to IEC-61010 concerning
electronic measuring instruments with a measurement category III (CAT
III 300V) and pollution degree 2. Measuring Category III (CAT III) is for
measurement performed on circuits directly connected to low voltage
installation (for example, measurements on household appliances,
portable tools, and similar equipment). Do not use this meter for
measurements within Measurement Category IV.
WARNING! To avoid possible electric shock or personal injury,
follow these guidelines:
1. Ensure that the batteries are correctly placed in the battery case
and connected properly.
2. Do not operate the meter with the battery cover or portions of the
case removed or loosened.
3. Do not use the meter if it is damaged. Before you use the meter,
inspect the case. Inspect the test leads for damaged insulation or
exposed metal. Check test lead continuity. Damaged leads should
be replaced.
4. Do not use the meter if it operates abnormally. Protection may be
impaired. When in doubt, have the meter serviced an authorized
service center.
5. Do not operate the meter around explosive gas, vapor, or dust.
6. Do not apply a voltage or current higher that the selected range’s
upper limit between terminals.
7. Before use, verify the meter’s operation by measuring a known voltage.
8. When measuring current, turn off power to the circuit before
connecting the meter to the circuit. Remember to place the meter
in series with the circuit.
9. Use caution when working above 30V AC rms, 42V peak, or 60V
DC. Such voltages pose a shock hazard.

9011495 Pen-Probe-Style Autoranging Digital Multimeter V1.0
6 For technical questions call 1-800-665-8685
10. Do not touch any naked conductor with hand or skin and do not
ground yourself.
11. Connect the black test lead before connecting the red test lead. When
disconnecting test leads, always disconnect the red test lead first.
12. Remove the test leads from the meter before opening the battery
cover or the case.
13. Replace the battery as soon as the low battery indicator appears
on the LCD display.
CAUTION! To avoid possible damage to the meter or to the
equipment under test, follow these guidelines:
1. Disconnect circuit power and discharge all capacitors before
measuring resistance or continuity.
2. Select the proper function and range for your measurement.
3. Before measuring current, turn off the power to the circuit before
connecting the meter to the circuit.
4. Before rotating the range switch to change functions, disconnect
the test leads from the circuit under test.
5. Remove the test leads from the meter before opening the battery
cover or the case.
6. When finished measuring, switch off the power. Be sure to remove
the batteries when storing for long periods to avoid leakage
problems.
7. Do not use or store this instrument in a place of direct sunlight,
high temperature and high humidity.
1. Carefully remove the parts and accessories from the box.
2. Make sure that all items listed in the parts lists are included.
3. Inspect the parts carefully to make sure the tool was not damaged
while shipping.
4. Do not discard the packaging material until you have carefully
inspected and satisfactorily operated the tool.

V1.0 Pen-Probe-Style Autoranging Digital Multimeter 9011495
Visit www.princessauto.com for more information 7
WARNING! If any part is missing, do not operate the tool until the
missing parts are replaced. Failure to do so could result in
serious personal injury.
1. Display
2. Button
To enable the
flashlight function,
press and hold down
this button. To turn off
the flashlight, release
the button.
3. Button
To hold the present
reading on the display,
press this button. will appear on the display as an indicator. To
exit the hold mode, press this button again. will no longer appear
on the display. This button can also be used to wake the meter
from sleep mode.
4. Function Switch
Used to select the required function or range, as well as turn off the
meter. To preserve battery life, set this switch to the “OFF” position
when the meter is not is use.
5. Test Probe
Input probe (positive polarity) for the following tests: voltage,
current (< 200mA), resistance, and diode.
6. Flashlight LED
Used for illumination.

9011495 Pen-Probe-Style Autoranging Digital Multimeter V1.0
8 For technical questions call 1-800-665-8685
7. Button
Used to switch the meter between:
• DC voltage and AC voltage measurements
• DC current and AC current measurements
• Diode and continuity tests
8. Button
To turn on or off the backlight, press and hold down this button for
about 1 second. The backlight will turn off automatically about 15
seconds after being turned on.
9. Probe of the Black Test Lead (Negative Polarity)
10. Black Test Lead
1. Set the function switch to the position.
2. Press the button to select DC voltage measurement.
Appears on the display.
3. Connect the test probe and the black test lead across the source
or circuit to be measured.
4. The display shows the reading and the polarity of the test probe
connection.
1. Set the function switch to the position.
2. Press the button to select AC voltage measurement.
Appears on the display.
3. Connect the test probe and the black test lead across the source
or circuit to be measured.
4. The display shows the reading.
1. Set the function switch to the position.
2. Press the button to select DC current measurement.
Appears on the display.

V1.0 Pen-Probe-Style Autoranging Digital Multimeter 9011495
Visit www.princessauto.com for more information 9
3. Connect the test probe and the black test lead in series with the
circuit to be measured.
4. The display shows the reading and the polarity of the test
probe connection.
1. Set the function switch to the position.
2. Press the button to select AC voltage measurement.
Appears on the display.
3. Connect the test probe and the black test lead in series with the
circuit to be measured.
4. The display shows the reading.
1. Make sure the load to be tested is without power and all capacitors
are fully discharged.
2. Set the function switch to the position.
3. Connect the test probe and the black test lead across the load to
be measured.
4. The display shows the reading.
IMPORTANT! If the resistance is more than 1M, it may take
several seconds to stabilize the reading. This is normal for high
resistance measurements.
IMPORTANT! If the probes are open, overload indication will be
shown on the display.
1. Set the function switch to the position.
2. Press the button until appears on the display.
3. Connect the test probe to the anode of the diode and the black test
lead to the cathode of the diode being measured.
4. Read the approximate forward voltage drop of the diode on
the display.

9011495 Pen-Probe-Style Autoranging Digital Multimeter V1.0
10 For technical questions call 1-800-665-8685
1. Turn off the power to the circuit under test, and then discharge all
capacitors and inductors.
2. Set the function switch to the position.
3. Press the button until appears on the display.
4. Connect the test probe and the black test lead across the circuit
being measured.
5. If the resistance of the circuit is less than 50 , the built-in buzzer
will sound.
1. Set the function switch to the position.
2. Connect the black test lead to the ground terminal of the circuit to
be measured and the test probe to the required test point of
the circuit.
3. If the level of the test point is more than or equal to 2.3 ± 0.2V, the
display will show “HI ” and the voltage value. The meter will sound
discontinuously.
4. If the level of the test point is less than or equal to 0.8 ± 0.2V, the
display will show “LO ” and the voltage value. The meter will
sound continuously.
5. If the probes are open, the display will show a TTL logic levels
approximate mid value (1.0 to 1.4V).
CAUTION! Before attempting to open the case of the instrument,
be sure to disconnect the test lead and the test probe from any
energized circuits to avoid shock hazard.
When appears on the display, the battery is low and should be
replaced immediately. To replace the battery, follow these steps:
1. Remove the screws from the battery cover, and then remove the
battery cover.
2. Replace the old battery with new battery of the same type (9V).
3. Reinstall the battery cover and the screws.

V1.0 Pen-Probe-Style Autoranging Digital Multimeter 9011495
Visit www.princessauto.com for more information 11
CAUTION! Before attempting to open the case of the instrument,
be sure to disconnect test leads from any energized circuits to
avoid shock hazard.
The fuses will rarely need replacement and usually are blown as a result
of an operator error. If the meter does not work, you should replace the
fuses. The meter uses a fuse with a specified rating of 250mA L 250V.
To replace the fuses, follow these steps:
1. Set the function switch to the OFF position.
2. Remove the battery
door (c).
3. Remove part “a” by
turning it.
4. Remove the screws
on the back cover,
and then remove
the back cover (b).
5. Remove the fuse by gently prying one end loose, then slide the
fuse out of its bracket.
6. Install a new fuse of the same rating.
7. Reinstall the back cover, battery door, part “a” and all the screws.
IMPORTANT! If the test lead is not placed in its correct position,
the back cover cannot be installed.
Before making any adjustments or changing any accessory, turn off the
tool and remove the batteries.
1. Check for damaged parts. Before using any tool, any part that
appears to be damaged should be carefully checked to determine
that it will operate properly and perform its intended functions.
Check for alignment and binding of moving parts, for broken parts
or mounting fixtures, or for any other condition that may affect
proper operation. Any part that is damaged should be repaired or
replaced by a qualified technician.

9011495 Pen-Probe-Style Autoranging Digital Multimeter V1.0
12 For technical questions call 1-800-665-8685
2. When servicing, use only identical replacement parts. Only use
accessories intended for use with this tool. Replace damaged parts
immediately.
3. Keep the tool clean. Wipe the tool with a clean cloth and
periodically blow out all areas with compressed air. If compressed
air is not available, use a brush to remove dust from all areas. Do
not use harsh chemicals or solvents to clean the tool. These
chemicals could seriously damage the plastic housing.
4. Regularly inspect all mountings and screws to ensure tightness.
Should any screws become loose, tighten immediately.
5. If repairs are required, bring your tool to an authorized
service center.
If your tool has become damaged beyond repair, do not throw it out.
Bring it to the appropriate recycling facility.

V1,0 9011495
Vous devez lire et comprendre toutes les instructions avant d'utiliser l'appareil. Conservez ce
manuel afin de pouvoir le consulter plus tard.
.

9011495 Multimètre numérique à commutation automatique V1,0
de calibre, style sonde stylo
2 En cas de questions techniques, appelez le 1-800-665-8685
Affichage Afficheur ACL de 3 1/2 chiffres, avec
une lecture maximale de 1 999
Polarité Indication automatique de polarité
Indication de dépassement de plage
« OL » affiché à l'écran
Fréquence d'échantillonnage 3 fois par seconde
Puissance Une pile standard de 9 V
Affichage de tension faible de pile est affichée lorsque la tension de
la pile chute plus bas que la tension
de fonctionnement
Mise hors tension automatique Si le multimètre ne fonctionne pas
pendant environ 15 minutes, il
s'arrêtera automatiquement et entrera
en mode veille.
Température de fonctionnement 0 °C à 40 °C, < 75 % HR
Température d'entreposage -20 °C à 60 °C, < 85 % HR
Accessoires Pile 9 V, manuel du propriétaire
FONCTION PLAGE R SOLUTION
Tension c.c. 200 mV ± (0,5 % + 2)
2 V à 20 V à 200 V ± (0,7 % + 2)
300 V ± (0,8 % + 2)
Impédance d'entrée : approximativement 10 M
Tension maximale d'entrée permise : 300 V c.c.

V1,0 Multimètre numérique à commutation automatique 9011495
de calibre, style sonde stylo
Visitez www.princessauto.com pour plus d'informations 3
Tension c.a. 2 V ± (0,8 % + 3)
20V à 200V ± (1,2 % + 3)
300 V ± (1,5 % + 3)
Impédance d'entrée : approximativement 10 M
Fréquence : 40 Hz à 400 Hz
Tension maximale d'entrée permise : 300 V c.a.
Courant c.c. 20 mA ± (1,2 % + 3)
200 mA
Courant maximum d'entrée permis : 200 mA c.c.;
surintensité grillera le fusible
Courant c.a. 20 mA ± (1,5 % + 5)
20 0mA
Fréquence : 40 Hz à 400 Hz
Courant maximum d'entrée permis : 200 mA c.a.;
surintensité grillera le fusible
Résistance 200 ± (1,2 % + 3)
2 k , 20 k , 200 k ,
2 M
± (1,0 % + 2)
20 M ± (2,0 % + 2)
Vérification de
la diode Tension de circuit ouvert : approximativement 1,5 V
Courant d'essai : approximativement 0,5 mA
Continuité
sonore
L'avertisseur sonore intégré retentit si la résistance est
inférieure à 50 .
L'avertisseur sonore intégré pourrait retentir si la
résistance est entre 50 et 120 .
L'avertisseur sonore intégré ne retentit pas si la
résistance est supérieure à 120 .

9011495 Multimètre numérique à commutation automatique V1,0
de calibre, style sonde stylo
4 En cas de questions techniques, appelez le 1-800-665-8685
Veuillez-vous familiariser avec les avis de danger qui sont présentés dans
ce manuel. Un avis est une alerte indiquant qu'il existe un risque de
dommage à la propriété, de blessure ou de décès si on ne respecte pas
certaines instructions.
DANGER ! Cet avis indique un risque immédiat et particulier qui
entraînera des blessures corporelles graves ou
même la mort si on omet de prendre les précautions
nécessaires.
AVERTISSEMENT ! Cet avis indique un risque particulier ou une pratique
non sécuritaire qui pourrait entraîner des blessures
corporelles graves ou même la mort si on omet de
prendre les précautions nécessaires.
ATTENTION ! Cet avis indique une situation possiblement
dangereuse qui peut entraîner des blessures
mineures ou modérées si on ne procède pas de la
façon recommandée.
AVIS ! Cet avis indique un risque particulier ou une pratique
non sécuritaire qui entraînera des dommages au
niveau de l'équipement ou des biens, mais non des
blessures corporelles.
Ce multimètre numérique compact sert à mesurer la tension c.c. et c.a.,
le courant c.c. et c.a., la résistance, la diode, la continuité et le niveau
logique. Ce multimètre a été conçu pour la maison, les passe-temps et
les professions qui nécessitent de faire des mesures sur les
équipements électriques et électroniques.
AVERTISSEMENT ! Veuillez lire et comprendre toutes les
instructions avant d’utiliser cet outil. Conservez ce manuel qui
contient les avertissements et les mesures de sécurité, les
instructions de fonctionnement, d’inspection et d’entretien.

V1,0 Multimètre numérique à commutation automatique 9011495
de calibre, style sonde stylo
Visitez www.princessauto.com pour plus d'informations 5
Lorsque vous utilisez cet outil, vous devez toujours prendre les
précautions de base pour réduire le risque de blessures
corporelles et/ou de dommage à l’équipement. Veuillez noter
que lorsque ce manuel fait référence à un numéro de pièce, il fait
référence à la liste des pièces ci-incluse. Avant de permettre à un
autre individu d’utiliser cet outil, assurez-vous qu’il connaît
toutes les consignes de sécurité.
1. 1. Gardez votre aire de travail propre et bien éclairée. Les endroits
encombrés et sombres sont une invitation aux accidents.
2. Travaillez dans un environnement de travail sécuritaire. N’utilisez
pas les appareils ou les outils pneumatiques dans des endroits
humides ou mouillés. Gardez l’outil à l’abri de la pluie.
3. Gardez les enfants, les spectateurs et les visiteurs à l’écart de l’aire
de travail. Ne les laissez pas manipuler les outils ou les rallonges
de câble. Aucune personne ne doit se trouver dans l’aire de travail
à moins de porter l’équipement de protection approprié.
4. Entreposez l’équipement non utilisé. Lorsqu’ils ne sont pas en
usage, les outils doivent être entreposés dans un endroit sec pour
prévenir la rouille. Gardez toujours les outils dans un endroit
verrouillé et hors de portée des enfants.
1. Portez des vêtements appropriés et de l’équipement de protection.
2. Ne vous étirez pas trop loin; restez stable et en équilibre en tout
temps. Une stabilité et un équilibre appropriés permettent d’avoir un
meilleur contrôle de l’outil en cas de situations inattendues.
3. Restez alerte, portez attention à vos gestes et faites preuve de bon
sens. N’utilisez pas d’appareil ni d’outil si vous êtes fatigué ou sous
l’effet de drogues, d’alcool ou de médicaments.1. Portez toujours
des lunettes antiprojections qui offrent une protection frontale et
latérale pour les yeux. L'équipement de protection des yeux devrait
être conforme à la norme CSA Z94.3-07 ou ANSI Z87.1 fonction
du type de travail effectué.

9011495 Multimètre numérique à commutation automatique V1,0
de calibre, style sonde stylo
6 En cas de questions techniques, appelez le 1-800-665-8685
Ce multimètre a été conçu conformément à la norme IEC-61010 sur les
instruments de mesure électroniques de la catégorie de mesure III (CAT
III 300 V) et du niveau de pollution 2. La catégorie de mesure III (CAT
III) concerne les mesures effectuées sur les circuits directement
connectés à une installation à basse tension (par exemple, mesures
d’appareils électroménagers, d’outils portatifs et d’équipement
similaire). N’utilisez pas ce multimètre pour des mesures se trouvant
dans la catégorie de mesure IV.
AVERTISSEMENT ! Pour éviter les chocs électriques ou les
blessures, suivez ces directives :
1. Assurez-vous que les piles sont bien placées dans le boîtier des
piles et connectées correctement.
2. Ne faites pas fonctionner le multimètre si le couvercle de pile ou
des parties du boîtier ont été enlevés ou desserrés.
3. N’utilisez pas le multimètre s’il est endommagé. Avant d’utiliser le
multimètre, vérifiez le boîtier. Vérifiez si l’isolant est endommagé ou
si le métal est exposé sur les fils d’essai. Vérifiez la continuité des
fils d’essai. Les fils endommagés devraient être remplacés.
4. N’utilisez pas le multimètre s’il ne fonctionne pas normalement. La
protection peut être diminuée. En cas de doute, faites vérifier le
multimètre par un centre de réparation autorisé.
5. Ne faites pas fonctionner le multimètre près des poussières,
vapeurs ou gaz explosifs.
6. N’utilisez pas une tension ou un courant supérieurs à la maximale
haute de la plage sélectionnée entre les bornes.
7. Avant son utilisation, vérifiez le fonctionnement du multimètre en
mesurant une tension connue.
8. Lorsque vous mesurez l’intensité, coupez l’alimentation du circuit
avant de brancher le multimètre au circuit. N’oubliez pas de
brancher le multimètre en série avec le circuit.
9. Soyez prudent lorsque vous travaillez dans des conditions qui
dépassent 30 V c.a. rms, 42 V de pointe ou 60 V c.c. De telles
tensions constituent un risque de choc.

V1,0 Multimètre numérique à commutation automatique 9011495
de calibre, style sonde stylo
Visitez www.princessauto.com pour plus d'informations 7
10. Ne touchez aucun conducteur dénudé avec la main ou la peau et
ne soyez pas raccordé à la masse.
11. Branchez le fil d’essai noir avant de brancher le fil d’essai rouge.
Lors du débranchement des fils d’essai, débranchez toujours le fil
d’essai rouge en premier.
12. Enlevez les fils d’essai du multimètre avant d’ouvrir le couvercle de
pile ou le boîtier.
13. Remplacez la pile aussitôt que l’indicateur de pile faible apparaît à
l’écran ACL.
ATTENTION ! Pour éviter d’endommager le multimètre ou
l’équipement en cours d’essai, suivez ces directives :
1. Débranchez l’alimentation du circuit et déchargez tous les
condensateurs avant de mesurer la résistance ou la continuité.
2. Utilisez la fonction et la plage appropriées pour vos mesures.
3. Avant de mesurer l’intensité, coupez l’alimentation du circuit avant
de brancher le multimètre au circuit.
4. Avant de tourner le sélecteur de plage pour changer les fonctions,
débranchez les fils d’essai du circuit à tester.
5. Enlevez les fils d’essai du multimètre avant d’ouvrir le couvercle de
pile ou le boîtier.
6. Lorsque vous avez fini les mesures, coupez l’alimentation. Assurez-
vous de retirer les piles pendant les longues périodes
d’entreposage pour éviter les problèmes de fuite.
7. N’utilisez pas et n’entreposez pas cet instrument dans un lieu
exposé à la lumière directe du soleil, aux températures élevées ou
à un taux d’humidité élevé.
1. Retirez soigneusement les pièces et les accessoires de la boîte.
2. Assurez-vous que tous les articles figurant sur les listes de pièces
sont inclus.
3. Inspectez les pièces attentivement pour vous assurer que l’outil n’a
pas été endommagé pendant son transport.

9011495 Multimètre numérique à commutation automatique V1,0
de calibre, style sonde stylo
8 En cas de questions techniques, appelez le 1-800-665-8685
4. Ne jetez pas le matériel d’emballage avant d’avoir examiné
attentivement l’outil et de l’avoir fait fonctionner avec succès.
AVERTISSEMENT ! Si des pièces sont manquantes, ne faites pas
fonctionner l’outil avant que les pièces manquantes aient été
remplacées. Le non-respect de cet avertissement peut entraîner
de graves blessures corporelles.
1. Affichage
2. Bouton
Pour activer la fonction
lampe de poche,
appuyez sur ce bouton
et maintenez-le enfoncé.
Pour éteindre la lampe
de poche, relâchez
le bouton.
3. Bouton
Pour garder la lecture
actuelle sur l’afficheur, appuyez sur ce bouton. apparaîtra à
l’écran comme un indicateur. Pour quitter le mode de maintien,
appuyez de nouveau sur ce bouton. n’apparaîtra plus à l’écran.
Ce bouton peut aussi être utilisé pour activer le multimètre lorsqu’il
est en mode veille.
4. Sélecteur de fonction
Utilisé pour sélectionner la fonction ou la plage requise ainsi que
pour éteindre le multimètre. Pour conserver la durée de vie de la
pile, réglez ce commutateur à la position « OFF » (arrêt) lorsque le
multimètre n’est pas en service.
5. Sonde d’essai
Sonde d’entrée (polarité positive) pour les mesures suivantes :
tension, courant (< 200 mA), résistance et diode.
Table of contents
Languages:
Other PROPOINT Multimeter manuals