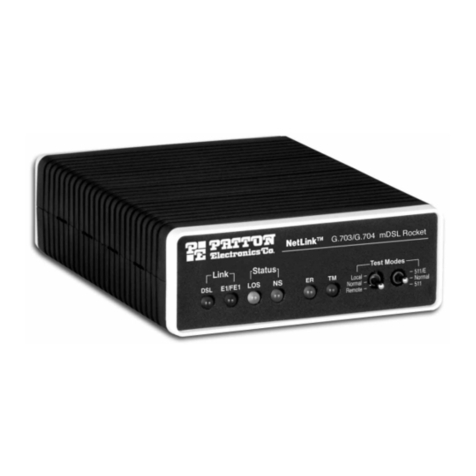
Proscend 5099N Series User manual

5099N Series
G.SHDSL.bis NTU
User Manual
V1.00

5099N Series User Manual
II
Tables of Contents
1Introduction.................................................................................................................. 1
1.1 Features................................................................................................................................. 1
1.2 Specification........................................................................................................................... 2
1.3 Applications............................................................................................................................ 2
2Getting to know about the SHDSL.bis NTU ............................................................... 3
2.1 Front Panel............................................................................................................................. 3
2.1.1 E1 interface model............................................................................................................. 3
2.1.2 Serial interface model........................................................................................................ 3
2.2 Rear Panel ............................................................................................................................. 5
2.2.1 E1 Interface Model............................................................................................................. 5
2.2.2 Serial Interface Model........................................................................................................ 6
2.3 Installation.............................................................................................................................. 7
2.3.1 E1 Interface........................................................................................................................ 8
2.3.2 Serial Interface................................................................................................................... 9
2.4 Models vs. Interface modes support.................................................................................... 10
2.5 CAUTION..............................................................................................................................11
3Configuration with Keypad and LCD.........................................................................13
3.1 Keypad................................................................................................................................. 13
3.2 Main menu Tree................................................................................................................... 13
3.3 Menu tree for SHOW STATUS............................................................................................. 14
3.4 Menu tree for SHOW STATISTICS...................................................................................... 16
3.4.1 Show Statistic on E1 Interface......................................................................................... 18
3.5 Menu tree for SYSTEM SETUP........................................................................................... 19
3.5.1 SETUP INTERFACE........................................................................................................ 19
3.5.2 Sub-Menu tree for SETUP SHDSL.................................................................................. 20
3.5.3 Sub-Menu tree for SETUP E1 Interface .......................................................................... 21
3.5.4 Sub-Menu tree for SETUP SERIAL Interface.................................................................. 25
3.5.5 Application of STU-R configuration follow STU-C........................................................... 28
3.6 Sub-menu tree for REBOOT SYSTEM................................................................................ 28
3.7 Sub-Menu tree for DISGNOSTIC......................................................................................... 29
3.7.1 Loopback function............................................................................................................ 29
3.7.2 BER Test function ............................................................................................................ 32
4Parameters Table........................................................................................................33
4.1 NTU and SHDSL parameters............................................................................................... 33
4.2 E1 parameters...................................................................................................................... 33
4.3 Serial parameters................................................................................................................. 33
5Configuration with Console Port...............................................................................34
5.1 Login Procedure................................................................................................................... 35
5.2 Window structure ................................................................................................................. 36

5099N Series User Manual
III
5.3 Main Menu Summary........................................................................................................... 37
5.4 Configuration........................................................................................................................ 39
5.4.1 Configure NTU Interface.................................................................................................. 40
5.4.2 Configure SHDSL parameters......................................................................................... 41
5.4.3 Configure E1 parameters................................................................................................. 44
5.4.4Configure Serial parameters............................................................................................ 55
5.4.5 Remote configuration....................................................................................................... 60
5.4.6 Restore factory default..................................................................................................... 61
5.5 Reboot.................................................................................................................................. 62
5.6 View the system status ........................................................................................................ 63
5.6.1 View the SHDSL status.................................................................................................... 63
5.6.2 View the Interface status ................................................................................................. 64
5.6.3 View the Statistics............................................................................................................ 67
5.7 View System Configuration.................................................................................................. 71
5.7.1Show system Information ................................................................................................ 72
5.7.2 Show system with listing format....................................................................................... 73
5.7.3 Show system with script format....................................................................................... 74
5.8 Upgrade................................................................................................................................ 76
5.9 Diagnostic............................................................................................................................. 80
5.10 Exit ....................................................................................................................................... 83
6Appendix.....................................................................................................................84
6.1 Abbreviation ......................................................................................................................... 84
6.2 Serial Interface Pin Assignments ......................................................................................... 87
6.3 V.35 DB25(M) to M.34(F) adaptor Cable ............................................................................. 88
6.4 X.21 DB25(M) to DB15(F) adaptor Cable............................................................................ 90
6.5 Console Cable...................................................................................................................... 92
6.6 E1 Balanced Cable .............................................................................................................. 93
6.7 E1 Unbalanced Cable.......................................................................................................... 94
6.8 Ethernet Cable ..................................................................................................................... 95
6.9 DSL Cable............................................................................................................................ 96
6.10 Power Cord .......................................................................................................................... 97
6.11 Illustration of Loopback connection device (E1) .................................................................. 98
6.12 Illustration of Loopback connection device (Serial) ............................................................. 99

5099N G.SHDSL.BIS NTU - UM V0.08
1
1Introduction
The G.SHDSL.bis NTU offers two different interfaces (E1 and Serial) connecting customers to
high-speed TDM services. This series has six models types as follows:
E1 interface model: 5099N-**/*W/E1
It offers two different ways to connect customers ahigh-speed TDMservices with two G.703
E1 interfaces (Balanced 120Ω RJ45 jack and Unbalanced 75Ω dual BNCs). The G.703
interface will carry from 64kbps to 2.048Mbps.
Serial interface model: 5099N-**/*W/SER
It offers the customers premise a high-speed TDM service with a DB25 interface. The
industry standard DB25 interface can be configured as a V.35/RS530 or V.36/X.21
connection. The DB25 interface can transfers data up to 2.304 Mbps (for 2-wire model).
They can be configured and managed via EOC, or menu-driven VT100 compatible
Asynchronous Terminal Interface, either locally or remotely.
The G.SHDSL.Bis NTU is equipped with an auto rate capability that identifies the maximum
line rate supported by the copper loop. This powerful automatic configuration capability makes
installation and service provisioning simple and painless. Further flexibility is provided as the
ability to manually set the maximum NTU speed at different levels for different customer-
tailored service offerings.
1.1 Features
Standard G.SHDSL.Bis ITU G.991.2 (2004) supports improved reach/speed and greater
interoperability
Fast and cost-effective provisioning of traditional frame relay (FR or T-HDLC) or TDM
leased line services
User existing copper loop infrastructures
Can operate in point to point connection
Efficient single wire pair usage
Up to 2.304 Mbps (2-wire) symmetric service bit rate
Auto rate installation maximizes data rate based on loop conditions
Wetting current sink to protect SHDSL line
Local management interface with LCD display
Remote line loopback
SHDSL Line performance monitoring
Raw and per time interval statistics
Bandwidth guaranteed transmission equipment
Remote firmware upgrade

5099N Series User Manual
2
1.2 Specification
WAN Interface
Line Rate: ITU G.991.2 (2004)
Coding: trellis coded pulse amplitude modulation
Support: Annex A, B, F and G
Payload rates:
64 Kbps to 2.3 Mbps (N=1 to 36) for 2-wire model
Connection: RJ-45 jack (2-wire or 4-wire)
Impedance: 135 ohms
G.703 Interface (as E1)
Connection: RJ-48C for balanced 120Ω E1 cable
and BNC for unbalanced 75Ω E1 cable
Line Rate: 2048 KHz +/- 50 ppm
Line code: HDB3/AMI
Framing: PCM30/PCM30C/PCM31/PCM31C
and Unframed
Data Rate: 64 Kbps to 2.048 Mbps (Nx64 Kbps,
N=1 to 32)
Operation: Full E1 and Fractional E1
Serial Interface (as RS-530/V.35/X.21)
Payload rates: Up to 2.304 Mbps (for 2-wire
model)
Support V.35/RS-530 or V.36/X.21
DSL Timing
Internal
From E1 Recovery (as E1)
From DTE (as V.35)
Performance Monitoring
ES, SES, UAS, LOWS for SHDSL
ES, SES, UAS for E1
Alarms and Errors for SHDSL or interface
Loopback Tests (for E1 and V.35 interface
only)
Local Digital Loopback
Local Loopback
Remote Line Loopback
Remote Payload Loopback
Far-end Line Loopback
Far-end Payload Loopback
V.54 Loopback (for V.35 interface)
Build-in 2047(211-1) bit BER tester
Management
Configuration with keypads and LCD display
Console port (RJ45, RS232C)
Support firmware upgradeable
Physical/Electrical
Dimensions: 19.8 x 4.6 x 16.8 cm
AC Input: 100 - 240 V AC with 50 - 60 Hz, 200 mA
DC Input: -48 V , 300 mA
Power Consumption: 12 W Max
Operation temperature: 0 to 45 °C
Humidity: Up to 95% (non-condensing)
External screw for frame grounding
1.3 Applications

5099N Series User Manual
3
2Getting to know about the SHDSL.bis NTU
This chapter shows the front and rear panel and how to install the hardware.
The models listing on G.SHDSL.bis NTU series:
Interface
type
2/4
wires
AC Power supply
DC Power supply
AC & DC
Dual Power supply
E1
2
5099N-AC/2W/E1
5099N-DC/2W/E1
5099N-DA/2W/E1
4
5099N-AC/4W/E1
5099N-DC/4W/E1
5099N-DA/4W/E1
Serial
2
5099N-AC/2W/SER
5099N-DC/2W/SER
5099N-DA/2W/SER
2.1 Front Panel
2.1.1 E1 interface model
2.1.2 Serial interface model
Front panel can be separated into three parts: LCD display, LED indicator and Keypads.
The LCD display can show the status and configuration of the device. The local management
interface will be done by keypad with this LCD display.
The purpose of the keypad is to configure the setting or function selection on this NTU.

5099N Series User Manual
4
The following table describes the LEDs’ functions of the SHDSL.bis NTU:
LED
Color
Action
Description
PWR
Green
On
Power is on. (RT)
Off
Power is off.
Blue
On
Power is on. (CO)
Off
Power is off.
ALM
Red
On
System loss.
Off
System is working nomarally.
TST
Yellow
On
System is testing for connection.
Off
System is working nomarlly.
SHDSL
SYN
Green
On
SHDSL line is connected.
Blink
Data transmit in SHDSL line.
Off
SHDSL line is dropped.
ERR
Red
Blink
Error second occurs.
Off
No error second.
LPB
Yellow
On
Loopback is on.
Off
Loopback is off.
E1
SYN
Green
On
E1 line is connected.
Off
E1 line is dropped.
ERR
Red
Blink
There are error seconds.
Off
There is not any error second.
LPB
Yellow
On
Loopback is on.
Off
Loopback is off.
V.35
TD
Green
On
Data transmit in V.35.
Off
No data transmit in V.35.
RD
Green
On
Data receive in V.35.
Off
No data reveive in V.35.
ERR
Red
Blink
Error second occurs.
Off
No error second.

5099N Series User Manual
5
2.2 Rear Panel
2.2.1 E1 Interface Model
AC power input version
5099N-AC/2W/E1 5099N-AC/4W/E1
The rear panel of this model is including power switch, AC power socket, RJ-45 console, G.703
RJ-48C jack or BNC jack for transmitting and receiving and RJ-45 for DSL cable from left to
right.
DC power input version
5099N-DC/2W/E1 5099N-DC/4W/E1
The rear panel of this model is including power switch, DC power socket, RJ-45 console, G.703
RJ-48C jack or BNC jack for transmitting and receiving and RJ-45 for DSL cable from left to
right.
AC & DC dual power input version
5099N-DA/2W/E1 5099N-DA/4W/E1
The rear panel of this model is including DC power socket, AC power switch,AC power socket,
RJ-45 console, G.703 RJ-48C jack or BNC jack for transmitting and receiving and RJ-45 for
DSL cable from left to right.

5099N Series User Manual
6
Connector Description
ON
Power switch. Press 1 for turn on and press 0 for off
100 -240Vac
IEC-320 C6 AC input connector. It has power adapting function from 100V to 240V
-48V GND
DC power input connector (-48V)
CONSOLE
RJ-45 for system configuration and maintenance
G.703
RJ-48C for 120Ω E1 connection with PABX (Private Automatic Branch Exchange) or E1
Router
TX
BNC for 75Ω E1 transmitting
RX
BNC for 75Ω E1 receiving
SHDSL
RJ-45 for DSL connection
2.2.2 Serial Interface Model
AC power input version
5099N-AC/2W/SER
The rear panel of this model is including power switch, AC power socket, RJ-45 for console
cable, DB-25 (Female) for serial cable and RJ-45 for DSL cable from left to right.
DC power input version
5099N-DC/2W/SER
The rear panel of this model is including power switch, DC power socket, RJ-45 for console
cable, DB-25 (Female) for serial cable and RJ-45 for DSL cable from left to right.

5099N Series User Manual
7
AC & DC dual power input version
5099N-DA/2W/SER
The rear panel of this model is including DC power socket, AC power switch,AC power socket,
RJ-45 for console cable, DB-25(Female) for serial cable and RJ-45 for DSL cable from left to
right.
Connector Description
ON
Power switch. Press 1 for turn on and press 0 for off.
100 -240Vac
IEC-320 C6 AC input connector. It has power adapting function from 100V to 240V
-48V GND
DC power input connector (-48V)
CONSOLE
RJ-45 for system configuration and maintenance
SERIAL
DB-25(F) for RS-530 and V.35 or X.21(with adaptor cable)
SHDSL
RJ-45 for DSL Connection
2.3 Installation
Note: To avoid possible damage to this NTU, do not turn on the product before hardware
installation.
(a) Plug the power cord in the power socket.
(b) Plug the console port in console if you want to configure the NTU with VT100 program of
NB or PC.
(c) Plug the E1 cable (75Ω BNC cables for E1 or 120Ω cable for E1)
or/and SERIAL cable
or/and Ethernet cable
(d) Plug SHDSL cable
(e) Power on

5099N Series User Manual
8
2.3.1 E1 Interface
AC power input version
DC power input version
AC & DC dual power input version (Use DC input only)

5099N Series User Manual
9
2.3.2 Serial Interface
AC power input version
DC power input version
AC & DC dual power input version (Use DC input only)

5099N Series User Manual
10
2.4 Models vs. Interface modes support
Models vs. Interface modes support (table 1):
Model
Interface modes support
E1 interface model
5099N-AC/2W/E1
5099N-DC/2W/E1
5099N-DA/2W/E1
5099N-AC/4W/E1
5099N-DC/4W/E1
5099N-DA/4W/E1
E1
Serial interface model
5099N-AC/2W/SER
5099N-DC/2W/SER
5099N-DA/2W/SER
Serial
Models vs. Interface modes support (table 2):
Interface
Model
E1
SER
2-wire
4-wire
5099N-AC/2W/E1
5099N-DC/2W/E1
5099N-DA/2W/E1
5099N-AC/4W/E1
5099N-DC/4W/E1
5099N-DA/4W/E1
●
5099N-AC/2W/SER
5099N-DC/2W/SER
5099N-DA/2W/SER
●

5099N Series User Manual
11
Models vs. Interface modes support (table 3):
Model
Interface modes support
E1 interface model
5099N-AC/2W/E1
5099N-DC/2W/E1
5099N-DA/2W/E1
5099N-AC/4W/E1
5099N-DC/4W/E1
5099N-DA/4W/E1
Serial interface model
5099N-AC/2W/SER
5099N-DC/2W/SER
5099N-DA/2W/SER
2.5 CAUTION
CAUTION for accessibility
Be sure that the power outlet you plug the power card into is easily accessible and located as
close as to the equipment operator as possible. When you need to disconnect power to the
equipment, be sure to unplug the power card from the electrical outlet.
Warnings
Do not use this product near water.
Do not place this product on an unstable cart, stand or table. If the product falls, it could
be seriously damaged.
Slots and openings are provided for ventilation to ensure reliable operation of the
product and to protect it from overheating. These openings must not be blocked or
covered. The openings should never be blocked by placing the product on a bed, soft,
rug or other similar surface. This product should never be placed near or over a radiator
or heat register, or in a built-in installation unless proper ventilation is provided.
Never push objects of any kind into this product through cabinet slots as they may touch
dangerous voltage points or short-out parts that could result in a fire or electric shock.
Never spill liquid of any kind onto or into the product.
Using electrical power
This product should be operated from the type of power indicated on the marking label.
If you are not sure of the type of power available, consult your dealer or local power
company.
Do not allow anything to rest on the power card. Do not locate this product where
people will walk on the cord.
If an extension cord is used with this product, make sure that the total ampere rating of
the equipment plugged into the extension cord does not exceed the extension card
ampere rating. Also, make sure that the total rating of all products plugged into the wall
outlet does not exceed the fuse rating.

5099N Series User Manual
12
Do not overload a power outlet, strip or receptacle by plugging in too many devices. The
overall system load must not exceed 80% of the branch circuit rating. If power strips are
used, the load should not exceed 80% of the power strip’s input rating.
The product’s power supply is equipped with a three-wire grounding plug. The plug only
fits in a grounded power outlet. Make sure the power outlet is properly grounded before
inserting the power supply plug. Do not insert the plug into a non-grounded power
outlet. Contact your electrician for details.
!
Warning!
The grounding pin is a safety feature. Using a power outlet that is not properly grounded may
result in electric shock and/or injury.
Note: The grounding pin also provides good protection from unexpected noise produced by
other nearby electrical devices that may interfere with the performance of this product.
Product servicing
Do not attempt to service this product yourself, as opening or removing covers may expose
you to dangerous voltage points or other risks, refer all servicing to qualified service personnel.
Unplug this product from the wall outlet and refer servicing to qualified service personnel when:
The power card or plug is damaged, cut or frayed
Liquid was spilled into the product
The product was exposed to rain or water
The product has been dropped or the case has been damaged
The product exhibits a distinct change in performance, indicating a need for service
The product does not operate normally after following the operating instructions
Note: Adjust only those controls that are covered by the operating instructions, since improper
adjustment of other controls may result in damage and will often require extensive work by a
qualified technician to restore the product to normal condition.
Disposal instructions
Do not throw this electronic device into the trash when discarding.
To minimize pollution and ensure utmost protection of the global environment, please recycle.

5099N Series User Manual
13
3Configuration with Keypad and LCD
This chapter provides information about the configuration of your G.SHDSL.Bis NTU via front
panel LCD display and keypads.
3.1 Keypad
The G.SHDSL.bis NTU is designed to provide a user-friendly configuration and management
by using keypad and LCD display on the front panel without a computer with the VT100
terminal software connected.
Key Pad
Description
Exit/-
Return to previous configuration menu.
Enter/+
Skip to next configuration menu or configure this item.
L
Select other parameter in the same level menu.
R
Select other parameter in the same level menu.
3.2 Main menu Tree
After turning on device, the LCD display will prompt G.SHDSL.BIS NTU. Press Enter to enter.
There will display some sub-menus as following:
For more detail on these sub-menus, please refer to each chapter.

5099N Series User Manual
14
3.3 Menu tree for SHOW STATUS
You can check the status via LCD display.
The SHOW STATUS menu tree is as following.

5099N Series User Manual
15
For more detail on these sub-menus, please refer to following:

5099N Series User Manual
16
3.4 Menu tree for SHOW STATISTICS
The product can display two kinds of statistics data:
(a) Current 15-minute period and 96 previous 15-minute periods of SHDSL performance.
(b) Current 24-hour period and 7 previous 24-hour periods of SHDSL performance.
SHDSL’s statistics data:
SHDSL
ES
SES
UAS
LOSW
If using the E1 interface mode, it can also show the E1 performance data.
(c) Current 15-minute period and 96 previous 15-minutes periods of E1 performance.
(d) Current 24-hour period and 7 previous 24-hours periods of E1 performance.
E1’s statistics data:
E1
ES
SES
UAS
Abbrev of statistics terms:
ES
Error Second
SES
Severely Error Second
UAS
Unavailable Second
LOWS
Loss of Synchronization word

5099N Series User Manual
17
Model vs. Interface modes and statistics support:
Model
Interface modes support
SHDSL statistics support ES,
SES, UAS, LOSW
E1 interface model
5099N-AC/2W/E1
5099N-DC/2W/E1
5099N-DA/2W/E1
5099N-AC/4W/E1
5099N-DC/4W/E1
5099N-DA/4W/E1
E1
●
Serial interface model
5099N-AC/2W/SER
5099N-DC/2W/SER
5099N-DA/2W/SER
Serial
●
This manual suits for next models
10
Table of contents
Other Proscend Modem manuals
