Proton Persona Standard 2019 User manual

IN-CAR ENTERTAINMENT OPERATION MANUAL
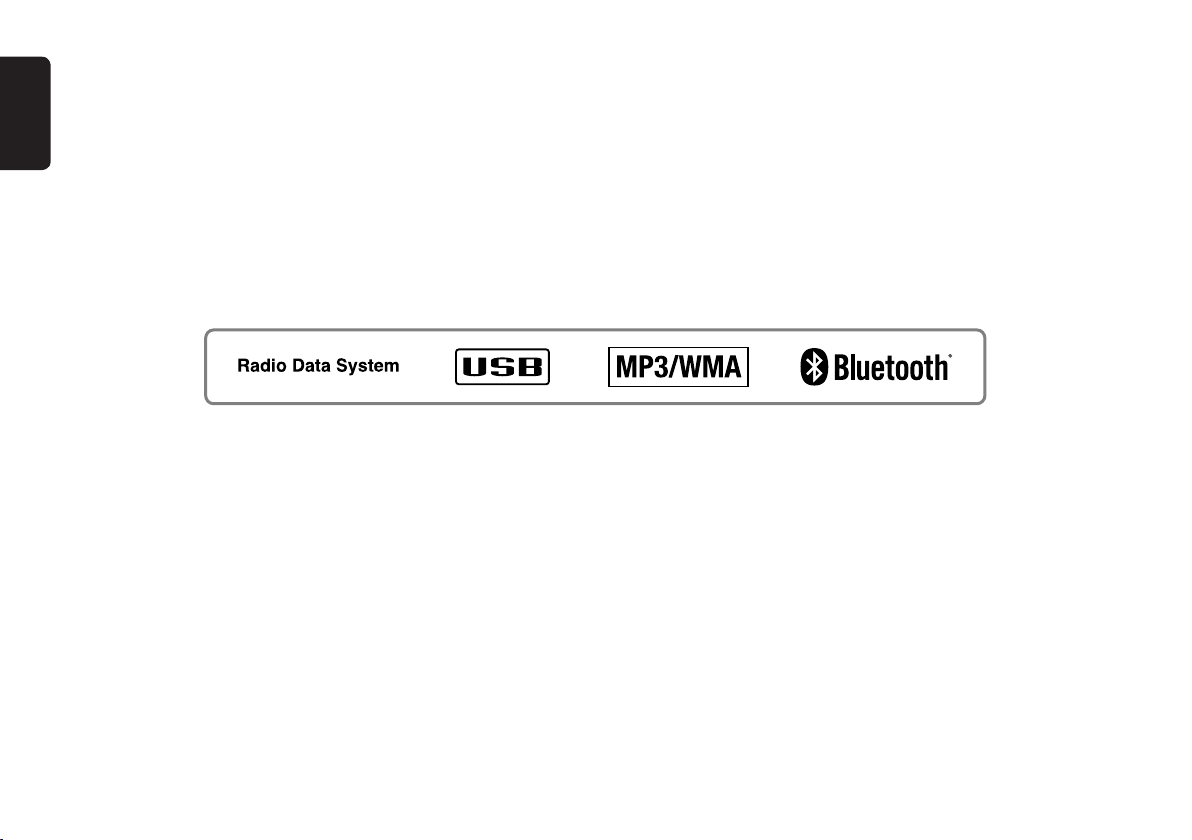
Bluetooth®, USB, Radio, Radio Data System
English
2
FOREWORD
We thank you for and congratulate you on your choice of new car.
This handbook contains essential information about the car radio of your new Proton as well as other important advice to be rigorously followed.
Before starting to use your new car radio, please read the information carefully and keep it for reference.
Trafc safety
As the driver of a motor vehicle, it is your responsibility to pay attention to the trafc situation at all times. Never use your car radio in a way that could
distract you. Please keep in mind that you travel a distance of 14m per second of a speed of only 50 km/h.
Should the trafc situation become particularly demanding, we advice you not to use the radio. Always make sure that you are still able to hear any meaning
signals coming from outside the vehicle, such as police or re engine sirens, so that you can react accordingly.
The Bluetooth®word mark and logos are owned by the Bluetooth®SIG, Inc. and any use of such marks by Clarion Malaysia is under license. Other
trademarks and trade names are those of their respective owners.

English
3
2. CONTROLS........................................................................................................................................... 4
3. NOMENCLATURE ............................................................................................................................... 5
Names of the Buttons and their Functions ............................................................................................ 5
4. OPERATIONS ....................................................................................................................................... 7
Basic Operations ................................................................................................................................... 7
Radio Mode Operations......................................................................................................................... 9
RDS Operations................................................................................................................................... 10
USB Operations................................................................................................................................... 11
USB Common Operations ................................................................................................................... 13
Introduction to Bluetooth® Wireless Technology.................................................................................. 16
Handsfree Operations.......................................................................................................................... 19
Audio Streaming Operations................................................................................................................ 20
Other Operations ................................................................................................................................. 20
Compatible Devices............................................................................................................................. 21
5. TROUBLESHOOTING ........................................................................................................................ 22
6. ERROR DISPLAYS ............................................................................................................................. 25
7. SPECIFICATIONS............................................................................................................................... 26
Contents

English
4
2. CONTROLS
Main Unit
[DIRECT] buttons
[ ]
[ ]
[ / ]
[ / ]
[ ]
[ ]
[ ]
[ / ]
[ / ]
[ / ] [ / ] [ / ]
[ / / ]
[ VOL / VOL ]
English
5
Note:
Be sure to read this chapter referring to the front diagrams of chapter “2. CONTROLS” on page 4.
3. NOMENCLATURE
Names of the Buttons and their Functions
[SRC / ] button
Press the button to turn ON power.
During power on, press the button for more than
1 second to turn OFF power.
During power on, press the button to switch to
different source mode.
[ VOL / VOL ] button
Adjust the volume by pressing [VOL +/-] to
increase and decrease the volume.
Adjust the audio value by pressing [VOL +/-]
during Audio Mode Function.
Adjust setting by pressing [VOL +/-] during ADJ
Mode Function.
[ ] button
Select the next Folder (USB only).
[ ] button
Select the previous Folder (USB only).
[ / ] button
Short press the button to select audio
adjustment.
Press and hold the button for 1 second or longer
to toggle LOUDNESS ON/OFF
Reject/end call during incoming call/ call
conversation.
End Voicedial
[ / ] button
Press the button to seek down a station while
in the Tuner mode, select previous track when
listening to a USB/BT Audio.
Press and hold the button for 1 second or longer
to auto seek down in Tuner mode and enter the
fast-backward in USB/BT Audio mode.
[ / ] button
Press the button to seek up a station while in the
Tuner mode, select next track when listening to
a USB/BT Audio.
Press and hold the button for 1 second or longer
to auto seek up in Tuner mode and enter the
fast-forward in USB/BT Audio mode.
[ / ] button
Press the button to switch the display in TUNER,
USB and B/TOOTH AUDIO mode.
Press and hold the button for 1 second or longer
to enter Telephone mode.
Press the button to transfer call between phone
and head unit during conversation.
[ / ] button
Play or pause a track while in the USB/B/TOOTH
Audio mode.
Press the button to perform second level
adjustment or selection.
Press the button to perform preset scan while in
the Tuner mode.
Press and hold the button for 1 second or longer
to perform auto store in Tuner mode.
Short press to accept incoming call.
[ / / ] button
Press the button to switch the band in the Tuner
mode.
Press and hold button for 1 second or longer to
toggle DX/LO seek in the Tuner mode.
Play the rst track while in the USB mode.
Cancel pairing mode.
Cancel setting conrmation and return to parent
level.
[ / ] button
Press the button to toggle MUTE function.
Press and hold the button for 1 second or longer
to enter Adjustment mode.
[SCN] button
Press the button to perform track scan play
for 10 seconds of each track while in the USB
mode.
Press the button during track scan to perform
folder scan play while in the USB mode.
Press the button during Folder scan to Off scan
play.

English
6
[RPT] button
Press the button to perform track repeat play
while in the USB mode.
Press the button during track repeat to perform
folder repeat play while in the USB mode.
Press the button during Folder repeat to Off
repeat play.
[RDM] button
Press the button to perform track random play
while in the USB mode.
Press the button during track random to perform
folder random play while in the USB mode.
Press the button during Folder random to Off
random play.
[DIRECT] buttons
Recall station directly while in the Tuner mode.
Press and hold the button for 1 second or longer
to store a station into memory in the Tuner
mode.
Names of the Buttons and their Functions
English
7
Notes:
• If USB is selected when no device inserted, the display
shows “NO MEDIA” .
• If B/TOOTH AUDIO is selected when no bluetooth
connected, the display shows “NO AUDIO”.
Switching the display
1. Press the [DISP] button to select the desired
display.
2. Each time you press the [DISP] button, the
display switches in the following order:
For USB mode:
Main Display (File Name) Folder Name
Title Name Artist Name Album Name
Clock Display Main Display...
For Bluetooth Audio mode:
Main Display (Title Name) Artist Name
Album Name Clock Display Main Display...
For Tuner mode:
Main Display (Radio band) Clock Display
*
Once selected, the preferred display
becomes the default display. When a
function adjustment such as volume is
made, the screen will momentarily switch
to that function’s display several seconds
after the adjustment.
4. OPERATIONS
Note: Be sure to read this chapter referring to the front diagrams of chapter “2. CONTROLS” on page 4.
Basic Operations
CAUTION
!
Be sure to lower the volume before switching
off the unit power or the ignition key. The unit
remembers its last volume setting. If you switch
the power off with the volume up, when you
switch the power back on, the sudden loud
volume may hurt your hearing and damage
the unit.
Turning on/off the power
Note:
• Be careful about using this unit for a long time without
running the engine. If you drain the car’s battery too
far, you may not be able to start the engine and this
can reduce the service life of the battery.
1. Press the [ ] button.
2. The illumination and display on the unit light
up. The unit automatically remembers its last
operation mode and will automatically switch to
display that mode.
3. Press the [ ] button more than 1 second to
turn off the power for the unit.
Selecting a mode
1. Press the [SRC]button to change the operation
mode.
2. Each time press the [SRC]button, the operation
mode changes in the following order:
“TUNER” “USB” “B/TOOTH AUDIO”
“TUNER” ...
Adjusting the volume
Press the [VOL +/-] to increase/decrease the vol-
ume.
“VOL XX” will be displayed where “XX” is the vol-
ume level from 0 (minimum) to 30 (maximum).
Note:
• Factory default setting for volume is “VOL 10”.
Audio mode adjustments
1. Press the [ / ] button less than 1
second to enter the Audio Adjustment mode.
2. Press the [ / ] button to select the
“item name”.
(PRE-EQ) “BASS” “MID” “TREBLE”
“BALANCE” “FADER” Exit Audio Mode
(Main Display)
3. Press the [VOL +/-] to adjust selected sound
mode.
PRE-EQ : Adjustment range: FLAT/POP/
ROCK/CLASSIC/HIPHOP/
DANCE/JAZZ/HEAVY METAL
BASS : Adjustment range : -7 to +7
MID : Adjustment range: -7 to +7
TREBLE : Adjustment range : -7 to +7
BALANCE : Adjustment range : LEFT 12 to
RIGHT 12
FADER : Adjustment range : REAR 12 to
FRONT 12
English
8
Note:
• If no operation is performed for more than 7
seconds, the audio mode is cancelled and
returns to the previous mode.
• Bass, Mid and Treble will be hidden when Preset -EQ
other than FLAT is selected.
Adjusting the Preset Equalizer (PRE-EQ)
1. Press the [SOUND] button and select “PRE-
EQ”
2. Pressing the [VOL +/-] button to select the fol-
lowing settings.
“PRE-EQ FLAT” “PRE-EQ POP” “PRE-
EQ ROCK” “PRE-EQ CLASSIC” “PRE-
EQ HIPHOP” “PRE-EQ DANCE” “PRE-
EQ JAZZ” “PRE-EQ H-METAL”
Note:
• The factory default setting is “PRE-EQ FLAT”.
Adjusting the bass
1. Press the [SOUND] button and select “BASS”.
2. Pressing the [VOL +/-] button to emphasizes/
attenuates the bass
“GAIN XX” will be displayed where “XX” is the
value from -7 to +7.
Note:
• The factory default setting is “GAIN 0”.
Basic Operations
Adjusting the mid
1. Press the [SOUND] button and select “MID”.
2. Pressing the [VOL +/-] button to emphasizes/
attenuate the mid.
“GAIN XX” will be displayed where “XX” is the
value from -7 to +7.
Note:
• The factory default setting is “GAIN 0”.
Adjusting the treble
1. Press the [SOUND] button and select
“TREBLE”.
2. Pressing the [VOL +/-] button to emphasizes/
attenuate the treble.
“GAIN XX” will be displayed where “XX” is the
value from -7 to +7.
Note:
• The factory default setting is “GAIN 0”.
Adjusting the balance
1. Press the [SOUND] button and select
“BALANCE”
2. Pressing the [VOL +/-] button to emphasizes
the sound from the right /left speakers. The dis-
play changes as follows:
“RIGHT XX” will be displayed where “XX” is the
value from 1 to 12.
“LEFT XX” will be displayed where “XX” is the
value from 1 to 12.
Note:
• The factory default setting is “CENTER”.
Adjusting the fader
1. Press the [SOUND] button and select
“FADER”.
2. Pressing the [VOL +/-] button to emphasizes
the sound from the front /rear speakers.
The display changes as follows:
“FRONT XX” will be displayed where “XX” is the
value from 1 to 12.
“REAR XX” will be displayed where “XX” is the
value from 1 to 12.
Note:
• The factory default setting is “CENTER”.

English
9
Radio Mode Operations
Listening to the radio
1. Press the [SRC] button and select the Tuner
mode, then the radio will be on.
2. To select a preset band, press the [BAND]
button, and then select one of the preset
bands such as FM1, FM2, FM3 or AM.
Every time the [BAND]button is pressed, the band
switches in the following order:
FM1 FM2 FM3 AM FM1...
3. Press the [ ]/[ ] button to tune in the
desired station.
Seek tuning
There are 2 types of seek tuning: DX SEEK and
LOCAL SEEK.
DX SEEK can automatically tune in to receivable
broadcast stations; LOCAL SEEK can tune in
to only broadcast stations with good reception
sensitivity.
1. Press the [BAND] button and select the
desired band (FM or AM).
2. Press the [MENU] button for 1 second or longer
to toggle DX/LOCAL seek. “DX MODE/LO
MODE” will be displayed.
3. Press the [ ]/[ ] button for 1 second or lon-
ger to start automatic station tuning.
DX SEEK
When the [ ] button is pressed and held in
position for 1 second or longer, search will be
performing in the direction of higher frequencies.
When the [ ] button is pressed and held in
position for 1 second or longer, search will be
performed in the direction of lower frequencies.
* When seek tuning starts, “DX SEEK”
appears in the display.
LOCAL SEEK
If the [ ] button is pressed and held in position
for 1 second or longer, search will be performing
in the direction of higher frequencies. When the
[ ] button is pressed and held for 1 second or
longer, search will be performed in the direction
of lower frequencies. Broadcast stations with
good reception sensitivity are selected.
* When local seek starts, “LO SEEK”
appears in the display.
Manual tuning
1. Press the [BAND] button to select the desired
band FM1,FM2,FM3 or AM.
2. Press the [ ]/[ ] button to manually tune in
a station.
Preset memory function
Preset memory function can store up to 24
stations. There are 6 stations for each of FM1,
FM2, FM3 and AM .
Manual memory function
1. Press the [BAND]button and select a band
that you want to store in the memory.
2. Press the [ ]/[ ] button to tune into a
desired station.
3. Press and hold one of the [DIRECT]buttons for
1 second or longer to store the current station
into preset memory.
Auto store
Auto store is a function for storing up to 6 stations
that are automatically tuned in sequentially. If 6
receivable stations cannot be received, a previously
stored station remains un-overwritten at the
memory position.
1. Press the [BAND]button and select the desired
band (FM or AM).
2. Press and hold the [PS/AS]button for 1 second
or longer. The stations with good reception are
stored automatically to the preset channels.
“A-STORE” will be displayed.
* Auto store is performed in current band.
Preset scan
Preset scan receives the stations stored in preset
memory in order. This function is useful when
searching for a desired station in memory.
1. Press the [PS/AS] button.
2. When a desired station is tuned in, press the
[PS/AS] button again to continue receiving
that station. “P-SCAN” will be displayed and “
” indicator lights in the display.

English
10
Radio Mode Operations
Note:
• Be careful not to press and hold the [PS/AS]
button for 1 second or longer, otherwise the
auto store function is engaged and the unit starts
storing stations.
Recalling a preset station
A total of 24 preset positions (6-FM1, 6-FM2,
6-FM3, 6-AM) exists to store individual radio
stations in memory. Pressing the corresponding
[DIRECT]button recalls the stored radio frequency
automatically.
1. Press the [BAND]button and select the
desired band (FM or AM).
2. Press the corresponding [DIRECT]button to
recall the stored station.
RDS Operations
RDS (Radio Data System)
This unit has a built-in RDS decoder system that
supports broadcast stations transmitting RDS
data. This system can display the name of the
broadcast station being received (PS) and can
automatically switch to the broadcast station with
the best reception as you move long distances (AF
switching).
When using the RDS function, always set the radio
to FM mode.
AF : Alternative Frequency
PS : Programme Service Name
*
When set receives RDS signal, and can
read PS data, PS appears in the display.
RDS mode adjustment
RDS mode is one of the Adjustment mode. Please
refer to “Other Operations” on page 21 for details.
English
11
USB Operations
USB memory device operation
Note:
The following operations are available in USB mode.
- Pause
- Track selection
- Fast-forward/fast-backward
- Top function
- Scan play
- Repeat play
- Random play
- Folder selection
See “USB Common Operations” on page 13.
About USB
USB is the abbreviation of Universal Serial
Bus, an external bus standard that supports
data transfer rates of 12Mbps. The main unit is
compatible with USB 1.1/2.0 with maximum data
transfer rates of 12Mbps (Full Speed).
USB memory devices that can be played by
connecting to the unit’s USB cable are limited to
those recognized as “USB mass storage class
device”; operation is not guaranteed with all
USB memory devices. For USB memory devices
compatibility, please consult the nearest service
dealer for more information.
*Devices compatible with “USB Mass Storage
Class” can be used simply by connecting to
the host device, without need for special
drivers or application software.
Consult the manufacturer of your USB memory
device for information regarding whether it
is supported by “USB Mass Storage Class”
standards. Please take note that hard disk drive
(HDD) is not supported.
To prevent the accidental loss of data, always
back up important data to your computer.
Do not try to put your hand or ngers in the
USB insertion slot. Also never insert foreign
objects into the slot.
USB memory device insertion may result in
protruding as it might be dangerous to the
user while driving. For safety purposes, it is
advisable to use a USB extension cable to
connect between the USB memory device
and the USB port on the main unit.
Do not leave a USB memory device
unattended in an automobile. Exposure to
direct sunlight or high temperatures may
cause deformation or other malfunction of
the USB memory device.
When the device is subjected to static
electricity or electric noise, this may result
in the loss of data.
Folder structure
1. An USB memory device with a folder
having more than 8 hierarchical levels will be
impossible.
Number of les or folders
1. Up to 255 les per folder can be recognized. Up
to 10000 les can be played.
2. Up to a maximum of 512 folders can be
supported. However, actual folders support will
still be depending on total les.
3. Tracks are played in the order that they were
recorded onto a device. (Tracks might not always
be played in the order displayed on the PC.)
4. Some noise may occur depending on the type
of encoder software used while recording.
CAUTION
!
This unit does not support connections to a
computer. In addition, connections made through
a USB hub device are also not supported.
If the USB memory device supports multiple
partitions, only the rst partition will be supported.
The order in which tracks are recorded may be
differ depending on the USB memory devices
connected (the actual playback order may not be
the same as that indicated on your computer’s
display).
Audio les playable on this unit are limited to
MP3/WMA/FLAC les. For further information
on MP3/WMA/FLAC playback, please refer to
“USB Common Operations” on page 13.

English
12
USB Operations
Precautions when creating MP3/WMA/
FLAC on USB memory device
Usable sampling rates and bit rates:
Hot plugging function
This unit has the ability to recognize the changes
of connecting and disconnecting a USB memory
device.
When the unit is powered on, this function allows
you to start playing the tracks automatically when
the USB memory device is inserted.
Connecting a USB memory device
1. Connect the USB memory device into the port
with the correct direction.
2. Playback will begin from the rst track on the
USB memory device.
*
Always insert the USB memory device
fully into the port. Incomplete connections
may cause the USB memory device to be
not recognizable.
*
Depending on the number of tracks
recorded, some amount of time may be
required until all tracks are read into the
unit.
*
USB memory devices may have different
shape depending on brands. Some USB
memory devices may not be able to plug
into the port due to the shape design.
Please use an extension cable instead.
Note:
• Do not forcibly connect the USB memory device to the
port with incorrect direction as this will damage the USB
memory device as well as the USB port.
MP3
Decode Format MPEG 1, 2 and 2.5 - Layer
3
Sampling Rate
(kHz)
MPEG-1 : 32, 44.1, 48
MPEG-2 : 16, 22.05, 24
MPEG-2.5 : 8, 11.025, 12
Bit-rate (kbps) MPEG-1 : 32 - 320
MPEG-2 : 8 - 160
MPEG-2.5 : 8 - 160
VBR
WMA
Sampling Rate
(kHz)
8, 16, 22.05, 32, 44.1
Bit-rate (kbps) 48 - 192
FLAC
Sampling Rate
(kHz)
44.1
Bit-rate (kbps) All
Listening to a track with USB memory
device already connected to the unit
Press the [SRC] button to select the USB mode.
When the unit enters the USB mode, track will start
to play automatically.
If there is no USB memory device inserted,
“NO MEDIA” will be shown for selection
*
The operation mode changes in the
following order each time the [SRC] button
is pressed.
“TUNER” “USB” “B/TOOTH AUDIO”
“TUNER” ...
Unplug the USB memory device
Remove the USB memory device from the port
during USB mode,”NO MEDIA” will be shown for
4 seconds before revert to Radio mode.
Alternatively, user can remove USB memory
device at any other mode. It is safe to remove USB
memory device during track playing.
English
13
USB Common Operations
Pausing play
1. Press the [ ] button to pause play. “PAUSE”
is shown in the display.
2. To resume USB play, press the [ ] button
again.
Display selection
1. You can choose the display type for USB by
pressing the [DISP] button. To select the next
type, press the same button again.
USB mode:
Main Display (File Name) Folder Name
Title Name Artist Name Album Name
Clock Display Main Display...
where Track, Folder, Title Tag, Album Tag and
Artist Tag are called Title Display.
Note:
• USB will have different functionalities in some cases.
Please read carefully where differences applied.
Note:
• Each of the items in Title Display will dis-
play “FILE”, “FOLDER”, “TITLE”, “ARTIST” or
“ALBUM” respectively for 2 seconds before showing
related title information.
Title display
1. If a MP3/WMA/FLAC le encode with ID3 TAG
header but no consist of any TAG information,
the following will be displayed respectively.
“NO ALBUM NAME” for Album Tag
“NO ARTIST NAME” for Artist Tag
“NO SONG NAME” for Title Tag
Note:
• The folder name will be displayed as “ROOT” which the
le allocates in the root folder.
• For MP3, it supports ID3 Tags V2.4/2.3/2.2/1.1/ 1.0.
• The MP3 player decodes each le ID3 TAG ver. 2 by
default, if ID3 TAG ver. 2 is unavailable, ID3 TAG ver. 1
will be decoded.
The arrangement is shown below.
File
Folder
Title
Artist
Album
Clock Display
2 Sec
2 Sec
2 Sec
2 Sec
2 Sec
2 Sec
(Finish)Info
Info (File/Folder/Title/Artist/Album)
Info (Further)

English
14
USB Common Operations
Folder select
This function allows you to select a folder
containing MP3/WMA/FLAC les and start playing
from the rst track in the folder.
1. Press the [ ] button to move the next
folder. Press the [ ] button to move the
previous folder.
*
Press the [ ] button while in the nal
folder will shift to the rst folder.
*
Folder without any MP3/WMA/FLAC le is
not selectable.
2. Press the [ ]/[ ] button to select a track.
[ ]
[ ]
UNICODE ID3 (Chinese, Japanese and etc) is
not supported. Only ASCII characters can be
displayed in Tags.
If ID3 TAG has Japanese, Chinese or other non-
supported characters, “*” will be displayed as
substitution.
Selecting a track
Track-up
1. Press the [ ] button to move to the beginning
of the next track.
2. Each time the [ ] button is pressed, playback
proceeds to another track in the advancing
direction.
Track-down
1. Press the [ ] button to move to the beginning
of the current track.
2. Press the [ ] button twice to move to the
beginning of the previous track.
Fast-forward/fast-backward
Fast-forward
Press and hold the [ ] button for 1 second or
longer.
Fast-backward
Press and hold the [ ] button for 1 second or
longer.
MP3/WMA/FLAC playing order
During playback, les and folders are accessed
in the order in which they were written by the
CD-ROM writer or PC. Files might not always
be played in the order displayed on the PC. You
may be able to set the order in which MP3/WMA/
FLAC les are to be played by writing them onto
a medium such as a USB with their le names
beginning with play sequence numbers such as
“01” to “99”, depending on your USB writer.
For example, a medium with the following folder/
le hierarchy is shown below.
English
15
USB Common Operations
Top function
Press the [BAND]button, then the USB will start
playing from the top.
Start to play the rst track of rst folder.
Other various play functions
Scan play
This function allows you to locate and play the rst
10 seconds of all the tracks in all folders.
1. Press the [SCN]button to perform scan play.
the “ ” indicator lights in the display.
*
Scan play starts from the next track after
the track currently being played.
*
Scan play will proceed to next folder after
all the tracks in the current folder have
been scanned.
All scan play
This function allows you to locate and play the rst
10 seconds of the rst track of all the folders on
an USB.
1. Press [SCN] button during scan play to
perform all scan play. the “ ” and “ ”
indicators light in the display.
*
All scan play will always start from the rst
track of next folder.
To Cancel Scan
1. Press the [SCN] button again during All Scan
play.the “ ” and “ ” indicators are turned
off.
Repeat play
This function allows you to play the current track
repeatedly.
1. Press the [RPT]button to perform repeat play.
the “ ” indicator lights in the display.
All repeat play
This function allows you to play all tracks in the
current USB folder repeatedly.
1. Press [RPT]button during repeat
play to perform folder repeat play.
the “ ” and “ ” indicators light
in the display.
To Cancel Repeat
1. Press the [RPT] button again during All Repeat
play.the “ ” and “ ” indicators are turned
off.
Random play
This function allows you to play all tracks of current
folder in a random order.
1. Press the [RDM]button to perform random
play.
The “ ” indicator lights in the display.
All random play
This function allows you to play all the tracks of all
the folders recorded on a USB in a random order.
1. Press [RDM] button during random play to
perform all random play. The “ ” and “
”indicators light in the display.
To Cancel Random
1. Press the [RDM] button again during All Random
play.the “ ” and “ ” indicators are turned
off.

English
16
Introduction to
Bluetooth
® Wireless Technology
What is
Bluetooth
® wireless
technology?
Bluetooth
®wireless technology is a radio technology
that connects devices, such as mobile phones and
headsets, without wires or cords over a short
distance of approximately 10 meters (Approx. 33
feet). Get more information at www.bluetooth.com.
What is
Bluetooth
® wireless proles?
Bluetooth
® wireless proles are the different ways
that
Bluetooth
®devices communicate with other
devices.
Bluetooth
®phones support the hands-free
prole (HFP). In order to support a certain prole,
a phone manufacturer must implement certain
mandatory features within the phone’s software.
The followings are the currently supported proles
for the main unit.
Hands-Free Prole (HFP)
This prole is commonly used to allow car hands-
free kits to communicate with mobile phones in
the car. The
Bluetooth
®car kits allow users with
Bluetooth
®- equipped cell phones to make use of
some of the phone’s features.
Advanced Audio Distribution Prole
(A2DP)
This prole allows you to send CD quality stereo
music from external audio player to car stereo
without wires. A2DP is able to provide crystal
clear music without the hassle of plugging cables.
Bluetooth
®Wireless Technology with A2DP makes
mobiles phones, PDAs and computer capable of
streaming music.
Audio/Video Remote Control Prole
(AVRCP)
This prole enables music from
Bluetooth
®audio
player to be controlled remotely. AVRCP allows
some basic playback control function such as play/
pause, volume up/down and next/previous track to
a
Bluetooth
®audio player.
What is pairing?
Bluetooth
®devices will not work if the devices
have not been paired. With a mobile phone
featuring
Bluetooth
® technology, you must ‘pair’
the car stereo with the phone before you use it for
the rst time. ‘Pairing’ creates a unique wireless
link between the phone with
Bluetooth
®wireless
technology and your car stereo eliminating the need
to repeat the pairing process during future use.
What is passkey?
Passkey or PIN is a code that you enter on
your mobile phone to pair it with the
Bluetooth
®
receiver unit. This makes your phone and the
Bluetooth
®receiver units recognize each other
and automatically work together. The
Bluetooth
®
wireless function in your phone has to be turned
on to establish automatic connection.
Telephone Menu Mode
1. Press and hold the [TEL] button for 1 second
or longer to enter Telephone mode.
2. Press [ ]/[ ] button select the item.
VOICEDIAL REDIAL
Note:
• Telephone menu mode only can access when
Bluetooth connected.
• Voicedial only can support Android version 6 and
above.
Bluetooth Settings Mode
1. Press and hold the [ADJ] button for 1 second
or longer to enter Adjustment mode.
2. Press the [ ]/[ ] button to select the
“B/TOOTH SETTINGS” in the item list.
Please refer chapter “Other Operations” on
page 20 for Adjustment function.
3. Press [ ] button to enter “B/TOOTH
SETTINGS” mode.
4. Press [ ]/[ ] button to select the item.
(CONNECT DEVICE) ADD DEVICE
(DELETE DEVICE) (DISCONN
DEVICE) B/TOOTH RESET
Note:
• Items in brackets will be displayed according to con-
nection status.
Pairing with a mobile phone
1. Select “ADD DEVICE” from B/TOOTH
SETTINGS mode.
2. Press [ ] button to enter then “PAIRING”
is displayed.
3. Activate
Bluetooth
®on your mobile phone.
Please check your mobile phone owner’s
manual for further details.
4. Search for new
Bluetooth
®device on the mobile
phone. The car stereo’s name is “PROTON”.
5. Perform one of the method below:
For newer phone that supports Secure Simple
Pairing (SSP):
A random 6 digit passkey will be displayed.
Compare and confirm the passkey on
both the phone and head unit are
matched.

English
17
For classic phone:
Enter the dened PIN code when prompt
(“0000” by default).
Upon successful pairing, system will
automatically connect with the phone. the
mobile phone will prompt for a passkey,
enter the PIN.
Notes:
• Please make sure your mobile phone supports the HFP
proles.
• Always make sure the
Bluetooth
Operation mode in the
phone is on when using this car handsfree.
• Any further connection attempts by other devices to
connect as HFP partner are rejected until the current
device is disconnected. Please refer your mobile phone
owner’s manual for disconnecting device.
• Timeout for pairing mode is 2 minutes.
• Please refer chapter “Handsfree Operations” on page
19 for telephone function.
Pairing with an external audio player
(A2DP support)
1. Select “ADD DEVICE” from B/TOOTH
SETTINGS mode.
2. Press [ ] button to enter then “PAIRING”
is displayed.
3. Set the
Bluetooth
®audio player in Pairing mode.
Notes:
• Please make sure your external audio player supports
the A2DP and AVRCP proles.
• Any further connection attempts by other devices to
connect as A2DP/AVRCP partner are rejected until the
current device is disconnected.
• The same device may connect as both A2DP/ AVRCP
and HFP partner. This normally happens to mobile phone
with wireless music streaming capability. However, using
the same device might cause the A2DP/AVRCP to be
disconnected when there is an incoming call or making
a call.
• Timeout for pairing mode is 2 minutes.
• Please refer chapter “Audio Streaming Operations” on
page 20 for music streaming functionality.
Cancelling pairing mode
1. During pairing mode, press the [ BAND] button
once to cancel Pairing mode.
2. The display returns to previous mode.
Deleting paired devices
1. Select “DELETE DEVICE” from B/TOOTH
SETTINGS mode.
2. Press the [ ] button. If there is device paired,
“XXXXXXXX” will be displayed
3. Press [ ]/[ ] button to select a device to
be deleted and press the [ ] button for the
conrmation. “DELETED” will be displayed.
4. During “DELETE ALL”, press the [ENT] button
will delete all devices. “DELETED” will be
displayed.
5. During “DELETE ALL”, press the [ ] button
will enter the conrmation screen.
6. Press [VOL+] button to select “YES” and press
[ ] button for the conrmation.
7. Press [VOL -] button to select “NO” and press
[ ] button to return to previous screen.
Note:
• Upon nish deleting, display will switch to B/TOOTH
SETTINGS.
Introduction to
Bluetooth
® Wireless Technology
Connecting
Bluetooth
® device
The unit will automatically connect to the paired
device after pairing. However, some phones will
not allow automatic connection to the device after
pairing; please use the phone to manually connect
to the unit. Connection can be established at
any Source mode. If connection is unsuccessful,
automatic connection will stop.
1. Select “CONNECT DEVICE” from B/TOOTH
SETTINGS mode.
2. Press [ ] button.
3. Press []/[ ]button to select a paired device
to be connect and press the [ ] button.
4. Unit will try to establish a connection with the
selected connected phone.
Notes:
• The “ ” indicator will light on and device name and
“CONNECT” will be displayed upon successful
connection.
• The unit will also automatically connect to the last
connected phone when car ignition is turned on.
• Make sure your phone’s
Bluetooth
function is turned
on, within acceptable range and no other
Bluetooth
devices such as headset is connected during automatic
connection.
• Connection activated through unit is only HFP
(Handsfree).
• Audio streaming connection will need to be initiated
by the
Bluetooth
audio device itself. Some phones will
connect audio streaming as well when HFP is connected.
• Any connection attempt with a new device will require
disconnecting previously connected device first.
Otherwise, connection will not be successful.
• It is not recommended to connect 2 devices (phone and
external audio player) at the same time.

English
18
Disconnecting
Bluetooth
® device
1. Select “DISCONN DEVICE” from B/TOOTH
SETTINGS mode.
2. Press [ ] button.
3. Press [VOL +] button to select “YES” and press
[ ] button for the conrmation.
4. Press [VOL -] button to select “NO” and press
[ ] button to return to previous screen.
5. Unit will disconnect from all connected devices.
Notes:
• User can use the phone/device to manually disconnect
from the unit.
• Turning off the unit power will also disconnect the device.
Resetting Bluetooth Settings
1.Select “B/TOOTH RESET” from B/TOOTH
SETTINGS mode.
2. Press [ ] button.
3.Press [VOL +] button to select “YES” and press
[ ] button for the conrmation.
4.Press [VOL -] button to select “NO” and press [
] button to return to previous screen.
5. All
Bluetooth
®setting will reset to factory default
setting.
Note:
• All Pairing information will be deleted.
Introduction to
Bluetooth
® Wireless Technology

English
19
Handsfree Operations
Incoming call
Whenever your car stereo is operating, the car
stereo is in standby mode waiting for the next call.
When an incoming call arrives the car stereo is
muted automatically and the ring tone is reproduced
through your car’s speaker.
Car stereo will temporarily switch to Telephone
mode and caller ID will be displayed in the car
stereo.
Notes:
• Car stereo will be automatically set as default speaker
output every time when there is an incoming call.
• Caller ID display (telephone number) is dependent on
mobile phone and network provider.
• Caller ID and “CALLING” will be displayed during
incoming call.
Answering a call
User can answer an incoming call directly from the
car stereo. Alternatively, you may also answer the
call by using your phone’s answer keypad.
1. Short press the [ ] button to pick up an
incoming call.
2. The display switch to Telephone mode.
3. During conversation, talk time is displayed.
4. Press the button [DISP] to transfer call between
phone and head unit during conversation.
“PRIVATE MODE” will be displayed.
Rejecting a call
This function allows you to reject an incoming call
via the car stereo.
1. Press the [] button to reject an incoming call.
2. “CALL REJECTED” will display before returns
to previous mode.
Note:
• Alternatively, you may also reject the call by using your
phone’s keypad.
Ending a call
This function allows you to end a call conversation
via the car stereo.
1. Press the [] button to end the call.
2. “CALL ENDED” will display before returns to
previous mode.
Note:
• Alternatively, you may also end the call by using your
phone’s keypad.
Making a call (Redial)
1. Select “REDIAL” from Telephone Menu mode.
2. Press [ ] button.
3. “DIALING” will be displayed when call is
successfully activated.
Notes:
• Redial function is highly dependent on phone and
phone’s screen display level.
• Alternatively, user can make calls using the phone’s
keypad.
Making a call (Voice dial)
1. Select “VOICE DIAL” from Telephone Menu
mode.
2. Press [ ] button.
3. “DIALING” will be displayed when call is
successfully activated.
Cancelling a call
This function allows you to cancel an outgoing call
via the car stereo.
1. Press the [] button to cancel an outgoing
call.
2. “CALL ENDED” will display before returns to
previous mode.
Note:
• Alternatively, you may also cancel the call by using your
phone’s keypad.
English
20
Other Operations
Adjustment mode
1. Press and hold the [ADJ]button for 1 second
or longer to switch to the adjustment selection
display.
2. Press the [ ]/[ ] button to select the “item
name”.
“12/24 HR” CLOCK EDIT B/TOOTH
SETTINGS RDS SETTINGS FACTORY
RESTORE
* Some of the items will have “ ” indicator
light on, the [ ] button must be pressed
to display the setting value.
3. Press the [VOL +/-] button to select the
“desired setting value”.
Clock Format
Toggle between 12 or 24 hour format for clock
display.
1. Press the [VOL +/-] button to select “24 HOURS”
or “12 HOURS”
12 HOURS - 12 hour format display
24 HOURS - 24 hour format display
Clock Edit
This settings allows the user to adjust the clock
manually.
1. Select “CLOCK EDIT”.
2. Press the [ ] button.
3. Press the [ ]/[ ] to toggle between hour/
minute adjustment.
4. Press the [VOL +/-] button to decrease the
hour/minute.
5. Press the [ ] button to store the settings.
Audio Streaming Operations
Note:
• Be sure to read the chapter “Pairing with an
external audio player (A2DP support)”before
proceeding.
What is audio streaming?
Audio streaming is a technique for transferring
audio data such that it can be processed as a
steady and continuous stream.
Users can stream music from their external audio
player to their car stereo wirelessly and listen to
the tracks through the car’s speakers.
Listening to audio streaming
1. Press the [SRC] button and select the B/
TOOTH AUDIO mode, then audio streaming will
be played.
“TUNER” “USB” “B/TOOTH AUDIO”
“TUNER” ...
Notes:
• System will not automatically switch to B/TOOTH
AUDIO mode when A2DP is connected.
• If the B/TOOTH AUDIO mode is selected when no
A2DP device is connected, the display shows
“NO AUDIO”.
Play/Pause a track
1. Press the [ ] button to pause play.
2. To resume track play, press the [ ]
button again.
Selecting a track
Track-up
1. Press the [ ] button to move to the
beginning of the next track.
2. Each time the [ ] button is pressed,
playback proceeds to another track in the
advancing direction.
Track-down
1. Press the [ ] button to move to the
beginning of the previous track.
2. Each time the [ ] button is pressed, play
back proceeds to previous track in the
reverse direction.
Fast-forward/fast-backward
Fast-forward
1. Press and hold the [ ] button for 1 second or
longer.
Fast-backward
1. Press and hold the [ ] button for 1 second or
longer.
Note:
• This feature is dependent on mobile phone and mobile
application.
Display selection
1. You can choose the display type by pressing
the [DISP] button.
2. Every time the [DISP] button is pressed, the
display type switches in the following order:
Main Display (Title Name) Artist Name
Album Name Clock Display Main
Display...
Table of contents


