Protos XL380 V2 User manual

XL380 V2- Instructions Manual
Instructions Manual
1
Always check on www.xlpower-rc.com for a more recent version of this manual
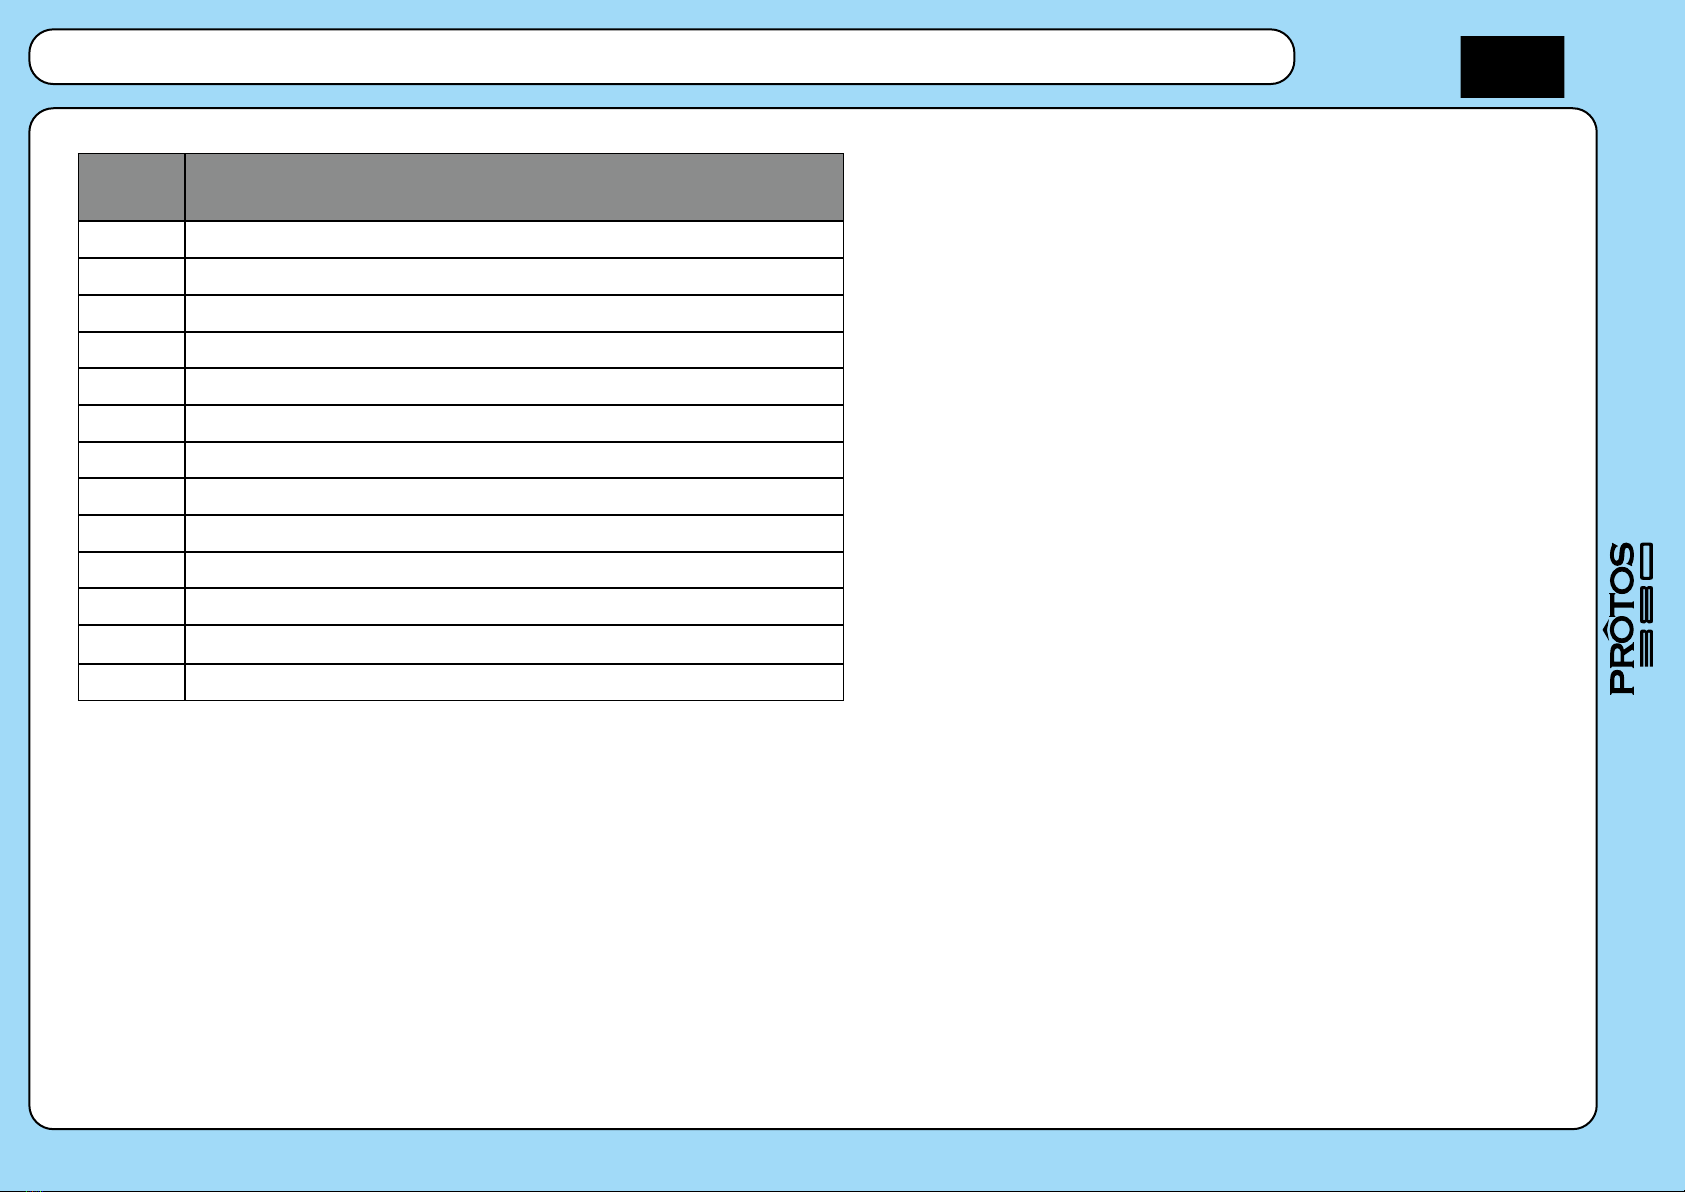
Main rotor diameter.................
Tail rotor diameter..................
Length without main blades.......
Length with main blades...........
Overall height........................
Tail rotor-Main rotor ratio..........
Main pulley............................
Autorotation pulley..................
Tail pulley.............................
864mm (380mm blades)
181mm (67mm tail blades)
800mm
1003mm (380mm blades)
235mm
4,27(4.43 optional)
120T
94T
22T(21T optional)
Index
Instructions Manual
2
Pages Content
3safety rules
4tools required for assembly
5R/C equipment required to complete
6how to read this manual
7motor pinion teeth choice
8-25 main frame assembly
26-34 head assembly
35-48 tail assembly
49 ESC, BEC
50 canopy installation
51-56 Metal Tail upgrade (optional)
57 Alu main blade holder set (optional)
58 Metal Tail blade holder upgrade(optional)

Always follow these rules for safety
Instructions Manual
3
Operate the helicopter in open areas with no people nearby.
Do NOT operate the helicopter in the following places and situations (or else you risk severe accidents):
-in places where children gather or people pass through
-in residential areas and parks
-indoors and in limited space
-in windy weather or when there is rain, snow, fog or other precipitation
If you do not observe these instructions you may be held liable for personal injury or property damage!
Always check the R/C system prior to operating your helicopter.
When the R/C system batteries get weaker,the operational range of the R/C system decreases.
Note that you may lose control of your model when operating it under such conditions.
Keep in mind that other people around you might also be operating a R/C model.
Never use a frequency which someone else is using at the same time.
Radio signals will be mixed and you will lose control of your model.
If the model shows irregular behavior, bring the model to a halt immediately and disconnect the batteries.
Investigate the reason and x the problem.
Do not operate the model again as long as the problem is not solved, as this may lead to further trouble
and unforeseen accidents.
In order to prevent accidents and personal injury, be sure to observe the following:
Before ying the helicopter, ensure that all screws are tightened.
A single loose screw may cause a major accident.
Replace all broken or defective parts with new ones, as damaged parts lead to crashes.
Never approach a spinning rotor. Keep at least 10 meters/yards away from a spinning rotor blades.
Do not touch the motor immediately after use. It may be hot enough to cause burns.
Perform all necessary maintenance.
PRIOR TO ADJUSTING AND OPERATING YOUR MODEL, OBSERVE THE FOLLOWING
Operate the helicopter only outdoors and out of people’s reach as the main rotor operates at high rpm!
While adjusting, stand at least 10 meters
Novice R/C helicopter pilots should always seek advice from experienced pilots to obtain hints with assembly
and for pre-ght adjustments.
Note that a badly assembled or insuciently adjusted helicopter is a safety hazard!
In the beginning, novice R/C helicopter pilots should always be assisted by an experienced pilot
and never y alone!
XLPOWER
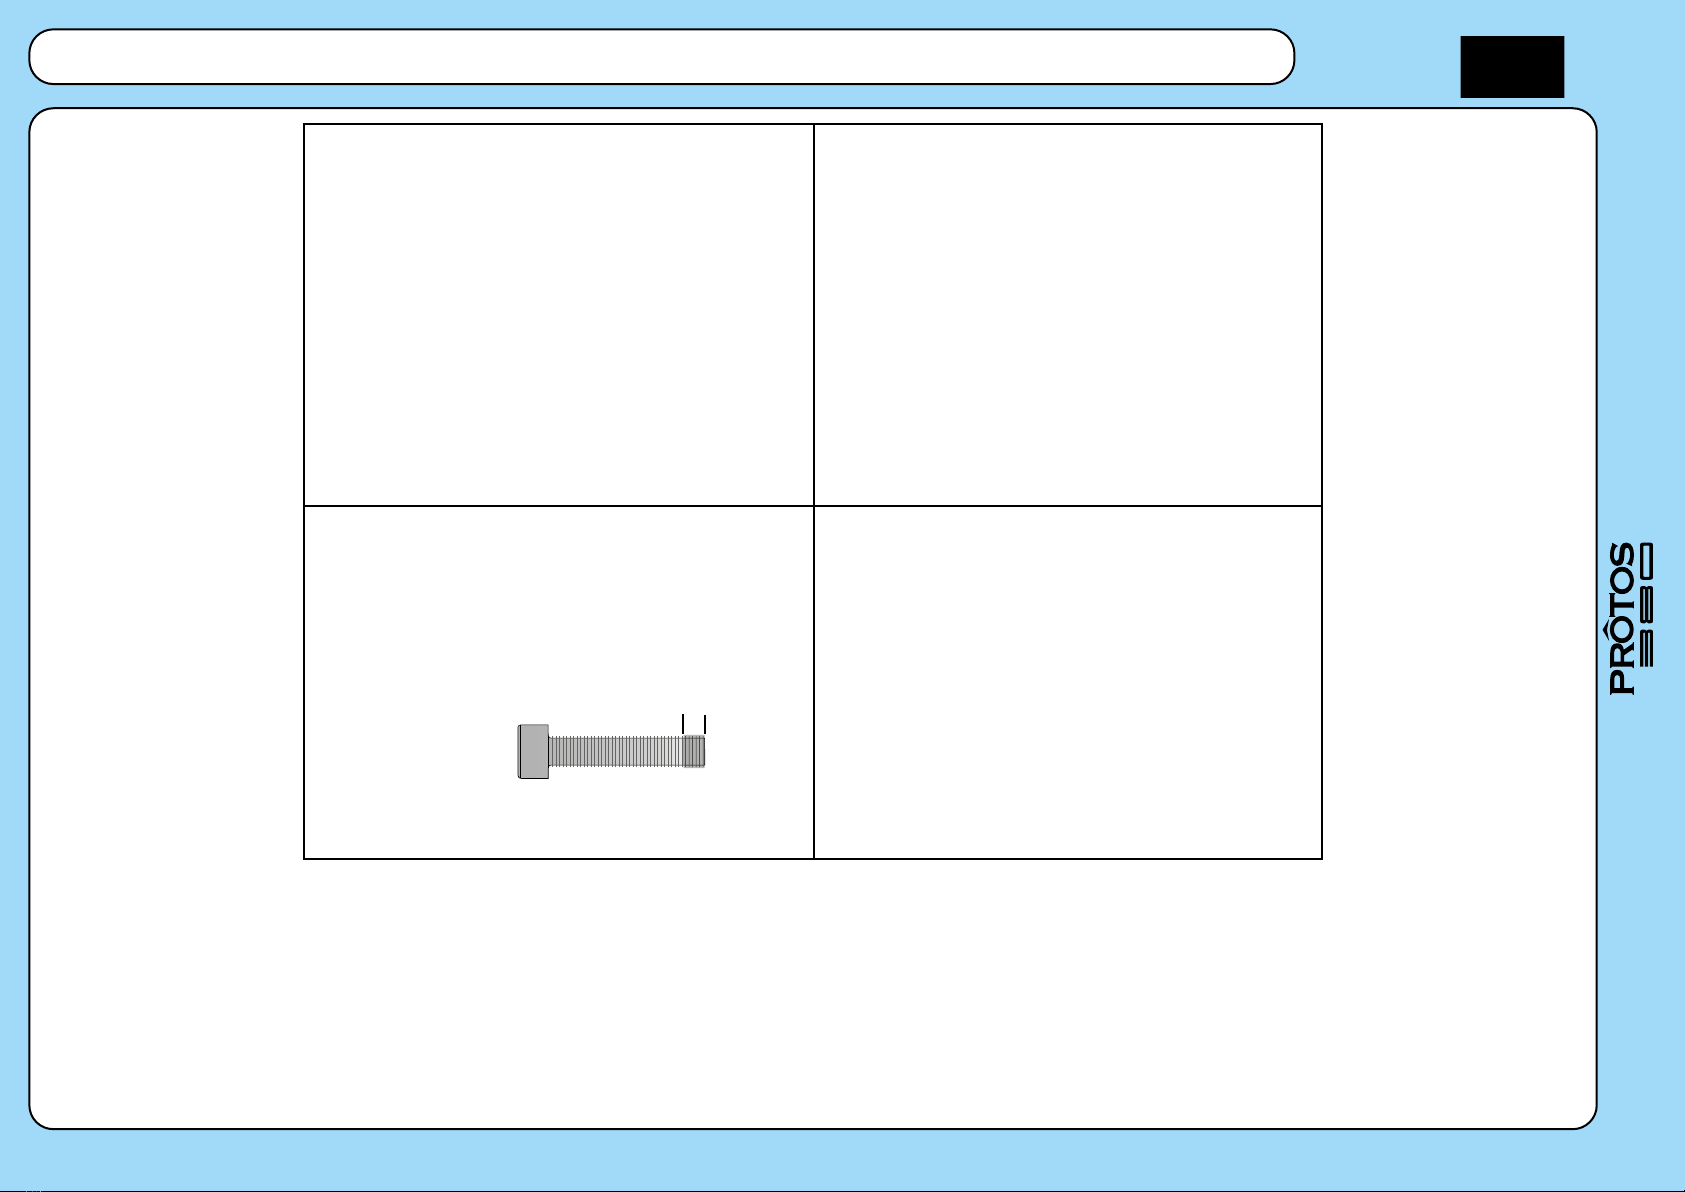
Tools required for assembly
Instructions Manual
4
Thrust bearing grease
Slow curing EPOXY
where indicated use
Thread lock MEDIUM
Hexagon screw drivers :
1,5mm
2,0mm
two 2,5mm (spindle)

Tools required for assembly
Instructions Manual
5
Main blades:
standard full carbon blades
380mm
Motor:3215 motor or other
5mm shaft motor arround
1000kv
ESC:50A or more
Swashplate servos supported:
all micro servos (qnty. 3)
Tail servo supported:
all micro and mini servos (qnty. 1)
Trasmitter
Receiver/satellite
Flybarless unit
Battery pack:
LiPo 6s 1800mAh
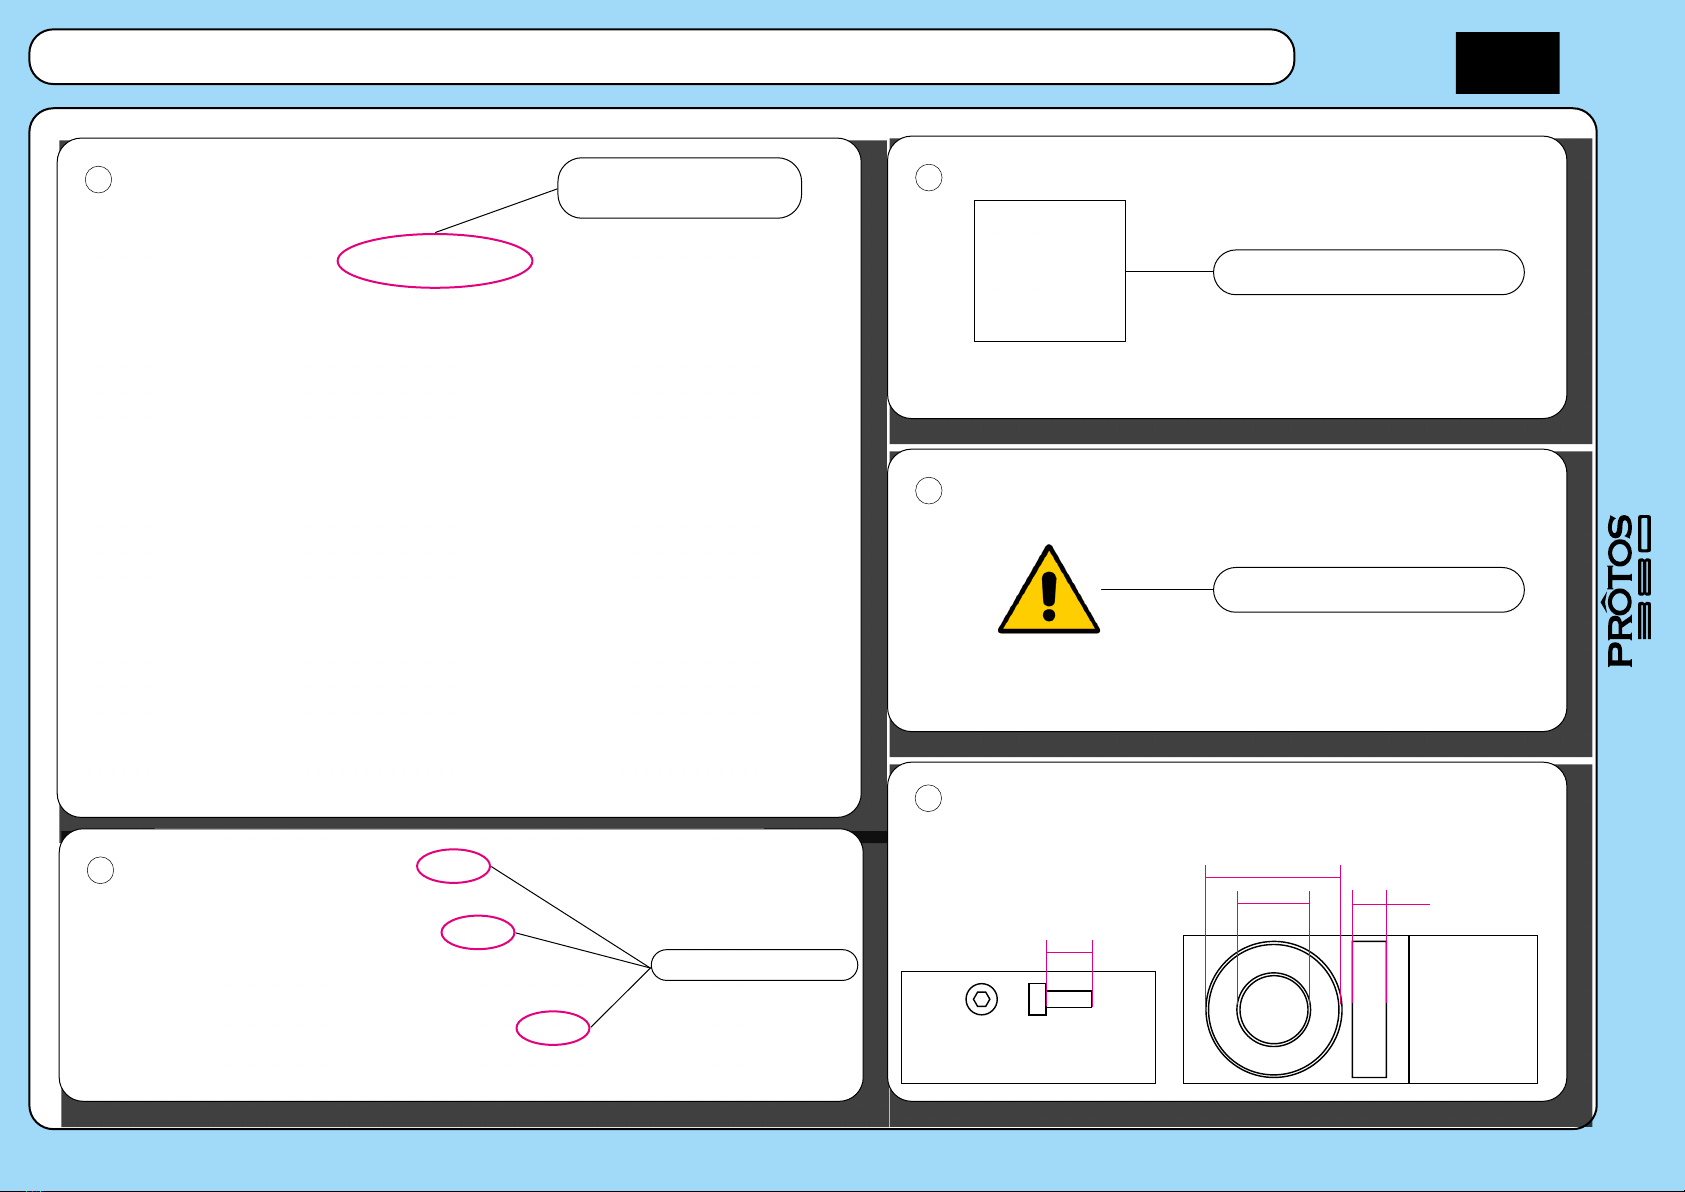
How to read this manual
Instructions Manual
6
Box and bag where you can
nd washers, bearings, screws
and parts
MSH spare part code
Apply a thin layer of threadlock on the
external part of the ball bearing
Pay attention to the instruction step
behind this icon
13
4
2
5
Hex screw M3x6
ART. MSH71108
6mm
24mm
12mm 6mm
Ball bearing
12x24x6
ART. MSH71155
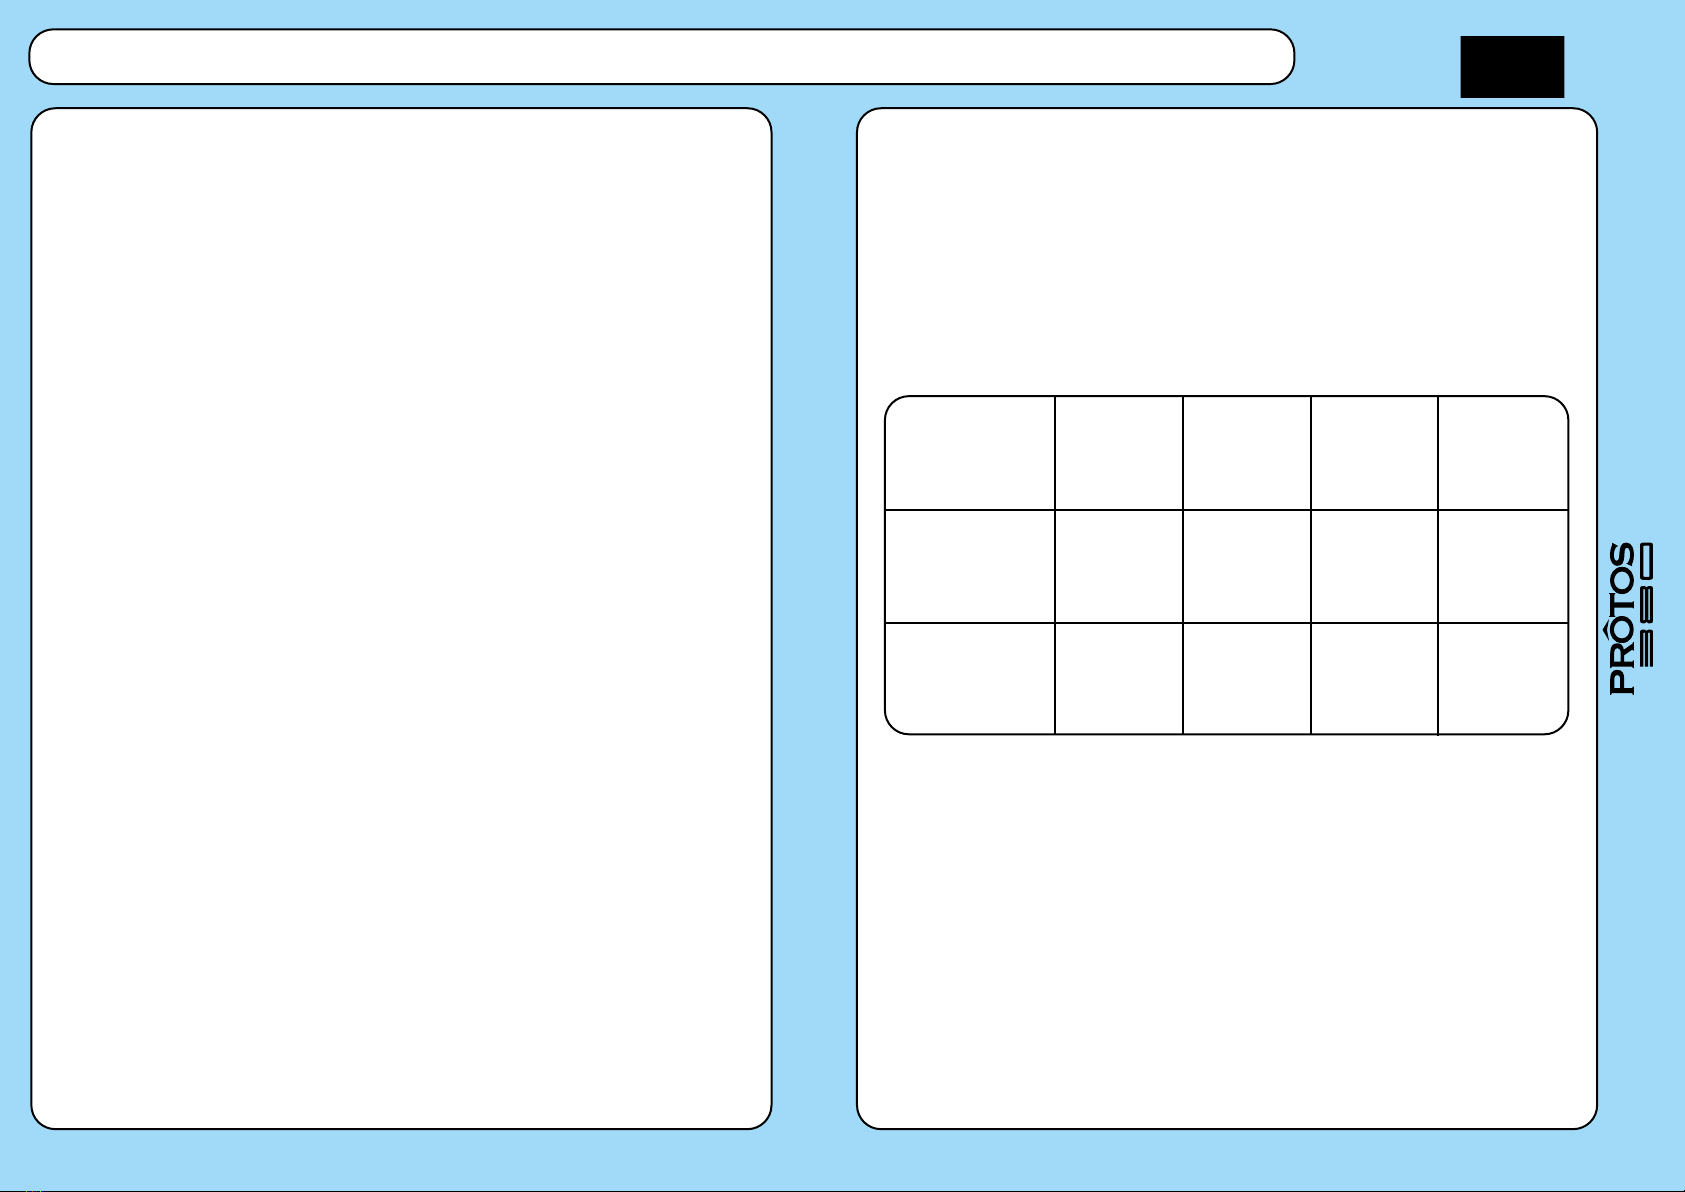
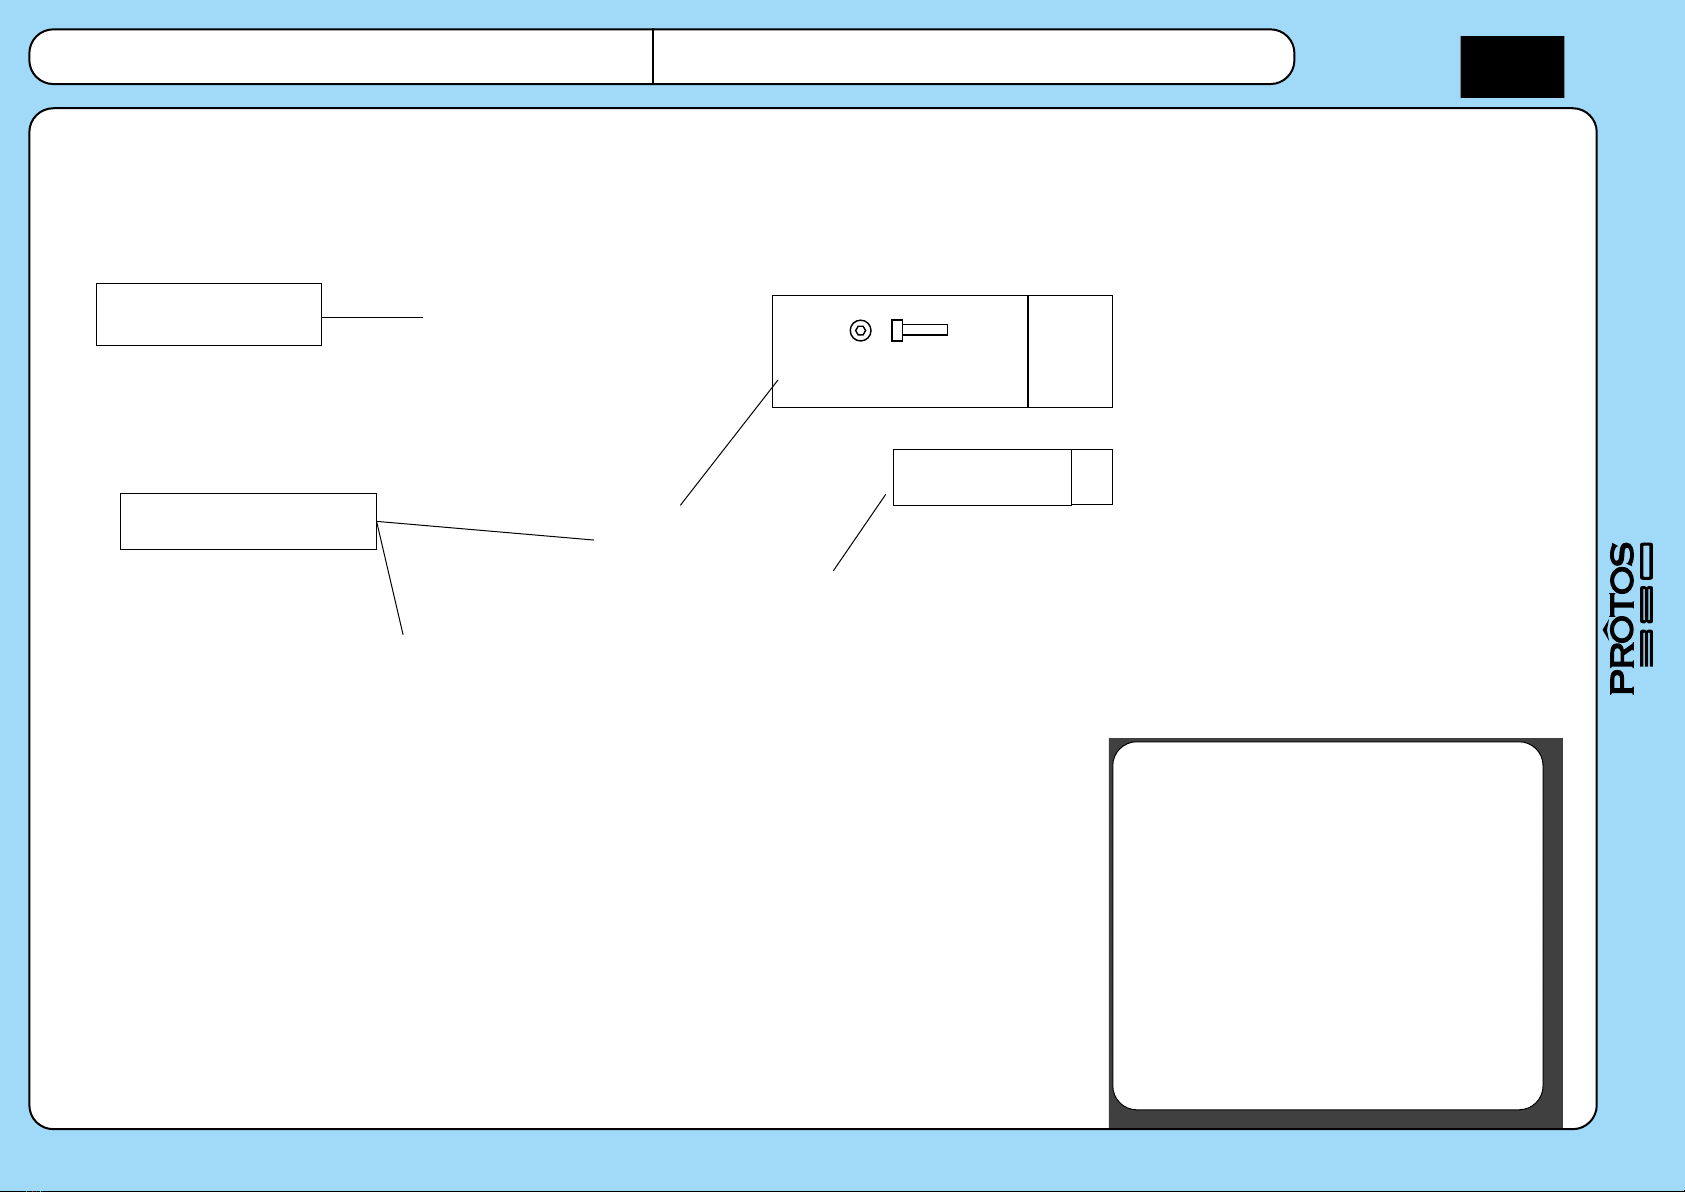
Motor pinion teeth choice
Instructions Manual
7
SportStock Extreme
3D
Hard
3D
920 Kv
ø 5mm 21T 20-22T 25T23-24T

Instructions Manual
Instructions Manual
8
Hex screw M3x6
ART. MSH41130
Hex grub screw M3x3
ART. MSH41133
where I can nd the parts
Pinion ø5 21T ART. MSH41223
(optional)
Pinion ø5 20T ART. MSH41222
Pinion ø5 22T ART. MSH41192
Pinion ø5 23T ART. MSH41224
Pinion ø5 24T ART. MSH41193
Pinion ø5 25T ART. MSH41194
5*10*4 Bearing
ART. MSH51071
Bag 1
Tighten hard and make sure the grub screw
engages in the recess when tightening
Motor mount
ART. XL38B01
XL3215 920KV
Motor
ART. XL38M01
Not include in kit

Instructions Manual
Instructions Manual
9
M2,5 Nut
ART. MSH51137
M2,5x10
ART. MSH51143
Do not fully tighten yet.Tighten
after adjusted belt tension
Washer
2,6x6,5x1,5
ART. MSH41217
where I can nd the parts
Bag 1
3rd bearing block
ART. XL38B02
Ball bearing
6x12x4
ART. MSH41074
ART. MSH41154

Instructions Manual
Instructions Manual
10
Main pulley assembly
ART. MSH41145
Hex screw M2x4
ART. MSH41141
Main pulley
ART. MSH41146
Oneway hub
ART. XL38B03
Oneway Bearing HF1012(Pre-
assembled)
ART. XL52A15
Ball bearing (Pre-
assembled)
10x15x4
Autorotation pulley
ART. MSH41147
Oneway shaft
ART. XL38B04
where I can nd the parts
Bag 2

Instructions Manual
Instructions Manual
11
where I can nd the parts
This side up
Bag 2
Main shaft Protos 380
ART.MSH41148
M2,5 Nut
ART. MSH51137
M2,5x16
ART. MSH51145
Instructions Manual
Instructions Manual
12
where I can nd the parts
Bag 2
Front belt
ART.MSH41149
Tail belt
ART.MSH41150

Instructions Manual
Instructions Manual
13
where I can nd the parts
Bag 2 + Bag 3
Washer 2,5x5,5x0.5
ART. XL38A01
Carbon main frame XL380 V2
ART. XL38B05-1
Hex screw M2x6
ART. MSH41122
Hex screw M2.5x6
(Do not fully tighten yet.Tighten
after adjusted belt tension )
ART. MSH51153

Instructions Manual
Instructions Manual
14
where I can nd the parts
Bag 2 + Bag 3
Hex screw M2.5x6
(Do not fully tighten yet.Tighten
after adjusted belt tension)
ART. MSH51153
Washer 2,5x5,5x0.5
ART. XL38A01
Carbon main frame XL380 V2
ART. XL38B05-1
Hex screw M2x6
ART. MSH41122
Instructions Manual
Instructions Manual
15
Hex screw M2X8
ART. MSH41128
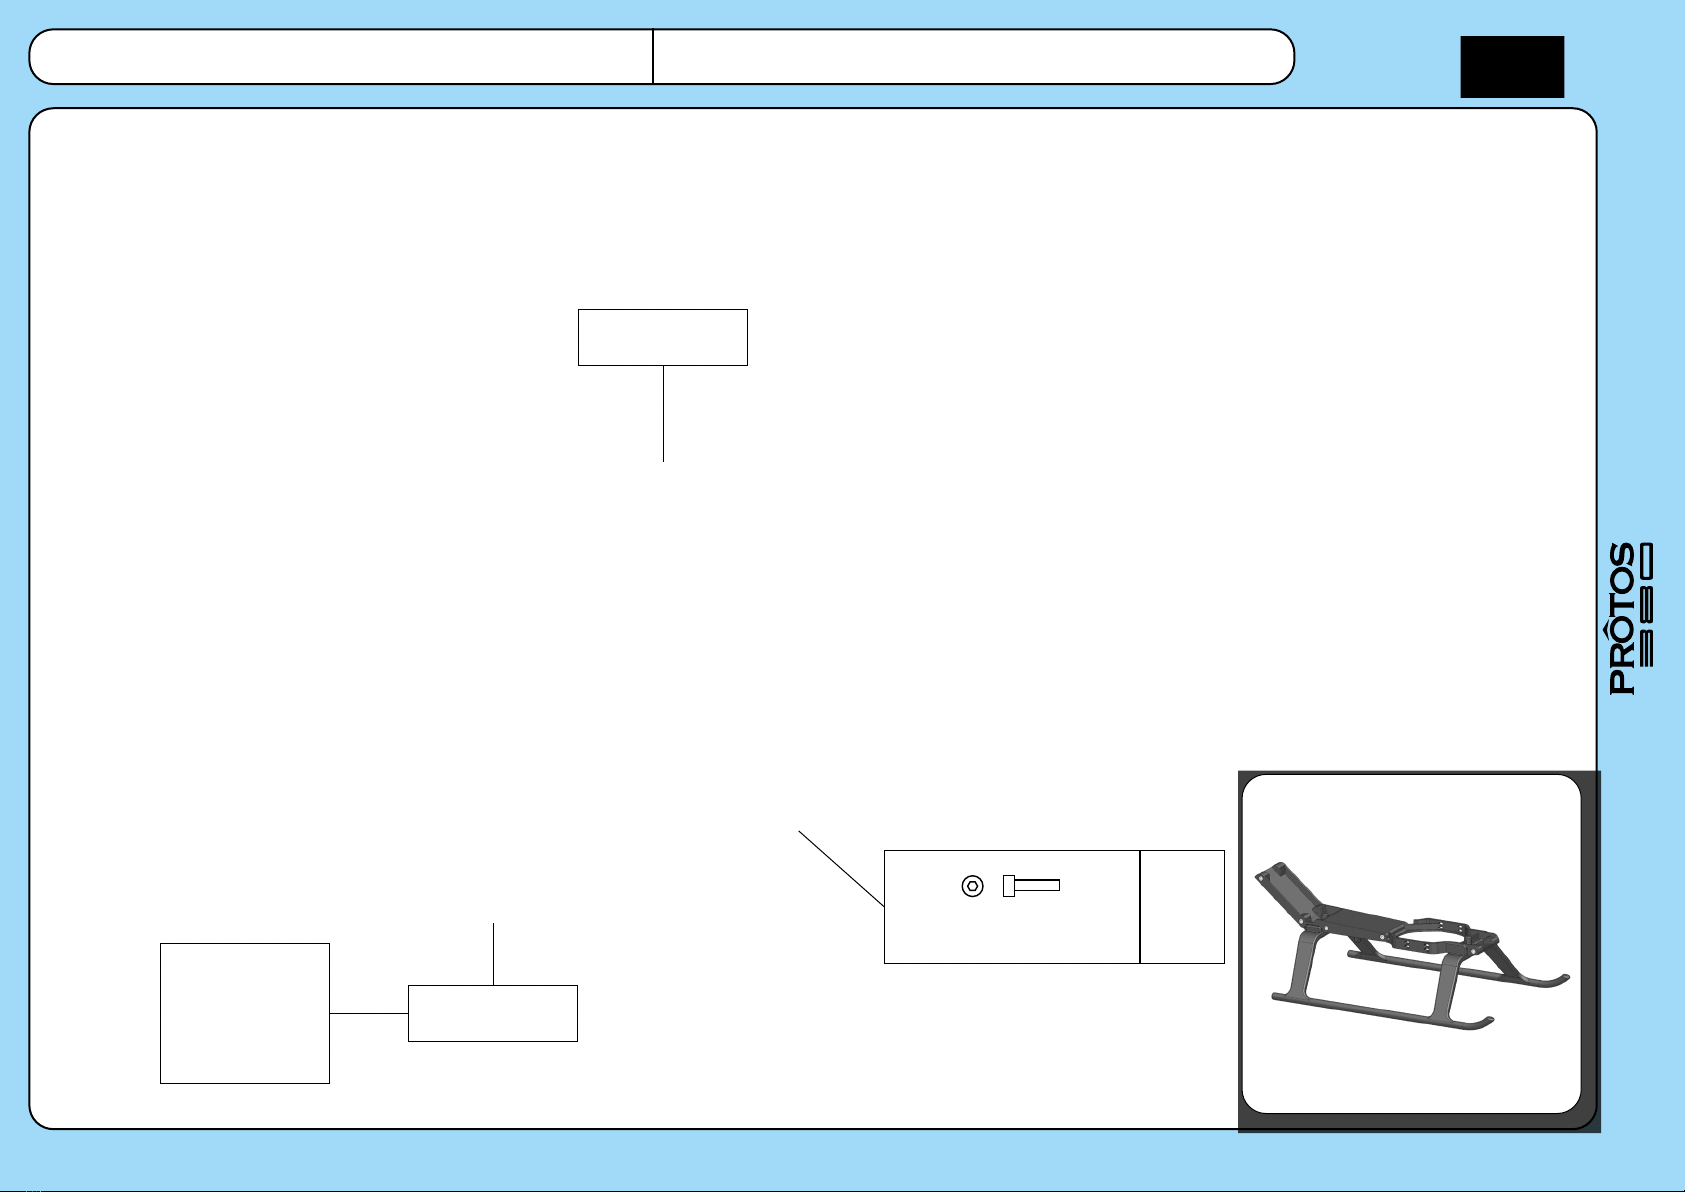
Lower plate Protos 380
MSH41152
Landing gear White
ART. MSH41214
where I can nd the parts
(optional)
Landing gear Black
ART. MSH41011
Landing gear Yellow
ART. MSH41207
Landing gear Red
ART. MSH41232
Bag 4
Instructions Manual
Instructions Manual
16
where I can nd the parts
Bag 4
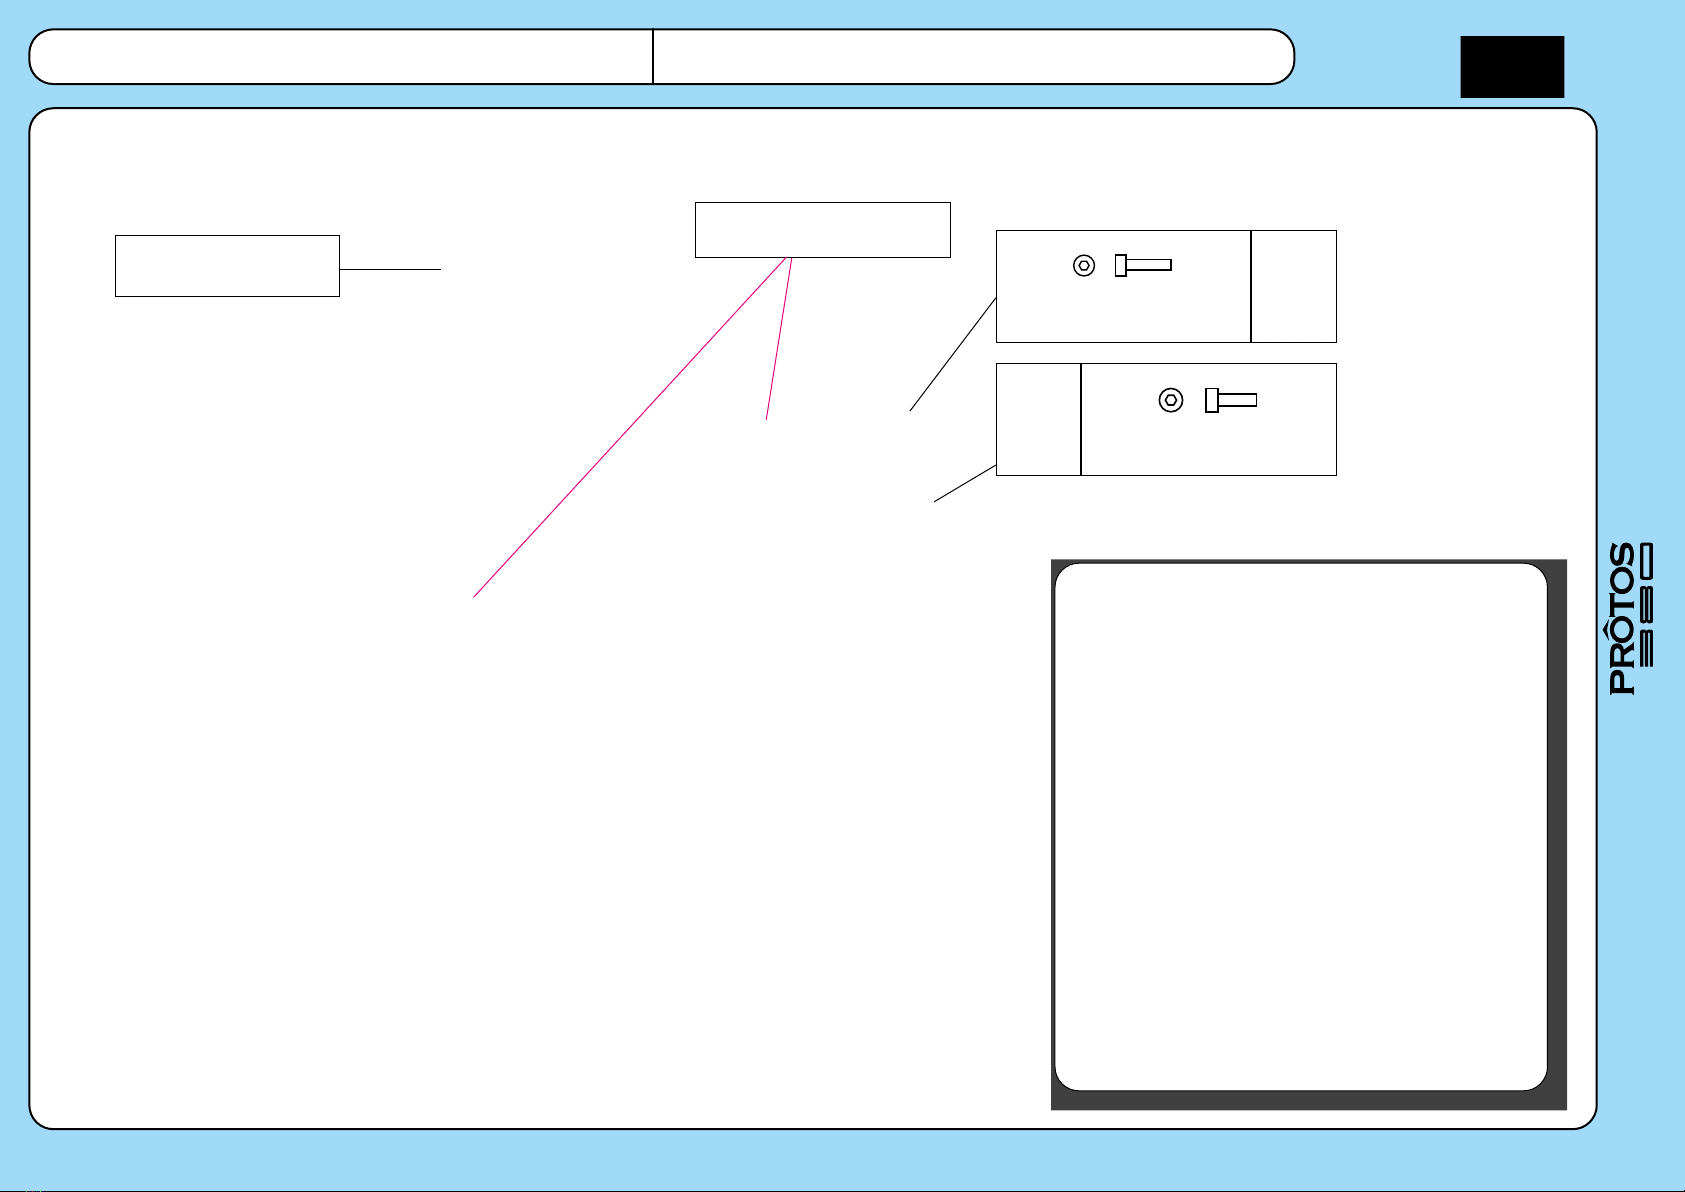
Hex screw M2x6
ART. MSH41122

Instructions Manual
Instructions Manual
17
Servo frame Protos 380 V2
ART. MSH41154 -1
Ball bearing
6x12x4
ART. MSH41074
ART. MSH41154-1
where I can nd the parts
Bag 4
Instructions Manual
Instructions Manual
18
where I can nd the parts
Bag 4
Hex screw M2x6
ART. MSH41122
ART. MSH41154-1
Hex screw M2X8
ART. MSH41128
Servo mount
ART. XL38B10
Servo frame Protos 380 V2
ART. MSH41154 -1
Instructions Manual
Instructions Manual
19
where I can nd the parts
Bag 4
Hex screw M2X8
ART. MSH41128
Canopy mount scew
ART. XL38B07
Servo mount
ART. XL38B10
Servo frame Protos 380 V2
ART. MSH41154 -1

Instructions Manual
Instructions Manual
20
where I can nd the parts
Bag 4
Canopy mount post
ART. XL38B06
380 X frame
ART. XL38B12
M2,5x6
ART. MSH51153
Other Protos Toy manuals


Popular Toy manuals by other brands


Techone
Techone angel epp instruction manual

Step 2
Step 2 My First Christmas Tree 8798 manual

Step 2
Step 2 Fiesta Cruise Sand and Water Table Assembly instructions

V-tech
V-tech KidiStar Karaoke Remix Parents' guide

V-tech
V-tech Kidizoom SELFICAM Parents' guide

Fisher-Price
Fisher-Price REAL LOVING BABY L3834-0920 instructions