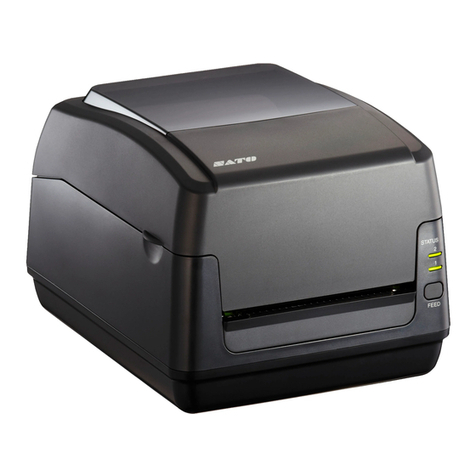
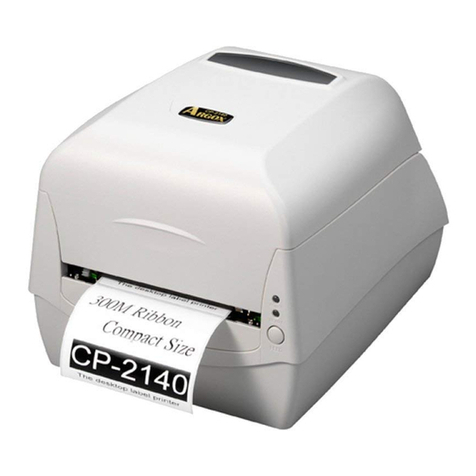
Provill BTP-2100E User manual

U
Us
se
er
r
M
Ma
an
nu
ua
al
l
Barcode Printer
PROVILL TECHNOLOGY Co., Ltd.
M
Mo
od
de
el
l:
:
B
BT
TP
P-
-2
21
10
00
0E
E

BTP-2100E USER MANUAL
Declaration
Information in this document is subject to change without notice. PROVILL
Technology Co., Ltd. (Hereinafter referred to as “PROVILL”) reserves the right to
improve products as new technology, components, software, and firmware become
available. If users need the further data about these products, please feel free to
contact our market department or your local distributor.
No part of this document may be reproduced or transmitted in any form or by any
means, electronic or mechanical, for any purpose without the express written
permission of PROVILL.
Copyright
This manual was published in 2008 and PROVILL owns the copyright.
Made in China.
Version: 1.0.
Trademark
Our registered trademark
Safety warning
Caution: Must comply with warning to avoid bodily harm or damage to
device.
Notice: Provides important information and prompts for printer
operation.
Warning
This is a class A product. In a domestic environment this product may cause radio
interference in which case the user may be required to take adequate measures.
Quality Certification
(DNV)ISO9001:2000
EMC and Safety Standards Applied
- 1 -

BTP-2100E USER MANUAL
- 2 -
CONTENT
General Safety Information .................................................... 1
Overview ............................................................................... 2
Outline................................................................................ 2
Package content .................................................................. 2
Printer mount ...................................................................... 3
Connect with power adapter.................................................. 3
Connect communication cable ............................................... 3
Printer operations ................................................................. 4
Apperance and parts ............................................................ 4
Main modules ...................................................................... 5
LEDs and keys .................................................................... 5
Loading paper ..................................................................... 8
Assembling the ribbon ........................................................ 10
Starting the printer ............................................................. 11
Installing the driver ............................................................ 13
Printer adjustment................................................................15
THP pressure adjustment.................................................... 15
Sensor position adjustment................................................. 15
Printer common parameter adjustment ................................. 17
Cleaning THP .................................................................... 20
Cleaning sensors ............................................................... 20
Cleaning the platen ............................................................ 20
LEDs and buzzer status...................................................... 22
The printout quality issue ................................................... 23
Appendix..............................................................................24

BTP-2100E USER MANUAL
- 3 -
Appendix 1 Technical specifications ................................... 24
Appendix 2 Self-test page................................................... 28
Appendix 3 Print and paper out position ............................... 30
Appendix 4 Communication interface ................................... 31
Appendix 5 Paper load guide in peel-off mode ...................... 33

BTP-2100E USER MANUAL
General Safety Information
Before installing and using the printer, please read the following items
carefully.
Safety Labels
The THP (THP) is calorific and its temperature is high when
printing or just after the operation, so please don’t touch it and
its peripherals for safety purpose.
Due to the static, please don’t touch the surface of THP and
connecting parts to keep it from damages.
Caution
zInstall the printer on a flat and stable place.
zReserve adequate space around the printer so that the operation and maintenance
can be performed conveniently.
zKeep the printer far away from water source and do not expose the printer to direct
sunlight, strong light and heater.
zDo not use or store the printer in a place exposed to heat of fire, moisture and
serious pollution.
zDo not place the printer on a place exposed to vibration and impact.
zNo dew condensation is allowed to the printer. In case of such condensation, do
not turn on the power until it has completely gone away.
zConnect the AC adaptor to an appropriate earthing outlet. Avoid sharing a single
outlet with large power motors and other devices that may cause voltage
fluctuation.
zDisconnect the AC adapter when the printer is deemed to spare for a long time.
zDon’t spill water or other electric materials into the printer. In case that this
happens, turn off the power immediately.
zDo not allow the printer to start printing when there is no recording paper in,
otherwise the THP and platen roller will be damaged.
zTo ensure print quality and normal lifetime, use recommended paper and ribbon or
materials with same quality.
zTurn off the printer before connecting or disconnecting interfaces connectors to
prevent control board from damages.
zSet the print darkness to a lower grade as long as the print quality is acceptable.
This will help to keep the THP durable.
zDo not disassemble the printer without permission of a technician, even for
repairing purpose.
zKeep this manual carefully at hand for ready reference.
- 1 -

BTP-2100E USER MANUAL
Overview
Outline
BTP-2100E/2200E/2300E printer has a smart appearance and high
performance, which is an ideal label printer for office use. It can apply to
real-time label printing, label batch printing, transport and commercial label
printing, other receipt printing for railway, airport, bus station, etc.
This product can connect with the peripheral equipments via serial or other
interfaces, at the same time it can provide common drivers for the operation
systems as WINDOWS95/98/2000/NT4.0/XP and a software package based
on DLL.
zThermal / thermal transfer printing.
zLow noise and high-speed thermal printing.
zEasy and quick paper load.
zUse 32 bit hi-speed micro-processor.
zUse Auto-suitable control of heat history and temperature.
zUse new THP which has long lifetime and hi-quality of printout.
zSupport continuous paper, label paper, marked paper and
perforated paper.
Package content
Unpacking the printer carton and refer to the packing list to check parts as
below (include all parties in figure 1.1, of which Serial cable or USB cable shall
be used depending on corresponding interface type). If any part is short or
damaged, please contact with our distributor or manufacturer.
Figure 1.1
- 2 -

BTP-2100E USER MANUAL
Printer mount
The printer should be placed on the flat table surface where water,
moisture or dust should be prevented. When mounting it, the slanting
extent shall not exceed 15°.
Connect with power adapter
1) Be sure that printer power switch is off.
2) Connect one end of AC power cable to power adapter, then put another
end of power adapter into power adapter socket at the back of the
printer.
3) Put another end of AC power cable into 220V power socket.
Notice: If the printer is idle for a long period, please disconnect the
power.
Connect communication cable
1) Be sure the printer power switch is off.
2) Put communication cable into matched interface and fix it in using clip
spring or screw of the plug.
3) Connect another end of communication cable to the host.
Notice: Please do not connect or disconnect Serial and Parallel cable
with power on!
- 3 -

BTP-2100E USER MANUAL
Printer operations
Apperance and parts
1—Bottom cover
2—Top cover 3—Left cover
4—Key 5—LED
6—Power switch
7—Peel-off turnplate
8—Tear-off bar
9—Scale Label
10—Platen holder
11—Ribbon holder
12—THP pressure knob
13—Ribbon baffle
14—Ribbon rewinding shaft
15—Ribbon output shaft
16—Paper guide
17—Paper roll holder
18—THP cover
19—Manual ribbon bushing
20—THP lift-up button
21—Ribbon block
22—Locking hook
23—Paper guide block
24—Platen
25—Reflection sensor
26—Sensor top cover
27—Transmission sensor
28—Transmission sensor cover
29—THP
30—Ribbon turn wheel
- 4 -

BTP-2100E USER MANUAL
31—THP micro-switch
32—Power adaptor interface
33—Serial interface
34—Parallel interface
35—USB Interface
Main modules
1) Keys and LEDs(4, 5)
Indicate the printer status and execute its print functions.
2) Power switch(6)
Turn off the power when pressing “O”, and turn on the power
when pressing “-”.
3) Paper holder(17)and Paper guide(16)
Hold paper roll and prevent it sliding in paper outlet.
4) Paper guide block(23)
Prevent paper sliding in paper outlet.
5) Reflection sensor(25)
Verify black mark paper, check it available or position it.
6) Transmission sensor(27)
Verify label paper, check it available or position it.
7) THP micro-switch(31)
Check THP open or closed status.
LEDs and keys
LEDs functions
LED name Status Explanation
Always light Printer is in standby status
Power LED
(Green)Flash Printer is busy(process commands)
Always Off Printer is in standby status
Printer enters pause status
Stop LED
(Yellow)Always light Wait and confirm label is taken away in
tear-off/peel off mode
Always Off Printer is in standby status
Error LED
(Red)Flash Printer has error
Table 2.1
- 5 -

BTP-2100E USER MANUAL
- 6 -
Keys functions
Keys Functions Explanation
Feed paper
In standby status, press down “Feed” key, the
printer feeds one label for non-continuous
paper. The printer feeds paper until releasing
the key for continuous paper.
feed
key
Print self-test page
Turn on the power and press “feed” key until
buzzer sounds, then the printer starts to print
a self-test page.
In standby status, press down “Pause” key,
the printer enters pause status. When
pressing down “Pause” again, the printer
shall be back to standby status.
Pause Press down “Pause” key in printing, then the
current print job shall pause. When pressing
down “Pause” key again, the printer shall
continuous last print job.
Confirm label is
taken away
In tear-off/peel-off mode, after the printer
shall print a label and stop without paper
sensor, the light shall be on. User presses
down “Pause” to confirm label taken away.
then printer shall retract paper and start to
print next label.
Pause
key
Paper checkout
Turn on the power and press down “Pause”
until buzzer sounds, the printer shall feed
paper and verify paper.
Cancel print job
First press “Pause” key to stop current print
job, then press “Pause” key to cancel the
print job.
Remove error This key is used to remove printer error and
recover printer standby status
Cancel
key
Enter default Serial
communication
Turn on the power and press down “Cancel”
key until buzzer sounds, then the printer
enters default serial mode.(9600, N, 8, 1,no
Auto paper load)
Table 2.2
LEDs and Buzzer
1) Buzzer sounds shortly under following cases:
zWhen the printer is turned on or reset with software
successfully.
zErase FLASH successfully.
zDownload character set, bitmap to FLASH successfully.

BTP-2100E USER MANUAL
2) Printer error information, buzzer and LEDs:
Error
information Buzzer sound LED
THP lift-up
Wrong command
functions
Paper end
Serial
communication
error
Paper checkout
error
THP voltage /
temperature
abnormal
Ribbon is used
out
System error
Flash
Table 2.3
Key-configuration functions
The printer can print the configuration content and execute the
parameter configuration using keys and LEDs’ status.
Serial interface and Parallel interface are standard interfaces of printer,
RS-232 interface is standard Serial interface, Centronics parallel
interface accords with IEEE1284. User can also choose USB interface
to replace Parallel interface.
1) Simple Parameter Settings
Key Key Function LEDs Status
FEED+
PAUSE
Press “FEED” and “PAUSE”, release after the
buzzer sound once, start to print simple
parameter setting menu and enter simple
parameter setting mode.
Three LEDs flash
alternately.
Press “FEED” first to confirm the change of the
paper type after entering the simple mode. Power LED flashes
FEED
Continue to press “FEED” to switch among
label paper, label mark paper, continuous
paper.
Different
compounding of the
three LEDs means
different setting.
Press “PAUSE” to confirm changing the type of
print after entering the simple mode. PAUSE LED flash.
PAUSE
Continue to press “PAUSE” to switch print
mode between thermal print and thermal
transfer print.
Different
compounding of the
three LEDs means
different setting.
- 7 -

BTP-2100E USER MANUAL
Press “CANCEL” first to confirm the change of
Auto. Paper Feed after entering the simple
mode.
Error LED flash
CANCEL
Continue to press “CANCEL” to switch between
Auto. Paper Feed mode and non-auto paper
feed mode.
Different
compounding of the
three LEDs means
different setting.
FEED+
CANCEL
Press “FEED” and “CANCEL” to save the
modified parameter and exit the simple
parameter setting mode and back to standby
status.
Power LED always
light.
Table 2.4
2) Complex Parameter Settings
Key Key Functions LED Status
PAUSE+
CANCEL
Press “PAUSE” and “CANCEL”, release
after the buzzer sound once, start to print
complex parameter setting menu and
enter complex parameter setting mode.
POWER LED always
light.
STOP LED not light.
ERROR LED always
light.
FEED
Press “FEED” to turn the main menu
content withershins or change parameter
of current menu item.
POWER LED flashes
once.
PAUSE
Press “PAUSE” to print current setting
items to be changed. After that, press
“PAUSE” to print the changed setting
items and back to the first item of the
setting menu.
STOP LED flashes
once.
CANCEL
Press “CANCEL” and turn main menu
content items deasil or change the
parameter of current menu item.
ERROR LED flashes
once.
FEED+
CANCEL
Press “FEED” + “CANCEL” to save the
changed parameter and exit complex
setting mode, then back to standby
status.
POWER LED always
light.
Table 2.5
Loading paper
1) Push up the top cover with two hands according to the arrows in figure
2.1 and open it.
2) Press down Print-head lift button. After ribbon holder is lift, turn it at the
angle shown as below (stop it until a slight sound “pa” is prompted) (see
figure 2.2).
- 8 -

BTP-2100E USER MANUAL
Figure2.1 Figure2.2
3) Load a paper roll on paper roll holder and add one paper roll guide
on each side of paper roll.
4) Drop paper roll on the paper holder to the paper room, then pull out the
front end of the paper and put it in the print path flatly, and also release
the paper guide to hold it. (See figure 2.3)
Figure2.3 Figure2.4
5) Paper roll has two sizes of I/D: 25mm (1 inch) and 38mm (1.5 inch).
When paper roll ID is different, the loading method of paper holder
into paper room will be different. Operation method is as below
(See figure 2.5 and figure 2.6).
- 9 -
Figure2.5 Figure2.6

BTP-2100E USER MANUAL
Notice:
zThe print side should be upside. If it is the marked paper, please
put black mark downwards.
zThe front end of paper roll should be in the middle of the platen as
possible as it can. This could be positioned with the mark of peel-off
plate(see figure 2.4).
Assembling the ribbon
1) Pull the manual bushing of ribbon output shaft slightly, then take off
ribbon output shaft and put it into ribbon core axis according to the arrow
in the figure as below. (See figure 2.7)
2) Lift up the ribbon holder at about 30°(When a slight sound “pa” is
prompted, the ribbon holder shall keep this position). Pull the manual
bushing out slightly until the ribbon output shaft is at the original position,
then release the manual bushing. The mount of ribbon output shaft is
finished. (See figure 2.8)
Figure 2.7 Figure 2.8
3) Put the ribbon front around the bottom of THP and rewind it on the ribbon
retraction shaft (see figure 2.9). Turn ribbon wheel to tight it up (the
loaded paper roll and ribbon see figure 2.10).
Figure 2.9 Figure 2.10
4) Press down the ribbon holder until it is locked, then close the top cover
- 10 -

BTP-2100E USER MANUAL
(see figure 2.11).
Figure 2.11
Notice:
zSelect the print mode: To select thermal transfer mode, you
need to mount ribbon. To select thermal mode, no need to
mount ribbon.
zIn normal condition, ribbon width should be bigger than the
paper width.
zDuring this mount, the ribbon should not be cockled or
damaged.
Starting the printer
Turn on the printer and self-test
1) Be sure that power adapter and communication cable are connected,
then turn on the printer power switch.
2) The printer starts self-test. After this self-test, buzzer shall sound one
time.
3) If the printer sets the media type as non-continuous paper and allows
Auto paper load, it shall automatically load paper to the print position.
Notice: If the printer cannot start or work normally, please contact
with our distributors or manufacturer.
Print a self-test page
The self-test page includes the printer configuration sample and TPH
test sample.
1) Turn off the printer power and load the media. Hold down “Feed”
key and turn power switch to “-” until the buzzer gives one sound.
The printer shall feed paper and print a self-test page after
releasing “feed” button. (Self-test page sees appendix 1).
2) The configuration describes the current settings of the printer.
- 11 -

BTP-2100E USER MANUAL
3) THP test page can show if the THP status is in good status.
Set paper type
Before the print, set the paper type in driver correctly and pay attention
to the relation between paper type and sensor in paper load. Select
paper type according to the table as below:
Paper type in the
driver Actual paper type Sensor type
Continuous paper Continuous strip paper Reflection sensor
Non-continuous marked paper Reflection sensor
Non-continuous Perforated
paper
Black mark paper
Non-continuous edge-gap
paper
Reflection sensor
Label Non-continuous label paper Transmission sensor
Table 2.6.1
Checkout mark
A Manual checkout function
1) Turn off the printer.
2) Load the media properly.
3) Hold down “Pause” key and turn power switch to “-” position.
After the buzzer gives one sound, release “Pause” key, the printer
shall feed paper and start the checkout.
4) If checkout is successful, the printer enters standby status. If it fails,
the printer shall alert, then please check:
¾If media is loaded correctly.
¾If paper type loaded is consistent with current paper type of
the printer (via a self-test page printed)
Notice:
In the following cases, the media needs to be verified before the
print:
It is the first time to mount and use the printer.
The printer is used again after a long idle time.
Replace new type of paper roll.
First time to use it after cleaning the sensor.
Fails to identify marks in effect during the print.
Operation environment of the printer is changed greatly.
B Auto Checkout functions
Before starting the print job, the printer shall compare the parameter
set by customers with current parameter of the printer to decide if it
shall initiate the checkout with the process as below:
- 12 -

BTP-2100E USER MANUAL
1) Set paper type and page length correctly in the printer driver.
2) Send the print job. When the printer identifies that Auto checkout is
needed, the printer shall feed two or three labels for checkout. It
shall enter pause status after success. After pressing pause key,
the printer shall exit pause status and print.
3) If the checkout fails, the printer shall alarm:
¾Please confirm if loaded paper is same with the one
selected in the printer properties. If they are different,
please correct and print it again. The printer shall restart
Auto checkout..
¾If the settings are correct and Auto checkout still fails,
please refer to manual checkout operation.
Notice:
¾Only when the printer checkout is correct, it can work
normally.
¾After following the steps above and cleaning the sensor, it
still fail to find out the failure reason of printer checkout,
please contact with maintenance people!
Installing the driver
The drive supports the operation system as Windows98,
WindowsNT4.0, Windows 2000, Windows XP, Windows
server 2003, which is stored in the disk packed with printer. You also
can download the driver from our website www.newbeiyang.com.cn.
The installation method of the driver:
1) Run “Setup.exe” in the driver package and read the license
agreement carefully. If you accept all the clauses in this Agreement,
please click “I Accept” and then click “Next” button.
2) Choose the type and name of printer to be installed. If you want to
set this printer as the default printer, please select “setting the
printer as default printer” button, then click “next”.
3) Choose the method of installation, then click “next” button.
4) Choose the current system type, then click “next” button.
5) Set the printer port, then the system defaults interfaces as “LPT1”.
User can execute the installation depending on the current port.
- 13 -

BTP-2100E USER MANUAL
- 14 -
Please choose “BYCOMx” for the Serial drive in Windows NT4.0 or
above (“x” equals to “1,2,3,4,5,6,7 or 8”), then click “Finish” to
end the installation.
6) Press “Yes” in the dialog box to reset computer in Windows 98.
7) If you want to use USB interface, you must install USB device
driver first, installation step as follow:
When connecting USB interface printer to the host, the system identifies
USB device automatically and pop up the driver installation guide. The
printer finds out USB device drive path and installs this driver depending
on this guide.
If you want to update the driver, please run “Uninstall.exe” in the driver
package to uninstall original driver first.

BTP-2100E USER MANUAL
Printer adjustment
THP pressure adjustment
THP pressure adjustment device has two adjusting knobs each of which
has four levels indicating different THP pressures. When turning the
knob in clockwise, the THP pressure increases along with level number.
(See figure 3.1.1).
In normal print, follow the pressure level of factory default settings,
normally at level 2 or 3.
Figure 3.1.1
In following cases, you need to do the adjustment:
1) When the THP pressure in using doesn’t meet the requirement
(for example, rewinding ribbon not smoothly), turn the adjusting
knob in clockwise to increase it.
2) In using different width label for the print, different level can be
selected (only for reference, please see the table as below)
Label width Left level Right level
25mm 1 1
51mm 2 2
75mm 3 3
110mm 4 4
Notice:
It is recommended to use the THP pressure as low as
possible under the condition that the printout meets the
requirement.
Sensor position adjustment
When the paper width is changed, can adjust sensor position
- 15 -

BTP-2100E USER MANUAL
according to the methods as below:
1) According to the marked position of the media, measure the
sensor position required in advance.
2) Push the latch according to the arrow on top cover, then turn
and take off top cover of the sensor (see figure 3.2.1).
3) Act on sensor latch to move the sensor to the required
position (For example: below the black mark) (see figure
3.2.2).
4) Press down top cover latch and assemble the top cover.
Top cover
of sensor
Figure 3.2.1
Figure 3.2.2
- 16 -
Table of contents
