Prstech DoorCAM DC2 User manual

DoorCAM DC2
Product Manual (EN)
Gebrauchsanleitung (DE)
Istruzioni per l’uso (IT)
Mode d'emploi (FR)
Manual del producto (ES)

Product Manual (EN)
Description and Function
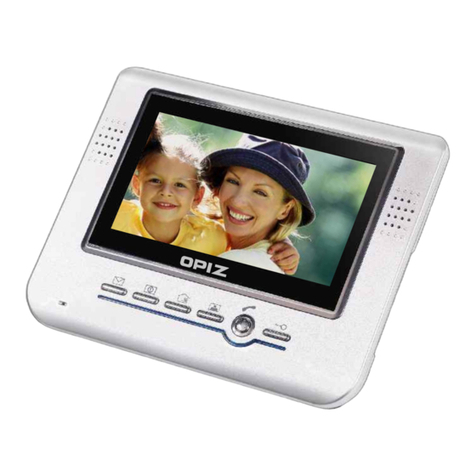
The DoorCAM DC2 is a digital door viewer. It features a display on which the user can easily view who is
standing in front of the door.
Intended Use
This product is intended for household use. Any use other than that described in the chapter
"Description and Function" is not permitted. The use is only allowed in dry indoor areas. Failure to observe
and disregard these regulations and safety instructions can result in serious injury and personal injury and
property damage.
Safety Information
•Please read the user manual carefully before using the product. It includes important information for
proper installation and use. Keep this guide in order to be able to access it quickly, and in order to pass
it on to the next owner.
•Your product is not a toy and is not meant for children, it contains small parts which can be swallowed
and can injure when used inappropriately!
•We recommend that the installation only be performed by qualified technicians.
•Keep your device dry. Humidity and all types of liquids may damage device parts or electronic circuits.
•Only skilled electricians may assemble and disassemble the housing of the product.
•Do not use or store your device in dusty, dirty areas. Dust can cause your device to malfunction.
•Do not store your device in hot or cold areas. Use your device at -20 °C to 50 °C
•Do not expose your device to direct sunlight for extended periods of time (such as on the dashboard of
a car).
•If the battery terminals are in contact with metal objects, it may cause a fire.
•Do not store your device near or in heaters, microwaves, hot cooking equipment, or high pressure
containers
•The battery may leak.
•Do not drop your device or cause impacts to your device
•If bent or deformed, your device may be damaged or parts may malfunction.
•Avoid charging batteries for more than a week, as overcharging may shorten battery life.
•Over time, unused batteries will discharge and must be recharged before use.
•Do not disassemble, modify, or repair your device. Any changes or modifications to your device can
void your manufacturer’s warranty.
•Do not disassemble or puncture the battery, as this can cause explosion
DoorCAM DC2 1

Contents
1. Main unit
2. 4x AAA batteries (not included)
3. Installation wrench
4. Backplate
5. Camera incl. 3 cylinders
6. Battery slot covers
2 DoorCAM DC2

Installation
Overview
1. Main unit
2. 4x AAA batteries (not included)
3. Camera cylinder
4. Backplate
5. Door
6. Camera
Step by Step
•Remove the backplate (1) using ample force. It is held in place by two strong magnets.
•If necessary, remove any other door viewer that is installed in the door.
•If necessary, drill a hole with 14mm diameter in the door.
DoorCAM DC2 3

•Unscrew the cylinders from the camera
•Check the thickness of the door and set the approprate cylinders aside. If necessary, screw the cylinder
parts together (see fig. above).
•Insert the camera into the hole in the door (without the cylinder). Note that the arrow has to point up
(see fig. above, 1)
•Pass the camera cable through the hole of the backplate and place the backplate on the door using the
adhesive sticker on the plate.
•Take the cylinder and pass the camera cable through it. After that screw the cylinder tightly with the
camera. Use the installation wrench to secure it (see fig. above, 2).
•Connect the camera cable to the main unit. make sure the cable is fully inserted into the receptacle.
Secure the camera cable to the plastic flaps (see fig. above).
Make sure the cable is FULLY INSERTED into the receptacle. Not doing so could
damage the device and render it unusable. Any incorrect installation is not covered by
the manufacturers warranty.
4 DoorCAM DC2

•Remove the battery slot covers and insert 4x AAA batteries into the main unit. Make sure to observe
the correct polarity!
•Mount the main unit to the backplate, and secure it to the magnets.
•Installation is now complete!
Operation
1. ON button
Turn device on
Press ON button. The screen will turn itself on. After 10 seconds it will turn itself off automatically.
Battery status
If the battery power is critically low, the battery status symbol will flash in the upper right corner of
the screen. In this case make sure to replace the batteries immediately.
Troubleshooting
The screen is blue and shows "No camera / Nobody outside"
Make sure the cable is FULLY INSERTED in to the receptacle.
The device won’t turn on
Make sure the batteries have enough power. Replace them if necessary.
The image is flickering / jittery / black & white
Make sure the batteries have enough power. Replace them if necessary.
Warranty and Liability
The manufacturer grants a 2 year warranty to a new device. As the manufacturer has no influence on
installation, warranty of the product only applies to the product. If your dealer cannot be contacted, you can
also contact us directly. The manufacturer is not liable for damages to persons or property caused by
improper installation or operation not described in this guide. This includes, among others, any alteration
and modification of the product and its accessories.
Note on Waste Disposal
According to the European WEEE directive, electrical equipment must not be disposed with
DoorCAM DC2 5

household waste. The consumer is committed by law to dispose of electrical and electronic devices at public
collecting points or the dealer at the end of the devices lifetime for free. Particulars are regulated in national
law. This symbol shown on the product, in the manual or at the packing alludes to these terms. With this
kind of procedure, the customer contributes to environmental protection.
Contact
Customer satisfaction is our top priority! Should you have any questions or complaints, please contact us at:
[email protected]. We are committed to providing the highest level of satisfaction and answer every
query within a few hours.
Declaration of Conformity
PRS Trading GmbH ensures that the product conforms to these basic standards and directives. These can be
requested online at www.prsworld.eu. This device corresponds to the following directives:
•EMC Directive 2014/30/EU
•RoHS Directive 2011/65/EU
Gebrauchsanleitung (DE)
Beschreibung und Funktion
DoorCAM DC2 ist ein digitaler Türspion. Es verfügt über ein Display, mit dem der Anwender sehen kann,
wer vor der Tür steht.
Bestimmungsgemäßer Gebrauch
Dieses Produkt ist für den Haushaltsgebrauch vorgesehen. Ein anderer als im Kapitel
„Beschreibung und Funktion“ beschriebener Gebrauch ist nicht gestattet. Die Verwendung darf nur in
trockenen Innenräumen erfolgen. Das Nichtbeachten und Nichteinhalten dieser Bestimmungen und der
Sicherheitshinweise kann zu schweren Unfällen und Schäden an Personen und Sachen führen.
Sicherheitshinweise
•Die Montage und Demontage des Produktgehäuses darf nur durch ausgebildetes Elektro-Fachpersonal
erfolgen!
•Diese Bedienungsanleitung dient dazu, Sie mit der Funktionsweise dieses Produktes vertraut zu
machen. Bewahren Sie diese Anleitung daher gut auf, damit Sie jederzeit darauf zugreifen können.
•Ihr Produkt ist kein Spielzeug und gehört nicht in Kinderhände, weil zerbrechliche, kleine und
verschluckbare Teile enthalten sind, die bei unsachgemäßem Gebrauch Personen schädigen können!
•Bitte installieren Sie das Produkt und die daran befestigten Geräte so, dass keine Personen oder Sachen
z.B.: durch Herabstürzen oder Stolpern verletzt oder beschädigt werden können.
•Lassen Sie Verpackungsmaterial nicht einfach liegen, da sich spielende Kinder daran schneiden können.
Weiterhin besteht die Gefahr des Verschluckens und Einatmens von Kleinteilen und Dämmmaterial.
Öffnen Sie das Produkt niemals eigenmächtig. Führen Sie Reparaturen nie selbst aus!
6 DoorCAM DC2

•Behandeln Sie das Produkt sorgfältig. Es kann durch Stöße, Schläge oder Fall aus bereits geringer Höhe
beschädigt werden.
•Halten Sie das Produkt fern von Feuchtigkeit und extremer Hitze.
•Tauchen Sie das Produkt niemals in Wasser oder andere Flüssigkeiten.
•Installieren Sie das Produkt nicht in der Nähe von Klimaanlagenöffnungen oder an Stellen, an denen es
übermäßig viel Staub oder Rauch gibt, sowie an Stellen, an denen es Erschütterungen oder
Schwingungen ausgesetzt ist.
•Modifizieren und ändern Sie den Artikel und dessen Zubehörteile nicht! Beachten Sie dazu auch das
Kapitel „Gewährleistung und Haftung“
•Verwenden Sie keine beschädigten Teile.
•Stecken Sie keine Gegenstände, wie z.b.: Metallteile und dergleichen in das Gerät.
•Bei Fragen, Defekten, mechanischen Beschädigungen, Störungen und anderen nicht durch diese
Anleitung behebbaren Funktionsproblemen, wenden Sie sich an Ihren Händler zur Reparatur oder zum
Austausch wie in Kapitel „Gewährleistung und Haftung“ beschrieben.
•Beachten Sie das Kapitel „technische Daten“
•Bitte beachten Sie auch die Nutzungsbedingungen im Kapitel „bestimmungsgemäßer Gebrauch“
•Technische Änderungen und Irrtümer vorbehalten.
Übersicht
1. Haupteinheit
2. 4x AAA Batterien (nicht inkludiert)
3. Montageschlüssel
4. Montageplatte
5. Kamera und 3 Zylinderteile
6. Batteriefachabdeckungen
DoorCAM DC2 7

Montage
Übersicht
1. Haupteinheit
2. 4x AAA Batterien (nicht inkludiert)
3. Türzylinder
4. Montageplatte
5. Tür
6. Kamera
Schritt für Schritt
•Entfernen Sie mit etwas Kraft die Montageplatte (1). Diese wird von zwei starken Magneten fixiert.
•Falls sich bereits ein Türspion in der Tür befindet, entfernen Sie diesen.
•Falls notwendig, bohren Sie ein Loch mit 14mm Durchmesser in die Tür.
8 DoorCAM DC2

•Schrauben Sie die Zylinder-Teile von der Kamera ab.
•Prüfen Sie die Dicke Ihrer Türe und wählen Sie die geeigneten Zylinderteile aus. Falls nötig
verschrauben Sie diese. (Siehe Abb. oben).
•Setzen die Kamera in das Türloch ein (ohne Zylinder), und beachten Sie dabei die Pfeilrichtung (siehe
Abb. oben, 1).
•Führen Sie das Kamera-Kabel durch das Loch in der Montageplatte und setzen Sie die Platte an der Tür
an. Nutzen Sie dazu den auf der Montageplatte angebrachten Klebefilm.
•Führen Sie das Kabel weiter durch den Zylinder und schrauben Sie diesen mit der Kamera fest. Nutzen
Sie dazu den Montageschlüssel (siehe Abb. oben, 2).
•Verbinden Sie das Kabel mit der Haupteinheit und setzen Sie diese an der Montageplatte an. Achten Sie
darauf, dass der Stecker gänzlich eingesetzt ist (siehe Abb. oben).
Bitte stellen Sie bei der Installation sicher, dass das Kamera-Kabel VOLLSTÄNDIG
hineingesteckt wird. Andernfalls kann es zu Fehlfunktionen und zu einem Defekt des
Gerätes kommen. Bei falscher Installationsweise verfällt jeglicher Garantieanspruch.
DoorCAM DC2 9

•Entfernen Sie die Abdeckungen der Batteriefächer und setzen Sie 4x AAA Batterien (nicht inkludiert) in
die Haupteinheit ein. Achten Sie auf die korrekte Polung!
•Setzen Sie die Haupteinheit an die Montageplatte an und fixieren sie diese mittels der zwei Magneten.
•Die Montage ist nun beendet!
Bedienung
1. EIN-Taste
Gerät einschalten
EIN-Taste betätigen; Sobald das Gerät eingeschaltet wurde, ist es für 10 Sekunden aktiv. Danach
schaltet das Gerät automatisch in den Ruhemodus. Ein erneutes aktivieren ist jederzeit durch
Drücken der EIN-Taste möglich.
Batteriestand
Sollte der Batteriestand zur Neige gehen, wird im rechten oberen Eck des Displays ein rotes
Batteriesymbol sichtbar. In diesem Fall müssen die 4x AAA Batterien getauscht werden.
Problembehebung
Der Bildschirm ist blau und zeigt "No camera / Nobody outside"
Stellen Sie sicher, dass der Stecker der Kamera vollständig in die dafür vorgesehene Buchse
hineingesteckt ist.
Das Gerät lässt sich nicht einschalten
Stellen Sie sicher, dass die Batterien noch ausreichend voll sind. Wechseln Sie die Batterien aus.
Das Bild flackert / zeigt Schlieren / ist Schwarzweiß
Stellen Sie sicher, dass die Batterien noch ausreichend voll sind. Wechseln Sie die Batterien aus.
Gewährleistung und Haftung
Der Hersteller gewährt 2 Jahre Gewährleistung auf ein neues Gerät. Da der Hersteller keinen Einfluss auf
die örtliche Gegebenheit und die Installation des Produktes hat, deckt die Gewährleistung nur das Produkt
selbst ab. Der Hersteller haftet nicht für Personen- oder Sachschäden, die durch unsachgemäße Installation
oder Bedienungsschritte, die nicht in dieser Anleitung beschrieben sind, entstanden sind. Dazu zählt u.a.
jegliche Änderung und Modifikation des Produktes und seines Zubehörs. Ein anderer als in dieser
Betriebsanleitung beschriebener Einsatz ist unzulässig und führt zu Gewährleistungsverlust, Garantieverlust
und Haftungsausschluss.
10 DoorCAM DC2

Entsorgungshinweise
Elektrische und elektronische Geräte dürfen nach der europäischen WEEE Richtlinie nicht mit dem
Hausmüll entsorgt werden. Der Verbraucher ist nach dem ElektroG verpflichtet, elektrische und
elektronische Geräte am Ende ihrer Lebensdauer an den dafür eingerichteten, öffentlichen Sammelstellen
oder an die Verkaufsstelle kostenlos zurückzugeben. Einzelheiten dazu regelt das jeweilige Landesrecht. Das
Symbol auf dem Produkt, der Gebrauchsanleitung oder der Verpackung weist auf diese Bestimmung hin. Mit
dieser Art der Verwendung von Altgeräten leisten Sie einen wichtigen Beitrag zum Schutz unserer Umwelt.
Kontakt
Kundenzufriedenheit bemüht und bearbeiten jedes Anliegen innerhalb von ein paar Stunden.
Konformitätserklärung
PRS Trading GmbH erklärt hiermit, dass das Gerät die grundlegenden Anforderungen und Richtlinien der
europäischen Bestimmungen erfüllt. Diese können online auf www.prsworld.eu angefragt werden. Dieses
Gerät ist mit der nach den folgenden Richtlinien vorgeschriebenen Kennzeichnung versehen:
•EMC Directive 2014/30/EU
•RoHS Directive 2011/65/EU
DoorCAM DC2 11

Istruzioni per l’uso (IT)
Descrizione e Funzione
Il dispositivo è previsto per l’uso come spioncino digitale. Lo spioncino digitale DoorCAM DC2, dotato con
uno schermo LCD, ha la funzione di monitorare chi si presenta davanti la porta.
Contenuto della confezione
1. Schermo
2. Batterie (4 x AAA non incluse)
3. Chiave di montaggio
4. Piastra di montaggio
5. Camera con 3 cilindiri
6. Coperchio del vano batteria
12 DoorCAM DC2

Montaggio
Sommario
1. Schermo
2. Batterie (4 x AAA non incluse)
3. Cilindro
4. Piastra di montaggio
5. Porta
6. Camera
Passo dopo passo
•Rimuovere la piastra di montaggio (1); è fissata con un magnete.
•Rimuovere lo spioncino tradizionale.
•Se necessario, forare un buco (diametro 14 mm) nella porta.
DoorCAM DC2 13

•Smontare i cilindri della camera.
•Controllare lo spessore della porta e scegliere il cilindro adeguato. Se necessario collegare/avvitare i
cilindri.
•Spingere la camera sul foro della porta. Fare attenzione alla direzione della freccia (fig. 1).
•Rimuovere l’adesivo della placca metallica.
•Posizionare la placca metallica sulla porta. La linguetta metallica deve puntare verso l’alto. Fare
pressione.
•Avvitare la telecamera con il cilindro (usare la chiave di montaggio)(fig.2).
•Collegare il connettore allo schermo. Assicurarsi che il connettore sia completamente inserito nella
presa. Fissare il cavo della videocamera alle alette di plastica (vedere la figura sopra).
Assicurarsi che lo spinotto sia ben inserito. In caso di installazione sbagliata, ogni
garanzia perde.
•Inserire le batterie (4 x AAA non incluse). Accertarsi che l’estremità positiva e negativa sono posizionate
14 DoorCAM DC2

nella direzione giusta!
•Montare lo schermo sulla piastra di montaggio e fissarlo con i due magneti.
•Lo spioncino digitale è ora pronto all’uso.
Funzionamento
1. Pulsante di accensione (ON)
Accendere lo spioncino
Per accendere lo spioncino premere il pulsante di accensione (ON). Dopo 10 secondi il dispositivo è
automaticamente nel modo veglia. Per riattivare lo spioncino premere di nuovo il pulsante.
Livello di carica della batteria
Lo stato della batteria è visualizzata nell’angolo in alto a destra della schermata. Quando l’icona della
batteria lampeggia, significa che la batteria è presto esaurita. Sostituirla a tempo.
Risoluzione dei problemi
Se lo schermo è blu e mostra “No camera / Nobody outside”
Controllare che lo spinotto della camera sia ben inserito.
Se il dispositivo non si accende
Verificare se le batterie sono ancora buone. Se necessario cambiarle.
Se lo schermo vacilla / mostra righe / è nero
Verificare se le batterie sono ancora buone. Se necessario cambiarle.
Garanzia e responsabilità
Il fabbricante offre una garanzia di due (2) anni. Poiché il fabbricante non ha alcuna influenza sul tipo di
parete e sull’installazione del relativo kit di installazione, la garanzia del prodotto si applica solo al kit di
installazione. In caso di guasto o danni rilevati sul dispositivo, contattare il rivenditore e presentare lo
scontrino o la fattura che prova l’acquisto. Il rivenditore invierà il dispositivo al fabbricante. Il fabbricante
non è responsabile dei danni alle persone o alle proprietà derivati da installazione o utilizzo improprio non
contemplato dal presente manuale. Ciò comprende tra l’altro qualsiasi alterazione o modificazione del
prodotto e degli accessori. Qualsiasi uso diverso da quanto descritto nel manuale utente non è permesso e
può fa decadere la garanzia e le eventuali responsabilità. Il fabbricante si riserva il diritto di correggere
eventuali errori di stampa, di apportare modifiche al dispositivo, alla confezione o al manuale utente. *
Modifiche tecniche, errori di stampa e rifusi riservati.
DoorCAM DC2 15

Nota sullo smaltimento dei rifiuti
In base alla Direttiva Europea WEEE, lo smaltimento dei dispositivi elettrici ed elettronici è vietato. In
base all’Electrical and Electronic Equipment Act (ElektroG) il consumatore è obbligato a riportare
gratuitamente i dispositivi elettrici ed elettronici al termine della loro durata utile presso punti di raccolto
pubblici appositamente installati, oppure presso il rivenditore. I dettagli sono regolati dalle leggi in vigore
nello stato. Il simbolo sul prodotto, nelle istruzioni operative oppure sulla confezione del prodotto indica
queste normative. Riciclando i prodotti in questo modo si contribuisce significativamente alla protezione
dell’ambiente.
Contatto
In caso di ulteriori domande o reclamo, si prega di inviare un messaggio e-mail al seguente indirizzo:
[email protected]. Per noi la vostra soddisfazione è importante.
Dichiarazione di conformità CE
PRS Trading GmbH dichiara che il dispositivo è conforme ai requisiti di base ed alle linee guida delle
normative Europee. La dichiarazione può essere consultata online sul sito: www.prsworld.eu. Questo
dispositivo porta il marchio prescritto dalle direttive:
•EMC Directive 2014/30/EU
•RoHS Directive 2011/65/EU
Mode d’emploi (FR)
Description et fonction
DoorCAM DC2 est un judas de porte numérique. L’utilisateur peut voir qui se situe devant la porte.
Utilisation conforme
Ce produit est destiné à un usage domestique. Toute utilisation autre que celle décrite dans le
chapitre "Description et fonction" n’est pas autorisée. Utiliser uniquement dans des locaux secs Le non-
respect de ces consignes et des consignes de sécurité peut entraîner des accidents graves et des dommages
corporels et matériels.
Consignes de sécurité
•L’ouverture et / ou l’assemblage du boîtier du produit doit être exclusivement effectué par du personnel
qualifié !
•Ce manuel a pour but de vous familiariser avec le fonctionnement de ce produit. Conservez ces
instructions dans un endroit sûr afin de pouvoir y accéder en tout temps.
•Votre produit n’est pas un jouet et n’appartient pas aux mains des enfants car il contient des pièces
fragiles, petites et avalables qui peuvent endommager les gens s’ils sont mal utilisés !
16 DoorCAM DC2

•Veuillez installer le produit et les appareils qui y sont fixés de manière à ce qu’aucune personne ou
objet, par exemple : ne puisse être blessé ou endommagé par une chute ou un trébuchement.
•Ne laissez pas traîner les matériaux d’emballage, car les enfants qui jouent peuvent se couper dessus. Il
y a aussi le risque d’inhalation et d’inhalation de petites pièces et de matériaux isolants.
•N’ouvrez jamais le produit vous-même. N’effectuez jamais les réparations vous-même !
•Manipulez le produit avec précaution. Il peut être endommagé par des chocs, des chocs ou des chutes
de faible hauteur.
•Tenir le produit à l’abri de l’humidité et de la chaleur extrême.
•Ne jamais immerger le produit dans de l’eau ou d’autres liquides.
•N’installez pas le produit près des ouvertures de climatisation ou dans des endroits où il y a trop de
poussière ou de fumée, ou dans des endroits où il est exposé à des vibrations ou des vibrations.
•Ne pas modifier ou altérer l’article ou ses accessoires ! Veuillez également respecter le chapitre
"Garantie et responsabilité".
•N’utilisez pas de pièces endommagées.
•N’insérez pas d’objets tels que des pièces métalliques ou des objets similaires dans l’appareil.
•En cas de questions, de défauts, de dommages mécaniques, de dysfonctionnements ou d’autres
problèmes de fonctionnement qui ne peuvent être corrigés par ce manuel, veuillez contacter votre
revendeur pour réparation ou remplacement, comme décrit au chapitre "Garantie et responsabilité".
•Respectez le chapitre "Caractéristiques techniques".
•Veuillez également respecter les conditions d’utilisation du chapitre "Utilisation conforme".
•Sous réserve de modifications techniques et d’erreurs.
DoorCAM DC2 17

Contenu
1. Unité principale
2. 4x piles (AAA, non incluses)
3. Clé de montage
4. Plaque de montage
5. Objectif du judas avec 3 cylindres
6. Compartiment de batterie
18 DoorCAM DC2

Montage
Vue d’ensemble
1. Unité principale
2. 4x piles (AAA, non incluses)
3. Cylindre
4. Plaque de montage
5. Porte
6. Objectif du judas
Pas à pas
•Retirer la plaque de montage (1) avec force. Cela est fixé par un aimant.
•S’il y a déjà un judas dans la porte, enlevez-le.
•Si nécessaire, percer un trou de 14mm de diamètre dans la porte.
DoorCAM DC2 19
Table of contents
Languages:
