Pulsar PWG2600V User manual

TABLE OF CONTENTS
Introduction............................................................................................................................................................................3
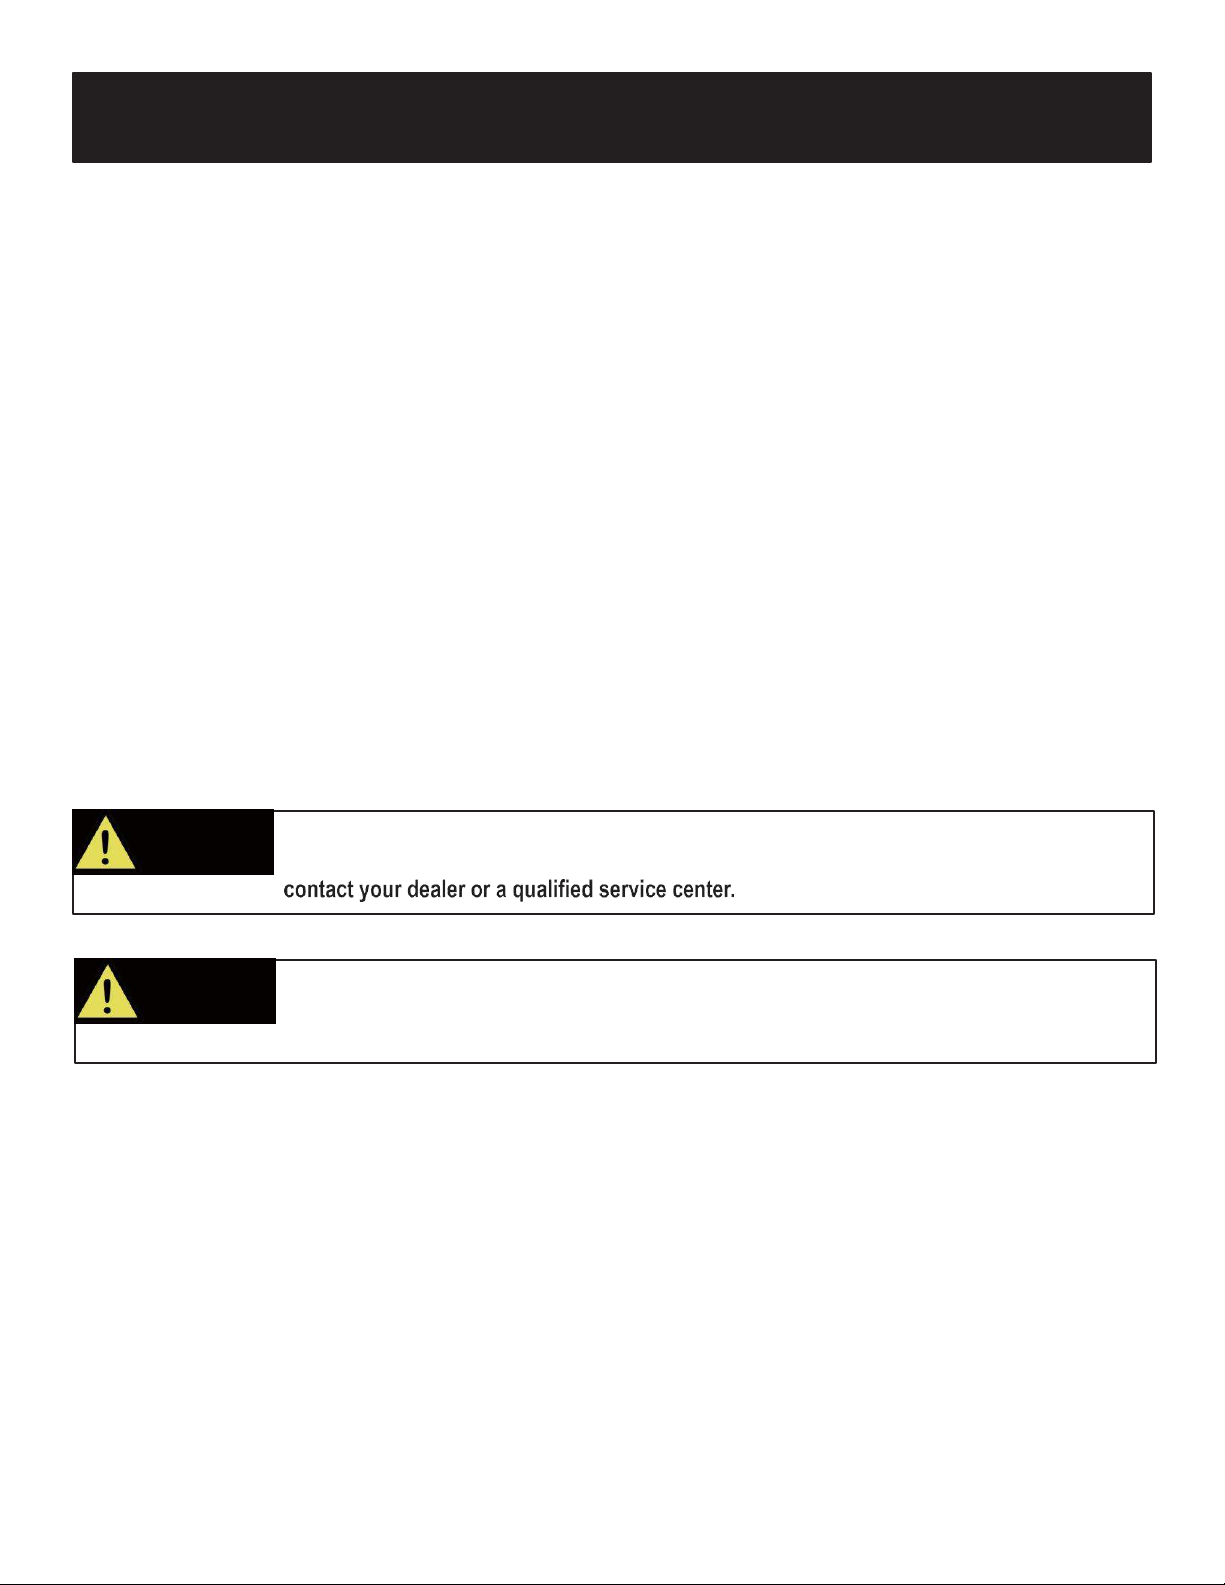
Safety Rules ...........................................................................................................................................................................4
Safety Symbols ...........................................................................................................................................................4
Safety Instructions ......................................................................................................................................................4
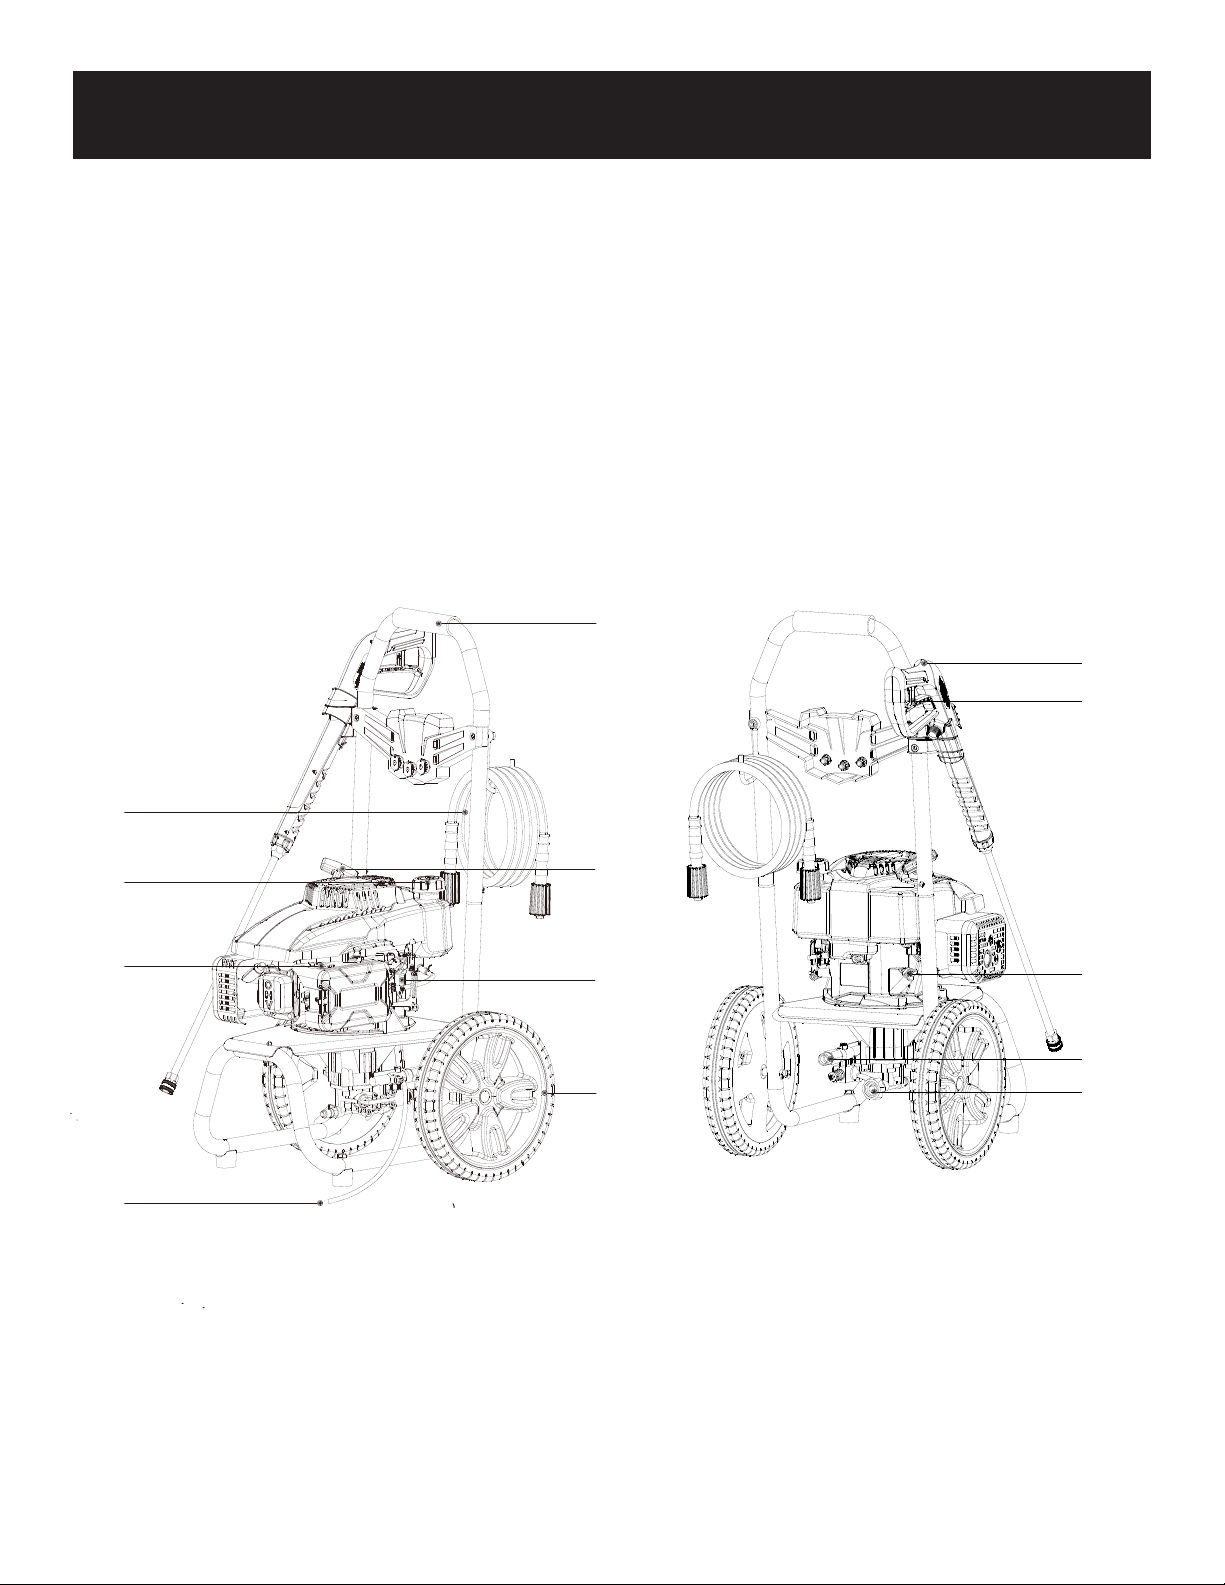
Pressure Washer Features....................................................................................................................................................7
Pressure Washer Parts Assembly........................................................................................................................................7
Pressure Washer Parts List ..................................................................................................................................................7
Assembly..............................................................................................................................................................................10
Packing List............................................................................................................................................................... 10
Unpacking................................................................................................................................................................. 10
Attaching Wheels...................................................................................................................................................... 11
Install Handle. ...........................................................................................................................................................11
Attaching Gun Hook and Pressure Hose Hook......................................................................................................... 11
Attaching Spray Gun.................................................................................................................................................12
Adding Engine Oil and Fuel ....................................................................................................................................... 13
Operation .............................................................................................................................................................................. 15
How to Start Pressure Washer.................................................................................................................................. 15
How to Turn Off Pressure Washer............................................................................................................................16
How to Use Spray Gun..............................................................................................................................................16
Using Spray Nozzle ..................................................................................................................................................17
How to Apply Detergent...........................................................................................................................................17
Maintenance .........................................................................................................................................................................18
Pre Operation Steps..................................................................................................................................................18
After Each Use..........................................................................................................................................................18
Maintenance Schedule..............................................................................................................................................18
Changing Oil.............................................................................................................................................................19
Engine Maintenance .................................................................................................................................................19
How to Store ............................................................................................................................................................20
Troubleshooting...................................................................................................................................................................21
Warranty ...............................................................................................................................................................................22
SAVE THIS MANUAL FOR FUTURE REFERENCE
This manual contains important information regarding safety, operation, and maintenance.

INTRODUCTION
3
Thank you for purchasing this superior quality pressure washer from Pulsar. When operating and maintaining this product
as instructed in this manual, your pressure washer will give you many years of reliable service.
Product Specifications:
This pressure washer operates at 2600PSI with a flow rate of 2.0 gallons per minute. This high end residential use system
features a 160cc Ducar engine, no flat foam filled tires, 25’ high pressure hose, and 3 quick-connect nozzles.
The emissions control system for this pressure washer is compliant with all standards set by the Environmental Protection
Agency.
Product Applications:
•
This pressure washer is designed to remove dirt and mold from house siding, decks, garage floors, brick patios, and
cement walkways.
•
This unit can be used to clean cars, motorcycles, boats, RV’s outdoor furniture, lawn equipment, and grills.
How to contact us:
You can contact us by internet at support@pulsar-products.com or write to us at:
PULSAR PRODUCTS INC
2051 S. Lynx Place
Ontario, CA 91761
1-866-591-8921
Record the following information bellow for service or warranty assistance.
Date of Purchase:
Model Number:
Serial Number:

4
SAFETY RULES
Safety Symbols
Indicates a potentially hazardous
situation which could result in
serious injury or death if not avoided.
Indicates a potentially hazardous
situation which could result in
damage to equipment orproperty.
Safety Instructions
The manufacturer cannot anticipate every possible hazardous circumstance that the user may encounter. Therefore, the
Warning!s in this manual, on tags, and on affixed decals are not all-inclusive. To avoid accidents, the user must understand
and follow all manual instructions and use commonsense.
WARNING!
Do not operate indoors or in a confined space preventing dangerous carbon monoxide gas
from dissipating.
•
•
•
•
Carbon monoxide gas is a poisonous, odorless gas that can cause headache, confusion, fatigue, nausea, fainting,
sickness, seizures, or death. If you start to experience any of these symptoms, IMMEDIATELY get fresh air and seek
medical attention.
Never use indoors, in a covered area, or in a confined space, even if doors and windows are open.
When working in areas where vapors could be inhaled, use a respirator mask according to all of its instructions.
WARNING!
Never spray near a power source such as an electrical outlet. Making contact with
a power source could cause an electric shock or burn.
WARNING!
Read and understand this manual in its entirety before operating this pressure washer.
Improper use of this pressure washer could result in serious injury or death.
Slippery surface
Risk of explosion
Risk of electric shock
Hot surface
Eye protection
WARNING!
CAUTION!

5
SAFETY RULES
WARNING!
•
death.
•
on the unit before starting the engine.
•
Never smoke while operating or fueling this unit.
•
•
•
•
•
When adding or draining fuel, unit should be turned off for at least 2 minutes to cool before removing fuel cap. If unit
has been running the fuel cap is under pressure, remove slowly.
To keep fuel from spilling, secure unit so it cannot tip while operating or transporting.
When transporting unit, disconnect the spark plug wire and make sure the fuel tank is empty with the fuel shutoff valve
turned to the off position.
WARNING!
Pressure washer can create puddles and slippery surfaces.
•
Never wear sandals, always wear protectivefootwear.
•
Operate pressure washer from a level and stablesurface.
•
Do not operate from a ladder, scaffolding, or uneven surface as recoil from spray gun could cause you tofall.
•
Use both hands to control spray gun to control recoil.
•
Do not over-extend yourself in attempt to reach a little further.
WARNING! Moving parts can catch on clothing, jewelry, and hair.
•
Do not wear loose clothing or gloves.
•
Remove jewelry or anything else that could be caught in moving parts.
•
Tie back or wear protective head covering to contain long hair.
WARNING!
To reduce the risk of injection, injury or possible amputation, never direct water pressure
towards people or pets.
•
The high pressure stream of water produced can cut through skin and underlying tissue. Never squeeze the trigger or
point the spray gun at other people, animals, plants, or fragile objects such as glass, even if the engine is stopped.
•
This unit is not a toy. Keep unit away from children and pets.
•
Do not leave spray gun unattended while unit is running.
•
Make sure the spray gun, nozzle, and accessories are attached correctly.
•
Never attempt to repair high pressure hose, alwaysreplace.
•
Never attempt to repair leaks with sealant, always replace O-ring orseal.
•
Never attempt to connect or disconnect hose from pump or spray gun while system is pressurized.
•
Always release water pressure from unit every time you stop the engine.

6
SAFETY RULES
WARNING!
Only use detergents or soaps that are safe to be used with pressure washers. Chemicals
which are caustic, such as acids or bleach, can result in serious injury, property damage,
damage to pressure washer, or death.
WARNING!
Use indirect vented safety goggles designed for wet conditions to protect eyes from
injury.
•
Spray from this unit has extreme pressure and can ricochet back splashing water or propelling objects towards eyes.
•
Never substitute eye protection with dry conditiongoggles.
WARNING! Only use this unit as it is intended or serious injury or death could result.
•
Do not bypass any safety device. Moving parts are covered with guards. Make sure all protective covers are in place.
•
Inspect hoses and connections making sure they are secure before starting engine.
•
Use only recommended accessories to avoid damage to this unit.
•
Never transport or make adjustments to this unit while it is running.
WARNING!
Avoid contacting hot areas of this unit.
•
•
Allow hot components to cool before touching.
WARNING! Never operate this unit if there are any broken or missing parts and only use Pulsar
replacement parts specifically designed for this unit.
•
Improper treatment of pressure washer can damage the unit and shorten it’slife.
•
service center.
•
Never modify this unit in any way or modify governed speed.
WARNING!
Pull cord recoils rapidly and pulls arm towards engine faster than you can let go which
could result in injury.
•
Always relieve pressure from spray gun before pulling starter cord, including every failed attempt to start engine.
•
To avoid recoil, pull starter cord slowly until resistance is felt, then pull rapidly.
WARNING! Stay alert and use common sense. Do not operate this unit if you are under the influence of
alcohol, drugs, medication or you feel tired.

7
PRESSURE WASHER FEATURES
A - 25’ High Pressure Hose
B - Fuel Tank and cap
C - Choke
D- Siphon Tube with Strainer
E- Handle
F - Pull Cord
G- Engine On/Off Switch
H - No Flat Foam Filled Tires
I - Spray Gun
J - Locking Trigger
K - Oil Fill and Dipstick
L- High Pressure Hose Outlet
M- Water Inlet
E
F
G
H
A
B
C
D
I
J
K
L
M

8
PRESSURE WASHER PARTS ASSEMBLY

PRESSURE WASHER PARTS LIST
9
180%( 5 ,7( 01$0( 47<
& &( QJLQH
&UDQNVKDIW.H\
06 HOIORFN1XW
%ROW0PP
+LPRUH:DWHU3XPS
)UDPHDVVHPEO\
5 XEEHU) HHW
5 RXQG+HDG%ROW0PP
:DVKHU
06 HOIORFN1XW
+DLU3LQ
:KHHO
$[OH
%DVH3ODWH
5 RXQG+HDG%ROW0PP
+DQGOH3LYRW/RFN
3UHVVXUe+RVH+RRN
+DQGOH
)RDP*ULS
3ODVWLF3LYRW
*XQ+RRN
3DQHO
1R]]OH+ROGHU
6 SUD\*XQ
:DQG
3UHVVXUe+RVH
6 SUD\3OXJ
& RQWDLQHURI:( QJLQH2LO
3KLOOLSV6 FUHZGULYHU
:UHQFK
6 LSKRQH7XEH
6 WUDLQHU%RG\
6 WUDLQHU:HLJKW
5 HG1R]]OH
:KLWH1R]]OH
%ODFN6 RDS1R]]OH
1R]]OH& OHDQHU
+ROGHU1R]]OH& OHDQHU

10
ASSEMBLY
Packing List
•
Pressure washer
•
Quick start guide
•
Operator’s manual and product registration card
•
Spray gun
•
Extension wand with quick-connect fitting
•
High pressure hose
•
Spray nozzles (3) - 0° , , 40° and soap nozzle
•
Spray gun hook (upper)
•
Spray gun hook (lower)
•
4-Cycle engine oil (SAE10W30)
•
Nozzle cleaner
•
Wrench
•
Spark plug
•
Phillips screwdriver
Unpacking
1. Remove the high pressure hose from box.
2. After the high pressure hose has been removed, carefully open product by cutting down the sides of the box.
3. Remove the product, parts, and all accessories. Make sure all items listed on the packing list are included and not
damaged.
WARNING!
Do not operate this pressure washer if any of the parts are damaged or missing until the
part is replaced. Using this product with damaged or missing parts can cause damage to
the machine or result in serious injury or death.
WARNING!
Do not attempt to assemble or operate this pressure washer until you have read and
understood this entire manual. If you have any problems assembling or operating this unit

11
ASSEMBLY
Attaching Wheels (See fig 1)
•
Parts needed - 2 wheels, 1 axle, 1 hair pin.
•
Raise or tilt pressure so you can slide the wheel axle pin into the wheel, the wheel mounting hole located on the side
of the frame.
•
Secure the wheel assembly by reinserting a hair pin through hole at the end of the wheel axle and pressing until it
locks into place.
•
Repeat process on the other side of the generator to install the second wheel.
Install Handle (See fig 2)
•
Install upper frame (handle) onto the lower frame by sliding the handle over the two upright tubes on the lower frame
and pressing down firmly until the handle is seated and the two detent pins snap in place.
FIG 1 FIG 2
Attaching Upper Gun Hooks and High Pressure Hose Hook (See fig 3)
•
Attach the upper gun hook. Align the upper gun hook with the holes, install two plastic rivets, until the plastic rivets are
snug, press hard with your finger to lock the rivet,then install the M6 screw & lock nut, wrench tighten until the nut is
snug, do not over tighten.
•
Attach the high pressure hose hook, install the M6 screw & lock nut, wrench tighten until the nut is snug, do not over
tighten.
FIG 3

12
2
ASSEMBLY
Attaching the Spray Gun (See fig 4 & 5)
•
Screw the spray wand and the trigger handle together until they are secure.
•
nut on by turning clockwise until it is hand tight.
FIG 4 FIG 5

ASSEMBLY
Adding / Checking Engine Oil (See fig 6)
•
Place pressure washer on a level surface.
•
•
Carefully add between 450 ml (15.3 oz) of 4-Cycle engine oil (SAE10W30) to empty reservoir until oil reaches
•
Be sure to replace both dipsticks before attempting to start theengine.
•
To check oil, set pressure washer on a level surface, wipe dipstick clean, then reinsert dipstick without re-threading.
FIG 6
Adding Fuel (See fig 7)
•
Set pressure washer on a clean and level surface in an area that is well ventilated.
•
Remove fuel cap.
•
Insert a funnel into the fuel tank and carefully pour gasoline into the tank until fuel level reaches 1.2 inches below the
top of the neck.
FIG 7
CAUTION!
CAUTION!
13

14
4
ASSEMBLY
Connecting Garden Hose to Pressure Washer (See fig 8)
•
•
Inspect inlet screen and remove any debris.
•
Connect hose to water inlet and tighten by hand. There must be a minimum of 10 feet of unrestricted hose between
pressure washer and faucet or shut off valve.
•
Turn on water.
•
Purge the system’s pump of air by releasing the safety and squeezing the trigger of the spray gun.
FIG 8
Connect High Pressure Hose to Pump (See Fig 9)
•
Attach end of high pressure hose to the high pressure outlet on pump.
•
Follow the same procedure with opposite end to attach high pressure hose to spray wand.
FIG 9
CAUTION!
Do not run pump without connecting to the water supply and turning water on. Failureto
do so could damage the pressure washer. Failure to follow these instructions will void
product warranty.

OPERATION
15
Pre-Operation Check List
•
Read and understand this operator manual in its entirety before operating pressure washer.
•
Check oil level and add oil to the proper level if low.
•
Check connections of handle and all hoses to make sure they are secure.
•
Check all hoses for kinks and damage.
•
Check flow of water supply and make sure it is adequate (40 - 80PSI).
Starting Pressure Washer (See Fig 10-11)
•
Place pressure washer on a level surface.
•
Turn on water.
•
Purge the system’s pump of air by releasing the safety and squeezing the trigger of the spray gun.
•
Attach wand/lance to spray gun.
•
Slide the choke lever to the “Choke” position.
•
Holding the machine with your hand, pull the recoil handle (starter cord) slowly until resistance is felt, then pull rapidly.
Squeeze the Gun trigger and release the pressure after every failed attempt to start the pressure washer (This will
reduce the back pressure).
•
Let engine run for several seconds and then gradually slide the choke lever to the RUN position as the engine warms
up until the choke is fully slid to the RUN position.
FIG 10 FIG 11
CAUTION!
Do not run pressure washer with a damaged hose. Do not run pressure washer without
result. FAILURE TO FOLLOW THESE INSTRUCTIONS WILL VOID PRODUCT WARRANTY.
WARNING!
from dissipating.
•
Carbon monoxide gas is a poisonous, odorless gas that can cause headache, confusion, fatigue, nausea, fainting,
sickness, seizures, or death. If you start to experience any of these symptoms, IMMEDIATELY get fresh air and seek
medical attention.
•
•
•
When working in areas where vapors could be inhaled, use a respirator mask according to all of its instructions.
CHOCK
RUN
start
CHOCK
RUN

OPERATION
16
Stopping Pressure Washer (See Fig 12)
•
Push switch to the stop position for 6 seconds.
•
Turn off water and squeeze the trigger handle to release all water pressure.
FIG 12
Using the Spray Gun (See Fig 13 - 14)
•
Flip the lock tab behind the trigger up or down until it clicks to apply or remove the safety. Pull back on the trigger to
begin operating pressurewasher.
•
FIG 13 FIG 14
WARNING!
Pull cord recoils rapidly and pulls arm towards engine faster than you can let go which
could result in injury.
•
Always relieve pressure from spray gun before pulling starter cord, including every failed attempt to start engine.
•
To avoid recoil, pull starter cord slowly until resistance is felt, then pull rapidly.
STOP
I
LOCK OUT
SLOT
TRIGGER

OPERATION
17
Using Spray Nozzle (See fig 15)
•
To connect or disconnect spray tip, pull back on the quick-connect collar. Insert or remove spray tip then release collar.
•
When spray tip is connected, pull on the spray tip to make sure it is secured.
•
For general cleaning use the 40° spray tip. This option is for cementwalkways.
•
For stripping, spot cleaning, blasting, and hard to reach areas use the 40° spray tip. This option is for removing paint,
rust, mildew, marine growth off boats, or grease stains. This option can be used for reaching second story surfaces, or
for the removal of paint, rust, oil stains, tar, gum, and other stubborn substances. Use extreme caution when using this
nozzle.
•
For applying pressure washer safe detergent, use the blacksoap nozzle.
Applying Soap / Detergent (See fig 16)
•
Rinse surface with cool water before applying cleaner.
•
Prepare detergent as required by job. For best results follow detergent directions as supplied from manufacturer.
•
Connect the siphon tube with strainer to the brass barb on the high pressure hose connection area of the pump and then
submerge the strainer end of the siphon tube in the soap/detergent solution bottle or bucket that you want to apply.
•
Spray detergent on surface. For best results use long, even, and overlapping strokes. Allow detergent to set for about
3 minutes before rinsing, but do not allow detergent to dry on surface or it may cause streaking or cause damage to the
surface. Use good judgment.
•
To clean equipment after use, flush water through the spray nozzle for 1-2 minutes then shut off engine. Soak nozzle
and Siphon Tube with the strainer in a bucket of clean water to remove detergent.
Rinsing with the Pressure Washer
•
Test a small area first to avoid surface damage.
•
Rinse from top to bottom using long, overlapping strokes.
Moving the Pressure Washer
•
Turn the pressure washer off.
•
Tilt unit towards you until it is balanced on its wheels.
•
Roll machine to desired location.
FIG 15 FIG 16
SPRAY
WAND
NOZZLE
“CLICK”
WARNING!
Only use detergents or soaps that are safe to be used with pressure washers.Chemicals
which are caustic, such as acids or bleach, can result in serious injury, property damage,
or death.

18
MAINTENANCE
Regular maintenance will extend the life of this pressure washer and improve its performance. The warranty does not
cover items that result from operator negligence, misuse, or abuse. To receive full value from the warranty, operator must
maintain the pressure washer as instructed in this manual, including proper storage.
Pre-operation Steps
Before starting the engine, perform the following pre-operation steps:
•
Check the level of the engine oil and the fuel tank level
•
•
Remove any debris that has collected on the pressurewasher.
•
Check water inlet screen for damage. Clean inlet screen if it is clogged.
•
Check high pressure hose for damage.
•
Briefly run garden hose to flush out any debris or insects.
•
Inspect the work area for hazards.
Remove Debris
•
•
Use a damp cloth to wipe exterior surfaces. If dirt is caked on, use a soft bristle brush.
After Each Use
Follow the following procedure after each use:
•
Shut off engine and turn off water supply. Release water pressure by pointing spray gun in a safe direction and
squeezing the trigger.
•
Disconnect high pressure hose, spray gun, and nozzle. Drain water from items and use a rag to wipe down the outside
of the hose and spray gun.
•
Empty the water from the pump by pulling the recoil starter 6 times.
•
Store unit in a clean and dry area.
•
Use of a pressure washer pump conditioner is recommended, follow the instructions provided by the manufacturer of
the pump conditioner.
Maintenance Schedule
After First 5 Hours
Change Engine Oil
After Each Use
Check and Clean Water Inlet screen
Check High Pressure Hose
Check and Clean Detergent Siphoning Tube
Check Spray Gun for Leaks
Clean Debris
Check Engine Oil Level before starting
Annually (20 hr Use)
Change Engine Oil (Service more often under dirty or dustyconditions)
Annually (50 hr Use)
Check and Clean Air Filter
Annually (100 hr Use)
Service or Replace Spark Plug
WARNING!
Before inspecting or servicing this machine, make sure the engine is off and no parts are
moving. Disconnect the spark plug wire and move it away from the spark plug.

19
MAINTENANCE
Checking Engine Oil
Checking Detergent Siphoning Tube
•
Check the detergent siphoning tube for clogs, leaks, or tears.
•
•
Replace siphoning tubes if damaged.
High Pressure Hose
•
Inspect hose for cuts, bulges, or leaks which can develop from kinking or wear. If damage is found, immediately replace
hose.
•
Inspect couplings for damage. Immediately replace hose if damage is found.
Spray Gun
•
Make sure the spray gun is connected securely.
•
Inspect the spray gun safety and make sure the spray gun trigger springs back upon release.
Spray Nozzle
If a pulsing sensation is felt while squeezing the trigger, the spray nozzle may be dirty or clogged and should be cleaned
immediately.
•
To clean the nozzle, shut off the engine and turn off the water.
•
Remove the nozzle from the spray wand making sure that the nozzle is pointing away from you and in a safe direction.
•
Use the nozzle cleaner or a small paper clip to dislodge any foreign materials which are clogging or restricting the
spray tip.
•
•
Reconnect the nozzle to the spray wand.
•
Turn the water supply back on and start engine.
Nozzle Cleaner
WARNING! Never repair high pressure hose or use unit if hose is damaged. If hose is damaged replace
with identical Pulsar part.
Oil Fill Opening,
Dipstick and Oil
Level
Check the oil level of the pressure washer according to the Recommended Maintenance Schedule in Figure 17.Ch The
pressure washer should be checked before each use for proper oil level. This is a critical step for proper engine starting.
To check the oil level:
- Make sure the pressure washer is on a level surface.
- Clean around oil fill. Remove dipstick and wipe the dipstick with a clean rag. Insert the dipstick into the oil fill opening
without screwing in. Remove the dipstick to check the oil mark. Add oil if the oil mark covers less than one half of the
dipstick.
- Slowly add more oil and repeat step 2 until the oil mark reaches to the top of dipstick (Fig. 18). Do not over fill the
crankcase.
- Reinstall oil dipstick and access panel.

20
MAINTENANCE
Checking Spark Plug
•
Disconnect the spark plug wire from the spark plug.
•
Before removing the spark plug, clean the area around its base to prevent debris from entering the engine.
•
Clean carbon deposits off the electrode with a wire brush.
•
Check the electrode gap and slowly adjust to 0.80mm (0.031in.) if necessary.
•
Reinstall spark plug and tighten to Torque 22.0 –26.9 Nm (16-20 ft-lb).
•
Reconnect spark plug wire.
•
If spark plug is worn replace only with an equivalent replacement part. Spark plug should be replaced annually.
Repairing Leaking Connections
•
Purchase O-Ring / Maintenance kits through the nearest authorized service center and follow instructions provided with
kit.
Air Filter
Storing Pressure Washer
If storing pressure washer for 30 days or more follow the proceduresbelow:
•
Add fuel stabilizer to gasoline to keep gasoline from going stale and to prevent gum deposits from forming on the
carburetor. Run engine for a couple of minutes to circulate the fuel stabilizer.
•
Add PumpSaver to protect pump from freezing or damage caused by mineral deposits.
•
•
Disconnect the spark plug wire and clean the spark plug. Leave spark plug wire disconnected.
•
•
Cover unit with a suitable protective cover to keep unit dry.
•
Store unit in a frost-free area.
WARNING! .
•
•
•
•
.
WARNING!
Water pressure produced by this unit can cut through skin and tissue leading toserious
injury and possible amputation.
•
Never attempt to repair high pressure hose, alwaysreplace.
•
Never attempt to repair leaks with sealant, always replace O-ring orseal.
Table of contents
Other Pulsar Pressure Washer manuals

Pulsar
Pulsar PWE1600 User manual

Pulsar
Pulsar PWG3000H User manual

Pulsar
Pulsar PEW1800 User manual

Pulsar
Pulsar PWE2001V User manual

Pulsar
Pulsar PWG2500V User manual

Pulsar
Pulsar PGPW3100H-AT User manual

Pulsar
Pulsar PWE2000 User manual

Pulsar
Pulsar PGPW2700H-A User manual

Pulsar
Pulsar PWG2700VE User manual

Pulsar
Pulsar W31H19 User manual