Pulsar dBi-M User manual

dBi-M
Instruction Manual

2

PULSAR MEASUREMENT
3
dBi-M (FIRST EDITION REV 1)
March 2022
Part Number M-dBiM-0-001-1P
COPYRIGHT
© Pulsar Measurement, 2022. All rights reserved. No part of this publication may be
reproduced, transmitted, transcribed, stored in a retrieval system, or translated into any
language in any form without the written permission of Pulsar Measurement.
WARRANTY AND LIABILITY
Pulsar Measurement guarantee for a period of 2 years from the date of delivery that it will
either exchange or repair any part of this product returned to Pulsar Measurement if it is found
to be defective in material or workmanship, subject to the defect not being due to unfair wear
and tear, misuse, modification or alteration, accident, misapplication, or negligence.
DISCLAIMER
Pulsar Measurement neither gives nor implies any process guarantee for this product and shall
have no liability in respect of any loss, injury or damage whatsoever arising out of the
application or use of any product or circuit described herein.
Every effort has been made to ensure accuracy of this documentation, but Pulsar Measurement
cannot be held liable for any errors.
Pulsar Measurement operates a policy of constant development and improvement and reserves
the right to amend technical details, as necessary.
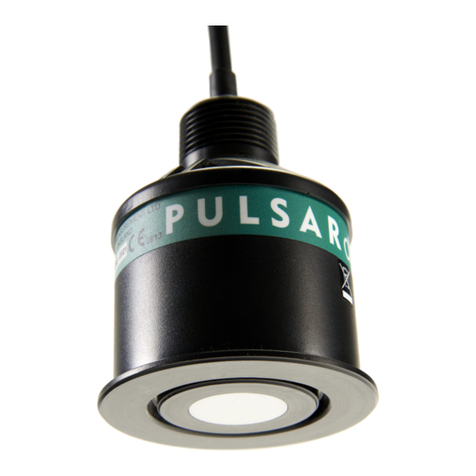
The dBi-M shown on the cover of this manual is used for illustrative purposes only and may not
be representative of the actual dBi-M supplied.
CONTACT
For technical support, please contact:
Europe: supporteurope@pulsarmeasurement.com
Outside Europe: supportnorthamerica@pulsarmeasurement.com
If you have any comments or suggestions about this product, please contact:
Europe: europe@pulsarmeasurement.com
Outside Europe: northamerica@pulsarmeasurement.com
Pulsar Measurement website: www.pulsarmeasurement.com
United States
11451 Belcher Road South
Largo,
FL 33773
888-473-9546
Canada
16456 Sixsmith Drive
Long Sault, Ont.
K0C 1P0
855-300-9151
United Kingdom
Cardinal Building, Enigma
Commercial Centre
Sandy’s Road, Malvern
WR14 1JJ
00 44 (0)1684 891371

4
CONTENTS
Chapter 1 Start Here................................................................................................................6
About this Manual ...............................................................................................................6
About the dBi-M...................................................................................................................7
Product Specification..........................................................................................................8
EU & UK Certificate of Conformity............................................................................. 10
Chapter 2 Installation........................................................................................................... 11
Unpacking............................................................................................................................11
Power Supply Requirements......................................................................................... 11
Location ................................................................................................................................11
Dimensions ..........................................................................................................................12
Outdoor and Open Vessel Installation ..................................................................... 14
Closed Vessel Installation ..............................................................................................15
Cable ...................................................................................................................................... 16
Hazardous area location................................................................................................. 17
Preparation for Operation ............................................................................................. 18
Maintenance ....................................................................................................................... 18
Parameter Defaults........................................................................................................... 18
Chapter 3 Getting Results With dBi-M Transducers................................................19
Setting up Your Application.......................................................................................... 19
Resetting Factory Defaults............................................................................................. 20
Chapter 4 dBi-M PC Software........................................................................................... 21
dBi-M RS485 Connector.................................................................................................21
Opening dBi-M PC............................................................................................................22
dBi-M PC Opening Screen.............................................................................................23
Menu Strip ........................................................................................................................... 23
Shortcut Icons..................................................................................................................... 27
Toggle Parameter List .....................................................................................................29
Main Screen Selection Tabs ..........................................................................................29
Main Screen......................................................................................................................... 30
Common Parameters.......................................................................................................34
Progress Bar ........................................................................................................................ 37
Cursor Position...................................................................................................................38
Transducer ........................................................................................................................... 39
Chapter 5 Parameter Guide ...............................................................................................40
Application...........................................................................................................................40

PULSAR MEASUREMENT
5
Operation ............................................................................................................................. 40
Distance ................................................................................................................................ 41
Data Logs ............................................................................................................................. 43
Temperature........................................................................................................................43
Transducer Power Information ....................................................................................43
Compensation .................................................................................................................... 44
Stability..................................................................................................................................46
Damping...............................................................................................................................46
Filters...................................................................................................................................... 46
System ................................................................................................................................... 47
System Information.......................................................................................................... 47
Defaults ................................................................................................................................. 47
Modbus Poll Address ......................................................................................................48
Alarm limits.......................................................................................................................... 48
Datem .................................................................................................................................... 49
Volume ..................................................................................................................................51
Conversion........................................................................................................................... 52
Breakpoints.......................................................................................................................... 57
Chapter 6 Modbus ................................................................................................................ 59
Modbus Protocol............................................................................................................... 59
Device Address...................................................................................................................59
Function Codes .................................................................................................................. 59
Register Address................................................................................................................ 60
Registers ............................................................................................................................... 60
Addressing 32-bit Registers on dBi-M ..................................................................... 60
Runtime Registers (Input Registers) .......................................................................... 62
Configuration/Holding Registers (Parameters).....................................................63
Echo Status (register 1)...................................................................................................68
Chapter 7 Troubleshooting................................................................................................69
Chapter 8 Disposal ................................................................................................................70

dBi-M INSTRUCTION MANUAL
6
CHAPTER 1 START HERE
Congratulations on your purchase of a Pulsar dBi-M. This quality system has
been developed over many years and represents the latest in high
technology level measurement and control.
It has been designed to give you years of trouble-free performance, and a
few minutes spent reading this operating manual will ensure that your
installation is as simple as possible.
About this Manual
It is important that this manual is referred to for correct installation and
operation. There are various parts of the manual that offer additional help
or information as shown.
Tips
TIP: Look for this icon throughout your Pulsar Measurement manual to
find helpful information and answers to frequently asked questions .
Additional Information
At various parts of the manual, you will find sections
like this that explain specific things in more detail.

PULSAR MEASUREMENT
7
About the dBi-M
Functional Description
The dBi-M transducer range has been specified and designed to meet the
demanding requirements of today’s process level measurement applications
for liquids and solids.
The transducers are compatible with RS-485 Modbus communications. They
are able to be easily set-up using a PC with an RS-485 adapter and Pulsar
dBi-M PC software.
Easy calibration and maintenance free “fit and forget” performance meaning
that you can install the dBi-M transducer level monitoring system rapidly
and with confidence, with calibration being achieved either by using a
Modbus RTU programmer/calibrator, or via Pulsar’s free dBi-M PC software.
The dBi-M units are based on a PZT ceramic transducer element. The
nominal beam angle is 10o(-3dB). When coupled with the DATEM®signal
processing they provide unmatched performance in industrial process level
measurement. All transducers have integral temperature compensation.
Optional submersion shields are available to prevent spurious signals if the
transducer becomes submerged. A range of flange mounting options are
available, with optional PTFE facing for improved chemical resistance.
The dBi-M series of transducers have an RS485 digital output which can be
programmed to give readings according to level, space, distance, or
volume.

dBi-M INSTRUCTION MANUAL
8
Product Specification
PHYSICAL
Transducer housing material
PVDF or Valox 357 PBT
Weight
dBi-M3: 1kg (2.2lbs), dBi-M6: 1.2kg (2.7lbs),
dBi-M10: 1.3kg (2.9lbs), dBi-M15: 1.4kg (3.1lbs)
Dimensions & Mounting
dBi-M3: 77mm dia x 134mm high (3 x 5.31”) 1”
BSP/NPT
dBi-M6 & dBi-M10: 86mm dia x 121mm high (3.38 x
4.75”) 1” BSP/NPT rear thread
dBi-M15: 86mm dia x 134mm high (3.38 x 5.32”)
1“BSP/NPT rear thread.
Standard Cables lengths
5m (16.4ft), 10m (32.8ft), 20m (65.6ft) or 30m (98.4ft)
Transducer Cable Extensions
4-core screened.
Maximum Separation
500m (1,640 ft)
ENVIRONMENTAL
IP Rating
IP68 / NEMA 6P
Max. & min. temperature
(electronics)
-40°C to +80°C (-40°F to 176°F)
Flammable atmosphere approval
Compatible with approved transducers (see spec.
sheets)
CE Approval
See DoC in this manual for details
Explosive atmosphere approvals
IECEx, UKEx & ATEX
Zone 0 : II 1 G Ex ia IIC T4 Ga, Zone 20 : II 1 D Ex ia
IIIC T130°C Da, Tamb= -40°C to +80°C. Also suitable
for zones 1,2,21,22.
PERFORMANCE
Measurement Range
dBi-M3: 0.125m (0.41 ft) to 3m (9.84 ft)
dBi-M6: 0.3m (0.98 ft) to 6m (19.69 ft)
dBi-M10: 0.3m (0.98 ft) to 10m (32.81 ft)
dBi-M15: 0.5m (1.64 ft) to 15m (49.21 ft)
Accuracy
dBi-M3: 2mm (0.08”)
dBi-M6: 4mm (0.16”)
dBi-M10: 3mm (0.12”) up to 6m (19.69 ft), 6mm
(0.24”) over 6m range.
dBi-M15: 5mm (0.2”) up to 10m (32.81 ft), 10mm
(0.36”) over 10m range.
Frequency
dBi-M3: 125kHz
dBi-M6: 75kHz
dBi-M10: 50kHz
dBi-M15: 41kHz

PULSAR MEASUREMENT
9
Beam Angle
dBi-M3, dBi M6 & dBi-M10: <10°
dBi-M15: <8° (all beam angles are inclusive)
Rate Response
Fully adjustable
Resolution
dBi-M3: 1mm (0.04”)
dBi-M6: 2mm (0.08”)
dBi-M10: 3mm (0.12”)
dBi-M15: 5mm (0.2”)
OUTPUTS
Digital Communications
Non-isolated RS485
Communication Protocol
Modbus RTU
PROGRAMING
PC Programming (via RS485
converter)
PC setup, installation, echo profiles, cloning and
troubleshooting)
Programming security
Via passcode
Program integrity
Via non-volatile memory
SUPPLY
Operating Voltage
5-15 VDC
Current Consumption
Average 14mA, 0.006 mAh per measurement.
Boot Time
1 second for warm bootup (within 12 hours), 2
seconds cold bootup (after 12 hours).
Pulsar Measurement operates a policy of constant development and
improvement and reserve the right to amend technical details, as necessary.

dBi-M INSTRUCTION MANUAL
10
EU & UK Certificate of Conformity

PULSAR MEASUREMENT
11
CHAPTER 2 INSTALLATION
Unpacking
Power Supply Requirements
The dBi-M series intelligent transducer operates from a supply voltage of 5
to 15V DC, and typical draw on average over 900ms is 14mA, peak is 100mA
at start up for 5ms.
The compact one-piece construction of the dBi-M series intelligent
transducer can be mounted easily using wither the 1” BSP/NPT rear
mounting thread or the integral 1.5” or 2” BSP/NPT front nose thread
(dependent on model).
Location
When choosing a location to mount the transducer, please bear in mind the
following:
•The ultrasonic signal path should be free of falling material and
obstructions such as pipes, beams etc.
•The dBi-M3 should be mounted at least 12.5cm (0.41 feet) above the
maximum level of the material and be perpendicular to the surface.
While the dBi-M6 and 10 should be mounted at least 30cm (0.98 feet)
above the maximum level of the material and be perpendicular to the
surface. And the dBi-M15 should be mounted at least 50cm (1.64 feet)
above the maximum level of the material and again should be
perpendicular to the surface.
Important Information
All shipping cartons should be opened carefully. When using a box cutter, do not
plunge the blade deeply into the box, as it could potentially cut or scratch
equipment components. Carefully remove equipment from each carton,
checking it against the packing list before discarding any packing material. If
there is any shortage or obvious shipping damage to the equipment, report it
immediately to your local Pulsar Measurement Partner.
Important Information
All electronic products are susceptible to electrostatic shock, so follow
proper grounding procedures during installation.

dBi-M INSTRUCTION MANUAL
12
•The ambient temperature is between -40ºC and 80ºC (-40°F to 176°F).
•There should be no high voltage cables or electrical wiring near the
transducer cabling.
Dimensions
The dimensions of the dBi-M Series Intelligent Transducerw are shown
below:
Rear Thread Mount
dBi - M6 &
dBi-M10
121mm (4.8”)
86mm ø (3.4”)
dBi-M6
dBi-M3
134mm (5.3”)
77mm ø (3”)
dBi-M3
dBi-M15
134mm (5.3”)
86mm ø (3.4”)
dBi-M15

PULSAR MEASUREMENT
13
Front Thread Mount
dBi-M6 & dBi-M10
65mm (2.6”)
160mm (6.3”)
77mm ø (3”)
2” Thread
(61mm (2.40”)
Clearance
hole)
dBi-M6
dBi-M3
65mm (2.6”)
160mm (6.3”)
77mm ø (3”)
1.5” Thread
(49mm (1.93”)
Clearance hole)
dBi-M3

dBi-M INSTRUCTION MANUAL
14
Outdoor and Open Vessel Installation
The dBi-M Series Intelligent Transducer can be simply mounted on a
bracket, suitable for the application and secured using either the 1" BSP/NPT
rear thread or via the 1½″ or 2″ front thread, dependant on model.
Care should be taken to ensure that the dBi Series Intelligent Transducer is
not installed in direct sunlight, to avoid errors in the measurement of
ambient temperature.
Attention should also be taken, when mounting the unit, to ensure that
strong windy conditions are avoided, wherever possible, to prevent
abnormal operation.
DBI MODEL
RANGE
L = BLANKING
dBi-M3
3 metres (9.84 feet)
125mm (0.41 feet)
dBi-M6
6 metres (19.69 feet)
300mm (0.98 feet)
dBi-M10
10 metres (32.18 feet)
300mm (0.98 feet
dBi-M15
15 metres (49.21 feet)
500mm (1.64 feet)
‘L’ (Blanking) should, as a minimum be at least that as detailed in the
table above but can be greater if required.
Mounted via Rear 1″BSP/NPT
Thread
Mounted via optional Front
Thread
dBi-M6
dBi-M6

PULSAR MEASUREMENT
15
Closed Vessel Installation
“L” should as a minimum be at least that as detailed in the table above but
can be greater if required. The dBi Series Intelligent Transducer can be
simply screwed into a flange and secured using the rear 1" BSP/NPT rear
thread or via the 1½″ or 2″ front thread, dependant on model.
Where possible, use a flange made of a synthetic material such as PVC, in
cases where a metal flange is used it is advisable to fit a suitable gasket
between the flange of the dBi Series Intelligent Transducer and the
connection to the vessel.
Standpipe Installations
When mounting the dBi Series Intelligent Transducer to a standpipe care
should be taken to ensure that the standpipe is of sufficient diameter with
reference to its length, see the table below for details:
DIA. (D)
MAX LENGTH
mm
inches
mm
inches
80
3
220
8
100
4
300
12
150
6
420
16
200
8
560
22
dBi Flange mounted via Front
Thread
Optional Flange Mounted dBi
When using a standpipe, fixed to the top of a vessel, ensure that the open
end of the standpipe is clear of any obstructions such as weld seams,
gaskets etc. to avoid unwanted signal returns.

dBi-M INSTRUCTION MANUAL
16
If using standpipes which extend into the vessel, beyond the blanking
distance, but not as far as the empty level, then the open end of the
standpipe should be cut to an angle of 45o.
When using the dBi-M Series Intelligent Transducer to measure ‘aggressive,
materials such as ‘alkaline’ and ‘acids’ it is recommended that either a PVDF
or an optional PTFE faced Flanged Transducer is used. Please consult Pulsar
Measurement for a full availability of options.
Cable
The dBi-M Series Intelligent Transducer comes with a fitted integral cable, if
this cable is extended then the total capacitance must not exceed the limits
for the voltage applied.
Wiring detail
COLOUR
DESCRIPTION
LIMITS
Red
Power
15V max.
Orange
RS485 +
5V Nom.
White
RS485 –
5V Nom.
Black
0V DC
N/A
Cable Screen
Correct
standpipe
installation
Pipe should be free
of obstructions
such as weld
seams.
The maximum level
(100% of Span) is
inside the Blanking
Distance.
dBi-M Cable

PULSAR MEASUREMENT
17
Hazardous area location
Ex ia (Intrinsically Safe) dBi-M transducers are certified for use in hazardous
zones 0, 1, 2 (gas) & 20, 21, 22 (dust).
The installation must comply with local regulations and the power supply
cable to the transducers shall meet the relevant requirements of clause 9 of
IEC60079-14:2013 / EN60079-14: 2014. The dBi-M series intelligent
transducer has bare wires; ensure that suitably specified barriers are
employed.
Marking for the dBi-M transducer:
Zener Barriers
RS485 -
RS485 +
Power
0V/Gnd
Red
White
Orange
Black
Zener barriers
Power:
Uo max. = 15.1V, R.min = 44.6R
Signal: RS485 -, RS485 +
Uo max. = 10.3V, R.min = 49R
Safe Area
IS earth
IS earth
IS earth
Screen
NC
Entity parameters:
Power:
Ui = 15.1V
Li = 350mA
Pi = 0.65W
Signal:
Ui = 10.3V
Li = 350mA
Pi = 0.65W
Uo = 6.51V
Lo = 132mA
dBi-M
transducer
Hazardous area
Zones 0, 1, 2 (gas) & 20, 21, 22 (dust)

dBi-M INSTRUCTION MANUAL
18
Preparation for Operation
Before switching on, check the following:
✓The dBi Series Intelligent Transducer is mounted correctly.
✓The power supply is correctly installed.
Maintenance
There are no user serviceable parts inside your dBi-M Series Intelligent
Transducer, if you experience any problems with the unit, then please
contact Pulsar Measurement for advice.
To clean the equipment, wipe with a damp cloth. Do not use any solvents on
the enclosure.
Parameter Defaults
Once you are satisfied with the installation, and the dBi-M Series Intelligent
Transducer is reading what you would expect in terms of distance from the
face of the transducer to the material. Then you can proceed with any
programming, required for the intended application. It is sensible to
program all required parameters at the same time as soon as programming
is complete the system will then be setup ready for use.
Factory Defaults
When first installing the dBi-M Series Intelligent Transducer, or
subsequently moving or using the unit on a new application, before
proceeding to program the unit for its intended application it is
recommended that you ensure that all parameters are at their default
values by completing a Factory Default P930, as described in the relevant
unit type parameter guide.This can be done by using the free dBi-M PC
software.

PULSAR MEASUREMENT
19
CHAPTER 3 GETTING RESULTS WITH DBI-M TRANSDUCERS
This chapter explains how to undertake the various functions of your dBi-M
Series Intelligent Transducer. Where specific parameters are used, please
refer to Chapter 5 Parameter Guide.
Setting up Your Application
Empty Distance
Empty Level (P105) is the distance from the face of the transducer to the
material at the bottom of the vessel.
Span
Span (P106) is the distance from the empty level (0% full) to span (100%
full).
Near and Far Blanking
Near blanking (P107) is the distance from the face of the transducer that
the dBi-M Series Intelligent Transducer will not record a level nearer than. A
typical reason to increase this from the default value would be if you wish to
ignore close in obstructions.
Far blanking (P108) is the distance (as a percentage of empty level) beyond
the empty level that the dBi-M Series Intelligent Transducer will read, the
default is plus 20% of empty level. If you wish to monitor further than the
empty level, then increase this figure, so that the empty level plus the far
blanking figure (as % of empty level) is greater than the surface being
measured, within the capability of the transducer being used.

dBi-M INSTRUCTION MANUAL
20
Resetting Factory Defaults
If you need to restore parameters to their original factory settings, then
access parameter P930, which is the factory defaults parameter, change the
value to 1 and ENTER. Or access the Transfer menu option and select ‘Set
Factory Default’ and all parameters, will be restored to the factory settings
(including the DATEM trace) and on completion.
Checking Information Specific to your dBi-M Intelligent Transducer
There are some parameters dedicated to each individual dBi-M Series
Intelligent Transducer, such as the firmware revision and the unit’s serial
number.
Checking the Firmware Revision and Serial Number
If you need to identify the serial number of the unit or the current level of
firmware in your dBi Series Intelligent Transducer, the following parameters
can be used. Select parameter P926 to view the identity of the current
firmware revision or P928 for the serial number of the unit.
This manual suits for next models
4
Table of contents
Other Pulsar Transducer manuals
Popular Transducer manuals by other brands

controlair
controlair 500 Series Installation, operation and maintenance instructions

MKS
MKS Baratron 631D instruction manual

Humminbird
Humminbird transducer Assembly & operating instructions

kries
kries IKI-LUM 92 Assembly instructions

ZIEHL
ZIEHL STWA4MH operating manual

Airmar
Airmar TRIDUCER B744V Owner's guide & installation instructions

Airmar
Airmar P66 Owner's guide & installation instructions

MTS Systems
MTS Systems Temposonics II LDT Installation and instruction manual

Milltronics
Milltronics PL-551 instruction manual

Simrad
Simrad ES38B - REV E Installation

Camille Bauer
Camille Bauer 542-41210 operating instructions

HBM
HBM PAD4001A quick start guide