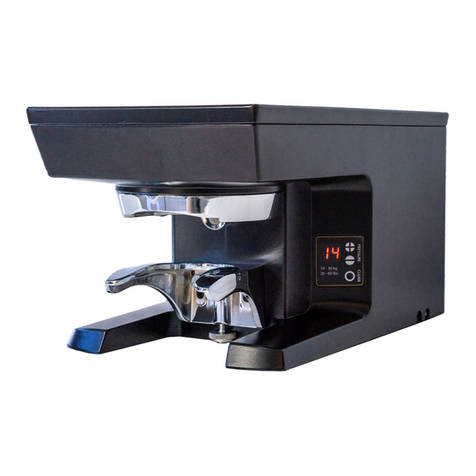
Puqpress Mini User manual

USER
MANUAL
Q2
Mini Q1
MODEL

2
www.puqpress.com/manuals
6WARNING
For more information see the extended
manual online about safe installation
and operation.
EN
EN Original manual

3
IMAGES
8
9
10
11
1
2
3
4
5
6
7
12
13
Mini

4
Q1
8
9
10
11
1
2
3
4
5
6
7
5
12
13

5
IMAGES
8
9
10
11
1
2
3
4
5
6
7
14
12
13
Q2

6
15
16
17

7
IMAGES

8
TABLE OF CONTENT
1 Introduction 8
2 Productdescription 9
3 Safety 11
4 Installation 13
5 Operation 14
6 Maintenance 16
7 Troubleshooting 18
8 Disposal 19
DEAR COFFEE ENTHUSIAST,
to standardise the tamping pressure, a
INTRODUCTION
1.1 Usedsymbolsinthismanual
6WARNING

9
EN
6CAUTION
NOTICE
1.2 Warranty
•
•
•
improper usage,
usage for purposes other than those
intended,
•
•
•
1.3 Disclaimer
PRODUCT DESCRIPTION
2.1 Intendeduse

10
2.2 Specications
Model Mini Q1 Q2
Voltage
Frequency
Power
Dimensions
Weight
Tamping
pressure
Operating
temperature
Storing
temperature
Tampingcycle
Tampershape Flat bottom
Warranty
Tampingcycles
withinthe
warranty
Serialnumber
Yearbuilt
Tamperdiameter
2.3 Mainparts
the Mini.
the Q1.
the Q2.
the Mini/Q1/Q2.
1. Tamper base bolt
3. Tamper base
4.
5.
6.
7.
8.
9. Up button
10.

11
EN
11.
13.
14.
15.
16.
17.
SAFETY
3.1 Safetyinstructions
6WARNING
•
•
•
•
•
•
•
•
•
•
6CAUTION
•
•
•

12
damages resulting from failure to
•
•
•
•
•
•
3.2 Personnelrequirements
3.3 Explanationofthesymbolsonthe
productandpackaging
insulation.
fragile.

13
EN
INSTALLATION
4.1 Preparation
4.1.1 Checkingthecontents
4.1.2 Toolsandmaterials
Requiredtoolsandmaterials
•
Providedtoolsandmaterials
•
4.2 Adjustingtheport-a-lterclamp
tamping.
6CAUTION
NOTICE
1.

14
Mini/Q1
Q2
3.
4. Mini/Q1
Q2
5.
NOTICE
6.
7.
8.
9.
6CAUTION
4.3 SwitchingonthePUQpress
6WARNING
1.
3.
on/offswitch
OPERATION
more information.
5.1 Preparation
5.1.1 Toolsandmaterials
Requiredtoolsandmaterials
•
5.2 UsingthePUQpress
1.
3.
4.

15
EN
5.
5.3 Adjustingthetampingforce
1. upbutton
downbutton
NOTICE
5.4 Selectingthetampingmode
1. setbutton for 5
Use the up and downbutton
the setting.
3.
Mini/Q1
Code Setting Explanation
tamper base
Q2
Code Setting Explanation
tamper base
Triple tamp
4. setbutton
setting.
5.5 Checkingthetampingcyclecount
1.
and hold the up and downbutton for 3
5.6 Checkingthecleaningcyclecount
1. setbutton.
up and downbutton
3.
5.7 SwitchingoffthePUQpress
1.
on/offswitch to O.
3.

16
MAINTENANCE
information.
6.1 Preparation
6.1.1 Toolsandmaterials
Requiredtoolsandmaterials
•
Providedtoolsandmaterials
• Brush
•
•
6.2 Cleaning
NOTICE
damaged.
Part Cleaning
method
Cleaning
interval
Tamper base
Tamper base
tamper base is
sensor
Brush
6.2.1 Cleaningthetamperbase
1. setbutton. The tamper base
3.
4.
5.
6.
6CAUTION
7.
8.
9.
10.
11. setbuttonagain. The tamper
position.

17
EN
6.3 Storing
6.4 Maintaining
6.4.1 Servicing
dealer.
depends on the diameter range of the tamper
•
•
6.4.2 Orderingspareparts
•
•
Use the same name as the part is

TROUBLESHOOTING
Problem Cause(s) Solution(s)
the tamper base.
outlet.
Tamping does not start
18

DISPOSAL
19
EN

BaristaTechnologyB.V.
This manual suits for next models
4
Table of contents
Other Puqpress Coffee Maker manuals
Popular Coffee Maker manuals by other brands

Bunn
Bunn Single SH BrewWISE DBC Installation and operating manual

Jura
Jura GIGA X8c Technical documentation

Electrolux
Electrolux Lavazza A Modo Mio quick start guide

DeLonghi
DeLonghi NESCAFE Dolce Gusto JOVIA EDG 250 user manual

Gevi
Gevi GECME403-U instruction manual

eunasa
eunasa Lucca CEM-BLK instruction manual