PURE Highway 400 User manual

Highway 400
Highway_400_Euro_v1.indb 1 2/24/2016 4:21:23 PM

Highway_400_Euro_v1.indb 2 2/24/2016 4:21:23 PM

EN
DE
FR
IT
NO
DA
NL
1
Thank you for choosing Highway 400. This manual will get you up and
running in no time, and explains how to make the most of your Highway.
We’re constantly improving and adding new features to our products. To
take advantage of any enhancements made since your product was shipped,
please visit support.pure.com where you can find out about the latest product
updates and download the latest version of this user guide in PDF format.
Highway 400
Highway_400_Euro_v1.indb 1 2/24/2016 4:21:23 PM

2
Safety instructions
1. Read and retain these instructions.
2. Heed the warnings given.
3. Follow the operating instructions.
4. Failure to install or use the product in accordance with these instructions may impair the safety of the product and invalidate the warranty.
5. Use only power supplies listed in the user manual/user instructions.
6. Do not fit the wireless controller, receiver or the antenna in such a way that may interfere with the safe operation of the vehicle, the deployment of air bags or other safety product.
7. Avoid running cables and wires near the steering wheel.
8. Do not connect to anything other than the vehicle 12V supply using the supplied adapter.
9. Do not use the product in a manner that would cause careless driving or improper control of your vehicle.
10. Do not immerse in water.
11. Clean only with a dry cloth.
12. Do not place on or near sources of heat, for example heating vents.
13. This product must only be used with the supplied battery types and 12V accessory power adapter.
14. WARNING: The batteries in the wireless controller shall not be exposed to excessive heat such as sunshine, fire or similar.
15. Ensure batteries are fitted with the correct polarity.
16. Attention should be drawn to the environmental aspects of battery disposal.
17. Do not cover any of the vehicle’s ventilation openings as this may impair the vehicle’s ventilation.
18. Do not expose the product to naked flame sources, for example a lighter.
19. This product is intended for use in moderate climates.
20. Ensure that power is removed prior to making any connections to the rear of your vehicle’s head unit. Only turn on your product once connections are made safe. See your vehicle’s
owner’s manual for more information.
If the product is used in a manner not specified by the instructions, the product’s protection could be impaired.
Do not use the product if any damage is noticed.
Product repairs are only allowed to be carried out by competent and authorised personnel.
Keep new and used batteries away from children. If the battery compartment does not close securely, stop using the product and keep it away from children. If you think batteries may
have been swallowed or placed inside any part of the body, seek immediate medical attention.
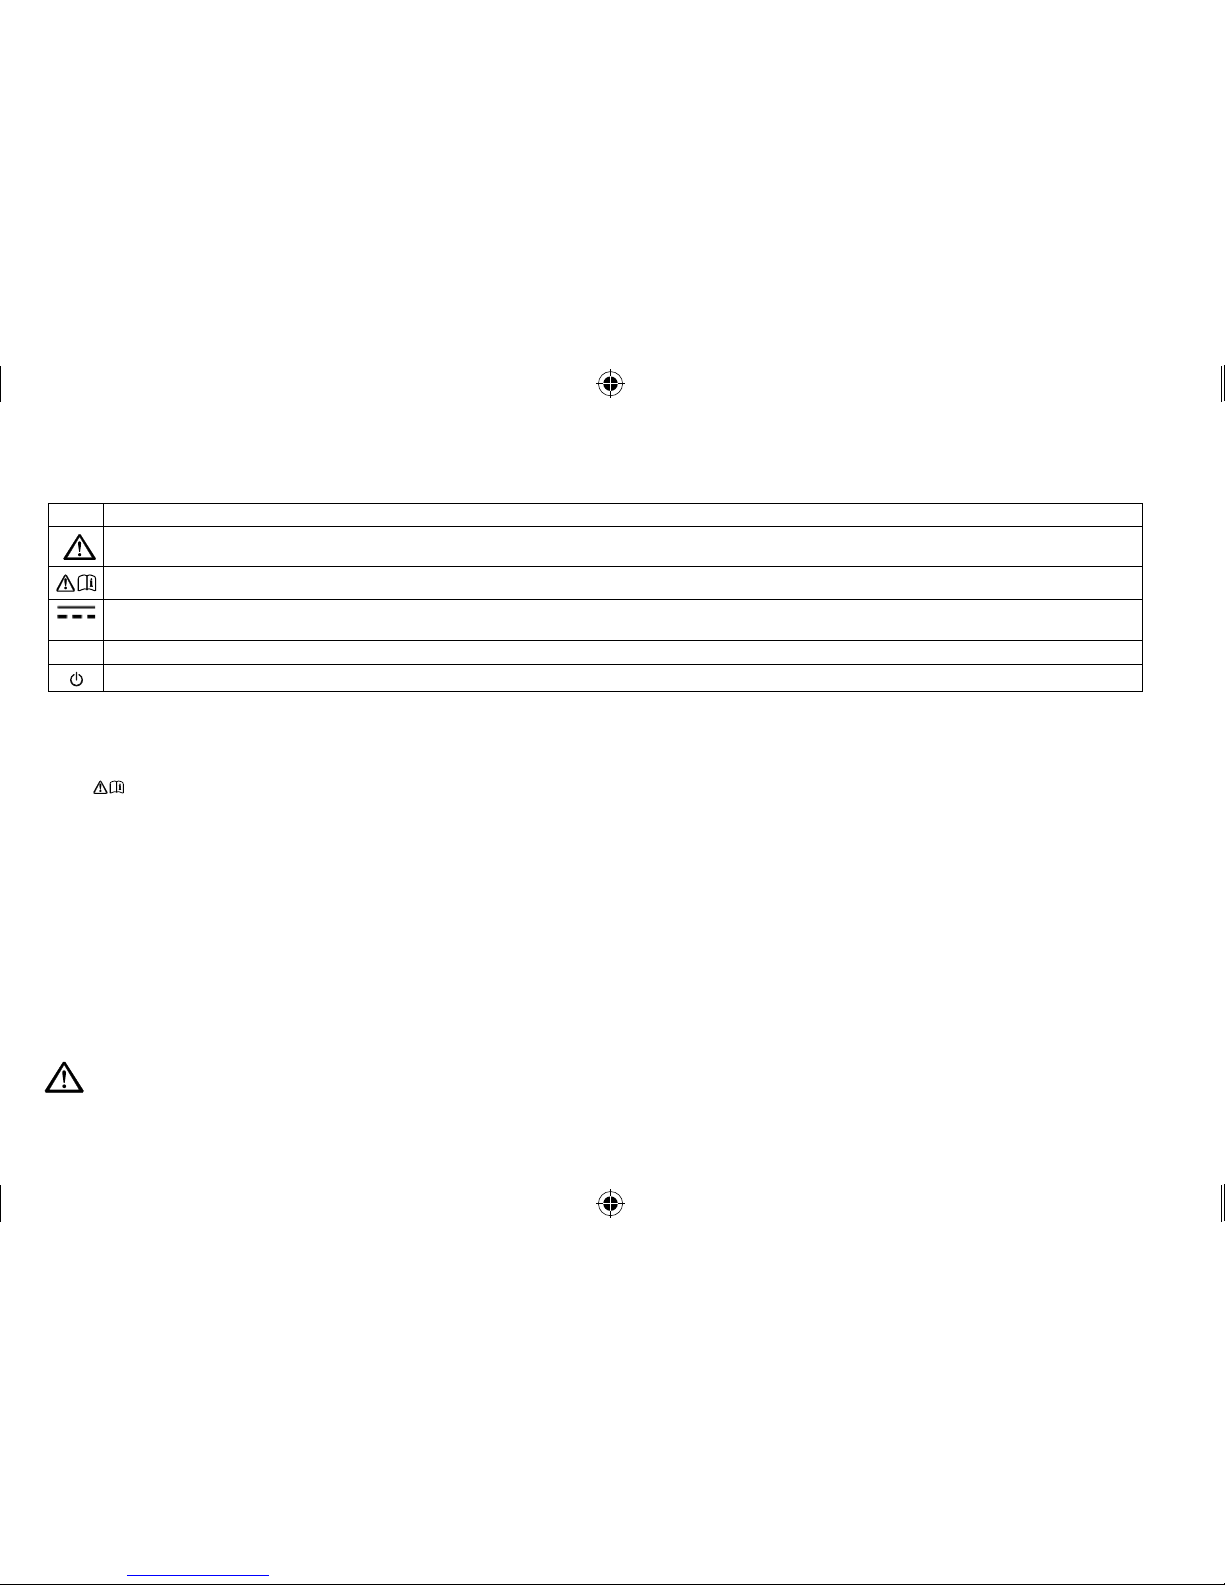
Symbol Description
This WARNING symbol is used throughout this manual to indicate a potentially serious risk to your personal safety. Obey all safety notices that accompany this symbol to avoid
possible injury or death.
This symbol is used on the product to indicate a caution and that instructions should be read before use.
12V DC
This symbol indicates 12V DC.
1A This symbol indicates a USB socket rated at 1 Amp maximum.
This symbol indicates where the product is switched on or put into standby.
Symbols used on this product
Note: For information on all the other symbols used on the product, see page 12.
Highway_400_Euro_v1.indb 2 2/24/2016 4:21:24 PM

3
EN
Contents
4 Introduction
4 Package contents
5 Installing Highway in your vehicle
5 Important safety notice
6 Considerations before installing Highway
8 Installing the receiver
9 Cable routing overview
10 Connecting the receiver to the power supply
11 Installing the wireless controller
12 Overview
12 Controls
13 Display
13 Switching on and o
14 Switching on Highway for the first time
15 Listening to digital radio
16 Pairing Highway with a phone or tablet
17 Streaming audio stored on your phone
or tablet
18 Streaming from a music streaming service
18 Using Highway with your mobile’s
personal assistant feature
18 Settings
18 Digital radio settings
20 Bluetooth settings
20 Tag add settings
21 Switching between auxiliary connection and FM
transmission
22 Display
22 About
23 Resetting Highway to factory settings
23 Software updates
23 Appendix
23 Troubleshooting
26 Technical specifications
Highway_400_Euro_v1.indb 3 2/24/2016 4:21:24 PM

4
Introduction
Package contents
Receiver
This is intended to be mounted
to the windscreen.
Magnetic grounding tail
This attaches to the receiver
(see page 7).
DAB film antenna
This attaches to the receiver.
Note: The DAB film antenna is
delicate, so be careful not to
bend it.
Wireless controller
The wireless controller
connects to the receiver using
Bluetooth and is used to control
all of Highway’s functions.
Batteries
Two AAA batteries.
Wireless controller bracket
Bracket for positioning the wireless
controller on your dashboard.
Includes sticky pad.
Highway power adapter
Dual USB port 12V accessory
power adapter.
Self-adhesive cable clips
Used for securing any cables.
Cleaning wipe
Used to wipe down surfaces before
fixing any of Highway’s components
into place.
Highway_400_Euro_v1.indb 4 2/24/2016 4:21:25 PM

5
EN
Installing Highway in your vehicle
Important safety notice
For your safety, do not run cables so that they interfere with operation of the vehicle, or through a location that would interfere
with the function of the airbags or other safety equipment, for example seat belts. Do not install any of Highway’s components
in a location that obstructs the view of the driver or in a location where digital radio interference may be caused from the metal
bodywork or other components.
Receiver positioning overview
The receiver is designed to be installed on a window
using the self-adhesive pads provided.
Make sure that you install the receiver in a safe position
where the primary viewing area is not obstructed. Your
windscreen can be divided into separate zones to help
you determine where the receiver can be safely placed:
Zone A is a vertical area 290mm wide, centred on the
steering wheel and contained within the swept area of
the windscreen (this area is 350mm wide on vehicles
over 3.5 tonnes) which must not be incurred upon by
more than 1cm.
Note: Fitting Highway in this area is not recommended.
Zone B is the remainder of the swept area of the
windscreen which must not be incurred upon by more
than 4cm.
The above information is a guide only, for full
information you should consult the relevant country
department of transport guidelines.
Max 1cm
incursion
Max 4cm
incursion
No restriction Zone B Zone A
Suggested position
Highway_400_Euro_v1.indb 5 2/24/2016 4:21:26 PM

6
Considerations before installing Highway
Minimum vehicle requirements
• Fitted audio system with either aux-in (3.5 mm) or FM receiver.
• Standard 12V negative earth power system - not suitable for 24V systems.
Check for the latest Highway software updates
Visit http://www.pure.com/highway-update to see if any software updates are available for your Highway.
Test intended positions of receiver and wireless controller before fixing into place
• Check the cable length to ensure connectors can reach the audio and accessory power outlet positions.
• Temporarily place the receiver and wireless controller in their intended positions and check that Highway is working as
expected. Check the digital radio quality and signal strength (see ‘Info’ on page 22 for more information).
Receiver positioning
• Ensure you can easily access the ‘Reset’ button on the receiver before fitting.
• For best performance we recommend positioning the receiver away from heated screen elements and not on glass panels
that contain metallic UV filters.
Wireless controller positioning
Consider usability and visibility from driving seat and possible mounting points/brackets.
Connecting to your existing audio system
There are two options for installing Highway. You can connect Highway to your audio system’s auxiliary connection or you can
transmit to your audio system wirelessly using an available FM frequency.
• If you want to use an auxiliary cable (recommended for best performance), check for auxiliary inputs on the existing audio
system (this may be on the back on some audio systems). For more information, see your existing audio system’s user guide.
• If you want to use an available FM frequency, select this option during initial Highway setup (see page 14 for more information).
Note: To comply with legal requirements the FM transmitter function of Highway will switch o if no audio is transmitted for a
period lasting over a minute - this includes DAB radio or audio streamed from your phone or tablet. If FM transmission is switched
o you need to re-tune to an active DAB station or stream audio from your phone or tablet.
Highway_400_Euro_v1.indb 6 2/24/2016 4:21:26 PM

7
EN
Receiver overview
Reset button
Used to reset Highway or to start
pairing between the receiver
and the wireless controller, see
’Troubleshooting’ on page 23 for
more information.
Optional detachable magnetic grounding tail
We recommend fitting the magnetic grounding tail if you
can stick it to a metal part of your vehicle’s bodywork.
It can improve DAB reception in areas with poor signal
strength. See the next page for installation guidance.
Power and audio out cable
Status LED
Lights up for a few seconds when you first
switch on Highway. If the LED starts to flash see
’Troubleshooting’ on page 23 for more information.
Film antenna
Clip to the receiver.
Highway_400_Euro_v1.indb 7 2/24/2016 4:21:26 PM

8
Installing the receiver
3. Remove the backing from the receiver (A) and attach to your windscreen.
Note: Make sure that you install Highway in a safe position where the
primary viewing area is not obstructed (see page 5).
4. Gently unpeel the backing of the film antenna (B) and attach to your
windscreen, taking care not to bend it. Apply gentle pressure until the film
antenna is held firmly in position.
Note: Take care not to unclip the film antenna from the receiver when
attaching to your windscreen.
2. Use the supplied cleaning wipe to clean the area of the windscreen
that you want to install the receiver and film antenna on and wait for the
surface to dry. Important: Ensure the surface is completely clean and dry
before adhesion.
Note: The receiver and antenna should be installed at least 40mm from
your vehicle’s metal bodywork.
A
B
1. If you decided to fit the magnetic grounding tail, gently pull down the
front of the roof liner so that there is enough room to push the detachable
magnetic grounding tail through the gap.
Note: Ensure that the magnet on the end of the magnetic grounding
tail makes contact with the roof above your vehicle’s headliner or the
vehicle’s metal bodywork surface.
We recommend installing Highway’s receiver on your vehicle’s windscreen as described below (see page 5 for more information).
Highway_400_Euro_v1.indb 8 2/24/2016 4:21:26 PM

9
EN
1. Identify the location of the vehicle power outlet and the auxiliary
audio input (if required).
2. Uncoil the cable (A) from the receiver (B) and place in its
intended position. Check there is adequate length for the cable
to run to the 12V accessory socket and the auxiliary connection.
3. Route the cable so it is near your 12V accessory socket (C). Try
to secure the cable by tucking the cable behind the trim on the
side of your windscreen.
4. If you are connecting Highway to your audio system using
the auxiliary connection, separate the auxiliary cable (D) from
the USB power cable by gently pulling the cables apart to the
right length and connect to the auxiliary connection (E) on your
audio system. If you are using FM transmission, coil the auxiliary
connection cable and stow away in a safe position.
5.
Secure the cables using the self-adhesive clips (F) (if required).
Ensure all surfaces are completely clean and dry before adhesion.
Installing the main cable
Cable routing overview
F
C
E
D
A
B
WARNING: Do not route the main cable in a way that could
interfere with operation of the vehicle, or through a location
that could interfere with the function of the airbags or other
safety equipment. See page 5 for more information.
1 2 3 4
5 6 7 8
Highway_400_Euro_v1.indb 9 2/24/2016 4:21:27 PM

10
Connecting the receiver to the power supply
Plug the Highway power adapter into the 12V accessory socket
and then plug the USB power cable from the receiver into one of
the adapter’s USB ports.
Note: Cigarette lighter and power sockets can vary between
car makes and models. Ensure the power adapter is completely
inserted and is firmly held in position.
Note: Other electronic devices can interfere with Highway’s
DAB performance, for best results only use the supplied
Highway power adapter to power the receiver.
Highway_400_Euro_v1.indb 10 2/24/2016 4:21:27 PM

11
EN
1. Slide the back cover from the wireless controller and fit the supplied
batteries with the correct polarity.
2. Choose an area on your dashboard (A) where you want to install the
wireless controller and wipe down with the supplied cleaning wipe.
Ensure the surface is completely clean and dry before adhesion.
Installing the wireless controller
WARNING: See the ‘Safety instructions’ on page 2 for more
information on fitting and using the batteries.
WARNING: See page 6 for positioning guidance.
4. Slide the wireless controller (C) on to the bracket until you hear it click
into position.
3. Attach the bracket (B) to your dashboard.
A
B
C
Highway_400_Euro_v1.indb 11 2/24/2016 4:21:28 PM

12
Previous track/preset button
Bluetooth streaming: Press once to go to
the start of the current track, press twice
to go to the start of the previous track.
Digital radio: Press to select
previous preset.
Next track/preset button
Bluetooth streaming: Press to skip to the
next track.
Digital radio: Press to select next preset.
Power/Back button
Press and hold to put the wireless
controller and receiver in or out of standby.
Press to move back up a level in menus
or lists.
Play/Pause/Personal Assistant button
Bluetooth streaming: Press to pause or play music.
Press and hold to launch your mobile phone’s personal assistant
function.
Note: You will need to install the Pure Go app to use the personal
assistant function on your mobile device (see page 18 for more
information).
Select dial
Turn to browse stations, tracks and menu
items. Push to select.
Digital radio: Press and hold to rescan for
new stations and remove inactive stations
from the menu.
Home/Favourites button
Press to return to the main menu.
Digital radio: Press and hold to open the
favourites menu.
Overview
Controls
Light sensor
Auto-adjusts the display brightness.
Go button
Press to stream audio from your music streaming
service.
Note: If you have set up more than one streaming
service, press to cycle through each streaming service.
If listening to a radio station, press and hold to identify
the track that is currently playing and add
it to your supported streaming service*.
Note: Before you can use the Go button you’ll need to
download Highway’s companion app on your mobile
device (see page 18 for more information).
* Requires streaming service supported by the Pure Go app (see page 18 for more information).
Highway_400_Euro_v1.indb 12 2/24/2016 4:21:28 PM

13
EN
Controls
Switching on and off
If the 12V accessory power socket in your vehicle only works when you turn on your vehicle’s ignition, Highway will switch on or o
automatically with your vehicle’s ignition.
If the 12V accessory power socket in your vehicle works even when your vehicle’s ignition is switched o, press and hold the
button on the controller to manually switch o Highway.
Note: The wireless controller screen will automatically switch into power saving mode after 15 seconds.
The receiver will automatically go into standby after 4 hours.
BBC R2
Display
1. Mode indicator (DR indicates digital radio,
BBC R2
indicates Bluetooth audio).
2. Text area.
Highway_400_Euro_v1.indb 13 2/24/2016 4:21:29 PM

14
1. Turn on your vehicle’s ignition to ensure that the receiver is switched on.
Note: The receiver LED will remain illuminated for a short period of time to indicate
that it is powered on.
After a few seconds, your controller will automatically connect to the receiver. If your
controller doesn’t connect to the receiver, see ‘Troubleshooting’ on page 23.
Switching on Highway for the first time
RECEIVER
CONNECTING
2. Choose your display language by turning the Select dial to highlight the language
you want. Push the Select dial in to confirm your choice.
LANGUAGE
ENGLIsh
3. Turn and press the Select dial to choose the way that you have connected
Highway to your audio system. If you are connecting via an available FM frequency,
select ‘FM TRANSMIT’ and move to the next step. If you are connecting using an
auxiliary cable, select ‘LINE OUT’ and skip to step 5,
FM TRANSMIT
AUDIO OUT
4. Turn and press the Select dial to choose an unused FM frequency that you want
Highway to use for transmitting to your audio system. The recommended frequency
for transmitting to your audio system in the UK is 87.6 MHz.
Note: You’ll need to tune your audio system to this FM frequency when ever you want
to listen to Highway. For easy access, you can store this FM frequency as a preset on
your audio system (see your vehicle’s owner’s manual for more information).
87\60MHZ
FM FREQ
DIG\ RADIO
SCANNING
5. Wait for Highway to complete an autotune and find all available digital stations.
When the autotune is complete, a station will start playing.
Highway_400_Euro_v1.indb 14 2/24/2016 4:21:30 PM

15
EN
Listening to digital radio
Switching to digital radio
1. Press the button.
2. Turn the Select dial until ‘DIG. RADIO’ is displayed on the bottom line of the
screen and press the Select dial.
Changing stations
Turn the Select dial to browse the list of available stations. Press the Select dial to
change station.
Changing station
(current station on top line)
BBC R2
BBC R3
Using presets
You can save up to 20 of your favourite digital stations in the presets list for easy access.
Saving presets
1. When listening to a digital radio station, press and hold the button on the
front of the wireless controller.
2. Turn the Select dial until you see the preset number that you want to save your
favourite station to.
3. Press and hold the button or the Select dial to save the current station to
that preset number. Previous presets can be overwritten. You will see ‘PRESET
SAVED’ on the screen when the preset has been saved.
Selecting presets
1. Press and hold the button.
2. Turn the Select dial to browse through your presets list and push the Select
dial to select one or press the or buttons to skip to the previous or
next preset.
BBC R2
PRESET 1
EMPTY
PRESET 1
SAVED
Highway_400_Euro_v1.indb 15 2/24/2016 4:21:32 PM

16
Pairing Highway with a phone or tablet
You can stream audio to Highway using your phone or tablet’s Bluetooth connection.
Note: Bluetooth pairing varies on dierent mobile devices. See your mobile device manual for specific information.
To pair with Highway using Bluetooth:
1. Press the button.
2. Turn and press the Select dial to select ‘SETTINGS’ > ‘BLUETOOTH’ > ‘PAIR’ > ‘BT MUSIC’. The Bluetooth icon on the
wireless controller will flash until Highway has paired with your phone or pairing mode times out.
Important: If ‘GO APP CODE’ appears on
Highway’s wireless controller,
press the button and repeat the above steps.
Note: To cancel pairing press the button and turn and press the Select dial to select ‘SETTINGS’ > ‘BLUETOOTH’ >
‘STOP PAIR’.
3. On your mobile device, enable Bluetooth and select the option to add a new Bluetooth device. On some mobile devices
you may need to select the search or scan option (see your mobile device user guide for more information).
4. On your mobile device select ‘Highway xxxx’ from the list of available devices.
5. When Highway’s wireless controller displays a message asking if you want to pair your mobile device with Highway, turn
and press the Select dial to select ‘YES’.
Note: Once paired with your Bluetooth device, Highway will automatically reconnect whenever it is in range. If using the Pure
Go app, Highway will only remember one device. Highway will remember several previously connected devices if they paired to
Highway using a standard Bluetooth connection.
Highway_400_Euro_v1.indb 16 2/24/2016 4:21:32 PM

17
EN
* Bluetooth classic compatibility varies across dierent manufacturers. For more information on compatibility, please visit www.pure.com/highway.
Controlling playback
Use the following controls to pause and control the audio content streamed from your connected mobile device:
Pause and restart playback.
Press to skip to the start of the current track or press again within three seconds to skip back to the previous track.
Skip track forward.
Browsing and selecting tracks
1. Press the button.
2. Turn and press the Select dial to select ‘BT MUSIC’.
3. Turn the Select dial and press to browse to your music content.
Note:
If you see a `BROWSE NOT AVAILABLE’ message, this function is not supported by your device.
Note: If you see a ‘+’ symbol while navigating through your music it indicates that the item is a folder or sub-folder containing
music files.
Streaming audio stored on your phone or tablet
Once paired to your Bluetooth device*, you can use Highway’s wireless controller to browse tracks and control playback.
Highway_400_Euro_v1.indb 17 2/24/2016 4:21:33 PM

18
Using Highway with your mobile’s personal assistant feature
You can trigger the personal assistant function on your iOS or Android device from Highway’s wireless controller.
Note: You will need to install the Pure Go app to use the personal assistant function (see above for more information).
To use your mobile device’s personal assistant feature:
Press and hold the button until you are prompted to ask a question by your mobile device’s personal assistant function. You can
cancel the personal assistant function by pressing the or button at any time. For more information on using the Pure Go app,
refer to the help within the app.
Settings
Digital radio settings
Autotune
You can use the autotune function to automatically scan for new digital radio stations and remove inactive ones.
To autotune Highway press and hold the Select dial on the wireless controller whilst in digital radio mode.
Alternatively, to carry out an autotune using Highway’s menu:
1. Press the button.
2. Turn and press the Select dial to choose ‘SETTINGS’ > ‘DIG. RADIO’ > ‘AUTOTUNE’. The number of stations found will be
displayed during the autotune.
* Subscription required for some streaming services.
† Highway software updates not available via iOS Pure Go app. To find out more about software updates visit http://www.pure.com/highway-update.
‡ Pure Go app requires phone or tablet with Bluetooth Low Energy (Bluetooth Smart) support. Visit www.pure.com/apps/go for more information.
Streaming from a music streaming service
With the Pure Go app, you can enjoy listening to music from streaming services* like Spotify, identify tracks playing on radio stations
on Highway and get the latest software updates†for your Highway. To download the app, search for Pure Go on the Apple App Store
or Google Play from your phone or tablet‡. If you want to find out more about the Pure Go app visit www.pure.com/apps/go.
Highway_400_Euro_v1.indb 18 2/24/2016 4:21:34 PM
Other manuals for Highway 400
2
Table of contents
Languages:
Other PURE Adapter manuals